文章目录
- 前言
- 项目结构
- 导航实现
- 创作中心
- 移动小球
- 消息提示
- 完整代码
前言
闲的,你信嘛,还得开发一个基本的门户社区网站,来给到Hlang,不然我怕说工作量不够。那么这个的话,其实也很好办,主要是这个门户网站的UI写起来麻烦一点,其他的就直接套用组件,和以前的老代码就行了。为了快速开发,我直接用royi-cloud去做了。反正自己搭建一个也是这样,还要自己重新搭建环境,不如直接加速。像这种类型的网站,没有啥技巧,无法是做做防抖,节流,对接点啥支付等等的玩意。一个礼拜就能开发好,前提是前端好写。不过也确实不难,这种东西。其他的就是套用组件,没啥,后端的话,原来是整合人人开源一套的,但是MP,我实在是不喜欢,越写越觉得MP有点呆。懒得改写,不如直接换架构。这也是为啥直接用ruoyi了。
废话不多说,看看效果:
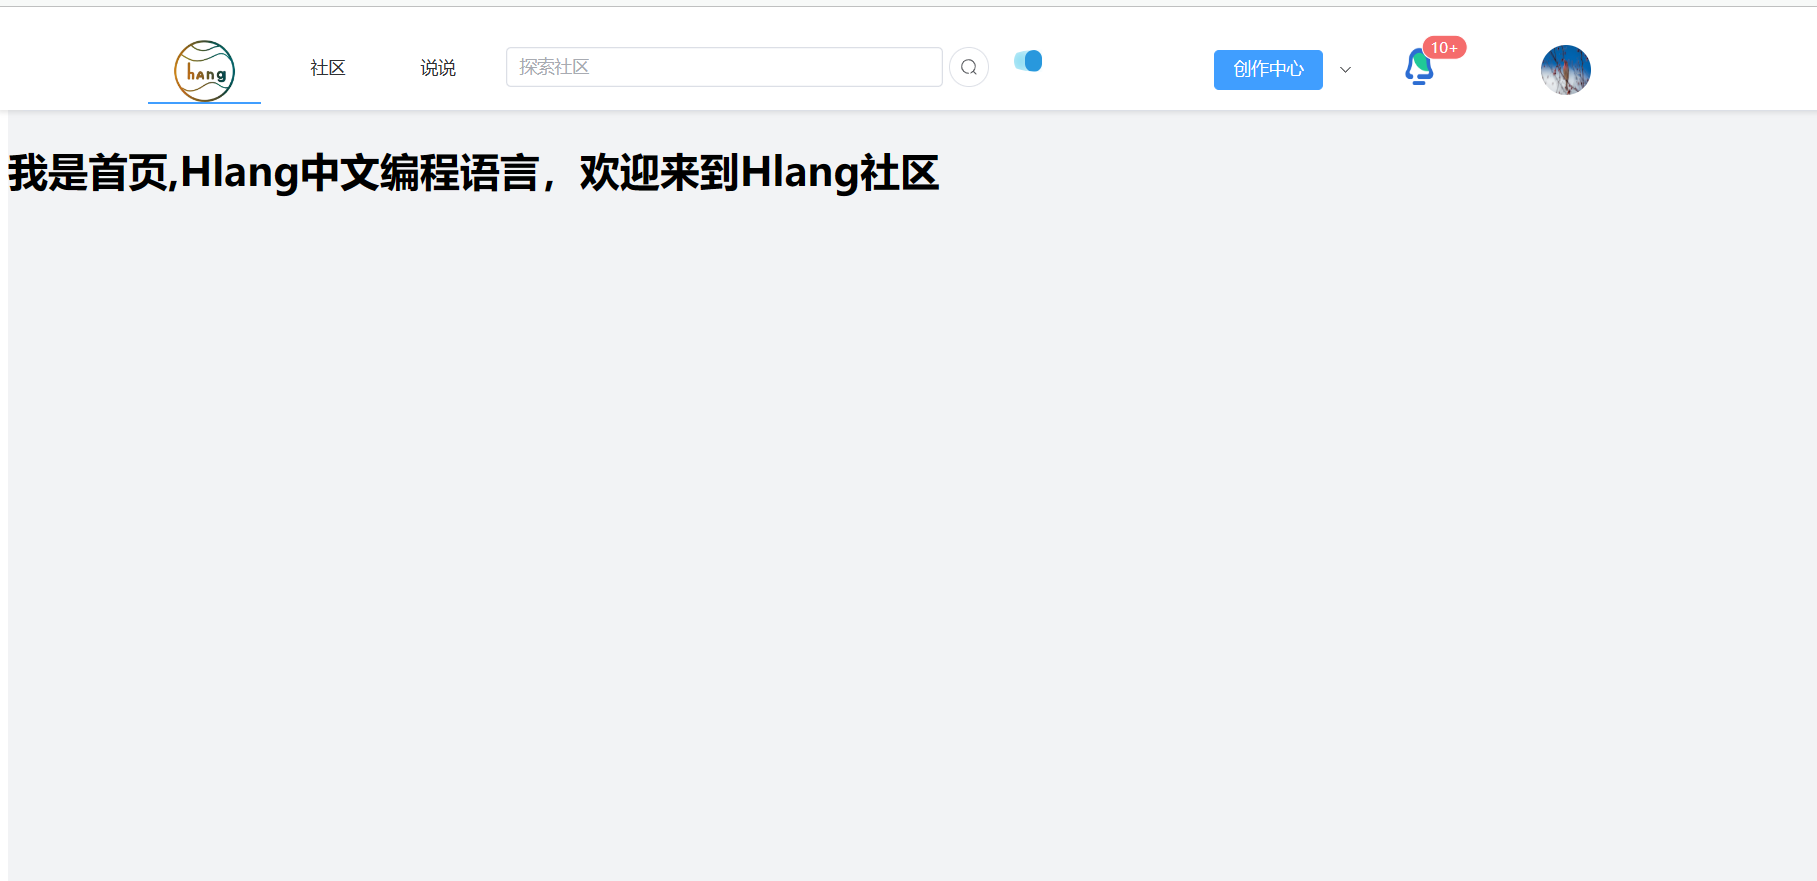
我甚至为此用New Bing生成了一个Logo。
首先,没错,我的临时毕设方案有两个部分:
1. 基于Python实现的中文编程解释器。因为主打的是教学,锻炼编程思维,因此不考虑任何性能,只考虑开发成本和周期,要是用C++怼,那我觉得我一开始的算法开发平台也不是不能做完。
2. 给这个玩意,做一个技术交流社区,这个社区的名字叫做Hlang,但是它不限于Hlang,其实就是个博客社区套壳。然后里面很多功能会直接套用白洞。但是所有内容会重构,反正现在开发一个这种玩意顶多一个礼拜(包括前端估计两个礼拜顶天了)
项目结构
废话不多说,先来看到我们的项目结构:

在这里导航栏是一个组件。
在App.vue里面直接调用:
<script setup>
import { RouterLink, RouterView } from 'vue-router'
import Header from './components/Header.vue';
</script>
<template>
  <header>
    <Header></Header>
  </header>
  <div class="main">
    <div class="placeholder"></div>
    <RouterView />
  </div>
</template>

<style scoped>
  .main{
    width: 100%;
    background-color: rgb(242,243,245);
  }
  .placeholder{
    height: 80px;
    width: 100%;
  }
  header {
    position: fixed;
    top: 0;
    left: 0;
    width: 100%;
    height: 42px;
    background-color: #fff; /* 设置背景颜色 */
    padding: 20px; /* 添加内边距 */
    box-shadow: 0 2px 4px rgba(0, 0, 0, 0.1); /* 添加阴影效果 */
    z-index: 999; /* 设置堆叠顺序,确保 header 位于其他内容之上 */
  }
</style>
这里注意的是,为了让head固定,我用fixed布局,然后的话为了避免挡住内容,于是在这里我用了一个div把main里面的东西顶下去。
就是这个:
<div class="placeholder"></div>
导航实现
那么接下来就是我们的导航了。
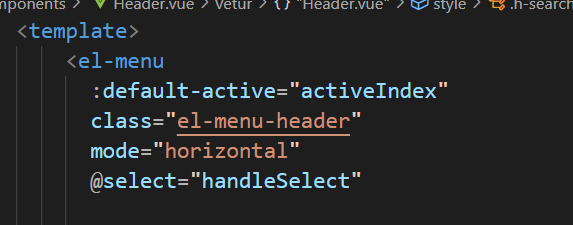
首先是这个导航的基本结构:
<template>
    <el-menu
      :default-active="activeIndex"
      class="el-menu-header"
      mode="horizontal"
      @select="handleSelect"

    >
      <!-- <span style="width: 50px;"></span> -->
      <el-menu-item index="1">
        <span>
           <img
             style="width: 50px;height: 50px"
             src="../../public/favicon.ico"
           >
        </span>
      </el-menu-item>


      <el-menu-item index="2">
        <template #title>社区</template>
      </el-menu-item>

      <el-menu-item index="3">
        <template #title>说说</template>
      </el-menu-item>

      <div class="h-search">
        <el-autocomplete
            style="height: 50px; width: 350px;margin-top: 12px;"
            v-model="state1"
            :fetch-suggestions="querySearch"
            clearable
            placeholder="探索社区"
            @select="handleSelect"
            />
        <el-button style="margin-top: 12px;margin-left: 5px;" :icon="Search" circle />
      </div>

      <div class="h-show">
        <div class="custom-loader"></div>
      </div>

      <el-sub-menu index="4">
        <template #title>
          <el-button type="primary">创作中心</el-button>
        </template>
        <div class="w-center">
          <div class="w-c-item">
            <img class="w-c-it-img" src="~@/assets/image/write.png">
            <div class="w-c-it-text">
              写文章
            </div>
          </div>

          <div class="w-c-item">
            <img class="w-c-it-img" src="~@/assets/image/shuoshuo.png">
            <div class="w-c-it-text">
              写说说
            </div>
          </div>

          <div class="w-c-item">
            <img class="w-c-it-img" src="~@/assets/image/chaogao.png">
            <div class="w-c-it-text">
              草稿箱
            </div>
          </div>

        </div>
      </el-sub-menu>

      <div class="message-tip">
        <el-badge :value="100" :max="10" class="item">
          <img class="message-img" src="~@/assets/image/notic.png">
        </el-badge>
      </div>

      <div class="avatar hover-rotate">
        <img class="avatar-img" src="https://fuss10.elemecdn.com/e/5d/4a731a90594a4af544c0c25941171jpeg.jpeg">
      </div>

    </el-menu>
  </template>
整体用到是flex布局:

然后的话,导航最外层用到还是element-plus的导航,但是里面的css重新改了一下。
首先是间隔,为了避免改动源代码出现问题,我直接在menu里面多了一个属性:
.el-menu-header{
    gap: 20px;
    padding-left: 100px;
}
然后在这里设置:
也可以实现效果。
创作中心
在这里的话,前面几个按钮都是直接使用的组件,主要是后面这个东西。借鉴了掘金的这个操作:
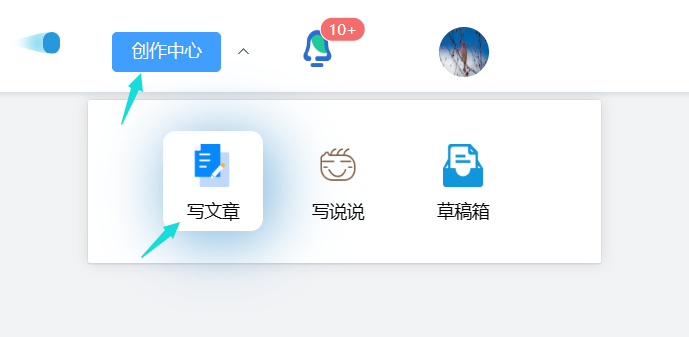
这部分代码结构是这样的:
   <el-sub-menu index="4">
        <template #title>
          <el-button type="primary">创作中心</el-button>
        </template>
        <div class="w-center">
          <div class="w-c-item">
            <img class="w-c-it-img" src="~@/assets/image/write.png">
            <div class="w-c-it-text">
              写文章
            </div>
          </div>

          <div class="w-c-item">
            <img class="w-c-it-img" src="~@/assets/image/shuoshuo.png">
            <div class="w-c-it-text">
              写说说
            </div>
          </div>

          <div class="w-c-item">
            <img class="w-c-it-img" src="~@/assets/image/chaogao.png">
            <div class="w-c-it-text">
              草稿箱
            </div>
          </div>

        </div>
      </el-sub-menu>
直接这样写,就可以实现那种自定义的效果。
那么css代码是这样的:
.w-c-it-img{
  margin-top: 10px;
  width: 40%;
  height: 40px;
}

.w-c-it-text{
  margin-top: 10px;
  width: 100%;
  height: 30px;
  font-size: 14px;
  text-align: center;
}
.w-c-item:hover{
  border-radius: 10px;
  -webkit-box-shadow: 5px 5px 50px 0px rgba(105,170,214,1);
  -moz-box-shadow: 5px 5px 50px 0px rgba(105,170,214,1);
  box-shadow: 5px 5px 50px 0px rgba(105,170,214,1);
}
.w-c-item{
  cursor: pointer;
  margin-top: 20px;
  width: 80px;
  height: 80px;
  display: flex;
  flex-direction: column;
  justify-items: center;
  align-items: center;
}
.w-center{
  border-radius: 30px;
  height: 120px;
  display: flex;
  padding-left: 60px;
  gap: 20px;
  width: 350px;
}
移动小球
这玩意其实就是这个:

这玩意会动。其实就是用来占位置的,实在是没有啥功能了。留个空,反正也是微服务架构,后面上个功能也好办。
  <div class="h-show">
        <div class="custom-loader"></div>
      </div>
.custom-loader {
  margin-top: 12px;
  width: 120px;
  height: 22px;
  border-radius: 40px;
  color: #E4E4ED;
  position: relative;
  overflow: hidden;
}

.custom-loader::before {
  content: "";
  position: absolute;
  margin: 2px;
  width: 14px;
  top: 0;
  bottom: 0;
  left: -20px;
  border-radius: inherit;
  background: #2898dd;
  box-shadow: -10px 0 12px 3px #83daf1;
  clip-path: polygon(0 5%, 100% 0,100% 100%,0 95%,-30px 50%);
  animation: ct4 1s infinite linear;
}

@keyframes ct4 {
  100% {left: calc(100% + 20px)}
}
消息提示
这个消息提示和头像是类似的,就一起说了。其实原来我一直用错了,就是那个消息提示显示的个数,原来做的时候忙个数老是和图标有很大间距。因为原来一直套用的是el-button 这个玩意样式不好改,于是直接在div上面加。
 <div class="message-tip">
        <el-badge :value="100" :max="10" class="item">
          <img class="message-img" src="~@/assets/image/notic.png">
        </el-badge>
</div>
.message-img{
  cursor: pointer;
  width: 25px;
  height: 30px;
}

.message-img:hover{
  border-radius: 10px;
  -webkit-box-shadow: 0px 0px 24px 6px rgba(5,143,235,1);
  -moz-box-shadow: 0px 0px 24px 6px rgba(5,143,235,1);
  box-shadow: 0px 0px 24px 6px rgba(5,143,235,1);
}

.message-tip{
  margin-top: 12px;
  width: 30px;
}
完整代码
okey,接下来是完整代码:
<template>
    <el-menu
      :default-active="activeIndex"
      class="el-menu-header"
      mode="horizontal"
      @select="handleSelect"

    >
      <!-- <span style="width: 50px;"></span> -->
      <el-menu-item index="1">
        <span>
           <img
             style="width: 50px;height: 50px"
             src="../../public/favicon.ico"
           >
        </span>
      </el-menu-item>


      <el-menu-item index="2">
        <template #title>社区</template>
      </el-menu-item>

      <el-menu-item index="3">
        <template #title>说说</template>
      </el-menu-item>

      <div class="h-search">
        <el-autocomplete
            style="height: 50px; width: 350px;margin-top: 12px;"
            v-model="state1"
            :fetch-suggestions="querySearch"
            clearable
            placeholder="探索社区"
            @select="handleSelect"
            />
        <el-button style="margin-top: 12px;margin-left: 5px;" :icon="Search" circle />
      </div>

      <div class="h-show">
        <div class="custom-loader"></div>
      </div>

      <el-sub-menu index="4">
        <template #title>
          <el-button type="primary">创作中心</el-button>
        </template>
        <div class="w-center">
          <div class="w-c-item">
            <img class="w-c-it-img" src="~@/assets/image/write.png">
            <div class="w-c-it-text">
              写文章
            </div>
          </div>

          <div class="w-c-item">
            <img class="w-c-it-img" src="~@/assets/image/shuoshuo.png">
            <div class="w-c-it-text">
              写说说
            </div>
          </div>

          <div class="w-c-item">
            <img class="w-c-it-img" src="~@/assets/image/chaogao.png">
            <div class="w-c-it-text">
              草稿箱
            </div>
          </div>

        </div>
      </el-sub-menu>

      <div class="message-tip">
        <el-badge :value="100" :max="10" class="item">
          <img class="message-img" src="~@/assets/image/notic.png">
        </el-badge>
      </div>

      <div class="avatar hover-rotate">
        <img class="avatar-img" src="https://fuss10.elemecdn.com/e/5d/4a731a90594a4af544c0c25941171jpeg.jpeg">
      </div>

    </el-menu>
  </template>


<script lang="ts" setup>
import { ref,onMounted } from 'vue'
import {Search} from '@element-plus/icons-vue'


const activeIndex = ref('1')
const state1 = ref('')

interface RestaurantItem {
  value: string
  link: string
}
const restaurants = ref<RestaurantItem[]>([])

const querySearch = (queryString: string, cb: any) => {
  const results = queryString
    ? restaurants.value.filter(createFilter(queryString))
    : restaurants.value
  // call callback function to return suggestions
  cb(results)
}
const createFilter = (queryString: string) => {
  return (restaurant: RestaurantItem) => {
    return (
      restaurant.value.toLowerCase().indexOf(queryString.toLowerCase()) === 0
    )
  }
}
const loadAll = () => {
  return [
    { value: 'vue', link: 'https://github.com/vuejs/vue' },
    { value: 'element', link: 'https://github.com/ElemeFE/element' },
    { value: 'cooking', link: 'https://github.com/ElemeFE/cooking' },
    { value: 'mint-ui', link: 'https://github.com/ElemeFE/mint-ui' },
    { value: 'vuex', link: 'https://github.com/vuejs/vuex' },
    { value: 'vue-router', link: 'https://github.com/vuejs/vue-router' },
    { value: 'babel', link: 'https://github.com/babel/babel' },
  ]
}


const handleSelect = (item: RestaurantItem) => {
  console.log(item)
}

onMounted(() => {
  restaurants.value = loadAll()
})
</script>


<style scoped>

.avatar{
  cursor: pointer;
  margin-left: 60px;
  width: 40px;
  height: 40px;
  border-radius: 100px;
}

.hover-rotate {
  transition: transform 0.5s ease-in-out;
}

.hover-rotate:hover {
  transform: rotate(360deg);
}

.avatar-img{
  border-radius: 100px;
  margin-top: 10px;
  width: 100%;
  height: 100%;
}
.message-img{
  cursor: pointer;
  width: 25px;
  height: 30px;
}

.message-img:hover{
  border-radius: 10px;
  -webkit-box-shadow: 0px 0px 24px 6px rgba(5,143,235,1);
  -moz-box-shadow: 0px 0px 24px 6px rgba(5,143,235,1);
  box-shadow: 0px 0px 24px 6px rgba(5,143,235,1);
}

.message-tip{
  margin-top: 12px;
  width: 30px;
}
.w-c-it-img{
  margin-top: 10px;
  width: 40%;
  height: 40px;
}

.w-c-it-text{
  margin-top: 10px;
  width: 100%;
  height: 30px;
  font-size: 14px;
  text-align: center;
}
.w-c-item:hover{
  border-radius: 10px;
  -webkit-box-shadow: 5px 5px 50px 0px rgba(105,170,214,1);
  -moz-box-shadow: 5px 5px 50px 0px rgba(105,170,214,1);
  box-shadow: 5px 5px 50px 0px rgba(105,170,214,1);
}
.w-c-item{
  cursor: pointer;
  margin-top: 20px;
  width: 80px;
  height: 80px;
  display: flex;
  flex-direction: column;
  justify-items: center;
  align-items: center;
}
.w-center{
  border-radius: 30px;
  height: 120px;
  display: flex;
  padding-left: 60px;
  gap: 20px;
  width: 350px;
}
.custom-loader {
  margin-top: 12px;
  width: 120px;
  height: 22px;
  border-radius: 40px;
  color: #E4E4ED;
  position: relative;
  overflow: hidden;
}

.custom-loader::before {
  content: "";
  position: absolute;
  margin: 2px;
  width: 14px;
  top: 0;
  bottom: 0;
  left: -20px;
  border-radius: inherit;
  background: #2898dd;
  box-shadow: -10px 0 12px 3px #83daf1;
  clip-path: polygon(0 5%, 100% 0,100% 100%,0 95%,-30px 50%);
  animation: ct4 1s infinite linear;
}

@keyframes ct4 {
  100% {left: calc(100% + 20px)}
}
.h-search{
    display: flex;

}
.el-menu-header{
    gap: 20px;
    padding-left: 100px;
}
</style>
后面多写写特效啥的,锻炼锻炼美感,可惜的就是,先前写的前端主页用不了了。可恶,没办法风格不合适。
真的有一说一,CSDN的页面设计实在是有点那啥,先前whitehole的页面设计就是照着csdn来的,写道后面发现不行,改成掘金的一些风格,结果有些地方不伦不类,写到后面有点像知乎页面。这次的话,就直接照着掘金借鉴了(狗头)

![数据结构07:查找[C++][顺序、分块、折半查找]](https://img-blog.csdnimg.cn/d80cec258ca24c989b1a96081b310db3.png)