目录
- 数据集介绍
- VOC 格式转换为 YOLO 格式
- YOLO 格式转换为 VOC 格式
数据集介绍
本文使用的数据集是自制的安全帽数据集,共含有 6696 张图片,部分图片如下:

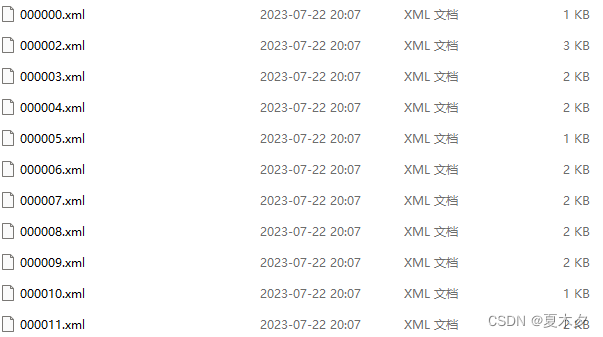
以及对应的 6696 个 VOC 格式的 xml 标注文件,部分文件如下:
首先,按照 VOC2007 的数据集格式要求,分别创建文件夹 VOCdevkit、VOC2007、Annotations、ImageSets、和 JPEGImages,它们的层级结构如下所示:
VOCdevkit
	 └───VOC2007
	    ├───Annotations
	    ├───ImageSets 【空】
		└───JEPGImages
其中,Annotations 文件夹用来存放标签数据 xml 文件,JEPGImages 文件夹用来存放图片文件,ImageSets用来存放划分后的数据集。

- 其中 VOC 格式与 YOLO 格式相互转换的
Voc2Yolo.py以及Yolo2Voc.py我在下面的内容里均已提供; - 按照
8:2以及7:2:1划分数据集的split82.py以及split721.py我也在 YOLO 划分数据集(训练集、验证集、测试集)这篇博客提供 - 免费 下载本文数据集 请移步
以下代码亲测可以直接复制运行(以下所有的路径修改成自己对应的路径) {\color{Red} \mathbf{以下代码亲测可以直接复制运行 (以下所有的路径修改成自己对应的路径)}} 以下代码亲测可以直接复制运行(以下所有的路径修改成自己对应的路径)
VOC 格式转换为 YOLO 格式
在做目标检测时候,都会通过一些方法获得大量的数据集,或是网上下载,或是自己用软件比如 IabelImg,手动地一个一个打标签。
在日常生活中,我们也通常会打 VOC 格式的标签(xml 文件),因为它所包含的数据最多,使人一目了然,如:
<annotation>
	<folder>hat01</folder>
	<filename>000000.jpg</filename>
	<path>D:\dataset\000000.jpg</path>
	<source>
		<database>Unknown</database>
	</source>
	<size>
		<width>947</width>
		<height>1421</height>
		<depth>3</depth>
	</size>
	<segmented>0</segmented>
	<object>
		<name>hat</name>
		<pose>Unspecified</pose>
		<truncated>0</truncated>
		<difficult>0</difficult>
		<bndbox>
			<xmin>60</xmin>
			<ymin>66</ymin>
			<xmax>910</xmax>
			<ymax>1108</ymax>
		</bndbox>
	</object>
</annotation>
而 YOLO 格式的数据就很抽象,如:
0 0.512143611404435 0.4130893736805067 0.8975712777191129 0.733286418015482
当我们使用 YOLO算法进行我们的项目实战时,将标签数据的 VOC 格式(xml文件)转换为 YOLO 格式(txt文件)就显得格外重要 ——
VOC 格式转换为 YOLO 格式的代码 Voc2Yolo.py内容如下:
import os
import shutil
import cv2
from lxml import etree


def VOC2Yolo(class_num, voc_img_path, voc_xml_path, yolo_txt_save_path, yolo_img_save_path=None):
    xmls = os.listdir(voc_xml_path)
    xmls = [x for x in xmls if x.endswith('.xml')]
    if yolo_img_save_path is not None:
        if not os.path.exists(yolo_img_save_path):
            os.mkdir(yolo_img_save_path)
    if not os.path.exists(yolo_txt_save_path):
        os.mkdir(yolo_txt_save_path)
    all_xmls = len(xmls)
    for idx, one_xml in enumerate(xmls):
        xl = etree.parse(os.path.join(voc_xml_path, one_xml)) # os.path.join(a,b)会自动在ab之间加/
        root = xl.getroot()
        objects = root.findall('object')
        img_size = root.find('size')
        img_w = 0
        img_h = 0
        if img_size:
            img_width = img_size.find('width')
            if img_width is not None:
                img_w = int(img_width.text)
            img_height = img_size.find('height')
            if img_height is not None:
                img_h = int(img_height.text)
        label_lines = []
        for ob in objects:
            one_annotation = {}
            label = ob.find('name').text
            one_annotation['tag'] = label
            one_annotation['flag'] = False
            bbox = ob.find('bndbox')
            xmin = int(bbox.find('xmin').text)
            ymin = int(bbox.find('ymin').text)
            xmax = int(bbox.find('xmax').text)
            ymax = int(bbox.find('ymax').text)
            if img_w == 0 or img_h == 0:
                img = cv2.imread(os.path.join(voc_img_path, one_xml.replace('.xml', '.jpg')))
                img_h, img_w = img.shape[:2]
            bbox_w = (xmax - xmin) / img_w
            bbox_h = (ymax - ymin) / img_h
            bbox_cx = (xmin + xmax) / 2 / img_w
            bbox_cy = (ymin + ymax) / 2 / img_h
            try:
                bbox_label = class_num[label]
                label_lines.append(f'{bbox_label} {bbox_cx} {bbox_cy} {bbox_w} {bbox_h}' + '\n')
            except Exception as e:
                print("not find number label in class_num ", e, one_xml)
                label_lines = []
                break
        if len(label_lines):
            with open(os.path.join(yolo_txt_save_path, one_xml.replace('.xml', '.txt')), 'w') as fp:
                fp.writelines(label_lines)
            if yolo_img_save_path is not None:
                shutil.copy(os.path.join(voc_img_path, one_xml.replace('.xml', '.jpg')),
                            os.path.join(yolo_img_save_path))
        print(f"processing: {idx+1}/{all_xmls}")


if __name__ == '__main__':
    VOC2Yolo(
        class_num={'hat': 0, 'person': 1},  # 标签种类
        voc_img_path='./VOCdevkit/VOC2007/JPEGImages',  # 数据集图片文件夹存储路径
        voc_xml_path='./VOCdevkit/VOC2007/Annotations',  # 标签xml文件夹存储路径
        yolo_txt_save_path='./YoloLabels'  # 将要生成的txt文件夹存储路径
    )
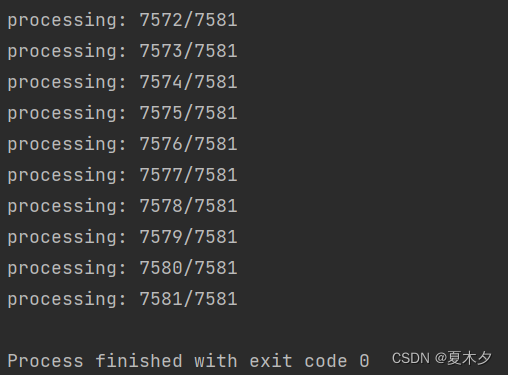
转换完成!
YOLO 格式转换为 VOC 格式
什么情况下我们需要将 YOLO 格式转换为 VOC 格式?
这个问题还真困惑了我一段时间,当我们使用 YOLO 算法跑代码的时候,不就是需要YOLO格式的标注文件吗,这不现成的 YOLO 格式吗,为什么还要转换回 VOC 格式呢?
目前初学的我也不知道,呜呜呜~ 知道有知道的友友可以评论或私信我哦
YOLO 格式转换为 VOC 格式的代码 Yolo2Voc.py 内容如下:
from xml.dom.minidom import Document
import os
import cv2


def makexml(picPath, txtPath, xmlPath):  # txt所在文件夹路径,xml文件保存路径,图片所在文件夹路径
    """此函数用于将yolo格式txt标注文件转换为voc格式xml标注文件
    """
    dic = {'0': "hat",  # 创建字典用来对类型进行转换
           '1': "person",  # 此处的字典要与自己的classes.txt文件中的类对应,且顺序要一致
           }
    files = os.listdir(txtPath)
    all_txts = len(files)
    if not os.path.exists(xmlPath):
        os.mkdir(xmlPath)
    for i, name in enumerate(files):
        xmlBuilder = Document()
        annotation = xmlBuilder.createElement("annotation")  # 创建annotation标签
        xmlBuilder.appendChild(annotation)

        txtFile = open(txtPath + name)
        # txtFile = open(os.path.join(txtPath, name))

        txtList = txtFile.readlines()
        img = cv2.imread(picPath + name[0:-4] + ".jpg")
        Pheight, Pwidth, Pdepth = img.shape

        folder = xmlBuilder.createElement("folder")  # folder标签
        foldercontent = xmlBuilder.createTextNode("driving_annotation_dataset")
        folder.appendChild(foldercontent)
        annotation.appendChild(folder)  # folder标签结束

        filename = xmlBuilder.createElement("filename")  # filename标签
        filenamecontent = xmlBuilder.createTextNode(name[0:-4] + ".jpg")
        filename.appendChild(filenamecontent)
        annotation.appendChild(filename)  # filename标签结束

        size = xmlBuilder.createElement("size")  # size标签
        width = xmlBuilder.createElement("width")  # size子标签width
        widthcontent = xmlBuilder.createTextNode(str(Pwidth))
        width.appendChild(widthcontent)
        size.appendChild(width)  # size子标签width结束

        height = xmlBuilder.createElement("height")  # size子标签height
        heightcontent = xmlBuilder.createTextNode(str(Pheight))
        height.appendChild(heightcontent)
        size.appendChild(height)  # size子标签height结束

        depth = xmlBuilder.createElement("depth")  # size子标签depth
        depthcontent = xmlBuilder.createTextNode(str(Pdepth))
        depth.appendChild(depthcontent)
        size.appendChild(depth)  # size子标签depth结束

        annotation.appendChild(size)  # size标签结束

        for j in txtList:
            oneline = j.strip().split(" ")
            object = xmlBuilder.createElement("object")  # object 标签
            picname = xmlBuilder.createElement("name")  # name标签
            namecontent = xmlBuilder.createTextNode(dic[oneline[0]])
            picname.appendChild(namecontent)
            object.appendChild(picname)  # name标签结束

            pose = xmlBuilder.createElement("pose")  # pose标签
            posecontent = xmlBuilder.createTextNode("Unspecified")
            pose.appendChild(posecontent)
            object.appendChild(pose)  # pose标签结束

            truncated = xmlBuilder.createElement("truncated")  # truncated标签
            truncatedContent = xmlBuilder.createTextNode("0")
            truncated.appendChild(truncatedContent)
            object.appendChild(truncated)  # truncated标签结束

            difficult = xmlBuilder.createElement("difficult")  # difficult标签
            difficultcontent = xmlBuilder.createTextNode("0")
            difficult.appendChild(difficultcontent)
            object.appendChild(difficult)  # difficult标签结束

            bndbox = xmlBuilder.createElement("bndbox")  # bndbox标签
            xmin = xmlBuilder.createElement("xmin")  # xmin标签
            mathData = int(((float(oneline[1])) * Pwidth + 1) - (float(oneline[3])) * 0.5 * Pwidth)
            xminContent = xmlBuilder.createTextNode(str(mathData))
            xmin.appendChild(xminContent)
            bndbox.appendChild(xmin)  # xmin标签结束

            ymin = xmlBuilder.createElement("ymin")  # ymin标签
            mathData = int(((float(oneline[2])) * Pheight + 1) - (float(oneline[4])) * 0.5 * Pheight)
            yminContent = xmlBuilder.createTextNode(str(mathData))
            ymin.appendChild(yminContent)
            bndbox.appendChild(ymin)  # ymin标签结束

            xmax = xmlBuilder.createElement("xmax")  # xmax标签
            mathData = int(((float(oneline[1])) * Pwidth + 1) + (float(oneline[3])) * 0.5 * Pwidth)
            xmaxContent = xmlBuilder.createTextNode(str(mathData))
            xmax.appendChild(xmaxContent)
            bndbox.appendChild(xmax)  # xmax标签结束

            ymax = xmlBuilder.createElement("ymax")  # ymax标签
            mathData = int(((float(oneline[2])) * Pheight + 1) + (float(oneline[4])) * 0.5 * Pheight)
            ymaxContent = xmlBuilder.createTextNode(str(mathData))
            ymax.appendChild(ymaxContent)
            bndbox.appendChild(ymax)  # ymax标签结束

            object.appendChild(bndbox)  # bndbox标签结束

            annotation.appendChild(object)  # object标签结束

        print(f"processing: {i+1}/{all_txts}")

        f = open(xmlPath + name[0:-4] + ".xml", 'w')
        xmlBuilder.writexml(f, indent='\t', newl='\n', addindent='\t', encoding='utf-8')
        f.close()


if __name__ == "__main__":
    picPath = "./VOCdevkit/VOC2007/JPEGImages/"  # 图片所在文件夹路径,后面的/一定要带上
    txtPath = "./YoloLabels/"  # txt所在文件夹路径,后面的/一定要带上
    xmlPath = "./VocLabels/"  # xml文件保存路径,后面的/一定要带上
    makexml(picPath, txtPath, xmlPath)
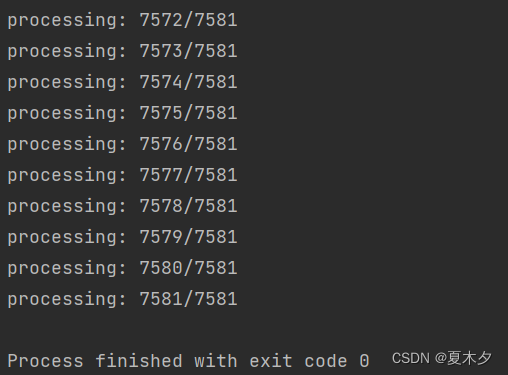
转换完成!
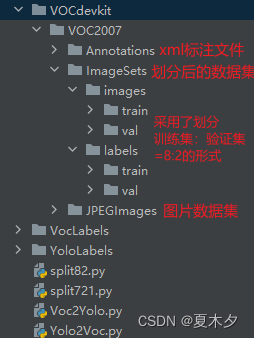
完成本文 VOC 格式与 YOLO 格式的相互转换以及我的另一篇博客YOLO 划分数据集(训练集、验证集、测试集)之后,我的整个项目结构如下图所示:
![[Linux]进程间通信](https://img-blog.csdnimg.cn/img_convert/e6fe24a78706bc605f79d5dcc4e6ef9e.png)


