需要源码和数据集请点赞关注收藏后评论区留言私信~~~
一、YOLO目标检测算法
YOLO是端到端的物体检测深度卷积神经网络,YOLO可以一次性预测多个候选框,并直接在输出层回归物体位置区域和区域内物体所属类别,而Faster R-CNN仍然是采用R-CNN那种将物体位置区域框与物体分开训练的思想,只是利用RPN网络,将提取候选框的步骤放在深度卷积神经网络内部实现,YOLO最大的优势就是速度快,可满足端到端训练和实时检测要求

二、Deep Sort多目标跟踪算法
算法原理如下图所示,在目标检测算法得到检测结果后,利用目标框来初始化卡尔曼滤波器,使用一个八维空间去刻画轨迹在某时刻的状态分别表示目标框的中心位置,纵横比,高度以及在图像坐标中对应的速度信息,计算卡尔曼滤波器提供的预测框与目标检测框之间的位置关系和外观特征关系,利用两个信息综合判断目标检测与跟踪框之间的关联程度,完成多目标的跟踪匹配

三、实战项目算法流程
实现流程为:首先从视频中分解出图像帧,将图像输入目标检测模块,将检测到的动态目标,输入到目标跟踪模块,而将检测到的静态目标直接输出检测结果,目标跟踪模块为同一动态目标编上同样的编号并显示在目标框的左上角,连接多帧中出现的相同的动态目标,从而画出该动态目标的运动轨迹

效果展示
目标检测与跟踪的结果如下图

三、代码
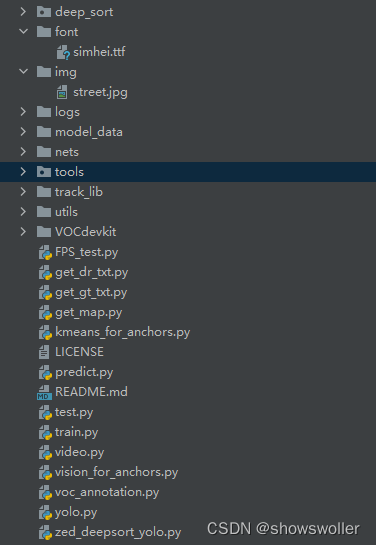
项目结构如下
代码中主要的模块及步骤如下
1:导入第三方库
2:主函数
3:目标检测部分YOLO
4:目标跟踪部分Deep Sort
部分代码如下 需要全部代码请点赞关注收藏后评论区留言私信~~~
YOLO算法代码
import os
import numpy as np
import copy
import colorsys
from timeit import default_timer as timer
from keras import backend as K
from keras.models import load_model
from keras.layers import Input
from PIL import Image, ImageFont, ImageDraw
from nets.yolo4 import yolo_body,yolo_eval
from utils.utils import letterbox_image
#--------------------------------------------#
#   使用自己训练好的模型预测需要修改2个参数
#   model_path和classes_path都需要修改!
#--------------------------------------------#
class YOLO(object):
    _defaults = {
        "model_path"        : 'model_data/yolo4_weight.h5',
        "anchors_path"      : 'model_data/yolo_anchors.txt',
        "classes_path"      : 'model_data/coco_classes.txt',
        "score"             : 0.5,
        "iou"               : 0.3,
        "max_boxes"         : 100,
        # 显存比较小可以使用416x416
        # 显存比较大可以使用608x608
        "model_image_size"  : (416, 416)
    }

    @classmethod
    def get_defaults(cls, n):
        if n in cls._defaults:
            return cls._defaults[n]
        else:
            return "Unrecognized attribute name '" + n + "'"

    #---------------------------------------------------#
    #   初始化yolo
    #---------------------------------------------------#
    def __init__(self, **kwargs):
        self.__dict__.update(self._defaults)
        self.class_names = self._get_class()
        self.anchors = self._get_anchors()
        self.sess = K.get_session()
        self.boxes, self.scores, self.classes = self.generate()

    #---------------------------------------------------#
    #   获得所有的分类
    #---------------------------------------------------#
    def _get_class(self):
        classes_path = os.path.expanduser(self.classes_path)
        with open(classes_path) as f:
            class_names = f.readlines()
        class_names = [c.strip() for c in class_names]
        return class_names

    #---------------------------------------------------#
    #   获得所有的先验框
    #---------------------------------------------------#
    def _get_anchors(self):
        anchors_path = os.path.expanduser(self.anchors_path)
        with open(anchors_path) as f:
            anchors = f.readline()
        anchors = [float(x) for x in anchors.split(',')]
        return np.array(anchors).reshape(-1, 2)

    #---------------------------------------------------#
    #   获得所有的分类
    #---------------------------------------------------#
    def generate(self):
        model_path = os.path.expanduser(self.model_path)
        assert model_path.endswith('.h5'), 'Keras model or weights must be a .h5 file.'

        # 计算anchor数量
        num_anchors = len(self.anchors)
        num_classes = len(self.class_names)

        # 载入模型,如果原来的模型里已经包括了模型结构则直接载入。
        # 否则先构建模型再载入
        try:
            self.yolo_model = load_model(model_path, compile=False)
        except:
            self.yolo_model = yolo_body(Input(shape=(None,None,3)), num_anchors//3, num_classes)
            self.yolo_model.load_weights(self.model_path)
        else:
            assert self.yolo_model.layers[-1].output_shape[-1] == \
                num_anchors/len(self.yolo_model.output) * (num_classes + 5), \
                'Mismatch between model and given anchor and class sizes'

        print('{} model, anchors, and classes loaded.'.format(model_path))

        # 画框设置不同的颜色
        hsv_tuples = [(x / len(self.class_names), 1., 1.)
                      for x in range(len(self.class_names))]
        self.colors = list(map(lambda x: colorsys.hsv_to_rgb(*x), hsv_tuples))
        self.colors = list(
            map(lambda x: (int(x[0] * 255), int(x[1] * 255), int(x[2] * 255)),
                self.colors))

        # 打乱颜色
        np.random.seed(10101)
        np.random.shuffle(self.colors)
        np.random.seed(None)

        self.input_image_shape = K.placeholder(shape=(2, ))

        boxes, scores, classes = yolo_eval(self.yolo_model.output, self.anchors,
                num_classes, self.input_image_shape, max_boxes = self.max_boxes,
                score_threshold = self.score, iou_threshold = self.iou)
        return boxes, scores, classes

    '''
        函数名称:detect_image
        函数作用:目标跟踪程序(YOLO V4)
        函数输入:frame: 图像
        函数输出:
            boxs_person:行人检测框【x1, y1, w, h】
            boxs_others:其他类别检测框【x1, y1, x2, y2】
            labels_others: 其他框的类别

    '''
    def detect_image(self, image):
        new_image_size = (self.model_image_size[1],self.model_image_size[0])
        boxed_image = letterbox_image(image, new_image_size)
        image_data = np.array(boxed_image, dtype='float32')
        image_data /= 255.
        image_data = np.expand_dims(image_data, 0)  # Add batch dimension.
        boxs_person = []
        boxs_others = []
        labels_others = []
        # 预测结果
        out_boxes, out_scores, out_classes = self.sess.run(
            [self.boxes, self.scores, self.classes],
            feed_dict={
                self.yolo_model.input: image_data,
                self.input_image_shape: [image.size[1], image.size[0]],
                K.learning_phase(): 0
            })


        for i, c in list(enumerate(out_classes)):
            predicted_class = self.class_names[c]
            box = out_boxes[i]
            score = out_scores[i]
            top, left, bottom, right = box
            ###输入deepSort的格式如下###
            box_deepsort = [left,top,right-left,bottom-top]
            box_other = [left,top,right,bottom]

            if predicted_class == 'person':
                boxs_person.append(box_deepsort)
            else:
                boxs_others.append(box_other)
                labels_others.append(predicted_class)


        return boxs_person,boxs_others,labels_others

    def close_session(self):
        self.sess.close()
Deep Sort算法代码
#!python3
#--coding:utf8--
from yolo import YOLO
from PIL import Image
import os
import sys
import time
import logging
import random
from random import randint
import math
import statistics
import getopt
from ctypes import *
import numpy as np
import cv2
from deep_sort import nn_matching
from deep_sort.detection import Detection
from deep_sort.tracker import Tracker
from tools import generate_detections as gdet
from deep_sort.detection import Detection as ddet
from collections import deque
from deep_sort import preprocessing


'''
函数名称:track_deepsort
函数作用:目标跟踪程序
函数输入:frame:图像
         boxs_person:行人检测框【x1,y1,w,h】
         boxs_others:其他类别检测框【x1,y1,x2,y2】
         labels_others:其他框的类别
         encoder:跟踪器的编码器
         tracker: 跟踪器
         pts: 运动点初始化值
         show_results:是否显示结果

函数输出:tracker 跟踪器
         pts 运动轨迹

'''

def track_deepsort(frame,boxs_person,boxs_others,labels_others,encoder,tracker,pts,show_results=True):
    nms_max_overlap = 1.0
    features = encoder(frame, boxs_person)
    detections = [Detection(bbox, 1.0, feature) for bbox, feature in zip(boxs_person, features)]
    boxes = np.array([d.tlwh for d in detections])
    scores = np.array([d.confidence for d in detections])
    indices = preprocessing.non_max_suppression(boxes, nms_max_overlap, scores)
    detections = [detections[i] for i in indices]
    # 跟踪
    tracker.predict()
    tracker.update(detections)
    i = int(0)
    indexIDs = []
    ##########结果显示###########
    if show_results:
        for det in detections:
            bbox = det.to_tlbr()
            cv2.rectangle(frame, (int(bbox[0]), int(bbox[1])), (int(bbox[2]), int(bbox[3])), (255, 255, 255), 2)
        for ii in range(len(boxs_others)):
            bbox = boxs_others[ii]
            label = labels_others[ii]
            cv2.rectangle(frame, (int(bbox[0]), int(bbox[1])), (int(bbox[2]), int(bbox[3])), (0, 255, 255), 2)
            cv2.putText(frame, str(label), (int(bbox[0]), int(bbox[1])), cv2.FONT_HERSHEY_COMPLEX, 0.5, (0, 255, 255), 2)

        for track in tracker.tracks:
            if not track.is_confirmed() or track.time_since_update > 1:
                continue
            # boxes.append([track[0], track[1], track[2], track[3]])
            indexIDs.append(int(track.track_id))
            bbox = track.to_tlbr()

            cv2.rectangle(frame, (int(bbox[0]), int(bbox[1])), (int(bbox[2]), int(bbox[3])), (0, 255, 0), 3)
            cv2.putText(frame, str(track.track_id), (int(bbox[0]), int(bbox[1] - 50)), 0, 5e-3 * 150, (0, 255, 0), 2)


            i = i + 1
            center = (int(((bbox[0]) + (bbox[2])) / 2), int(((bbox[1]) + (bbox[3])) / 2))
            pts[track.track_id].append(center)
            # draw motion path
            for j in range(1, len(pts[track.track_id])):
                if pts[track.track_id][j - 1] is None or pts[track.track_id][j] is None:
                    continue
                thickness = int(np.sqrt(64 / float(j + 1)) * 2)
                cv2.line(frame, (pts[track.track_id][j - 1]), (pts[track.track_id][j]), (0, 255, 255), thickness)

    return tracker,pts


if __name__ == "__main__":

    yolo = YOLO()
    ####设置跟踪参数###
    max_cosine_distance = 0.5
    nn_budget = 20
    metric = nn_matching.NearestNeighborDistanceMetric("cosine", max_cosine_distance,
                                                       nn_budget)  # 最近邻距离度量,对于每个目标,返回到目前为止已观察到的任何样本的最近距离(欧式或余弦)。
    tracker = Tracker(metric)  # 由距离度量方法构造一个 Tracker。
    writeVideo_flag = False
    ###轨迹点定义##
    pts = [deque(maxlen=30) for _ in range(9999)]
    model_filename = './model_data/mars-small128.pb'  ###DeepSort 模型位置##
    encoder = gdet.create_box_encoder(model_filename, batch_size=1)
    Obj_centre = [[] for i in range(200)]
    Obj_pre_direction = [[] for i in range(200)]
    ShowFlag = True ##是否显示结果
    ####打开摄像机###
    # 创建VideoCapture,传入0即打开系统默认摄像头
    # cap = cv2.VideoCapture(0)
    #######读取视频######################################
    video_path = 'structure.mp4'
    video_capture = cv2.VideoCapture(video_path)
    key = ''
    count = 0
    save_path = './saveimg/'

    while key != 113:  # for 'q' key
       ###读取图像###
        ret, frame = video_capture.read()
        #######目标检测########################
        frame2 = Image.fromarray(cv2.cvtColor(frame, cv2.COLOR_BGRA2RGBA))
        boxs_person,boxs_others,labels_others = yolo.detect_image(frame2)

        #######目标跟踪########################
        tracker, pts = track_deepsort(frame, boxs_person, boxs_others, labels_others, encoder, tracker, pts)
        #######显示检测及跟踪结果####
        cv2.namedWindow("YOLO3_Deep_SORT", 0)
        cv2.resizeWindow('YOLO3_Deep_SORT', 1024, 768)
        cv2.imshow('YOLO3_Deep_SORT', frame)
        cv2.waitKey(3)
        count  += 1
        jpg_name = os.path.join(save_path,str(count).zfill(6)+'.jpg')
        cv2.imwrite(jpg_name,frame)
四、实战效果评价
结果显示,在目标检测环节,当人群交叉 光照突变时可能出现漏检的现象,这将导致目标跟踪环节出现跟踪错误,应该进一步地调整目标跟踪策略,使目标跟踪算法具有鲁棒性,尤其是解决人员聚集情况下的目标跟踪问题
创作不易 觉得有帮助请点赞关注收藏~~~