一: uboot源码移植准备工作
1.在家目录下创建一个<demo>文件夹
2.将en.SOURCES-stm32mp1-openstlinux-5.10-dunfell-mp1-21-11-17_tar_v3.1.0.xz文件夹拷贝到demo目录下
3.对en.SOURCES-stm32mp1-openstlinux-5.10-dunfell-mp1-21-11-17_tar_v3.1.0.xz进行解压
tar -vxf en.SOURCES-stm32mp1-openstlinux-5.10-dunfell-mp1-21-11-17_tar_v3.1.0.xz
4.在家目录下创建一个FSMP1A文件夹
5.进入到~/demo/stm32mp1-openstlinux-5.10-dunfell-mp1-21-11-17/进入拷贝uboot源码
二:分析uboot源码
以 tar -vxf u-boot-stm32mp-v2020.10-stm32mp-r2-r0.tar.gz 为例
1.进入/home/linux/FSMP1A/u-boot-stm32mp-v2020.10-stm32mp-r2-r0目录 cd /home/linux/FSMP1A/u-boot-stm32mp-v2020.10-stm32mp-r2-r0
2.对uboot源码进行解压 tar -vxf u-boot-stm32mp-v2020.10-stm32mp-r2-r0.tar.gz
3.进入uboot源码目录下 cd u-boot-stm32mp-v2020.10-stm32mp-r2/
4.分析uboot源码目录
1>平台相关代码 arch:存放平台架构相关的文件 board:存放各个板子相关文件
2>平台无关代码 Makefile:工程管理文件
README:帮助文档,所有源码配置核编译的信息,都可以在README文件中找到
lib :存放库相关文件
Kconfig:配置相关文件
dts:存放是设备树相关内容
drivers:驱动相关内容
5.因为uboot源码使用的是Makefile工程管理文件进行编译,所以需要查看makefile编译相关命令----->make help
1> 清除中间文件 ---->make distclean Cleaning targets: clean - Remove most generated files but keep the config mrproper - Remove all generated files + config + various backup files distclean - mrproper + remove editor backup and patch files
2> 基于图形化界面信息配置 ---->make menuconfig menuconfig - Update current config utilising a menu based program
3> 编译命令 ---->make all all - Build all necessary images depending on configuration 6.分析README文件 195 For all supported boards there are ready-to-use default 196 configurations available; just type "make <board_name>_defconfig". 197 198 Example: For a TQM823L module type: 199 200 cd u-boot 201 make TQM823L_defconfig
通过以上分析可知:编译板子的命令:make <board_name>_defconfig
三:如何确定<board name> 名字
只记录常用方法
1.在uboot源码目录下,打开Makefile文件,搜索目标:config
564 %config: scripts_basic outputmakefile FORCE
565 $(Q)$(MAKE) $(build)=scripts/kconfig $@
2.在uboot源码目录下,打开Makefile文件,搜索目标:config,使用echo命令查看各个 变量打印的内容
564 %config: scripts_basic outputmakefile FORCE
565 @echo $(Q)
566 @echo $(MAKE)
567 @echo $(build)
568 @echo $@
569 $(Q)$(MAKE) $(build)=scripts/kconfig $@
3.在uboot源码顶层目录下,执行 make fsmp1a_defconfig,会打印如下信息:
@
make
-f ./scripts/Makefile.build obj
fsmp1a_defconfig
四: basic版本启动流程
BL0:芯片厂家固化到芯片内部程序
BL1:FSBL(u-boot-spl.stm32)
BL2:SSBL(u-boot.img)
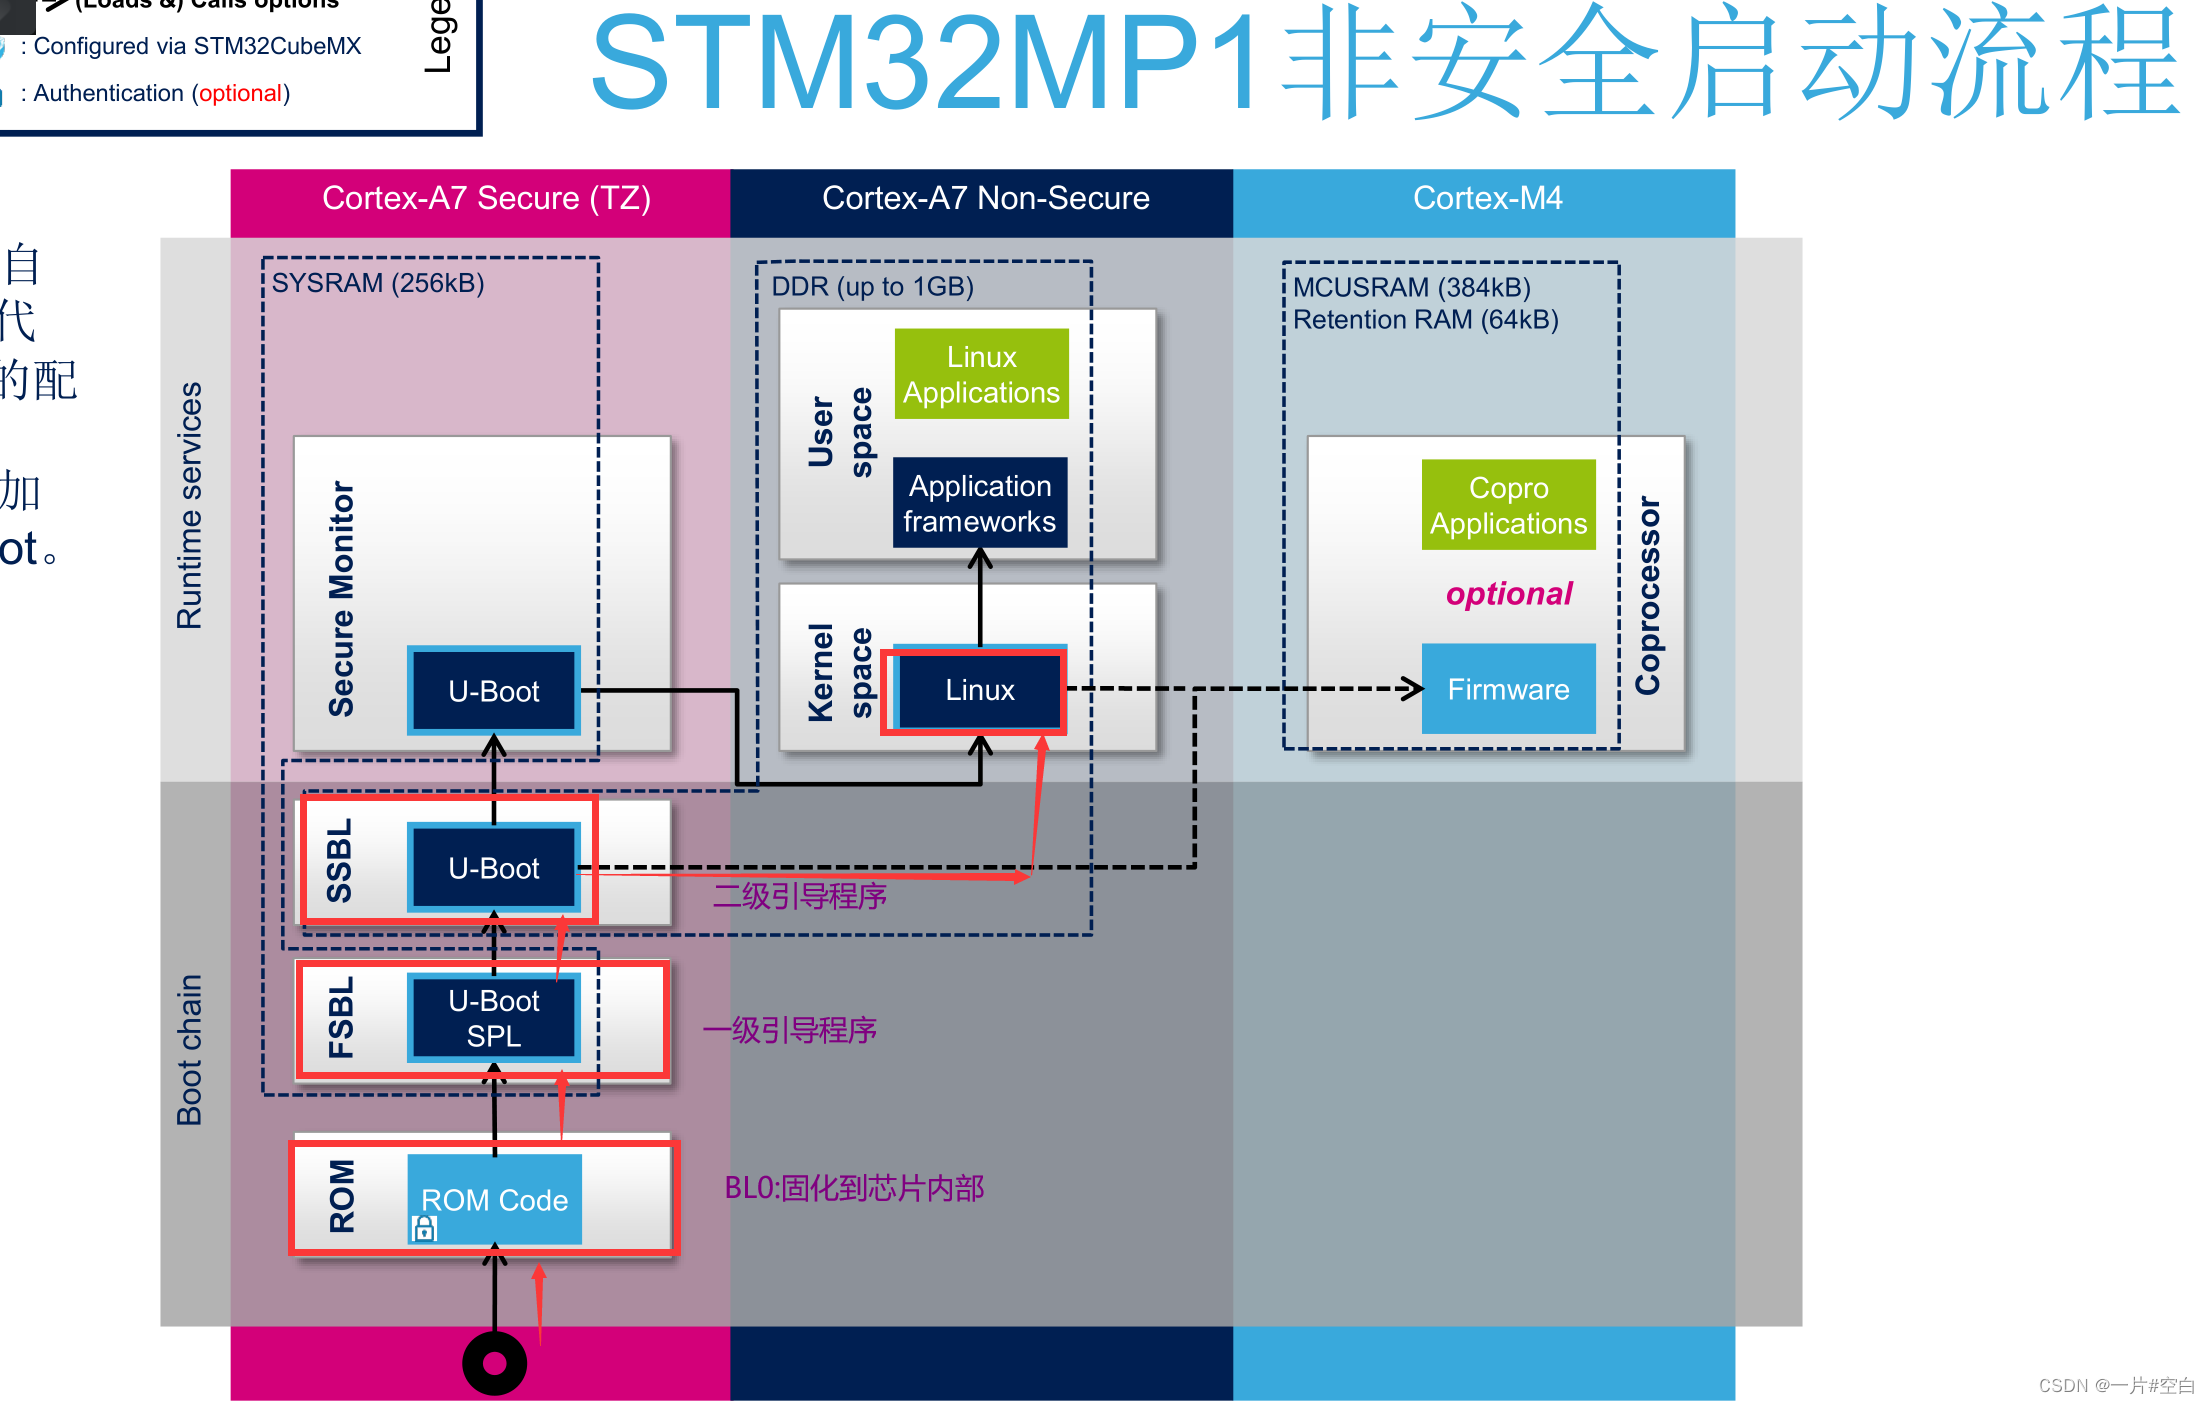
五: uboot源码配置和编译流程
1.进入uboot源码顶层目录下
2..配置交叉编译工具链,打开uboot源码顶层目录下Makefile,搜索CROSS_COMPILE,替换文件
3.在uboot源码顶层目录下,配置非安全模式的默认缺省配置文件
4..在uboot源码目录下,执行图形化界面信息命令:make menuconfig(只读)
5.设备树相关内容
6.复制DK1公板相关设备树内容
1>在uboot源码顶层目录下,进入arch/arm/dts,查找DK1公板相关设备树内容
2>进入arch/arm/dts,将DK1公板设备树相关内容,复制为FSMP1A相关平台内容
3>进入arch/arm/dts,打开stm32mp157a-fsmp1a.dts文件
4>进入arch/arm/dts,打开sMakefile文件,添加stm32mp157a-fsmp1a.dtb
7.进入uboot源码顶层目录下,对uboot源码进行编译
六:制作TF卡启动盘
1>对TF卡进行分区,将TF开插入到读卡器中,将读卡器插入到电脑中,并且被ubuntu识别,点击确定
2>查看TF卡分区
例:linux@ubuntu:~/FSMP1A/u-boot-stm32mp-v2020.10-stm32mp-r2-r0/u-boot-stm32mp-v2020.10-stm32mp-r2$ ls /dev/sd*
3>删除TF卡所有分区
4>对TF卡进行分区
5>进入uboot源码顶层目录下,对uboot源码镜像文件进行烧写
例:linux@ubuntu:$ sudo dd if=u-boot-spl.stm32 of=/dev/sdb1 conv=fdatasync linux@ubuntu:$ sudo dd if=u-boot-spl.stm32 of=/dev/sdb2 conv=fdatasync linux@ubuntu:$ sudo dd if=u-boot.img of=/dev/sdb3 conv=fdatasync


