相关文档
- arduino-esp32 SDK
- ESP-IDF SDK
- ESP-IDF 软件环境搭建说明
- Arduino 软件环境使用说明
- Arduino as an ESP-IDF component (官方说明)
环境准备
目前,最新 Master 版本的 arduino-esp32 SDK 要求使用 v4.4 版本的 ESP-IDF SDK 软件编译环境。
- 不同版本的 arduino-esp32 SDK 对应的 ESP-IDF SDK 版本的说明参见 “ESP32 Arduino Release” 说明
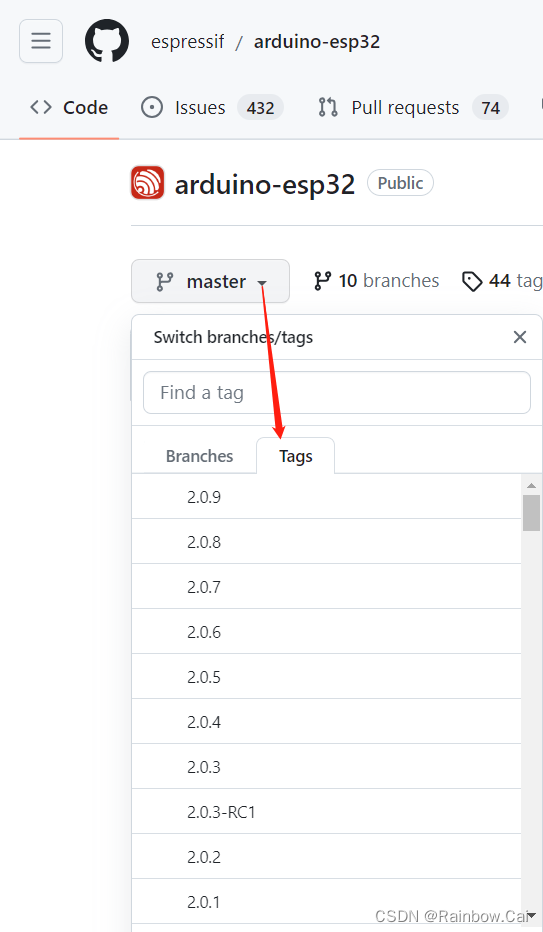
- arduino-esp32 SDK 发布的版本可在 arduino-esp32 SDK 管理目录下查看,如下:
- ESP-IDF 软件编译环境
- 如何您使用的是 Windows 环境, 它非常简单. 您只需要使用离线版本的 “ESP-IDF 工具安装器” 来安装 esp-idf SDK 版本的编译环境。 可参考 “Windows 上搭建 ESP-IDF SDK 编译环境 + Visual Studio Code 软件编程环境” 指南,视频教程参见 “使用一键安装工具快速搭建 ESP-IDF 开发环境 (Windows)”。
- 如果您使用的是 Ubuntu 环境,请阅读 “Linux 和 macOS 平台工具链的标准设置” 说明。您也可以参考 “Ubuntu18.04 上通过 Gitee 完成 ESP32-S3 的 ESP-IDF 编译环境搭建” 指南。
接下来,我们将基于 windows 环境来演示如何将 arduino-esp32 库作为 ESP-IDF SDK 组件使用,包含:
- 将 arduino-esp32 库作为工程的组件来使用
- 将 arduino-esp32 库作为 ESP-IDF SDK 库里的组件来使用
1、 将 arduino-esp32 库作为工程的组件来使用
- 创建一个自定义工程
- 为当前工程创建组件文件夹
- 克隆 arduino-esp32 库作为当前工程的组件
- 对工程文件名做相应修改
- 对工程配置选项做相应修改
- 编译、下载当前工程进行测试
1.1 创建一个自定义工程
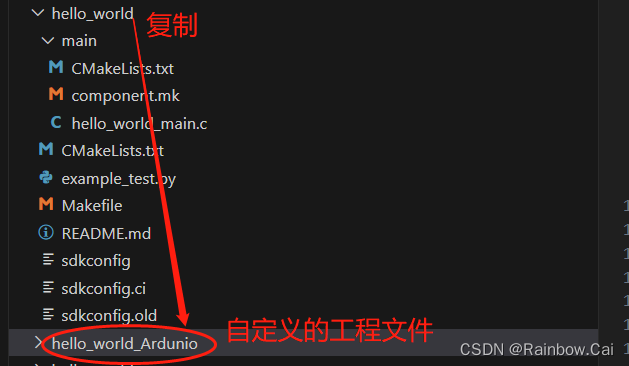
基于 ESP-IDF SDK 可复制一个工程来进行测试,例如复制 hello-world 工程,改名为 hello-world_Arduino , 如下:
1.2 为当前工程创建组件文件夹
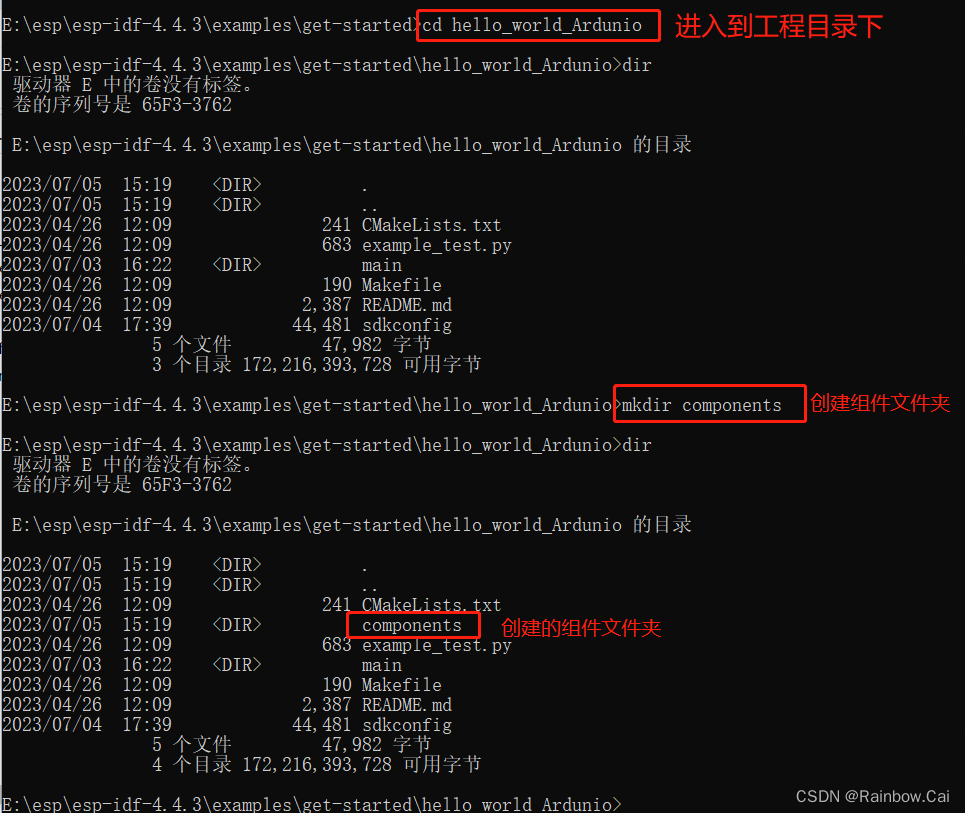
可使用如下指令,为当前自定义的工程文件创建组件文件夹
cd hello-world_Arduino
mkdir components
1.3 克隆 arduino-esp32 库作为当前工程的组件
- 进入到
components文件目录下,运行如下指令,克隆 arduino-esp32 库
cd components

git clone https://github.com/espressif/arduino-esp32.git

- arduino-esp32 SDK 克隆完成后,进入到 arduino-esp32 文件目录下,运行如下指令,克隆 arduino-esp32 库的子仓库
cd arduino-esp32

git submodule update --init --recursive

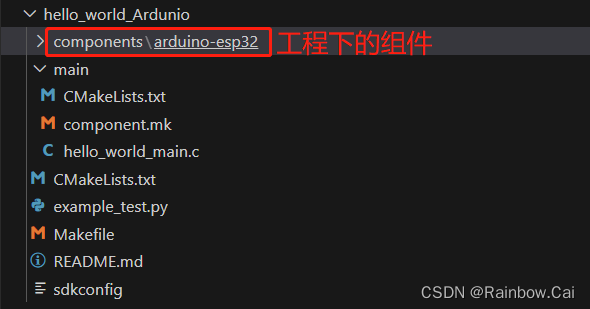
以上步骤完成后,工程结构如下:
1.4 对工程文件名做相应修改
这里我们在 hello-world_Arduino 的工程文件下,使用 Arduino setup() 和 loop() 来测试
-
在
hello-world_Arduino工程文件夹下,将文件main.c重命名为main.cpp, 如下: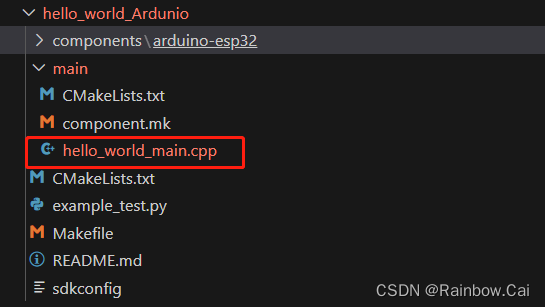
-
在工程文件夹下的
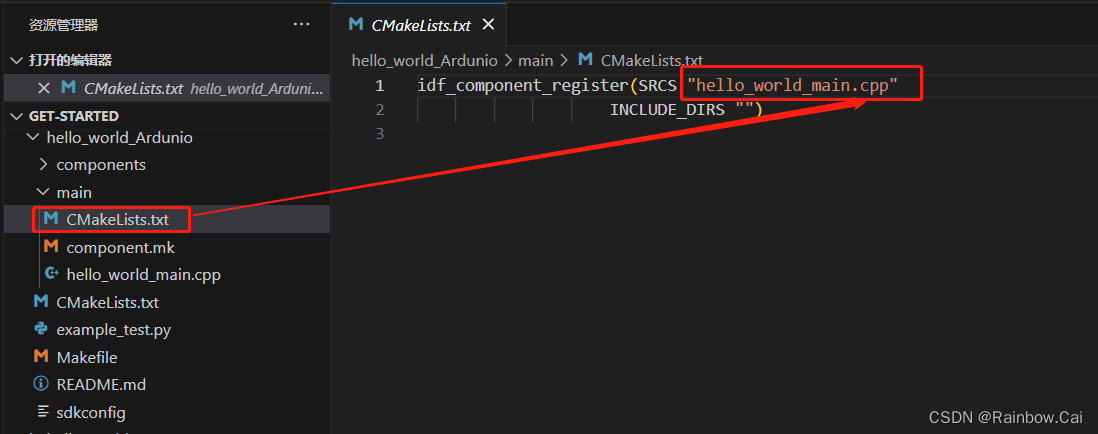
main文件夹中,打开文件CMakeLists.txt并将main.c更改为main.cpp,如下
-
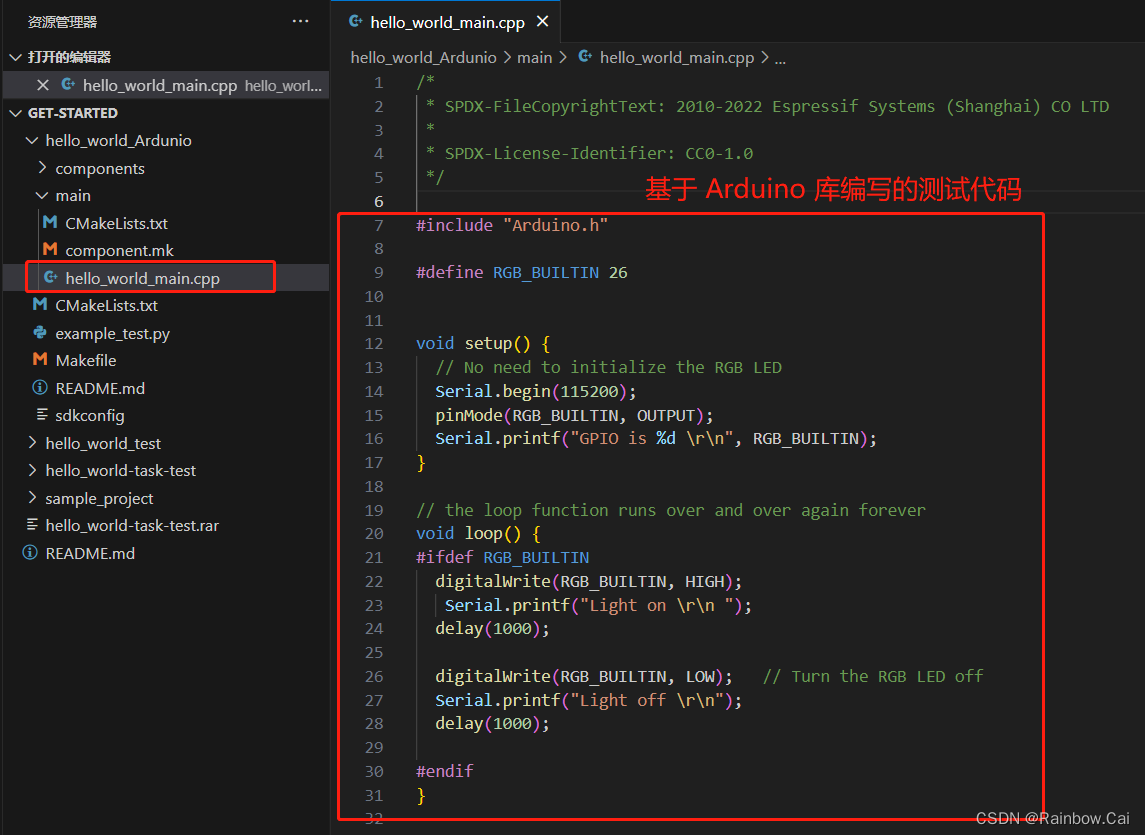
在
hello-world_Arduino工程下的hello_world_main.cpp文件中可基于 Arduino 库编写测试代码,如下:
#include "Arduino.h"

#define RGB_BUILTIN 26

void setup() {
  // No need to initialize the RGB LED
  Serial.begin(115200);
  pinMode(RGB_BUILTIN, OUTPUT);
  Serial.printf("GPIO is %d \r\n", RGB_BUILTIN);
}

// the loop function runs over and over again forever
void loop() {
#ifdef RGB_BUILTIN
  digitalWrite(RGB_BUILTIN, HIGH);
   Serial.printf("Light on \r\n ");
  delay(1000);

  digitalWrite(RGB_BUILTIN, LOW);   // Turn the RGB LED off
  Serial.printf("Light off \r\n");
  delay(1000);

#endif
}
1.5 对工程配置选项做相应修改
-
修改
sdkconfig文件中的CONFIG_FREERTOS_HZ配置为1000, 默认是100。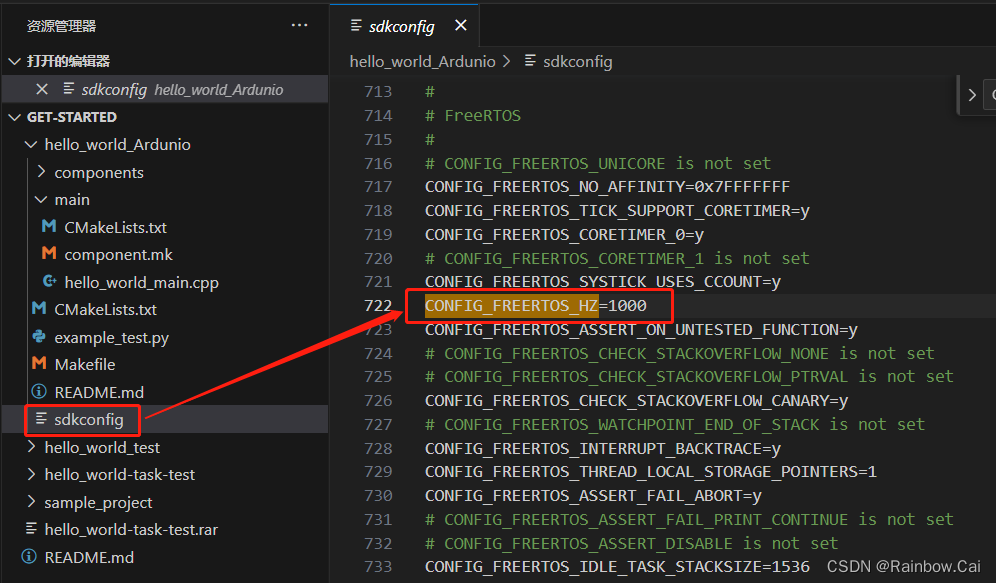
-
在 工程目录下,运行
idf.py menuconfig指令进入工程配置选项界面,开启Autostart Arduino setup and loop on boot配置选项
idf.py menuconfig → Arduino Configuration [*] Autostart Arduino setup and loop on boot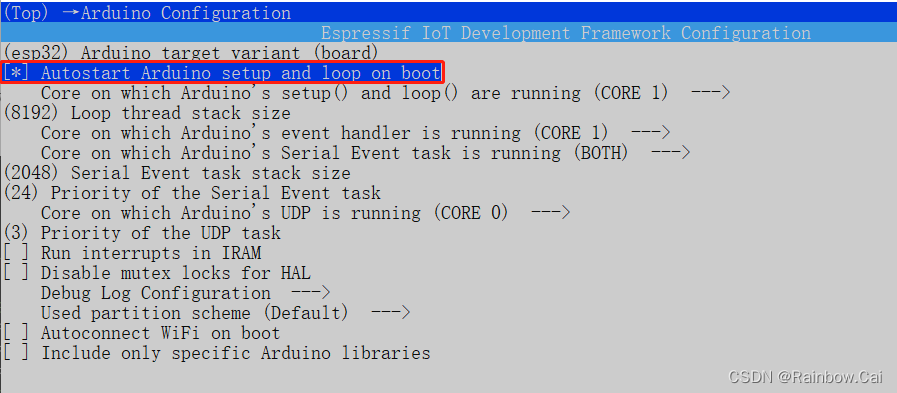
1.6 编译、下载当前工程进行测试
-
在当前工程目录下,运行如下指令编译工程
idf.py build
固件编译完成将打印如下日志,提示编译生成的固件和对应的下载地址

-
在当前工程目录下运行如下指令下载固件并打印固件运行日志
idf.py -p COM4 flash monitor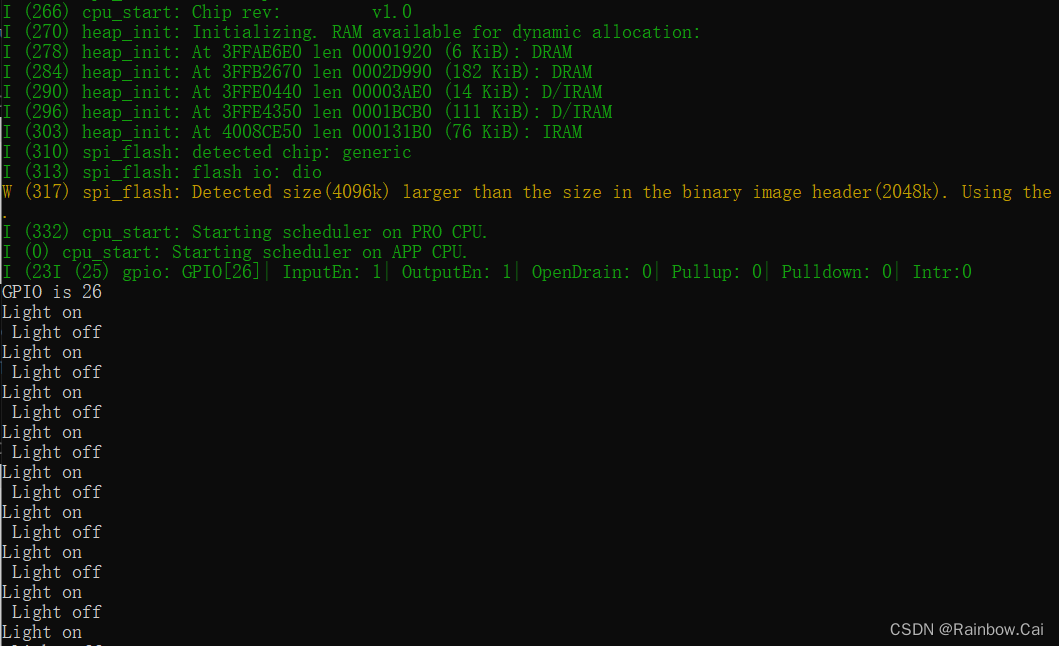
2、将 arduino-esp32 库作为 ESP-IDF SDK 库里的组件来使用
- 在
esp-idfSDK 目录下创建components-Arduino文件夹- 在
components-Arduino文件夹下克隆 arduino-esp32 SDK- 在工程目录下的
CmakeLists.txt文件中增加 arduino-esp32 组件的路径
2.1 在 esp-idf SDK 目录下创建 components-Arduino 文件夹
mkdir components-Arduino

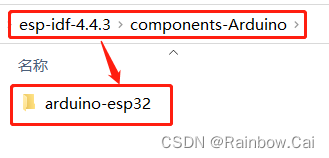
2.2 在 components-Arduino 文件夹下克隆 arduino-esp32 SDK
cd components-Arduino

git clone https://github.com/espressif/arduino-esp32.git

cd arduino-esp32

git submodule update --init --recursive
2.3 在工程目录下的 CmakeLists.txt 文件中增加 arduino-esp32 组件的路径
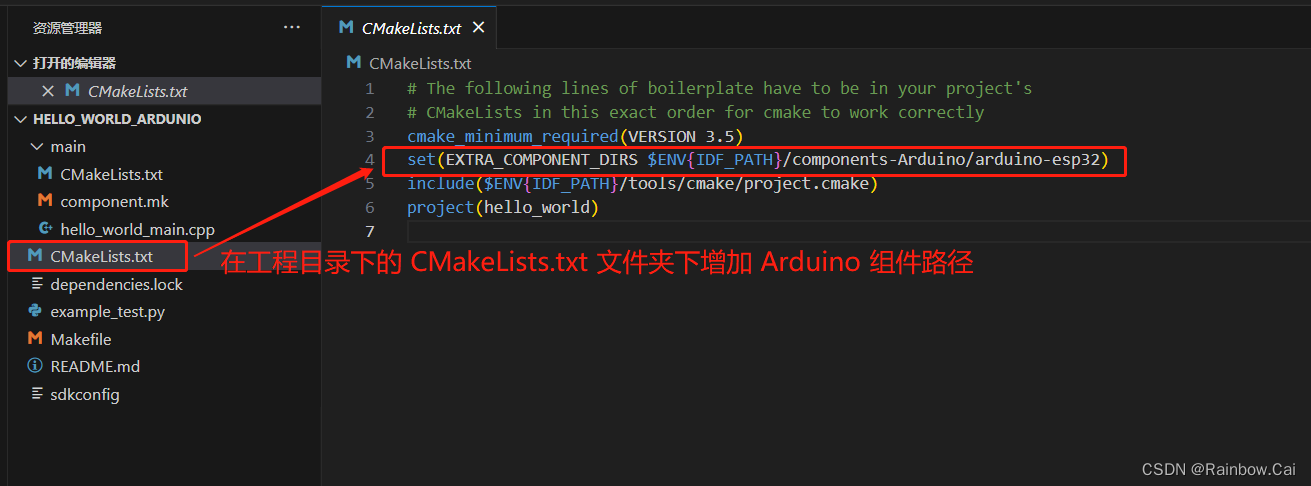
基于 esp-idf SDK 目录下增加 arduino-esp32 库作为组件,只需要在工程目录下的 CmakeLists.txt 文件中增加 arduino-esp32 组件的路径,如下:
set(EXTRA_COMPONENT_DIRS $ENV{IDF_PATH}/components-Arduino/arduino-esp32)
其他步骤与 1 完全相同。
【说明】
- 如果需要切换芯片环境,只需要在工程目录下运行如下指令:
idf.py set-target esp32s3
- 如果需要使用
ESP-IDF中的app_main()来运行代码,并调用Arduino库的 API 函数,工程文件名必须是main.cpp。同时需要关闭Autostart Arduino setup and loop on boot配置选项,并使用extern "C" void app_main()来定义app_main(), 例如如下测试代码:
#include "Arduino.h"

#include <stdio.h>
#include <inttypes.h>
#include "sdkconfig.h"
#include "freertos/FreeRTOS.h"
#include "freertos/task.h"
#include "esp_chip_info.h"
#include "esp_flash.h"

#define RGB_BUILTIN 21

extern "C" void app_main()
{

      // ESP-IDF API Usage
 printf("Hello world!\n");

    /* Print chip information */
    esp_chip_info_t chip_info;
    uint32_t flash_size;
    esp_chip_info(&chip_info);
    printf("This is %s chip with %d CPU core(s), %s%s%s%s, ",
           CONFIG_IDF_TARGET,
           chip_info.cores,
           (chip_info.features & CHIP_FEATURE_WIFI_BGN) ? "WiFi/" : "",
           (chip_info.features & CHIP_FEATURE_BT) ? "BT" : "",
           (chip_info.features & CHIP_FEATURE_BLE) ? "BLE" : "",
           (chip_info.features & CHIP_FEATURE_IEEE802154) ? ", 802.15.4 (Zigbee/Thread)" : "");

    unsigned major_rev = chip_info.revision / 100;
    unsigned minor_rev = chip_info.revision % 100;
    printf("silicon revision v%d.%d, ", major_rev, minor_rev);
    if(esp_flash_get_size(NULL, &flash_size) != ESP_OK) {
        printf("Get flash size failed");
        return;
    }

    printf("%" PRIu32 "MB %s flash\n", flash_size / (uint32_t)(1024 * 1024),
           (chip_info.features & CHIP_FEATURE_EMB_FLASH) ? "embedded" : "external");

    printf("Minimum free heap size: %" PRIu32 " bytes\n", esp_get_minimum_free_heap_size());

    for (int i = 5; i >= 0; i--) {
        printf("Restarting in %d seconds...\n", i);
        vTaskDelay(1000 / portTICK_PERIOD_MS);
    }

    // Arduino-like setup()
  Serial.begin(115200);
   pinMode(RGB_BUILTIN, OUTPUT);
  Serial.printf("GPIO is %d \r\n", RGB_BUILTIN);

  // Arduino-like loop()
  while(true){
    #ifdef RGB_BUILTIN
  digitalWrite(RGB_BUILTIN, HIGH);
   Serial.printf("Light on \r\n ");
  delay(1000);

  digitalWrite(RGB_BUILTIN, LOW);   // Turn the RGB LED off
  Serial.printf("Light off \r\n");
  delay(1000);

#endif

    }

}
- Arduino 中的
setup()函数在app_main()中只需要调用一次,不需要while(!Serial){}循环- Arduino 中的
loop()函数使用在app_main()中必须要使用while(true){}或while(1){}无线循环
- 固件运行日志:




![商业海外社交媒体营销10步指南 [2023]](https://img-blog.csdnimg.cn/img_convert/ec6d5dd11ec57e4b36919ac308f113cb.png)

