uniapp快速开发小程序全流程
完整项目代码:https://gitee.com/Zifasdfa/ziyi-app
欢迎fork与star
1 项目效果及环境准备
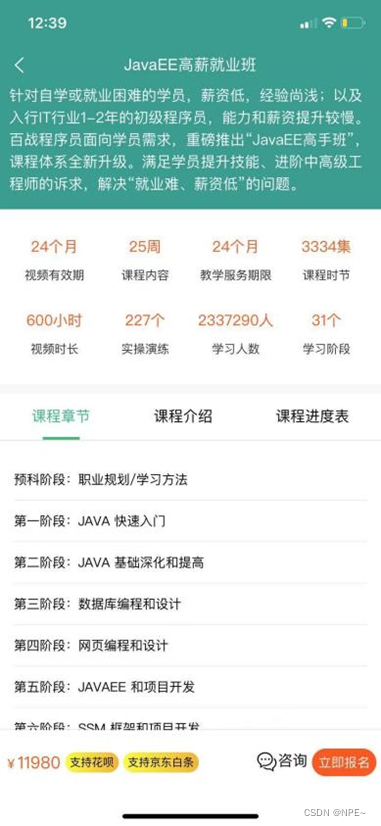
1.1 项目效果
本文主要使用uniapp实现一个简单的app应用


1.2 环境准备&项目初始化
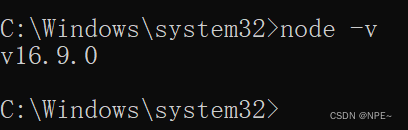
①node环境:去node.js官网下载稳定版的node即可,下载之后配置环境变量,通过
node -v查看是否配置成功
② 开发工具选择:HBuilder-X
官网下载地址:https://uniapp.dcloud.net.cn/quickstart.html#
根据自己的操作系统下载对应的环境即可,下载好之后,双击.exe文件打开HBuilderX
点击左上角:文件 - 新建项目 - 选择uni-app项目,填写对应项目名,其他默认即可【这里我采用vue2的语法】
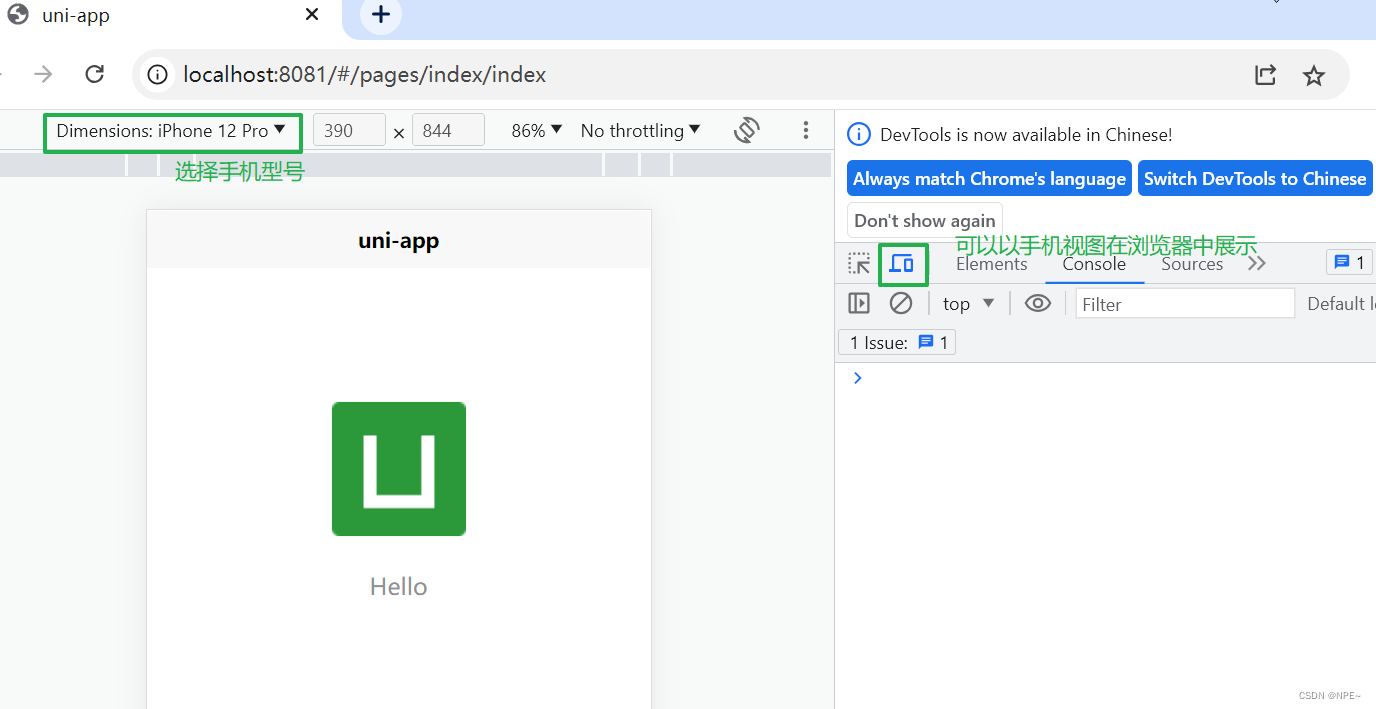
效果:
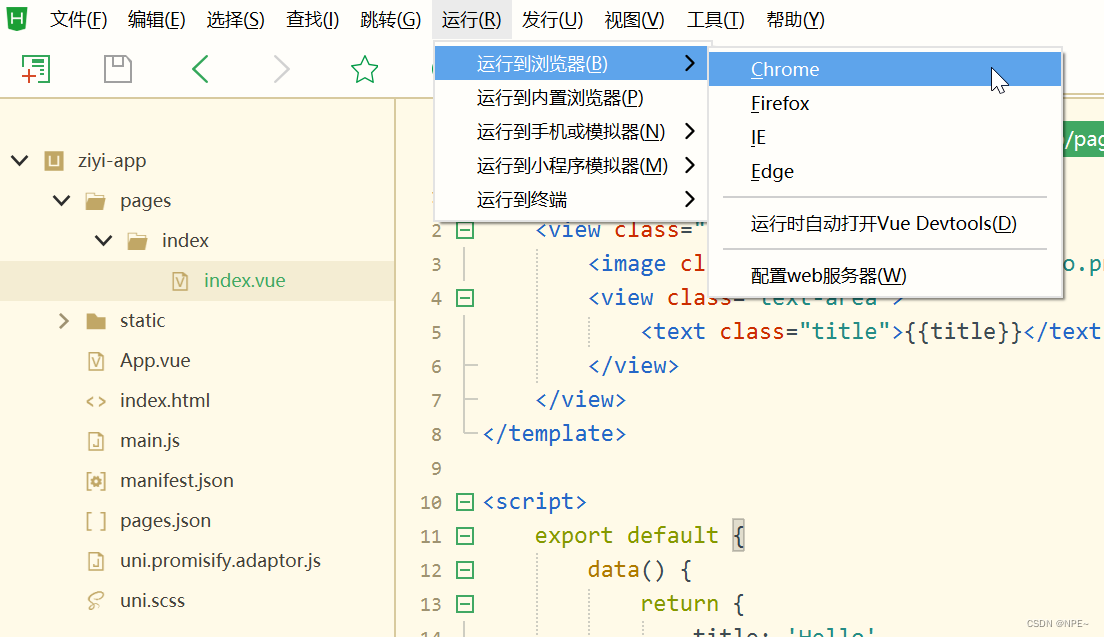
展示效果选择手机页面方式:
当然我们也可以通过数据线,将手机与电脑连接起来,然后直接在真机上运行。

2 实现tabbar底部导航
增加底部导航,为:首页、分类、学习、我的
官网tabbar教程:https://uniapp.dcloud.net.cn/collocation/pages.html#tabbar
- tabBar 中的 list 是一个数组,只能配置最少2个、最多5个 tab,tab 按数组的顺序排序。
①导入图片资源
导入所给源码中的static下的图片

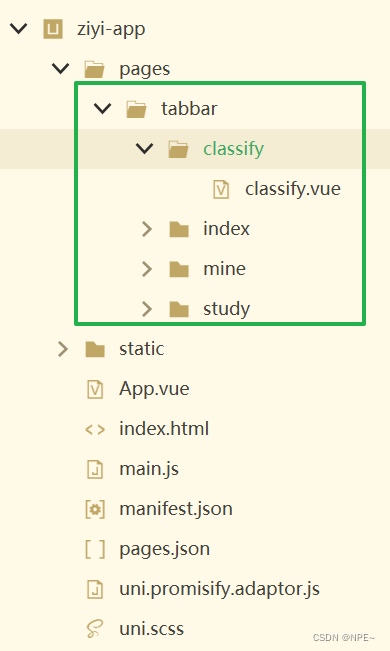
②新建tabbar目录及对应页面
因为我们整个项目是将底部导航栏中的index默认为首页,因此删除之前pages目录的index整个文件夹,并在pages下新建tabbar目录,然后在tabbar目录下分别新建classify、index、mine、study页面
③修改页面主题颜色,修改App.vue
<style>
	/*每个页面公共css 修改页面主背景色为灰色,配合白色的底部导航栏*/
	body{
		background-color: #f8f8f8;
	}
</style>
④配置底部导航栏,修改package.json
- 配置页面
在pages配置下,修改页面配置,包括修改页面路径及是否允许下拉刷新等
{
	"pages": [ //pages数组中第一项表示应用启动页,参考:https://uniapp.dcloud.io/collocation/pages
		{
			//指定有哪些页面,并配置样式
		    "path" : "pages/tabbar/index/index",
		    "style" :
		    {
				//页面顶部的文本
		       "navigationBarTitleText":"首页",
			   "navigationStyle":"custom"
		    }

		}
		,{
		    "path" : "pages/tabbar/classify/classify",
		    "style" :
		    {
				"navigationBarTitleText":"分类",
				"navigationBarBackgroundColor":"#00b783",
				"navigationBarTextStyle":"white",
				//不启动下拉刷新
				"enablePullDownRefresh":false
		    }

		}
		,{
		    "path" : "pages/tabbar/study/study",
		    "style" :
		    {
		    	"navigationBarTitleText":"学习中心",
		    	"navigationBarBackgroundColor":"#00b783",
		    	"navigationBarTextStyle":"white",
		    	"enablePullDownRefresh":false
		    }

		}
		,{
		    "path" : "pages/tabbar/mine/mine",
		    "style" :
		    {
		    	"navigationBarTitleText":"个人中心",
		    	"navigationBarBackgroundColor":"#00b783",
		    	"navigationBarTextStyle":"white",
		    	"enablePullDownRefresh":false
		    }

		}
    ],
	...
}
- 新增tabbar配置
包括配置文本,选中未选中时候的图标等
{
	"pages": [ //pages数组中第一项表示应用启动页,参考:https://uniapp.dcloud.io/collocation/pages
	....

	// 底部导航栏
	"tabBar":{
		"color":"#999",
		//选中时的颜色
		"selectedColor":"#00b783",
		"borderStyle":"white",
		"backgroundColor":"#FFFFFF",
		"list":[
			{
				//底部导航栏的index对应页面
				"pagePath":"pages/tabbar/index/index",
				//对应文本
				"text":"首页",
				//未选中时的图标
				"iconPath":"static/tabar1.png",
				//选中之后的图标
				"selectedIconPath":"static/tabaron1.png"
			},
			{
				"pagePath":"pages/tabbar/classify/classify",
				"text":"分类",
				"iconPath":"static/tabar2.png",
				"selectedIconPath":"static/tabaron2.png"
			},
			{
				"pagePath":"pages/tabbar/study/study",
				"text":"学习",
				"iconPath":"static/tabar3.png",
				"selectedIconPath":"static/tabaron3.png"
			},
			{
				"pagePath":"pages/tabbar/mine/mine",
				"text":"我的",
				"iconPath":"static/tabar4.png",
				"selectedIconPath":"static/tabaron4.png"
			}
		]
	}
}
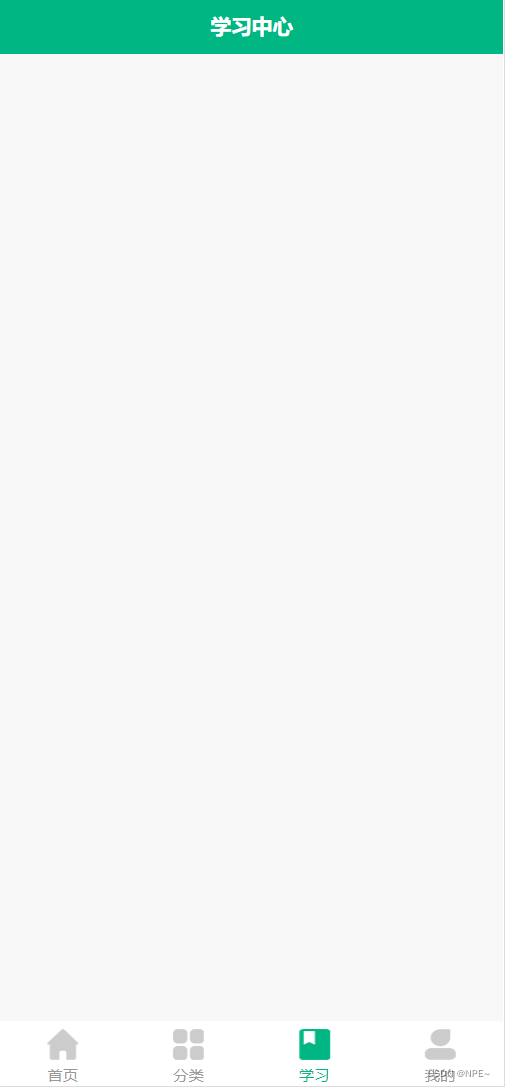
⑤查看效果
然后重新运行在浏览器,如果显示不出效果,则先暂停,然后重新运行在对应浏览器

效果:
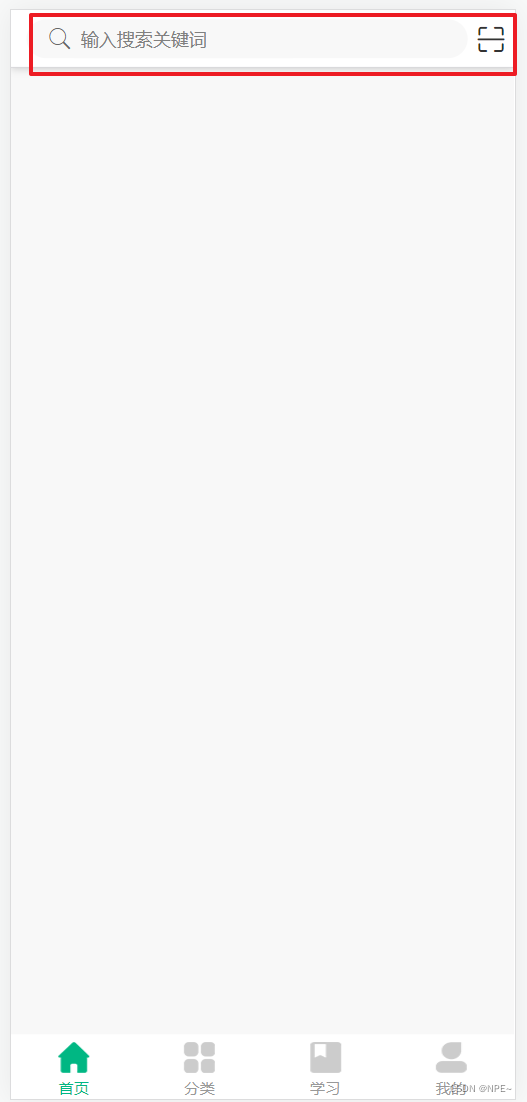
3 实现搜索框(使用第三方组件实现)
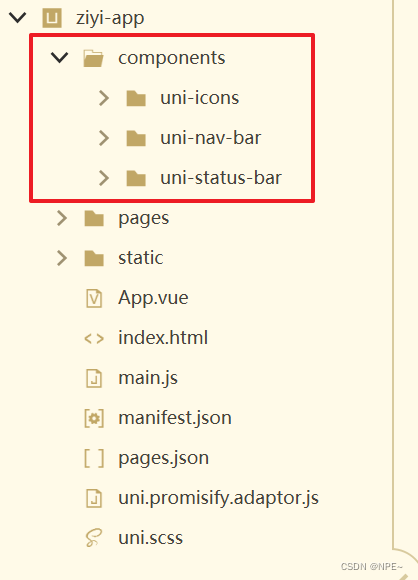
①下载第三方组件
组件 - 自定义导航栏-下载组件
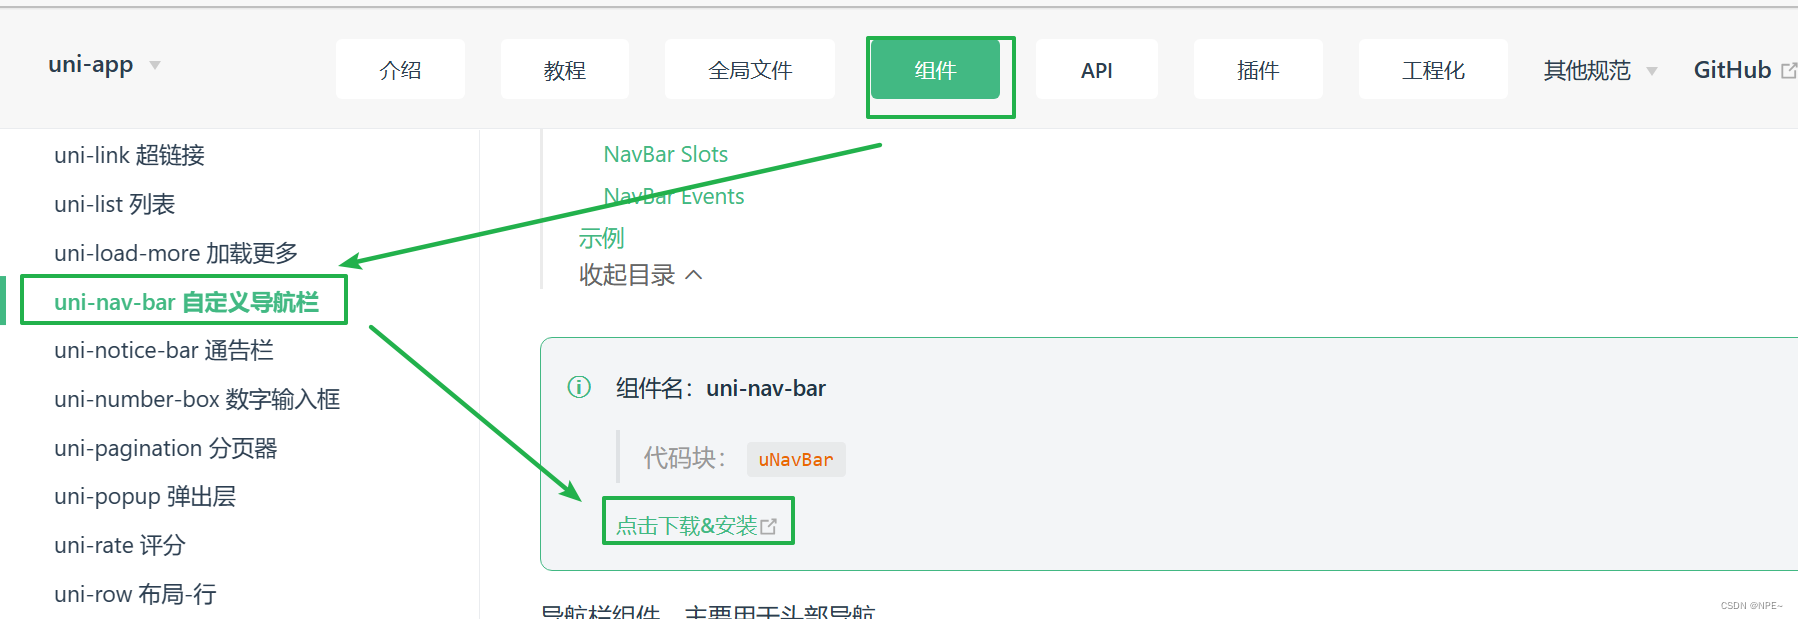
选择下载并导入:
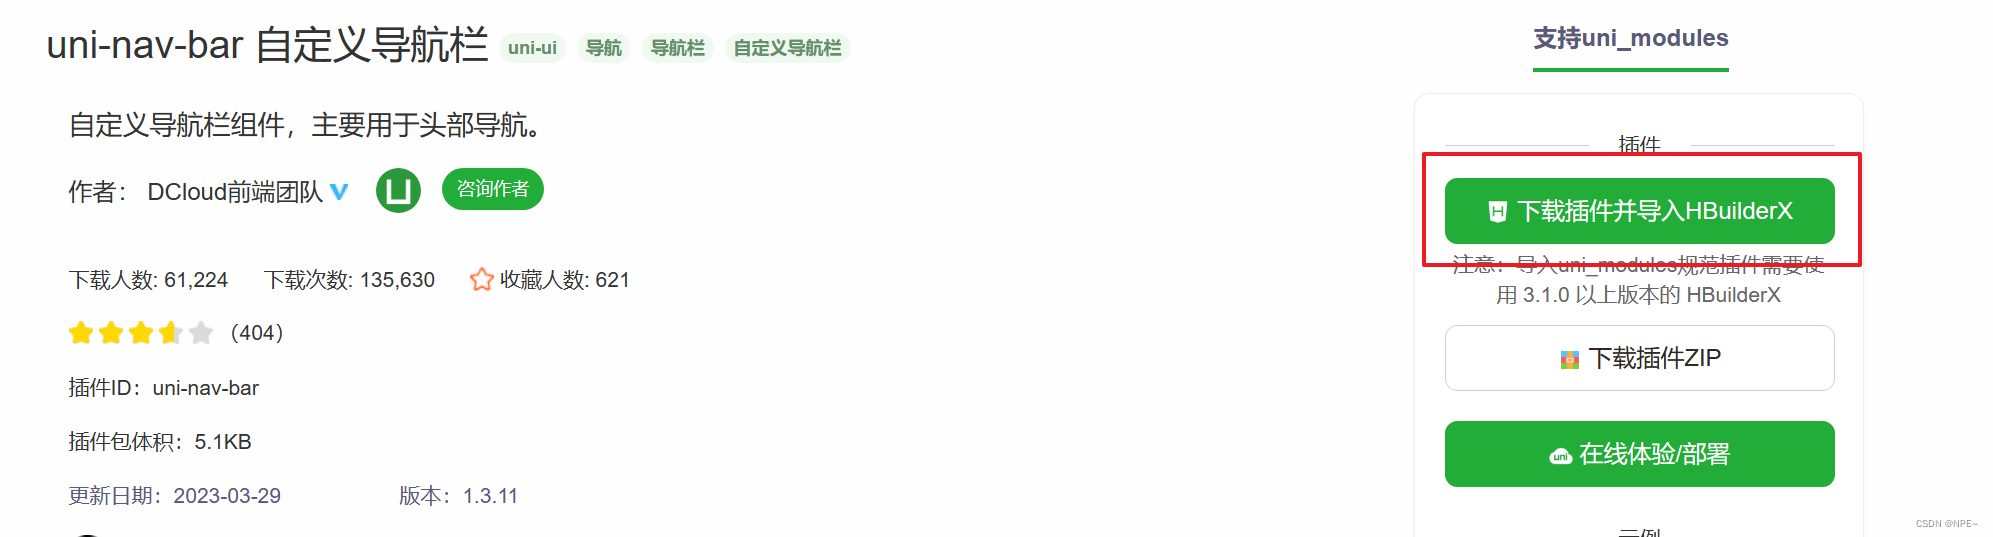
注意,下载插件是需要注册账号并登录的,如果没有账号的话,注册并登录即可
导入成功之后的效果:
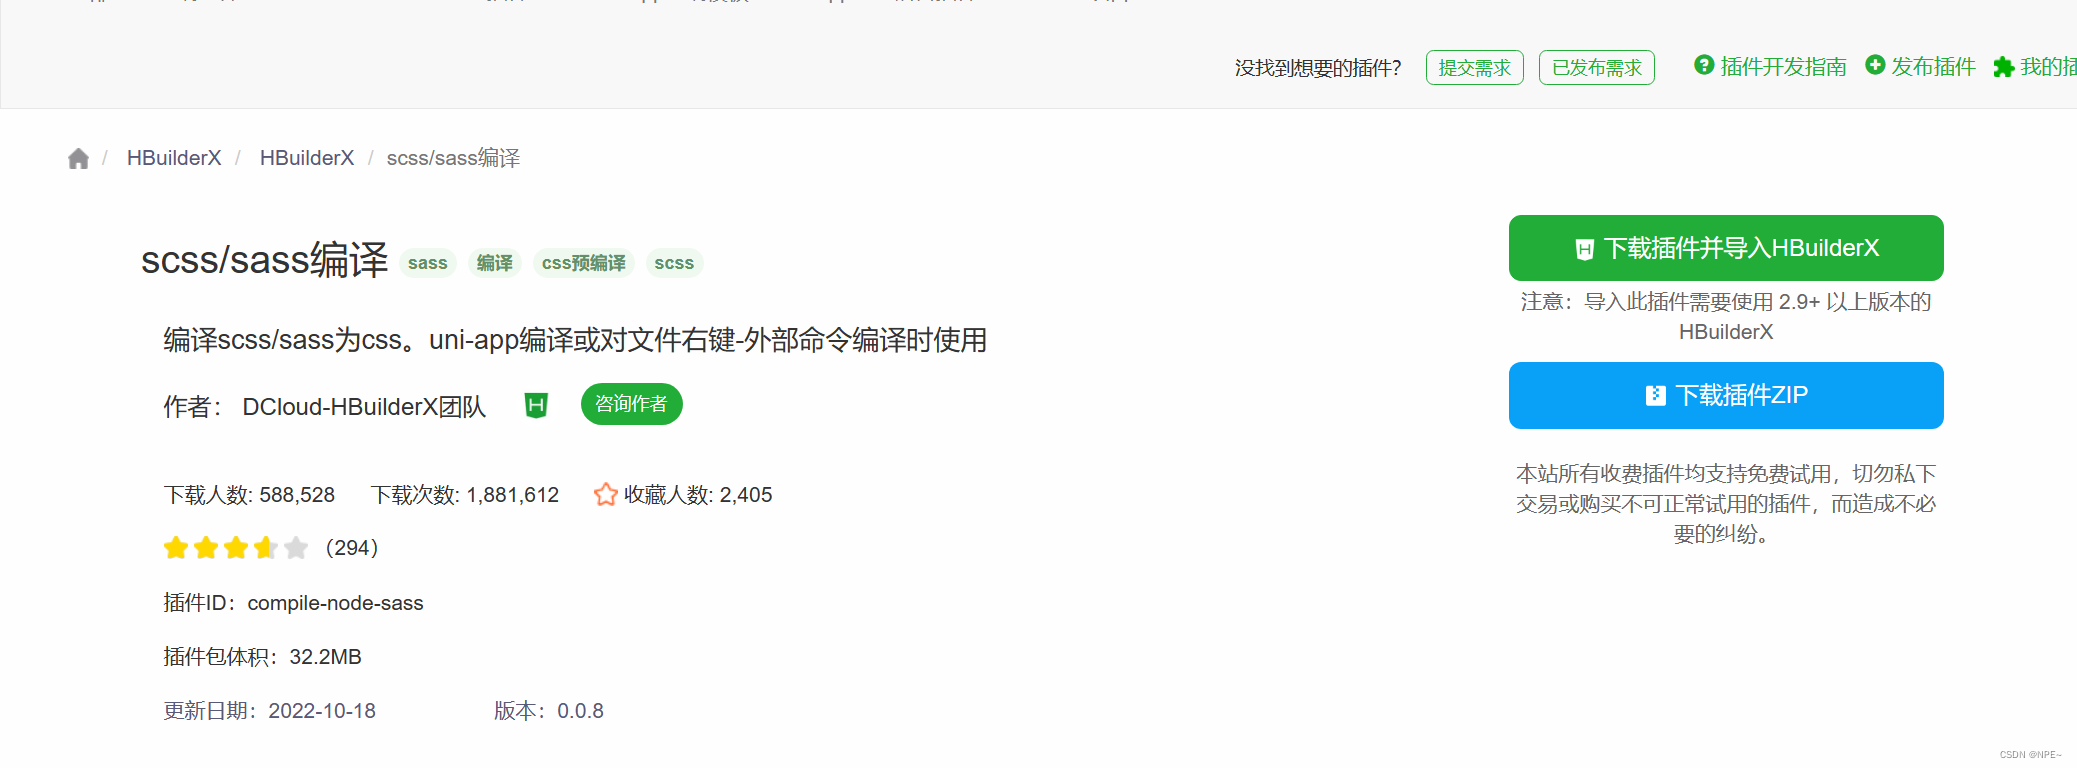
②安装scss/sass插件
因为我们后续会使用到css中的scss语法,所以需要提前安装插件
工具 - 插件安装
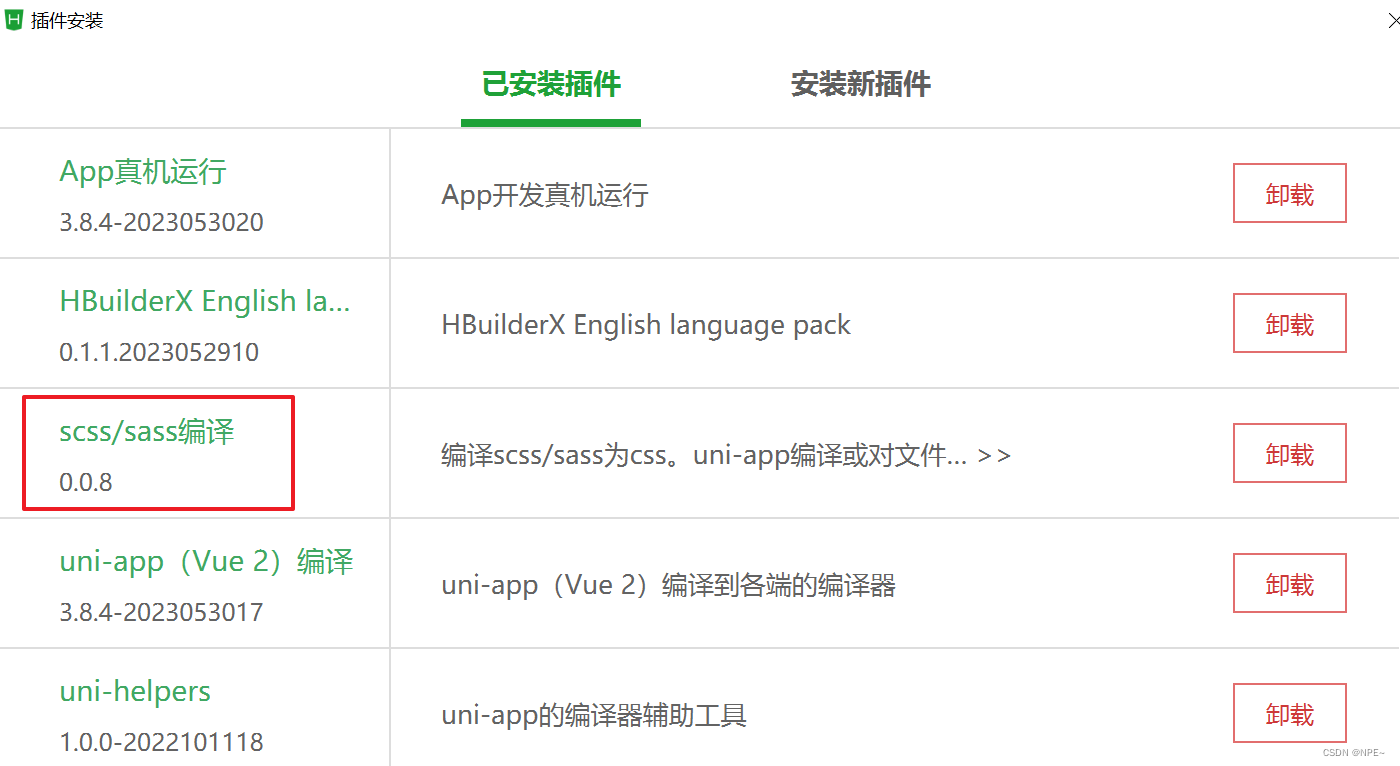
如果已经存在则无需安装
否则,点击安装新插件,插件市场中搜索sass,然后选择下载插件并导入
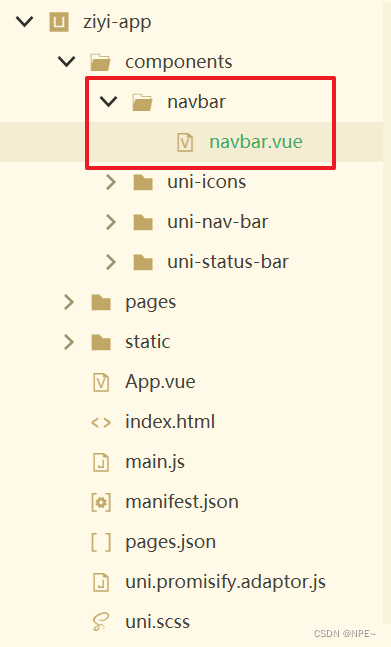
③抽取nav-bar组件(防止主页面代码过多不易维护)
在components组件下新建navbar目录,然后在navbar目录下创建navbar.vue文件
navbar.vue:
<template>
	<view>
		<view class="example-body">
			<!--uni-nav-bar 中的 statusBar 主要是为了适配"齐刘海",防止navbar遮盖住手机顶部的电量、时间等状态 -->
			<uni-nav-bar shadow statusBar :fixed="false" color="#333333" background-color="#FFFFFF" right-icon="scan">
				<view class="input-view">
					<uni-icons class="input-uni-icon" type="search" size="22" color="#666666" />
					<input confirm-type="search" class="nav-bar-input" type="text" placeholder="输入搜索关键词">
				</view>
			</uni-nav-bar>
		</view>
	</view>
</template>

<script>
	import uniNavBar from '@/components/uni-nav-bar/uni-nav-bar.vue'
	export default {
		data() {
			return {

			}
		},
		methods: {

		},
		components: {
			uniNavBar
		}
	}
</script>

<style lang="scss">
	.input-view {
		/* #ifndef APP-PLUS-NVUE */
		display: flex;
		/* #endif */
		flex-direction: row;
		width: 600rpx;
		flex: 1;
		background-color: #f8f8f8;
		height: 30px;
		border-radius: 15px;
		padding: 0 15px;
		flex-wrap: nowrap;
		margin: 7px 0;
		line-height: 30px;
	}

	.input-uni-icon {
		line-height: 30px;
	}

	.nav-bar-input {
		height: 30px;
		line-height: 30px;
		/* #ifdef APP-PLUS-NVUE */
		width: 370rpx;
		/* #endif */
		padding: 0 5px;
		font-size: 28rpx;
		background-color: #f8f8f8;
	}

	.example-body {
		padding: 0;
	}
</style>
④在pages/tabbar/index/index.vue中引入Navbar组件
<template>
	<view>
		<!-- 引入顶部搜索框导航栏 -->
		<Navbar/>

	</view>
</template>

<script>
	import Navbar from "../../../components/navbar/navbar.vue"
	export default {
		data() {
			return {

			}
		},
		methods: {

		},
		components:{
			Navbar,
		}
	}
</script>
⑤效果
页面效果:
4 首页实现Banner轮播图
通过网络请求动态获取图片数据
4.1 通过网络请求获取数据
①uni.request发起网络请求
pages/tabbar/index/index.vue:
<script>
	import Navbar from "../../../components/navbar/navbar.vue"
	export default {
		data() {
			return {
				//多张图片,用数组存放
				topBanner: [],

			}
		},
		methods: {

		},
		mounted(){
				//vue的生命周期函数
				uni.request({
					url: "http://html5.bjsxt.cn/api/index/banner",
					//注意:网络请求必须要按照下面的方式发起,不能使用新语法等
					success: (res) => {
						// console.log(res)
						this.topBanner = res.data.top_banner
					}
				})
		},
		components:{
			Navbar,
		}
	}
</script>
②通过console.log打印网络请求所返回的数据:
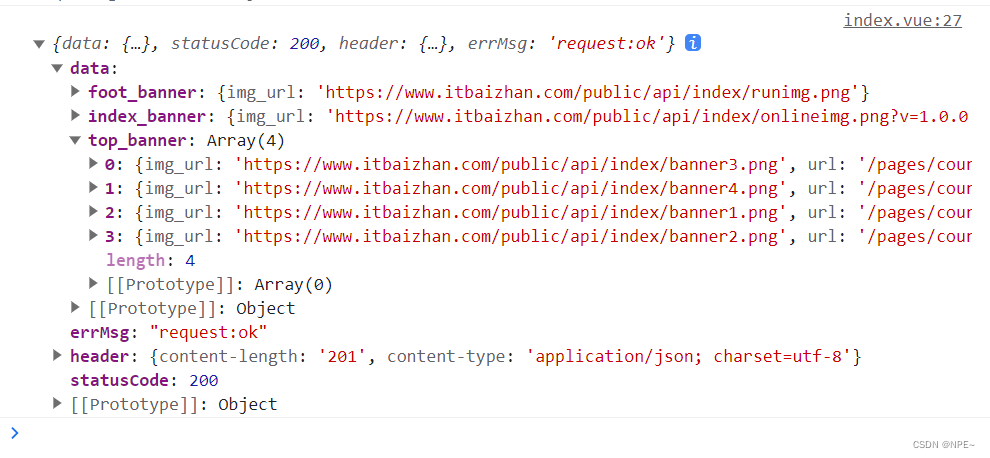
③根据网络返回的结果获取图片
需要根据自己的手机型号进行样式的调整
pages/tabbar/index/index.vue:
<template>
	<view class="home">
		<!-- 引入顶部搜索框导航栏 -->
		<Navbar/>
		<view class="index_banner_box">
			<!-- 顶部banner,同时配置对应参数 -->
			<swiper class="swiper" :indicator-dots="true" :autoplay="true" :interval="3000" :duration="500">
				<!-- 从图片数组中取出对应图片并展示在页面上 -->
				<swiper-item v-for="(item, index) in topBanner" :key="index">
					<image class="banner" :src="item.img_url" mode=""></image>
				</swiper-item>
			</swiper>
		</view>
	</view>
</template>

<script>
	...
</script>

<!-- 使用scss的语法 -->
<style lang="scss">
	.home {
		//flex:盒子模型
		display: flex;
		flex-direction: column;
		flex: 1;
		overflow: hidden;
		.index_banner_box {
			display: flex;
			width: 100%;
			padding: 10px;
			justify-content: center;
			align-items: center;
			border-radius: 5px;
			overflow: hidden;
			.swiper{
				width: 100%;
				height: 260rpx;
				.banner{
					width: 700rpx;
					height: 260rpx;
				}
			}
		}
	}
</style>
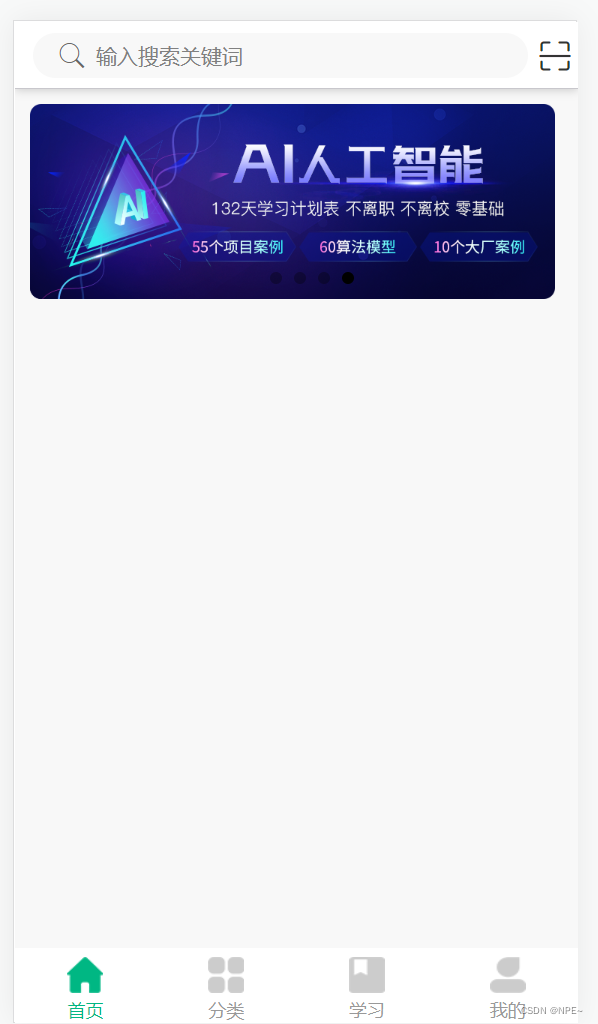
4.2 在页面中展示图片数据并配置样式
4.3 结果
5 实现课程导航
注意:import用于在js中引入css文件, @import用于在css中引入css文件
5.1 抽取课程导航coursenav为component,并编写页面
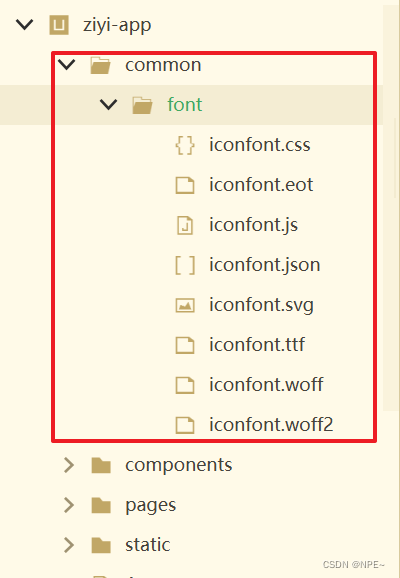
①引入源码中common下的图标样式,css文件等
②在components文件夹下新建coursenav
coursenav.vue:
<template>
	<view class="course_nav_con">
		<view class="course_nav_info" v-for="(item, index) in list" :key="index">
			<text class="course_nav_icon icon iconfont" :class="item.icon"></text>
			<view class="course_info_text">{{item.text}}</view>
		</view>

	</view>
</template>

<script>
	export default {
		data() {
			return {
				list: []
			}
		},
		mounted() {
			uni.request({
				url: "http://html5.bjsxt.cn/api/index/nav",
				success: (res) => {
					this.list = res.data.data
				}
			})
		},
		methods: {

		}
	}
</script>

<style lang="scss">

	// import用于在js中引入css文件, @import用于在css中引入css文件
	@import "@/common/font/iconfont.css";

	.course_nav_con {
		display: flex;
		// 盒子模型不撑开容器本身大小
		box-sizing: border-box;
		flex-direction: row;
		flex-wrap: wrap;
		padding: 15px 10px;

		.course_nav_info {
			width: 20%;
			flex-direction: row;
			flex-wrap: wrap;
			text-align: center;
			margin-bottom: 15px;

			.course_nav_icon {
				font-size: 30px;
			}

			.icon-java {
				color: #2a83fe;
			}

			.icon-weifuwu {
				color: #fd3761;
			}

			.icon-zuzhijiagou {
				color: #2b91e2;
			}

			.icon-dashuju {
				color: #2a83fe;
			}

			.icon-h {
				color: #00b478;
			}

			.icon-icon-- {
				color: #fd6012;
			}

			.icon-rengongzhineng {
				color: #fe391f;
			}

			.icon-ruanjianceshi {
				color: #00b478;
			}

			.icon-huatong {
				color: #fea917;
			}

			.icon-bianchengshibaobiao_icon {
				color: #2a83fe;
			}

			.icon-jianmo {
				color: #00b478;
			}

			.icon-chuangye {
				color: #fe391f;
			}

			.course_info_text {
				width: 100%;
				font-size: 13px;
				margin-top: 10px;
				white-space: nowrap;
				text-overflow: ellipsis;
				overflow: hidden;
			}
		}
	}
</style>
5.2 主页导入课程
在pages/tabbar/index/index.vue中引入CourseNar
- import CourseNav from “…/…/…/components/coursenav/coursenav.vue”
- components中添加CourseNav,
- template标签中添加<CourseNav/>
<template>
	<view class="home">
		<!-- 引入顶部搜索框导航栏 -->
		<Navbar/>
		<view class="index_banner_box">
			<!-- 顶部banner,同时配置对应参数 -->
			<swiper class="swiper" :indicator-dots="true" :autoplay="true" :interval="3000" :duration="500">
				<!-- 从图片数组中取出对应图片并展示在页面上 -->
				<swiper-item v-for="(item, index) in topBanner" :key="index">
					<image class="banner" :src="item.img_url" mode=""></image>
				</swiper-item>
			</swiper>
		</view>
		<!-- 课程导航栏 -->
		<CourseNav/>
	</view>
</template>

<script>
	import Navbar from "../../../components/navbar/navbar.vue"
	import CourseNav from "../../../components/coursenav/coursenav.vue"
	export default {
		data() {
			return {
				//多张图片,用数组存放
				topBanner: [],

			}
		},
		methods: {

		},
		mounted(){
				//vue的生命周期函数
				uni.request({
					url: "http://html5.bjsxt.cn/api/index/banner",
					//注意:网络请求必须要按照下面的方式发起,不能使用新语法等
					success: (res) => {
						// console.log(res)
						this.topBanner = res.data.top_banner
					}
				})
		},
		components:{
			Navbar,
			CourseNav,
		}
	}
</script>
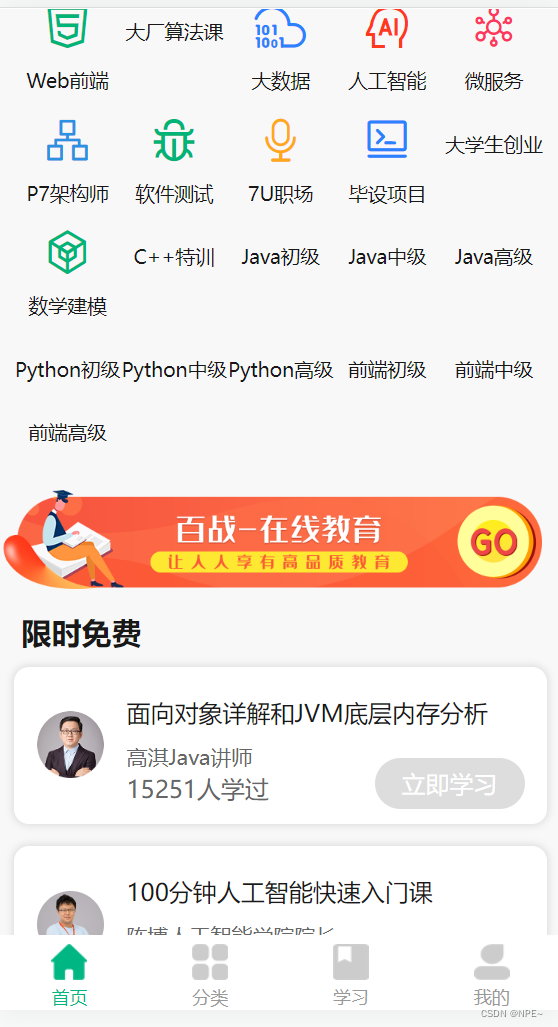
5.3 效果
部分网络上的css及图标样式已经获取不到了,所以大家可以替换新的网络地址来获取对应的图标

6 实现限时免费
6.1 创建free-card的components
新建free-card目录,然后新建free-card.vue文件
<template>
	<view>
		<view class="free_card_box" v-for="(item, index) in teaList" :key="index">
			<!-- 老师图片 -->
			<view class="free_card_img">
				<image :src="item.teacher_logo" mode=""></image>
			</view>
			<!-- 限时免费文本信息 -->
			<view class="free_card_txt">
				<view class="free_card_T">{{ item.limitName }}</view>
				<view class="free_card_info">
					<view class="free_card_info_txt">
						<view class="info_txt1">{{ item.teacher_name }}{{ item.teacher_job }}</view>
						<view>{{ item.limitNum }}人学过</view>
					</view>
					<view class="free_card_info_btn" v-if="item.baoming == '马上报名'">{{ item.baoming }}</view>
					<view class="free_card_info_btn free_card_info_btn1" v-else>{{ item.baoming }}</view>
				</view>
			</view>
		</view>
	</view>
</template>

<script>
	export default {
		name:"free-card",
		data() {
			return {
				teaList:[]
			}
		},
		mounted(){
			uni.request({
				url:"http://html5.bjsxt.cn/api/index/specific?userid=2162",
				success: (res) => {
					this.teaList = res.data.data
				}
			})
		},
		methods: {

		}
	}
</script>

<!-- .free_card_box的class里面再点.free_card_img的class 为 scss语法 -->
<style lang="scss">
	.free_card_box{
		display: flex;
		padding: 10px 0;
		margin: 10px;
		border-radius: 10px;
		box-shadow: 0 0  5px 1px rgba($color: #000000, $alpha: 0.1);
		box-sizing: border-box;
		align-items: center;
		margin-bottom: 15px;
		background-color: #fff;
		.free_card_img{
			flex-shrink: 0;
			width: 91rpx;
			height: 91rpx;
			border-radius: 100%;
			margin: 0 15px;
			image{
				width: 100%;
				height: 100%;
				border-radius: 100%;
			}
		}
		.free_card_txt{
			width: 100%;
			display: flex;
			box-sizing: border-box;
			flex-direction: column;
			padding: 0 15px 0 0;
			.free_card_T{
				font-size: 16px;
				white-space: nowrap;
				text-overflow: ellipsis;
				overflow: hidden;
				margin: 10px 0;
			}
			.free_card_info{
				width: 100%;
				display: flex;
				box-sizing: border-box;
				flex-flow: row nowrap;
				justify-content: space-between;
				.free_card_info_txt{
					width: 60%;
					overflow: hidden;
					font-size: 16px;
					color: #666;
					.info_txt1{
						height: 20px;
						font-size:14px;
						overflow: hidden;
					}
				}
				.free_card_info_btn{
					width: 100px;
					height: 34px;
					text-align: center;
					line-height: 34px;
					border-radius: 34px;
					background-color: #00b783;
					color: #fff;
					font-size: 16px;
					margin-top: 10px;
				}
				.free_card_info_btn1{
					background-color: #ddd;
				}
			}
		}
	}
</style>
6.2 首页引入free-card
- 在script标签中导入
- 在component中导入
- 在页面中引用
修改pages/tabbar/index/index.vue
①在课程导航栏下方添加FreeCard组件及在线课程图标
		<!-- 课程导航栏 -->
		<CourseNav/>
		<!-- 在线课程图标 -->
		<view class="online_box">
			<image :src="index_banner.img_url" class="online_img"></image>
		</view>
		<view class="free_box">
			<view class="free_T_box public_tow_box">
				<view class="public_T">
					限时免费
				</view>
			</view>
			<FreeCard />
		</view>
②在script中获取图片和文本数据,并引入FreeCard组件
<script>
	import Navbar from "../../../components/navbar/navbar.vue"
	import CourseNav from "../../../components/coursenav/coursenav.vue"
	import FreeCard from "../../../components/free-card/free-card.vue"
	export default {
		data() {
			return {
				//多张图片,用数组存放
				topBanner: [],
				index_banner:{},
			}
		},
		methods: {

		},
		mounted(){
				//vue的生命周期函数
				uni.request({
					url: "http://html5.bjsxt.cn/api/index/banner",
					//注意:网络请求必须要按照下面的方式发起,不能使用新语法等
					success: (res) => {
						// console.log(res)
						this.topBanner = res.data.top_banner
						this.index_banner = res.data.index_banner
					}
				})
		},
		components:{
			Navbar,
			CourseNav,
			FreeCard, //引入限时免费组件
		}
	}
</script>
③在style中新增css样式
<!-- 使用scss的语法 -->
<style lang="scss">
	.home {
		//flex:盒子模型
		display: flex;
		flex-direction: column;
		flex: 1;
		overflow: hidden;
		.index_banner_box {
			display: flex;
			width: 100%;
			padding: 10px;
			justify-content: center;
			align-items: center;
			border-radius: 5px;
			overflow: hidden;
			.swiper{
				width: 100%;
				height: 260rpx;
				.banner{
					width: 700rpx;
					height: 260rpx;
				}
			}
		}
		.online_box{
			display: flex;
			width: 724rpx;
			justify-content: center;
			align-items: center;
			box-sizing: border-box;
			overflow: hidden;
			margin-bottom: 15px;

			.online_img{
				//1px 约等于2 rpx
				width: 724rpx;
				height: 132rpx;
			}

		}
		.public_tow_box{
			display: flex;
			width: 100%;
			justify-content: center;
			align-items: center;
			box-sizing: border-box;
			overflow: hidden;
			padding: 0 15px;
			justify-content: space-between;
			align-content: space-between;
			flex-wrap: wrap;
			.public_T{
				font-size: 20px;
				font-weight: 700;
			}
		}
		.public_title{
			width: 100%;
			display: flex;
			padding: 0 15px;
			flex-direction: column;
			.public_class_t{
				font-size: 22px;
				font-weight: 700;
				margin-bottom: 15px;
			}
		}
	}
</style>
6.4 效果
7 实现就业班模块
view标签与div标签区别:
- view标签通常具有更丰富的功能,比如数据绑定、事件处理等。而div标签只是一个简单的容器,没有特定的功能。
7.1 创建jobScroll
步骤与前面大同小异
<template>
	<!-- 就业班模块:根据接口返回数据拼装内容 -->
	<view class="job_scroll_box">
		<scroll-view scroll-x="true" class="job_scroll_con_box">
			<view class="job_scroll_con">
				<view class="job_scroll_info" v-for="(item,index) in list" :key="index">
					<view class="job_scroll_card" :class="item.colors">
						<view class="job_scroll_card_T">{{ item.textT }}</view>
						<view class="job_scroll_card_icon">
							<view class="icon iconfont" :class="item.icon"></view>
						</view>
						<view class="job_scroll_card_des">{{ item.text }}</view>
						<view class="job_scroll_card_btn">免费试学</view>
					</view>
				</view>
			</view>
		</scroll-view>
	</view>
</template>

<script>
	export default {
		data() {
			return {
				list: []
			}
		},
		mounted() {
			uni.request({
				url: "http://html5.bjsxt.cn/api/index/course",
				success: (res) => {
					this.list = res.data.data
				}
			})
		},
		methods: {

		}
	}
</script>

<style lang="scss">
	// @import :从css中引入css
	@import "@/common/font/iconfont.css";

	.job_scroll_box {
		width: 100%;
		margin-bottom: 30px;
		box-sizing: border-box;

		.job_scroll_con {
			display: flex;
			align-items: center; //垂直据中
			flex-wrap: nowrap; //不换行
			box-sizing: border-box;

			.job_scroll_info {
				width: 225px;
				height: 260px;
				flex-shrink: 0;
				margin: 0 10px;

				.job_scroll_card {
					display: flex;
					flex-flow: column;
					box-sizing: border-box;
					align-items: center; //水平据中
					width: 100%;
					height: 248px;
					background-color: #b0def5;
					border-radius: 5px;
					margin-top: 12px;

					.job_scroll_card_T {
						display: flex;
						align-items: center; //水平据中
						justify-content: center; //垂直居中
						width: 210px;
						height: 38px;
						background-color: #e4f3fb;
						font-size: 16px;
						text-align: center;
						margin-top: -15px;
						border-bottom-left-radius: 25px;
						border-bottom-right-radius: 25px;
						border-top-left-radius: 15px;
						border-top-right-radius: 15px;
					}

					.job_scroll_card_icon {
						display: flex;
						align-items: center; //水平据中
						justify-content: center; //垂直居中
						box-sizing: border-box;
						width: 90px;
						height: 90px;
						background-color: #d3ecf9;
						border-radius: 100%;
						margin: 20px 0 15px;

						view {
							font-size: 42px;
							color: #2a83fe;
						}

					}

					.job_scroll_card_des {
						display: flex;
						box-sizing: border-box;
						align-items: center; //水平据中
						font-size: 14px;
					}

					.job_scroll_card_btn {
						display: flex;
						box-sizing: border-box;
						align-items: center;
						justify-content: center; //垂直居中
						width: 118px;
						height: 32px;
						line-height: 32px;
						color: #0a5ea0;
						font-size: 16px;
						border-radius: 34px;
						border: 1px solid #0a5ea0;
						margin-top: 15px;
					}
				}

				.job_scroll_card2 {
					background-color: #fed2b0;

					.job_scroll_card_T {
						background-color: #fff2e7;
					}

					.job_scroll_card_icon {
						background-color: #fee6d3;

						view {
							color: #d87e4e;
						}
					}

					.job_scroll_card_btn {
						color: #c44606;
						border: 1px solid #c44606;
					}
				}

				.job_scroll_card3 {
					background-color: #fee4b7;

					.job_scroll_card_T {
						background-color: #fef4e2;
					}

					.job_scroll_card_icon {
						background-color: #fef0d7;

						view {
							color: #b17001;
						}
					}

					.job_scroll_card_btn {
						color: #b17001;
						border: 1px solid #b17001;
					}
				}

				.job_scroll_card4 {
					background-color: #f5bcf7;

					.job_scroll_card_T {
						background-color: #fae0fb;
					}

					.job_scroll_card_icon {
						background-color: #f9d9fa;

						view {
							color: #8f0494;
						}
					}

					.job_scroll_card_btn {
						color: #8f0494;
						border: 1px solid #8f0494;
					}
				}

				.job_scroll_card5 {
					background-color: #cff2cb;

					.job_scroll_card_T {
						background-color: #ebf9e9;
					}

					.job_scroll_card_icon {
						background-color: #e4f7e2;

						view {
							color: #138a06;
						}
					}

					.job_scroll_card_btn {
						color: #138a06;
						border: 1px solid #138a06;
					}
				}

				.job_scroll_card6 {
					background-color: #f9cbc8;

					.job_scroll_card_T {
						background-color: #fce8e6;
					}

					.job_scroll_card_icon {
						background-color: #fbe2e0;

						view {
							color: #980c03;
						}
					}

					.job_scroll_card_btn {
						color: #980c03;
						border: 1px solid #980c03;
					}
				}

				.job_scroll_card7 {
					background-color: #f3eaa3;

					.job_scroll_card_T {
						background-color: #f8f3cc;
					}

					.job_scroll_card_icon {
						background-color: #f8f3cc;

						view {
							color: #786b03;
						}
					}

					.job_scroll_card_btn {
						color: #786b03;
						border: 1px solid #786b03;
					}
				}

				.job_scroll_card8 {
					background-color: #b4eef3;

					.job_scroll_card_T {
						background-color: #e4f9fb;
					}

					.job_scroll_card_icon {
						background-color: #d5f5f8;

						view {
							color: #088691;
						}
					}

					.job_scroll_card_btn {
						color: #088691;
						border: 1px solid #088691;
					}
				}

				.job_scroll_card9 {
					background-color: #f7c8a4;

					.job_scroll_card_T {
						background-color: #fcebdd;
					}

					.job_scroll_card_icon {
						background-color: #fae0cc;

						view {
							color: #9c4604;
						}
					}

					.job_scroll_card_btn {
						color: #9c4604;
						border: 1px solid #9c4604;
					}
				}

				.job_scroll_card10 {
					background-color: #cfd2fe;

					.job_scroll_card_T {
						background-color: #edefff;
					}

					.job_scroll_card_icon {
						background-color: #e4e6fe;

						view {
							color: #4e06ab;
						}
					}

					.job_scroll_card_btn {
						color: #4e06ab;
						border: 1px solid #4e06ab;
					}
				}
			}
		}
	}
</style>
7.2 首页中引入
pages/tabbar/index/index.vue:
		<!-- view标签功能更强大:表示一个视图 -->
		<view class="public_title">
			<view class="public_class_t">零基础就业班</view>
			<JobScroll />
		</view>
其他和前面类似,导入JobScroll组件,然后在页面中引用即可
7.3 效果

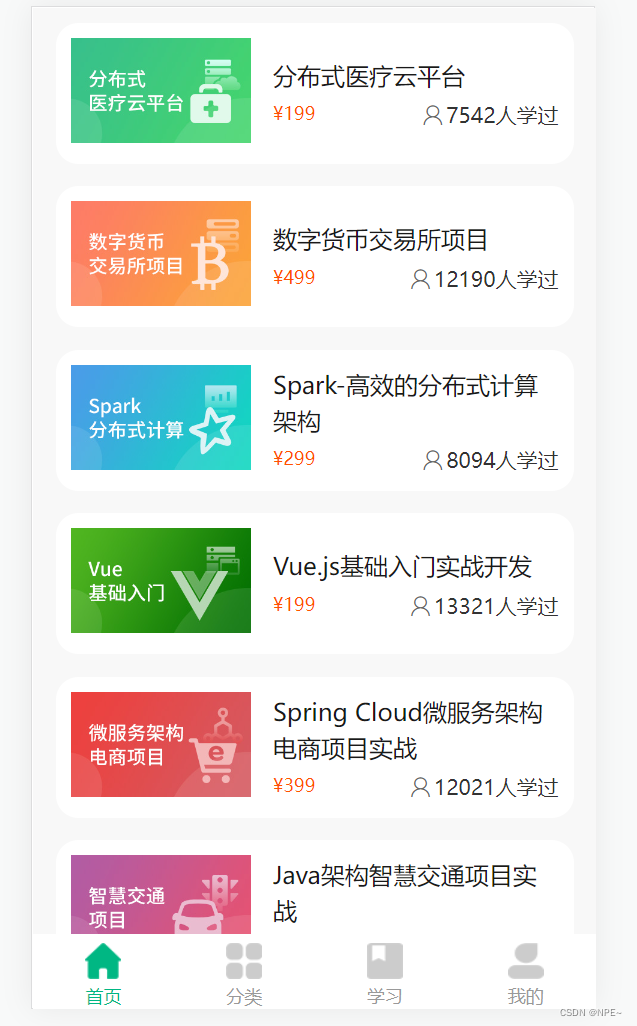
8 实现课程推荐部分
8.1 新增course-card这个component
<template>
	<view class="course_card_box">
		<view class="course_card_con">
			<view class="course_card_info" v-for="(item,index) in list" :key="index">
				<view class="course_card_img">
					<image :src="item.logo" mode=""></image>
				</view>
				<view class="course_card_des">
					<view class="course_card_des_T">{{ item.textT }}</view>
					<view class="course_card_des_info">
						<view class="course_card_des_pay">¥{{item.money}}</view>
						<view class="course_card_des_icon">
							<text class="icon iconfont icon-yonghu2"></text>
							{{item.hits}}人学过
						</view>
					</view>
				</view>
			</view>
		</view>
	</view>
</template>

<script>
	export default {
		data(){
			return{
				list:[]
			}
		},
		mounted(){
			uni.request({
				url:"http://html5.bjsxt.cn/api/index/recommend",
				success: (res) => {
					this.list = res.data.data
				}
			})
		}
	}

</script>

<style lang="scss">
	@import '@/common/font/iconfont.css';

	.course_card_box {
		width: 100%;
		display: flex;
		box-sizing: border-box;
		padding: 0 15px;
		margin-bottom: 15px;
		overflow: hidden;
		align-items: center;
		justify-content: center;

		.course_card_info {
			display: flex;
			box-sizing: border-box;
			width: 100%;
			background: #fff;
			border-radius: 15px;
			padding: 10px;
			margin-bottom: 15px;
			flex-direction: row;
			align-items: center; //子元素垂直居中

			.course_card_img {
				flex-shrink: 0;
				margin-right: 15px;

				image {
					width: 240rpx;
					height: 140rpx;
				}
			}

			.course_card_des {
				width: 100%;
				display: flex;
				box-sizing: border-box;
				flex-direction: column;

				.course_card_des_T {
					font-size: 16px;
					line-height: 24px;
					margin-bottom: 5px;
				}

				.course_card_des_info {
					width: 100%;
					display: flex;
					flex-direction: row; //横向排列
					box-sizing: border-box;
					justify-content: space-between;
					/* 横向中间自动空间 */
					align-content: space-between;
					/* 竖向中间自动空间 */
					flex-wrap: wrap;

					/* 换行 */
					.course_card_des_pay {
						font-size: 12px;
						color: #ff5200;

						text {
							font-size: 16px;
						}
					}

					.course_card_des_icon {
						font-size: 14px;
						color: #333;

						text {
							font-size: 14px;
							color: #666;
							margin: 0 2px 0 0;
						}
					}
				}
			}
		}
	}
</style>
8.2 首页引入
<template>
	<view class="home">
 	...
		<!-- view标签功能更强大:表示一个视图 -->
		<view class="public_title">
			<view class="public_class_t">零基础就业班</view>
			<JobScroll />
		</view>
		<view class="recommend_box">
			<view class="recommed_T_box public_tow_box">
				<view class="public_T">推荐课程</view>
			</view>
			<CourseCard />
		</view>
		<view class="daotu_box">
			<view class="daotu_T">驱动教学-贯穿教|学|练|测|评</view>
			<image :src="fontBanner.img_url" mode=""></image>
		</view>
	</view>
</template>
<script>
	import Navbar from "../../../components/navbar/navbar.vue"
	import CourseNav from "../../../components/coursenav/coursenav.vue"
	import FreeCard from "../../../components/free-card/free-card.vue"
	import JobScroll from "../../../components/jobscroll/jobscroll.vue"
	import CourseCard from "../../../components/course_card/course_card.vue"
	export default {
		data() {
			return {
				//多张图片,用数组存放
				topBanner: [],
				index_banner:{},
				fontBanner:{}
			}
		},
		methods: {

		},
		mounted(){
				//vue的生命周期函数
				uni.request({
					url: "http://html5.bjsxt.cn/api/index/banner",
					//注意:网络请求必须要按照下面的方式发起,不能使用新语法等
					success: (res) => {
						// console.log(res)
						this.topBanner = res.data.top_banner
						this.index_banner = res.data.index_banner
						this.fontBanner = res.data.foot_banner
					}
				})
		},
		components:{
			Navbar,
			CourseNav,
			FreeCard, //引入限时免费组件
			JobScroll,
			CourseCard
		}
	}
</script>
8.3 效果
9 课程列表详情、课程介绍详情实现
9.1 新建courseIntroduce页面
①新建courseIntroduce目录及页面

②修改pages.json
//在"pages"配置下新增courseIntroduce配置
        ,{
            "path" : "pages/course/courseIntroduce/courseIntroduce",
            "style" :
            {
                "navigationBarTitleText": "课程介绍",
				"navigationBarBackgroundColor":"#0c9c8f",
				"navigationBarTextStyle":"white",
                "enablePullDownRefresh": false
            }
        }
9.2 给coursenav.vue新增点击事件
		//template部分:新增点击事件
		<view class="course_nav_info" v-for="(item, index) in list" :key="index" @click="courseItemHandle(item.id,item.course)">
			<text class="course_nav_icon icon iconfont" :class="item.icon"></text>
			<view class="course_info_text">{{item.text}}</view>
		</view>

		...
<script>
		...
		methods: {
			// 点击事件,点击图标跳转页面,并传入id和course
			courseItemHandle(id, course){
				uni.navigateTo({
					// url为pages中配置的courseIntroduce配置的页面路径,同时将id和course传过去
					url:"/pages/couser/courseIntroduce/courseIntroduce?id=" + id +"&course="+course
				})
			}
		}
</script>
9.3 新增course-jieshao、courseList、courseIntroduce-data component
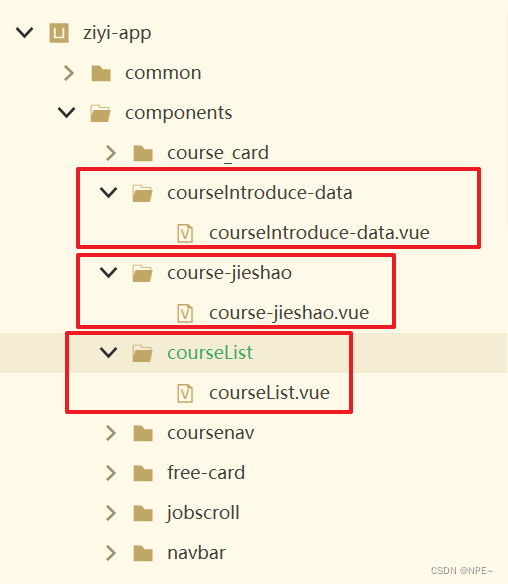
course-jieshao.vue:
<template>
	<view class="course_jieshao_box">
		<image :src="images" mode="" :style="{ height:imageHeight + 'rpx' }"></image>
	</view>
</template>

<script>
	export default {
		data() {
			return {

			}
		},
		props:{
			images:{
				type:String,
				defualt:""
			},
			imageHeight:{
				type:String,
				default:""
			}
		},
		methods: {

		}
	}
</script>

<style lang="scss">
	.course_jieshao_box{
		display: flex;
		box-sizing: box;
		flex-direction: column;
		justify-content: center;
		width: 100%;
		image{
			width: 750rpx;

		}
	}
</style>
courseList.vue:
<template>
	<view class="course_list_box">
		<view class="course_list_con">
			<view class="course_list_info" @click="clickViode" v-for="(item,index) in videoList" :key="index">
				<view class=".course_list_info_txt">{{ item.type_name }}</view>
			</view>
		</view>
	</view>
</template>

<script>
	export default {
		data() {
			return {

			}
		},
		props: {
			videoList: {
				type: Array,
				default: function() {
					return []
				}
			}
		},
		methods: {
			clickViode(){
				uni.navigateTo({
					url:"/pages/couser/video/video"
				})
			}
		}
	}
</script>

<style lang="scss">
	.course_list_box {
		display: flex;
		box-sizing: border-box;
		flex-direction: column;
		width: 100%;
		padding: 0 15px;

		.course_list_con {
			display: flex;
			box-sizing: border-box;
			flex-direction: column;
			flex-grow: 1;

			.course_list_info {
				display: flex;
				box-sizing: border-box;
				flex-direction: center;
				overflow: hidden;
				flex: 1;
				width: 100%;
				height: 45px;
				line-height: 45px;
				font-size: 14px;
				border-bottom: 1px solid #efefef;

				.course_list_info_txt {
					white-space: nowrap;
					overflow: hidden;
					text-overflow: ellipsis;
				}
			}
		}
	}
</style>
courseIntroduce-data.vue
<template>
	<view class="courseIntroduce_data_box">
		<view class="courseIntroduce_data_info" v-for="(item,index) in msg" :key="index">
			<view class="courseIntroduce_data_txt1"><text>{{ item.num }}</text></view>
			<view class="courseIntroduce_data_txt2"><text>{{ item.txt }}</text></view>
		</view>
	</view>
</template>

<script>
	export default {
		data() {
			return {

			}
		},
		props:{
			msg:{
				type:Array,
				default:function(){
					return []
				}
			}
		},
		methods: {

		}
	}
</script>

<style lang="scss">
	.courseIntroduce_data_box {
		display: flex;
		box-sizing: border-box;
		flex-direction: row;
		/*横向排列*/
		flex-wrap: wrap;
		/* 换行排列 */
		justify-content: center;
		/*居中对齐*/
		width: 100%;
		padding: 15px 10px;

		.courseIntroduce_data_info {
			display: flex;
			box-sizing: box;
			flex-direction: column;
			justify-content: center;
			align-items: center;
			width: 25%;
			height: 80px;
			flex-grow: 1;
			position: relative;

			.courseIntroduce_data_txt1 {
				text-align: center;
				width: 100%;
				font-size: 12px;
				color: #ff5200;
				overflow: hidden;
				white-space: nowrap;
				text-overflow: ellipsis;
				margin-bottom: 10px;

				text {
					font-size: 16px;
				}
			}

			.courseIntroduce_data_txt2 {
				text-align: center;
				width: 100%;
				font-size: 13px;
				color: #333;
				overflow: hidden;
				white-space: nowrap;
				text-overflow: ellipsis;
			}
		}

	}
</style>
9.4 courseIntroduce页面中引入course-jieshao、courseList、courseIntroduce-data组件
courseIntroduce.vue:
<template>
	<view class="home">
		<view class="courseIntroduce_box">
			<view class="courseIntroduce_des">
				<view class="courseIntroduce_info">{{ introduce }}</view>
			</view>
			<CourseIintroduceData :msg="introduceList"/>
			<view class="question_line"></view>
			<view class="courseIntroduce_tab_box">
				<view class="courseIntroduce_tab_nav">
					<view v-for="(item,index) in items" :class="{ 'btna':count === index }" @tap="change(index)" :key="index">{{ item }}</view>
				</view>
				<view class="courseIntroduce_tab_con">
					<view class="discount_info" :class="{dis:count === 0}">
						<CourseList :videoList="Clist"/>
					</view>
					<view class="discount_info" :class="{dis:count === 1}">
						<CourseJieshao :images="imageT" :imageHeight="imageHeight"/>
					</view>
				</view>
			</view>
		</view>
	</view>
</template>

<script>

	import CourseIintroduceData from "../../../components/courseIntroduce-data/courseIntroduce-data.vue"
	import CourseList from "../../../components/courseList/courseList.vue"
	import CourseJieshao from "../../../components/course-jieshao/course-jieshao.vue"
	export default {
		data() {
			return {
				introduce:"",
				introduceList:[],
				items:["课程章节","课程介绍"],
				count:0,
				Clist:[],
				imageT:"",
				imageHeight:""
			}
		},
		components:{
			CourseIintroduceData,
			CourseList,
			CourseJieshao
		},
		onLoad(options) {
			uni.request({
				url: "https://www.itbaizhan.cn/api/course/detail",
				// 参数
				data: {
					id: options.id,
					course: options.course
				},
				success: (res) => {
					this.introduce = res.data.data.introduce
					this.introduceList = res.data.data.introduceList
					this.Clist = res.data.data.Clist
					this.imageT = res.data.data.image
					this.imageHeight = res.data.data.height
				}
			})
		},
		methods: {
			change(index){
				this.count = index;
			}
		}
	}
</script>
<style lang="scss">
	.courseIntroduce_box {
		display: flex;
		box-sizing: box;
		flex-direction: column;
		margin-bottom: 90px;

		.courseIntroduce_des {
			display: flex;
			box-sizing: border-box;
			flex-direction: column;
			justify-content: center;
			align-items: center;
			width: 100%;
			background-color: #0c9c8f;
			padding: 0 10px 15px;
			overflow: hidden;

			.courseIntroduce_info {
				display: flex;
				box-sizing: box;
				width: 100%;
				color: #fff;
				font-size: 16px;
				line-height: 24px;
			}
		}

		//tab
		.courseIntroduce_tab_box {
			display: flex;
			box-sizing: border-box;
			flex-direction: column;

			.courseIntroduce_tab_nav {
				display: flex;
				box-sizing: border-box;
				flex-direction: row;
				background-color: #fff;
				border-bottom: 1px solid #e4e4e4;
				margin-bottom: 20px;

				view {
					height: 50px;
					line-height: 50px;
					font-size: 16px;
					flex-grow: 1;
					text-align: center;
					background-color: #fff;

				}
			}

			.discount_info {
				display: none;
			}

			.btna {
				display: flex;
				box-sizing: border-box;
				justify-content: center; //水平方向对齐
				color: #00b783;
				position: relative;
			}

			.btna::after {
				content: '';
				width: 40px;
				height: 3px;
				background-color:#00b783;
				position: absolute;
				bottom: 0;
				left: 50%;
				margin-left: -20px;
			}

			.dis {
				display: block;
			}
		}
	}
</style>
9.5 效果

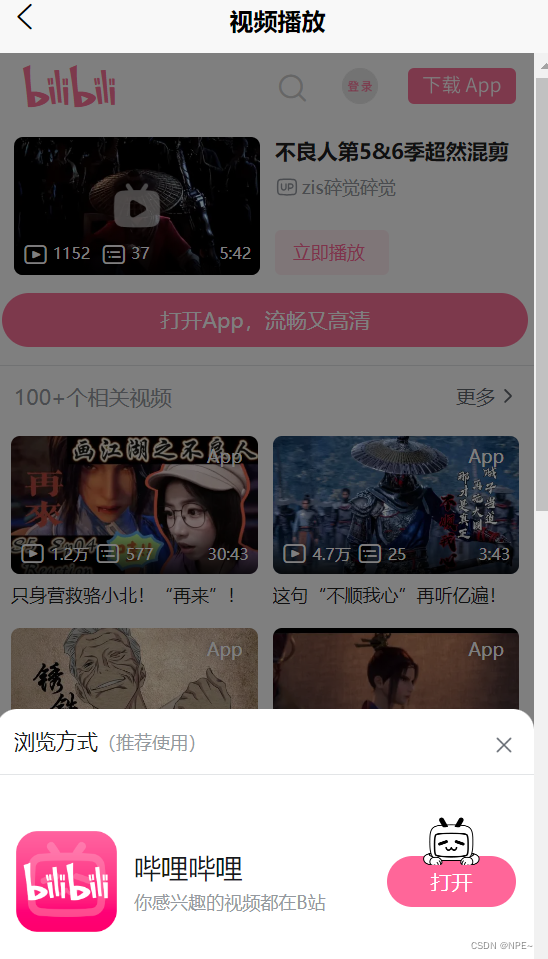
10 播放页面实现(webView)
web-view:在浏览器中内嵌网页,可以理解为一个内嵌的浏览器
10.1 创建video页面
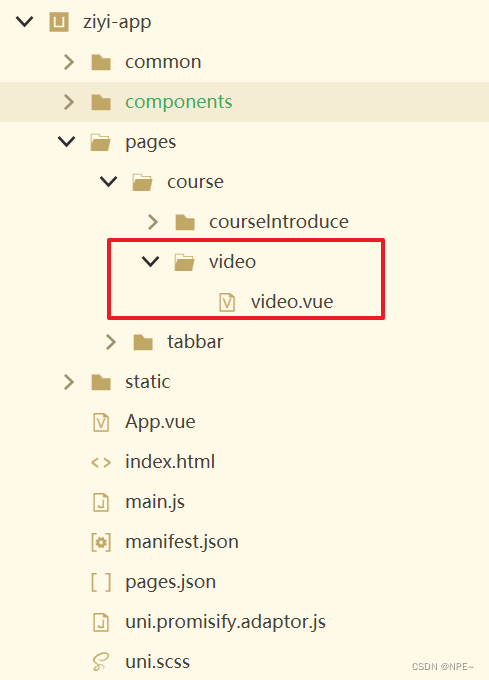
video.vue:
<template>
	<view>
		<!-- 后期根据课程详情页面跳转时传过来的数据,请求后端或者拼接对应视频地址替换即可 -->
		<web-view src="https://www.bilibili.com/video/BV1ZM4y177kh/"></web-view>
	</view>
</template>

<script>
	export default {
		data() {
			return {

			}
		},
		methods: {

		}
	}
</script>

<style>

</style>
10.2 给courseList添加点击事件跳转视频播放
courseList.vue:
<template>
	<view class="course_list_box">
		<view class="course_list_con">
			<view class="course_list_info" @click="clickViode" v-for="(item,index) in videoList" :key="index">
				<view class=".course_list_info_txt">{{ item.type_name }}</view>
			</view>
		</view>
	</view>
</template>
<script>
		methods: {
			clickViode(){
				uni.navigateTo({
					// 跳转视频播放页面
					url:"/pages/course/video/video"
				})
			}
		}
	}
</script>
10.3 效果
bug
如果运行项目发现报错:‘core-js/modules/es.string.iterator.js’
- 则表明缺少
core-js环境,在终端cmd执行下面命令
# 安装core-js之后,重新启动项目
npm i core-js -D
11 打包发布项目
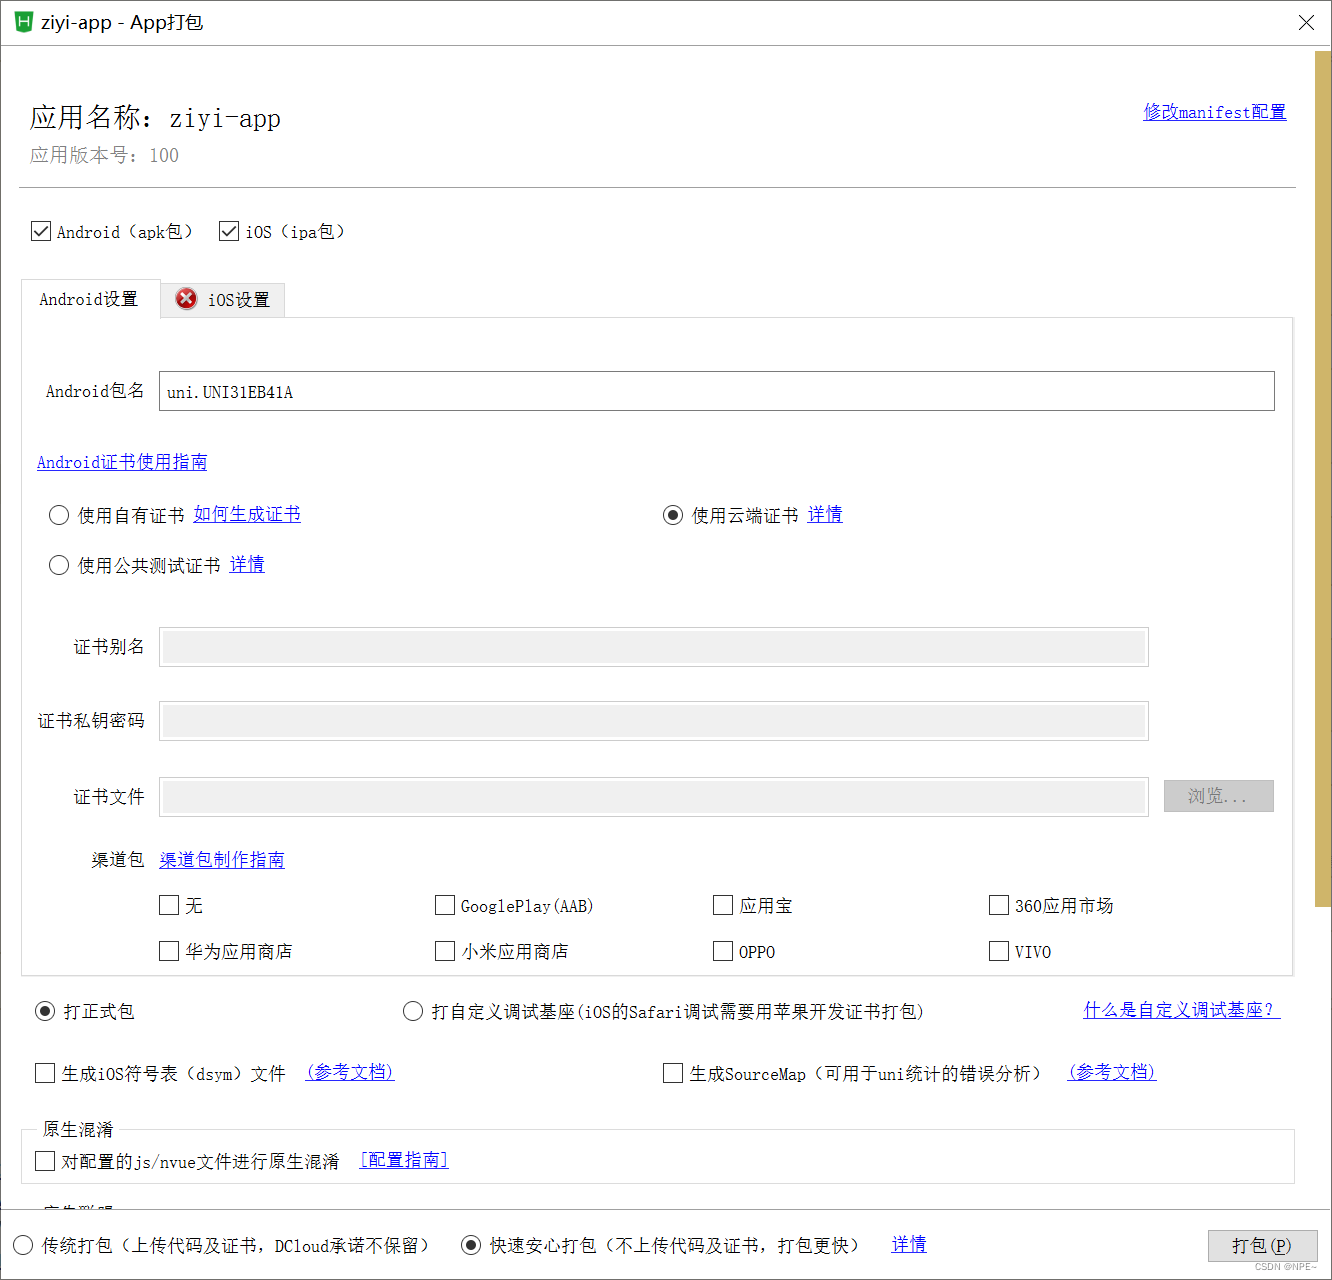
11.1 app打包
①在manifest.json中配置AppID、图标等,如果没有AppID则重新获取
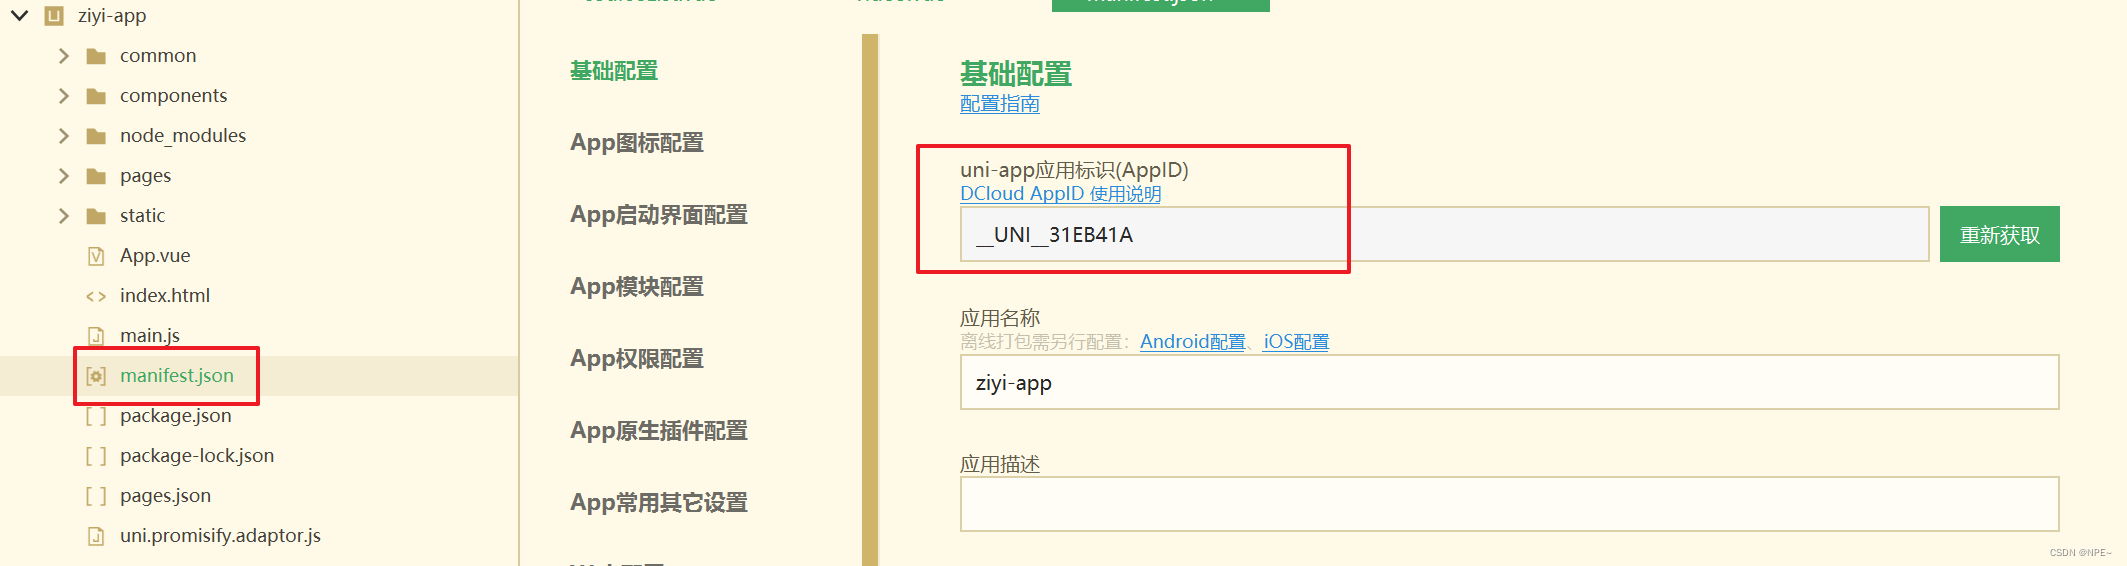
②选择应用顶部的发行 - 云打包 - 填写对应信息(证书等)
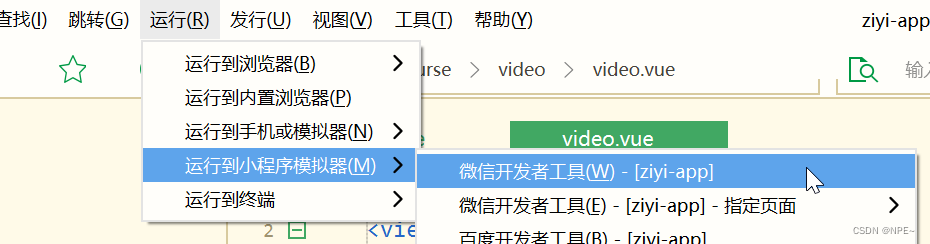
11.2 小程序打包
以微信小程序为例
①下载微信开发者工具,并开放端口供uniapp调用(设置-安全-打开服务端口)
②从uniapp直接跳转到微信开发者工具
③接下来的发布就和小程序发布一样了
详情参考:https://blog.csdn.net/weixin_45565886/article/details/130918238
填写AppId等