04自媒体文章-自动审核
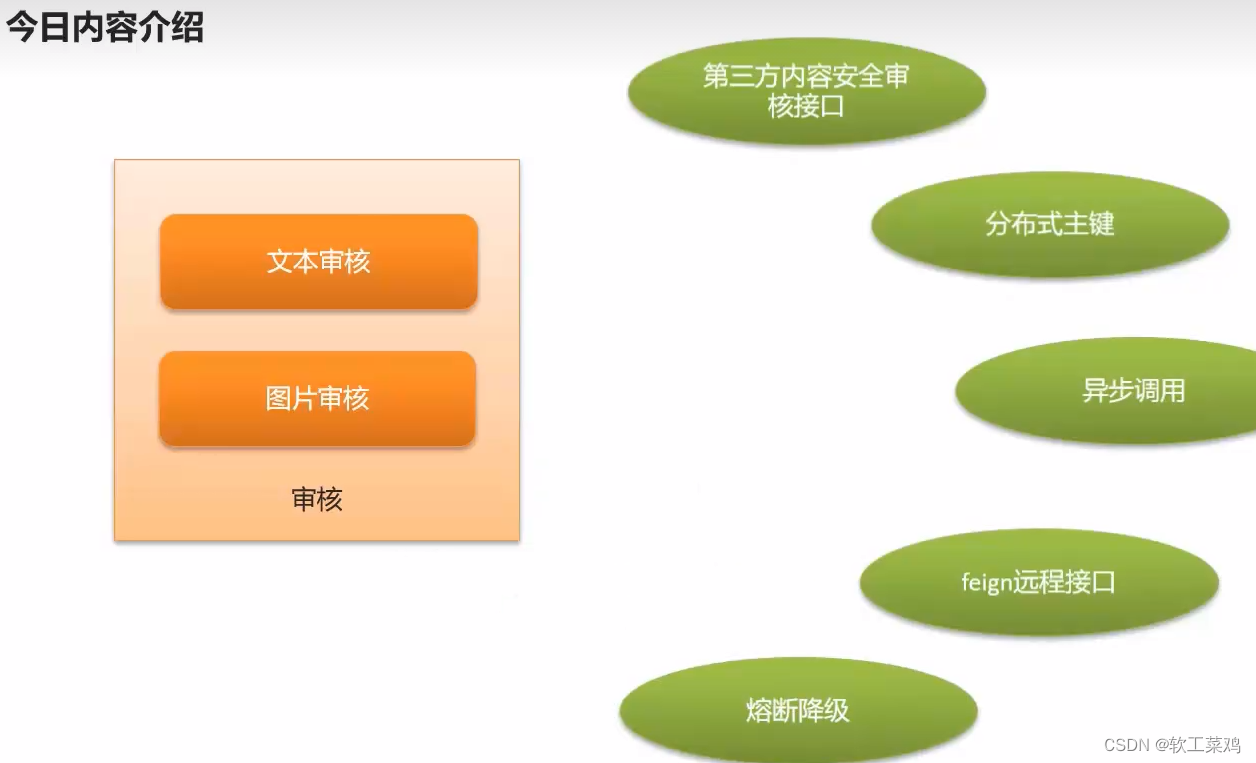
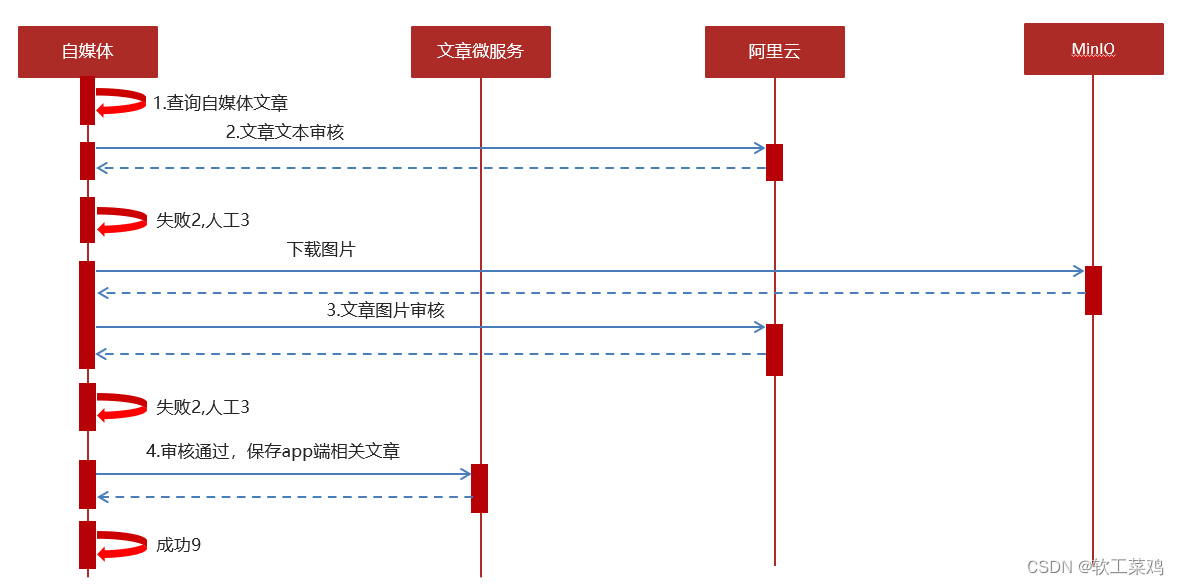
1)自媒体文章自动审核流程

1 自媒体端发布文章后,开始审核文章
2 审核的主要是审核文章的 内容(文本内容和图片)
3 借助 第三方提供的接口审核文本
4 借助第三方提供的接口审核图片,由于图片存储到minIO中,需要先下载才能审核
5 如果审核失败,则需要修改自媒体文章的状态,status:2 审核失败 status:3 转到人工审核
6 如果审核成功,则需要在文章微服务中创建app端需要的文章
2)内容安全第三方接口
2.1)概述
内容安全是识别服务,支持对图片、视频、文本、语音等对象多样化场景检测,有效降低内容违规风险
目前很多平台都支持内容检测,如阿里云、腾讯云、百度AI、网易云等国内大型互联网公司都对外提供了API。
按照性能和收费来看,黑马头条项目使用的就是阿里云的内容安全接口,使用到了图片和文本的审核。
阿里云收费标准:https://www.aliyun.com/price/product/?spm=a2c4g.11186623.2.10.4146401eg5oeu8#/lvwang/detail
2.2)准备工作
您在使用内容检测API之前,需要先注册阿里云账号,添加Access Key并签约云盾内容安全。
操作步骤
前往阿里云官网注册账号。如果已有注册账号,请跳过此步骤。
进入阿里云首页后,如果没有阿里云的账户需要先进行注册,才可以进行登录。由于注册较为简单,课程和讲义不在进行体现(注册可以使用多种方式,如淘宝账号、支付宝账号、微博账号等...)。
需要实名认证和活体认证。
打开云盾内容安全产品试用页面,单击立即开通,正式开通服务。
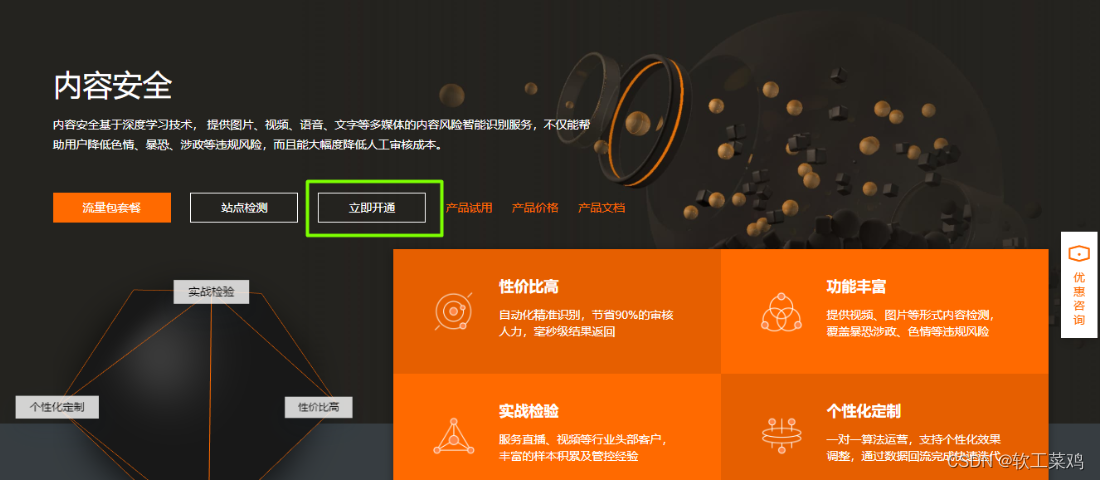
内容安全控制台

在AccessKey管理页面管理您的AccessKeyID和AccessKeySecret。

管理自己的AccessKey,可以新建和删除AccessKey

查看自己的AccessKey,
AccessKey默认是隐藏的,第一次申请的时候可以保存AccessKey,点击显示,通过验证手机号后也可以查看

2.3)文本内容审核接口
文本垃圾内容检测:https://help.aliyun.com/document_detail/70439.html?spm=a2c4g.11186623.6.659.35ac3db3l0wV5k
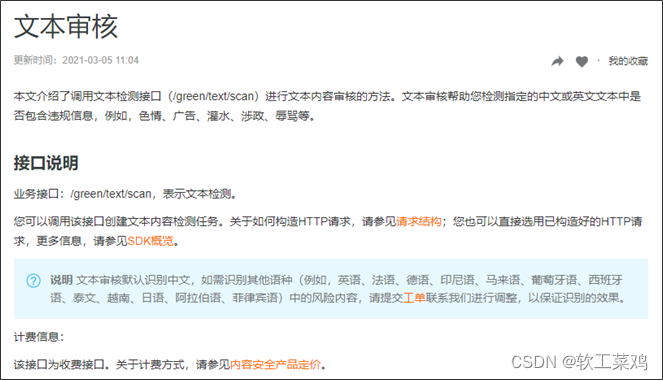
文本垃圾内容Java SDK: https://help.aliyun.com/document_detail/53427.html?spm=a2c4g.11186623.6.717.466d7544QbU8Lr
2.4)图片审核接口
图片垃圾内容检测:https://help.aliyun.com/document_detail/70292.html?spm=a2c4g.11186623.6.616.5d7d1e7f9vDRz4

图片垃圾内容Java SDK: https://help.aliyun.com/document_detail/53424.html?spm=a2c4g.11186623.6.715.c8f69b12ey35j4
2.5)项目集成
①:拷贝资料文件夹中的类到common模块下面,并添加到自动配置
包括了GreenImageScan和GreenTextScan及对应的工具类
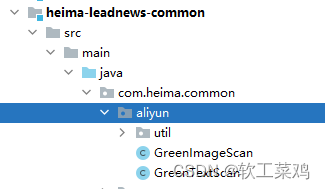
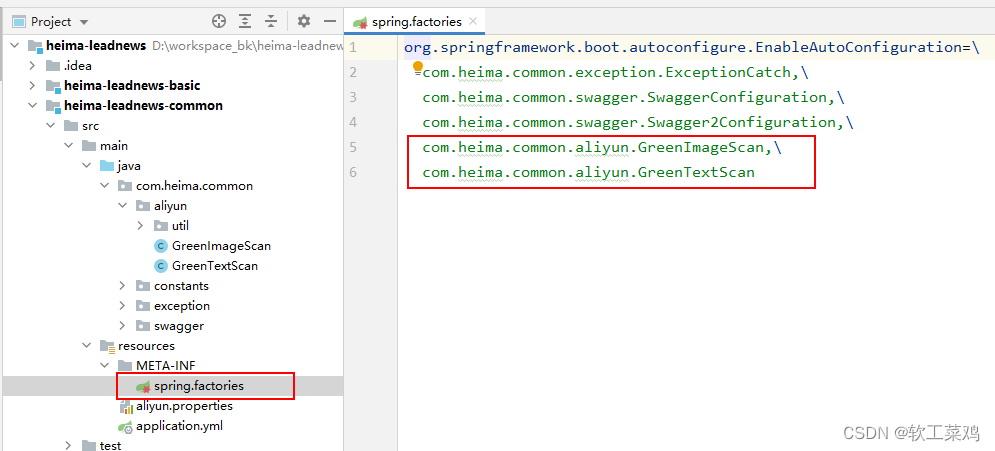
添加到自动配置中
②: accessKeyId和secret(需自己申请)
在heima-leadnews-wemedia中的nacos配置中心添加以下配置:
aliyun:
 accessKeyId: ...
 secret: ...
#aliyun.scenes=porn,terrorism,ad,qrcode,live,logo
 scenes: terrorism
③:在自媒体微服务中测试类中注入审核文本和图片的bean进行测试
package com.heima.wemedia;

import java.util.Arrays;
import java.util.Map;

@SpringBootTest(classes = WemediaApplication.class)
@RunWith(SpringRunner.class)
public class AliyunTest {

    @Autowired
    private GreenTextScan greenTextScan;

    @Autowired
    private GreenImageScan greenImageScan;

    @Autowired
    private FileStorageService fileStorageService;

    @Test
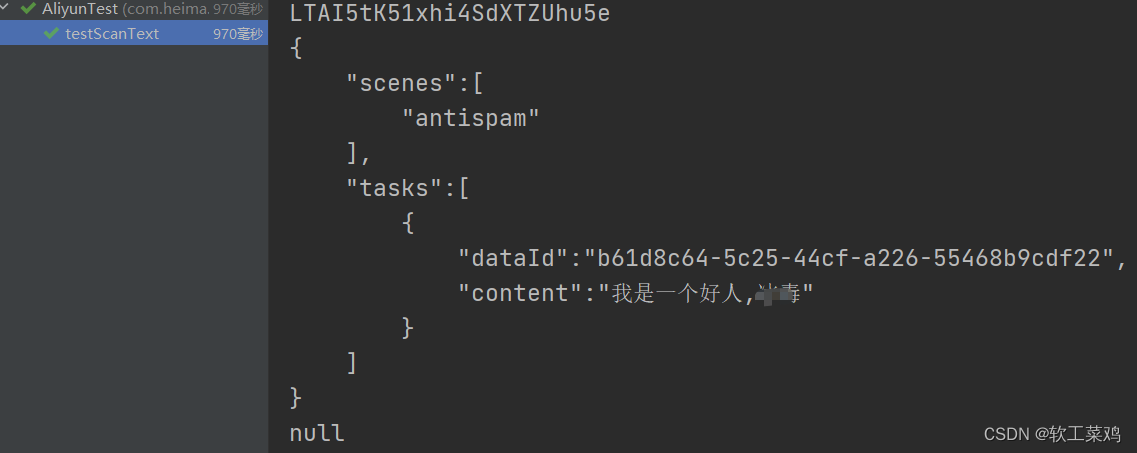
    public void testScanText() throws Exception {
        Map map = greenTextScan.greeTextScan("我是一个好人,冰毒");
        System.out.println(map);
    }

    @Test
    public void testScanImage() throws Exception {
        byte[] bytes = fileStorageService.downLoadFile("http://192.168.200.130:9000/leadnews/2021/04/26/ef3cbe458db249f7bd6fb4339e593e55.jpg");
        Map map = greenImageScan.imageScan(Arrays.asList(bytes));
        System.out.println(map);
    }
}
我用的是 阿里云 云安全 增强版1小时,没审核出效果为null;估计是阿里 改接口了;
图片审核页报错
java.lang.RuntimeException: upload file fail.

    at com.heima.common.aliyun.util.ClientUploader.uploadBytes(ClientUploader.java:129)
    at com.heima.common.aliyun.GreenImageScan.imageScan(GreenImageScan.java:71)
    at com.heima.wemedia.test.AliyunTest.testScanImage(AliyunTest.java:51)
    at sun.reflect.NativeMethodAccessorImpl.invoke0(Native Method)
    at sun.reflect.NativeMethodAccessorImpl.invoke(NativeMethodAccessorImpl.java:62)
    at sun.reflect.DelegatingMethodAccessorImpl.invoke(DelegatingMethodAccessorImpl.java:43)
    at java.lang.reflect.Method.invoke(Method.java:498)
    at org.junit.runners.model.FrameworkMethod$1.runReflectiveCall(FrameworkMethod.java:50)
    at org.junit.internal.runners.model.ReflectiveCallable.run(ReflectiveCallable.java:12)
    at org.junit.runners.model.FrameworkMethod.invokeExplosively(FrameworkMethod.java:47)
    at org.junit.internal.runners.statements.InvokeMethod.evaluate(InvokeMethod.java:17)
    at org.springframework.test.context.junit4.statements.RunBeforeTestExecutionCallbacks.evaluate(RunBeforeTestExecutionCallbacks.java:74)
    at org.springframework.test.context.junit4.statements.RunAfterTestExecutionC
3)app端文章保存接口
3.1)表结构说明

3.2)分布式id
随着业务的增长,文章表可能要占用很大的物理存储空间,为了解决该问题,后期使用数据库分片技术。将一个数据库进行拆分,通过数据库中间件连接。如果数据库中该表选用ID自增策略,则可能产生重复的ID,此时应该使用分布式ID生成策略来生成ID。

分布式id-技术选型

snowflake是Twitter开源的分布式ID生成算法,结果是一个long型的ID。
其核心思想是:使用41bit作为毫秒数,10bit作为机器的ID(5个bit是数据中心,5个bit的机器ID)(最多32个机房*32台机器(也可以自己设)),12bit作为毫秒内的流水号(意味着每个节点在每毫秒可以产生 4096 个 ID),最后还有一个符号位,永远是0(1为负数)

文章端相关的表都使用雪花算法生成id,包括ap_article、 ap_article_config、 ap_article_content
mybatis-plus已经集成了雪花算法,完成以下两步即可在项目中集成雪花算法
第一:在实体类中的id上加入如下配置,指定类型为id_worker
@TableId(value = "id",type = IdType.ID_WORKER)
private Long id;
第二:在application.yml文件中配置数据中心id和机器id
mybatis-plus:
  mapper-locations: classpath*:mapper/*.xml
  # 设置别名包扫描路径,通过该属性可以给包中的类注册别名
  type-aliases-package: com.heima.model.article.pojos
  global-config:
    datacenter-id: 1
    workerId: 1
datacenter-id:数据中心id(取值范围:0-31) ;workerId:机器id(取值范围:0-31)
3.3)思路分析
在文章审核成功以后需要在app的article库中新增文章数据
1.保存文章信息 ap_article
2.保存文章配置信息 ap_article_config
3.保存文章内容 ap_article_content
实现思路:

3.4)feign接口

ArticleDto
package com.heima.model.article.dtos;

import com.heima.model.article.pojos.ApArticle;
import lombok.Data;

@Data
public class ArticleDto  extends ApArticle {
    /**
     * 文章内容
     */
    private String content;
}
功能实现:
①:在heima-leadnews-feign-api中新增接口
第一:线导入feign的依赖
<dependency>
    <groupId>org.springframework.cloud</groupId>
    <artifactId>spring-cloud-starter-openfeign</artifactId>
</dependency>
第二:定义文章端的接口
package com.heima.apis.article;
import org.springframework.web.bind.annotation.RequestBody;

@FeignClient(value = "leadnews-article")
public interface IArticleClient {

    @PostMapping("/api/v1/article/save")
    public ResponseResult saveArticle(@RequestBody ArticleDto dto) ;
}
②:在heima-leadnews-article中实现该方法
package com.heima.article.feign;
import java.io.IOException;

@RestController
public class ArticleClient implements IArticleClient {

    @Autowired
    private ApArticleService apArticleService;

    @Override
    @PostMapping("/api/v1/article/save")
    public ResponseResult saveArticle(@RequestBody ArticleDto dto) {
        return apArticleService.saveArticle(dto);
    }
}
③:拷贝mapper
在资料文件夹中拷贝ApArticleConfigMapper类到mapper文件夹中
同时,修改ApArticleConfig类,添加如下构造函数
package com.heima.model.article.pojos;

import java.io.Serializable;

/**
 * <p>
 * APP已发布文章配置表
 * </p>
 *
 * @author itheima
 */

@Data
@NoArgsConstructor
@TableName("ap_article_config")
public class ApArticleConfig implements Serializable {


    public ApArticleConfig(Long articleId){
        this.articleId = articleId;
        this.isComment = true;
        this.isForward = true;
        this.isDelete = false;
        this.isDown = false;
    }

    @TableId(value = "id",type = IdType.ID_WORKER)
    private Long id;

    /**
     * 文章id
     */
    @TableField("article_id")
    private Long articleId;

    /**
     * 是否可评论
     * true: 可以评论   1
     * false: 不可评论  0
     */
    @TableField("is_comment")
    private Boolean isComment;

    /**
     * 是否转发
     * true: 可以转发   1
     * false: 不可转发  0
     */
    @TableField("is_forward")
    private Boolean isForward;

    /**
     * 是否下架
     * true: 下架   1
     * false: 没有下架  0
     */
    @TableField("is_down")
    private Boolean isDown;

    /**
     * 是否已删除
     * true: 删除   1
     * false: 没有删除  0
     */
    @TableField("is_delete")
    private Boolean isDelete;
}
④:在ApArticleService中新增方法
/**
     * 保存app端相关文章
     * @param dto
     * @return
     */
ResponseResult saveArticle(ArticleDto dto) ;
实现类:
@Autowired
private ApArticleConfigMapper apArticleConfigMapper;

@Autowired
private ApArticleContentMapper apArticleContentMapper;

/**
     * 保存app端相关文章
     * @param dto
     * @return
     */
@Override
public ResponseResult saveArticle(ArticleDto dto) {
    //1.检查参数
    if(dto == null){
        return ResponseResult.errorResult(AppHttpCodeEnum.PARAM_INVALID);
    }

    ApArticle apArticle = new ApArticle();
    BeanUtils.copyProperties(dto,apArticle);

    //2.判断是否存在id
    if(dto.getId() == null){
        //2.1 不存在id  保存  文章  文章配置  文章内容

        //保存文章
        save(apArticle);

        //保存配置
        ApArticleConfig apArticleConfig = new ApArticleConfig(apArticle.getId());
        apArticleConfigMapper.insert(apArticleConfig);

        //保存 文章内容
        ApArticleContent apArticleContent = new ApArticleContent();
        apArticleContent.setArticleId(apArticle.getId());
        apArticleContent.setContent(dto.getContent());
        apArticleContentMapper.insert(apArticleContent);

    }else {
        //2.2 存在id   修改  文章  文章内容

        //修改  文章
        updateById(apArticle);

        //修改文章内容
        ApArticleContent apArticleContent = apArticleContentMapper.selectOne(Wrappers.<ApArticleContent>lambdaQuery().eq(ApArticleContent::getArticleId, dto.getId()));
        apArticleContent.setContent(dto.getContent());
        apArticleContentMapper.updateById(apArticleContent);
    }


    //3.结果返回  文章的id
    return ResponseResult.okResult(apArticle.getId());
}
⑤:测试
编写junit单元测试,或使用postman进行测试
http://localhost:51802/api/v1/article/save
{
	"id":这个id要去数据库自己找 ,
    "title":"黑马头条项目背景22222222222222",
    "authoId":1102,
    "layout":1,
    "labels":"黑马头条",
    "publishTime":"2028-03-14T11:35:49.000Z",
    "images": "http://192.168.200.130:9000/leadnews/2021/04/26/5ddbdb5c68094ce393b08a47860da275.jpg",
    "content":"22222222222222222黑马头条项目背景,黑马头条项目背景,黑马头条项目背景,黑马头条项目背景,黑马头条项目背景"
}
4)自媒体文章自动审核功能实现
4.1)表结构说明
wm_news 自媒体文章表

status字段:0 草稿 1 待审核 2 审核失败 3 人工审核 4 人工审核通过 8 审核通过(待发布) 9 已发布
4.2)实现
在heima-leadnews-wemedia中的service新增接口
package com.heima.wemedia.service;

public interface WmNewsAutoScanService {

    /**
     * 自媒体文章审核
     * @param id  自媒体文章id
     */
    public void autoScanWmNews(Integer id);
}
实现类:
package com.heima.wemedia.service.impl;

import com.alibaba.fastjson.JSONArray;
import com.heima.apis.article.IArticleClient;
import com.heima.common.aliyun.GreenImageScan;
import com.heima.common.aliyun.GreenTextScan;
import com.heima.file.service.FileStorageService;
import com.heima.model.article.dtos.ArticleDto;
import com.heima.model.common.dtos.ResponseResult;
import com.heima.model.wemedia.pojos.WmChannel;
import com.heima.model.wemedia.pojos.WmNews;
import com.heima.model.wemedia.pojos.WmUser;
import com.heima.wemedia.mapper.WmChannelMapper;
import com.heima.wemedia.mapper.WmNewsMapper;
import com.heima.wemedia.mapper.WmUserMapper;
import com.heima.wemedia.service.WmNewsAutoScanService;
import lombok.extern.slf4j.Slf4j;
import org.apache.commons.lang3.StringUtils;
import org.springframework.beans.BeanUtils;
import org.springframework.beans.factory.annotation.Autowired;
import org.springframework.stereotype.Service;
import org.springframework.transaction.annotation.Transactional;

import java.util.*;
import java.util.stream.Collectors;


@Service
@Slf4j
@Transactional
public class WmNewsAutoScanServiceImpl implements WmNewsAutoScanService {

    @Autowired
    private WmNewsMapper wmNewsMapper;

    /**
     * 自媒体文章审核
     *
     * @param id 自媒体文章id
     */
    @Override
    public void autoScanWmNews(Integer id) {
        //1.查询自媒体文章
        WmNews wmNews = wmNewsMapper.selectById(id);
        if(wmNews == null){
            throw new RuntimeException("WmNewsAutoScanServiceImpl-文章不存在");
        }

        if(wmNews.getStatus().equals(WmNews.Status.SUBMIT.getCode())){
            //从内容中提取纯文本内容和图片
            Map<String,Object> textAndImages = handleTextAndImages(wmNews);

            //2.审核文本内容  阿里云接口
            boolean isTextScan = handleTextScan((String) textAndImages.get("content"),wmNews);
            if(!isTextScan)return;

            //3.审核图片  阿里云接口
            boolean isImageScan =  handleImageScan((List<String>) textAndImages.get("images"),wmNews);
            if(!isImageScan)return;

            //4.审核成功,保存app端的相关的文章数据
            ResponseResult responseResult = saveAppArticle(wmNews);
            if(!responseResult.getCode().equals(200)){
                throw new RuntimeException("WmNewsAutoScanServiceImpl-文章审核,保存app端相关文章数据失败");
            }
            //回填article_id
            wmNews.setArticleId((Long) responseResult.getData());
            updateWmNews(wmNews,(short) 9,"审核成功");

        }
    }

    @Autowired
    private IArticleClient articleClient;

    @Autowired
    private WmChannelMapper wmChannelMapper;

    @Autowired
    private WmUserMapper wmUserMapper;

    /**
     * 保存app端相关的文章数据
     * @param wmNews
     */
    private ResponseResult saveAppArticle(WmNews wmNews) {

        ArticleDto dto = new ArticleDto();
        //属性的拷贝
        BeanUtils.copyProperties(wmNews,dto);
        //文章的布局
        dto.setLayout(wmNews.getType());
        //频道
        WmChannel wmChannel = wmChannelMapper.selectById(wmNews.getChannelId());
        if(wmChannel != null){
            dto.setChannelName(wmChannel.getName());
        }

        //作者
        dto.setAuthorId(wmNews.getUserId().longValue());
        WmUser wmUser = wmUserMapper.selectById(wmNews.getUserId());
        if(wmUser != null){
            dto.setAuthorName(wmUser.getName());
        }

        //设置文章id
        if(wmNews.getArticleId() != null){
            dto.setId(wmNews.getArticleId());
        }
        dto.setCreatedTime(new Date());

        ResponseResult responseResult = articleClient.saveArticle(dto);
        return responseResult;

    }


    @Autowired
    private FileStorageService fileStorageService;

    @Autowired
    private GreenImageScan greenImageScan;

    /**
     * 审核图片
     * @param images
     * @param wmNews
     * @return
     */
    private boolean handleImageScan(List<String> images, WmNews wmNews) {

        boolean flag = true;

        if(images == null || images.size() == 0){
            return flag;
        }

        //下载图片 minIO
        //图片去重
        images = images.stream().distinct().collect(Collectors.toList());

        List<byte[]> imageList = new ArrayList<>();

        for (String image : images) {
            byte[] bytes = fileStorageService.downLoadFile(image);
            imageList.add(bytes);
        }


        //审核图片
        try {
            Map map = greenImageScan.imageScan(imageList);
            if(map != null){
                //审核失败
                if(map.get("suggestion").equals("block")){
                    flag = false;
                    updateWmNews(wmNews, (short) 2, "当前文章中存在违规内容");
                }

                //不确定信息  需要人工审核
                if(map.get("suggestion").equals("review")){
                    flag = false;
                    updateWmNews(wmNews, (short) 3, "当前文章中存在不确定内容");
                }
            }

        } catch (Exception e) {
            flag = false;
            e.printStackTrace();
        }
        return flag;
    }

    @Autowired
    private GreenTextScan greenTextScan;

    /**
     * 审核纯文本内容
     * @param content
     * @param wmNews
     * @return
     */
    private boolean handleTextScan(String content, WmNews wmNews) {

        boolean flag = true;

        if((wmNews.getTitle()+"-"+content).length() == 0){
            return flag;
        }

        try {
            Map map = greenTextScan.greeTextScan((wmNews.getTitle()+"-"+content));
            if(map != null){
                //审核失败
                if(map.get("suggestion").equals("block")){
                    flag = false;
                    updateWmNews(wmNews, (short) 2, "当前文章中存在违规内容");
                }

                //不确定信息  需要人工审核
                if(map.get("suggestion").equals("review")){
                    flag = false;
                    updateWmNews(wmNews, (short) 3, "当前文章中存在不确定内容");
                }
            }
        } catch (Exception e) {
            flag = false;
            e.printStackTrace();
        }

        return flag;

    }

    /**
     * 修改文章内容
     * @param wmNews
     * @param status
     * @param reason
     */
    private void updateWmNews(WmNews wmNews, short status, String reason) {
        wmNews.setStatus(status);
        wmNews.setReason(reason);
        wmNewsMapper.updateById(wmNews);
    }

    /**
     * 1。从自媒体文章的内容中提取文本和图片
     * 2.提取文章的封面图片
     * @param wmNews
     * @return
     */
    private Map<String, Object> handleTextAndImages(WmNews wmNews) {

        //存储纯文本内容
        StringBuilder stringBuilder = new StringBuilder();

        List<String> images = new ArrayList<>();

        //1。从自媒体文章的内容中提取文本和图片
        if(StringUtils.isNotBlank(wmNews.getContent())){
            List<Map> maps = JSONArray.parseArray(wmNews.getContent(), Map.class);
            for (Map map : maps) {
                if (map.get("type").equals("text")){
                    stringBuilder.append(map.get("value"));
                }

                if (map.get("type").equals("image")){
                    images.add((String) map.get("value"));
                }
            }
        }
        //2.提取文章的封面图片
        if(StringUtils.isNotBlank(wmNews.getImages())){
            String[] split = wmNews.getImages().split(",");
            images.addAll(Arrays.asList(split));
        }

        Map<String, Object> resultMap = new HashMap<>();
        resultMap.put("content",stringBuilder.toString());
        resultMap.put("images",images);
        return resultMap;

    }
}
4.3)单元测试
package com.heima.wemedia.service;

import com.heima.wemedia.WemediaApplication;
import org.junit.Test;
import org.junit.runner.RunWith;
import org.springframework.beans.factory.annotation.Autowired;
import org.springframework.boot.test.context.SpringBootTest;
import org.springframework.test.context.junit4.SpringRunner;

import static org.junit.Assert.*;


@SpringBootTest(classes = WemediaApplication.class)
@RunWith(SpringRunner.class)
public class WmNewsAutoScanServiceTest {

    @Autowired
    private WmNewsAutoScanService wmNewsAutoScanService;

    @Test
    public void autoScanWmNews() {

        wmNewsAutoScanService.autoScanWmNews(6238);
    }
}
4.4)feign远程接口调用方式

在heima-leadnews-wemedia服务中已经依赖了heima-leadnews-feign-apis工程,只需要在自媒体的引导类中开启feign的远程调用即可
注解为:@EnableFeignClients(basePackages = "com.heima.apis") 需要指向apis这个包

4.5)服务降级处理

服务降级是服务自我保护的一种方式,或者保护下游服务的一种方式,用于确保服务不会受请求突增影响变得不可用,确保服务不会崩溃
服务降级虽然会导致请求失败,但是不会导致阻塞。
实现步骤:
①:在heima-leadnews-feign-api编写降级逻辑
package com.heima.apis.article.fallback;

import com.heima.apis.article.IArticleClient;
import com.heima.model.article.dtos.ArticleDto;
import com.heima.model.common.dtos.ResponseResult;
import com.heima.model.common.enums.AppHttpCodeEnum;
import org.springframework.stereotype.Component;

/**
 * feign失败配置
 * @author itheima
 */
@Component
public class IArticleClientFallback implements IArticleClient {
    @Override
    public ResponseResult saveArticle(ArticleDto dto)  {
        return ResponseResult.errorResult(AppHttpCodeEnum.SERVER_ERROR,"获取数据失败");
    }
}
在自媒体微服务中添加类,扫描降级代码类的包
package com.heima.wemedia.config;

import org.springframework.context.annotation.ComponentScan;
import org.springframework.context.annotation.Configuration;

@Configuration
@ComponentScan("com.heima.apis.article.fallback")
public class InitConfig {
}
②:远程接口中指向降级代码
package com.heima.apis.article;

import com.heima.apis.article.fallback.IArticleClientFallback;
import com.heima.model.article.dtos.ArticleDto;
import com.heima.model.common.dtos.ResponseResult;
import org.springframework.cloud.openfeign.FeignClient;
import org.springframework.web.bind.annotation.PostMapping;
import org.springframework.web.bind.annotation.RequestBody;

@FeignClient(value = "leadnews-article",fallback = IArticleClientFallback.class)
public interface IArticleClient {

    @PostMapping("/api/v1/article/save")
    public ResponseResult saveArticle(@RequestBody ArticleDto dto);
}
③:客户端开启降级heima-leadnews-wemedia
在wemedia的nacos配置中心里添加如下内容,开启服务降级,也可以指定服务响应的超时的时间
feign:
  # 开启feign对hystrix熔断降级的支持
  hystrix:
    enabled: true
  # 修改调用超时时间
  client:
    config:
      default:
        connectTimeout: 2000
        readTimeout: 2000
④:测试
在ApArticleServiceImpl类中saveArticle方法添加代码
try {
    Thread.sleep(3000);
} catch (InterruptedException e) {
    e.printStackTrace();
}
在自媒体端进行审核测试,会出现服务降级的现象
5)发布文章提交审核集成
5.1)同步调用与异步调用
同步:就是在发出一个调用时,在没有得到结果之前, 该调用就不返回(实时处理)
异步:调用在发出之后,这个调用就直接返回了,没有返回结果(分时处理)

异步线程的方式审核文章
5.2)Springboot集成异步线程调用
①:在自动审核的方法上加上@Async注解(标明要异步调用)
@Override
@Async  //标明当前方法是一个异步方法
public void autoScanWmNews(Integer id) {
	//代码略
}
②:在文章发布成功后调用审核的方法
@Autowired
private WmNewsAutoScanService wmNewsAutoScanService;

/**
 * 发布修改文章或保存为草稿
 * @param dto
 * @return
 */
@Override
public ResponseResult submitNews(WmNewsDto dto) {

    //代码略

    //审核文章
    wmNewsAutoScanService.autoScanWmNews(wmNews.getId());

    return ResponseResult.okResult(AppHttpCodeEnum.SUCCESS);

}
③:在自媒体引导类中使用@EnableAsync注解开启异步调用
@SpringBootApplication
@EnableDiscoveryClient
@MapperScan("com.heima.wemedia.mapper")
@EnableFeignClients(basePackages = "com.heima.apis")
@EnableAsync  //开启异步调用
public class WemediaApplication {

    public static void main(String[] args) {
        SpringApplication.run(WemediaApplication.class,args);
    }

    @Bean
    public MybatisPlusInterceptor mybatisPlusInterceptor() {
        MybatisPlusInterceptor interceptor = new MybatisPlusInterceptor();
        interceptor.addInnerInterceptor(new PaginationInnerInterceptor(DbType.MYSQL));
        return interceptor;
    }
}
6)文章审核功能-综合测试
6.1)服务启动列表
1,nacos服务端
2,article微服务
3,wemedia微服务
4,启动wemedia网关微服务
5,启动前端系统wemedia
6.2)测试情况列表
1,自媒体前端发布一篇正常的文章
审核成功后,app端的article相关数据是否可以正常保存,自媒体文章状态和app端文章id是否回显
2,自媒体前端发布一篇包含敏感词的文章
正常是审核失败, wm_news表中的状态是否改变,成功和失败原因正常保存
3,自媒体前端发布一篇包含敏感图片的文章
正常是审核失败, wm_news表中的状态是否改变,成功和失败原因正常保存
7)新需求-自管理敏感词
7.1)需求分析
文章审核功能已经交付了,文章也能正常发布审核。突然,产品经理过来说要开会。
会议的内容核心有以下内容:
文章审核不能过滤一些敏感词:
私人侦探、针孔摄象、信用卡提现、广告代理、代开发票、刻章办、出售答案、小额贷款…
需要完成的功能:
需要自己维护一套敏感词,在文章审核的时候,需要验证文章是否包含这些敏感词
7.2)敏感词-过滤
技术选型
方案 | 说明 |
数据库模糊查询 | 效率太低 |
String.indexOf("")查找 | 数据库量大的话也是比较慢 |
全文检索 | 分词再匹配 |
DFA算法 | 确定有穷自动机(一种数据结构) |
7.3)DFA实现原理
DFA全称为:Deterministic Finite Automaton,即确定有穷自动机。
存储:一次性的把所有的敏感词存储到了多个map中,就是下图表示这种结构
敏感词:冰毒、大麻、大坏蛋

检索的过程

7.4)自管理敏感词集成到文章审核中
①:创建敏感词表,导入资料中wm_sensitive到leadnews_wemedia库中

package com.heima.model.wemedia.pojos;

import com.baomidou.mybatisplus.annotation.IdType;
import com.baomidou.mybatisplus.annotation.TableField;
import com.baomidou.mybatisplus.annotation.TableId;
import com.baomidou.mybatisplus.annotation.TableName;
import lombok.Data;

import java.io.Serializable;
import java.util.Date;

/**
 * <p>
 * 敏感词信息表
 * </p>
 *
 * @author itheima
 */
@Data
@TableName("wm_sensitive")
public class WmSensitive implements Serializable {

    private static final long serialVersionUID = 1L;

    /**
     * 主键
     */
    @TableId(value = "id", type = IdType.AUTO)
    private Integer id;

    /**
     * 敏感词
     */
    @TableField("sensitives")
    private String sensitives;

    /**
     * 创建时间
     */
    @TableField("created_time")
    private Date createdTime;

}
②:拷贝对应的wm_sensitive的mapper到项目中
package com.heima.wemedia.mapper;

import com.baomidou.mybatisplus.core.mapper.BaseMapper;
import com.heima.model.wemedia.pojos.WmSensitive;
import org.apache.ibatis.annotations.Mapper;


@Mapper
public interface WmSensitiveMapper extends BaseMapper<WmSensitive> {
}
③:在文章审核的代码中添加自管理敏感词审核
第一:在WmNewsAutoScanServiceImpl中的autoScanWmNews方法上添加如下代码
//从内容中提取纯文本内容和图片
//.....省略

//自管理的敏感词过滤
boolean isSensitive = handleSensitiveScan((String) textAndImages.get("content"), wmNews);
if(!isSensitive) return;

//2.审核文本内容  阿里云接口
//.....省略
新增自管理敏感词审核代码
@Autowired
private WmSensitiveMapper wmSensitiveMapper;

/**
     * 自管理的敏感词审核
     * @param content
     * @param wmNews
     * @return
     */
private boolean handleSensitiveScan(String content, WmNews wmNews) {

    boolean flag = true;

    //获取所有的敏感词
    List<WmSensitive> wmSensitives = wmSensitiveMapper.selectList(Wrappers.<WmSensitive>lambdaQuery().select(WmSensitive::getSensitives));
    List<String> sensitiveList = wmSensitives.stream().map(WmSensitive::getSensitives).collect(Collectors.toList());

    //初始化敏感词库
    SensitiveWordUtil.initMap(sensitiveList);

    //查看文章中是否包含敏感词
    Map<String, Integer> map = SensitiveWordUtil.matchWords(content);
    if(map.size() >0){
        updateWmNews(wmNews,(short) 2,"当前文章中存在违规内容"+map);
        flag = false;
    }

    return flag;
}
8)新需求-图片识别文字审核敏感词
8.1)需求分析
产品经理召集开会,文章审核功能已经交付了,文章也能正常发布审核。对于上次提出的自管理敏感词也很满意,这次会议核心的内容如下:
文章中包含的图片要识别文字,过滤掉图片文字的敏感词

8.2)图片文字识别
什么是OCR?
OCR (Optical Character Recognition,光学字符识别)是指电子设备(例如扫描仪或数码相机)检查纸上打印的字符,通过检测暗、亮的模式确定其形状,然后用字符识别方法将形状翻译成计算机文字的过程
方案 | 说明 |
百度OCR | 收费 |
Tesseract-OCR | Google维护的开源OCR引擎,支持Java,Python等语言调用 |
Tess4J | 封装了Tesseract-OCR ,支持Java调用 |
8.3)Tess4j案例
①:创建项目导入tess4j对应的依赖
<dependency>
    <groupId>net.sourceforge.tess4j</groupId>
    <artifactId>tess4j</artifactId>
    <version>4.1.1</version>
</dependency>
②:导入中文字体库, 把资料中的tessdata文件夹拷贝到自己的工作空间下

③:编写测试类进行测试
package com.heima.tess4j;

import net.sourceforge.tess4j.ITesseract;
import net.sourceforge.tess4j.Tesseract;

import java.io.File;

public class Application {

    public static void main(String[] args) {
        try {
            //获取本地图片
            File file = new File("D:\\26.png");
            //创建Tesseract对象
            ITesseract tesseract = new Tesseract();
            //设置字体库路径
            tesseract.setDatapath("D:\\workspace\\tessdata");
            //中文识别
            tesseract.setLanguage("chi_sim");
            //执行ocr识别
            String result = tesseract.doOCR(file);
            //替换回车和tal键  使结果为一行
            result = result.replaceAll("\\r|\\n","-").replaceAll(" ","");
            System.out.println("识别的结果为:"+result);
        } catch (Exception e) {
            e.printStackTrace();
        }
    }
}
8.4)管理敏感词和图片文字识别集成到文章审核
①:在heima-leadnews-common中创建工具类,简单封装一下tess4j
需要先导入pom
<dependency>
    <groupId>net.sourceforge.tess4j</groupId>
    <artifactId>tess4j</artifactId>
    <version>4.1.1</version>
</dependency>
工具类
package com.heima.common.tess4j;

import lombok.Getter;
import lombok.Setter;
import net.sourceforge.tess4j.ITesseract;
import net.sourceforge.tess4j.Tesseract;
import net.sourceforge.tess4j.TesseractException;
import org.springframework.boot.context.properties.ConfigurationProperties;
import org.springframework.stereotype.Component;

import java.awt.image.BufferedImage;

@Getter
@Setter
@Component
@ConfigurationProperties(prefix = "tess4j")
public class Tess4jClient {

    private String dataPath;
    private String language;

    public String doOCR(BufferedImage image) throws TesseractException {
        //创建Tesseract对象
        ITesseract tesseract = new Tesseract();
        //设置字体库路径
        tesseract.setDatapath(dataPath);
        //中文识别
        tesseract.setLanguage(language);
        //执行ocr识别
        String result = tesseract.doOCR(image);
        //替换回车和tal键  使结果为一行
        result = result.replaceAll("\\r|\\n", "-").replaceAll(" ", "");
        return result;
    }

}
在spring.factories配置中添加该类,完整如下:
org.springframework.boot.autoconfigure.EnableAutoConfiguration=\
  com.heima.common.exception.ExceptionCatch,\
  com.heima.common.swagger.SwaggerConfiguration,\
  com.heima.common.swagger.Swagger2Configuration,\
  com.heima.common.aliyun.GreenTextScan,\
  com.heima.common.aliyun.GreenImageScan,\
  com.heima.common.tess4j.Tess4jClient
②:在heima-leadnews-wemedia中的配置中添加两个属性
tess4j:
  data-path: D:\workspace\tessdata
  language: chi_sim
③:在WmNewsAutoScanServiceImpl中的handleImageScan方法上添加如下代码
try {
    for (String image : images) {
        byte[] bytes = fileStorageService.downLoadFile(image);

        //图片识别文字审核---begin-----

        //从byte[]转换为butteredImage
        ByteArrayInputStream in = new ByteArrayInputStream(bytes);
        BufferedImage imageFile = ImageIO.read(in);
        //识别图片的文字
        String result = tess4jClient.doOCR(imageFile);

        //审核是否包含自管理的敏感词
        boolean isSensitive = handleSensitiveScan(result, wmNews);
        if(!isSensitive){
            return isSensitive;
        }

        //图片识别文字审核---end-----


        imageList.add(bytes);

    }
}catch (Exception e){
    e.printStackTrace();
}
最后附上文章审核的完整代码如下:
package com.heima.wemedia.service.impl;

import com.alibaba.fastjson.JSONArray;
import com.baomidou.mybatisplus.core.toolkit.Wrappers;
import com.heima.apis.article.IArticleClient;
import com.heima.common.aliyun.GreenImageScan;
import com.heima.common.aliyun.GreenTextScan;
import com.heima.common.tess4j.Tess4jClient;
import com.heima.file.service.FileStorageService;
import com.heima.model.article.dtos.ArticleDto;
import com.heima.model.common.dtos.ResponseResult;
import com.heima.model.wemedia.pojos.WmChannel;
import com.heima.model.wemedia.pojos.WmNews;
import com.heima.model.wemedia.pojos.WmSensitive;
import com.heima.model.wemedia.pojos.WmUser;
import com.heima.utils.common.SensitiveWordUtil;
import com.heima.wemedia.mapper.WmChannelMapper;
import com.heima.wemedia.mapper.WmNewsMapper;
import com.heima.wemedia.mapper.WmSensitiveMapper;
import com.heima.wemedia.mapper.WmUserMapper;
import com.heima.wemedia.service.WmNewsAutoScanService;
import lombok.extern.slf4j.Slf4j;
import org.apache.commons.lang3.StringUtils;
import org.springframework.beans.BeanUtils;
import org.springframework.beans.factory.annotation.Autowired;
import org.springframework.scheduling.annotation.Async;
import org.springframework.stereotype.Service;
import org.springframework.transaction.annotation.Transactional;

import javax.imageio.ImageIO;
import java.awt.image.BufferedImage;
import java.io.ByteArrayInputStream;
import java.util.*;
import java.util.stream.Collectors;


@Service
@Slf4j
@Transactional
public class WmNewsAutoScanServiceImpl implements WmNewsAutoScanService {

    @Autowired
    private WmNewsMapper wmNewsMapper;

    /**
     * 自媒体文章审核
     *
     * @param id 自媒体文章id
     */
    @Override
    @Async  //标明当前方法是一个异步方法
    public void autoScanWmNews(Integer id) {

//        int a = 1/0;

        //1.查询自媒体文章
        WmNews wmNews = wmNewsMapper.selectById(id);
        if (wmNews == null) {
            throw new RuntimeException("WmNewsAutoScanServiceImpl-文章不存在");
        }

        if (wmNews.getStatus().equals(WmNews.Status.SUBMIT.getCode())) {
            //从内容中提取纯文本内容和图片
            Map<String, Object> textAndImages = handleTextAndImages(wmNews);

            //自管理的敏感词过滤
            boolean isSensitive = handleSensitiveScan((String) textAndImages.get("content"), wmNews);
            if(!isSensitive) return;

            //2.审核文本内容  阿里云接口
            boolean isTextScan = handleTextScan((String) textAndImages.get("content"), wmNews);
            if (!isTextScan) return;

            //3.审核图片  阿里云接口
            boolean isImageScan = handleImageScan((List<String>) textAndImages.get("images"), wmNews);
            if (!isImageScan) return;

            //4.审核成功,保存app端的相关的文章数据
            ResponseResult responseResult = saveAppArticle(wmNews);
            if (!responseResult.getCode().equals(200)) {
                throw new RuntimeException("WmNewsAutoScanServiceImpl-文章审核,保存app端相关文章数据失败");
            }
            //回填article_id
            wmNews.setArticleId((Long) responseResult.getData());
            updateWmNews(wmNews, (short) 9, "审核成功");

        }
    }

    @Autowired
    private WmSensitiveMapper wmSensitiveMapper;

    /**
     * 自管理的敏感词审核
     * @param content
     * @param wmNews
     * @return
     */
    private boolean handleSensitiveScan(String content, WmNews wmNews) {

        boolean flag = true;

        //获取所有的敏感词
        List<WmSensitive> wmSensitives = wmSensitiveMapper.selectList(Wrappers.<WmSensitive>lambdaQuery().select(WmSensitive::getSensitives));
        List<String> sensitiveList = wmSensitives.stream().map(WmSensitive::getSensitives).collect(Collectors.toList());

        //初始化敏感词库
        SensitiveWordUtil.initMap(sensitiveList);

        //查看文章中是否包含敏感词
        Map<String, Integer> map = SensitiveWordUtil.matchWords(content);
        if(map.size() >0){
            updateWmNews(wmNews,(short) 2,"当前文章中存在违规内容"+map);
            flag = false;
        }

        return flag;
    }

    @Autowired
    private IArticleClient articleClient;

    @Autowired
    private WmChannelMapper wmChannelMapper;

    @Autowired
    private WmUserMapper wmUserMapper;

    /**
     * 保存app端相关的文章数据
     *
     * @param wmNews
     */
    private ResponseResult saveAppArticle(WmNews wmNews) {

        ArticleDto dto = new ArticleDto();
        //属性的拷贝
        BeanUtils.copyProperties(wmNews, dto);
        //文章的布局
        dto.setLayout(wmNews.getType());
        //频道
        WmChannel wmChannel = wmChannelMapper.selectById(wmNews.getChannelId());
        if (wmChannel != null) {
            dto.setChannelName(wmChannel.getName());
        }

        //作者
        dto.setAuthorId(wmNews.getUserId().longValue());
        WmUser wmUser = wmUserMapper.selectById(wmNews.getUserId());
        if (wmUser != null) {
            dto.setAuthorName(wmUser.getName());
        }

        //设置文章id
        if (wmNews.getArticleId() != null) {
            dto.setId(wmNews.getArticleId());
        }
        dto.setCreatedTime(new Date());

        ResponseResult responseResult = articleClient.saveArticle(dto);
        return responseResult;

    }


    @Autowired
    private FileStorageService fileStorageService;

    @Autowired
    private GreenImageScan greenImageScan;

    @Autowired
    private Tess4jClient tess4jClient;

    /**
     * 审核图片
     *
     * @param images
     * @param wmNews
     * @return
     */
    private boolean handleImageScan(List<String> images, WmNews wmNews) {

        boolean flag = true;

        if (images == null || images.size() == 0) {
            return flag;
        }

        //下载图片 minIO
        //图片去重
        images = images.stream().distinct().collect(Collectors.toList());

        List<byte[]> imageList = new ArrayList<>();

        try {
            for (String image : images) {
                byte[] bytes = fileStorageService.downLoadFile(image);

                //图片识别文字审核---begin-----

                //从byte[]转换为butteredImage
                ByteArrayInputStream in = new ByteArrayInputStream(bytes);
                BufferedImage imageFile = ImageIO.read(in);
                //识别图片的文字
                String result = tess4jClient.doOCR(imageFile);

                //审核是否包含自管理的敏感词
                boolean isSensitive = handleSensitiveScan(result, wmNews);
                if(!isSensitive){
                    return isSensitive;
                }

                //图片识别文字审核---end-----


                imageList.add(bytes);

            }
        }catch (Exception e){
            e.printStackTrace();
        }


        //审核图片
        try {
            Map map = greenImageScan.imageScan(imageList);
            if (map != null) {
                //审核失败
                if (map.get("suggestion").equals("block")) {
                    flag = false;
                    updateWmNews(wmNews, (short) 2, "当前文章中存在违规内容");
                }

                //不确定信息  需要人工审核
                if (map.get("suggestion").equals("review")) {
                    flag = false;
                    updateWmNews(wmNews, (short) 3, "当前文章中存在不确定内容");
                }
            }

        } catch (Exception e) {
            flag = false;
            e.printStackTrace();
        }
        return flag;
    }

    @Autowired
    private GreenTextScan greenTextScan;

    /**
     * 审核纯文本内容
     *
     * @param content
     * @param wmNews
     * @return
     */
    private boolean handleTextScan(String content, WmNews wmNews) {

        boolean flag = true;

        if ((wmNews.getTitle() + "-" + content).length() == 0) {
            return flag;
        }
        try {
            Map map = greenTextScan.greeTextScan((wmNews.getTitle() + "-" + content));
            if (map != null) {
                //审核失败
                if (map.get("suggestion").equals("block")) {
                    flag = false;
                    updateWmNews(wmNews, (short) 2, "当前文章中存在违规内容");
                }

                //不确定信息  需要人工审核
                if (map.get("suggestion").equals("review")) {
                    flag = false;
                    updateWmNews(wmNews, (short) 3, "当前文章中存在不确定内容");
                }
            }
        } catch (Exception e) {
            flag = false;
            e.printStackTrace();
        }

        return flag;

    }

    /**
     * 修改文章内容
     *
     * @param wmNews
     * @param status
     * @param reason
     */
    private void updateWmNews(WmNews wmNews, short status, String reason) {
        wmNews.setStatus(status);
        wmNews.setReason(reason);
        wmNewsMapper.updateById(wmNews);
    }

    /**
     * 1。从自媒体文章的内容中提取文本和图片
     * 2.提取文章的封面图片
     *
     * @param wmNews
     * @return
     */
    private Map<String, Object> handleTextAndImages(WmNews wmNews) {

        //存储纯文本内容
        StringBuilder stringBuilder = new StringBuilder();

        List<String> images = new ArrayList<>();

        //1。从自媒体文章的内容中提取文本和图片
        if (StringUtils.isNotBlank(wmNews.getContent())) {
            List<Map> maps = JSONArray.parseArray(wmNews.getContent(), Map.class);
            for (Map map : maps) {
                if (map.get("type").equals("text")) {
                    stringBuilder.append(map.get("value"));
                }

                if (map.get("type").equals("image")) {
                    images.add((String) map.get("value"));
                }
            }
        }
        //2.提取文章的封面图片
        if (StringUtils.isNotBlank(wmNews.getImages())) {
            String[] split = wmNews.getImages().split(",");
            images.addAll(Arrays.asList(split));
        }

        Map<String, Object> resultMap = new HashMap<>();
        resultMap.put("content", stringBuilder.toString());
        resultMap.put("images", images);
        return resultMap;

    }
}
9)文章详情-静态文件生成
9.1)思路分析
文章端创建app相关文章时,生成文章详情静态页上传到MinIO中

9.2)实现步骤
1.新建ArticleFreemarkerService创建静态文件并上传到minIO中
package com.heima.article.service;

import com.heima.model.article.pojos.ApArticle;

public interface ArticleFreemarkerService {

    /**
     * 生成静态文件上传到minIO中
     * @param apArticle
     * @param content
     */
    public void buildArticleToMinIO(ApArticle apArticle,String content);
}
实现
package com.heima.article.service.impl;

import com.alibaba.fastjson.JSON;
import com.alibaba.fastjson.JSONArray;
import com.baomidou.mybatisplus.core.toolkit.Wrappers;
import com.heima.article.mapper.ApArticleContentMapper;
import com.heima.article.service.ApArticleService;
import com.heima.article.service.ArticleFreemarkerService;
import com.heima.file.service.FileStorageService;
import com.heima.model.article.pojos.ApArticle;
import freemarker.template.Configuration;
import freemarker.template.Template;
import lombok.extern.slf4j.Slf4j;
import org.apache.commons.lang3.StringUtils;
import org.springframework.beans.BeanUtils;
import org.springframework.beans.factory.annotation.Autowired;
import org.springframework.scheduling.annotation.Async;
import org.springframework.stereotype.Service;
import org.springframework.transaction.annotation.Transactional;

import java.io.ByteArrayInputStream;
import java.io.InputStream;
import java.io.StringWriter;
import java.util.HashMap;
import java.util.Map;

@Service
@Slf4j
@Transactional
public class ArticleFreemarkerServiceImpl implements ArticleFreemarkerService {

    @Autowired
    private ApArticleContentMapper apArticleContentMapper;

    @Autowired
    private Configuration configuration;

    @Autowired
    private FileStorageService fileStorageService;

    @Autowired
    private ApArticleService apArticleService;

    /**
     * 生成静态文件上传到minIO中
     * @param apArticle
     * @param content
     */
    @Async
    @Override
    public void buildArticleToMinIO(ApArticle apArticle, String content) {
        //已知文章的id
        //4.1 获取文章内容
        if(StringUtils.isNotBlank(content)){
            //4.2 文章内容通过freemarker生成html文件
            Template template = null;
            StringWriter out = new StringWriter();
            try {
                template = configuration.getTemplate("article.ftl");
                //数据模型
                Map<String,Object> contentDataModel = new HashMap<>();
                contentDataModel.put("content", JSONArray.parseArray(content));
                //合成
                template.process(contentDataModel,out);
            } catch (Exception e) {
                e.printStackTrace();
            }

            //4.3 把html文件上传到minio中
            InputStream in = new ByteArrayInputStream(out.toString().getBytes());
            String path = fileStorageService.uploadHtmlFile("", apArticle.getId() + ".html", in);


            //4.4 修改ap_article表,保存static_url字段
            apArticleService.update(Wrappers.<ApArticle>lambdaUpdate().eq(ApArticle::getId,apArticle.getId())
                    .set(ApArticle::getStaticUrl,path));


        }
    }

}
2.在ApArticleService的saveArticle实现方法中添加调用生成文件的方法
/**
     * 保存app端相关文章
     * @param dto
     * @return
     */
@Override
public ResponseResult saveArticle(ArticleDto dto) {

    //        try {
    //            Thread.sleep(3000);
    //        } catch (InterruptedException e) {
    //            e.printStackTrace();
    //        }
    //1.检查参数
    if(dto == null){
        return ResponseResult.errorResult(AppHttpCodeEnum.PARAM_INVALID);
    }

    ApArticle apArticle = new ApArticle();
    BeanUtils.copyProperties(dto,apArticle);

    //2.判断是否存在id
    if(dto.getId() == null){
        //2.1 不存在id  保存  文章  文章配置  文章内容

        //保存文章
        save(apArticle);

        //保存配置
        ApArticleConfig apArticleConfig = new ApArticleConfig(apArticle.getId());
        apArticleConfigMapper.insert(apArticleConfig);

        //保存 文章内容
        ApArticleContent apArticleContent = new ApArticleContent();
        apArticleContent.setArticleId(apArticle.getId());
        apArticleContent.setContent(dto.getContent());
        apArticleContentMapper.insert(apArticleContent);

    }else {
        //2.2 存在id   修改  文章  文章内容

        //修改  文章
        updateById(apArticle);

        //修改文章内容
        ApArticleContent apArticleContent = apArticleContentMapper.selectOne(Wrappers.<ApArticleContent>lambdaQuery().eq(ApArticleContent::getArticleId, dto.getId()));
        apArticleContent.setContent(dto.getContent());
        apArticleContentMapper.updateById(apArticleContent);
    }

    //异步调用 生成静态文件上传到minio中
    articleFreemarkerService.buildArticleToMinIO(apArticle,dto.getContent());


    //3.结果返回  文章的id
    return ResponseResult.okResult(apArticle.getId());
}
3.文章微服务开启异步调用

05延迟任务精准发布文章
1)文章定时发布
2)延迟任务概述
2.1)什么是延迟任务
定时任务:有固定周期的,有明确的触发时间
延迟队列:没有固定的开始时间,它常常是由一个事件触发的,而在这个事件触发之后的一段时间内触发另一个事件,任务可以立即执行,也可以延迟
应用场景:
场景一:订单下单之后30分钟后,如果用户没有付钱,则系统自动取消订单;如果期间下单成功,任务取消
场景二:接口对接出现网络问题,1分钟后重试,如果失败,2分钟重试,直到出现阈值终止
2.2)技术对比
2.2.1)DelayQueue
JDK自带DelayQueue 是一个支持延时获取元素的阻塞队列, 内部采用优先队列 PriorityQueue 存储元素,同时元素必须实现 Delayed 接口;在创建元素时可以指定多久才可以从队列中获取当前元素,只有在延迟期满时才能从队列中提取元素
DelayQueue属于排序队列,它的特殊之处在于队列的元素必须实现Delayed接口,该接口需要实现compareTo和getDelay方法
getDelay方法:获取元素在队列中的剩余时间,只有当剩余时间为0时元素才可以出队列。
compareTo方法:用于排序,确定元素出队列的顺序。
实现:
1:在测试包jdk下创建延迟任务元素对象DelayedTask,实现compareTo和getDelay方法,
2:在main方法中创建DelayQueue并向延迟队列中添加三个延迟任务,
3:循环的从延迟队列中拉取任务
public class DelayedTask  implements Delayed{

    // 任务的执行时间
    private int executeTime = 0;

    public DelayedTask(int delay){
        Calendar calendar = Calendar.getInstance();
        calendar.add(Calendar.SECOND,delay);
        this.executeTime = (int)(calendar.getTimeInMillis() /1000 );
    }

    /**
     * 元素在队列中的剩余时间
     * @param unit
     * @return
     */
    @Override
    public long getDelay(TimeUnit unit) {
        Calendar calendar = Calendar.getInstance();
        return executeTime - (calendar.getTimeInMillis()/1000);
    }

    /**
     * 元素排序
     * @param o
     * @return
     */
    @Override
    public int compareTo(Delayed o) {
        long val = this.getDelay(TimeUnit.NANOSECONDS) - o.getDelay(TimeUnit.NANOSECONDS);
        return val == 0 ? 0 : ( val < 0 ? -1: 1 );
    }


    public static void main(String[] args) {
        DelayQueue<DelayedTask> queue = new DelayQueue<DelayedTask>();

        queue.add(new DelayedTask(5));
        queue.add(new DelayedTask(10));
        queue.add(new DelayedTask(15));

        System.out.println(System.currentTimeMillis()/1000+" start consume ");
        while(queue.size() != 0){
            DelayedTask delayedTask = queue.poll();
            if(delayedTask !=null ){
                System.out.println(System.currentTimeMillis()/1000+" cosume task");
            }
            //每隔一秒消费一次
            try {
                Thread.sleep(1000);
            } catch (InterruptedException e) {
                e.printStackTrace();
            }
        }
    }
}
DelayQueue实现完成之后思考一个问题:
使用线程池或者原生DelayQueue程序挂掉之后,任务都是放在内存,需要考虑未处理消息的丢失带来的影响,如何保证数据不丢失,需要持久化(磁盘)
2.2.2)RabbitMQ实现延迟任务
TTL:Time To Live (消息存活时间)
死信队列:Dead Letter Exchange(死信交换机),当消息成为Dead message后,可以重新发送另一个交换机(死信交换机)
2.2.3)redis实现
zset数据类型的去重有序(分数排序)特点进行延迟。例如:时间戳作为score进行排序
3)redis实现延迟任务
实现思路
问题思路
1.为什么任务需要存储在数据库中?
延迟任务是一个通用的服务,任何需要延迟得任务都可以调用该服务,需要考虑数据持久化的问题,存储数据库中是一种数据安全的考虑。
2.为什么redis中使用两种数据类型,list和zset?
效率问题,算法的时间复杂度
3.在添加zset数据的时候,为什么不需要预加载?
任务模块是一个通用的模块,项目中任何需要延迟队列的地方,都可以调用这个接口,要考虑到数据量的问题,如果数据量特别大,为了防止阻塞,只需要把未来几分钟要执行的数据存入缓存即可。
4)延迟任务服务实现
4.1)搭建heima-leadnews-schedule模块
leadnews-schedule是一个通用的服务,单独创建模块来管理任何类型的延迟任务
①:导入资料文件夹下的heima-leadnews-schedule模块到heima-leadnews-service下,如下图所示:
②:添加bootstrap.yml
server:
  port: 51701
spring:
  application:
    name: leadnews-schedule
  cloud:
    nacos:
      discovery:
        server-addr: 192.168.200.130:8848
      config:
        server-addr: 192.168.200.130:8848
        file-extension: yml
③:在nacos中添加对应配置,并添加数据库及mybatis-plus的配置
spring:
  datasource:
    driver-class-name: com.mysql.jdbc.Driver
    url: jdbc:mysql://localhost:3306/leadnews_schedule?useUnicode=true&characterEncoding=UTF-8&serverTimezone=UTC
    username: root
    password: root
# 设置Mapper接口所对应的XML文件位置,如果你在Mapper接口中有自定义方法,需要进行该配置
mybatis-plus:
  mapper-locations: classpath*:mapper/*.xml
  # 设置别名包扫描路径,通过该属性可以给包中的类注册别名
  type-aliases-package: com.heima.model.schedule.pojos
4.2)数据库准备
导入资料中leadnews_schedule数据库
taskinfo 任务表
实体类
package com.heima.model.schedule.pojos;

import com.baomidou.mybatisplus.annotation.IdType;
import com.baomidou.mybatisplus.annotation.TableField;
import com.baomidou.mybatisplus.annotation.TableId;
import com.baomidou.mybatisplus.annotation.TableName;
import lombok.Data;

import java.io.Serializable;
import java.util.Date;

/**
 * <p>
 *
 * </p>
 *
 * @author itheima
 */
@Data
@TableName("taskinfo")
public class Taskinfo implements Serializable {

    private static final long serialVersionUID = 1L;

    /**
     * 任务id
     */
    @TableId(type = IdType.ID_WORKER)
    private Long taskId;

    /**
     * 执行时间
     */
    @TableField("execute_time")
    private Date executeTime;

    /**
     * 参数
     */
    @TableField("parameters")
    private byte[] parameters;

    /**
     * 优先级
     */
    @TableField("priority")
    private Integer priority;

    /**
     * 任务类型
     */
    @TableField("task_type")
    private Integer taskType;


}
taskinfo_logs 任务日志表
实体类
package com.heima.model.schedule.pojos;

import com.baomidou.mybatisplus.annotation.*;
import lombok.Data;

import java.io.Serializable;
import java.util.Date;

/**
 * <p>
 *
 * </p>
 *
 * @author itheima
 */
@Data
@TableName("taskinfo_logs")
public class TaskinfoLogs implements Serializable {

    private static final long serialVersionUID = 1L;

    /**
     * 任务id
     */
    @TableId(type = IdType.ID_WORKER)
    private Long taskId;

    /**
     * 执行时间
     */
    @TableField("execute_time")
    private Date executeTime;

    /**
     * 参数
     */
    @TableField("parameters")
    private byte[] parameters;

    /**
     * 优先级
     */
    @TableField("priority")
    private Integer priority;

    /**
     * 任务类型
     */
    @TableField("task_type")
    private Integer taskType;

    /**
     * 版本号,用乐观锁
     */
    @Version
    private Integer version;

    /**
     * 状态 0=int 1=EXECUTED 2=CANCELLED
     */
    @TableField("status")
    private Integer status;


}
乐观锁支持:
/**
     * mybatis-plus乐观锁支持
     * @return
     */
@Bean
public MybatisPlusInterceptor optimisticLockerInterceptor(){
    MybatisPlusInterceptor interceptor = new MybatisPlusInterceptor();
    interceptor.addInnerInterceptor(new OptimisticLockerInnerInterceptor());
    return interceptor;
}
4.3)安装redis
①拉取镜像
docker pull redis② 创建容器
docker run -d --name redis --restart=always -p 6379:6379 redis --requirepass "leadnews"③链接测试
打开资料中的Redis Desktop Manager,输入host、port、password链接测试
能链接成功,即可
4.4)项目集成redis
① 在项目导入redis相关依赖,已经完成
<dependency>
    <groupId>org.springframework.boot</groupId>
    <artifactId>spring-boot-starter-data-redis</artifactId>
</dependency>
<!-- redis依赖commons-pool 这个依赖一定要添加 -->
<dependency>
    <groupId>org.apache.commons</groupId>
    <artifactId>commons-pool2</artifactId>
</dependency>
② 在heima-leadnews-schedule中集成redis,添加以下nacos配置,链接上redis
spring:
  redis:
    host: 192.168.200.130
    password: leadnews
    port: 6379
③ 拷贝资料文件夹下的类:CacheService到heima-leadnews-common模块下,并添加自动配置
④:测试
package com.heima.schedule.test;


import com.heima.common.redis.CacheService;
import com.heima.schedule.ScheduleApplication;
import org.junit.Test;
import org.junit.runner.RunWith;
import org.springframework.beans.factory.annotation.Autowired;
import org.springframework.boot.test.context.SpringBootTest;
import org.springframework.test.context.junit4.SpringRunner;

import java.util.Set;


@SpringBootTest(classes = ScheduleApplication.class)
@RunWith(SpringRunner.class)
public class RedisTest {

    @Autowired
    private CacheService cacheService;

    @Test
    public void testList(){

        //在list的左边添加元素
//        cacheService.lLeftPush("list_001","hello,redis");

        //在list的右边获取元素,并删除
        String list_001 = cacheService.lRightPop("list_001");
        System.out.println(list_001);
    }

    @Test
    public void testZset(){
        //添加数据到zset中  分值
        /*cacheService.zAdd("zset_key_001","hello zset 001",1000);
        cacheService.zAdd("zset_key_001","hello zset 002",8888);
        cacheService.zAdd("zset_key_001","hello zset 003",7777);
        cacheService.zAdd("zset_key_001","hello zset 004",999999);*/

        //按照分值获取数据
        Set<String> zset_key_001 = cacheService.zRangeByScore("zset_key_001", 0, 8888);
        System.out.println(zset_key_001);


    }
}
4.5)添加任务
①:拷贝mybatis-plus生成的文件,mapper
②:创建task类,用于接收添加任务的参数
package com.heima.model.schedule.dtos;

import lombok.Data;

import java.io.Serializable;

@Data
public class Task implements Serializable {

    /**
     * 任务id
     */
    private Long taskId;
    /**
     * 类型
     */
    private Integer taskType;

    /**
     * 优先级
     */
    private Integer priority;

    /**
     * 执行id
     */
    private long executeTime;

    /**
     * task参数
     */
    private byte[] parameters;

}
③:创建TaskService
package com.heima.schedule.service;

import com.heima.model.schedule.dtos.Task;

/**
 * 对外访问接口
 */
public interface TaskService {

    /**
     * 添加任务
     * @param task   任务对象
     * @return       任务id
     */
    public long addTask(Task task) ;

}
实现:
package com.heima.schedule.service.impl;

import com.alibaba.fastjson.JSON;
import com.heima.common.constants.ScheduleConstants;
import com.heima.common.redis.CacheService;
import com.heima.model.schedule.dtos.Task;
import com.heima.model.schedule.pojos.Taskinfo;
import com.heima.model.schedule.pojos.TaskinfoLogs;
import com.heima.schedule.mapper.TaskinfoLogsMapper;
import com.heima.schedule.mapper.TaskinfoMapper;
import com.heima.schedule.service.TaskService;
import lombok.extern.slf4j.Slf4j;
import org.springframework.beans.BeanUtils;
import org.springframework.beans.factory.annotation.Autowired;
import org.springframework.stereotype.Service;
import org.springframework.transaction.annotation.Transactional;

import java.util.Calendar;
import java.util.Date;

@Service
@Transactional
@Slf4j
public class TaskServiceImpl implements TaskService {
    /**
     * 添加延迟任务
     *
     * @param task
     * @return
     */
    @Override
    public long addTask(Task task) {
        //1.添加任务到数据库中

        boolean success = addTaskToDb(task);

        if (success) {
            //2.添加任务到redis
            addTaskToCache(task);
        }


        return task.getTaskId();
    }

    @Autowired
    private CacheService cacheService;

    /**
     * 把任务添加到redis中
     *
     * @param task
     */
    private void addTaskToCache(Task task) {

        String key = task.getTaskType() + "_" + task.getPriority();

        //获取5分钟之后的时间  毫秒值
        Calendar calendar = Calendar.getInstance();
        calendar.add(Calendar.MINUTE, 5);
        long nextScheduleTime = calendar.getTimeInMillis();

        //2.1 如果任务的执行时间小于等于当前时间,存入list
        if (task.getExecuteTime() <= System.currentTimeMillis()) {
            cacheService.lLeftPush(ScheduleConstants.TOPIC + key, JSON.toJSONString(task));
        } else if (task.getExecuteTime() <= nextScheduleTime) {
            //2.2 如果任务的执行时间大于当前时间 && 小于等于预设时间(未来5分钟) 存入zset中
            cacheService.zAdd(ScheduleConstants.FUTURE + key, JSON.toJSONString(task), task.getExecuteTime());
        }


    }

    @Autowired
    private TaskinfoMapper taskinfoMapper;

    @Autowired
    private TaskinfoLogsMapper taskinfoLogsMapper;

    /**
     * 添加任务到数据库中
     *
     * @param task
     * @return
     */
    private boolean addTaskToDb(Task task) {

        boolean flag = false;

        try {
            //保存任务表
            Taskinfo taskinfo = new Taskinfo();
            BeanUtils.copyProperties(task, taskinfo);
            taskinfo.setExecuteTime(new Date(task.getExecuteTime()));
            taskinfoMapper.insert(taskinfo);

            //设置taskID
            task.setTaskId(taskinfo.getTaskId());

            //保存任务日志数据
            TaskinfoLogs taskinfoLogs = new TaskinfoLogs();
            BeanUtils.copyProperties(taskinfo, taskinfoLogs);
            taskinfoLogs.setVersion(1);
            taskinfoLogs.setStatus(ScheduleConstants.SCHEDULED);
            taskinfoLogsMapper.insert(taskinfoLogs);

            flag = true;
        } catch (Exception e) {
            e.printStackTrace();
        }

        return flag;
    }
}
ScheduleConstants常量类
package com.heima.common.constants;

public class ScheduleConstants {

    //task状态
    public static final int SCHEDULED=0;   //初始化状态

    public static final int EXECUTED=1;       //已执行状态

    public static final int CANCELLED=2;   //已取消状态

    public static String FUTURE="future_";   //未来数据key前缀

    public static String TOPIC="topic_";     //当前数据key前缀
}
④:测试
4.6)取消任务
在TaskService中添加方法
/**
     * 取消任务
     * @param taskId        任务id
     * @return              取消结果
     */
public boolean cancelTask(long taskId);
实现
/**
     * 取消任务
     * @param taskId
     * @return
     */
@Override
public boolean cancelTask(long taskId) {

    boolean flag = false;

    //删除任务,更新日志
    Task task = updateDb(taskId,ScheduleConstants.EXECUTED);

    //删除redis的数据
    if(task != null){
        removeTaskFromCache(task);
        flag = true;
    }


    return false;
}

/**
     * 删除redis中的任务数据
     * @param task
     */
private void removeTaskFromCache(Task task) {

    String key = task.getTaskType()+"_"+task.getPriority();

    if(task.getExecuteTime()<=System.currentTimeMillis()){
        cacheService.lRemove(ScheduleConstants.TOPIC+key,0,JSON.toJSONString(task));
    }else {
        cacheService.zRemove(ScheduleConstants.FUTURE+key, JSON.toJSONString(task));
    }
}

/**
     * 删除任务,更新任务日志状态
     * @param taskId
     * @param status
     * @return
     */
private Task updateDb(long taskId, int status) {
    Task task = null;
    try {
        //删除任务
        taskinfoMapper.deleteById(taskId);

        TaskinfoLogs taskinfoLogs = taskinfoLogsMapper.selectById(taskId);
        taskinfoLogs.setStatus(status);
        taskinfoLogsMapper.updateById(taskinfoLogs);

        task = new Task();
        BeanUtils.copyProperties(taskinfoLogs,task);
        task.setExecuteTime(taskinfoLogs.getExecuteTime().getTime());
    }catch (Exception e){
        log.error("task cancel exception taskid={}",taskId);
    }

    return task;

}
测试
4.7)消费任务
在TaskService中添加方法
/**
 * 按照类型和优先级来拉取任务
 * @param type
 * @param priority
 * @return
 */
public Task poll(int type,int priority);
实现
/**
     * 按照类型和优先级拉取任务
     * @return
     */
@Override
public Task poll(int type,int priority) {
    Task task = null;
    try {
        String key = type+"_"+priority;
        String task_json = cacheService.lRightPop(ScheduleConstants.TOPIC + key);
        if(StringUtils.isNotBlank(task_json)){
            task = JSON.parseObject(task_json, Task.class);
            //更新数据库信息
            updateDb(task.getTaskId(),ScheduleConstants.EXECUTED);
        }
    }catch (Exception e){
        e.printStackTrace();
        log.error("poll task exception");
    }

    return task;
}
4.8)未来数据定时刷新
4.8.1)reids key值匹配
方案1:keys 模糊匹配
keys的模糊匹配功能很方便也很强大,但是在生产环境需要慎用!开发中使用keys的模糊匹配却发现redis的CPU使用率极高,所以公司的redis生产环境将keys命令禁用了!redis是单线程,会被堵塞
方案2:scan
SCAN 命令是一个基于游标的迭代器,SCAN命令每次被调用之后, 都会向用户返回一个新的游标, 用户在下次迭代时需要使用这个新游标作为SCAN命令的游标参数, 以此来延续之前的迭代过程。
代码案例:
@Test
public void testKeys(){
    Set<String> keys = cacheService.keys("future_*");
    System.out.println(keys);

    Set<String> scan = cacheService.scan("future_*");
    System.out.println(scan);
}
4.8.2)reids管道
普通redis客户端和服务器交互模式
Pipeline请求模型
官方测试结果数据对比
测试案例对比:
//耗时6151
@Test
public  void testPiple1(){
    long start =System.currentTimeMillis();
    for (int i = 0; i <10000 ; i++) {
        Task task = new Task();
        task.setTaskType(1001);
        task.setPriority(1);
        task.setExecuteTime(new Date().getTime());
        cacheService.lLeftPush("1001_1", JSON.toJSONString(task));
    }
    System.out.println("耗时"+(System.currentTimeMillis()- start));
}


@Test
public void testPiple2(){
    long start  = System.currentTimeMillis();
    //使用管道技术
    List<Object> objectList = cacheService.getstringRedisTemplate().executePipelined(new RedisCallback<Object>() {
        @Nullable
        @Override
        public Object doInRedis(RedisConnection redisConnection) throws DataAccessException {
            for (int i = 0; i <10000 ; i++) {
                Task task = new Task();
                task.setTaskType(1001);
                task.setPriority(1);
                task.setExecuteTime(new Date().getTime());
                redisConnection.lPush("1001_1".getBytes(), JSON.toJSONString(task).getBytes());
            }
            return null;
        }
    });
    System.out.println("使用管道技术执行10000次自增操作共耗时:"+(System.currentTimeMillis()-start)+"毫秒");
}
4.8.3)未来数据定时刷新-功能完成
在TaskService中添加方法
@Scheduled(cron = "0 */1 * * * ?")
public void refresh() {
    System.out.println(System.currentTimeMillis() / 1000 + "执行了定时任务");

    // 获取所有未来数据集合的key值
    Set<String> futureKeys = cacheService.scan(ScheduleConstants.FUTURE + "*");// future_*
    for (String futureKey : futureKeys) { // future_250_250

        String topicKey = ScheduleConstants.TOPIC + futureKey.split(ScheduleConstants.FUTURE)[1];
        //获取该组key下当前需要消费的任务数据
        Set<String> tasks = cacheService.zRangeByScore(futureKey, 0, System.currentTimeMillis());
        if (!tasks.isEmpty()) {
            //将这些任务数据添加到消费者队列中
            cacheService.refreshWithPipeline(futureKey, topicKey, tasks);
            System.out.println("成功的将" + futureKey + "下的当前需要执行的任务数据刷新到" + topicKey + "下");
        }
    }
}
在引导类中添加开启任务调度注解:@EnableScheduling
4.9)分布式锁解决集群下的方法抢占执行
4.9.1)问题描述
启动两台heima-leadnews-schedule服务,每台服务都会去执行refresh定时任务方法
4.9.2)分布式锁
分布式锁:控制分布式系统有序的去对共享资源进行操作,通过互斥来保证数据的一致性。
解决方案:
4.9.3)redis分布式锁
sexnx (SET if Not eXists) 命令在指定的 key 不存在时,为 key 设置指定的值。
这种加锁的思路是,如果 key 不存在则为 key 设置 value,如果 key 已存在则 SETNX 命令不做任何操作
客户端A请求服务器设置key的值,如果设置成功就表示加锁成功
客户端B也去请求服务器设置key的值,如果返回失败,那么就代表加锁失败
客户端A执行代码完成,删除锁
客户端B在等待一段时间后再去请求设置key的值,设置成功
客户端B执行代码完成,删除锁
4.9.4)在工具类CacheService中添加方法
/**
 * 加锁
 *
 * @param name
 * @param expire
 * @return
 */
public String tryLock(String name, long expire) {
    name = name + "_lock";
    String token = UUID.randomUUID().toString();
    RedisConnectionFactory factory = stringRedisTemplate.getConnectionFactory();
    RedisConnection conn = factory.getConnection();
    try {

        //参考redis命令:
        //set key value [EX seconds] [PX milliseconds] [NX|XX]
        Boolean result = conn.set(
                name.getBytes(),
                token.getBytes(),
                Expiration.from(expire, TimeUnit.MILLISECONDS),
                RedisStringCommands.SetOption.SET_IF_ABSENT //NX
        );
        if (result != null && result)
            return token;
    } finally {
        RedisConnectionUtils.releaseConnection(conn, factory,false);
    }
    return null;
}
修改未来数据定时刷新的方法,如下:
/**
 * 未来数据定时刷新
 */
@Scheduled(cron = "0 */1 * * * ?")
public void refresh(){

    String token = cacheService.tryLock("FUTURE_TASK_SYNC", 1000 * 30);
    if(StringUtils.isNotBlank(token)){
        log.info("未来数据定时刷新---定时任务");

        //获取所有未来数据的集合key
        Set<String> futureKeys = cacheService.scan(ScheduleConstants.FUTURE + "*");
        for (String futureKey : futureKeys) {//future_100_50

            //获取当前数据的key  topic
            String topicKey = ScheduleConstants.TOPIC+futureKey.split(ScheduleConstants.FUTURE)[1];

            //按照key和分值查询符合条件的数据
            Set<String> tasks = cacheService.zRangeByScore(futureKey, 0, System.currentTimeMillis());

            //同步数据
            if(!tasks.isEmpty()){
                cacheService.refreshWithPipeline(futureKey,topicKey,tasks);
                log.info("成功的将"+futureKey+"刷新到了"+topicKey);
            }
        }
    }
}
4.10)数据库同步到redis
@Scheduled(cron = "0 */5 * * * ?")
@PostConstruct
public void reloadData() {
    clearCache();
    log.info("数据库数据同步到缓存");
    Calendar calendar = Calendar.getInstance();
    calendar.add(Calendar.MINUTE, 5);

    //查看小于未来5分钟的所有任务
    List<Taskinfo> allTasks = taskinfoMapper.selectList(Wrappers.<Taskinfo>lambdaQuery().lt(Taskinfo::getExecuteTime,calendar.getTime()));
    if(allTasks != null && allTasks.size() > 0){
        for (Taskinfo taskinfo : allTasks) {
            Task task = new Task();
            BeanUtils.copyProperties(taskinfo,task);
            task.setExecuteTime(taskinfo.getExecuteTime().getTime());
            addTaskToCache(task);
        }
    }
}

private void clearCache(){
    // 删除缓存中未来数据集合和当前消费者队列的所有key
    Set<String> futurekeys = cacheService.scan(ScheduleConstants.FUTURE + "*");// future_
    Set<String> topickeys = cacheService.scan(ScheduleConstants.TOPIC + "*");// topic_
    cacheService.delete(futurekeys);
    cacheService.delete(topickeys);
}
5)延迟队列解决精准时间发布文章
5.1)延迟队列服务提供对外接口
提供远程的feign接口,在heima-leadnews-feign-api编写类如下:
package com.heima.apis.schedule;

import com.heima.model.common.dtos.ResponseResult;
import com.heima.model.schedule.dtos.Task;
import org.springframework.cloud.openfeign.FeignClient;
import org.springframework.web.bind.annotation.GetMapping;
import org.springframework.web.bind.annotation.PathVariable;
import org.springframework.web.bind.annotation.PostMapping;
import org.springframework.web.bind.annotation.RequestBody;

@FeignClient("leadnews-schedule")
public interface IScheduleClient {

    /**
     * 添加任务
     * @param task   任务对象
     * @return       任务id
     */
    @PostMapping("/api/v1/task/add")
    public ResponseResult  addTask(@RequestBody Task task);

    /**
     * 取消任务
     * @param taskId        任务id
     * @return              取消结果
     */
    @GetMapping("/api/v1/task/cancel/{taskId}")
    public ResponseResult cancelTask(@PathVariable("taskId") long taskId);

    /**
     * 按照类型和优先级来拉取任务
     * @param type
     * @param priority
     * @return
     */
    @GetMapping("/api/v1/task/poll/{type}/{priority}")
    public ResponseResult poll(@PathVariable("type") int type,@PathVariable("priority")  int priority);
}
在heima-leadnews-schedule微服务下提供对应的实现
package com.heima.schedule.feign;

import com.heima.apis.schedule.IScheduleClient;
import com.heima.model.common.dtos.ResponseResult;
import com.heima.model.schedule.dtos.Task;
import com.heima.schedule.service.TaskService;
import org.springframework.beans.factory.annotation.Autowired;
import org.springframework.web.bind.annotation.*;


@RestController
public class ScheduleClient  implements IScheduleClient {

    @Autowired
    private TaskService taskService;

    /**
     * 添加任务
     * @param task 任务对象
     * @return 任务id
     */
    @PostMapping("/api/v1/task/add")
    @Override
    public ResponseResult addTask(@RequestBody Task task) {
        return ResponseResult.okResult(taskService.addTask(task));
    }

    /**
     * 取消任务
     * @param taskId 任务id
     * @return 取消结果
     */
    @GetMapping("/api/v1/task/cancel/{taskId}")
    @Override
    public ResponseResult cancelTask(@PathVariable("taskId") long taskId) {
        return ResponseResult.okResult(taskService.cancelTask(taskId));
    }

    /**
     * 按照类型和优先级来拉取任务
     * @param type
     * @param priority
     * @return
     */
    @GetMapping("/api/v1/task/poll/{type}/{priority}")
    @Override
    public ResponseResult poll(@PathVariable("type") int type, @PathVariable("priority") int priority) {
        return ResponseResult.okResult(taskService.poll(type,priority));
    }
}
5.2)发布文章集成添加延迟队列接口
在创建WmNewsTaskService
package com.heima.wemedia.service;

import com.heima.model.wemedia.pojos.WmNews;


public interface WmNewsTaskService {

    /**
     * 添加任务到延迟队列中
     * @param id  文章的id
     * @param publishTime  发布的时间  可以做为任务的执行时间
     */
    public void addNewsToTask(Integer id, Date publishTime);


}
实现:
package com.heima.wemedia.service.impl;

import com.heima.apis.schedule.IScheduleClient;
import com.heima.model.common.enums.TaskTypeEnum;
import com.heima.model.schedule.dtos.Task;
import com.heima.model.wemedia.pojos.WmNews;
import com.heima.utils.common.ProtostuffUtil;
import com.heima.wemedia.service.WmNewsTaskService;
import lombok.SneakyThrows;
import lombok.extern.slf4j.Slf4j;
import org.springframework.beans.factory.annotation.Autowired;
import org.springframework.scheduling.annotation.Async;
import org.springframework.stereotype.Service;


@Service
@Slf4j
public class WmNewsTaskServiceImpl  implements WmNewsTaskService {


    @Autowired
    private IScheduleClient scheduleClient;

    /**
     * 添加任务到延迟队列中
     * @param id          文章的id
     * @param publishTime 发布的时间  可以做为任务的执行时间
     */
    @Override
    @Async
    public void addNewsToTask(Integer id, Date publishTime) {

        log.info("添加任务到延迟服务中----begin");

        Task task = new Task();
        task.setExecuteTime(publishTime.getTime());
        task.setTaskType(TaskTypeEnum.NEWS_SCAN_TIME.getTaskType());
        task.setPriority(TaskTypeEnum.NEWS_SCAN_TIME.getPriority());
        WmNews wmNews = new WmNews();
        wmNews.setId(id);
        task.setParameters(ProtostuffUtil.serialize(wmNews));

        scheduleClient.addTask(task);

        log.info("添加任务到延迟服务中----end");

    }

}
枚举类:
package com.heima.model.common.enums;

import lombok.AllArgsConstructor;
import lombok.Getter;

@Getter
@AllArgsConstructor
public enum TaskTypeEnum {

    NEWS_SCAN_TIME(1001, 1,"文章定时审核"),
    REMOTEERROR(1002, 2,"第三方接口调用失败,重试");
    private final int taskType; //对应具体业务
    private final int priority; //业务不同级别
    private final String desc; //描述信息
}
序列化工具对比
JdkSerialize:java内置的序列化能将实现了Serilazable接口的对象进行序列化和反序列化, ObjectOutputStream的writeObject()方法可序列化对象生成字节数组
Protostuff:google开源的protostuff采用更为紧凑的二进制数组,表现更加优异,然后使用protostuff的编译工具生成pojo类
拷贝资料中的两个类到heima-leadnews-utils下
Protostuff需要引导依赖:
<dependency>
    <groupId>io.protostuff</groupId>
    <artifactId>protostuff-core</artifactId>
    <version>1.6.0</version>
</dependency>

<dependency>
    <groupId>io.protostuff</groupId>
    <artifactId>protostuff-runtime</artifactId>
    <version>1.6.0</version>
</dependency>
修改发布文章代码:
把之前的异步调用修改为调用延迟任务
@Autowired
private WmNewsTaskService wmNewsTaskService;

/**
     * 发布修改文章或保存为草稿
     * @param dto
     * @return
     */
@Override
public ResponseResult submitNews(WmNewsDto dto) {

    //0.条件判断
    if(dto == null || dto.getContent() == null){
        return ResponseResult.errorResult(AppHttpCodeEnum.PARAM_INVALID);
    }

    //1.保存或修改文章

    WmNews wmNews = new WmNews();
    //属性拷贝 属性名词和类型相同才能拷贝
    BeanUtils.copyProperties(dto,wmNews);
    //封面图片  list---> string
    if(dto.getImages() != null && dto.getImages().size() > 0){
        //[1dddfsd.jpg,sdlfjldk.jpg]-->   1dddfsd.jpg,sdlfjldk.jpg
        String imageStr = StringUtils.join(dto.getImages(), ",");
        wmNews.setImages(imageStr);
    }
    //如果当前封面类型为自动 -1
    if(dto.getType().equals(WemediaConstants.WM_NEWS_TYPE_AUTO)){
        wmNews.setType(null);
    }

    saveOrUpdateWmNews(wmNews);

    //2.判断是否为草稿  如果为草稿结束当前方法
    if(dto.getStatus().equals(WmNews.Status.NORMAL.getCode())){
        return ResponseResult.okResult(AppHttpCodeEnum.SUCCESS);
    }

    //3.不是草稿,保存文章内容图片与素材的关系
    //获取到文章内容中的图片信息
    List<String> materials =  ectractUrlInfo(dto.getContent());
    saveRelativeInfoForContent(materials,wmNews.getId());

    //4.不是草稿,保存文章封面图片与素材的关系,如果当前布局是自动,需要匹配封面图片
    saveRelativeInfoForCover(dto,wmNews,materials);

    //审核文章
    //        wmNewsAutoScanService.autoScanWmNews(wmNews.getId());
    wmNewsTaskService.addNewsToTask(wmNews.getId(),wmNews.getPublishTime());

    return ResponseResult.okResult(AppHttpCodeEnum.SUCCESS);

}
5.3)消费任务进行审核文章
WmNewsTaskService中添加方法
/**
 * 消费延迟队列数据
 */
public void scanNewsByTask();
实现
@Autowired
private WmNewsAutoScanServiceImpl wmNewsAutoScanService;

/**
     * 消费延迟队列数据
     */
@Scheduled(fixedRate = 1000)
@Override
@SneakyThrows
public void scanNewsByTask() {

    log.info("文章审核---消费任务执行---begin---");

    ResponseResult responseResult = scheduleClient.poll(TaskTypeEnum.NEWS_SCAN_TIME.getTaskType(), TaskTypeEnum.NEWS_SCAN_TIME.getPriority());
    if(responseResult.getCode().equals(200) && responseResult.getData() != null){
        String json_str = JSON.toJSONString(responseResult.getData());
        Task task = JSON.parseObject(json_str, Task.class);
        byte[] parameters = task.getParameters();
        WmNews wmNews = ProtostuffUtil.deserialize(parameters, WmNews.class);
        System.out.println(wmNews.getId()+"-----------");
        wmNewsAutoScanService.autoScanWmNews(wmNews.getId());
    }
    log.info("文章审核---消费任务执行---end---");
}
在WemediaApplication自媒体的引导类中添加开启任务调度注解@EnableScheduling





![【重拾计划】[NOIP1998 提高组] 车站](https://img-blog.csdnimg.cn/abe8f79633d64acfa6419ba33676cb56.jpeg#pic_center)
