🚀作者:CAccept
🎂专栏:Qt Quick
文章目录
- 前言
- 代码示例
- 源码
- 关键知识点
- 总结
前言
在Qt Quick的Model-View中内置视图有很多,有Repeater、ListView、GridView…,而他们也有着自己的信号,比如Repeater有:itemAdded(int index, Item item)、itemRemoved(int index, Item item),ListView有:add()、pooled()、remove()以及reused(),GridView有:add()、remove()
以下分别是ListView和GridView在帮助文档中对Signal的列举👇


可以看到add()和remove()信号在各个视图中都很重要,add()信号是在model新添加一个元素时,他所绑定的View就会触发该信号,相反删除一个元素时就会触发remove()信号,接下来我们对这两个信号进行一些举例和说明吧~~
代码示例
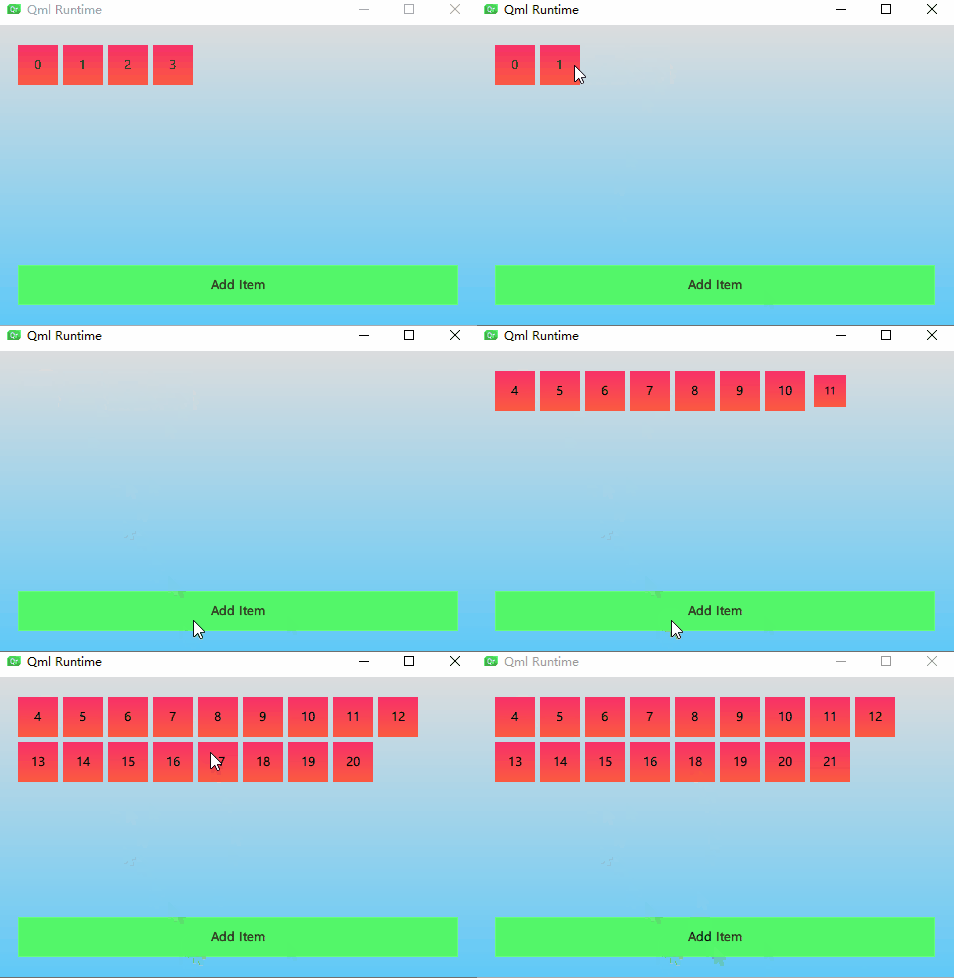
需要实现的代码效果:
1、使用矩形框将model中的元素表示出来
2、当点击add按钮时,实现model元素的添加
3、当点击元素矩形框时,对该元素进行删除
4、在添加和删除过程中要有渐变效果
源码
请先看代码,代码中也有很多注释,代码也不复杂相信认真看的话都能够看得懂,后续还有对关键知识点的讲解
main.qml
import QtQuick

Rectangle {
    width: 480
    height: 300
    //背景
    gradient: Gradient {
        GradientStop { position: 0.0; color: "#dbddde" }
        GradientStop { position: 1.0; color: "#5fc9f8" }
    }

    //add添加按钮
    Rectangle{
        property int count:count=theModel.count-1
        //确定位置
        anchors.bottom: parent.bottom
        anchors.left: parent.left
        anchors.right: parent.right
        anchors.margins: 20

        height: 40
        color:'#53f769'
        border.color: Qt.lighter(color,1.1)

        Text{
            anchors.centerIn: parent
            text:"Add Item"
        }
        MouseArea{
            anchors.fill: parent
            //点击添加按钮时,model就会添加元素
            onClicked: {
                theModel.append({num:++parent.count})
            }
        }
    }

    //View
    GridView{
        anchors.fill: parent
        anchors.margins: 20
        anchors.bottomMargin: 80

        clip: true
        cellHeight: 45;cellWidth: 45
        //指定model以及delegate
        model:theModel
        delegate: numberDelegate
    }

    //Model
    ListModel{
        id:theModel
        ListElement{num:0}
        ListElement{num:1}
        ListElement{num:2}
        ListElement{num:3}
    }

    //Delegate
    Component{
        id:numberDelegate

        Rectangle{
            id:wrapper

            gradient: Gradient {
                GradientStop { position: 0.0; color: "#f8306a" }
                GradientStop { position: 1.0; color: "#fb5b40" }
            }

            required property int index
            required property int num
            width: 40;height: 40

            Text{
                anchors.centerIn: parent
                font.pixelSize: 12
                text:wrapper.num
            }

            GridView.onAdd:addAnimation.start()
            GridView.onRemove:removeAnimation.start()

            //让框框慢慢变出来从0-》1
            NumberAnimation{
                id:addAnimation
                //目标就是代表当前元素的delegate
                target: wrapper
                property: "scale"
                from:0;to:1
                //耗时
                duration:250
                easing.type: Easing.InOutQuad
            }

            //顺序执行
            SequentialAnimation{
                id:removeAnimation
                //要使用延时删除,否则后面的效果其实都不会有效果
                PropertyAction {
                    target: wrapper; property: "GridView.delayRemove" ;value:true
                }
                NumberAnimation{
                    target: wrapper
                    property: "scale"
                    to:0
                    duration:250
                    easing.type: Easing.InOutQuad
                }
                //将延时删除的效果取消
                PropertyAction {
                    target: wrapper; property: "GridView.delayRemove" ;value:false
                }
            }

            MouseArea{
                anchors.fill: parent
                onClicked: {
                    //当点击元素的框框时触发remove信号,删除元素
                    theModel.remove(index)
                }
            }
        }
    }
}
运行效果:
关键知识点
1、在进行删除效果的设置时,一定先要将元素的删除进行delay延时,否则在实现效果前,元素已经被删除了,做任何的效果都会是无效的,在做完效果以后要将延时删除给解除
//要使用延时删除,否则后面的效果其实都不会有效果
PropertyAction {
	//wrapper为当前元素的delegate
    target: wrapper; property: "GridView.delayRemove" ;value:true
}
......................
......删除效果设置.....
......................
//将延时删除的效果取消
PropertyAction {
	//wrapper为当前元素的delegate
    target: wrapper; property: "GridView.delayRemove" ;value:false
}
2、ListModel的添加删除元素操作分别是:
- ListModel.append({num:++parent.count})//{}中的结构就是ListModel的数据元素结构
- ListModel.remove(index)//index为要删除元素的index
3、对于视图信号的处理一般是放在delegate中实现,因为这样很好的获得元素的index以及各种信息。
总结
本篇文章到此结束,很感谢您能够看到这里,希望本篇文章能够对您有所帮助,如果对本篇文章有任何疑问或者是发现问题,也请在评论区中提出来,谢谢啦!


