邮件验证是现代互联网服务中常用的安全功能,本文介绍如何利用Spring Boot框架快速搭建一个高效易用的邮箱验证码功能。从配置邮箱>发送服务,到编写验证逻辑,无痛实现邮箱验证码功能轻而易举。快来掌握这个技能,加强您的应用安全性吧!
Spring Boot是一个用于构建Java应用程序的开源框架,它简化了Java开发流程并提供了各种功能,使开发人员能够更快地构建高效的应>用。在本文中,我们将讨论如何使用Spring Boot实现邮箱验证码功能。
邮件验证码是一种常见的身份验证方法,它通过向用户发送包含验证码的电子邮件来验证其身份。在实现这个功能之前,我们需要一些先决条件:
- 一个可用的SMTP服务器:我们将使用一个SMTP服务器来发送电子邮件。您可以选择自己的SMTP服务器或使用一个免费的SMTP服务器,如Gmail、网易邮箱、QQ邮箱、新浪邮箱等。
- Spring Boot项目:我们将使用Spring Boot来构建我们的应用程序。您可以使用Spring Initializr生成一个新的Spring Boot项目。
这里测试了国内三家邮箱,网易邮箱、QQ邮箱、新浪邮箱的发送邮件的速度,博主所在的地区时河南洛阳,使用的网路是联通宽带,经过测试,发现网易邮箱响应最快!现在让我们开始实现邮箱验证码功能。
技术实现
Spring Boot 发送邮件验证码的功能,主要用到了spring-boot-starter-mail工具包实现邮件的发送功能,利用junit-vintage-engine工具包实现了html邮件模板功能,利用easy-captcha工具包生成随机验证码 的功能!
引入依赖
首先在springboot项目中引入邮箱依赖
maven方式:
     <!--引入mail依赖-->
        <dependency>
            <groupId>org.springframework.boot</groupId>
            <artifactId>spring-boot-starter-mail</artifactId>
        </dependency>
         <!--mail模板-->
         <dependency>
            <groupId>org.junit.vintage</groupId>
            <artifactId>junit-vintage-engine</artifactId>
            <scope>test</scope>
            <exclusions>
                <exclusion>
                    <groupId>org.hamcrest</groupId>
                    <artifactId>hamcrest-core</artifactId>
                </exclusion>
            </exclusions>
        </dependency>
          <!--验证码-->
        <dependency>
            <groupId>com.github.whvcse</groupId>
            <artifactId>easy-captcha</artifactId>
            <version>1.6.2</version>
        </dependency>
相关配置
然后再spring的配置文件中,设置mail相关配置:
spring:
  mail:
    host: smtp.163.com
    username: 你的邮箱
    password: 邮箱授权码
    default-encoding: UTF-8
    protocol: smtp
    properties:
      mail:
        smtp:
           auth: true # 启用SMTP认证
           starttls:
              enabled: true # 启用SMTP认证
              required: true # 必须采用加密链接
开启SMTP服务
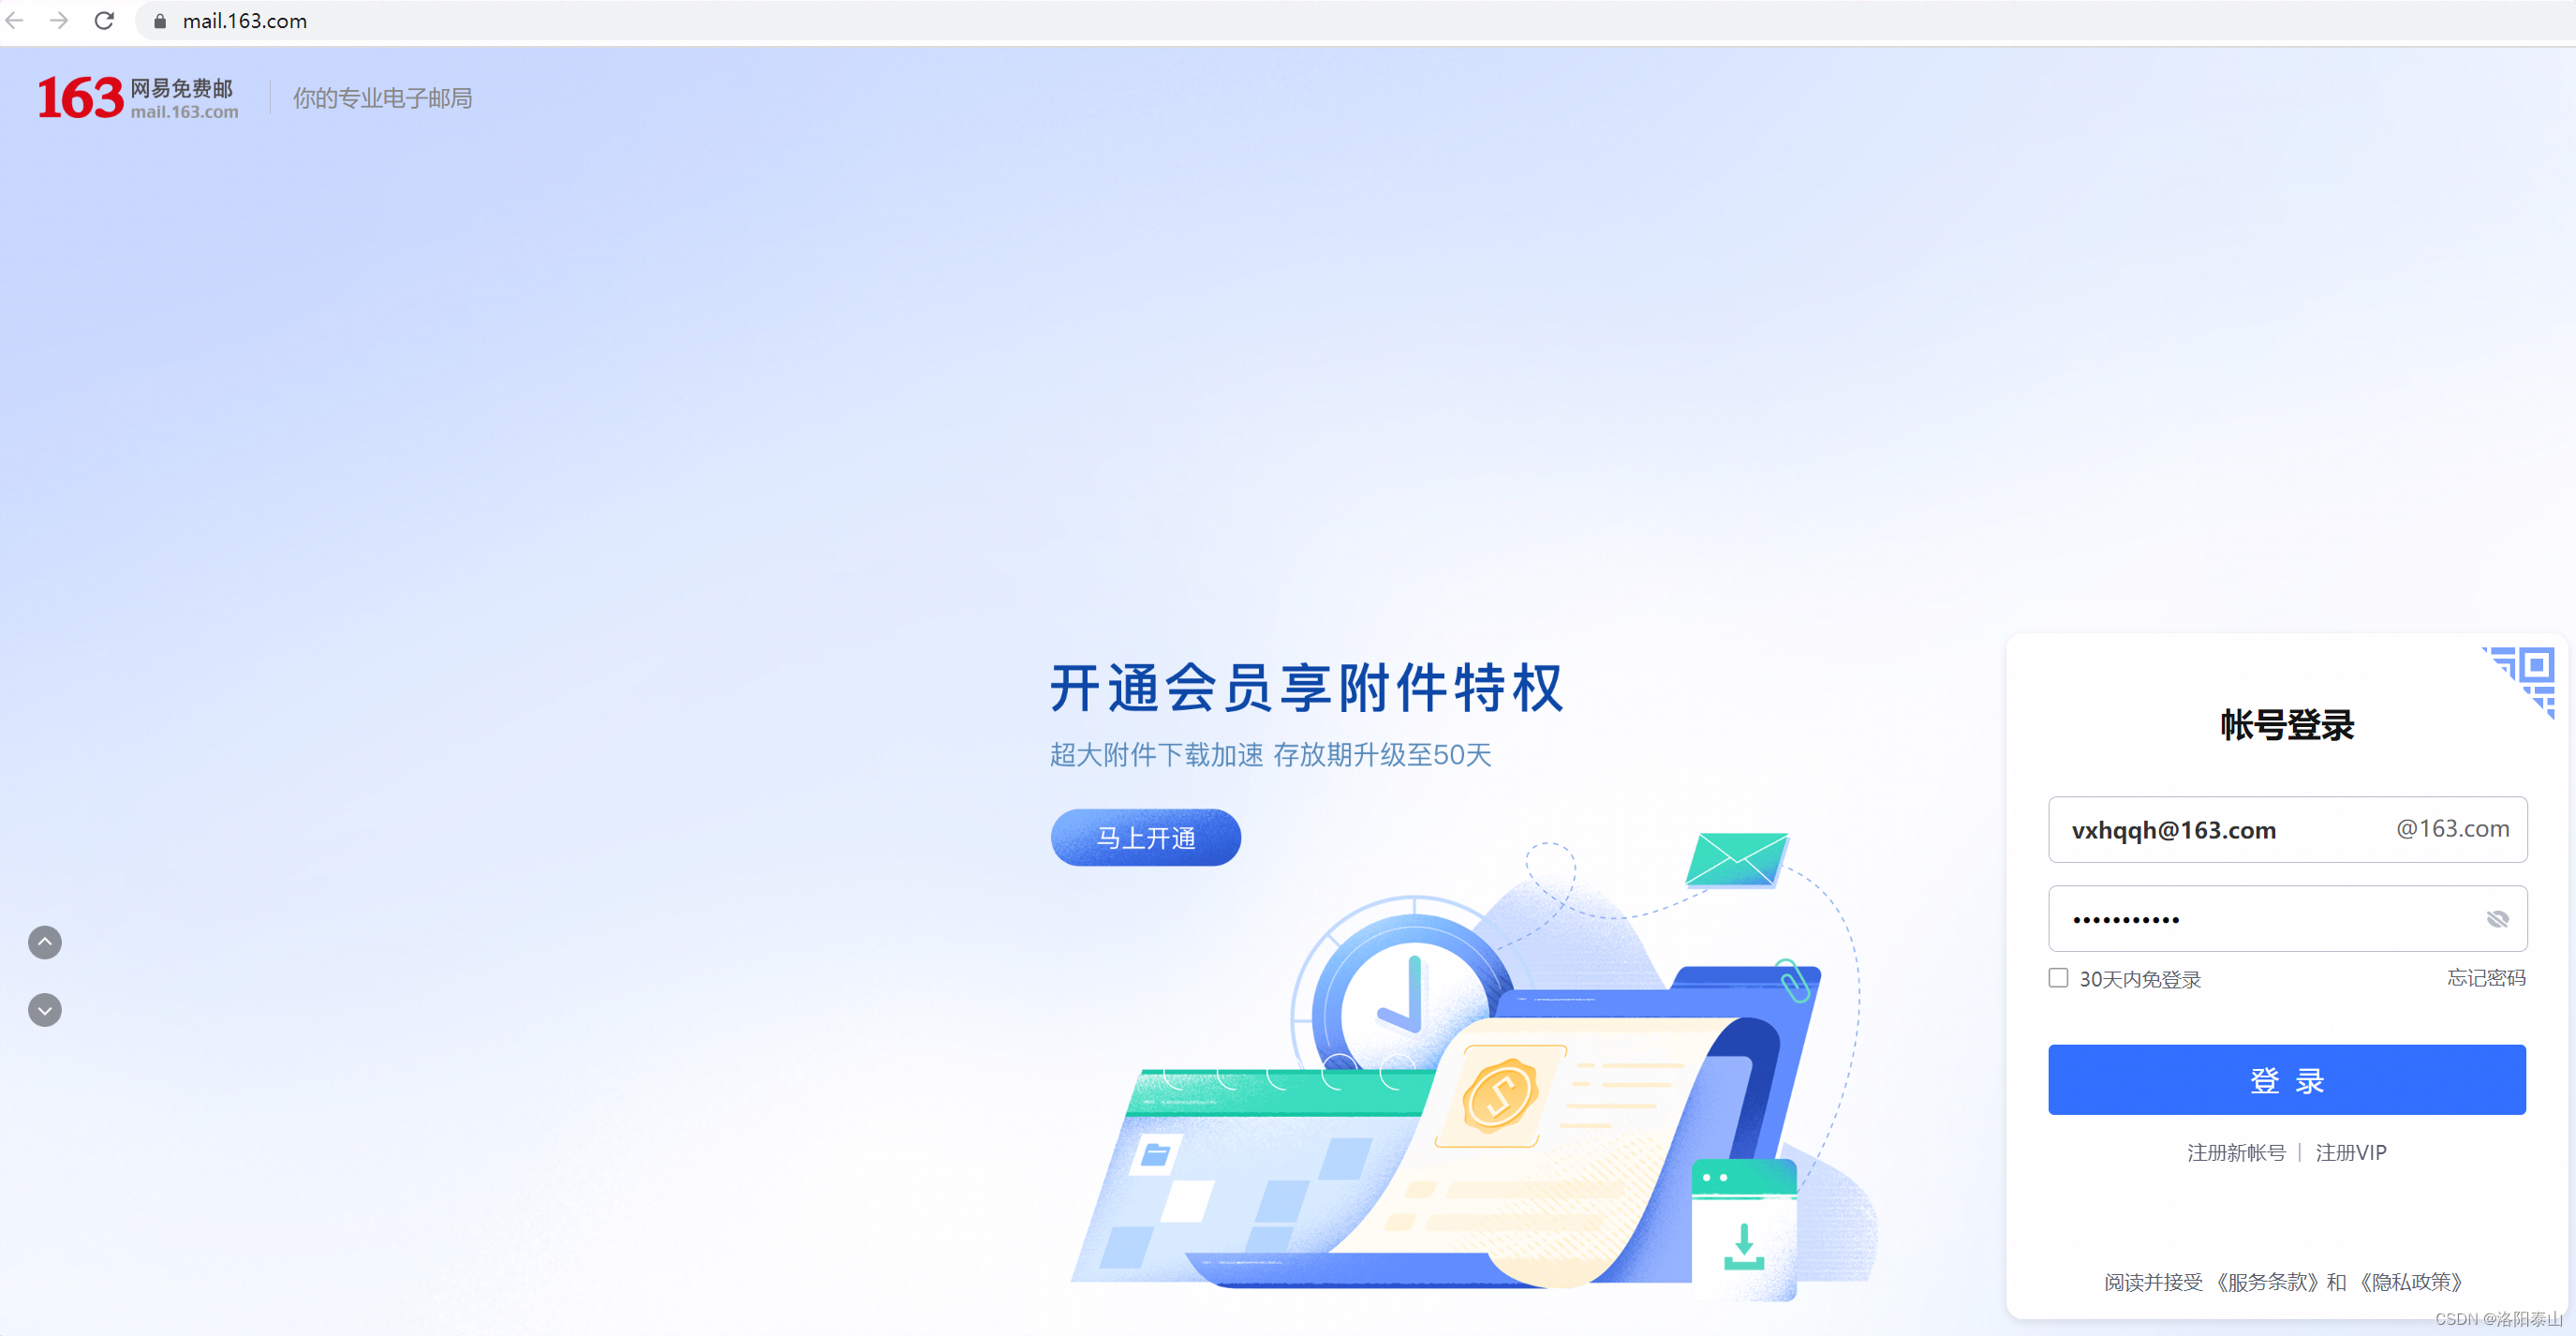
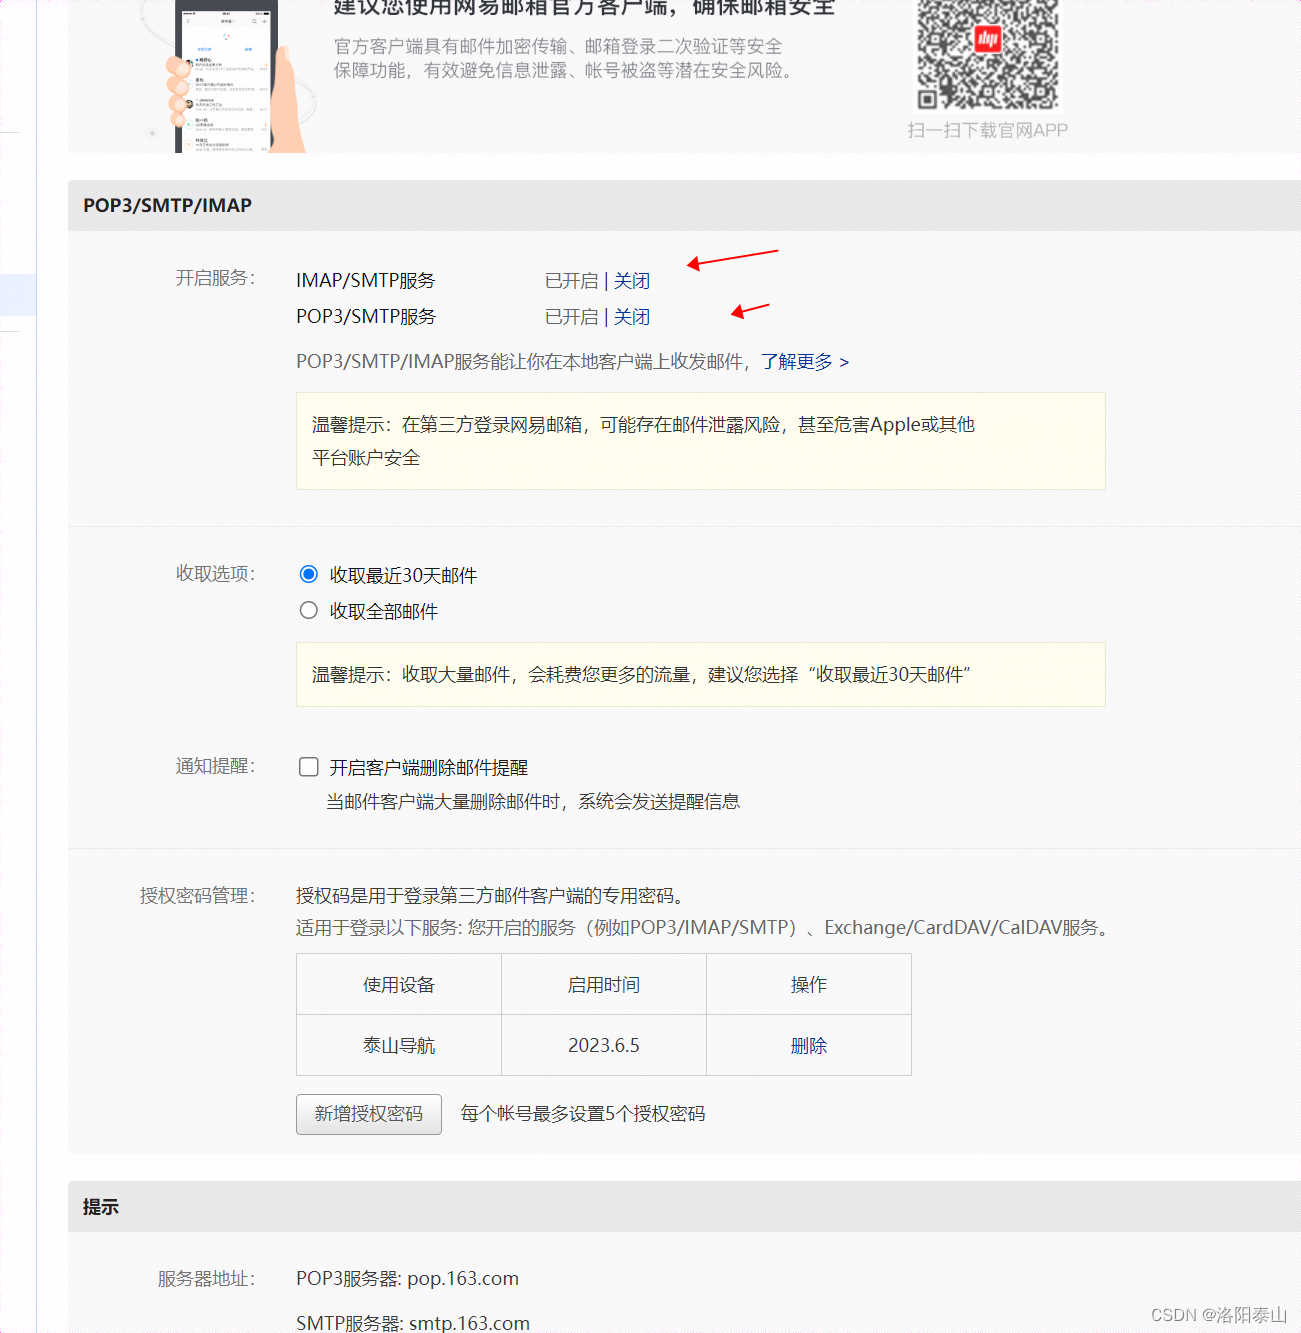
前往你的邮箱网站,以网易邮箱为例,打开网易邮箱地址,登录你的邮箱,进入邮箱管理后台界面。
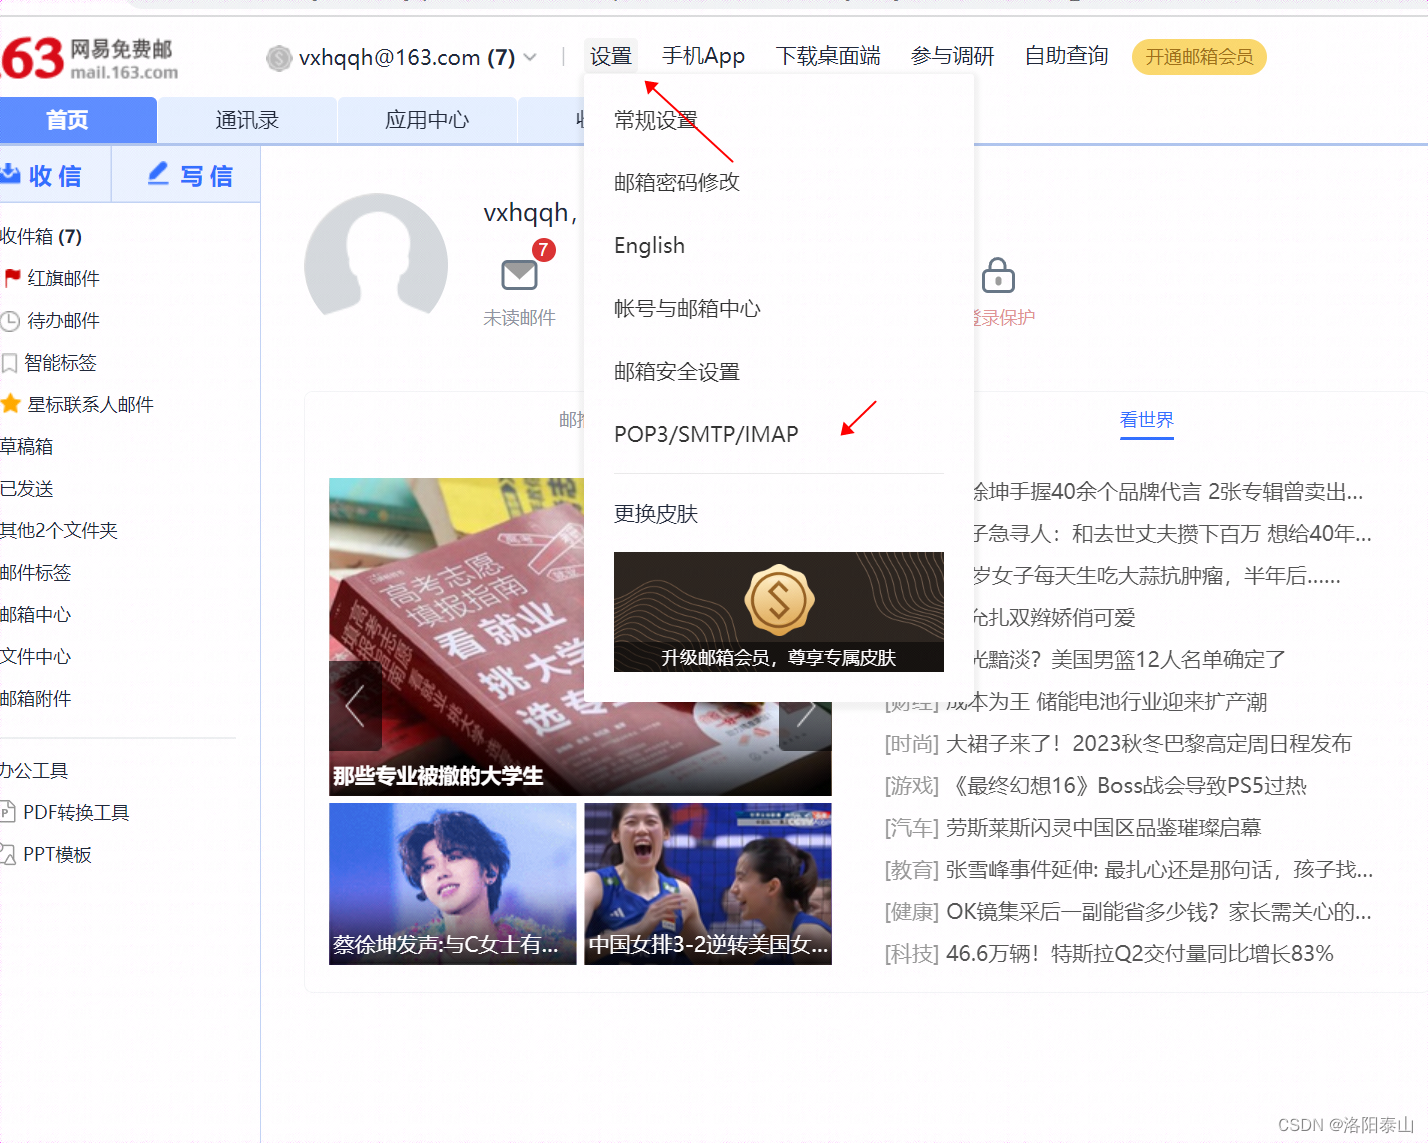
点击“设置”》》“POP3/SMTP/IMAP”后,点击开启SMTP服务即可。
开启时一般需要手机扫码,或者发送短信进行验证。开启后,会生成一个授权码,复制好粘贴到上面spring application.yml 文件相关的配置中。
代码实现
创建一个MailService类,实现邮件发送的功能,代码如下:
import com.tarzan.nav.modules.admin.service.sys.SysConfigService;
import com.tarzan.nav.utils.DateUtil;
import lombok.extern.slf4j.Slf4j;
import org.antlr.stringtemplate.StringTemplate;
import org.antlr.stringtemplate.StringTemplateGroup;
import org.springframework.beans.factory.annotation.Value;
import org.springframework.mail.javamail.JavaMailSender;
import org.springframework.mail.javamail.MimeMessageHelper;
import org.springframework.scheduling.annotation.Async;
import org.springframework.stereotype.Component;

import javax.annotation.Resource;
import javax.mail.MessagingException;
import javax.mail.internet.MimeMessage;
import java.util.Objects;


/**
 * @author tarzan
 */
@Component("mailService")
@Slf4j
public class MailService {

	private static final StringTemplateGroup templateGroup;
	@Resource
	private  SysConfigService sysConfigService;

	static{
		String classpath = Objects.requireNonNull(MailService.class.getClassLoader().getResource("")).getPath();
		templateGroup = new StringTemplateGroup("mailTemplates", classpath + "/mailTemplates");
	}

	public static String IMG_BASE_URL;
	public static String ACTIVATE_CONTEXT="http:";
	public static String RESET_PWD_CONTEXT;

	@Value("${spring.mail.username}")
	private String username;
    @Resource
    private JavaMailSender mailSender;


    private void sendMail(String to, String subject, String body) {
    	MimeMessage mail = mailSender.createMimeMessage();
    	try {
    		MimeMessageHelper helper = new MimeMessageHelper(mail, true, "utf-8");
			helper.setFrom(username);
			helper.setTo(to);
			helper.setSubject(subject);
			helper.setText(body, true);
			helper.setSentDate(DateUtil.now());
			mailSender.send(mail);
		} catch (MessagingException e) {
			log.error(e.getMessage());
		}
    }

    /**
     * send activation mail to
     * @param to,key
     */
    public void sendAccountActivationEmail(String to, String key){
    	StringTemplate activation_temp = templateGroup.getInstanceOf("activation");
    	activation_temp.setAttribute("img_base_url", IMG_BASE_URL);
    	activation_temp.setAttribute("email", to);
    	activation_temp.setAttribute("href", ACTIVATE_CONTEXT+key+"?email="+to);
    	activation_temp.setAttribute("link", ACTIVATE_CONTEXT+key+"?email="+to);
    	sendMail(to, sysConfigService.getSiteName()+"账户激活", activation_temp.toString());
    }

	@Async
	public void sendEmailCode(String to, String code){
		StringTemplate activation_temp = templateGroup.getInstanceOf("verificationCode");
		activation_temp.setAttribute("img_base_url", IMG_BASE_URL);
		activation_temp.setAttribute("email", to);
		activation_temp.setAttribute("code", code);
		sendMail(to, sysConfigService.getSiteName()+"邮箱验证码", activation_temp.toString());
	}

    /**
     * send change password link to
     * @param to,key
     */
    public void sendResetPwdEmail(String to, String key){
    	StringTemplate activation_temp = templateGroup.getInstanceOf("resetpwd");
    	activation_temp.setAttribute("img_base_url", IMG_BASE_URL);
    	activation_temp.setAttribute("href", RESET_PWD_CONTEXT+"?key="+key+"&email="+to);
    	activation_temp.setAttribute("link", RESET_PWD_CONTEXT+"?key="+key+"&email="+to);
    	sendMail(to, sysConfigService.getSiteName()+"账户密码重置", activation_temp.toString());
    }
}
代码中的SysConfigService主要是从数据库中,获取网站的名称的,这里不做展示,自行修改。
网站发送验证码,StringTemplateGroup模板文件verificationCode.st如下:
<!DOCTYPE html>
<html lang="en">
<head>
	<meta charset="UTF-8">
	<title>泰山导航网站邮箱验证码</title>
	<style type="text/css">
	body{
		font-family: '微软雅黑','Helvetica Neue',sans-serif;
	}
	.container{
		max-width: 600px;
		margin: 0 auto;
	}
	.segment{
		background: #fff;
    	border: 1px solid #e9e9e9;
    	border-radius: 3px;
    	padding: 20px;
	}
	.header{
		margin: 10px 0 30px 0;
		font-weight: 400;
    	font-size: 20px;
	}
	.logo{
	    margin: 0 auto;
	    text-align: center;
	    margin-bottom: 28px;
	}
	.logo img{
		width: 28px;
		height: auto;
	}
	</style>
</head>
<body>
	<div class="container">
		<div class="segment">
			<div class="logo">
				<img src="$img_base_url$logo_for_mail.png">
			</div>
			<div class="content">
				<div class="header">
					$email$
				</div>
				<p>欢迎加入泰山导航网站</p>
				<div>
					<p>您的验证码是:</p>
					<b>$code$</b>
				</div>
				<p>
					如果验证码失效,请重新点击发送验证码
				</p>
			</div>
		</div>
	</div>
</body>
</html>
接口实现
spring boot Controller层,发送邮箱验证码的接口,代码如下:
    @PostMapping("/send/code")
    @ResponseBody
    public ResponseVo authCode(HttpServletRequest request,RegisterDTO dto) {
            SpecCaptcha captcha = new SpecCaptcha(10, 10, 4);
            captcha.setCharType(Captcha.TYPE_ONLY_NUMBER);
            request.getSession().setAttribute("captcha", captcha.text().toLowerCase());
            Matcher matcher = EMAIL_PATTERN.matcher(dto.getEmail_phone());
            if(matcher.matches()){
                mailService.sendEmailCode(dto.getEmail_phone(),captcha.text());
                return ResultUtil.status(1,"邮件已经发送");
            }else{
                return ResultUtil.status(4,"邮箱格式错误");
            }
    }
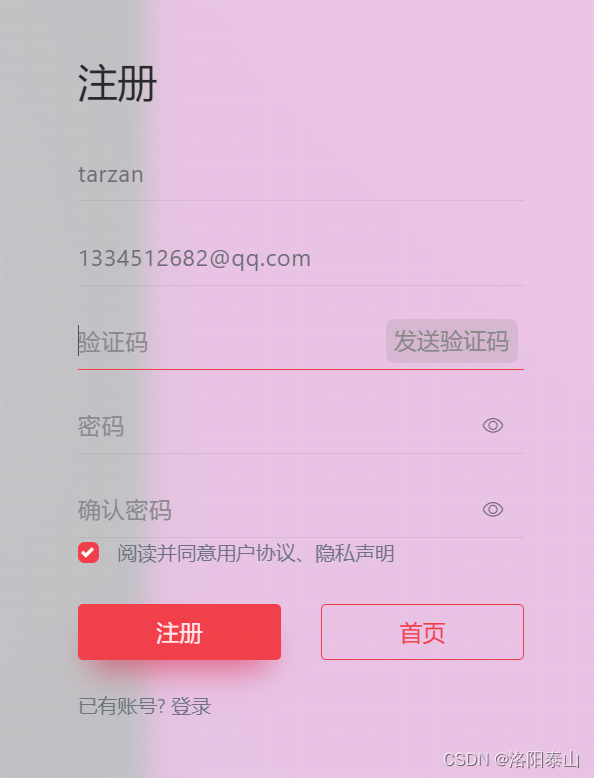
前端界面

结语
在本文中,我们讨论了如何使用Spring Boot实现邮箱验证码功能。我们首先添加了必要的依赖项,然后配置了SMTP服务器的详细信息。接下来,我们创建了一个验证码服务,该服务生成和发送包含验证码的电子邮件。最后,我们创建了一个REST控制器来演示验证码功能。
使用Spring Boot可以使开发人员更快地构建功能强大的应用程序,并且可以通过使用Spring的各种功能和库来简化开发过程。希望本文对您理解如何使用Spring Boot实现邮箱验证码功能有所帮助。
以上就是 springboot 实现邮箱发送验证码的全部教程,如果文章中,有错误或者有疑问的地方,请在评论区留言。创作不易,您的点赞和关注,是对我的持续创作的鼓舞!!!


