从 Qt 4.7 开始,Qt 引入了一种声明式脚本语言,称为 QML(Qt Meta Language 或者 Qt Modeling Language),作为 C++ 语言的一种替代。而 Qt Quick 就是使用 QML 构建的一套类库。 QML 是一种基于 JavaScript 的声明式语言。
每一个 QML 有且只有一个根元素,
一个 QML 文档分为 import 和 declaration 两部分。
qml的打印
使用:console.log(打印的字符串,打印的参数)

元素
基础元素
根元素
每一个QML文件都需要一个根元素,并且只能有一个根元素。
window
Opacity---透明度
值在0~1之间
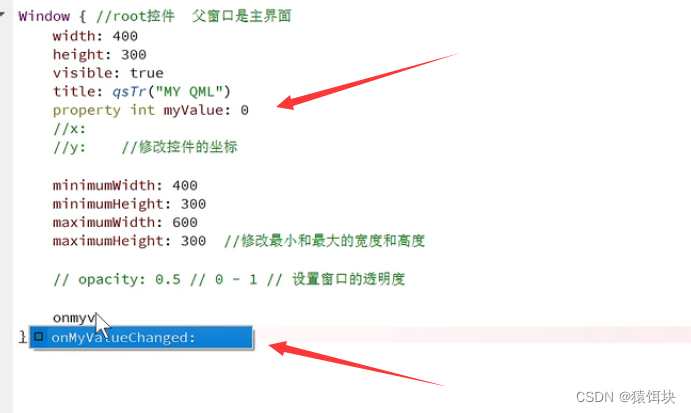
属性改变时会触发对于的属性改变槽函数

组件中的任何属性(包括自定义属性),都有改变时触发的槽函数
Item
属性和值
对于元素具有哪些属性可以直接查看QT帮助文档,让后进行设置就可以。
属性和属性可以设置的值都是已经定义好的,我们要做的就是知道属性和属性值的设置。
id
可以通过组件的id访问组件
x和y,z
相对于屏幕左上角
z为正数就靠平面前面
width和heigth
有这两个属性的组件,如果不设置这两属性,组件不显示。
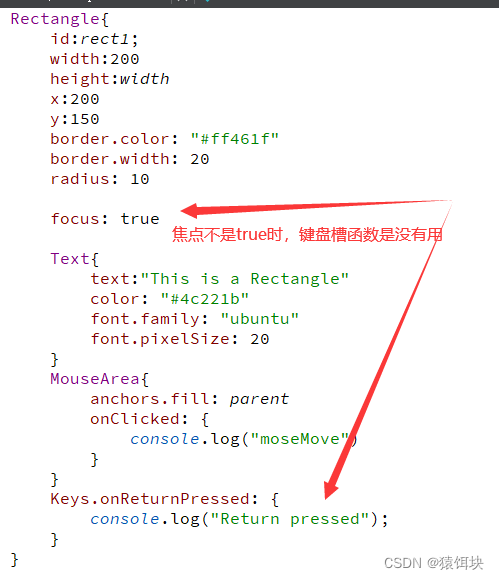
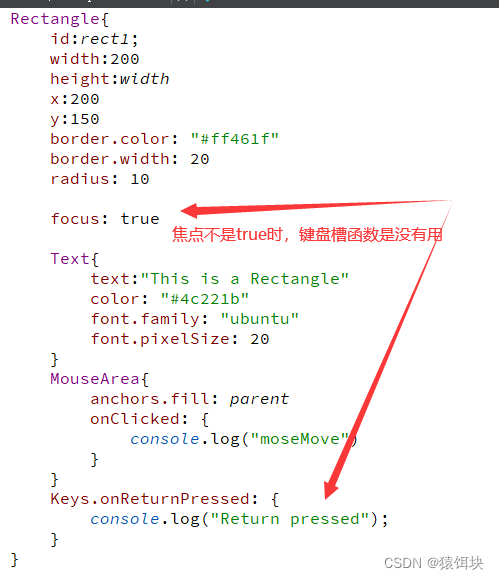
focus
焦点
焦点所在对象就是要控制的对象;
如果对象没有获取焦点,是不能(键盘或者鼠标)被控制的。
锚点(anchor)
设置一个元素或者组件的位置可以设置x,y,z,也可以通过锚点设置。
位置指定
Text {
text: qsTr("Hello World")
anchors.centerIn: parent
}
设置元素位置方式
1,x,y,z
2,anchors
rotation--旋转
顺时针旋转
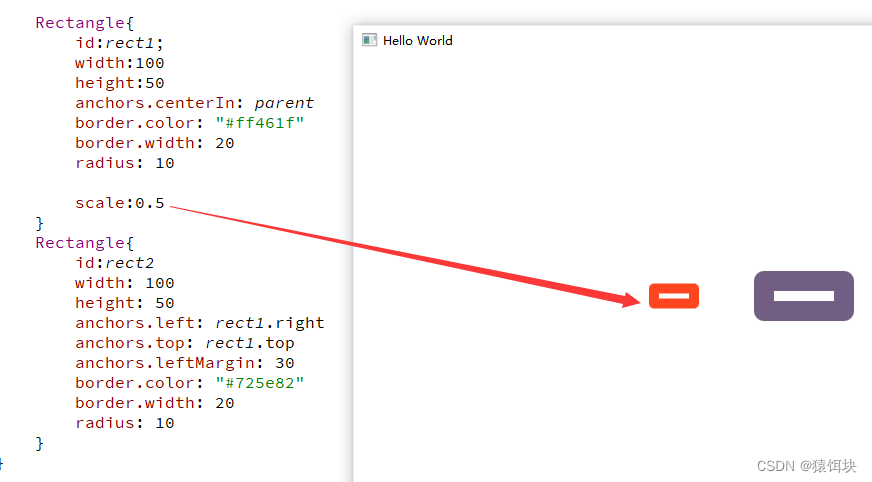
scale---改变大小
width和heigth乘以指定的倍数
rectangle的gredient
设置颜色渐变
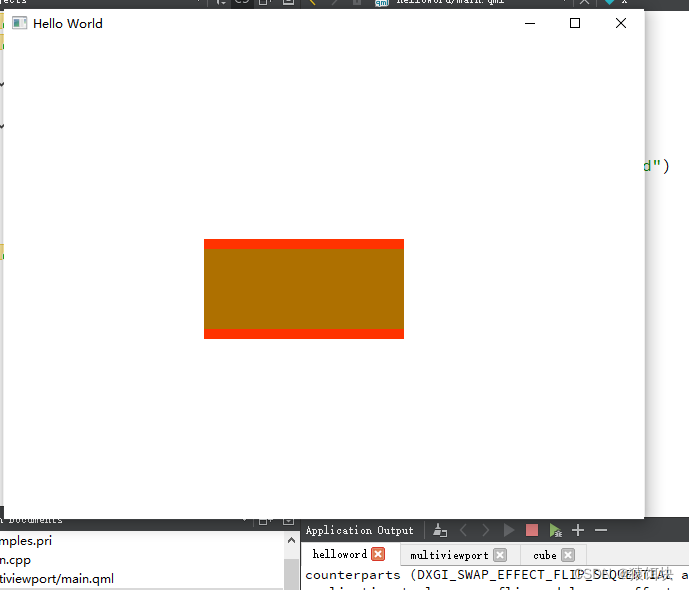
rectangle单边框设置
需要设置内外两个rectangle,通过设置margin(边缘)来设置两个rectangle的边缘宽度。
自定义组件:
import QtQuick 2.0

Rectangle{
    id:root
    width: 200
    height: 100

    color: "#ff3300"
    //border.color: "#4c8dae"

    property int m_topMargin: 0
    property int m_bottomMargin: 0
    property int m_leftMargin: 0
    property int m_rightMargin: 0

    Rectangle{
        id: innerRect
        anchors.fill: parent
        color: "#ae7000"

        anchors.topMargin: m_topMargin
        anchors.bottomMargin: m_bottomMargin
        anchors.leftMargin: m_leftMargin
        anchors.rightMargin: m_rightMargin
    }
}
main.qml调用
import QtQuick 2.6
import QtQuick.Window 2.2

Window {
    visible: true
    width: 640
    height: 480
    title: qsTr("Hello World")
    x:100
    y:100

    MyRectangle{
        //id:myRect
        x:200
        y:200
//        width: 200
//        height: 100

        m_topMargin: 10
        m_bottomMargin: 10
    }
}
state---states:[ ]
state
属性指定组件当前是使用哪个状态的属性。
states:[ ]
中指定这个组件的多种state(状态);
我们可以在states中设置组件的多种状态,在需要的不同时刻设置组件的state属性为states中的对应状态。
name是状态的名字;
PropertyChanges中可以设置这个状态的属性;
自定义文件中设置属性:
import QtQuick 2.0

Rectangle{
    id:root
    width: 200
    height: 100

    color: "#ff3300"
    //border.color: "#4c8dae"

    property int m_topMargin: 0
    property int m_bottomMargin: 0
    property int m_leftMargin: 0
    property int m_rightMargin: 0

    Rectangle{
        id: innerRect
        anchors.fill: parent
        color: "#ae7000"
        state: "normal"

        anchors.topMargin: m_topMargin
        anchors.bottomMargin: m_bottomMargin
        anchors.leftMargin: m_leftMargin
        anchors.rightMargin: m_rightMargin

        states: [
            State {
                  name: "normal"
                  PropertyChanges {target: innerRect; color:"#ae7000"}
            },
            State {
                  name: "red_color"
                  PropertyChanges { target: innerRect; color: "red" }
            },
            State {
                  name: "blue_color"
                  PropertyChanges { target: innerRect; color: "blue" }
            }
        ]
        MouseArea{
            anchors.fill: parent

            onPressed: {
                innerRect.state="red_color"
            }
            onReleased: {
                innerRect.state="blue_color"
            }
        }
    }

}
动画效果属性
动画有8种类型

propertyAnimation
PropertyAnimation支持所有属性
sequentialAnimation
可持续多个动画效果

动画效果的两种实现方法
1,将动画效果设置为组件的属性
需要执行动画的时候,动画名.start()就开启属性。
Rectangle {
      id: flashingblob
      width: 75; height: 75
      color: "blue"
      opacity: 1.0

      MouseArea {
          anchors.fill: parent
          onClicked: {
              animateColor.start()
              animateOpacity.start()
          }
      }

      PropertyAnimation {id: animateColor; target: flashingblob; properties: "color"; to: "green"; duration: 100}

      NumberAnimation {
          id: animateOpacity
          target: flashingblob
          properties: "opacity"
          from: 0.99
          to: 1.0
          loops: Animation.Infinite
          easing {type: Easing.OutBack; overshoot: 500}
     }
  }
弊端:
即使是同类型的动画效果也要设置在各自的动画属性中:

2,on某个属性
在需要产生动画的位置直接开启动画
    Rectangle {
          id: rect
          width: 100; height: 100
          color: "red"

          PropertyAnimation on x {
              to: 200;
              duration: 1500
          }
          PropertyAnimation on y {
              to: 100
              duration: 1500
          }
          NumberAnimation on width{
              to:300
              duration: 1500
          }
    }
transitions---states
transitions中指定states中状态变换,并且实现动画效果。
不需要开启transitions中的转变,只要指定的状态发送改变transitions就会自动执行。
Rectangle {
          width: 75; height: 75
          id: button
          state: "RELEASED"

          MouseArea {
              anchors.fill: parent
              onPressed: button.state = "PRESSED"
              onReleased: button.state = "RELEASED"
          }

          states: [
              State {
                  name: "PRESSED"
                  PropertyChanges { target: button; color: "#801dae"}
              },
              State {
                  name: "RELEASED"
                  PropertyChanges { target: button; color: "#dc3023"}
              }
          ]

          transitions: [
              Transition {
                  from: "PRESSED"
                  to: "RELEASED"
                  ColorAnimation { target: button; duration: 1500}
              },
              Transition {
                  from: "RELEASED"
                  to: "PRESSED"
                  ColorAnimation { target: button; duration: 1500}
              }
          ]
      }
自定义属性
添加自己定义的属性需要使用property修饰符,然后跟上类型,名字和可选择的初始化值(property : )。如果没有初始值将会给定一个系统初始值作为初始值。注意如果属性名与已定义的默认属性名不重复,使用default关键字你可以将一个属性定义为默认属性。这在你添加子元素时用得着,如果他们是可视化的元素,子元素会自动的添加默认属性的子类型链表(children property list)。
组件---component
为什么需要组件
组件的常用槽函数
onCompleted()
窗口创建的时候触发
onDestruction()
窗口销毁时触发

component中创建组件是不会被自动创建的
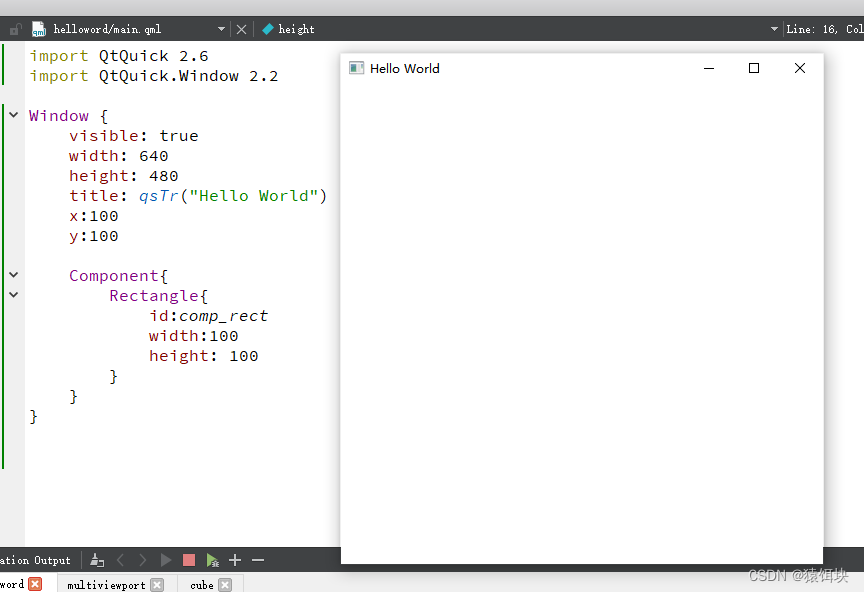
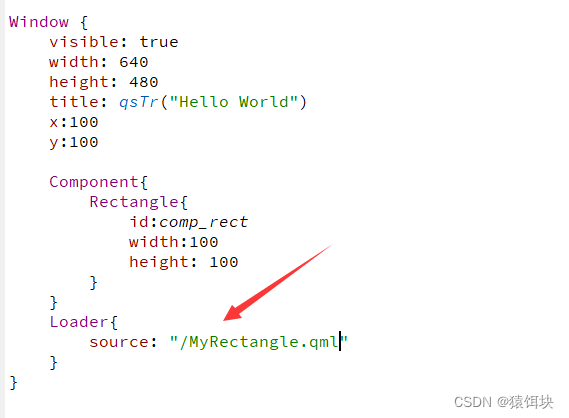
需要Loader加载控件
通过source加载:source+元素路径
sourceComponent:+组件id
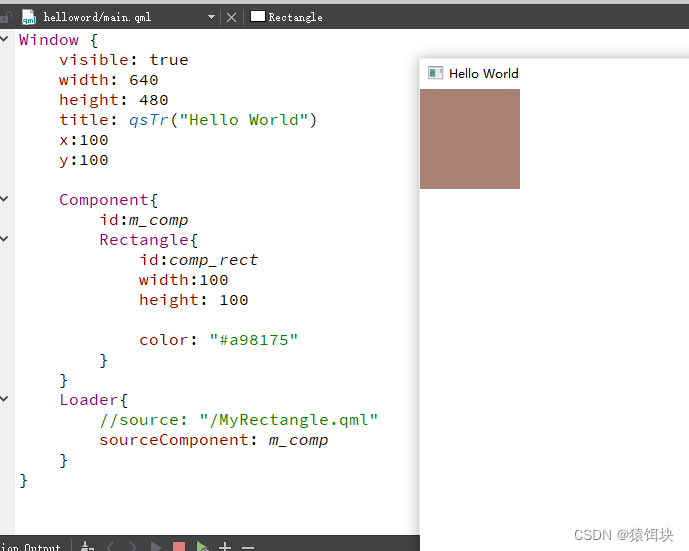
sourceComponent=null时loader加载的组件将被销毁
import QtQuick 2.6
import QtQuick.Window 2.2
import QtQuick.Controls 1.4

Window {
    visible: true
    width: 640
    height: 480
    title: qsTr("Hello World")
    x:100
    y:100

    Component{
        id:m_comp
        Rectangle{
            id:comp_rect
            width:100
            height: 100

            color: "#a98175"
            Component.onCompleted: {
                console.log("create");
            }
            Component.onDestruction: {
                console.log("destructed");
            }
        }
    }
    Loader{
        id:loader
        //source: "/MyRectangle.qml"
        sourceComponent: m_comp
        onStatusChanged: {
            console.log("loader status:",status);
        }
    }

    Button{
        id:button
        x:300
        y:300
        width:100
        height: 100
        onClicked: {
            loader.sourceComponent=null;
        }
    }
}

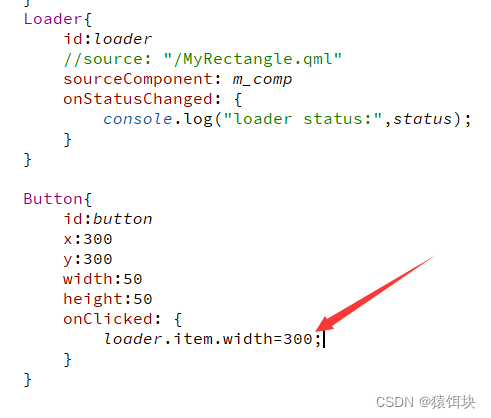
怎么获取component
loader的id加上item---loaderId.item返回组件根元素
Loader的异步--asynchronous
此属性保存组件是否将异步实例化。默认情况下,该属性为false。
当与源属性一起使用时,加载和编译也将在后台线程中执行。异步加载将创建组件跨多个框架声明的对象,并降低动画中的故障。当异步加载时,状态将更改为Loader.Load。一旦创建了整个组件,项目将可用,状态将更改为Loader.Ready。在进行异步加载时,将此属性的值更改为false将强制立即同步完成。如果必须在异步加载完成之前访问Loader内容,这允许开始异步加载,然后强制完成。
anchors怎么设置组件中根元素的位置
Image元素
Image元素属性
source加载图片
AnimatedImage加载动态图
image只能加载静态图片
属性
暂停,是否播放等
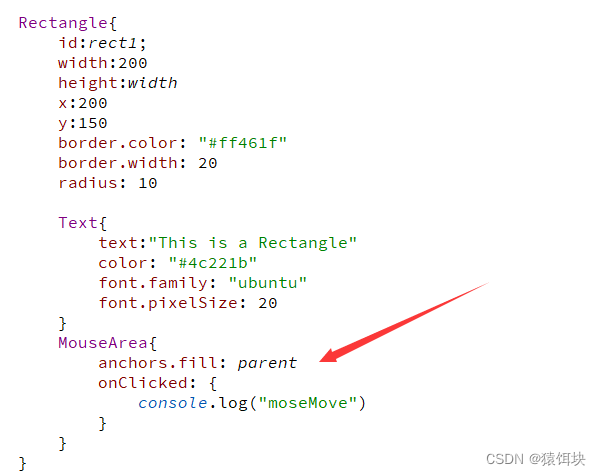
MouseArea
鼠标
设置鼠标可控范围:
anchors.fill
mouseArea的属性
clicked=pressed+released
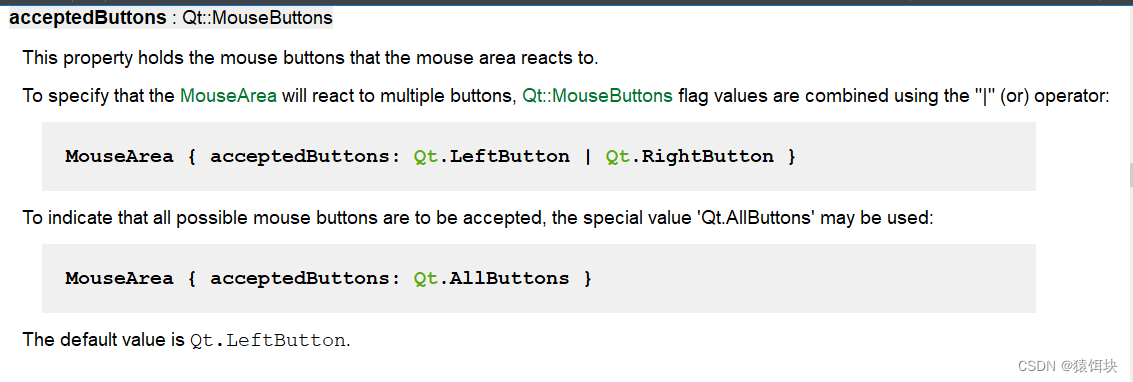
mouseArea的acceptedButton默认是左键,怎么设置右键
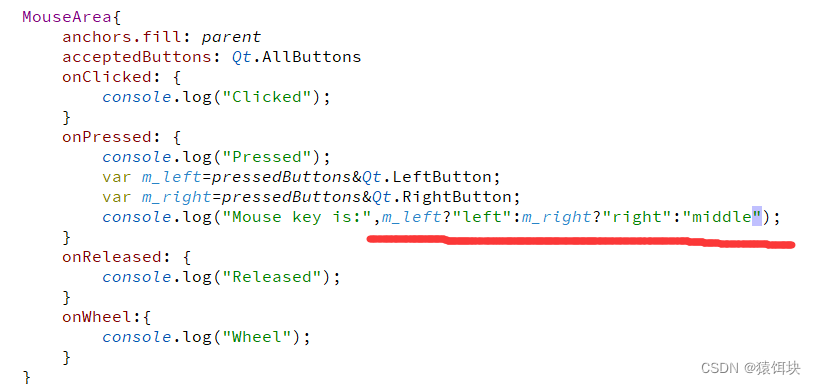
pressButtons属性记录鼠标键值
怎么获取鼠标的左右中键值
多条件联合判断
组件检测鼠标悬浮
containsPress属性记录鼠标是否按下
containsMouse记录鼠标是否存在MouseArea区域内
containsMouse和hoverEnble有关
按下可检测
   MouseArea{
        width: 200
        height: 200

        acceptedButtons: Qt.AllButtons
        Rectangle{
            id:mouse_rect
            anchors.fill: parent
            color: "#a4e2c6"
        }
        onContainsMouseChanged: {
            console.log("Mouse cursor status:",containsMouse);
        }
        onContainsPressChanged: {
            console.log("Press status:",containsPress);
        }
    }
悬浮可检测
   MouseArea{
        width: 200
        height: 200

        acceptedButtons: Qt.AllButtons
        hoverEnabled: true //设置悬浮使能
        Rectangle{
            id:mouse_rect
            anchors.fill: parent
            color: "#a4e2c6"
        }
        onContainsMouseChanged: {
            console.log("Mouse cursor status:",containsMouse);
        }
        onContainsPressChanged: {
            console.log("Press status:",containsPress);
        }
    }
信号和槽函数
信号的定义:
signal 信号函数名()
信号触发(槽函数):
on+信号函数名:{}
信号函数名首字母大写
键盘触发的槽函数
Keys.槽函数
函数
qstr()
qsTr()函数就是 QObject::tr()函数的 QML 版本,用于返回可翻译的字符串。
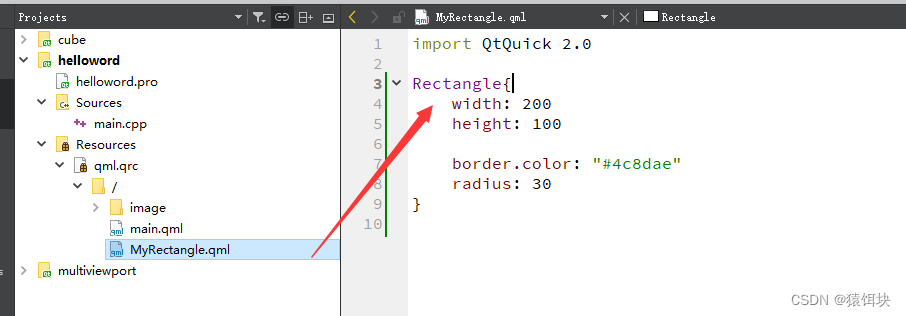
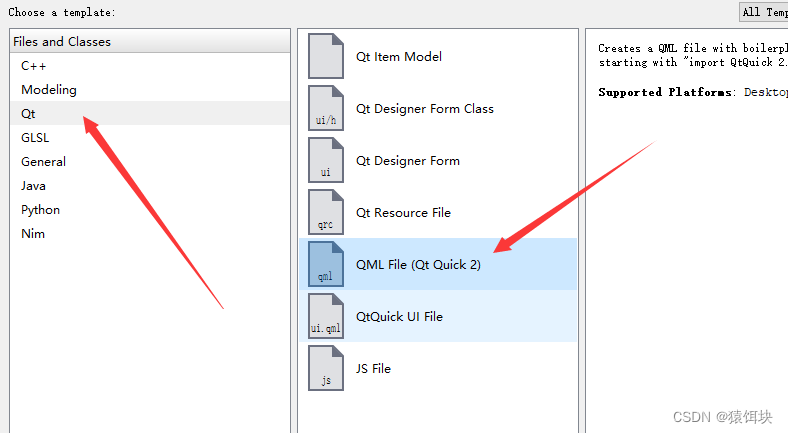
怎么添加qml文件

qml文件的调用原理
项目入口是main.qml文件,文件中使用window组件实现基础的窗口。
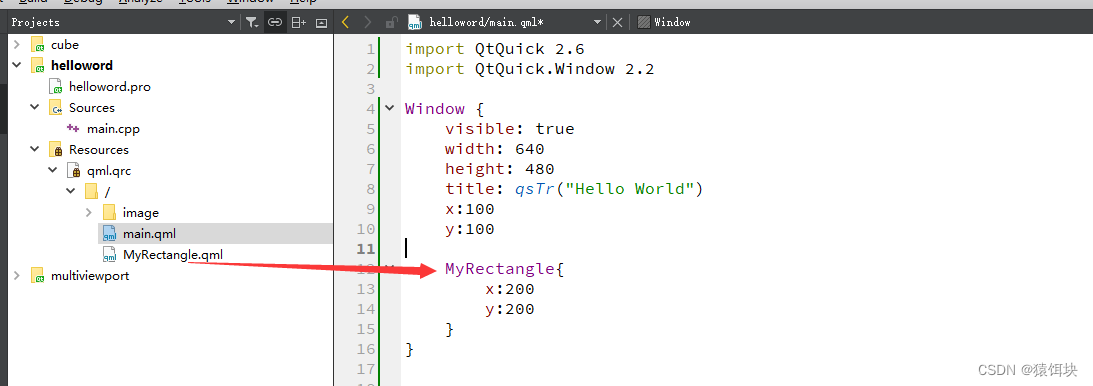
其他自定义的文件就相当于自己定义的一个组件,可以在自定义文件中设置这个自定义组件的属性,然后在main.qml文件中通过调用自定义文件名调用自定义组件,在调用中设置自定义文件中设置的属性。
main.qml中调用的自定义组件不要再加id属性,因为main中就是使用,而不是定义了。
main.qml调用其他文件元素和组件
qml项目运行的是main.qml文件,其他文件元素和组件要运行需要在main.qml中调用
在main.qml中直接调用其他qml文件的文件名,就会运行被调用文件中的设置。
