云原生之使用Docker部署Dashy个人导航页
- 一、Dashy介绍
- 1.1 Dashy简介
- 1.2 Dashy特点
- 二、本地环境介绍
- 2.1 本地环境规划
- 2.2 本次实践介绍
- 三、本地环境检查
- 3.1 检查Docker服务状态
- 3.2 检查Docker版本
- 3.3 检查docker compose 版本
- 四、部署前准备工作
- 4.1下载Dashy源码包
- 4.2 查看Dashy源码包
- 五、部署dashy个人导航页
- 5.1 创建数据目录
- 5.2 设置登录用户
- 5.2.1 编辑conf.yml文件
- 5.2.2 对密码进行hash加密
- 5.2.3 在conf.yml文件中设置用户名
- 5.3 查看docker-compose.yml文件
- 5.4 创建Dashy容器
- 5.5 检查dashy容器状态
- 六、访问Dashy个人导航页
- 七、Dashy的基本使用
- 7.1 设置中文语言
- 7.2 更换主题
- 7.3 新增网页链接
- 7.4 打开新增网页链接
一、Dashy介绍
1.1 Dashy简介
Dashy是一款开源的个人导航页。它是一个集成了多个网站的页面,在这个页面上,你可以快速访问你经常使用的网站。Dashy具有高度的自定义性,你可以自己添加和删除网站,也可以自己更换主题和背景。
1.2 Dashy特点
Dashy个人导航页的特点包括:
-
美观简洁:Dashy个人导航页的界面设计简洁美观,不会给用户带来视觉上的疲劳感。
-
自定义分类:用户可以自行添加、删除、编辑导航页中的分类,将网站进行分类整理,便于快速查找。
-
支持拖拽:用户可以通过拖拽网站链接的方式将其添加到自己的导航页中,方便快捷。
-
多设备同步:Dashy个人导航页可同步多设备,用户可以在任何一台设备上查看自己设定的导航页。
-
快捷搜索:Dashy个人导航页支持快速搜索,用户可以在搜索框中输入相关关键字,即可快速定位到所需网站。
-
多主题选择:用户可以根据自己的喜好选择不同的主题,个性化自己的导航页。
二、本地环境介绍
2.1 本地环境规划
本次实践为个人测试环境,操作系统版本为centos7.6。
| hostname | IP地址 | 操作系统版本 | Docker版本 |
|---|---|---|---|
| jeven | 192.168.3.166 | centos 7.6 | 20.10.17 |
2.2 本次实践介绍
1.本次实践部署环境为个人测试环境,生产环境请谨慎使用;
2.在Docker环境下成功部署Dashy个人导航页。
三、本地环境检查
3.1 检查Docker服务状态
检查Docker服务是否正常运行,确保Docker正常运行。
[root@jeven ~]# systemctl status docker
● docker.service - Docker Application Container Engine
   Loaded: loaded (/usr/lib/systemd/system/docker.service; enabled; vendor preset: disabled)
   Active: active (running) since Thu 2023-06-15 16:03:02 CST; 1 day 22h ago
     Docs: https://docs.docker.com
 Main PID: 32147 (dockerd)
    Tasks: 13
   Memory: 718.7M
3.2 检查Docker版本
检查Docker版本
[root@jeven ~]# docker -v
Docker version 20.10.17, build 100c701
3.3 检查docker compose 版本
检查Docker compose版本,确保2.0以上版本。
[root@jeven ~]# docker compose version
Docker Compose version v2.6.0
四、部署前准备工作
4.1下载Dashy源码包
在github下载Dashy源码包
git clone https://github.com/Lissy93/dashy.git
4.2 查看Dashy源码包
- 查看源码目录
[root@jeven dashy]# tree -L 2 ./
./
├── app.json
├── CNAME
├── docker
│   ├── Dockerfile-arm32v7
│   ├── Dockerfile-arm64v8
│   ├── Dockerfile-lite
│   ├── Dockerfile-old
│   ├── docker-readme.md
│   ├── hooks
│   └── nginx.conf
├── docker-compose.yml
├── Dockerfile
├── docs
│   ├── alternate-views.md
│   ├── assets
│   ├── authentication.md
│   ├── backup-restore.md
│   ├── configuring.md
│   ├── contributing.md
│   ├── credits.md
│   ├── deployment.md
│   ├── developing.md
│   ├── development-guides.md
│   ├── icons.md
│   ├── management.md
│   ├── multi-language-support.md
│   ├── pages-and-sections.md
│   ├── privacy.md
│   ├── quick-start.md
│   ├── readme.md
│   ├── release-workflow.md
│   ├── searching.md
│   ├── showcase
│   ├── showcase.md
│   ├── status-indicators.md
│   ├── theming.md
│   ├── troubleshooting.md
│   └── widgets.md
├── LICENSE
├── netlify.toml
├── package.json
├── Procfile
├── public
│   ├── conf.yml
│   ├── favicon.ico
│   ├── fonts
│   ├── img
│   ├── index.html
│   ├── initialization.html
│   ├── item-icons
│   ├── loading-screen.css
│   ├── manifest.json
│   ├── robots.txt
│   ├── web-icons
│   └── widget-resources
├── README.md
├── server.js
├── services
│   ├── config-validator.js
│   ├── cors-proxy.js
│   ├── healthcheck.js
│   ├── print-message.js
│   ├── rebuild-app.js
│   ├── save-config.js
│   ├── serverless-functions
│   ├── ssl-server.js
│   ├── status-check.js
│   ├── system-info.js
│   └── update-checker.js
├── src
│   ├── App.vue
│   ├── assets
│   ├── components
│   ├── directives
│   ├── main.js
│   ├── mixins
│   ├── router.js
│   ├── store.js
│   ├── styles
│   ├── utils
│   └── views
├── vue.config.js
└── yarn.lock

21 directories, 62 files
五、部署dashy个人导航页
5.1 创建数据目录
创建数据目录
mkdir -p /data/st/dashy/icons
5.2 设置登录用户
5.2.1 编辑conf.yml文件
在/data/st/dashy/目录下,编辑conf.yml文件,内容如下。
vim conf.yml
---
# Page meta info, like heading, footer text and nav links
pageInfo:
  title: Dashy
  description: Welcome to your new dashboard!
  navLinks:
  - title: GitHub
    path: https://github.com/Lissy93/dashy
  - title: Documentation
    path: https://dashy.to/docs

# Optional app settings and configuration
appConfig:
  theme: colorful
  layout: auto
  iconSize: medium
  language: en
  auth:
    users:
      - user: admin    # 改成自己的用户名
        hash: 8c6976e5b5410415bde908bd4dee15dfb167a9c873fc4bb8a81f6f2ab448a918   # cha256 哈希加密,地址用这个: https://emn178.github.io/online-tools/sha256.html
        type: admin
# Main content - An array of sections, each containing an array of items
sections:
- name: Getting Started
  icon: fas fa-rocket
  items:
  - title: Dashy Live
    description: Development a project management links for Dashy
    icon: https://i.ibb.co/qWWpD0v/astro-dab-128.png
    url: https://live.dashy.to/
    target: newtab
  - title: GitHub
    description: Source Code, Issues and Pull Requests
    url: https://github.com/lissy93/dashy
    icon: favicon
  - title: Docs
    description: Configuring & Usage Documentation
    provider: Dashy.to
    icon: far fa-book
    url: https://dashy.to/docs
  - title: Showcase
    description: See how others are using Dashy
    url: https://github.com/Lissy93/dashy/blob/master/docs/showcase.md
    icon: far fa-grin-hearts
  - title: Config Guide
    description: See full list of configuration options
    url: https://github.com/Lissy93/dashy/blob/master/docs/configuring.md
    icon: fas fa-wrench
  - title: Support
    description: Get help with Dashy, raise a bug, or get in contact
    url: https://github.com/Lissy93/dashy/blob/master/.github/SUPPORT.md
    icon: far fa-hands-helping
5.2.2 对密码进行hash加密
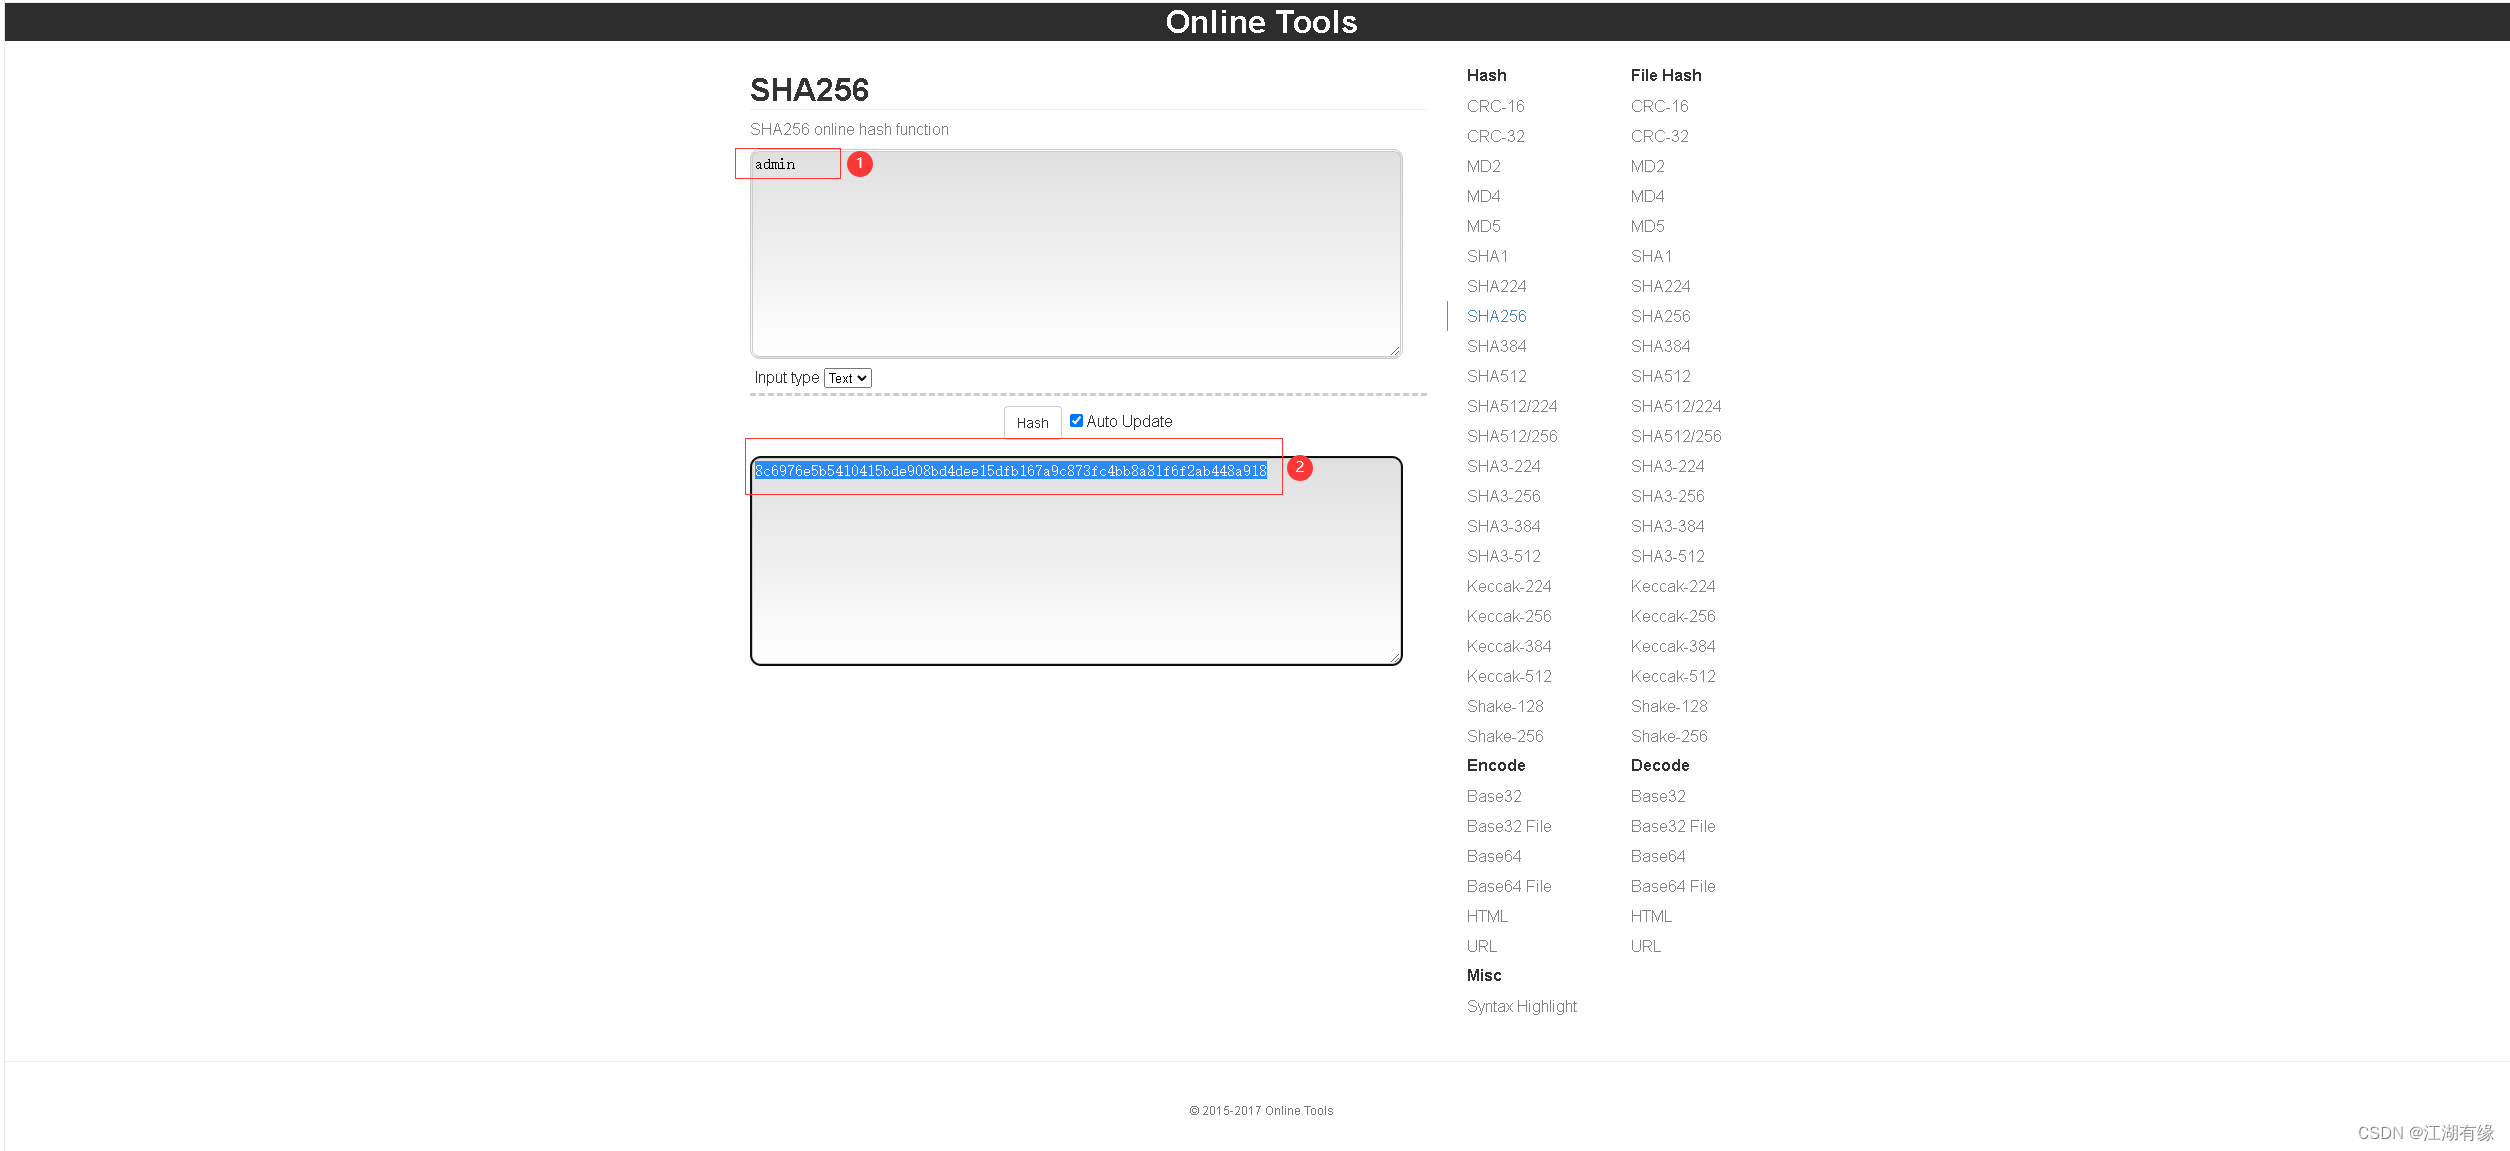
设置登录用户名为admin,密码为admin,密码进行hash加密
访问网址:https://emn178.github.io/online-tools/sha256.html
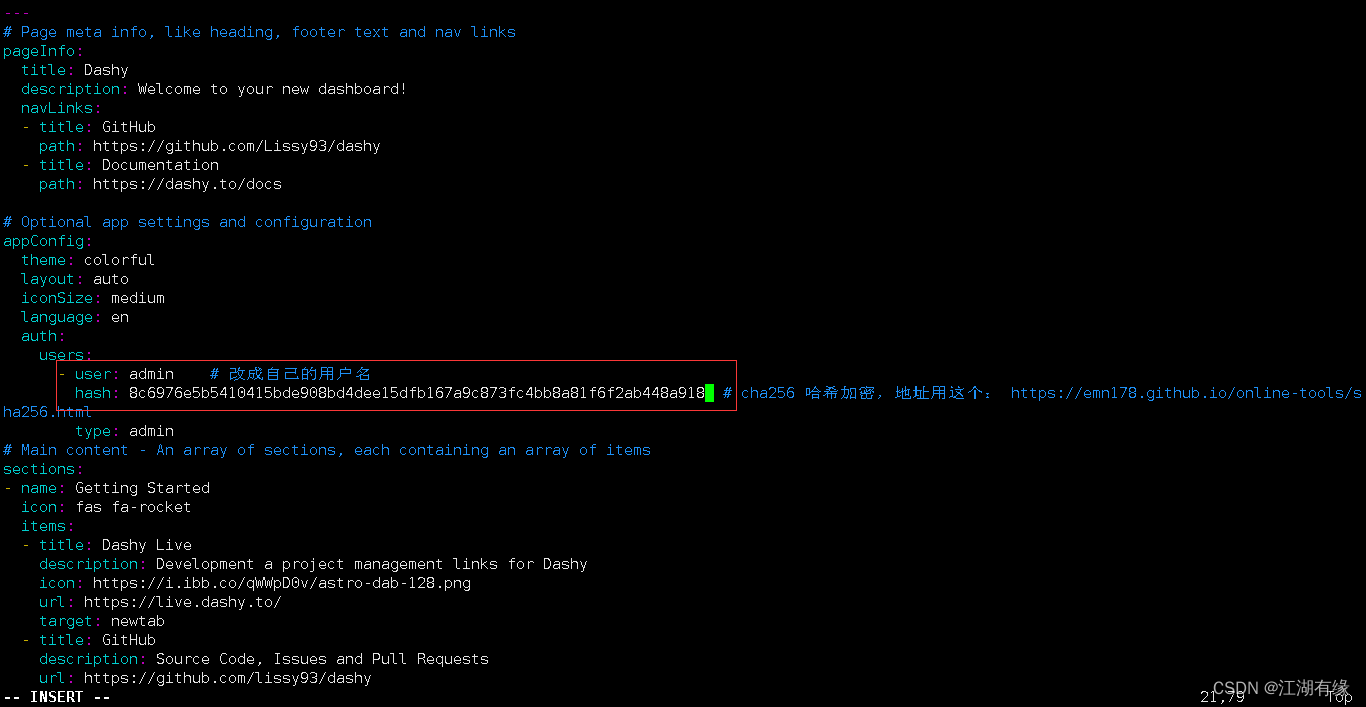
5.2.3 在conf.yml文件中设置用户名
将hash加密后的密码填入到conf.yml中
5.3 查看docker-compose.yml文件
查看docker-compose.yml文件,可以修改映射端口和挂载路径等。
[root@jeven dashy]# cat docker-compose.yml
---
# Welcome to Dashy! To get started, run `docker compose up -d`
# You can configure your container here, by modifying this file
version: "3.8"
services:
  dashy:
    container_name: Dashy

    # Pull latest image from DockerHub
    image: lissy93/dashy

    # To build from source, replace 'image: lissy93/dashy' with 'build: .'
    # build: .

    # Or, to use a Dockerfile for your archtecture, uncomment the following
    # context: .
    # dockerfile: ./docker/Dockerfile-arm32v7

    # You can also use an image with a different tag, or pull from a different registry, e.g:
    # image: ghcr.io/lissy93/dashy or image: lissy93/dashy:arm64v8

    # Pass in your config file below, by specifying the path on your host machine
    volumes:
       - /data/st/dashy/conf.yml:/app/public/conf.yml
       - /data/st/dashy/icons:/app/public/item-icons

    # Set port that web service will be served on. Keep container port as 80
    ports:
      - 4000:80

    # Set any environmental variables
    environment:
      - NODE_ENV=production
    # Specify your user ID and group ID. You can find this by running `id -u` and `id -g`
    #  - UID=1000
    #  - GID=1000

    # Specify restart policy
    restart: unless-stopped

    # Configure healthchecks
    healthcheck:
      test: ['CMD', 'node', '/app/services/healthcheck']
      interval: 1m30s
      timeout: 10s
      retries: 3
      start_period: 40s
5.4 创建Dashy容器
使用docker compose快速创建Dashy容器
[root@jeven dashy]# docker compose up -d
[+] Running 2/2
 ⠿ Network dashy_default  Created                                                                                                                 0.1s
 ⠿ Container Dashy        Started                                                                                                                 0.4s

5.5 检查dashy容器状态
检查dashy容器状态
[root@jeven dashy]# docker compose ps
NAME                COMMAND                  SERVICE             STATUS               PORTS
Dashy               "docker-entrypoint.s…"   dashy               running (starting)   0.0.0.0:4000->80/tcp, :::4000->80/tcp
六、访问Dashy个人导航页
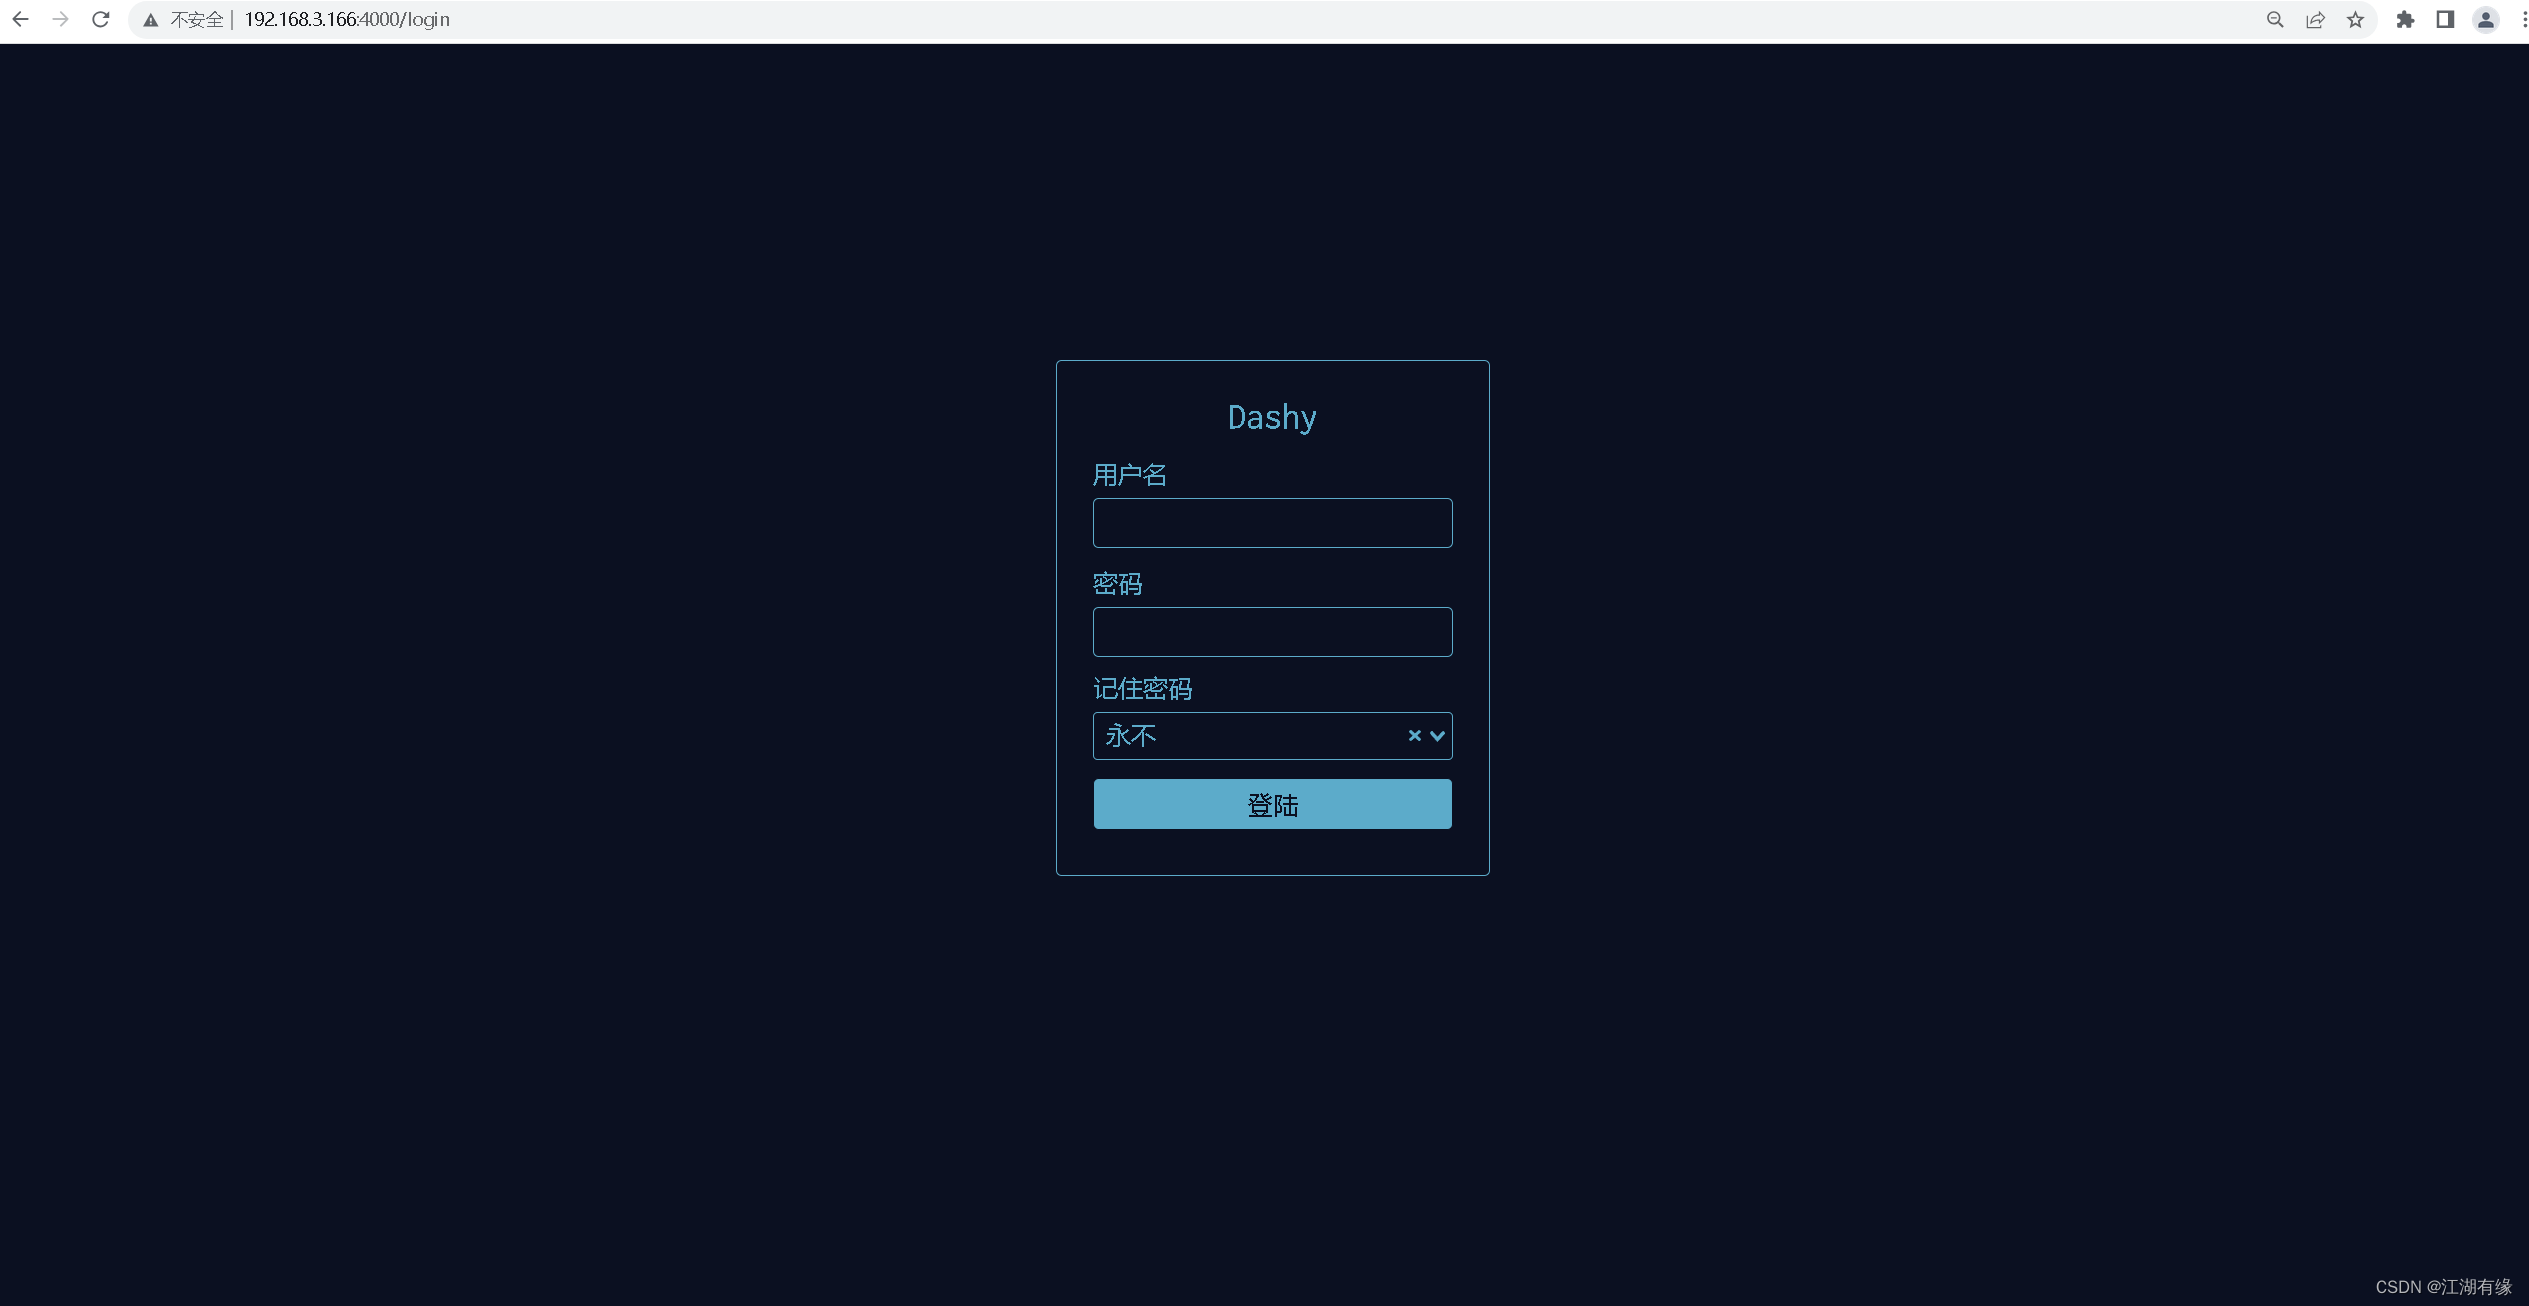
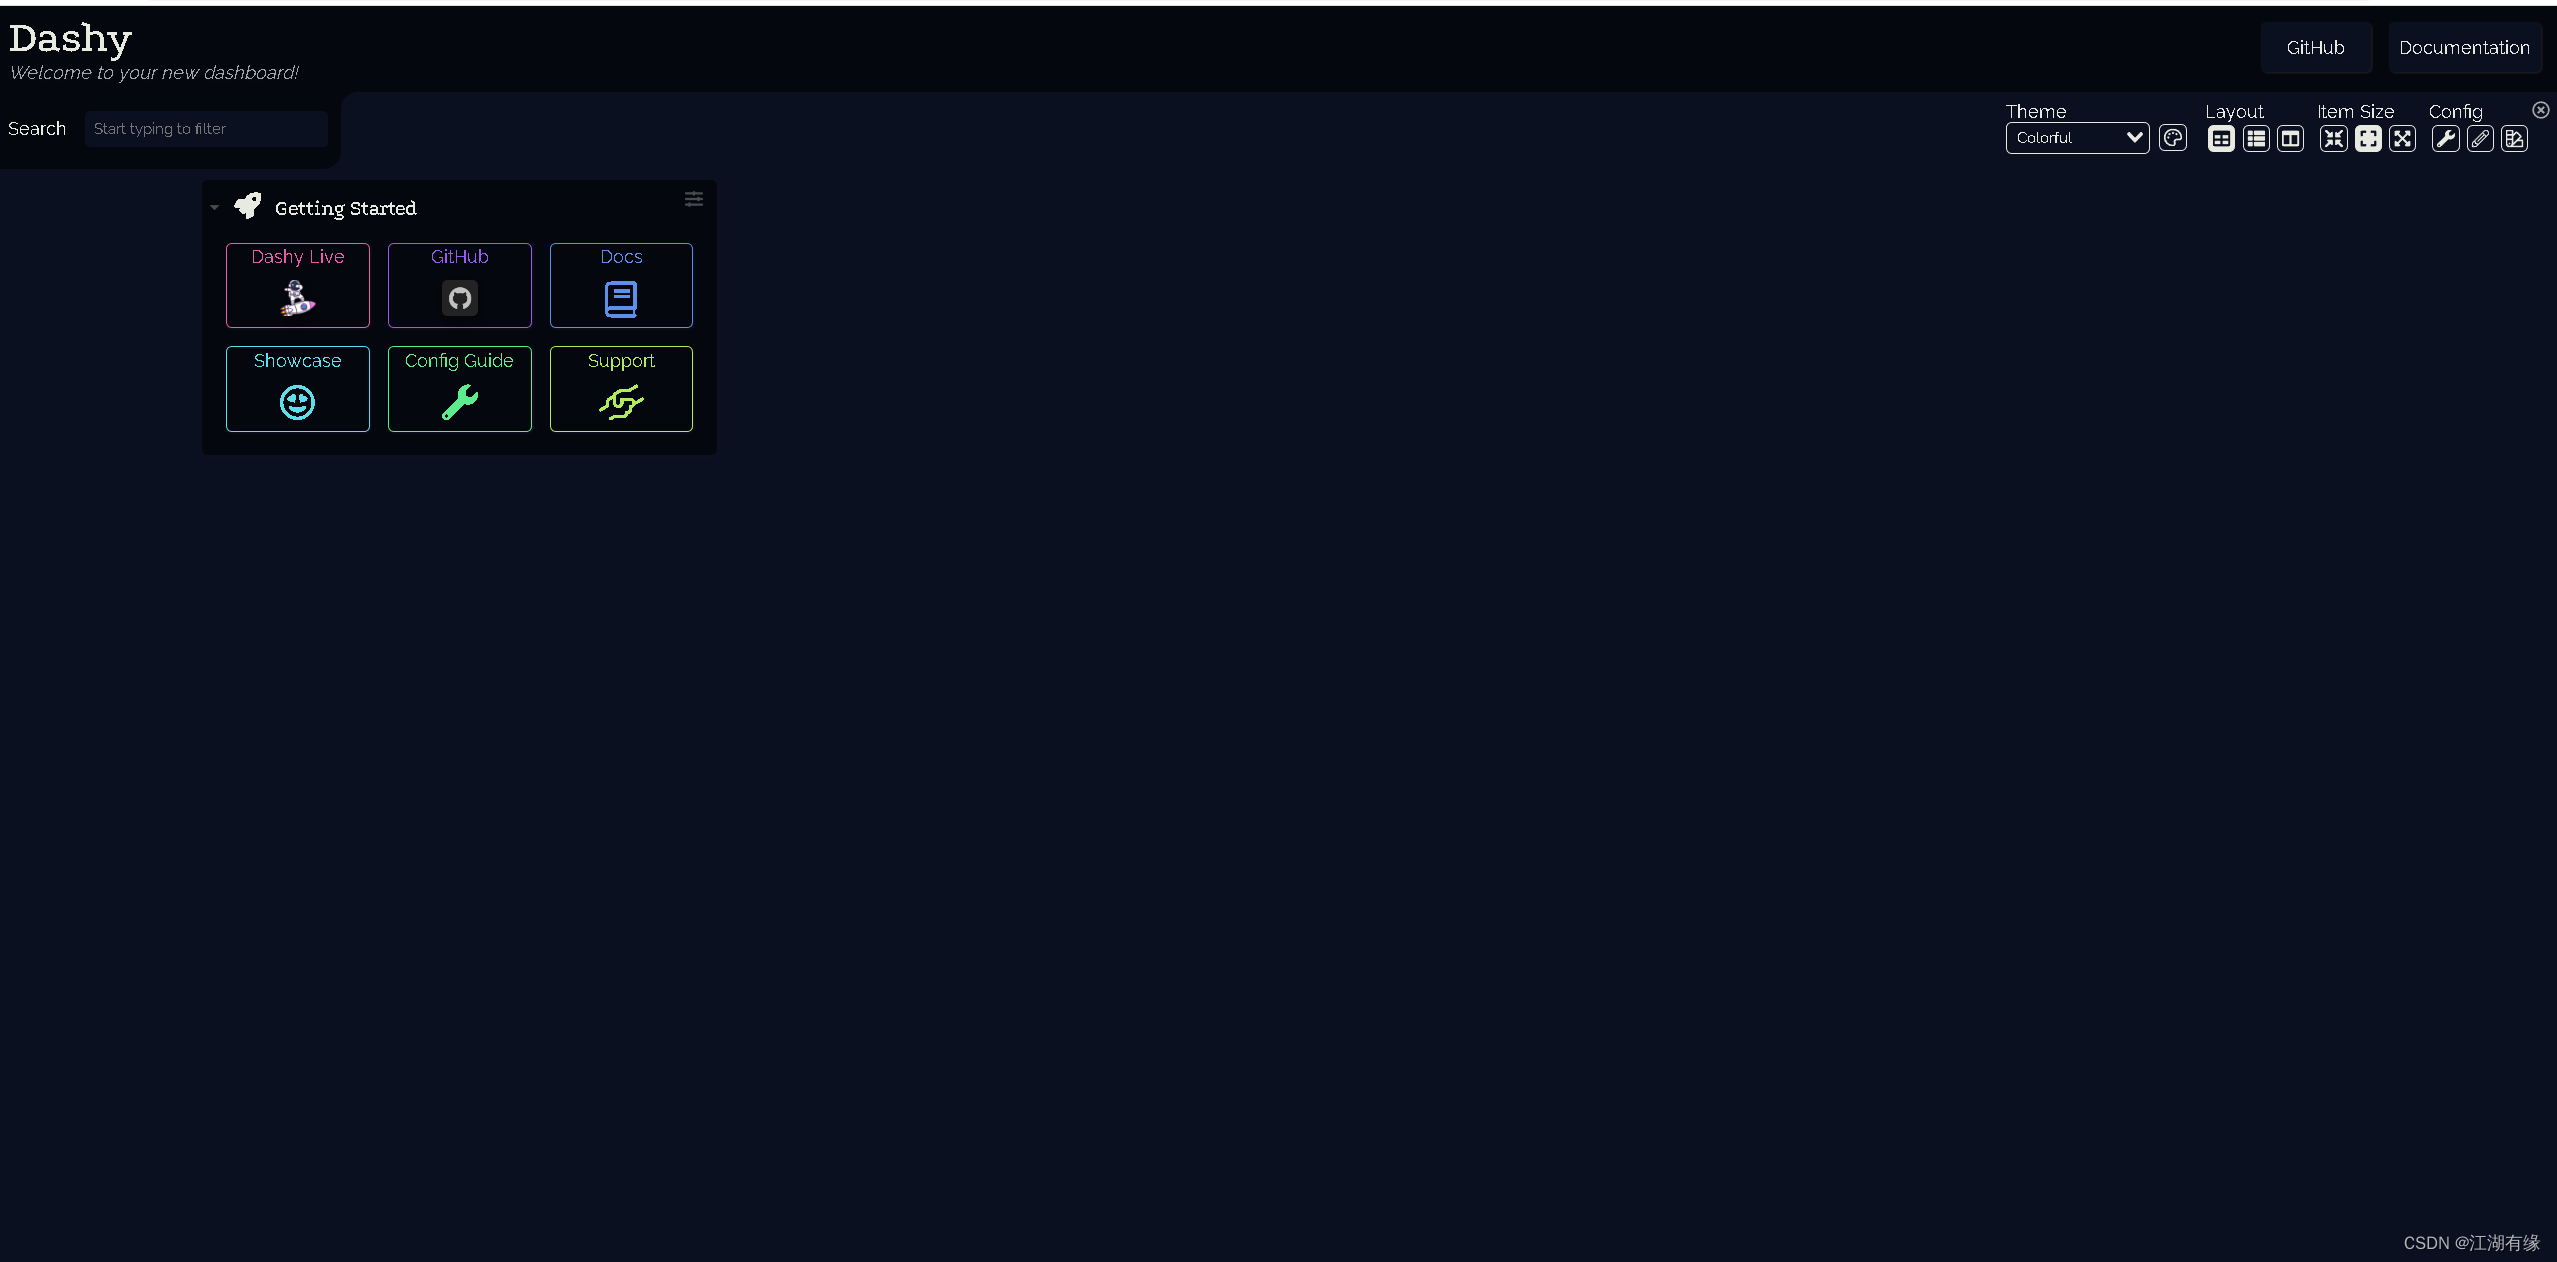
访问地址:http://192.168.3.166:4000/
输入设置的用户名和密码。
七、Dashy的基本使用
7.1 设置中文语言
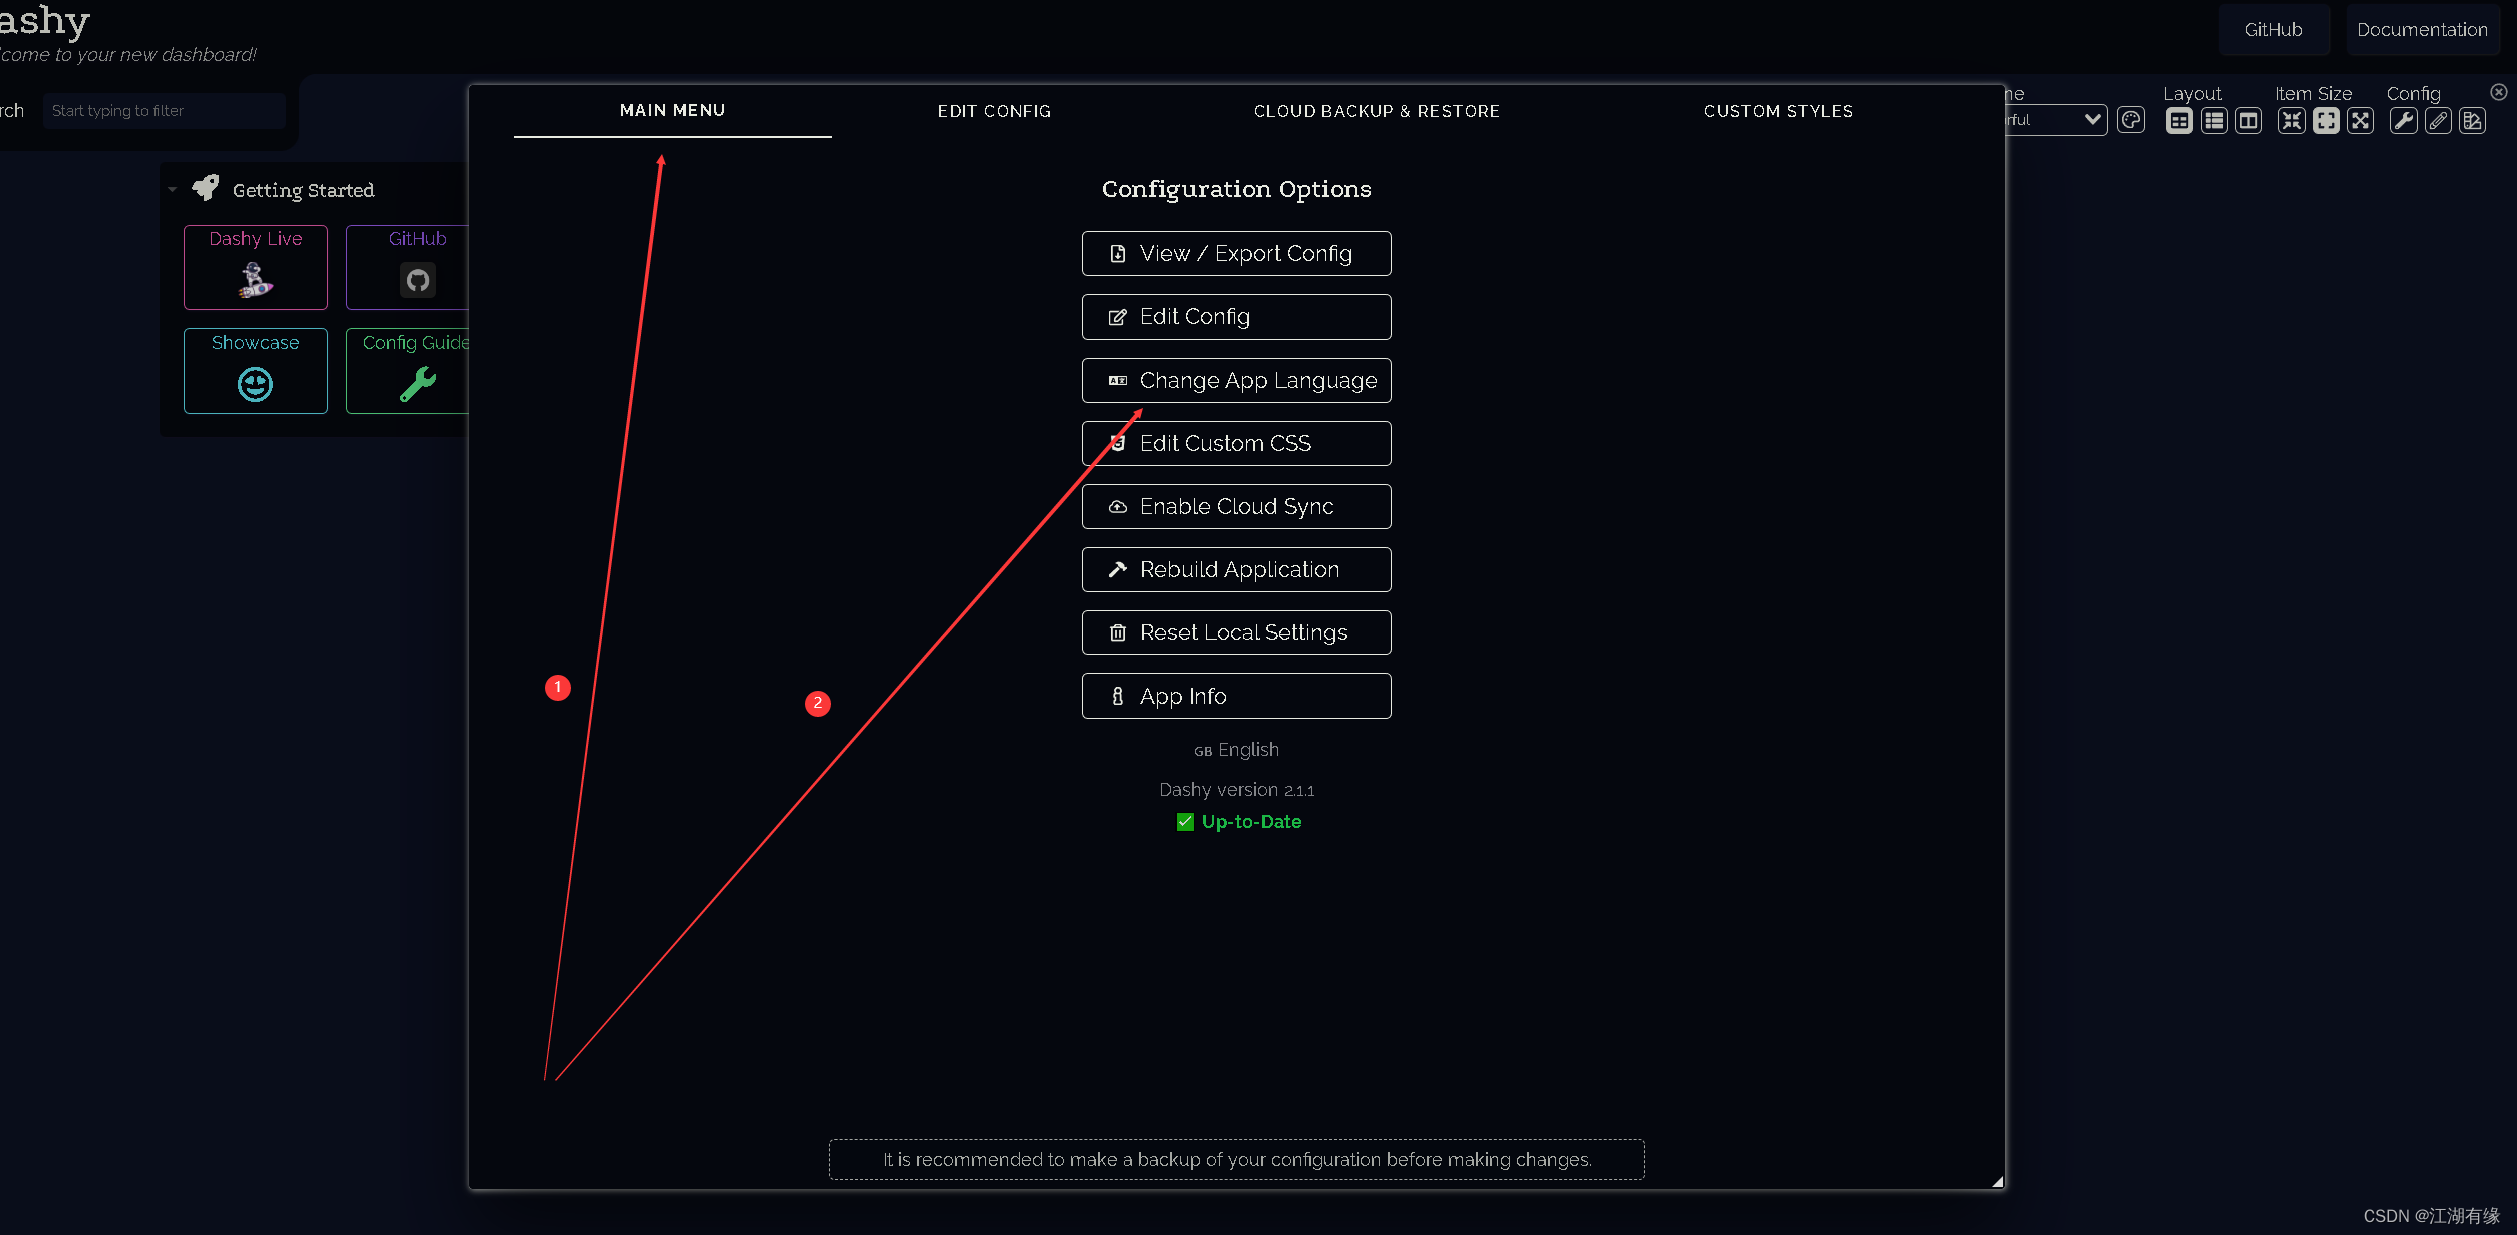
- 进入设置界面
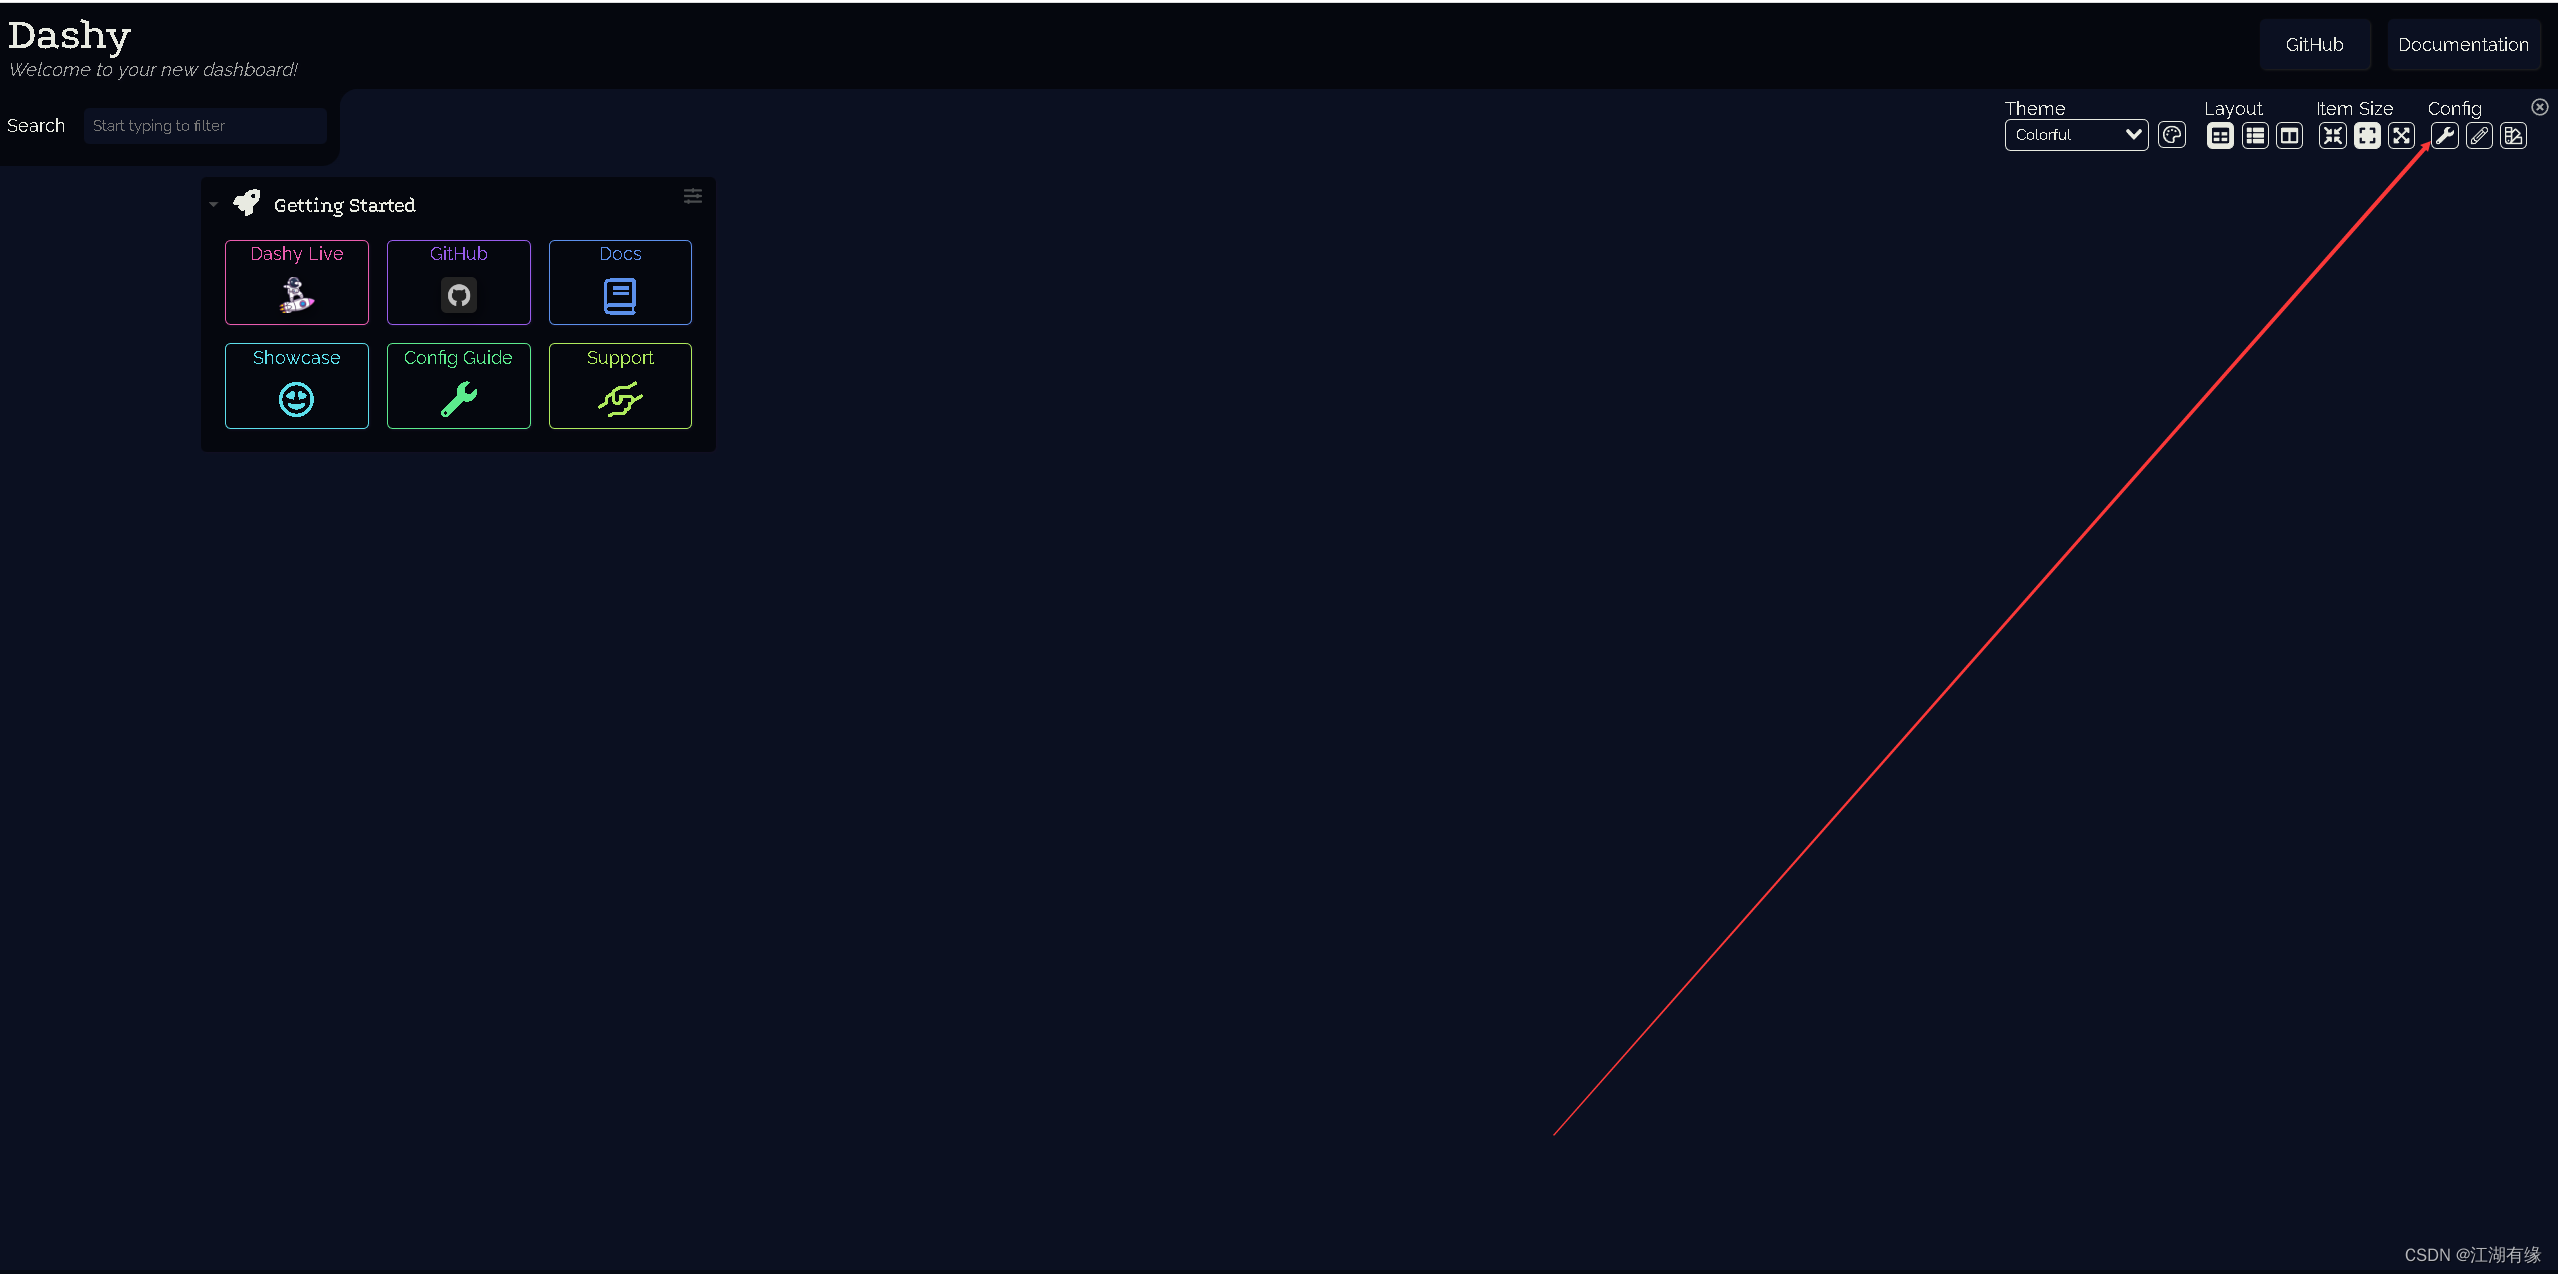
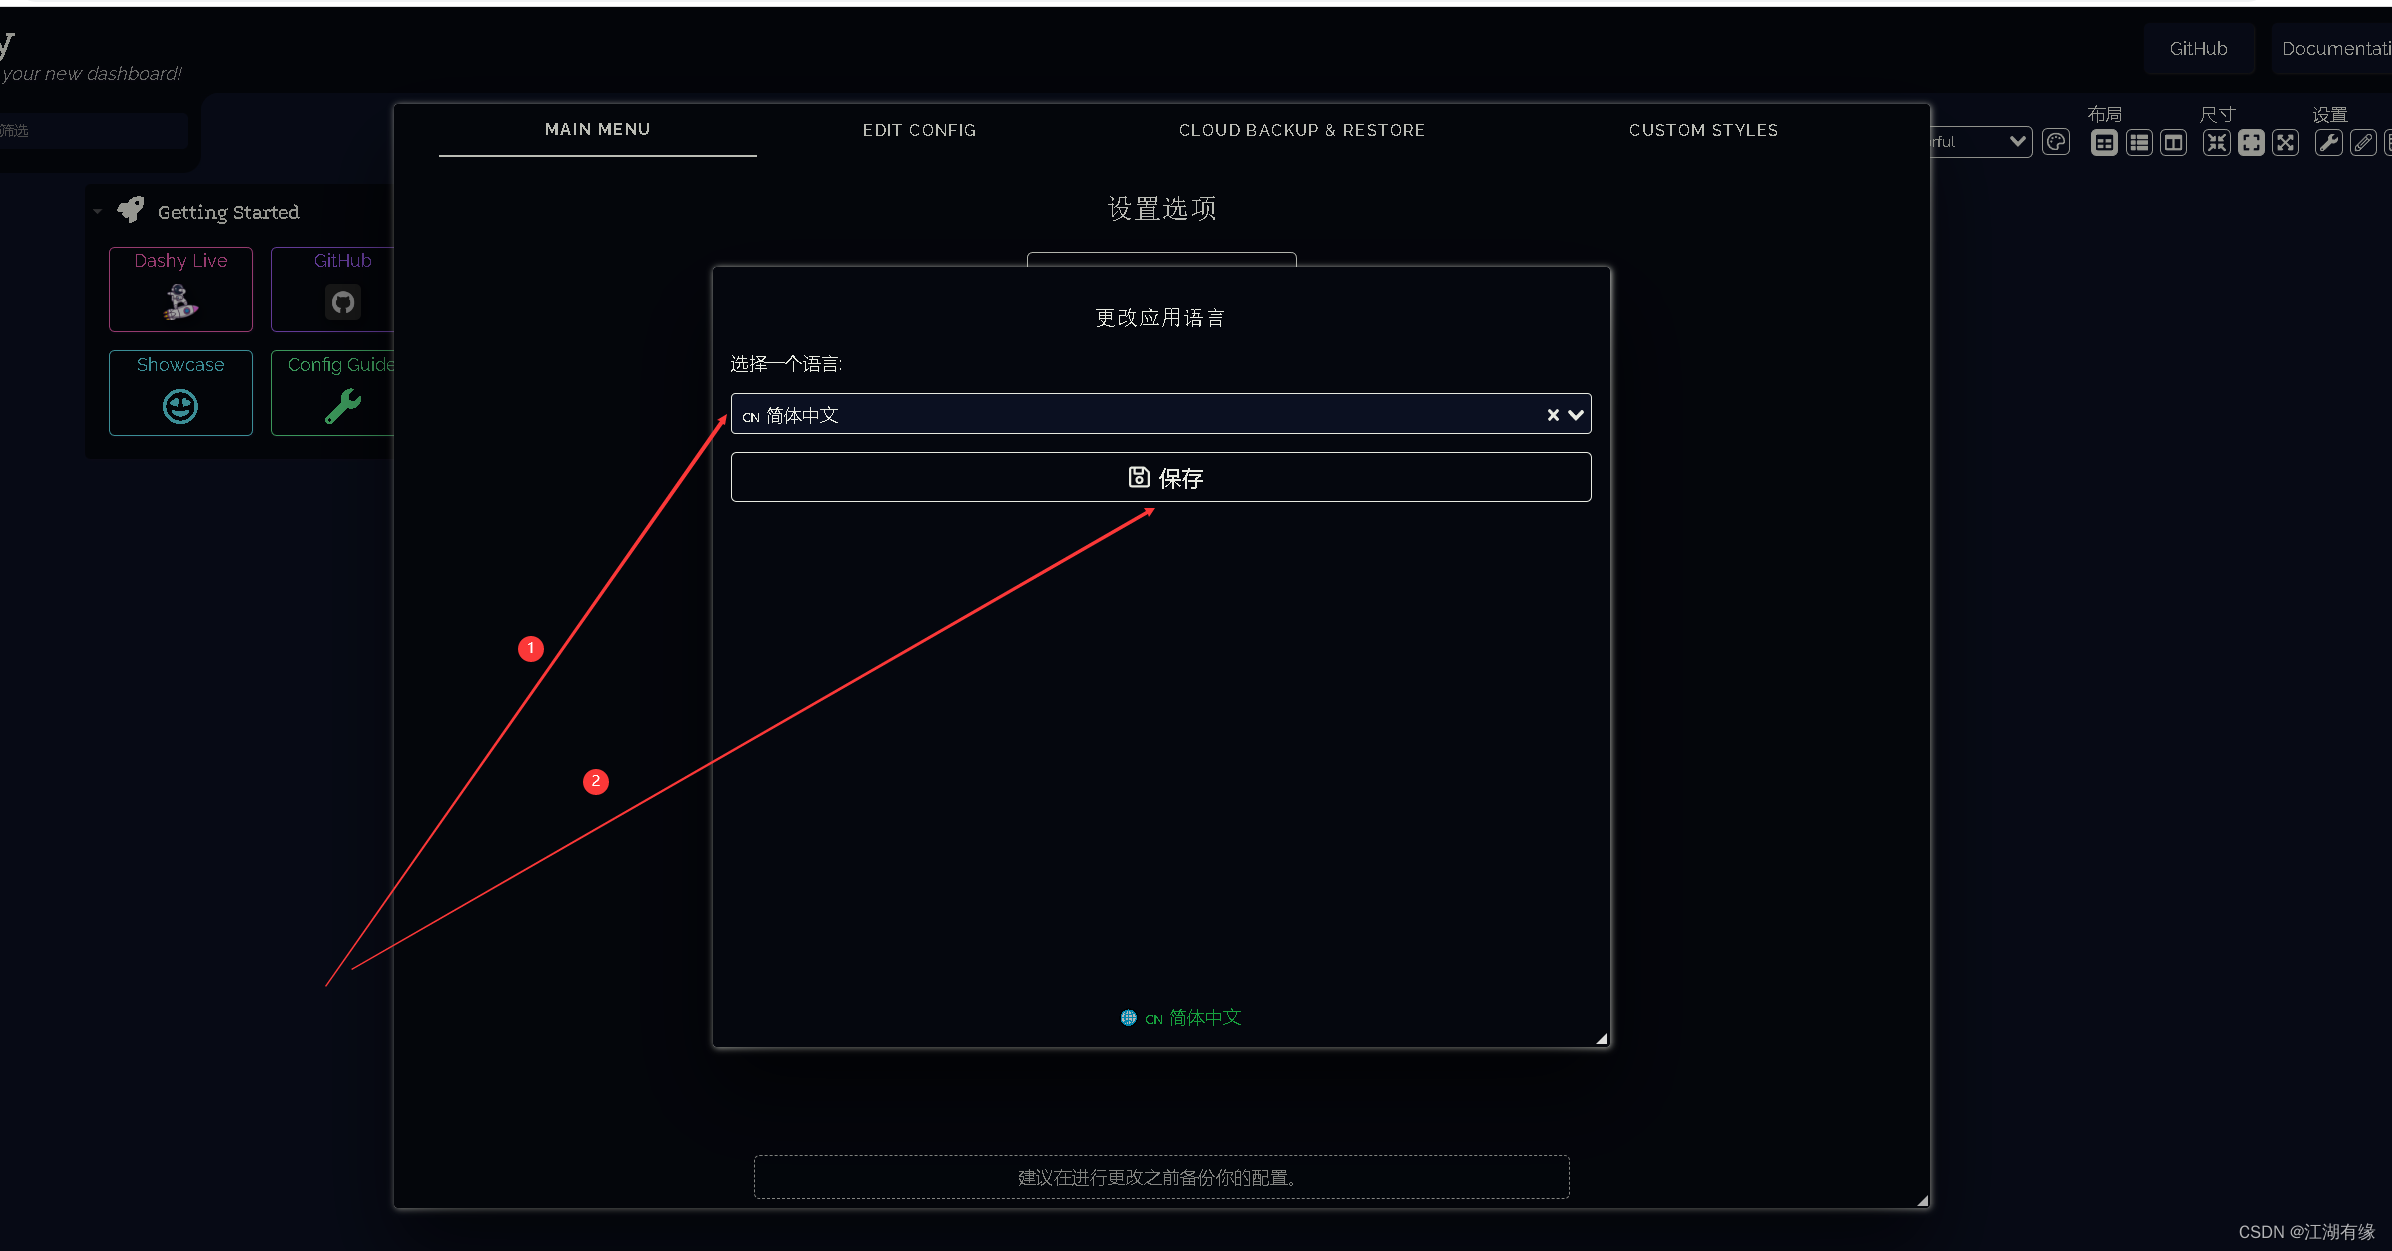
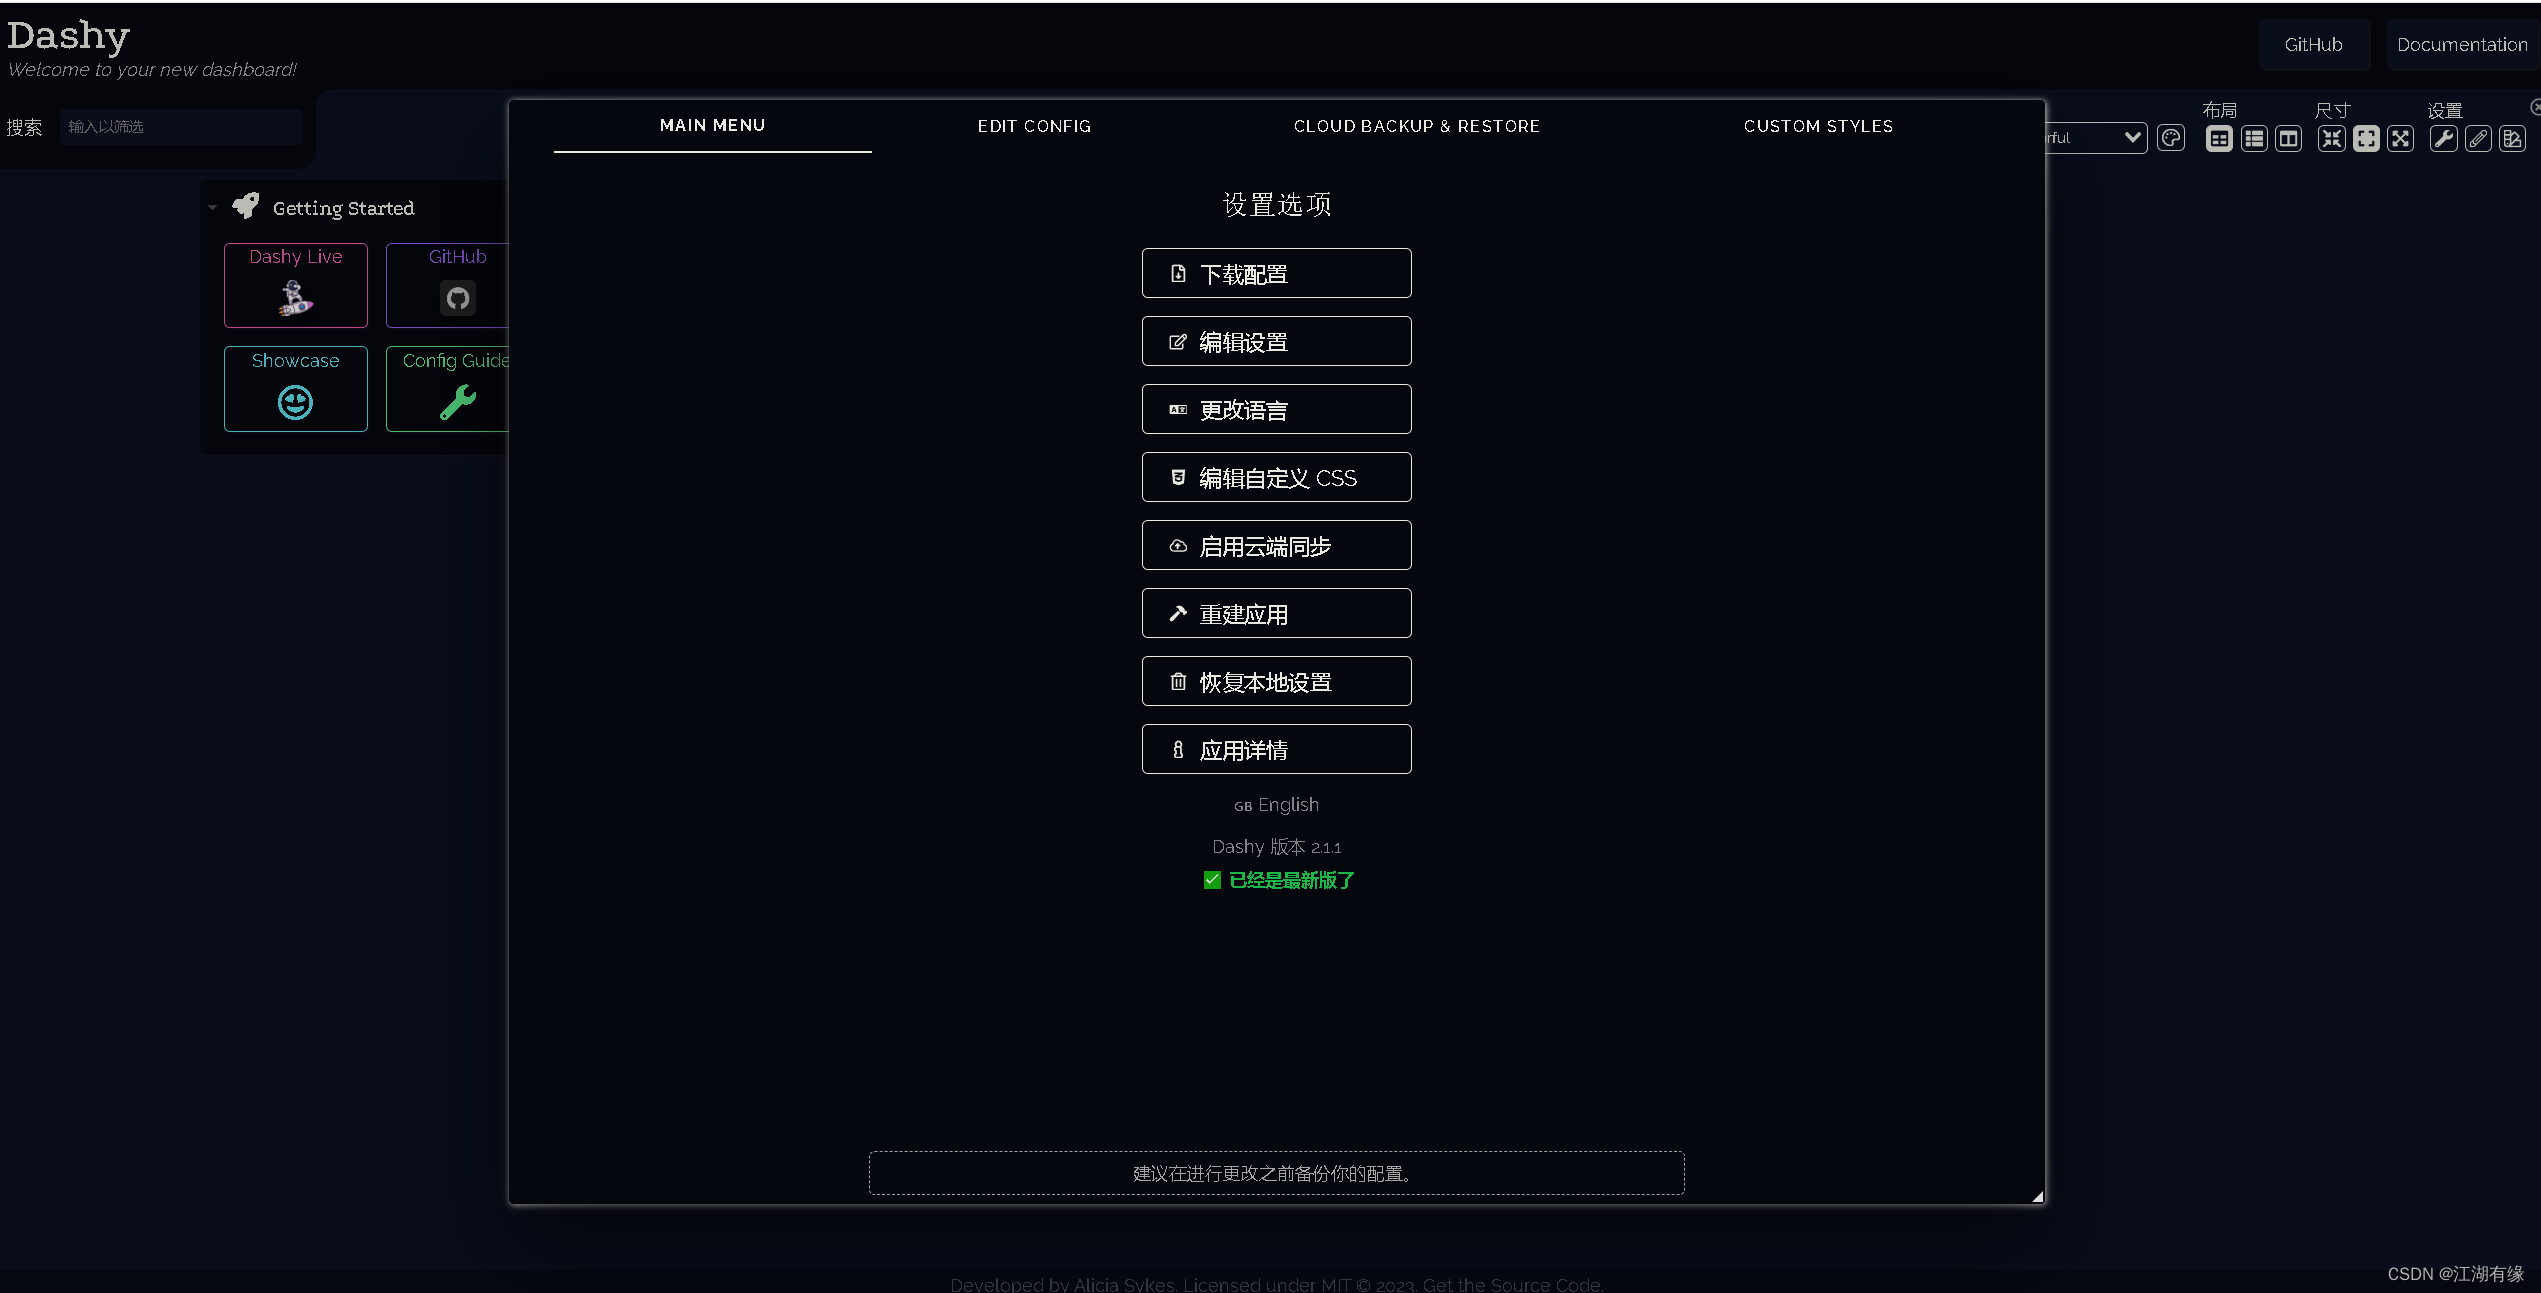
- 选择主菜单——设置语言——简体中文——保存。
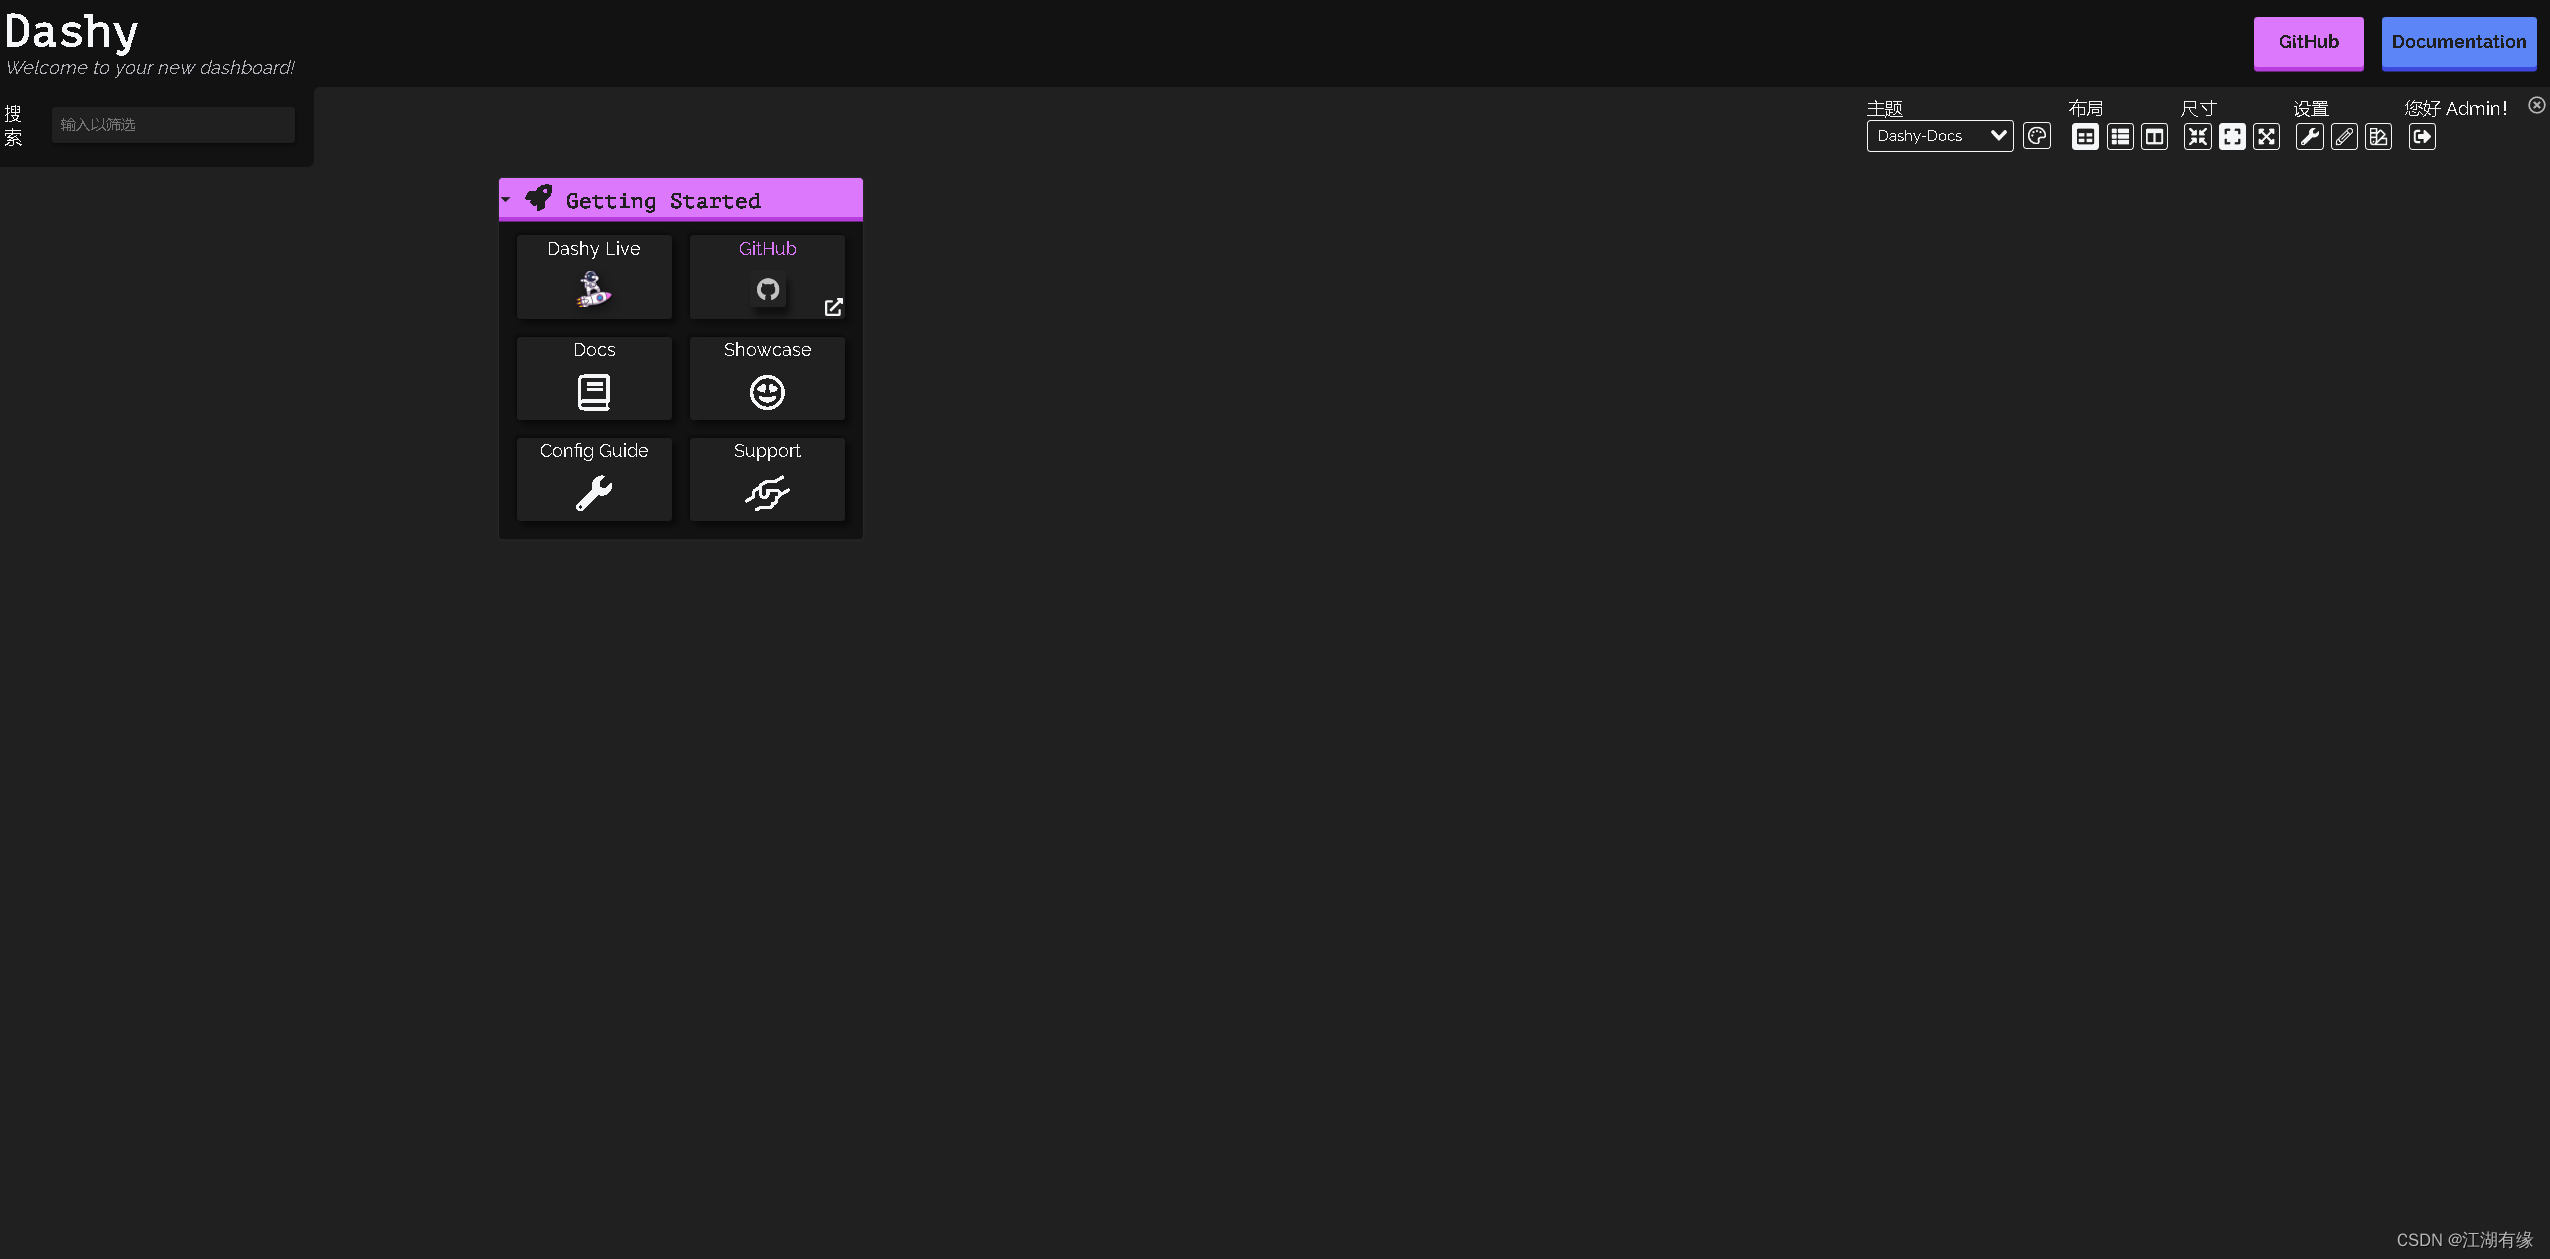
7.2 更换主题
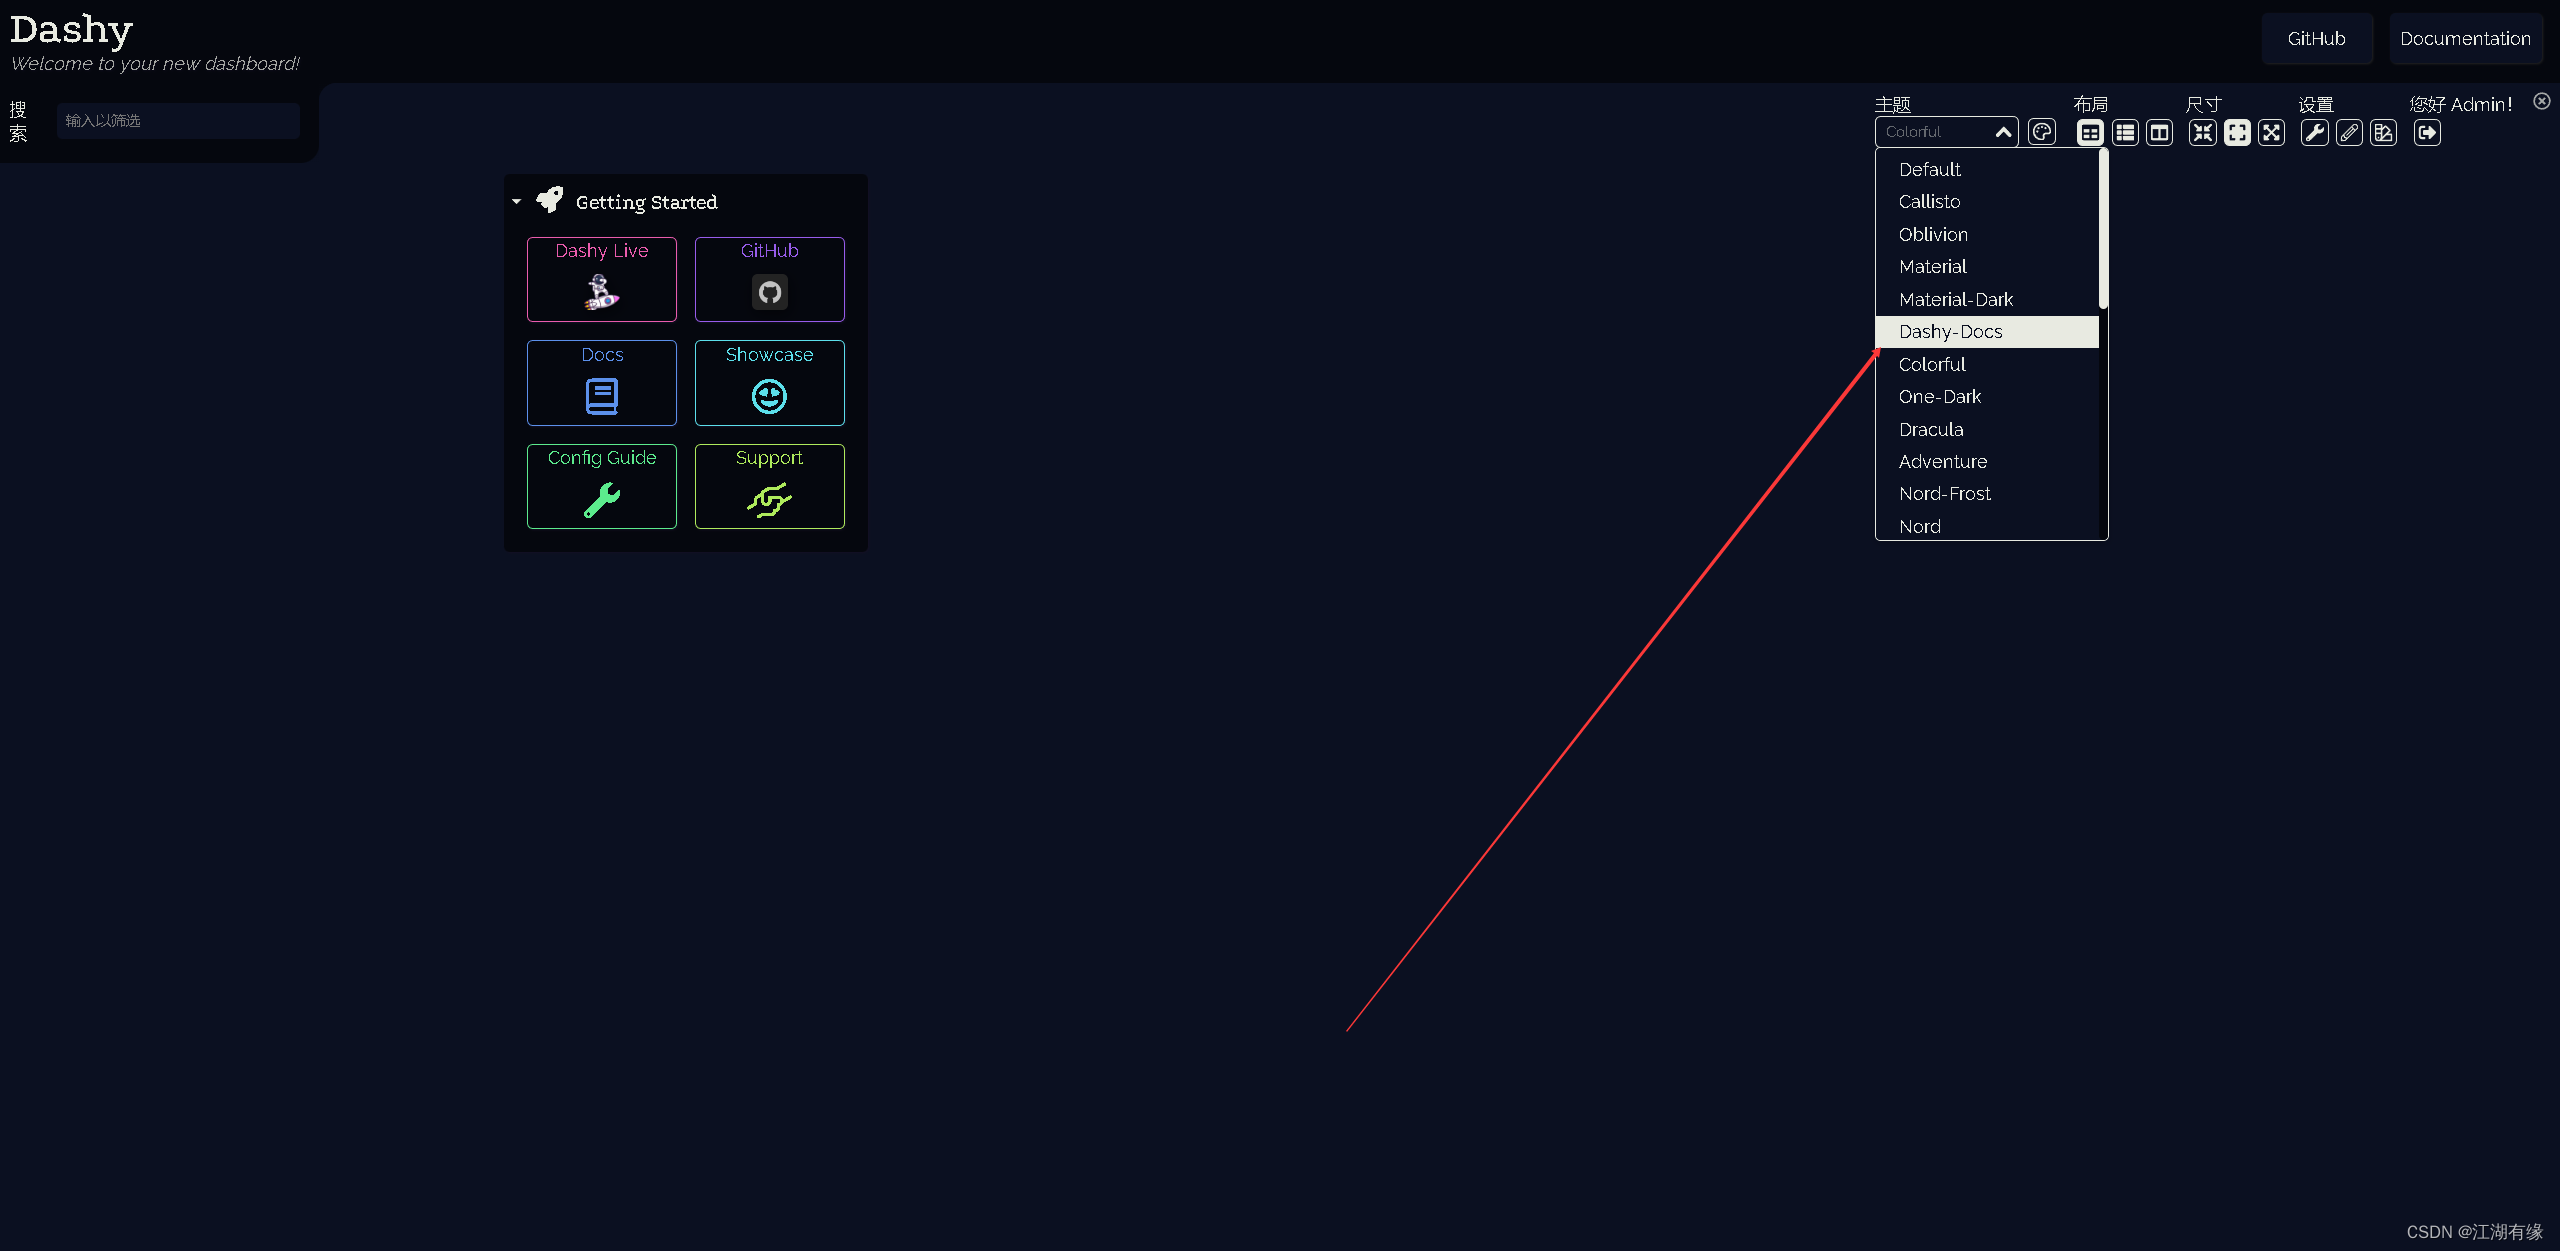
在主题选项,选择主题即可。
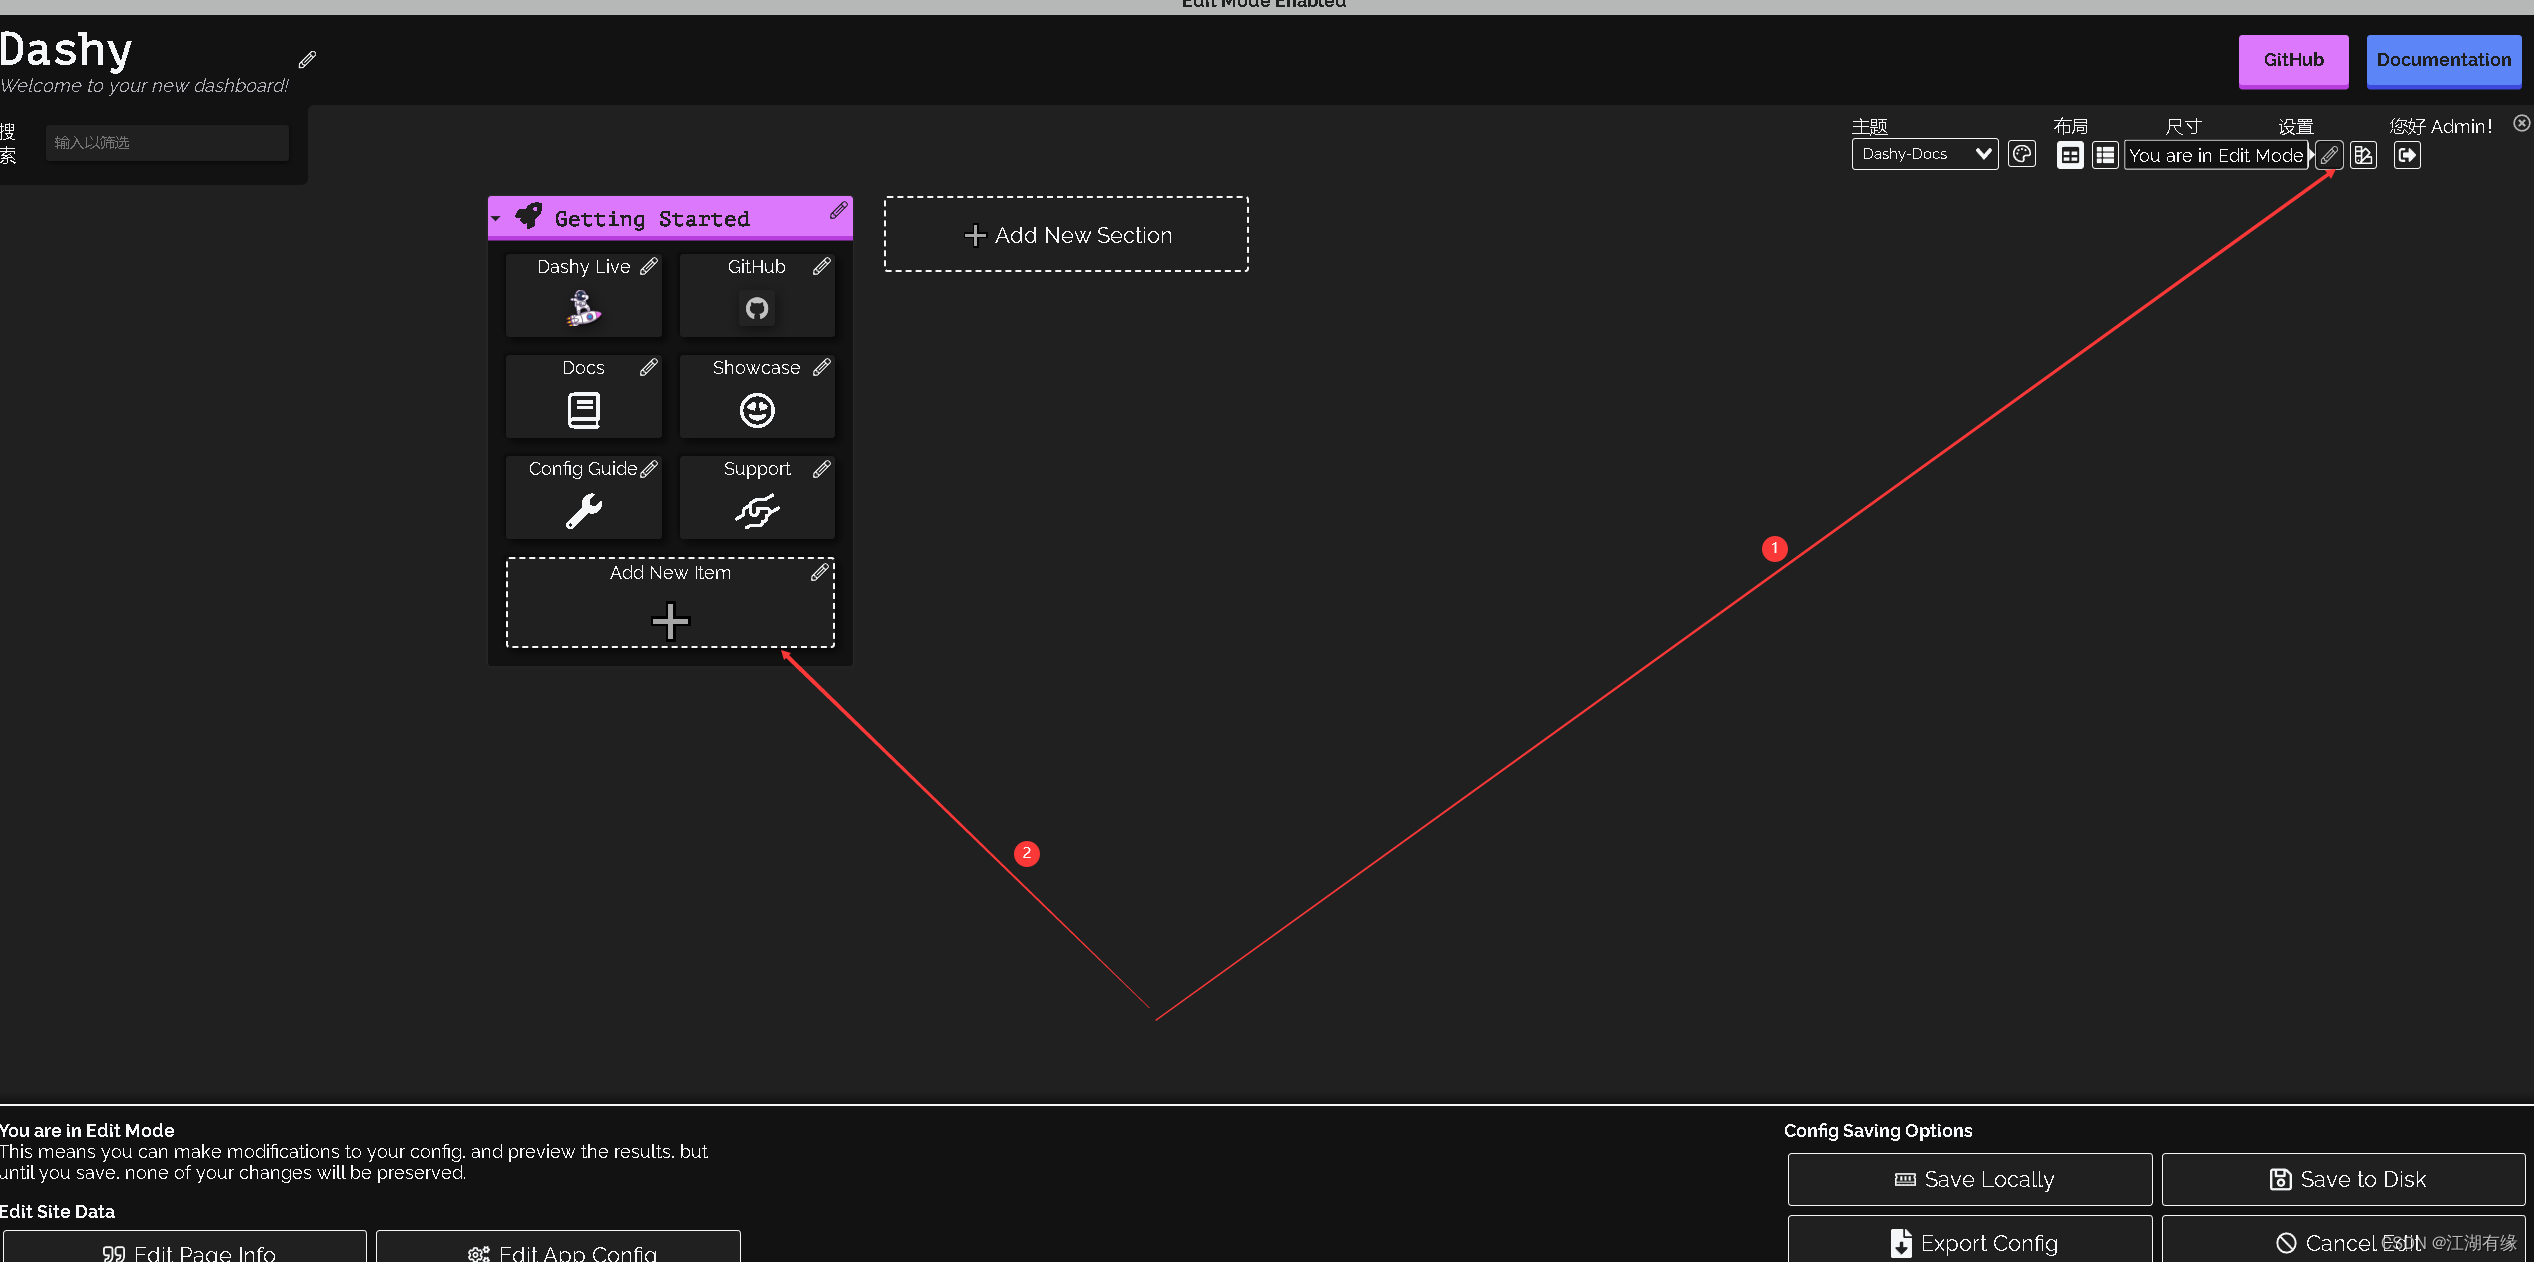
7.3 新增网页链接
- 进入交互编辑器,选择添加新链接。

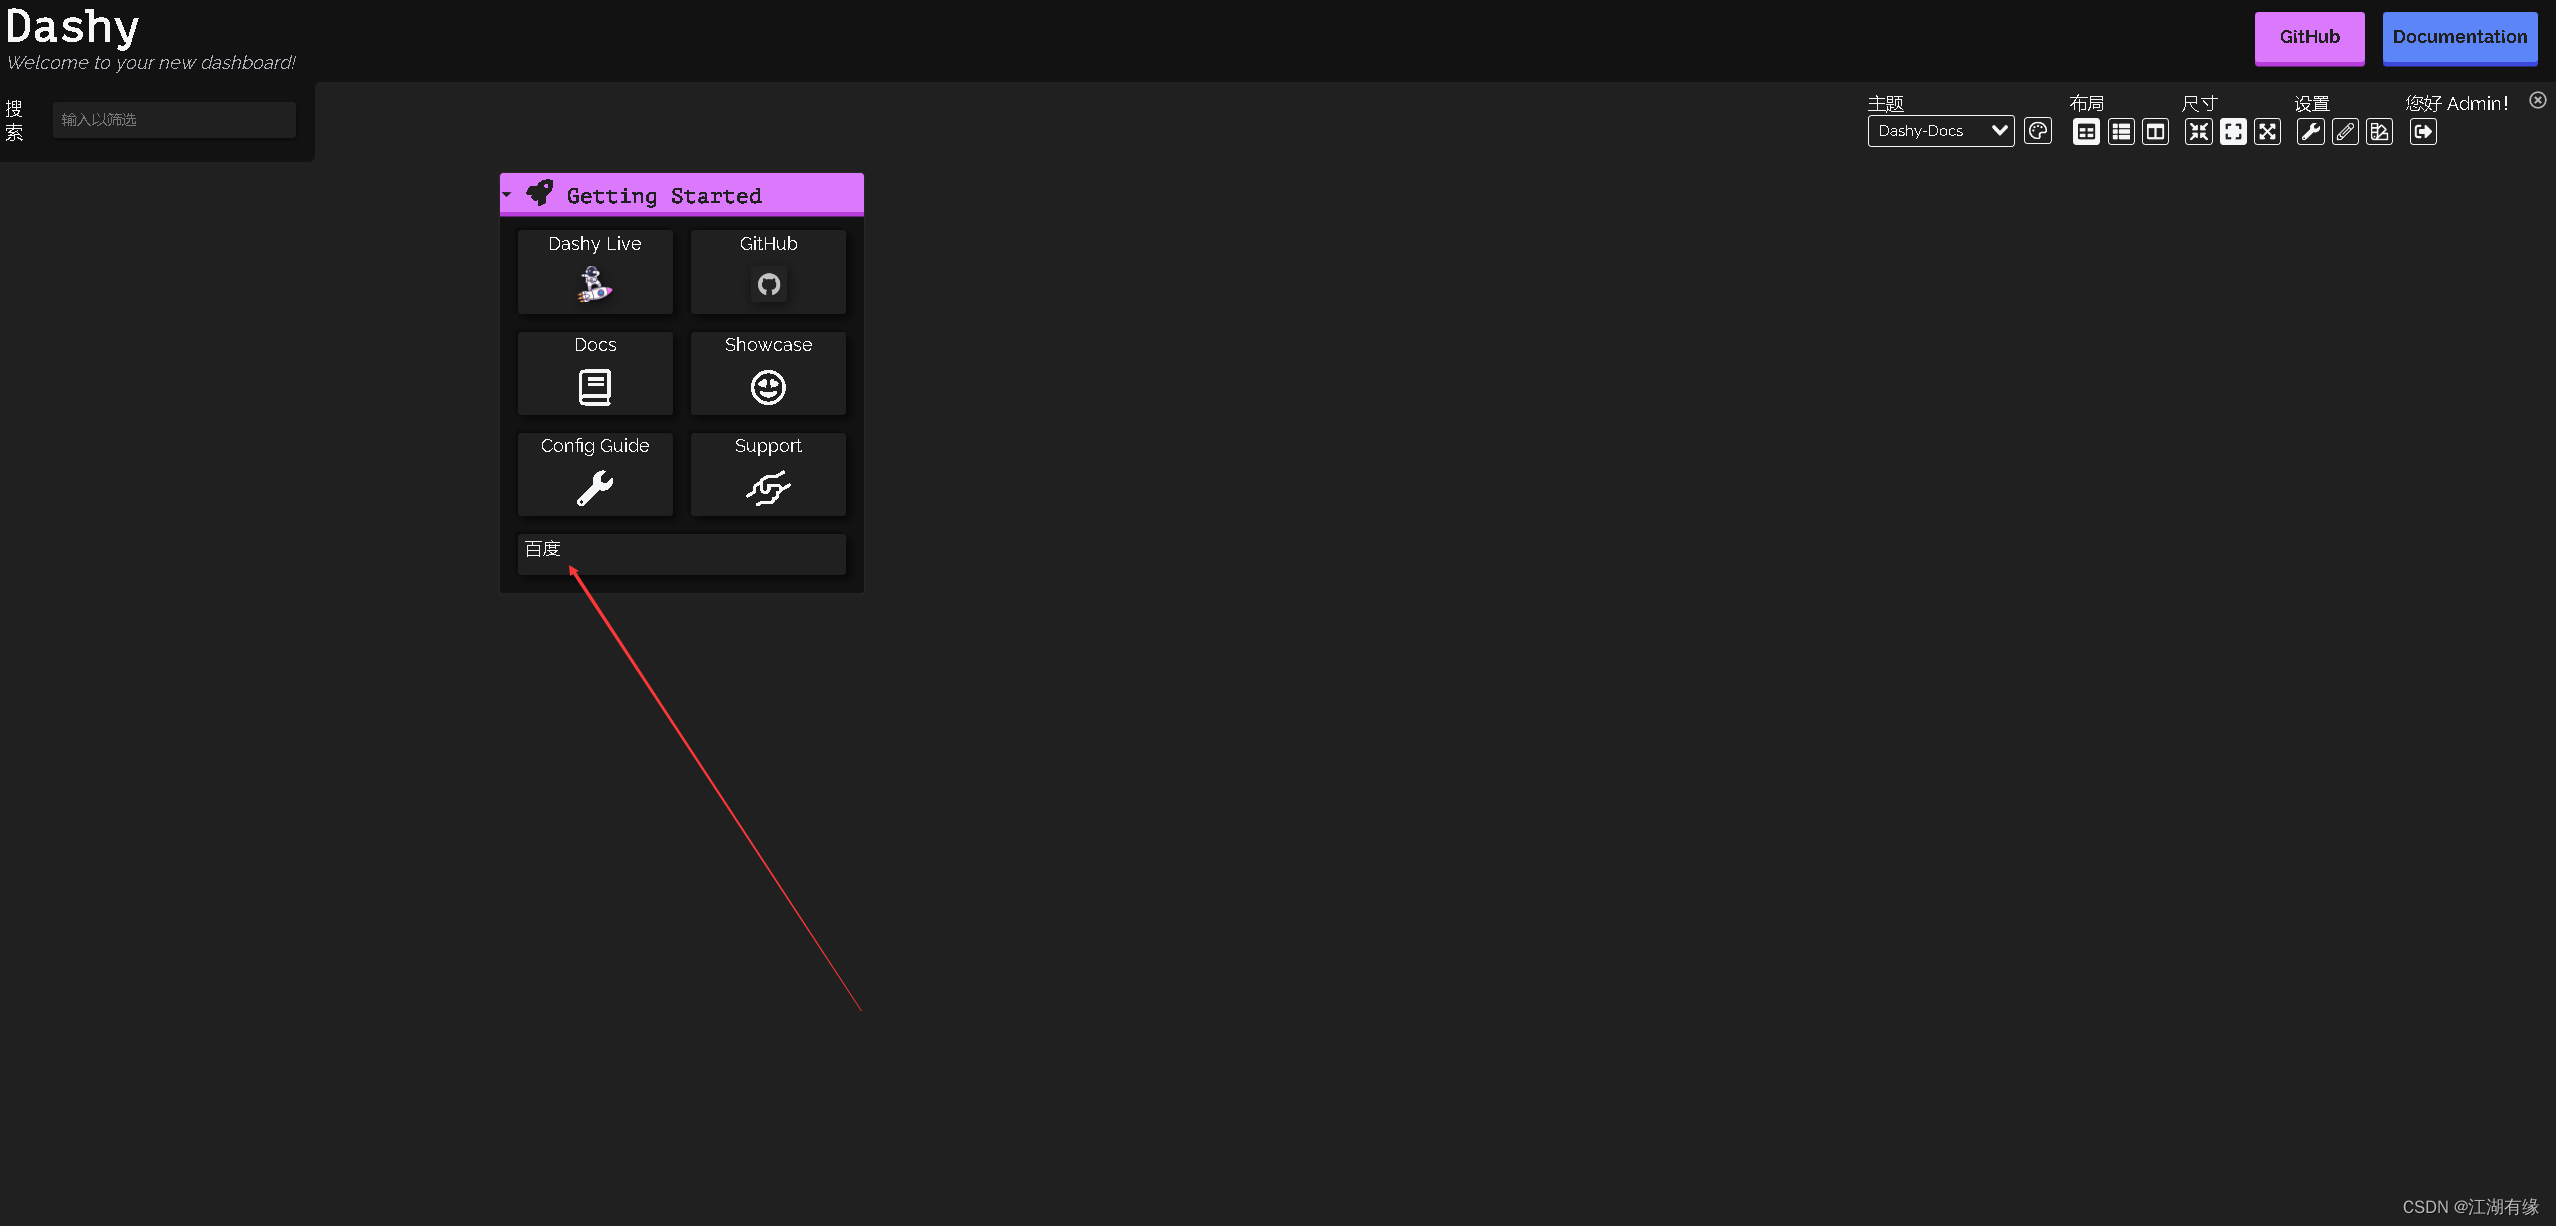
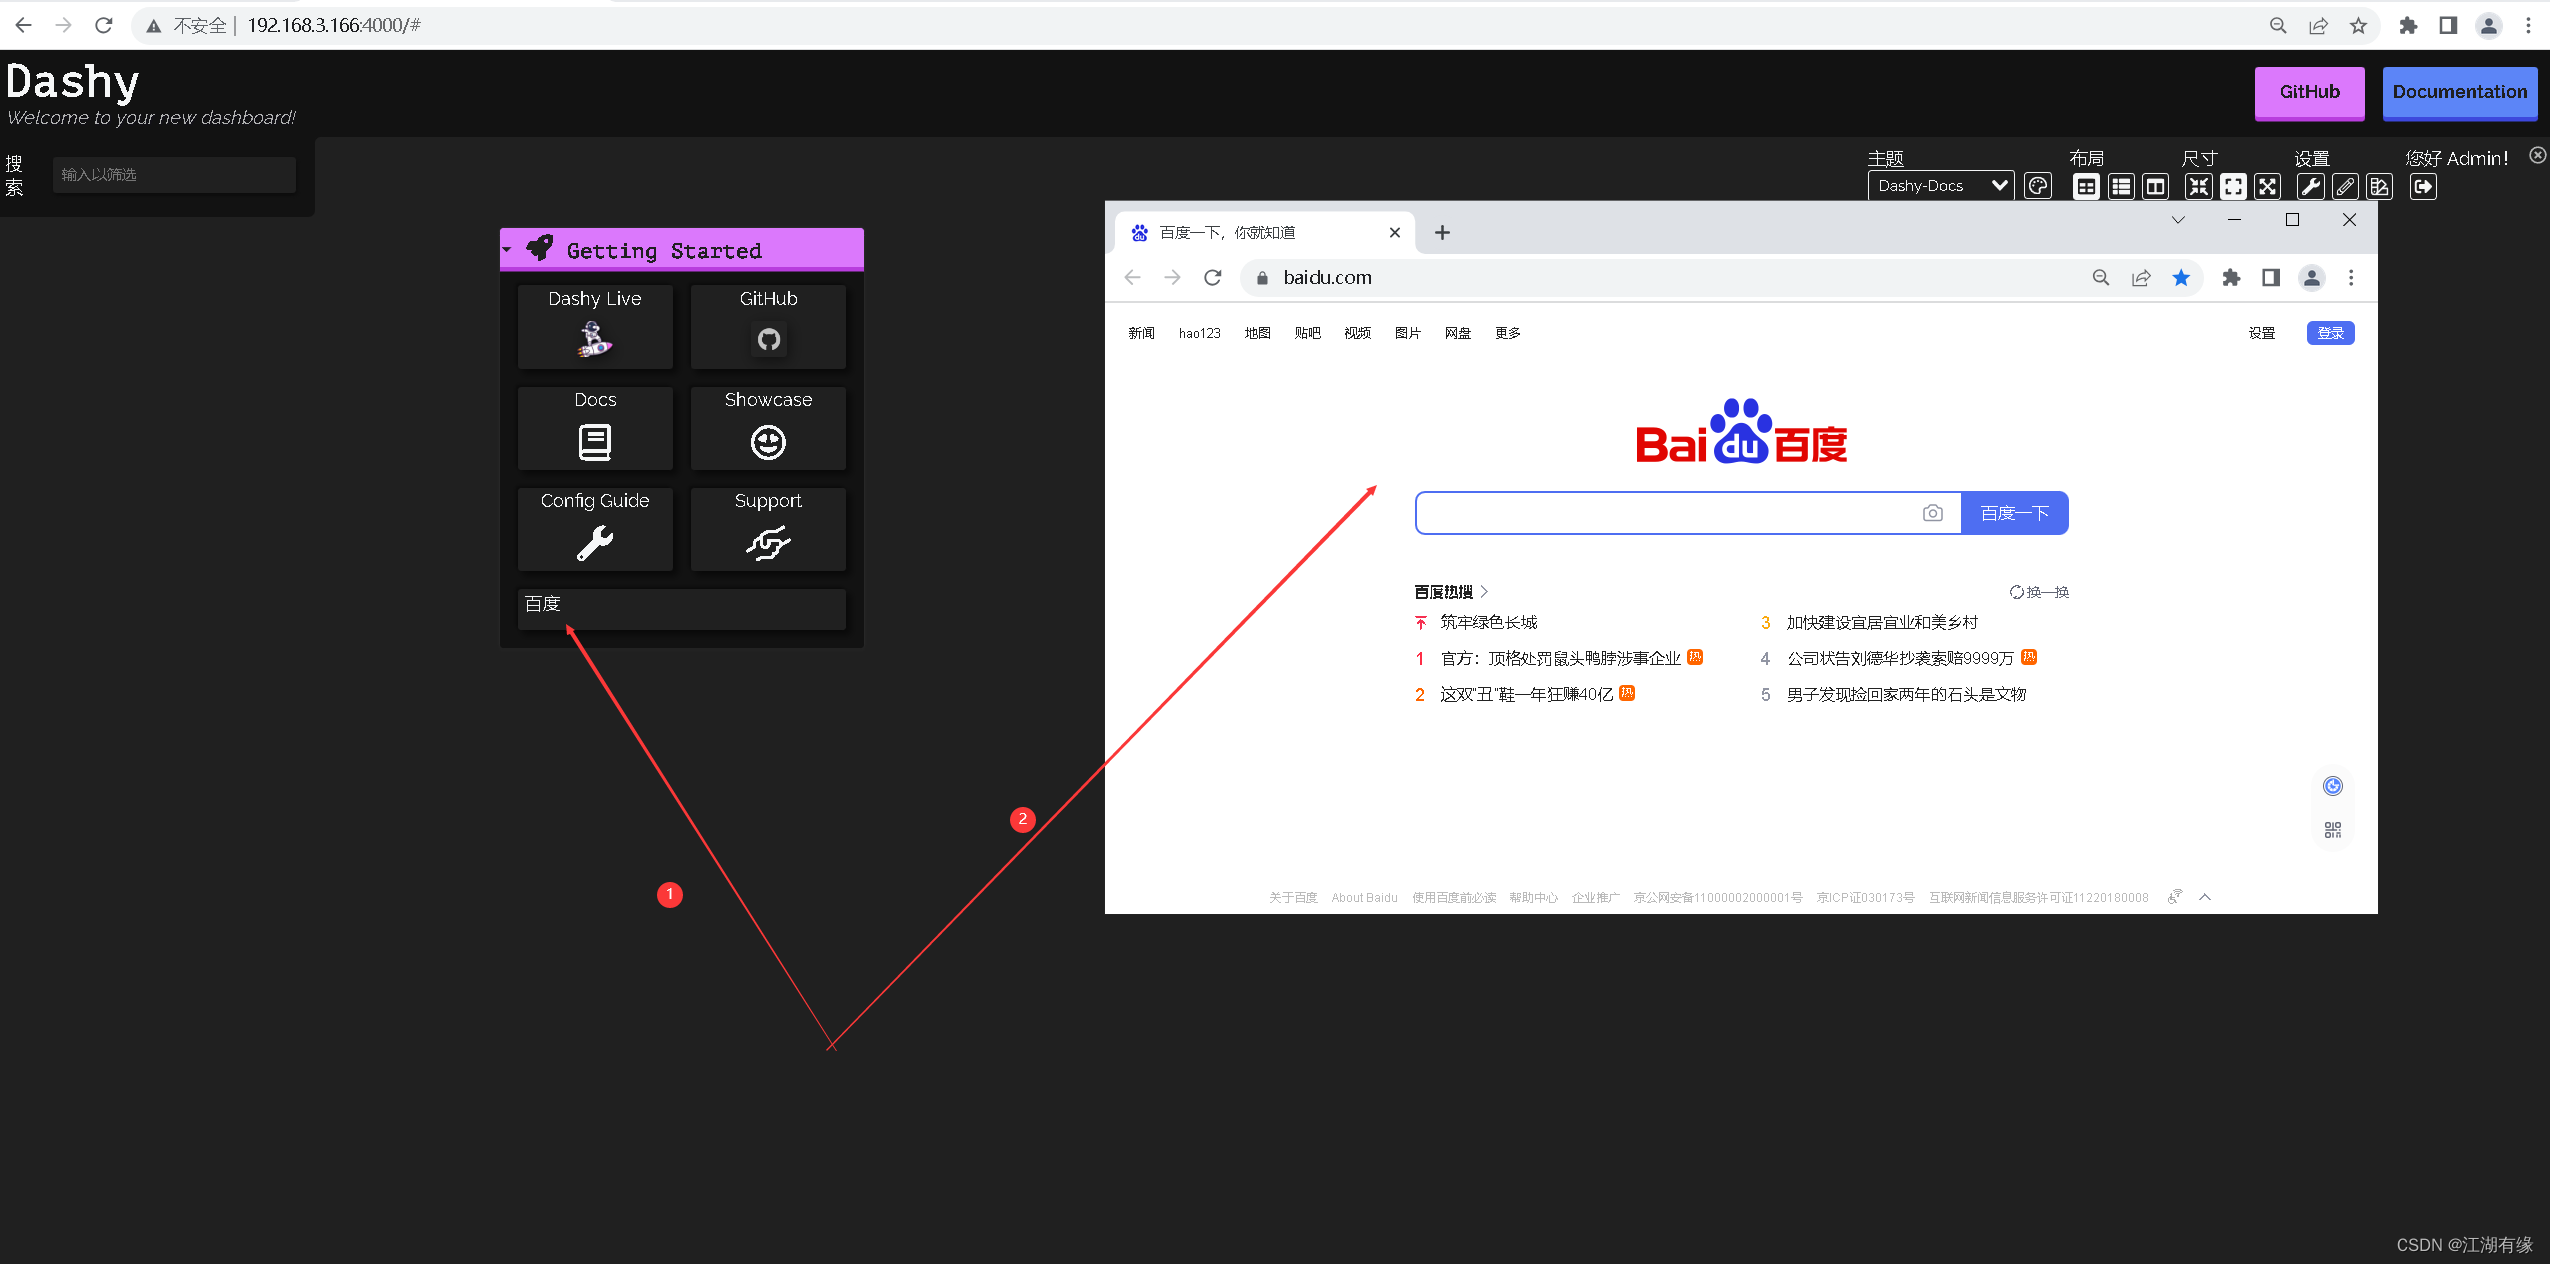
7.4 打开新增网页链接
打开新增网页链接

![[工业互联-10]:PLC入门简介](https://img-blog.csdnimg.cn/img_convert/8732fb230610db9e5c089e4e548479e3.gif)
