文章目录
- 一、vue的环境搭建:
- 二、文本数据绑定
- 三、属性数据绑定
- 四、事件绑定
- 五、案例1——全选/全不选
- 六、案例2——切换图片
- 主要内容: v-if 、v-show指令
- 七、表单数据绑定
- 八、综合练习
- 总结步骤:
一、vue的环境搭建:
官方文档:https://v2.cn.vuejs.org/v2/guide/index.html
1.将vue.min.js复制到js中:

2.在demo01.html中,引入js
<script src="./js/vue.min.js"></script>
3.将官方文档复制到demo01.html中
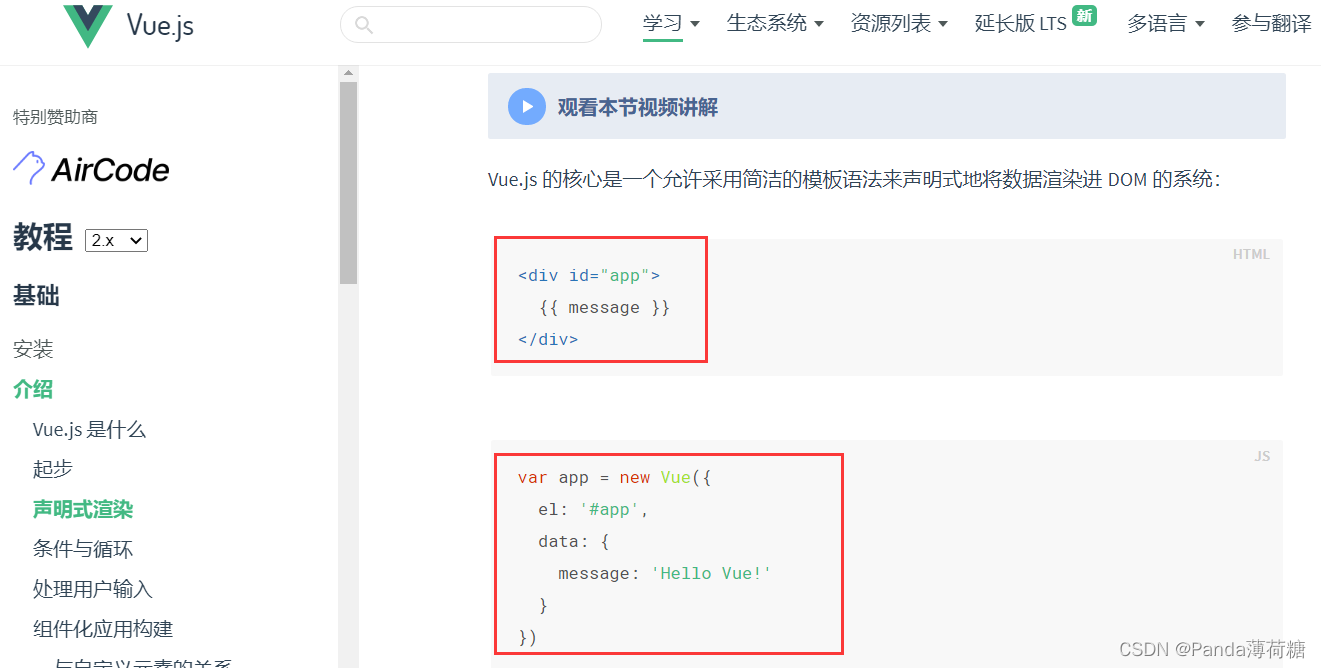
demo01.html代码如下:
<!DOCTYPE html>
<html lang="en">
  <head>
    <meta charset="UTF-8" />
    <meta http-equiv="X-UA-Compatible" content="IE=edge" />
    <meta name="viewport" content="width=device-width, initial-scale=1.0" />
    <title>vue环境搭建</title>
  </head>

  <body>
    <div id="app">
      {{ message }}
    </div>
  </body>
</html>
<script src="./js/vue.min.js"></script>
<script>
  var app = new Vue({
    el: '#app',
    data: {
      message: 'Hello Vue!'
    }
  })
</script>
4.出现如下结果,则环境搭建成功!

二、文本数据绑定
html代码如下:
<!DOCTYPE html>
<html lang="en">
  <head>
    <meta charset="UTF-8" />
    <meta http-equiv="X-UA-Compatible" content="IE=edge" />
    <meta name="viewport" content="width=device-width, initial-scale=1.0" />
    <title>文本数据绑定</title>
  </head>
  <body>
    <div id="app">
          <div>单个变量: {{message}} </div>
          <ul>普通数组:
              <li v-for="(city,index) in citys":key = "index">
                {{city}}
              </li>
          </ul>
          <div>单个对象: 姓名: {{person.name}}    --- 年龄:{{person.age}}   </div>
          <ul>对象数组
              <li v-for="(person,index) in persons":key="index">
              编号: {{person.id}}  姓名: {{person.name}}  --- 年龄:  {{person.age}}
            </li>
          </ul>
    </div>
  </body>
</html>
<script src="./js/vue.min.js"></script>
<script>
  var app = new Vue({
    el: '#app',
    data: {
      message: "hello vue!",
      citys: ["深圳", "广州", "兰州"],
      person: {
        name: "张三",
        age: 18,
      },
      persons: [
        { id:1,name: "张三", age: 18 },
        { id:2,name: "李四", age: 19 },
        { id:3,name: "王五", age: 19 },
      ],
    }
  })
</script>
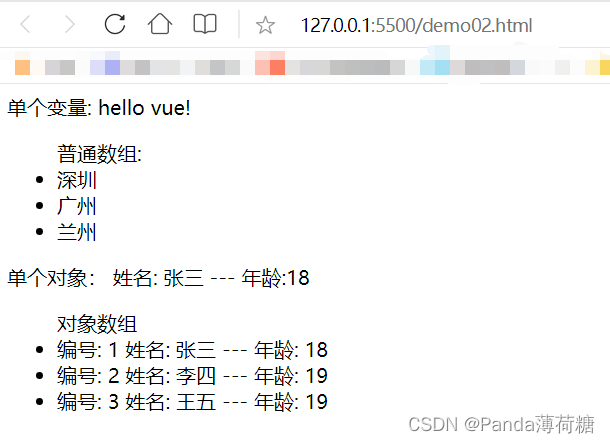
运行结果:
三、属性数据绑定
html代码如下:
<!DOCTYPE html>
<html lang="en">
  <head>
    <meta charset="UTF-8" />
    <meta http-equiv="X-UA-Compatible" content="IE=edge" />
    <meta name="viewport" content="width=device-width, initial-scale=1.0" />
    <title>属性数据绑定</title>
  </head>
  <body>
    <div id="app">
      <!-- 属性是不能写{{}}的 -->
      <img :src="imgObj.imgSrc" alt="" id="imgObj.id" />
    </div>
  </body>
</html>
<script src="./js/vue.min.js"></script>
<script>
  var app = new Vue({
  el: '#app',
  data: {
    imgObj: {
        imgSrc: "./img/girl1.jpg",
        id: 1001,
      },
  }
})
</script>
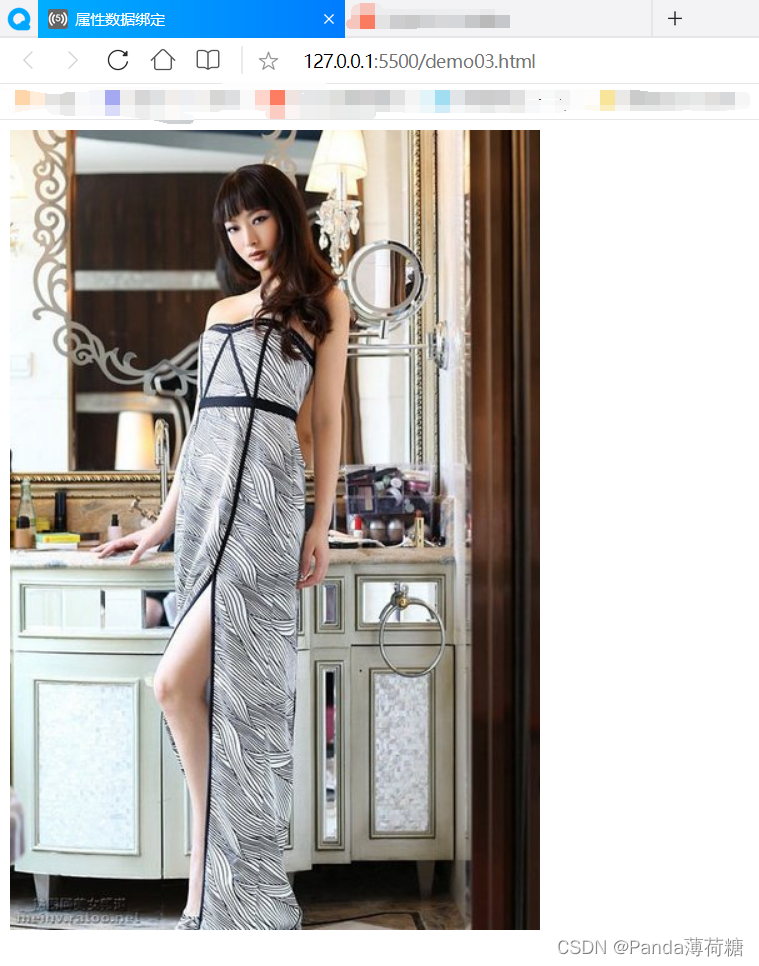
运行结果如下:
四、事件绑定
<!DOCTYPE html>
<html lang="en">
  <head>
    <meta charset="UTF-8" />
    <meta http-equiv="X-UA-Compatible" content="IE=edge" />
    <meta name="viewport" content="width=device-width, initial-scale=1.0" />
    <title>事件绑定</title>
    <style>
      #d1 {
        width: 300px;
        height: 300px;
        background-color: red;
      }
      #d2 {
        width: 300px;
        height: 300px;
        background-color: black;
      }
    </style>
  </head>
  <body>
    <div id="app">
      <div :id="color"></div>
      <input type="button" value="改变DIV背景颜色" @click="test01"/>
      <input type="button" value="测试有参数的方法" @click="test02(100)"/>
    </div>
  </body>
</html>
<script src="./js/vue.min.js"></script>
<script>
  var app = new Vue({
  el: '#app',
  data: {
    color:"d1"
  },
  methods:{
    test01(){
        this.color=(this.color == "d1"?"d2":"d1");
    },
    test02(num){
      console.log(num);
    }
  }
})
</script>
运行结果:
五、案例1——全选/全不选
代码如下:
<!DOCTYPE html>
<html lang="en">

<head>
  <meta charset="UTF-8" />
  <meta http-equiv="X-UA-Compatible" content="IE=edge" />
  <meta name="viewport" content="width=device-width, initial-scale=1.0" />
  <title>案例-全选全不选</title>
</head>

<body>
  <div id="root">
    <input type="checkbox" name="love" id="" value="cf" :checked="state"/>吃饭
    <input type="checkbox" name="love" id="" value="sj" :checked="state"/>睡觉
    <input type="checkbox" name="love" id="" value="sw" :checked="state"/>上网
    <input type="checkbox" name="love" id="" value="ddd" :checked="state"/>打豆豆
    <button @click="xz">选择</button>
  </div>
</body>

</html>
<script src="./js/vue.min.js"></script>
<script>
  var app = new Vue({
    el: "#root", //绑定DOM根元素
    data: {
      state: false
    },
    methods: {
      xz(){
        this.state = (this.state==true?false:true);
      },
    },
  });
</script>
初始页面:

点击选择后:

再点一次选择:

六、案例2——切换图片
主要内容: v-if 、v-show指令
最初版本可:Java实训第七天——四、DOM对象属性的操作案例
代码如下:
<!DOCTYPE html>
<html lang="en">
  <head>
    <meta charset="UTF-8" />
    <meta http-equiv="X-UA-Compatible" content="IE=edge" />
    <meta name="viewport" content="width=device-width, initial-scale=1.0" />
    <title>案例2-切换图片</title>
  </head>
  <body>
    <div id="root">
      <button @click="prev" v-show="index>0">上一张</button>
      <button @click="next" v-if="index<7">下一张</button>
      <br />
      <img :src="mvImg[index]" alt="" style="width: 200px; height: 400px" />
    </div>
  </body>
</html>
<script src="./js/vue.min.js"></script>
<script>
  var app = new Vue({
  el: '#root',
  data: {
    index:0,
    mvImg: ["./img/girl1.jpg", "./img/girl2.jpg", "./img/girl3.jpg", "./img/girl4.jpg",
     "./img/girl5.jpg", "./img/girl6.jpg", "./img/girl7.jpg", "./img/girl8.jpg"]
  },
  methods:{
    prev(){
      this.index--;
    },
    next(){
      this.index++;
    }
  },
})
</script>
七、表单数据绑定
代码如下:
<!DOCTYPE html>
<html lang="en">

<head>
  <meta charset="UTF-8" />
  <meta http-equiv="X-UA-Compatible" content="IE=edge" />
  <meta name="viewport" content="width=device-width, initial-scale=1.0" />
  <title>表单数据绑定</title>
</head>

<body>
  <div id="root">
    账号:
    <input type="text" name="username" v-model="userForm.username" />
    <br />
    密码:<input type="password" name="userpass" id="" v-model="userForm.userpass" />
    <br />
    性别:<input type="radio" name="sex" id="" value="M" v-model="userForm.sex" />男
    <input type="radio" name="sex" id="" value="F" v-model="userForm.sex" />女
    <br />
    爱好:<input type="checkbox" name="love" id="" value="cf" v-model="userForm.love" />吃饭
    <input type="checkbox" name="love" id="" value="sj" v-model="userForm.love" />睡觉
    <input type="checkbox" name="love" id="" value="sw" v-model="userForm.love" />上网
    <input type="checkbox" name="love" id="" value="ddd" v-model="userForm.love" />打豆豆
    <br />
    籍贯:
    <select name="city" id="city" v-model="userForm.city">
      <option value="深圳">深圳</option>
      <option value="广州">广州</option>
      <option value="长勺">长勺</option>
    </select>
    <br />
    备注:<textarea name="remark" id="remark" cols="30" rows="10" v-model="userForm.remark"></textarea>
    <br />
    注册的数据:
    <div> {{info}} </div>
    <div> {{info2}} </div>
    <button @click="reg">注册</button>
  </div>
</body>

</html>
<script src="./js/vue.min.js"></script>
<script>
  var app = new Vue({
    el: "#root", //绑定DOM根元素
    data: {
      info: undefined,
      info2:undefined,
      userForm: {
        username: undefined,
        userpass: undefined,
        sex: undefined,
        love: [],
        city: undefined,
        remark: undefined,
      }
    },
    methods: {
      reg() {
        this.info = this.userForm.username + "," + this.userForm.userpass + "," + this.userForm.sex
        + "," + this.userForm.love + "," + this.userForm.city + "," + this.userForm.remark
        //console.log(this.userForm.love);
      }
    },
  });
</script>
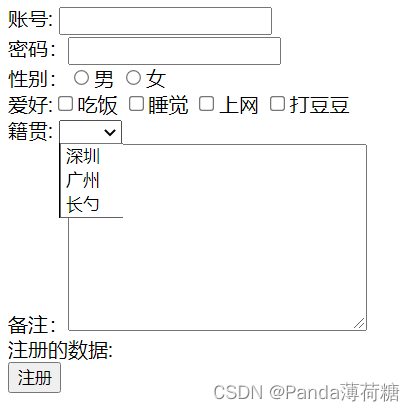
初始页面:
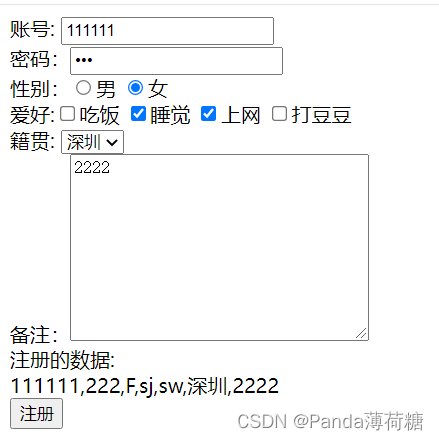
运行结果:
八、综合练习
总结步骤:
- v-for渲染数据到表格和下拉框
- 添加功能
2.1 准备 form对象 并在标签中用v-model绑定
2.2 添加点击事件 利用js中数组的api push方法完成添加 - 删除功能
3.1 删除按钮绑定事件并传入下标(要删除的数据的下标)
3.2 方法中利用js中数组的api splice完成删除 - 优化表格显示
添加一个tr 用v-show判断数组长度
代码如下:
<!DOCTYPE html>
<html lang="en">

<head>
  <meta charset="UTF-8" />
  <meta http-equiv="X-UA-Compatible" content="IE=edge" />
  <meta name="viewport" content="width=device-width, initial-scale=1.0" />
  <title>学生信息维护</title>
</head>

<body>
  <div id="app">
    学号: <input type="text" v-model="studentForm.stuid"/>
    姓名:<input type="text" v-model="studentForm.stuname"/>
    年龄:<input type="number" v-model="studentForm.age"/>
    邮箱:<input type="email" v-model="studentForm.email"/>
    所属班级:<select v-model="studentForm.classname">
      <option v-for="(c,index) in classes":key="index">
        {{c.classname}}
      </option>
    </select>
    <button @click="saveStudent">添加</button>
    <br />
    <br />
    <table width="400" border="1" cellspacing="0">
      <tr>
        <th>序号</th>
        <th>学号</th>
        <th>姓名</th>
        <th>年龄</th>
        <th>邮箱</th>
        <th>所属班级</th>
        <th>操作</th>
      </tr>

      <tr v-for="(student,index) in students":key="index" v-show="students.length>0">
        <th>{{index+1}}</th>
        <th>{{student.stuid}}</th>
        <th>{{student.stuname}}</th>
        <th>{{student.age}}</th>
        <th>{{student.email}}</th>
        <th>{{student.classname}}</th>
        <th><button @click="deleteStudent(index)">刪除</button></th>
      </tr>
      <tr v-show="students.length==0">
        <td colspan="7" align="center">暂无数据</td>
      </tr>
    </table>
  </div>
</body>

</html>
<script src="./js/vue.min.js"></script>
<script>
  var app = new Vue({
    el: "#app",
    data: {
      studentForm:{
        stuid:undefined,
        stuname: undefined,
        age: undefined,
        email: undefined,
        classname: undefined,
      },
      classes: [
        { classid: 1, classname: "st0730" },
        { classid: 2, classname: "st0731" },
      ],
      students: [
        {
          stuid: 1001,
          stuname: "张三",
          age: "10",
          email: "aaa@qq.com",
          classname: "st0730",
        },
        {
          stuid: 1002,
          stuname: "李四",
          age: "15",
          email: "bbb@qq.com",
          classname: "st0731",
        },
        {
          stuid: 1003,
          stuname: "王五",
          age: "23",
          email: "ccc@qq.com",
          classname: "st0731",
        },
      ],
    },
    methods: {
      deleteStudent(index){
        this.students.splice(index,1);
      },
      saveStudent(){
        let stu = JSON.parse(JSON.stringify(this.studentForm));
        this.students.push(stu);
      }
    },
  });
</script>
运行结果:

执行添加操作:

删除操作:

全部删除时显示:

