虚拟机模块:可以创建沙箱环境
const k = 100;

const vm = require("vm");
vm.runInThisContext("console.log(a)");

node 中如何实现代码的调试
node 调试指南
1. 可以在浏览器中进行调试(比如调试 webpack 等模块可以使用)
node --inspect-brk 文件:会自动在代码运行的第一行打上断点
let a = 1;
let b = 2;
function sum(x, y) {
    return x + y;
}
sum(a, b);
- 谷歌浏览器打开:
chrome://inspect/#devices - 点击
Open dedicated DevTools for Node打开 node 独立控制台 - 运行
node --inspect-brk '35 # 模块的断点调试 require 语法实现过程.js'

用 node 命令执行文件后

就会出现断点
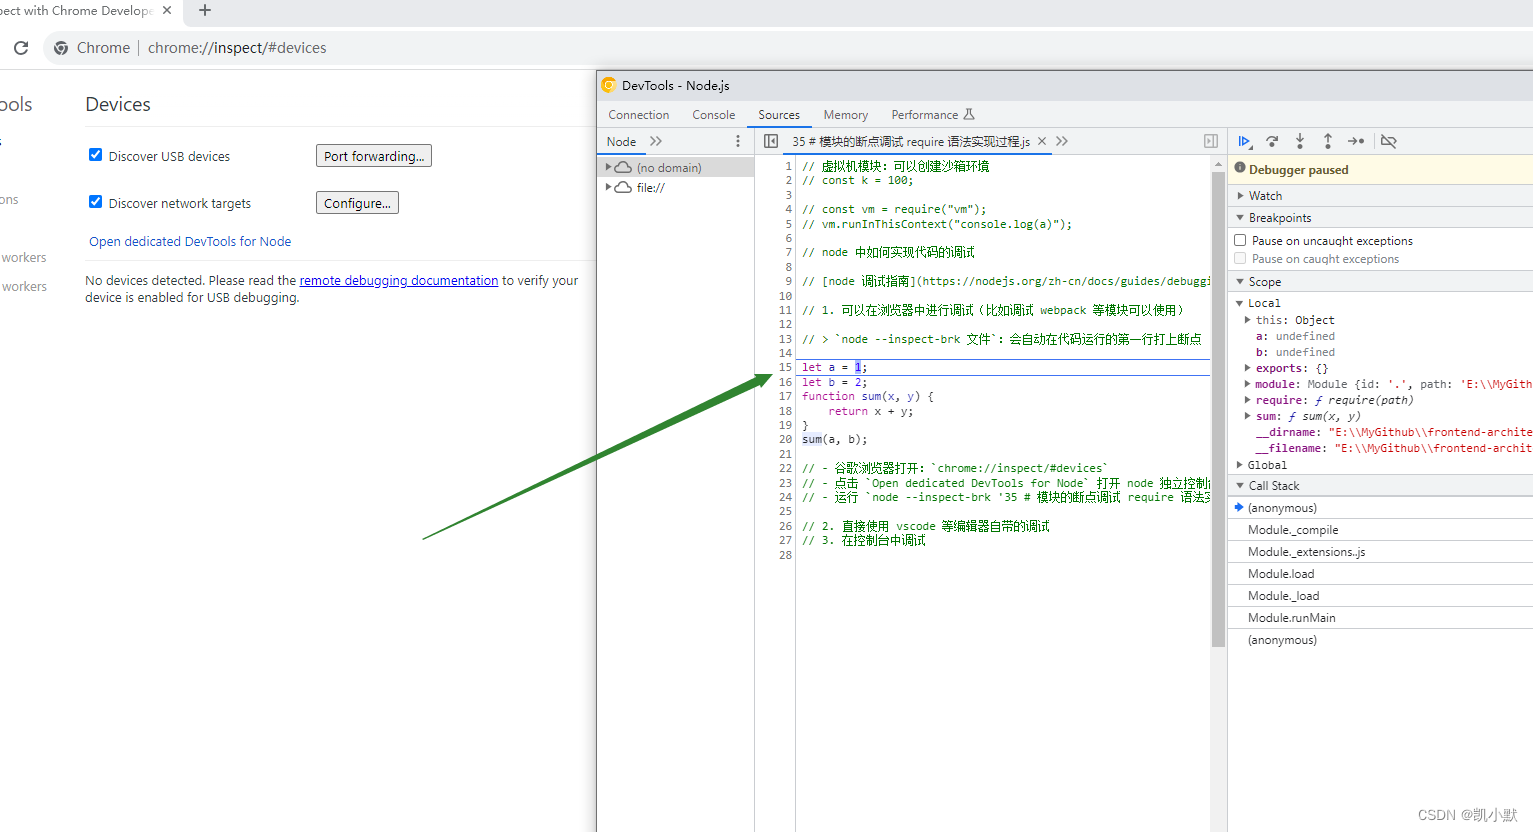
2. 直接使用 vscode 等编辑器自带的调试,利用 launch.json 进行调试(最方便,用的最多的方式)
创建 launch.json 文件
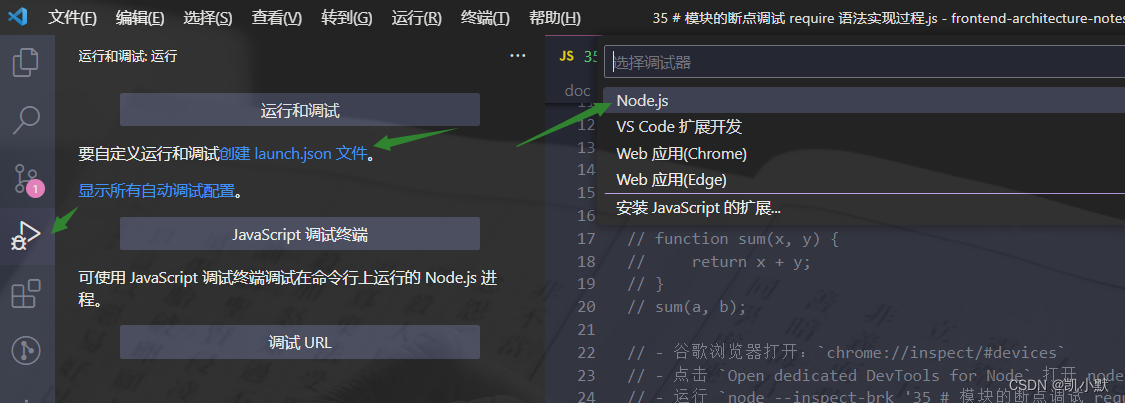
配置文件:这里我配死需要 debugger 的文件
{
    // 使用 IntelliSense 了解相关属性。
    // 悬停以查看现有属性的描述。
    // 欲了解更多信息,请访问: https://go.microsoft.com/fwlink/?linkid=830387
    "version": "0.2.0",
    "configurations": [
        {
            "type": "node",
            "request": "launch",
            "name": "启动程序",
            // 这里我们不跳过 node 的内部源码,因为等下需要调试 require,需注释掉
            "skipFiles": [
                // "<node_internals>/**"
            ],
            "program": "${workspaceFolder}\\doc\\35\\kaimo.js"
        }
    ]
}
新建 kaimo.js
let k = require("./a");
新建 a.js
let kaimo = "kaimo313";

module.exports = kaimo;
3. 在控制台中调试(在黑窗口调试)
调试分析 require 源码
基于上面的准备工作,下面进行 require 源码调试
先在 kaimo.js 第一行打上断点,会出现小红点
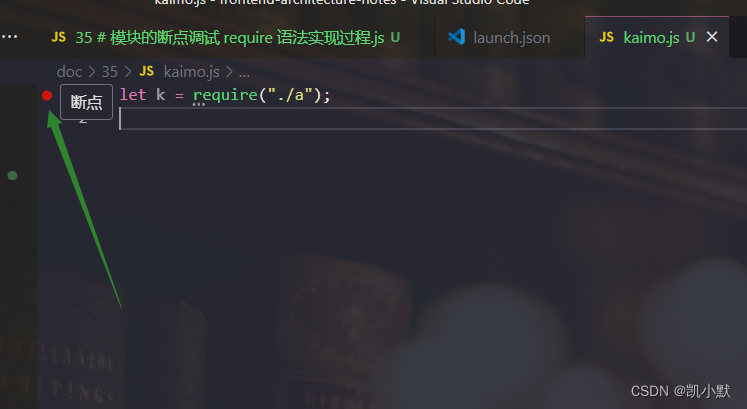
然后启动程序运行
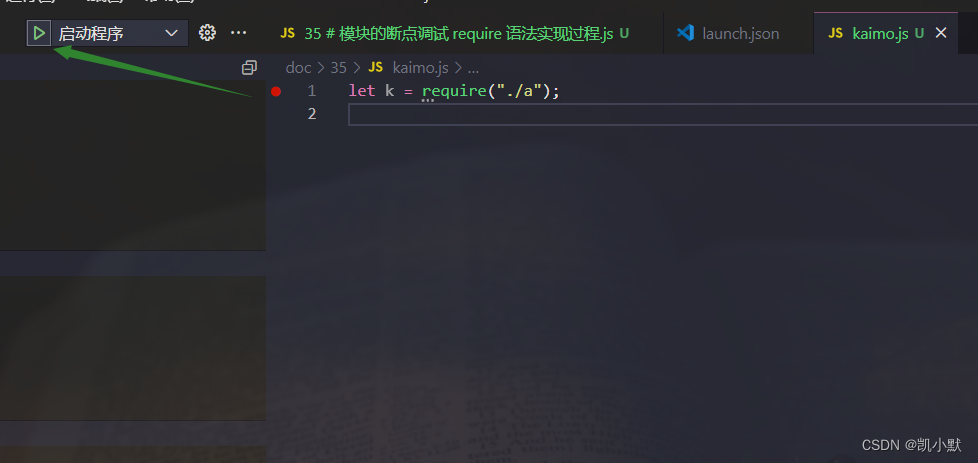
启动之后我们可以看到断点进入
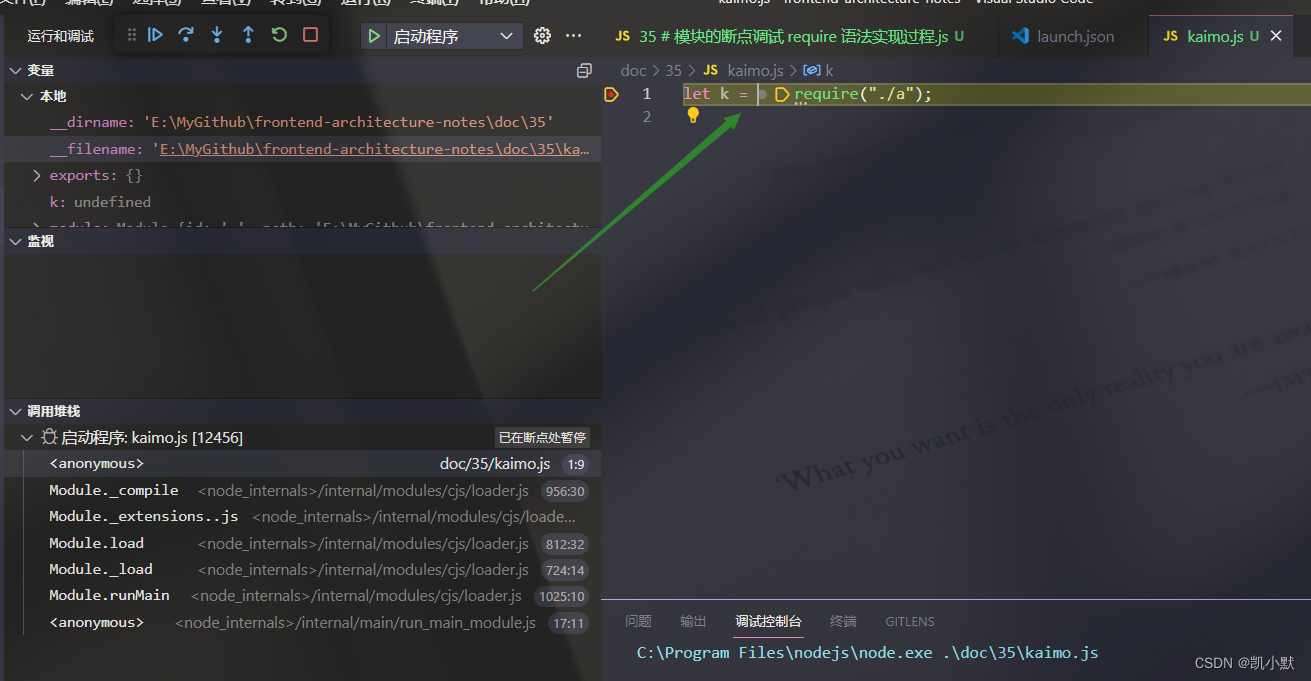
下面开始进行单步调试:(如果想跳出很长的单步,可以自己在需要的地方打断点,按继续按钮即可)
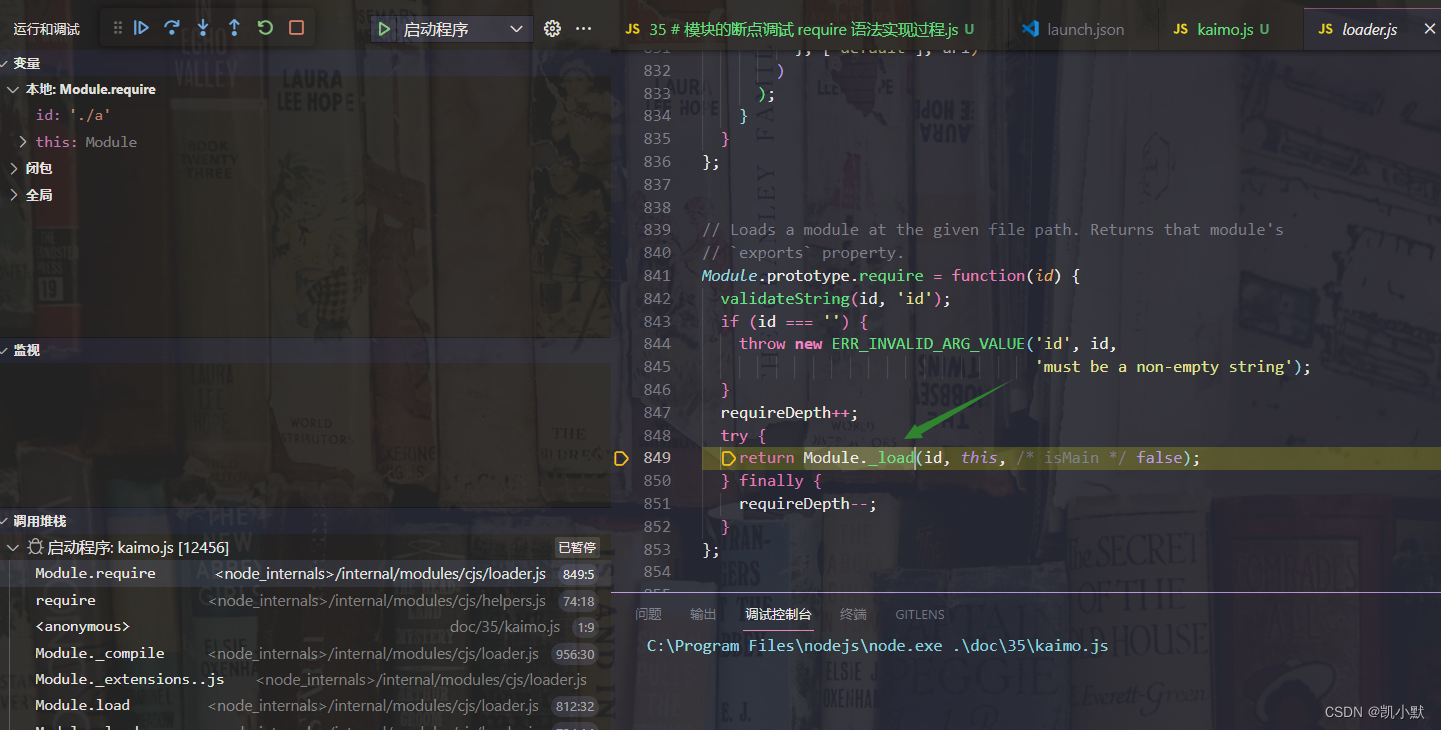
1、mod.require 会默认调用 require 语法

2、Module.prototype.require 模块的原型上有 require 方法

3、Module._load 调用模块的加载方法,最终返回的是 module.exports
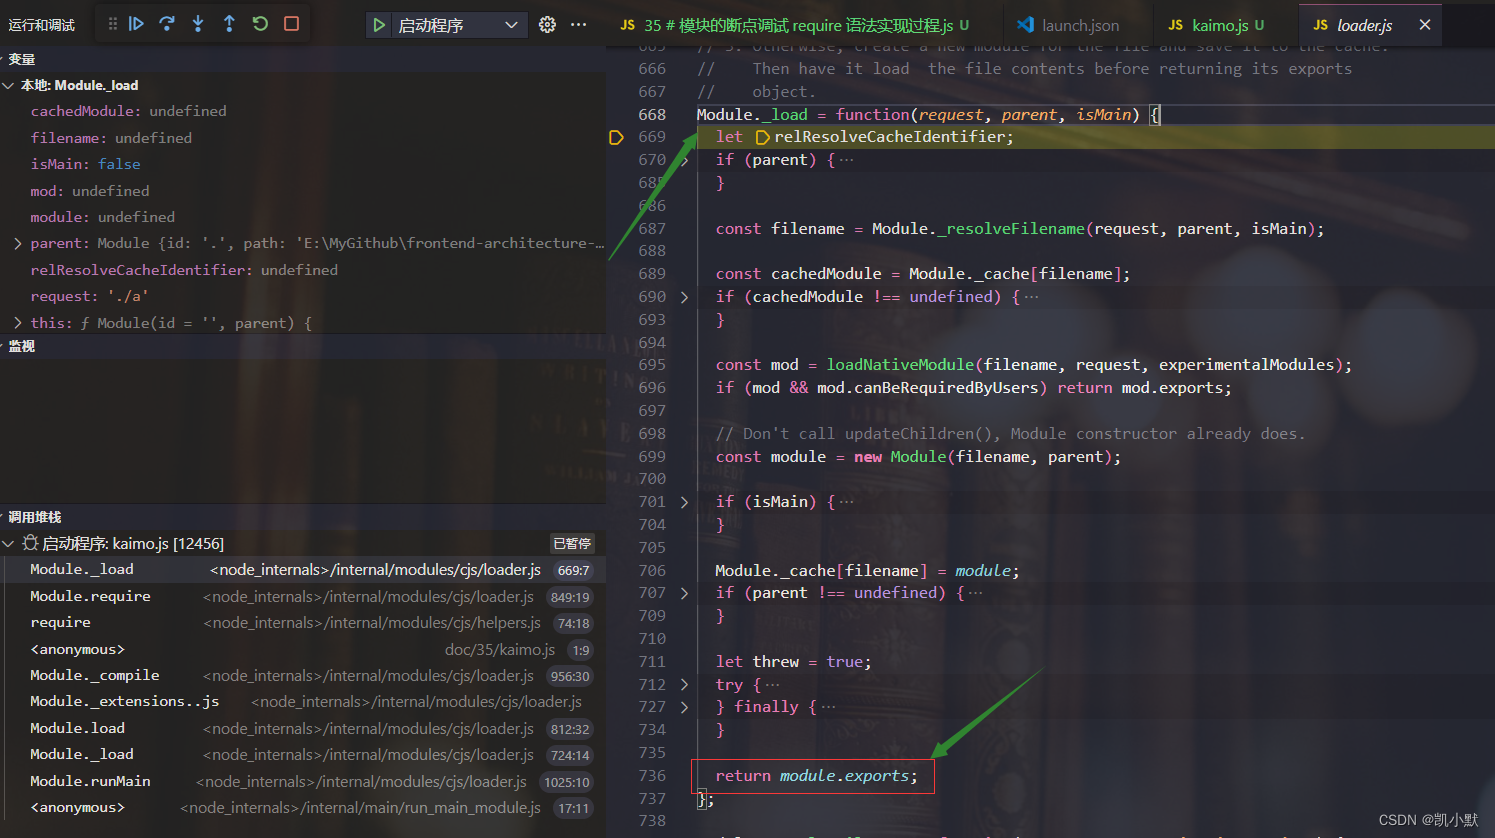
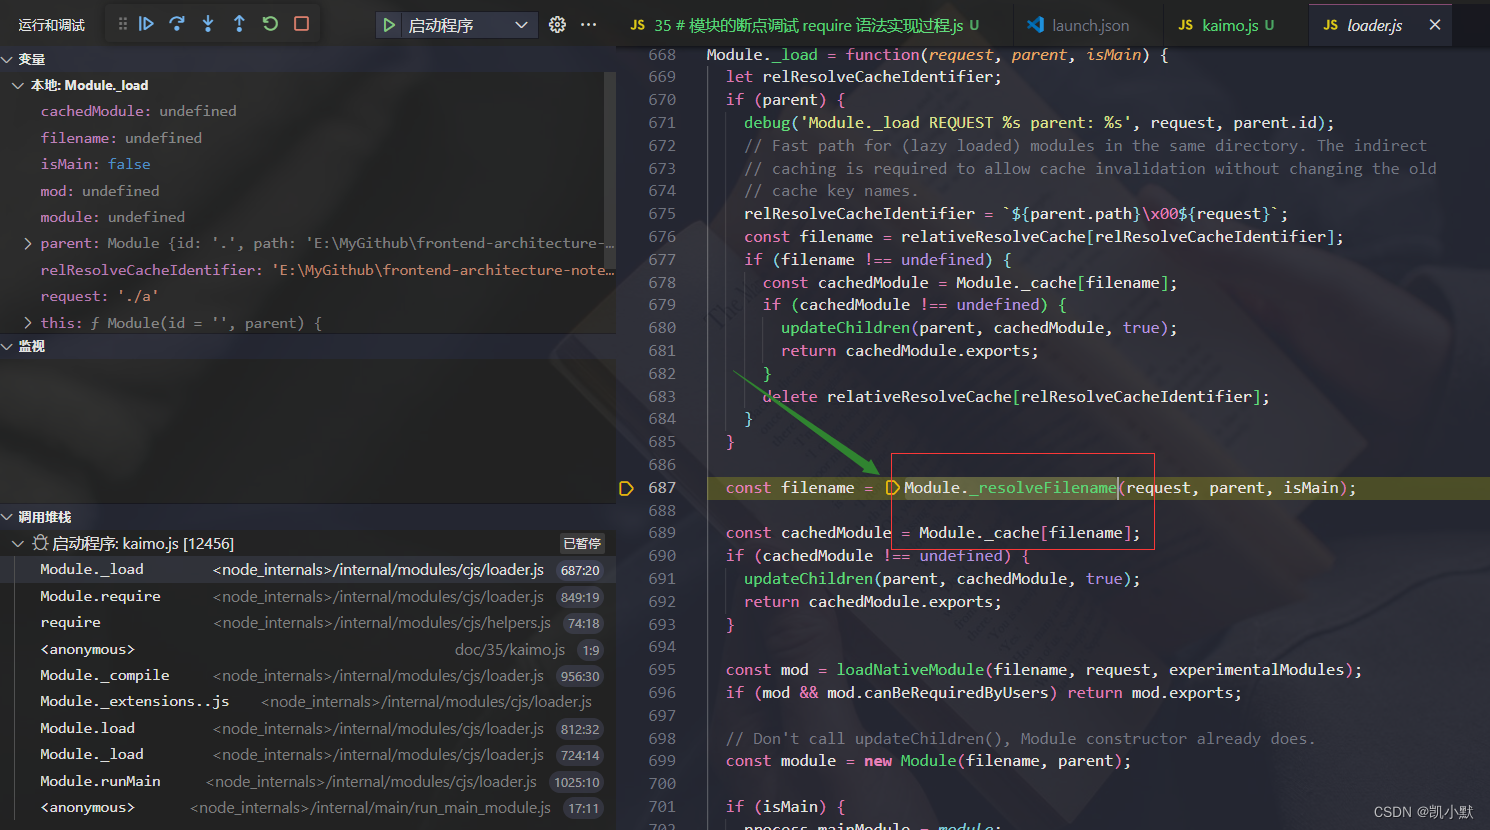
4、Module._resolveFilename 解析文件名,将文件名变成绝对路径,默认尝试添加 .js .json 等
5、Module._cache 默认会判断是否存在缓存
6、new Module 创建模块(对象),里面有 id,exports
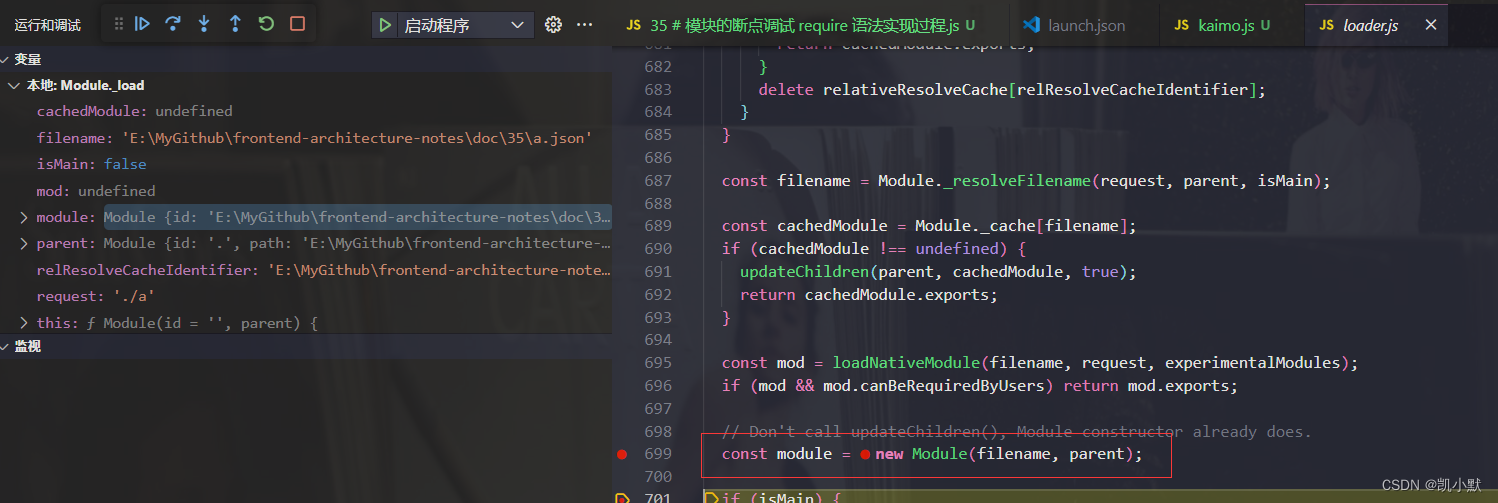
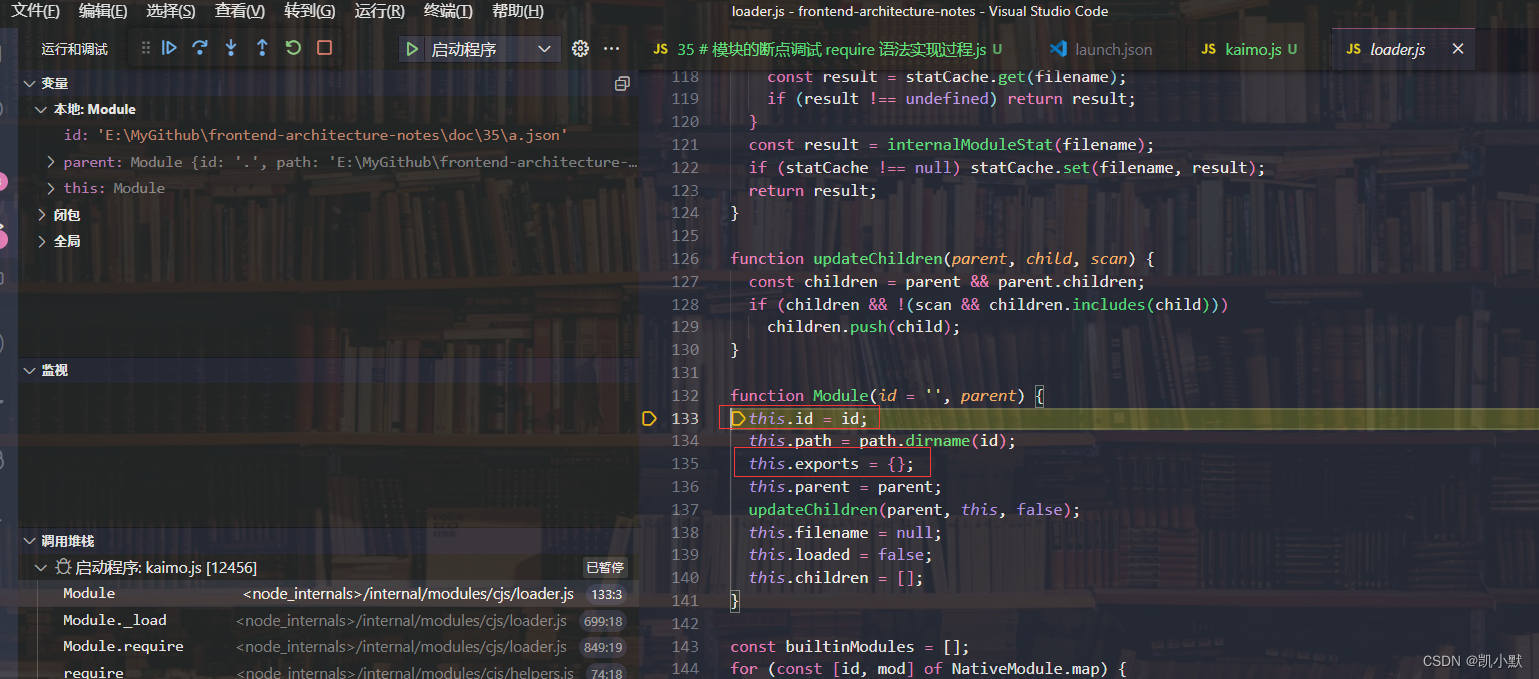
7、Module._cache[filename] = module 把模块缓存起来,方便下次使用

以上步骤都是根据文件名(绝对路径)创建一个模块
8、module.load 尝试加载模块
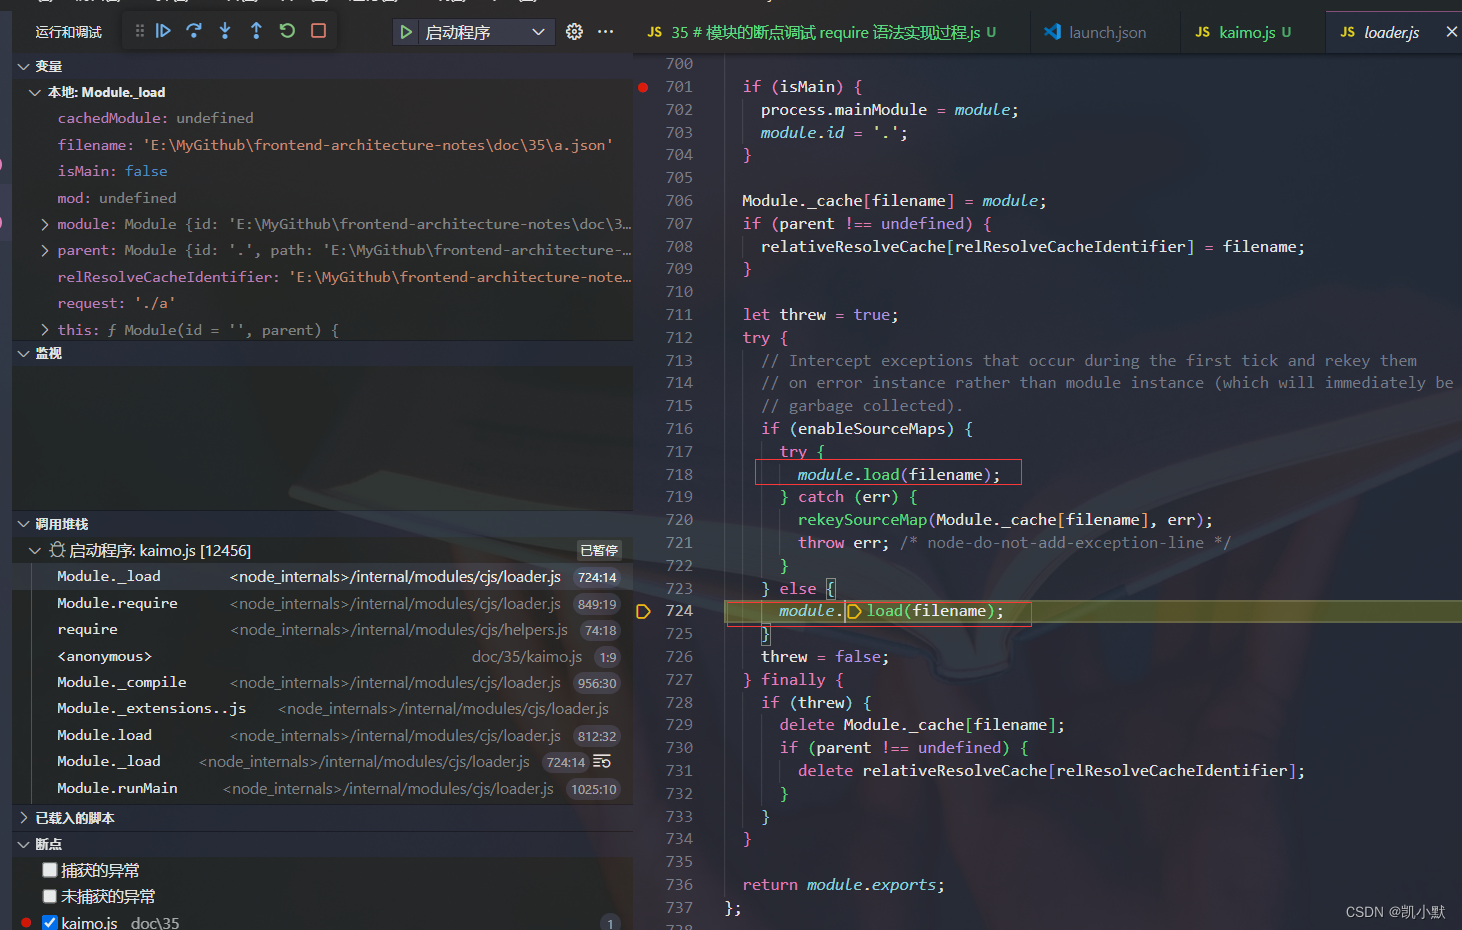
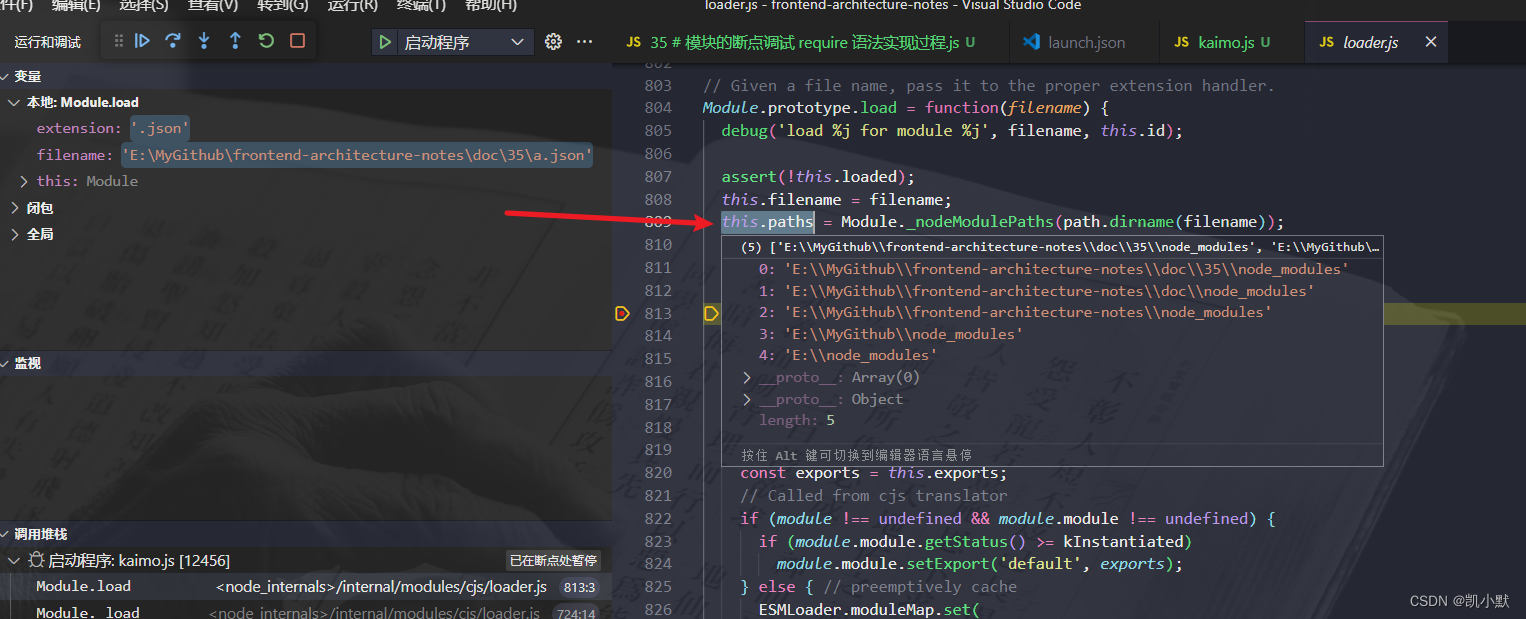
9、module.paths 第三方模块查找的路径
10、获取当前模块的拓展名,策略是根据拓展名调用对应的方法 Module._extensions[extension]


11、fs.readFileSync 读取文件的内容
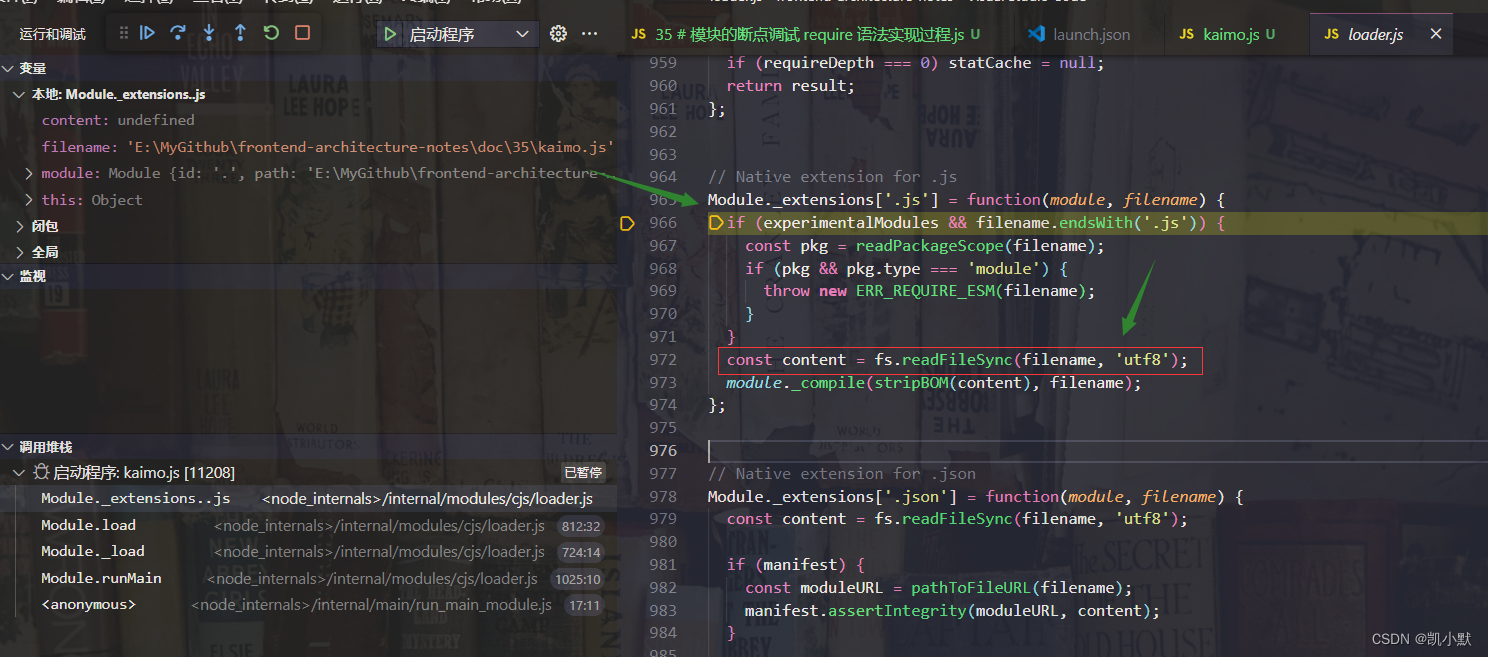
12、module._compile 去除文本文件 BOM 头,编译文件的内容
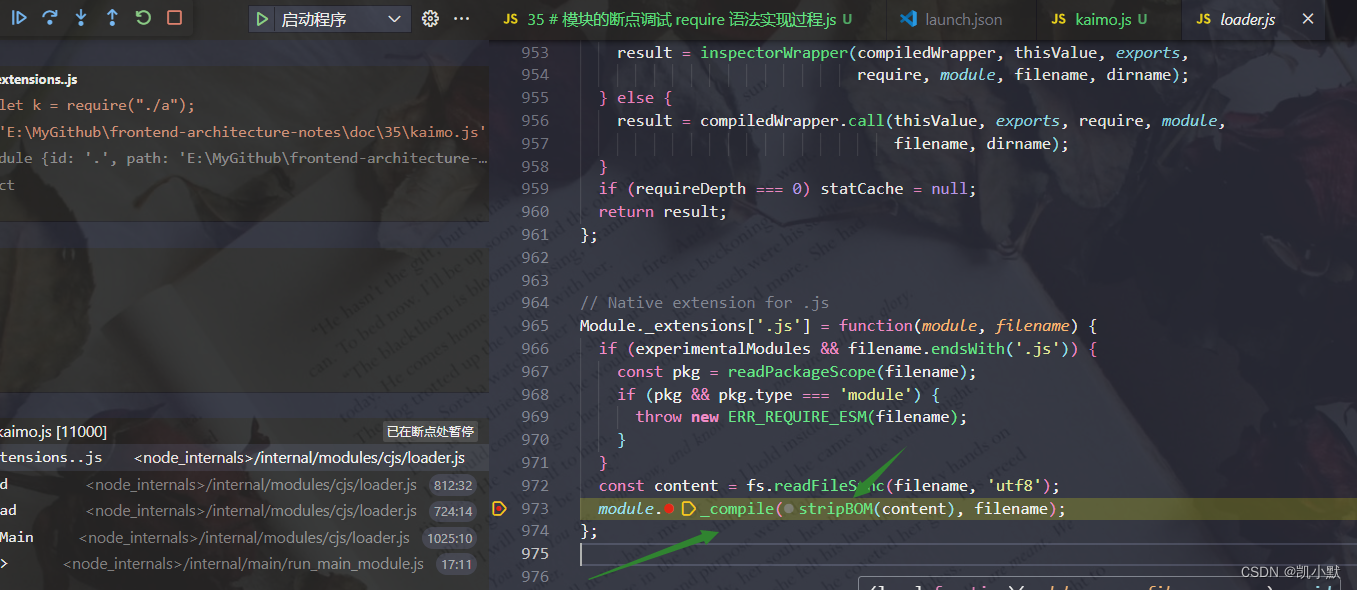
Node.js去除文本文件BOM头
BOM 字符虽然起到了标记文件编码的作用,其本身却不属于文件内容的一部分,如果读取文本文件时不去掉 BOM,在某些使用场景下就会有问题。例如我们把几个 JS 文件合并成一个文件后,如果文件中间含有 BOM 字符,就会导致浏览器 JS 语法错误。因此,使用 Node.js读取文本文件时,一般需要去掉 BOM。
/**
 * Remove byte order marker. This catches EF BB BF (the UTF-8 BOM)
 * because the buffer-to-string conversion in `fs.readFileSync()`
 * translates it to FEFF, the UTF-16 BOM.
 */
function stripBOM(content) {
  // 检测第一个字符是否为BOM
  if (content.charCodeAt(0) === 0xFEFF) {
    content = content.slice(1);
  }
  return content;
}
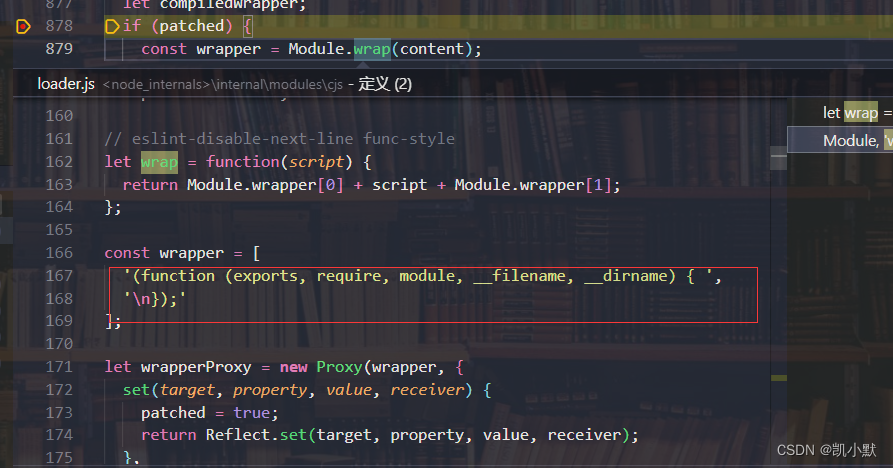
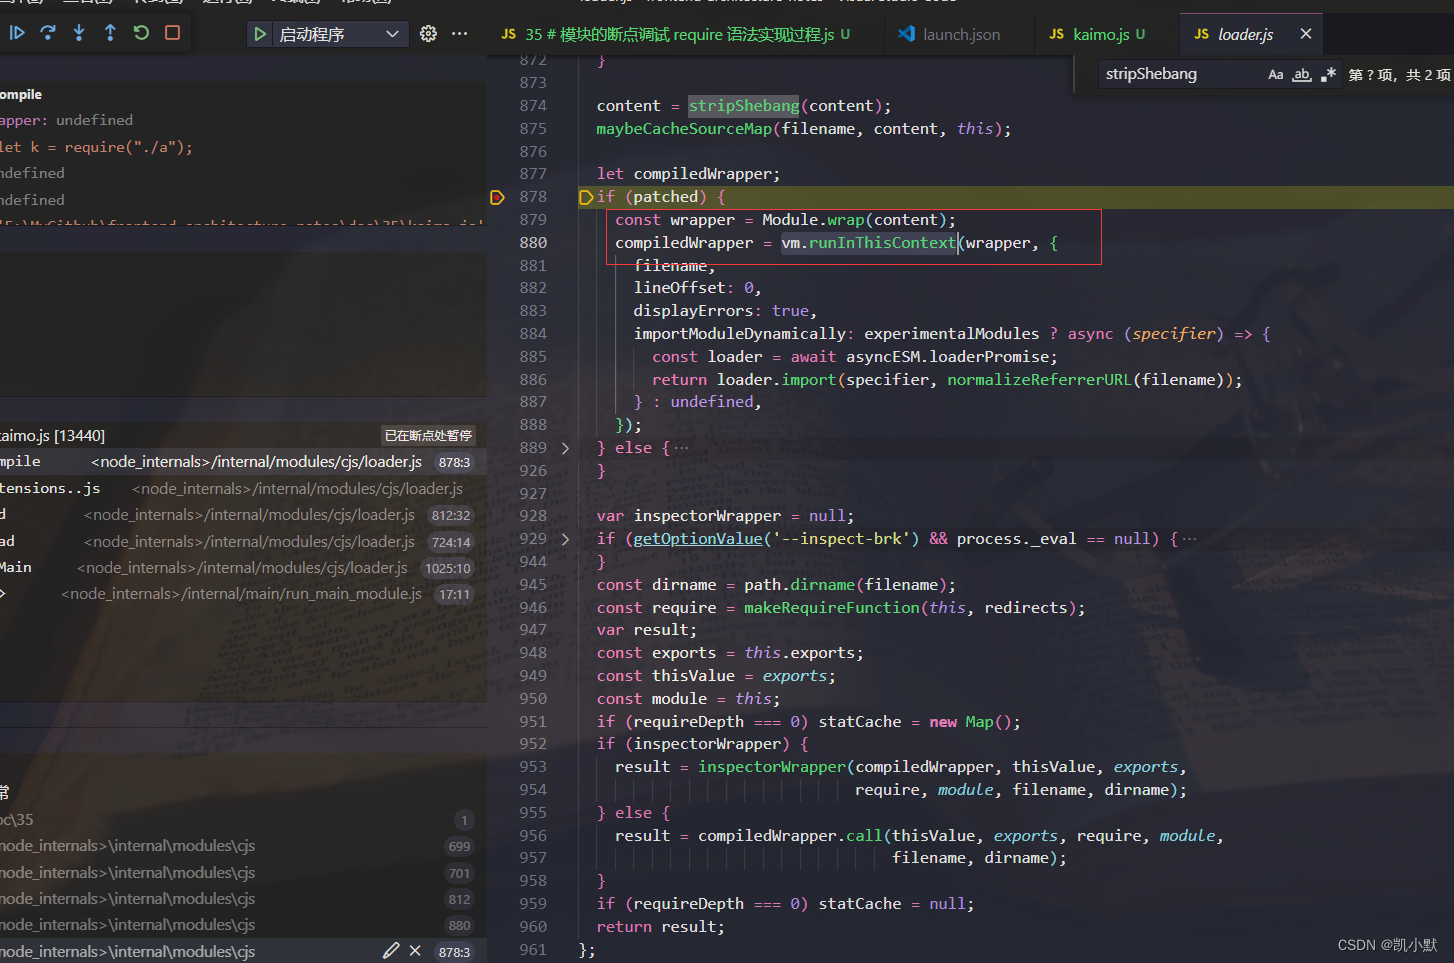
13、Module.wrap 将用户的内容包裹到一个函数中 (function (exports, require, module, __filename, __dirname) { }),用 vm.runInThisContext 创建沙箱环境,将字符串变成函数执行
五分钟了解 Node.js Shebang
Shebang 或 hashbang(#! 代码的英文发音)是文件的第一行,它告诉 OS 使用哪个解释器。它通常看起来像这样:
#!/absolute/path/to/the/interpreter [optional params]
去除 Shebang
/**
 * Find end of shebang line and slice it off
 */
function stripShebang(content) {
  // Remove shebang
  if (content.charAt(0) === '#' && content.charAt(1) === '!') {
    // Find end of shebang line and slice it off
    let index = content.indexOf('\n', 2);
    if (index === -1)
      return '';
    if (content.charAt(index - 1) === '\r')
      index--;
    // Note that this actually includes the newline character(s) in the
    // new output. This duplicates the behavior of the regular expression
    // that was previously used to replace the shebang line.
    content = content.slice(index);
  }
  return content;
}
最终返回的是 module.exports,用户会给这个 module.exports 进行赋值,可以大致理解为:
(function (exports, require, module, __filename, __dirname) {
    let kaimo = "kaimo313";

    module.exports = kaimo;
    return module.exports;
});
