要想全面快速学习Spring的内容,最好的方法肯定是先去Spring官网去查阅文档,在Spring官网中找到了适合新手了解的官网Guides,一共68篇,打算全部过一遍,能尽量全面的了解Spring框架的每个特性和功能。

接着上篇看过的guide34,接着往下看。
guide35、Scheduling Tasks
@Scheduled注解: 是spring boot提供的用于定时任务控制的注解,主要用于控制任务在某个指定时间执行,或者每隔一段时间执行.注意需要配合@EnableScheduling使用,配置@Scheduled主要有三种配置执行时间的方式,cron,fixedRate,fixedDelay。
1、cron表达式
该参数接收一个cron表达式,cron表达式是一个字符串,字符串以5或6个空格隔开,分开共6或7个域,每一个域代表一个含义。[年]不是必须的域,可以省略[年],则一共6个域。
表达式语法:
[秒] [分] [小时] [日] [月] [周] [年]
2、 fixedDelay
上一次执行完毕时间点之后多长时间再执行。如:
@Scheduled(fixedDelay = 5000) //上一次执行完毕时间点之后5秒再执行
3、fixedRate
上一次开始执行时间点之后多长时间再执行。如:
@Scheduled(fixedRate = 5000) //上一次开始执行时间点之后5秒再执行
具体参数设置可参考:https://segmentfault.com/a/1190000038938579
@EnableScheduling注解:用来使@Schedule注解功能可用的注解
使用也很简单:
@Component
public class ScheduledTasks {
        private static final Logger log = LoggerFactory.getLogger(ScheduledTasks.class);
        private static final SimpleDateFormat dateFormat = new SimpleDateFormat("HH:mm:ss");
        @Scheduled(fixedRate = 5000)
        public void reportCurrentTime() {
            log.info("The time is now {}", dateFormat.format(new Date()));
        }
}


@SpringBootApplication
@EnableScheduling
public class SchedulingTasksApplication {

    public static void main(String[] args) {
        SpringApplication.run(SchedulingTasksApplication.class);
    }
}
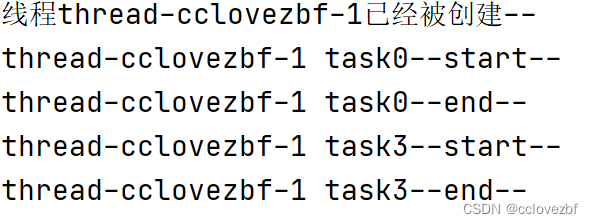
运行结果:

guide36、Building Java Projects with Gradle
简单介绍使用gradle创建项目。
Gradle是继Maven之后的新一代构建工具,它采用基于groovy的DSL语言作为脚本,相比传统构建工具通过XML来配置而言,最直观上的感受就是脚本更加的简洁、优雅。如果你之前对Maven有所了解,那么可以很轻易的转换到Gradle,它采用了同Maven一致的目录结构,可以与Maven一样使用Maven中央仓库以及各类仓库的资源,并且Gradle默认也内置了脚本转换命令可以方便的将POM转换为build.gradle。
参考文档:https://www.jianshu.com/p/7ccdca8199b8
一个简单的Gralde脚本,或许包含如下内容,其中标明可选的都是可以删掉的部分
- 插件引入:声明你所需的插件
- 属性定义(可选):定义扩展属性
- 局部变量(可选):定义局部变量
- 属性修改(可选):指定project自带属性
- 仓库定义:指明要从哪个仓库下载jar包
- 依赖声明:声明项目中需要哪些依赖
- 自定义任务(可选):自定义一些任务
//定义扩展属性(给脚本用的脚本)
buildScript {
    repositories {
         mavenCentral()
    }
}
//应用插件,这里引入了Gradle的Java插件,此插件提供了Java构建和测试所需的一切。
apply plugin: 'java'
//定义扩展属性(可选)
ext {
    foo="foo"
}
//定义局部变量(可选)
def bar="bar"

//修改项目属性(可选)
group 'pkaq'
version '1.0-SNAPSHOT'

//定义仓库,当然gradle也可以使用各maven库 ivy库 私服 本地文件等,后续章节会详细介绍(可选)
repositories {
    jcenter()
}

//定义依赖,这里采用了g:a:v简写方式,加号代表了最新版本(可选)
dependencies {
    compile "cn.pkaq:ptj.tiger:+"
}

//自定义任务(可选)
task printFoobar {
    println "${foo}__${bar}"
}
使用gradle build指令进行编译打包。

guide37、Accessing Relational Data using JDBC with Spring
主要介绍了jdbcTemplate的使用。
什么是JDBC?JDBC是Java DataBase Connectivity的缩写,它是Java程序访问数据库的标准接口。使用Java程序访问数据库时,Java代码并不是直接通过TCP连接去访问数据库,而是通过JDBC接口来访问,而JDBC接口则通过JDBC驱动来实现真正对数据库的访问。
jdbcTemplate:Spring对数据库的操作在jdbc上面做了深层次的封装,使用spring的注入功能,可以把DataSource注册到JdbcTemplate之中。
JdbcTemplate主要提供以下五类方法:
execute方法:可以用于执行任何SQL语句,一般用于执行DDL语句;
update方法及batchUpdate方法:
update方法用于执行新增、修改、删除等语句;
batchUpdate方法用于执行批处理相关语句;
query方法及queryForXXX方法:用于执行查询相关语句; call方法:用于执行存储过程、函数相关语句。
构建一个实体类
public class Customer {
  private long id;
  private String firstName, lastName;
  ...
主类:
@SpringBootApplication
public class RelationalDataAccessApplication implements CommandLineRunner {

  public static void main(String args[]) {
    SpringApplication.run(RelationalDataAccessApplication.class, args);
  }

  @Autowired
  JdbcTemplate jdbcTemplate;

  @Override
  public void run(String... strings) throws Exception {

    log.info("Creating tables");

    jdbcTemplate.execute("DROP TABLE customers IF EXISTS");
    jdbcTemplate.execute("CREATE TABLE customers(" +
        "id SERIAL, first_name VARCHAR(255), last_name VARCHAR(255))");

    // Split up the array of whole names into an array of first/last names
    List<Object[]> splitUpNames = Arrays.asList("John Woo", "Jeff Dean", "Josh Bloch", "Josh Long").stream()
        .map(name -> name.split(" "))
        .collect(Collectors.toList());

    // Use a Java 8 stream to print out each tuple of the list
    splitUpNames.forEach(name -> log.info(String.format("Inserting customer record for %s %s", name[0], name[1])));

    // Uses JdbcTemplate's batchUpdate operation to bulk load data
    jdbcTemplate.batchUpdate("INSERT INTO customers(first_name, last_name) VALUES (?,?)", splitUpNames);

    log.info("Querying for customer records where first_name = 'Josh':");
    jdbcTemplate.query(
        "SELECT id, first_name, last_name FROM customers WHERE first_name = ?", new Object[] { "Josh" },
        (rs, rowNum) -> new Customer(rs.getLong("id"), rs.getString("first_name"), rs.getString("last_name"))
    ).forEach(customer -> log.info(customer.toString()));
  }
}
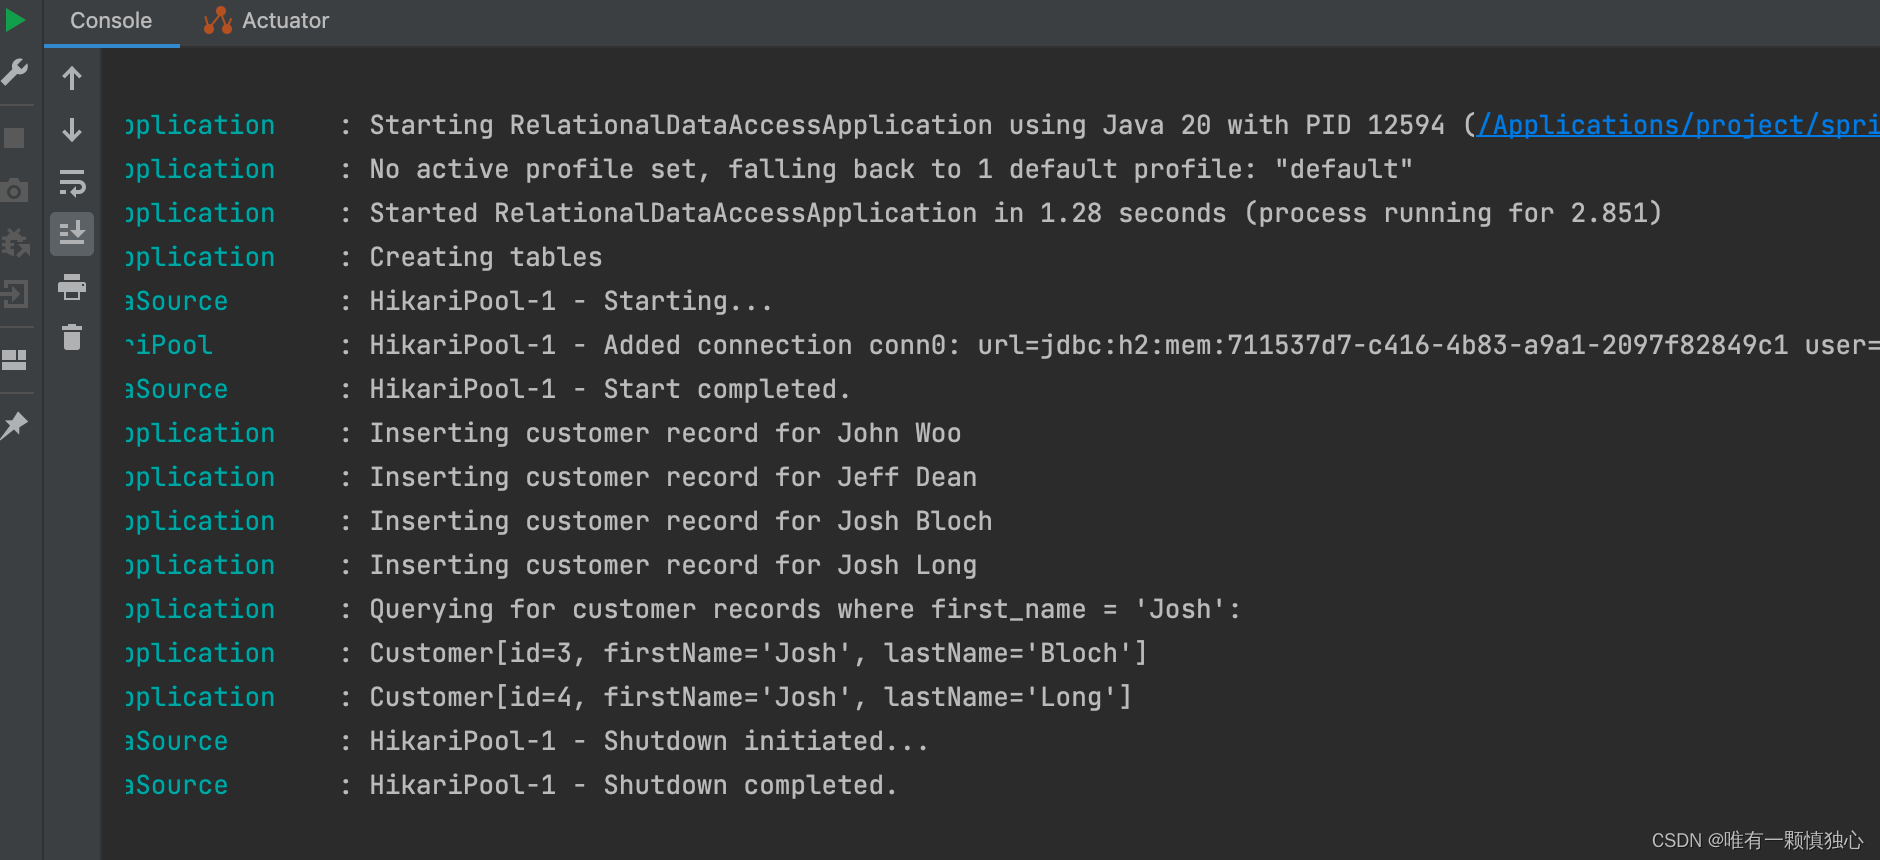
运行结果:
guide38、Authenticating a User with LDAP
LDAP(轻型目录访问协议)是一种软件协议 ,使任何人都可以在公共互联网或公司内网上查找网络中的组织,个人和其他资源(例如文件和设备)的数据 。LDAP 是目录访问协议(DAP)的“轻量级”版本,它是 X.500( 网络中目录服务的标准 )的一部分。
构建一个简单的web应用程序,该应用程序由Spring Security的嵌入式LDAP服务器保护。并使用包含一组用户的数据文件加载LDAP服务器。
首先是maven加载对应的jar包依赖,写个controller
@RestController
public class HomeController {

   @GetMapping("/")
   public String index() {
      return "Welcome to the home page!";
   }
}
其次在项目中配置安全策略类:
@Configuration
public class WebSecurityConfig {

  @Bean
  public SecurityFilterChain securityFilterChain(HttpSecurity http) throws Exception {
    http
      .authorizeRequests()
        .anyRequest().fullyAuthenticated()
        .and()
      .formLogin();

    return http.build();
  }

  @Autowired
  public void configure(AuthenticationManagerBuilder auth) throws Exception {
    auth
      .ldapAuthentication()
        .userDnPatterns("uid={0},ou=people")
        .groupSearchBase("ou=groups")
        .contextSource()
          .url("ldap://localhost:8389/dc=springframework,dc=org")
          .and()
        .passwordCompare()
          .passwordEncoder(new BCryptPasswordEncoder())
          .passwordAttribute("userPassword");
  }

}
通过定制一个WebSecurityConfig类来完成安全验证的设置。
还需要一个LDAP服务器, 这里使用了一个纯Java语言的内置服务器,Spring Boot为它提供了自动配置。ldapAuthentication()方法使得登录表单中用户名会插入到的uid={0},ou=people,dc=springframework,dc=org的“{0}”中。而passwordCompare()方法配置了密码编码器和密码属性。
还需要修改配置文件
spring.ldap.embedded.ldif=classpath:test-server.ldif
spring.ldap.embedded.base-dn=dc=springframework,dc=org
spring.ldap.embedded.port=8389
以及设置用户数据,LDAP服务器可以使用LDIF(LDAP数据交换格式)文件来交换用户数据。application.properties文件中的spring.ldap.embedded.ldif属性使得Spring Boot会加载对应的LDIF 文件。
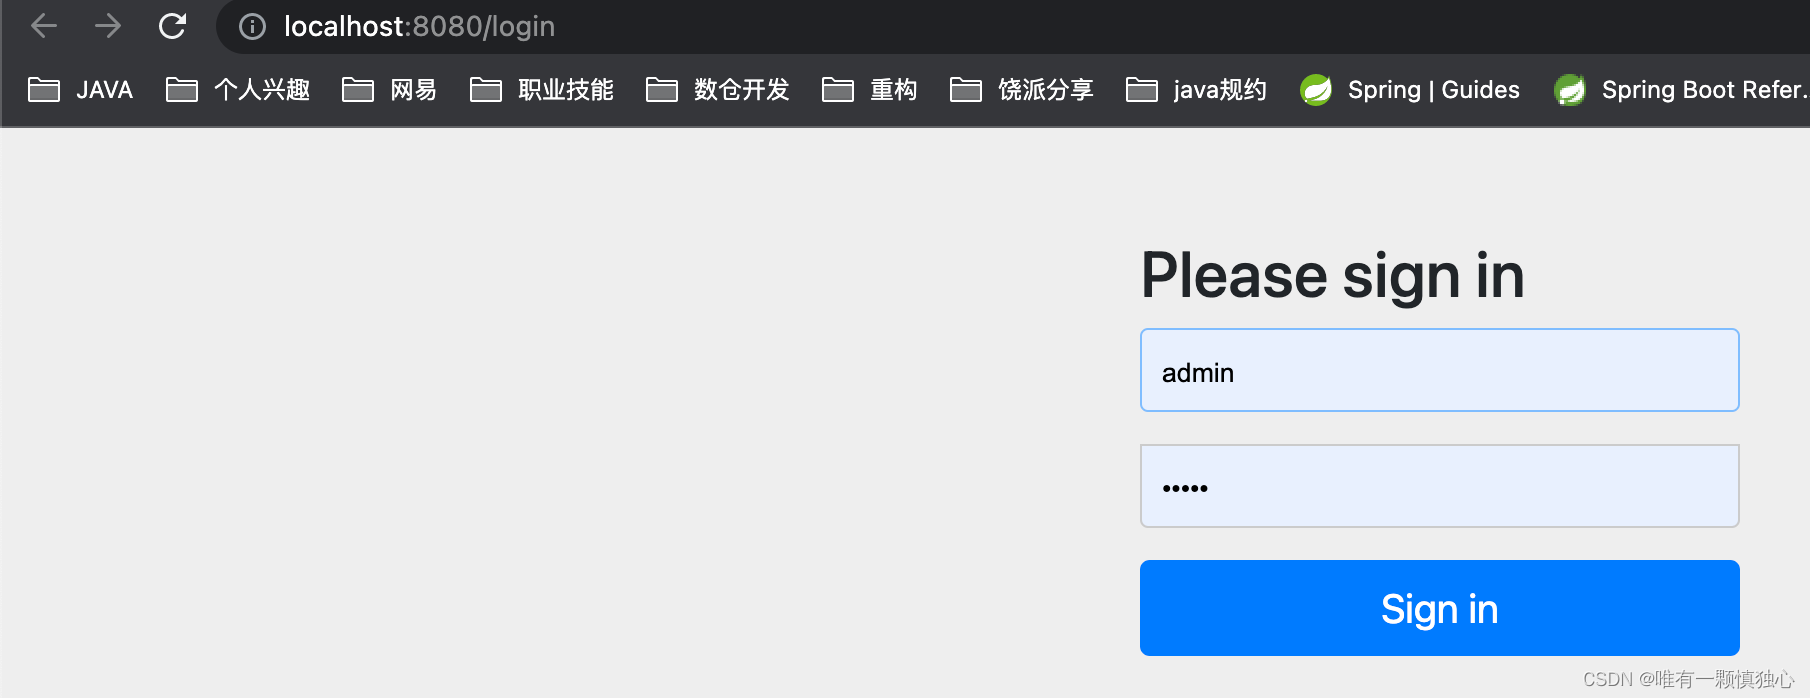
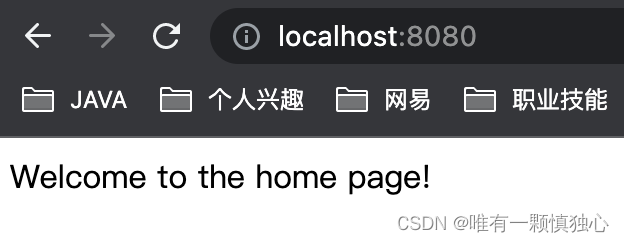
配置好这些,再启动程序,访问接口就会重定向到spring security提供的登录页。输入用户名密码,就可以得到返回结果。
guide39、Messaging with RabbitMQ
介绍使用Spring AMQP的RabbitTemplate发布消息,并使用MessageListenerAdapter在POJO上订阅消息。
RabbitMQ是实现了高级消息队列协议(AMQP)的开源消息代理软件(亦称面向消息的中间件)
AMQP :Advanced Message Queue,高级消息队列协议。它是应用层协议的一个开放标准,为面向消息的中间件设计,基于此协议的客户端与消息中间件可传递消息,并不受产品、开发语言等条件的限制。
首先安装rabbitmq,并启动。
brew install rabbitmq

rabbitmq-server
创建一个接收器来响应已发布的消息。Receiver是一个 POJO,它定义了接收消息的方法。
@Component
public class Receiver {

  private CountDownLatch latch = new CountDownLatch(1);

  public void receiveMessage(String message) {
    System.out.println("Received <" + message + ">");
    latch.countDown();
  }
  public CountDownLatch getLatch() {
    return latch;
  }
}
注册监听器并发送消息
Spring AMQP RabbitTemplate提供了使用 RabbitMQ 发送和接收消息所需的一切。但是,您需要:
- 配置消息侦听器容器。
- 声明队列、交换以及它们之间的绑定。
- 配置一个组件发送一些消息来测试监听器
@SpringBootApplication
public class MessagingRabbitmqApplication {

  static final String topicExchangeName = "spring-boot-exchange";

  static final String queueName = "spring-boot";

  @Bean
  Queue queue() {
    return new Queue(queueName, false);
  }

  @Bean
  TopicExchange exchange() {
    return new TopicExchange(topicExchangeName);
  }

  @Bean
  Binding binding(Queue queue, TopicExchange exchange) {
    return BindingBuilder.bind(queue).to(exchange).with("foo.bar.#");
  }

  @Bean
  SimpleMessageListenerContainer container(ConnectionFactory connectionFactory,
      MessageListenerAdapter listenerAdapter) {
    SimpleMessageListenerContainer container = new SimpleMessageListenerContainer();
    container.setConnectionFactory(connectionFactory);
    container.setQueueNames(queueName);
    container.setMessageListener(listenerAdapter);
    return container;
  }

  @Bean
  MessageListenerAdapter listenerAdapter(Receiver receiver) {
    return new MessageListenerAdapter(receiver, "receiveMessage");
  }

  public static void main(String[] args) throws InterruptedException {
    SpringApplication.run(MessagingRabbitmqApplication.class, args).close();
  }

}
该queue()方法创建一个 AMQP 队列。该exchange()方法创建主题交换。binding()方法将这两个方法绑定起来,并且定义了rabbitTemplate发布到主体交换时要发生的行为。
listenerAdapter()在容器中注册为消息侦听器。它侦听spring-boot队列中的消息。因为该类Receiver是一个 POJO,所以它需要包装在 中MessageListenerAdapter
发送测试消息
@Component
public class Runner implements CommandLineRunner {

  private final RabbitTemplate rabbitTemplate;
  private final Receiver receiver;

  public Runner(Receiver receiver, RabbitTemplate rabbitTemplate) {
    this.receiver = receiver;
    this.rabbitTemplate = rabbitTemplate;
  }

  @Override
  public void run(String... args) throws Exception {
    System.out.println("Sending message...");
    rabbitTemplate.convertAndSend(MessagingRabbitmqApplication.topicExchangeName, "foo.bar.baz", "Hello from RabbitMQ!");
    receiver.getLatch().await(10000, TimeUnit.MILLISECONDS);
  }

}
运行结果:

guide40、Validating Form Input
构建一个简单的Spring MVC应用程序,它接受用户输入,并使用标准的验证注释检查输入。
其实核心就是一些javax.validation中的注解。
public class PersonForm {

   @NotNull
   @Size(min=2, max=30)
   private String name;

   @NotNull
   @Min(18)
   private Integer age;
    ...
@NotNull注解: 是在 Java 中常用的非空检查注解。它的作用是表明使用该注解的变量、参数或返回值不能为 null,否则会抛出空指针异常。
@Min 验证 Number 和 String 对象是否大等于指定的值
@Max 验证 Number 和 String 对象是否小等于指定的值
@Size(min=, max=) 验证对象(Array,Collection,Map,String)长度是否在给定的范围之内
@Length(min=, max=) 验证字符串长度是否在给定的范围之内
@Valid 表示对这个对象属性需要进行验证
@NotEmpty 被注释的元素不为空(可用于String,Collection,Map,arrays)
@NotBlank 只应用于字符串且在比较时会去除字符串的首位空格
@GetMapping ("/get")
public String check(@Valid PersonForm personForm){
   return personForm.toString();
}
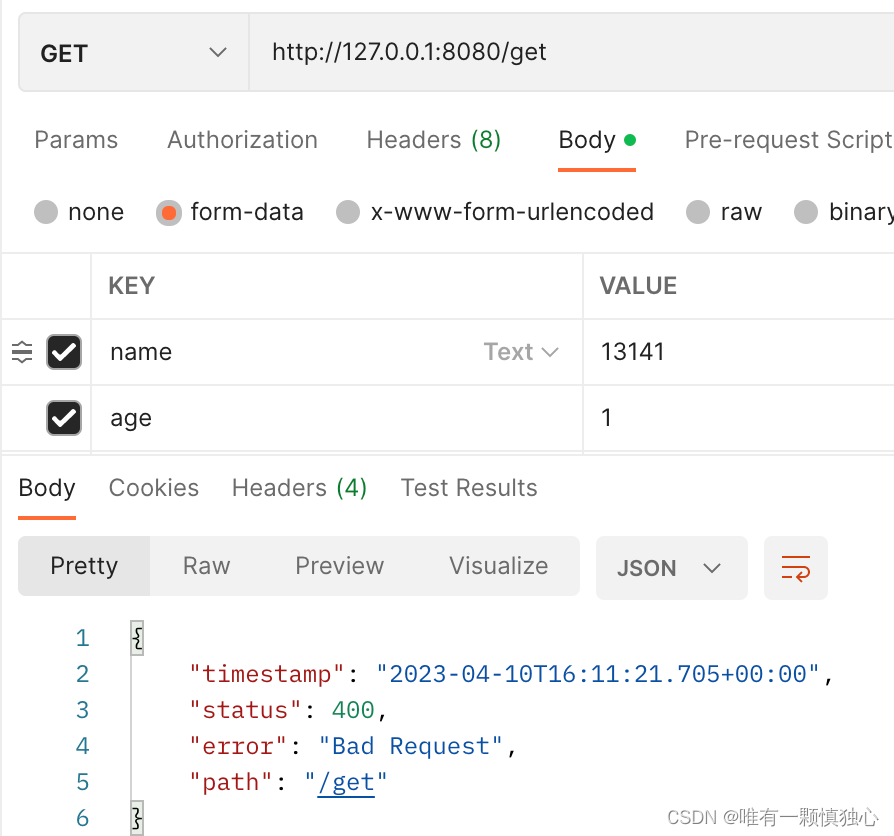
简单调用下接口,如果参数不满足校验,就直接返回400了,后台显示有bindException异常。
可以用BindingResult获取校验结果:
@GetMapping ("/get")
public String check(@Valid PersonForm personForm, BindingResult bindingResult){
   if (bindingResult.hasErrors()) {
      return bindingResult.getAllErrors().get(0).getDefaultMessage();
   }
   return personForm.toString();
}
不用BindingResult的话,其实也可以做一个全局异常处理,有异常的话返回信息给前端
@RestControllerAdvice
public class ValidExceptionHandler {
    @ExceptionHandler(BindException.class)
    public String validExceptionHandler(BindException exception) {
        return exception.getAllErrors().get(0).getDefaultMessage();
    }
}
文献参考:https://blog.csdn.net/sunnyzyq/article/details/103527380
