XWiki是一个知识管理平台,用于知识库管理和知识管理。最有名的是Confluence系统,我们现在搭建的是XWiki,这是一个开源系统。
我们可以到官网上查找安装的方法:
这里,我们采用PostgresSQL on Tomcat的方法:
1、下载docker-compose.yml文件:
wget -O docker-compose.yml https://raw.githubusercontent.com/xwiki-contrib/docker-xwiki/master/14/postgres-tomcat/docker-compose.yml2、编辑下该docker-compose.yml文件:
[root@vm1 ~]# cat docker-compose.yml
# ---------------------------------------------------------------------------
# See the NOTICE file distributed with this work for additional
# information regarding copyright ownership.
#
# This is free software; you can redistribute it and/or modify it
# under the terms of the GNU Lesser General Public License as
# published by the Free Software Foundation; either version 2.1 of
# the License, or (at your option) any later version.
#
# This software is distributed in the hope that it will be useful,
# but WITHOUT ANY WARRANTY; without even the implied warranty of
# MERCHANTABILITY or FITNESS FOR A PARTICULAR PURPOSE. See the GNU
# Lesser General Public License for more details.
#
# You should have received a copy of the GNU Lesser General Public
# License along with this software; if not, write to the Free
# Software Foundation, Inc., 51 Franklin St, Fifth Floor, Boston, MA
# 02110-1301 USA, or see the FSF site: http://www.fsf.org.
# ---------------------------------------------------------------------------
version: '2'
networks:
  bridge:
    driver: bridge
services:
  # The container that runs XWiki + Tomcat
  web:
    image: "xwiki:lts-postgres-tomcat"
    container_name: xwiki-postgres-tomcat-web
    depends_on:
      - db
    ports:
      - "8080:8080"
    # Default values defined in .env file.
    # The DB_USER/DB_PASSWORD/DB_DATABASE/DB_HOST variables are used in the hibernate.cfg.xml file.
    environment:
      - XWIKI_VERSION=xwiki
      - DB_USER=xwiki
      - DB_PASSWORD=xwiki
      - DB_DATABASE=xwiki
      - DB_HOST=xwiki-postgres-db
    # Provide a name instead of an auto-generated id for xwiki data (the permanent directory in included in it)
    # configured in the Dockerfile, to make it simpler to identify in 'docker volume ls'.
    volumes:
      - xwiki-data:/usr/local/xwiki
    networks:
      - bridge
  # The container that runs the database (postgres)
  db:
    image: "postgres:13"
    container_name: xwiki-postgres-db
    volumes:
      - postgres-data:/var/lib/postgresql/data
    environment:
      - POSTGRES_ROOT_PASSWORD=xwiki
      - POSTGRES_PASSWORD=xwiki
      - POSTGRES_USER=xwiki
      - POSTGRES_DB=xwiki
      - POSTGRES_INITDB_ARGS="--encoding=UTF8"
    networks:
      - bridge
volumes:
  postgres-data: {}
  xwiki-data: {}
3、然后使用下面命令运行:
[root@vm1 ~]# docker-compose up -d
Creating network "root_bridge" with driver "bridge"
Creating volume "root_postgres-data" with default driver
Creating volume "root_xwiki-data" with default driver
Pulling db (postgres:13)...
13: Pulling from library/postgres
a2abf6c4d29d: Pull complete
e1769f49f910: Pull complete
33a59cfee47c: Pull complete
461b2090c345: Pull complete
8ed8ab6290ac: Pull complete
495e42c822a0: Pull complete
18e858c71c58: Pull complete
594792c80d5f: Pull complete
8ce2d192c320: Pull complete
00cfe308d793: Pull complete
4c4a326c1cb3: Pull complete
c9f2a6fdb326: Pull complete
9c1f873a68ce: Pull complete
Digest: sha256:a63b1bd5dff73a9c1851a0f97e4c593a6b6e2cde6671811b1fa9d10d7e86b658
Status: Downloaded newer image for postgres:13
Pulling web (xwiki:lts-postgres-tomcat)...
lts-postgres-tomcat: Pulling from library/xwiki
lts-postgres-tomcat: Pulling from library/xwiki
e96e057aae67: Pull complete
4ced2591451d: Pull complete
df8f874ae8c0: Pull complete
111b6c748642: Pull complete
e6f84dce457c: Pull complete
a6c26749ee78: Pull complete
4dddc6d9fa60: Pull complete
06637eebe5e7: Pull complete
15641f13c84f: Pull complete
57412258b2a1: Pull complete
116c14fb7d25: Pull complete
703e9028fd65: Pull complete
041a50889cf3: Pull complete
a4f6bd132034: Pull complete
d3a79df8c165: Pull complete
Digest: sha256:10f13a1bf4e538da20825ea7c17c1adcdc6dc8fb0a231eb6a303d9893abbbb00
Status: Downloaded newer image for xwiki:lts-postgres-tomcat
Creating xwiki-postgres-db ... done
Creating xwiki-postgres-tomcat-web ... done
4、浏览器登录 http://192.168.17.105:8080
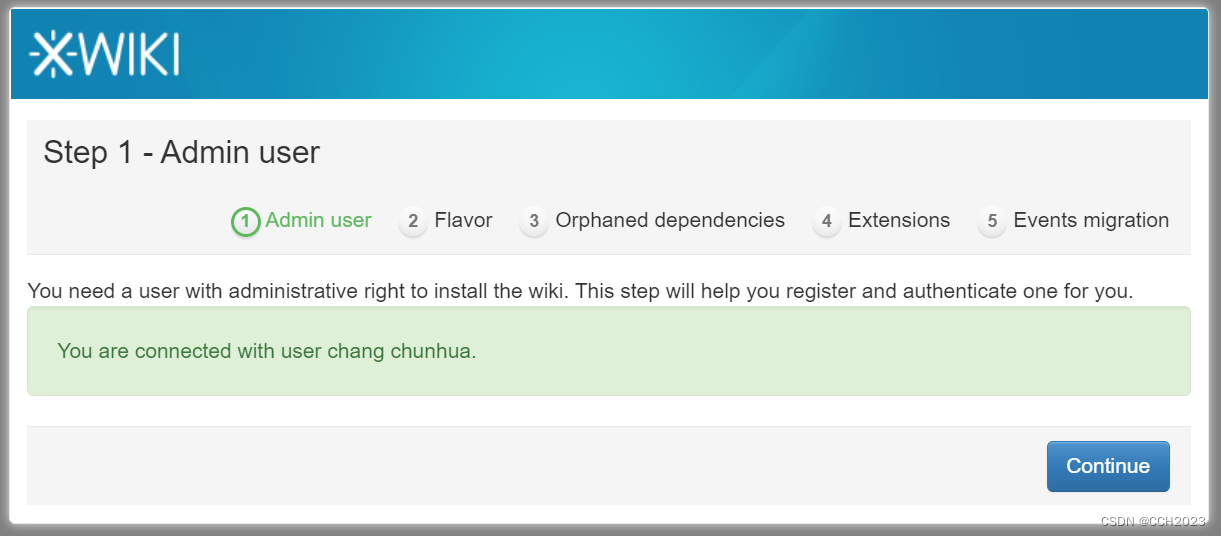
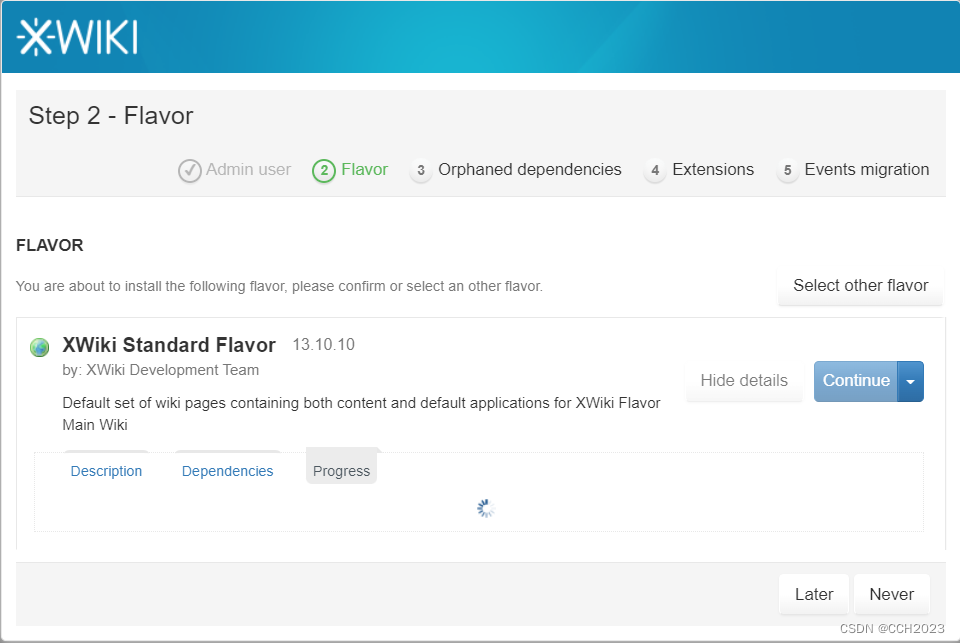
5、点击Install this flavor,我们看到XWiki Standard Flavor版本是:13.10.10版本:
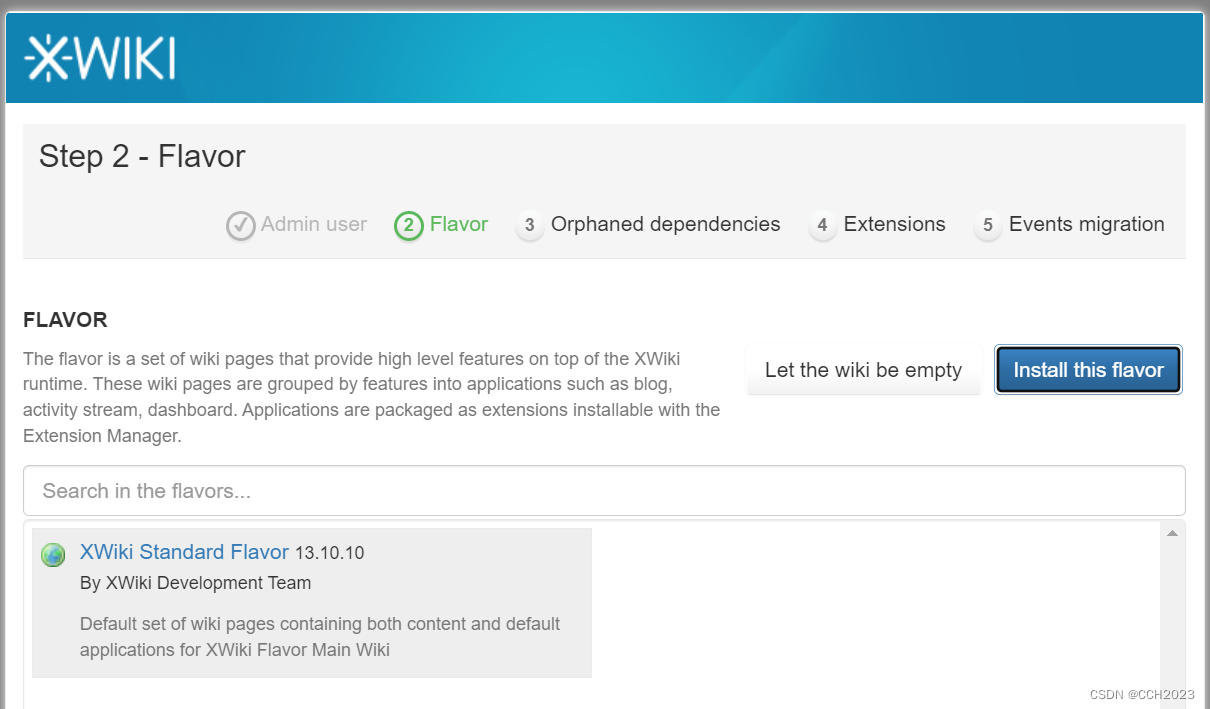
6、点击Install 按钮:
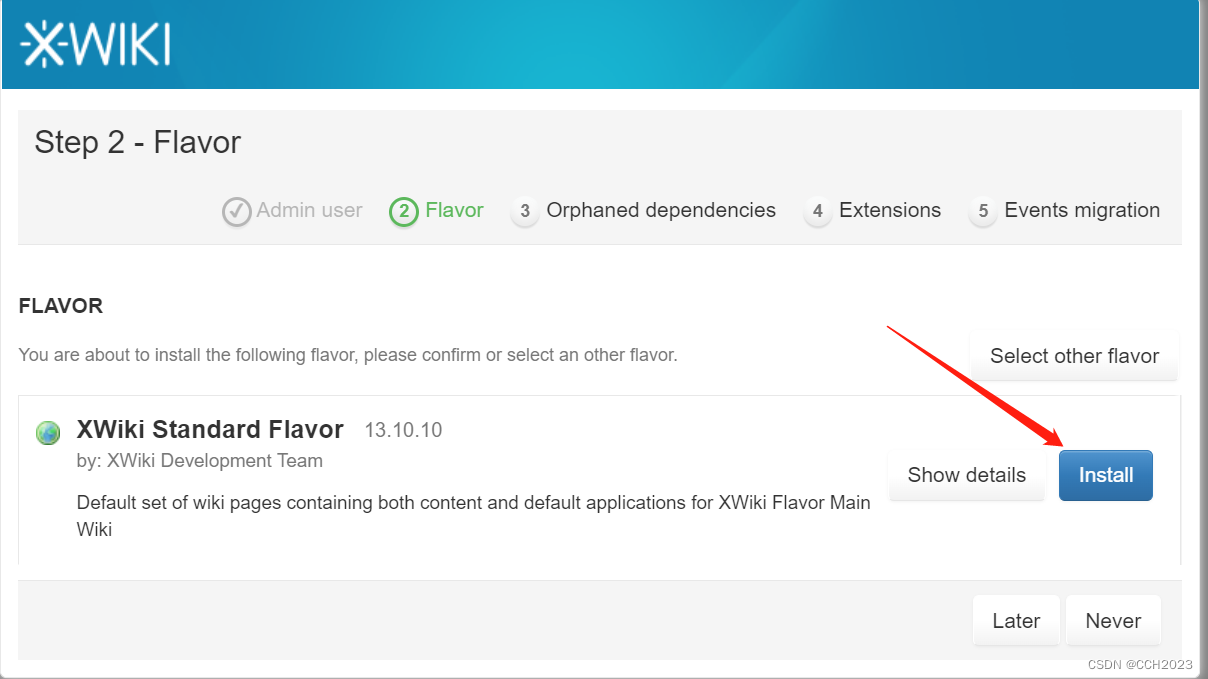
7、安装过程截图:
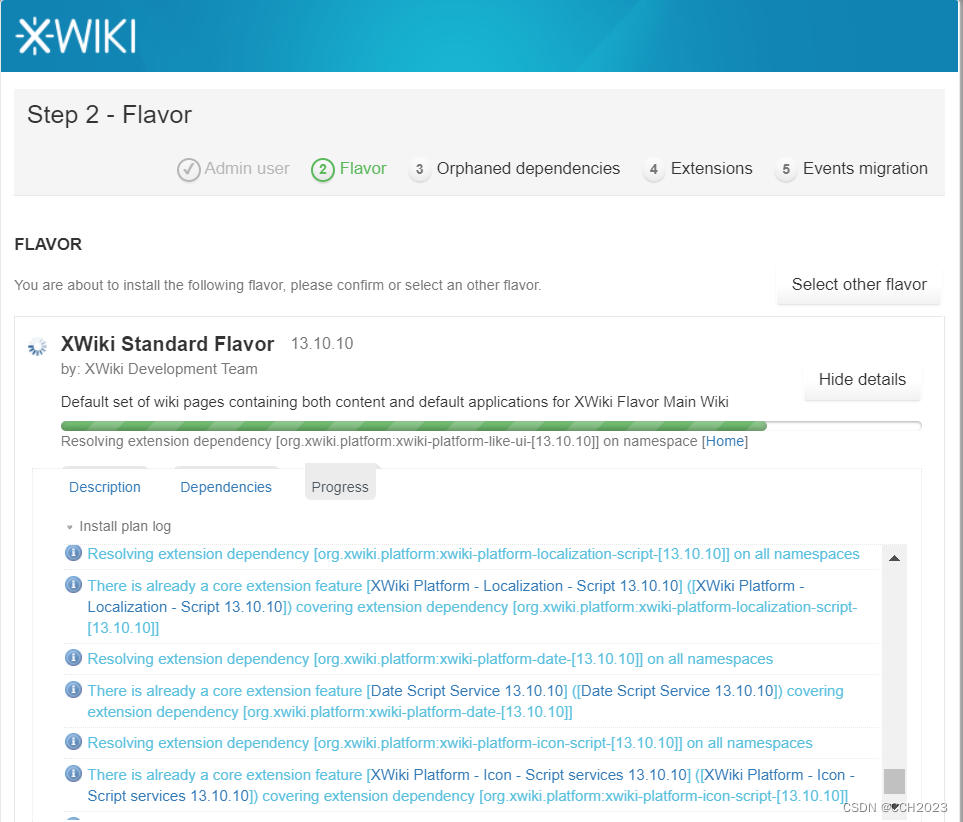
8、点击Continue,这个安装的时间比较长,耐心等待:
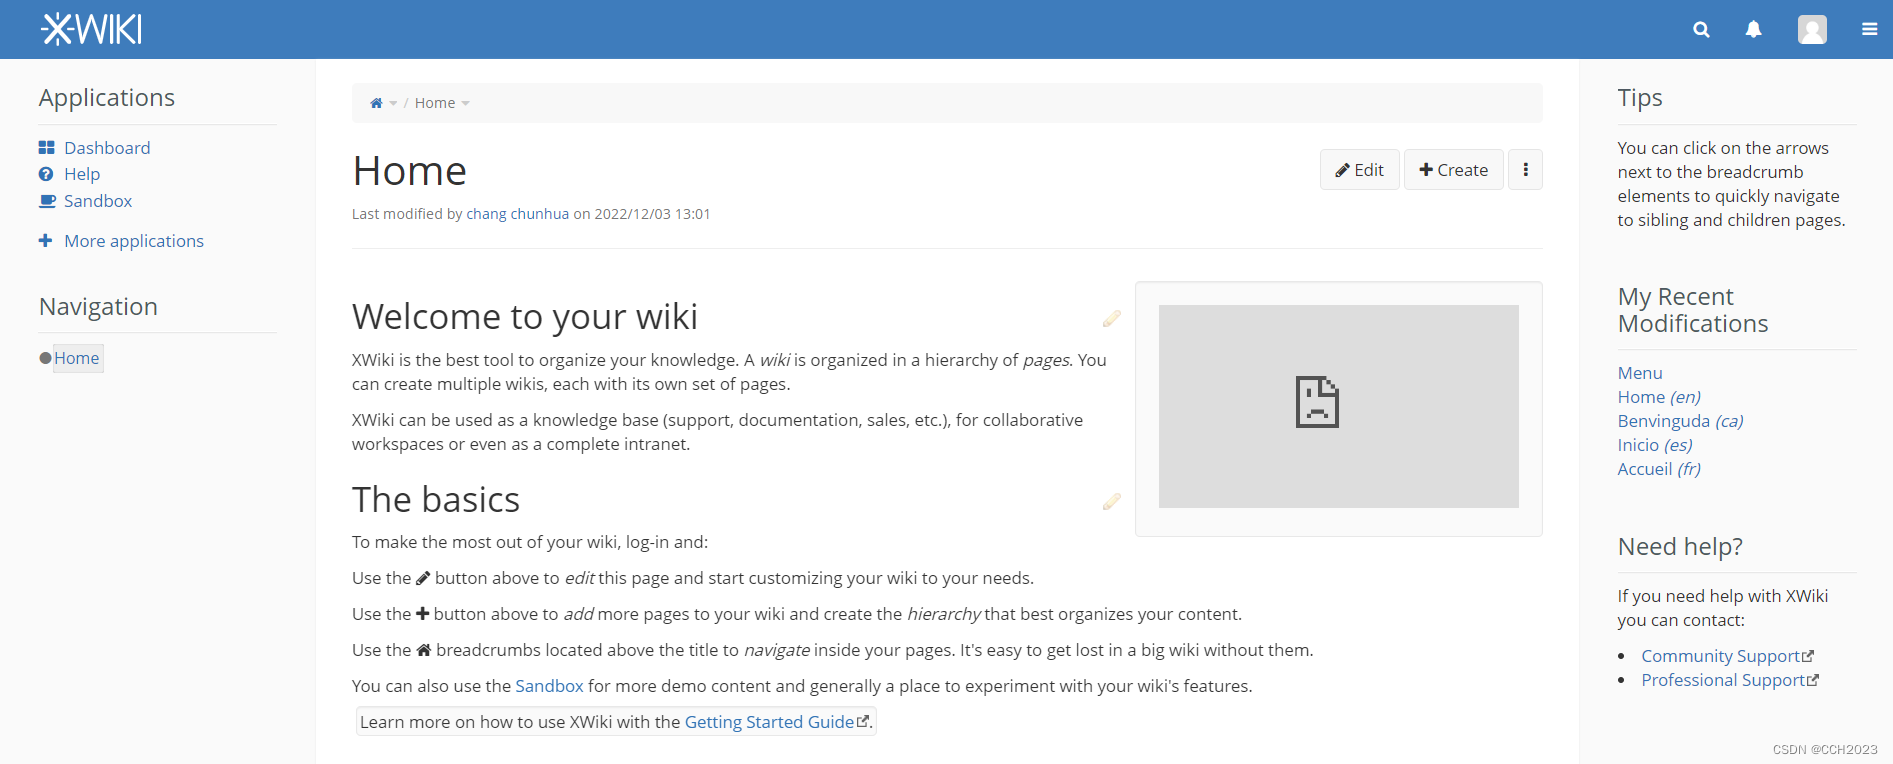
9、最后登录到页面:
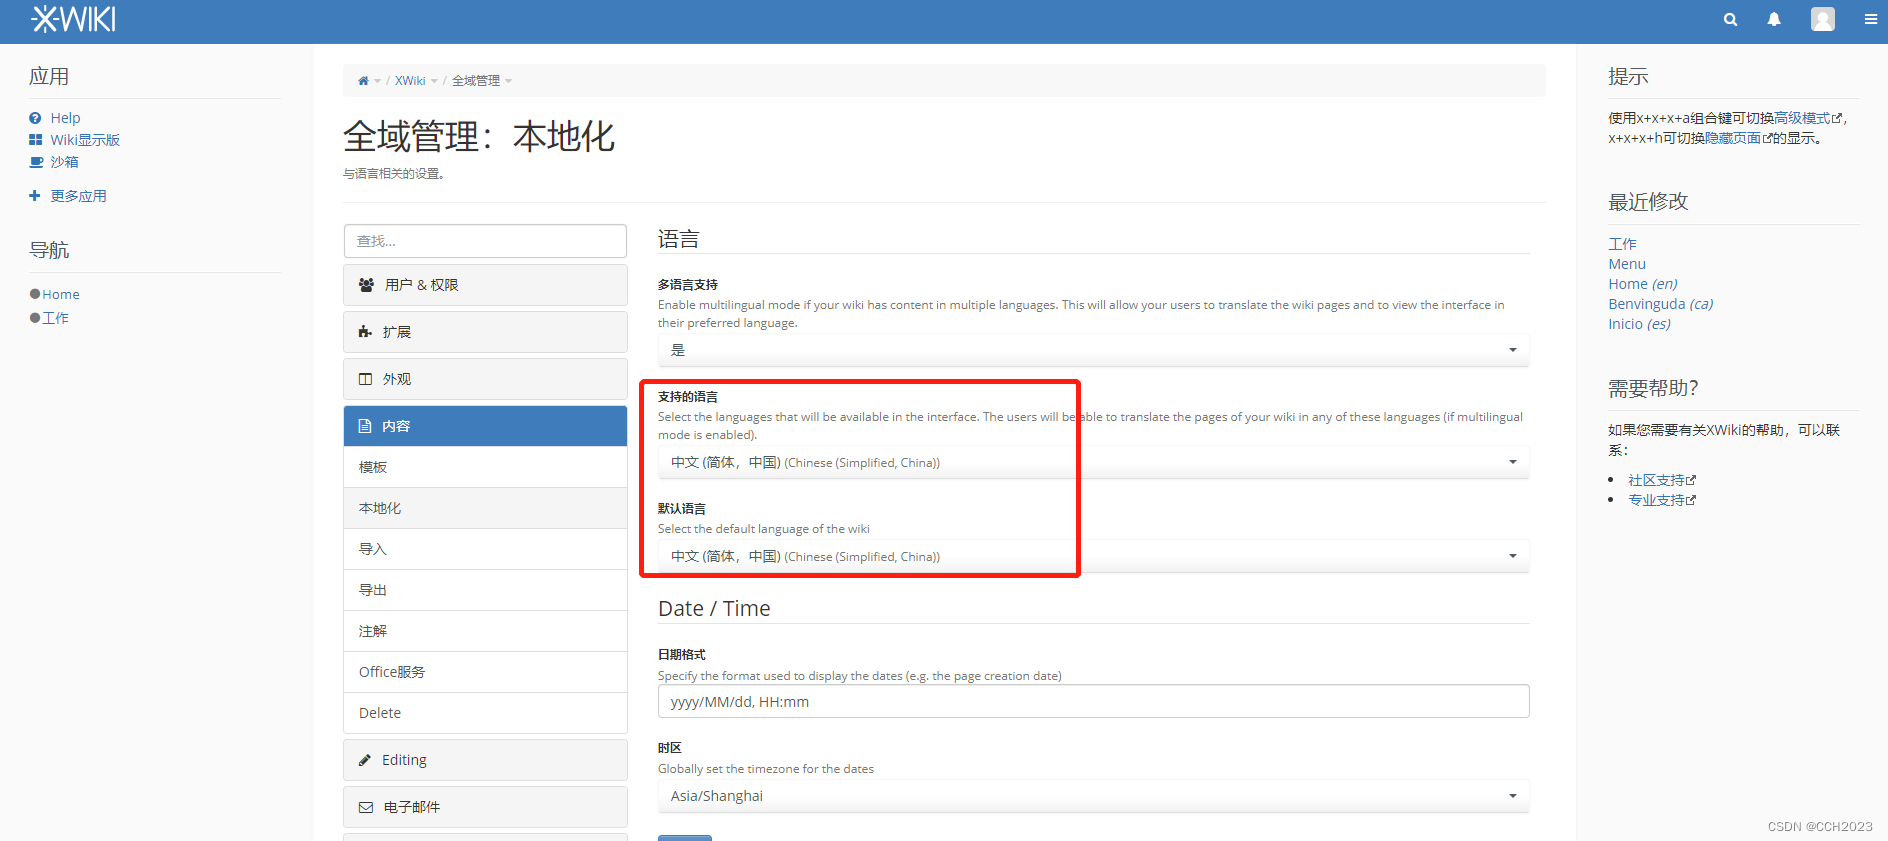
10、最后再将英文界面更改为中文界面:

![[附源码]计算机毕业设计springboot校园代取快递系统](https://img-blog.csdnimg.cn/ce6985b7ec244fbc804aa13dea88121d.png)


![[附源码]Python计算机毕业设计Django基于vuejs的爱宠用品销售app](https://img-blog.csdnimg.cn/b72dff28b4d64dffb99c01984fc3105c.png)




![[附源码]Python计算机毕业设计Django交通事故档案管理系统](https://img-blog.csdnimg.cn/d369f1b7905846d1a7a2dfaf9ef566e0.png)

![[附源码]JAVA毕业设计家庭理财管理系统(系统+LW)](https://img-blog.csdnimg.cn/b2d7577c2805493aa0a064dfd01c41ad.png)

