实现微信小程序授权登录
- 1、前端技术栈
- 1.1、uniapp
- 1.2、前端封装工具
- 1.3、Hbuilderx构建uniapp项目
- 2、后端技术栈
- 2.1、创建springboot后端项目
- 2.2、数据库准备
- 2.3、创建实体类
- 2.4、后端工具类
- 2.5、mapper和service接口
- 2.5、Service实现类
- 2.6、微信用户的控制层Controller
微信小程序官方登录流程图:
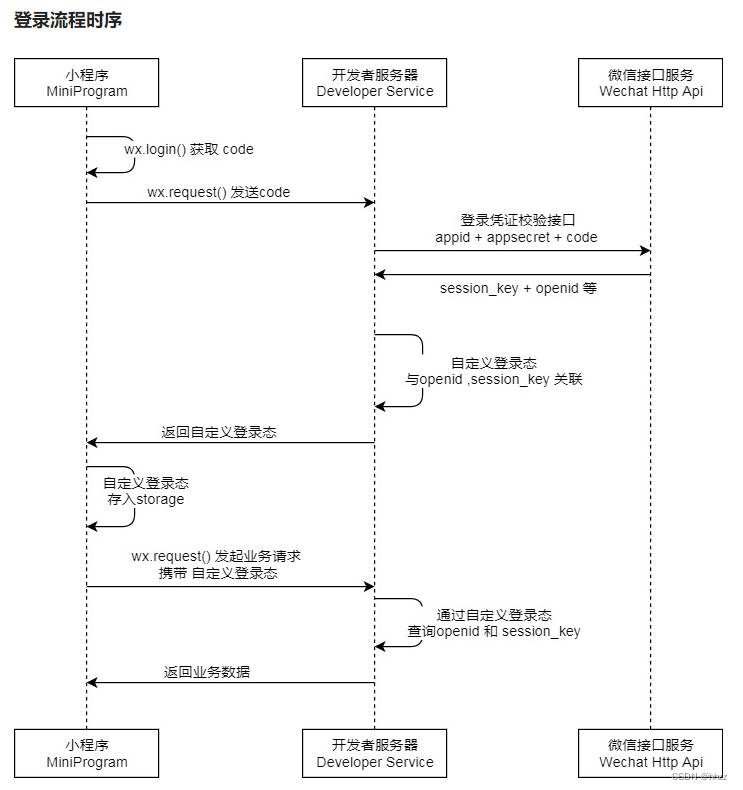
参考微信小程序登录官网文档
1、前端技术栈
1.1、uniapp
使用uniapp构建一套代码多端使用的前端框架项目
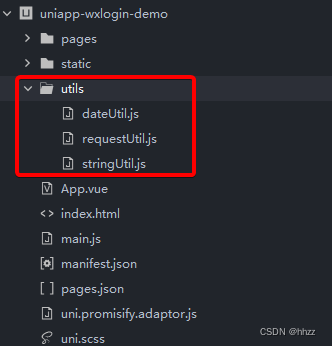
1.2、前端封装工具
-
dateUtil.js:
功能:
1. 时间日期格式化
2. 传入日期是否和当前日期的比较
完整代码:// 判断传入日期是否和当前日期比较 const judgeDate=(toDate)=>{ return new Date().getTime()-new Date(toDate).getTime(); } var timeFormat = function (msTime) { let time = new Date(msTime); let yy = time.getFullYear(); let MM = time.getMonth() + 1; let dd = time.getDate(); let hh = time.getHours() < 10 ? "0" + time.getHours() : time.getHours(); let min = time.getMinutes() < 10 ? "0" + time.getMinutes() : time.getMinutes(); let sec = time.getSeconds() < 10 ? "0" + time.getSeconds() : time.getSeconds(); return yy + "-" + MM + "-" + dd + " " + hh + ":" + min + ":" + sec; } export {timeFormat,judgeDate} -
requestUtil.js:
功能:
1. 定义公共的url
2. 后端请求工具封装
完整代码:// 同时发送异步代码的次数 let ajaxTimes = 0; // 定义公共的url const baseUrl = "http://localhost:8866"; /** * 返回baseUrl */ export const getBaseUrl = () => { return baseUrl; } /** * 后端请求工具类 * @param {*} params 请求参数 */ export const requestUtil = (params) => { let header = { ...params.header }; // 拼接header 带上token header["token"] = uni.getStorageSync("token"); ajaxTimes++; // 显示加载中 效果 wx.showLoading({ title: "加载中", mask: true }); var start = new Date().getTime(); // 模拟网络延迟加载 while (true) if (new Date().getTime() - start > 1000 * 1) break; return new Promise((resolve, reject) => { wx.request({ ...params, header: header, url: baseUrl + params.url, success: (result) => { resolve(result.data); }, fail: (err) => { uni.showToast({ icon: 'error', title: '连接服务器失败', duration: 3000 }) reject(err); }, complete: () => { ajaxTimes--; if (ajaxTimes === 0) { // 关闭正在等待的图标 wx.hideLoading(); } } }); }) } -
stringUtil.js:
功能:
1. 判断字符串是否为空
完整代码://判断字符串是否为空 export const isEmpty = (str) => { if (str === '' || str.trim().length === 0) { return true } else { return false; } }
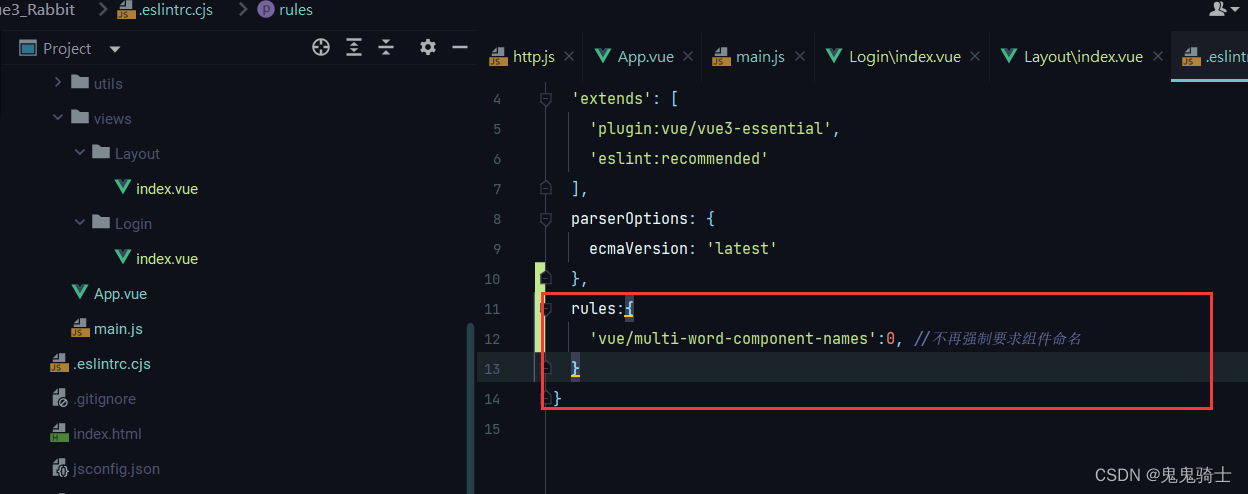
1.3、Hbuilderx构建uniapp项目
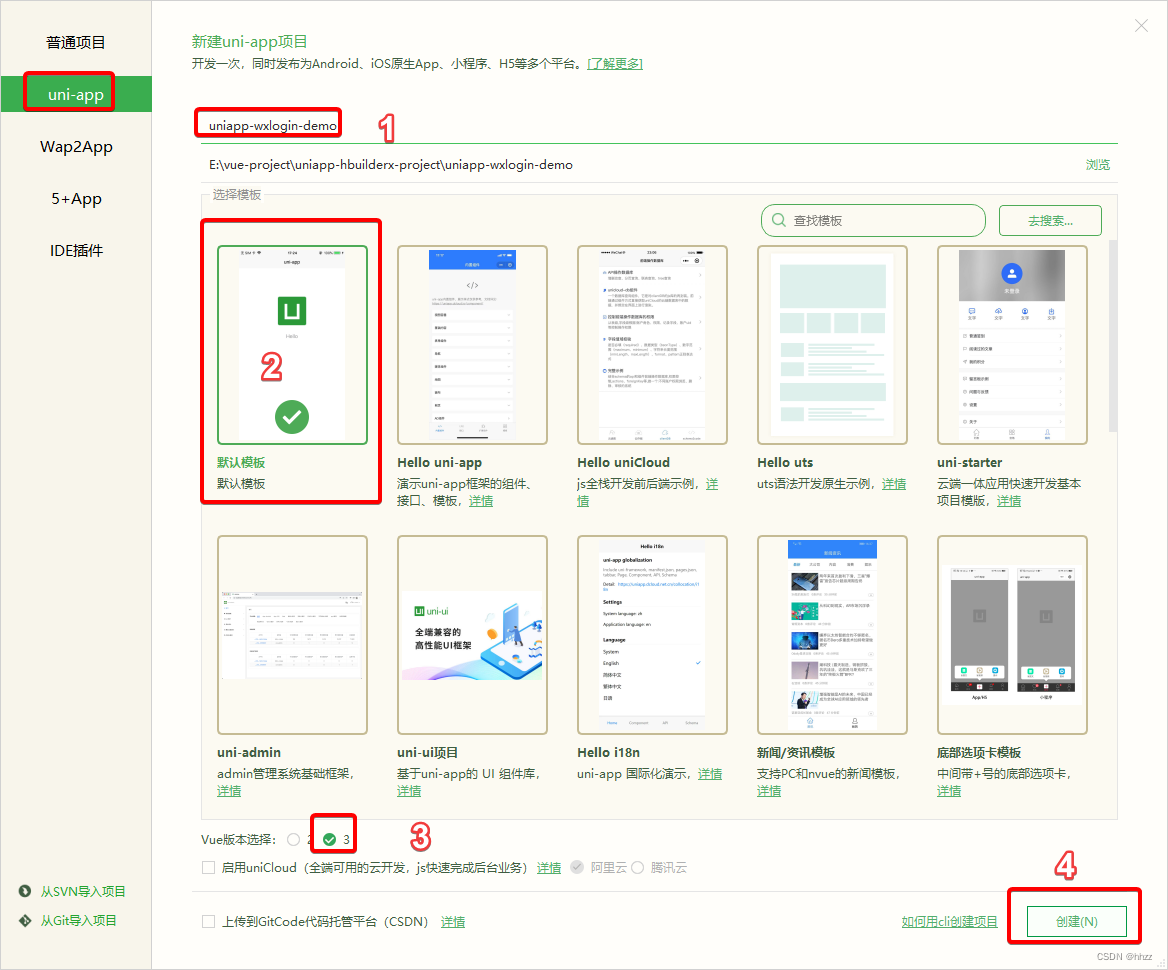
项目结构:
app.vue中,写两个方法:
- 在onLaunch生命周期函数中调用wx.login()获取code(前提是在微信开发者工具中登录微信账号,而且在uniapp中设置微信小程序AppId),code的作用是后端接受到code,通过code参数向微信后台发送请求,它是实现微信临时登录的url中的一个非常重要的参数。
- 三个重要参数
- appid:应用ID
- secret:应用密钥
- js_code:前台传给我们的code
- wxlogin方法
携带code参数发送请求给后端来获取token和openid
<script>
  import {
    requestUtil
  } from "./utils/requestUtil.js"
  export default {
    onLaunch: function() {
      console.log('App Launch')
      wx.login({
        timeout: 5000,
        success: (res) => {
          console.log(res)
          this.wxlogin(res.code);
        }
      });
    },
    onShow: function() {
      console.log('App Show')
    },
    onHide: function() {
      console.log('App Hide')
    },
    methods: {
      /**
       * 请求后端获取用户token
       * @param {} code
       */
      async wxlogin(code) {
        console.log("code=" + code)
        // 发送请求 获取用户的token
        const result = await requestUtil({
          url: "/user/wxlogin",
          data: {
            code: code
          },
          method: "post"
        });
        console.log("token=" + result.token);
        console.log("openid=" + result.openid);
        if (result.code == 0) {
          console.log("登录成功")
          uni.setStorageSync("token", result.token);
          uni.setStorageSync("openid", result.openid);
        } else {
          console.log("登录失败,报错信息:" + result.msg);
          uni.showToast({
            icon: 'error',
            title: result.msg,
            duration: 3000
          })
        }
      }
    }
  }
</script>

<style>
  /*每个页面公共css */
</style>
2、后端技术栈
- springboot后端技术框架
- mybatis-plus数据持久层框架
2.1、创建springboot后端项目
利用idea工具,使用spring initializr初始化创建一个空的springboot项目
springboot版本选择2.3.2.RELEASE。
- 修改pom.xml
 <dependencies>
        <dependency>
            <groupId>org.springframework.boot</groupId>
            <artifactId>spring-boot-starter-web</artifactId>
        </dependency>

        <dependency>
            <groupId>org.springframework.boot</groupId>
            <artifactId>spring-boot-starter-test</artifactId>
            <scope>test</scope>
        </dependency>

        <dependency>
            <groupId>org.springframework.boot</groupId>
            <artifactId>spring-boot-starter-validation</artifactId>
        </dependency>


        <dependency>
            <groupId>org.springframework.boot</groupId>
            <artifactId>spring-boot-devtools</artifactId>
            <scope>runtime</scope>
            <optional>true</optional>
        </dependency>

        <dependency>
            <groupId>mysql</groupId>
            <artifactId>mysql-connector-java</artifactId>
            <scope>runtime</scope>
        </dependency>


        <!-- 连接池 -->
        <dependency>
            <groupId>com.alibaba</groupId>
            <artifactId>druid</artifactId>
            <version>1.1.10</version>
        </dependency>
        <!-- mybatis-plus -->
        <dependency>
            <groupId>com.baomidou</groupId>
            <artifactId>mybatis-plus-boot-starter</artifactId>
            <version>3.3.2</version>
        </dependency>


        <dependency>
            <groupId>com.alibaba</groupId>
            <artifactId>fastjson</artifactId>
            <version>1.2.40</version>
        </dependency>

        <!-- JWT -->
        <dependency>
            <groupId>com.auth0</groupId>
            <artifactId>java-jwt</artifactId>
            <version>3.2.0</version>
        </dependency>
        <dependency>
            <groupId>io.jsonwebtoken</groupId>
            <artifactId>jjwt</artifactId>
            <version>0.9.1</version>
        </dependency>

        <dependency>
            <groupId>commons-io</groupId>
            <artifactId>commons-io</artifactId>
            <version>2.5</version>
        </dependency>

        <dependency>
            <groupId>org.projectlombok</groupId>
            <artifactId>lombok</artifactId>
            <optional>true</optional>
        </dependency>

        <!-- spring boot redis 缓存引入 -->
        <dependency>
            <groupId>org.springframework.boot</groupId>
            <artifactId>spring-boot-starter-data-redis</artifactId>
        </dependency>
        <!-- lettuce pool 缓存连接池 -->
        <dependency>
            <groupId>org.apache.commons</groupId>
            <artifactId>commons-pool2</artifactId>
        </dependency>

        <!-- hutool工具类-->
        <dependency>
            <groupId>cn.hutool</groupId>
            <artifactId>hutool-all</artifactId>
            <version>5.3.3</version>
        </dependency>

        <!-- 验证码依赖-->
        <dependency>
            <groupId>com.github.axet</groupId>
            <artifactId>kaptcha</artifactId>
            <version>0.0.9</version>
        </dependency>

        <!-- 添加Httpclient支持 -->
        <dependency>
            <groupId>org.apache.httpcomponents</groupId>
            <artifactId>httpclient</artifactId>
            <version>4.5.2</version>
        </dependency>

    </dependencies>

    <build>
        <plugins>
            <plugin>
                <groupId>org.springframework.boot</groupId>
                <artifactId>spring-boot-maven-plugin</artifactId>
                <version>2.3.2.RELEASE</version>
            </plugin>
        </plugins>
    </build>
- 创建application.yml
server:
  port: 8866
  servlet:
    context-path: /

spring:
  datasource:
    type: com.alibaba.druid.pool.DruidDataSource
    driver-class-name: com.mysql.cj.jdbc.Driver
    url: jdbc:mysql://localhost:3306/db-wxlogin?serverTimezone=Asia/Shanghai
    username: root
    password: 123456


mybatis-plus:
  global-config:
    db-config:
      id-type: auto
  configuration:
    map-underscore-to-camel-case: true
    auto-mapping-behavior: full
    log-impl: org.apache.ibatis.logging.stdout.StdOutImpl
  mapper-locations: classpath:mapper/*.xml


weixin:
  jscode2sessionUrl: https://api.weixin.qq.com/sns/jscode2session
  appid: wxa4aa78831ea93858  #修改自己的微信小程序 appId
  secret: a2efb3b611d96b2dee615b7a4dee451a   #修改自己的微信小程序 appSecret
2.2、数据库准备
创建名称db-wxlogin的数据库
创建t_wxuserinfo数据表
CREATE TABLE `t_wxuserinfo` (
  `id` int NOT NULL AUTO_INCREMENT COMMENT '用户编号',
  `openid` varchar(30) DEFAULT NULL COMMENT '用户唯一标识',
  `nick_name` varchar(50) DEFAULT NULL COMMENT '用户昵称',
  `avatar_url` varchar(200) DEFAULT NULL COMMENT '用户头像图片的 URL',
  `register_date` datetime DEFAULT NULL COMMENT '注册日期',
  `last_login_date` datetime DEFAULT NULL COMMENT '最后登录日期',
  `status` char(1) DEFAULT '1' COMMENT '状态 0 可用 1 封禁',
  PRIMARY KEY (`id`)
) ENGINE=InnoDB AUTO_INCREMENT=2 DEFAULT CHARSET=utf8;
2.3、创建实体类
- WxUserInfo类
对应数据库表t_wxuserinfo
package com.tigerhhzz.springbootvote.entity;

import com.baomidou.mybatisplus.annotation.TableField;
import com.baomidou.mybatisplus.annotation.TableName;
import com.fasterxml.jackson.databind.annotation.JsonSerialize;
import lombok.Data;

import java.io.Serializable;
import java.util.Date;

/**
 * 微信用户信息实体
 *
 * @author tigerhhzz
 * @date 2023/5/17 15:34
 */
@TableName("t_wxUserInfo")
@Data
public class WxUserInfo implements Serializable {

    private Integer id; // 用户编号

    private String openid; // 用户唯一标识

    private String nickName="微信用户"; // 用户昵称

    private String avatarUrl="default.png"; // 用户头像图片的 URL

    @JsonSerialize(using=CustomDateTimeSerializer.class)
    private Date registerDate; // 注册日期

    @JsonSerialize(using=CustomDateTimeSerializer.class)
    private Date lastLoginDate; // 最后登录日期

    private String status="0"; // 用户状态 状态 0 可用 1 封禁

    //查询时,则不返回该字段的值    设置该字段在数据库表中不存在
    @TableField(select = false,exist = false)
    private String code; // 微信用户code 前端传来的


}
- 页面响应实体类
package com.tigerhhzz.springbootvote.entity;

import java.util.HashMap;
import java.util.Map;


/**
 * 页面响应entity
 *
 * @author tigerhhzz
 * @date 2023/5/17 15:34
 */
public class R extends HashMap<String, Object> {

    private static final long serialVersionUID = 1L;

    public R() {
        put("code", 0);
    }

    public static R error() {
        return error(500, "未知异常,请联系管理员");
    }

    public static R error(String msg) {
        return error(500, msg);
    }

    public static R error(int code, String msg) {
        R r = new R();
        r.put("code", code);
        r.put("msg", msg);
        return r;
    }

    public static R ok(String msg) {
        R r = new R();
        r.put("msg", msg);
        return r;
    }

    public static R ok(Map<String, Object> map) {
        R r = new R();
        r.putAll(map);
        return r;
    }

    public static R ok() {
        return new R();
    }

    @Override
    public R put(String key, Object value) {
        super.put(key, value);
        return this;
    }
}
- jwt验证信息
package com.tigerhhzz.springbootvote.entity;

import io.jsonwebtoken.Claims;

/**
 * jwt验证信息
 *
 * @author tigerhhzz
 * @date 2023/5/17 17:05
 */
public class CheckResult {

    private int errCode;

    private boolean success;

    private Claims claims;

    public int getErrCode() {
        return errCode;
    }

    public void setErrCode(int errCode) {
        this.errCode = errCode;
    }

    public boolean isSuccess() {
        return success;
    }

    public void setSuccess(boolean success) {
        this.success = success;
    }

    public Claims getClaims() {
        return claims;
    }

    public void setClaims(Claims claims) {
        this.claims = claims;
    }

}
- 微信小程序配置文件
package com.tigerhhzz.springbootvote.properties;

import lombok.Data;
import org.springframework.boot.context.properties.ConfigurationProperties;
import org.springframework.stereotype.Component;

/**
 * 微信小程序配置文件
 *
 * @author tigerhhzz
 * @date 2023/5/17 16:55
 */
@Component
@ConfigurationProperties(prefix = "weixin")
@Data
public class WeixinProperties {

    private String jscode2sessionUrl; // 登录凭证校验请求地址

    private String appid; // 小程序 appId

    private String secret; // 小程序 appSecret


}
2.4、后端工具类
- 日期工具类 DateUtil
package com.tigerhhzz.springbootvote.util;

import java.text.SimpleDateFormat;
import java.util.Date;


/**
 * 日期工具类
 *
 * @author tigerhhzz
 * @date 2023/5/17 15:34
 */
public class DateUtil {

	/**
	 * 日期对象转字符串
	 * @param date
	 * @param format
	 * @return
	 */
	public static String formatDate(Date date,String format){
		String result="";
		SimpleDateFormat sdf=new SimpleDateFormat(format);
		if(date!=null){
			result=sdf.format(date);
		}
		return result;
	}

	/**
	 * 字符串转日期对象
	 * @param str
	 * @param format
	 * @return
	 * @throws Exception
	 */
	public static Date formatString(String str,String format) throws Exception{
		if(StringUtil.isEmpty(str)){
			return null;
		}
		SimpleDateFormat sdf=new SimpleDateFormat(format);
		return sdf.parse(str);
	}

	public static String getCurrentDateStr(){
		Date date=new Date();
		SimpleDateFormat sdf=new SimpleDateFormat("yyyyMMddhhmmssSSSSSSSSS");
		return sdf.format(date);
	}

	public static String getCurrentDatePath()throws Exception{
		Date date=new Date();
		SimpleDateFormat sdf=new SimpleDateFormat("yyyy/MM/dd/");
		return sdf.format(date);
	}

	public static void main(String[] args) {
		try {
			System.out.println(getCurrentDateStr());
		} catch (Exception e) {
			// TODO Auto-generated catch block
			e.printStackTrace();
		}
	}
}
- httpClient 工具类
package com.tigerhhzz.springbootvote.util;

import org.apache.http.HttpEntity;
import org.apache.http.HttpResponse;
import org.apache.http.NameValuePair;
import org.apache.http.client.ClientProtocolException;
import org.apache.http.client.HttpClient;
import org.apache.http.client.config.RequestConfig;
import org.apache.http.client.entity.UrlEncodedFormEntity;
import org.apache.http.client.methods.CloseableHttpResponse;
import org.apache.http.client.methods.HttpGet;
import org.apache.http.client.methods.HttpPost;
import org.apache.http.conn.ssl.DefaultHostnameVerifier;
import org.apache.http.conn.util.PublicSuffixMatcher;
import org.apache.http.conn.util.PublicSuffixMatcherLoader;
import org.apache.http.entity.StringEntity;
import org.apache.http.impl.client.CloseableHttpClient;
import org.apache.http.impl.client.HttpClients;
import org.apache.http.message.BasicNameValuePair;
import org.apache.http.util.EntityUtils;
import org.springframework.stereotype.Component;

import java.io.*;
import java.net.URL;
import java.util.ArrayList;
import java.util.List;
import java.util.Map;


/**
 * httpClient 工具类
 *
 * @author tigerhhzz
 * @date 2023/5/17 15:34
 */
@Component
public class HttpClientUtil {

	/**
	 * 默认参数设置
	 * setConnectTimeout:设置连接超时时间,单位毫秒。
	 * setConnectionRequestTimeout:设置从connect Manager获取Connection 超时时间,单位毫秒。
	 * setSocketTimeout:请求获取数据的超时时间,单位毫秒。访问一个接口,多少时间内无法返回数据,就直接放弃此次调用。 暂时定义15分钟
	 */
	private RequestConfig requestConfig = RequestConfig.custom().setSocketTimeout(600000).setConnectTimeout(600000).setConnectionRequestTimeout(600000).build();

	/**
	 * 静态内部类---作用:单例产生类的实例
	 * @author Administrator
	 *
	 */
	private static class LazyHolder {
       private static final HttpClientUtil INSTANCE = new HttpClientUtil();

    }
	private HttpClientUtil(){}
	public static HttpClientUtil getInstance(){
		return LazyHolder.INSTANCE;
	}

	/**
	 * 发送 post请求
	 * @param httpUrl 地址
	 */
	public String sendHttpPost(String httpUrl) {
		HttpPost httpPost = new HttpPost(httpUrl);// 创建httpPost
		return sendHttpPost(httpPost);
	}

	/**
	 * 发送 post请求
	 * @param httpUrl 地址
	 * @param params 参数(格式:key1=value1&key2=value2)
	 */
	public String sendHttpPost(String httpUrl, String params) {
		HttpPost httpPost = new HttpPost(httpUrl);// 创建httpPost
		try {
			//设置参数
			StringEntity stringEntity = new StringEntity(params, "UTF-8");
			stringEntity.setContentType("application/x-www-form-urlencoded");
			httpPost.setEntity(stringEntity);
		} catch (Exception e) {
			e.printStackTrace();
		}
		return sendHttpPost(httpPost);
	}

	/**
	 * 发送 post请求
	 * @param httpUrl 地址
	 * @param maps 参数
	 */
	public String sendHttpPost(String httpUrl, Map<String, String> maps) {
		HttpPost httpPost = new HttpPost(httpUrl);// 创建httpPost
		// 创建参数队列
		List<NameValuePair> nameValuePairs = new ArrayList<NameValuePair>();
		for (String key : maps.keySet()) {
			nameValuePairs.add(new BasicNameValuePair(key, maps.get(key)));
		}
		try {
			httpPost.setEntity(new UrlEncodedFormEntity(nameValuePairs, "UTF-8"));
		} catch (Exception e) {
			e.printStackTrace();
		}
		return sendHttpPost(httpPost);
	}

	/**
	 * 发送Post请求
	 * @param httpPost
	 * @return
	 */
	private String sendHttpPost(HttpPost httpPost) {
		CloseableHttpClient httpClient = null;
		CloseableHttpResponse response = null;
		HttpEntity entity = null;
		String responseContent = null;
		try {
			// 创建默认的httpClient实例
			httpClient = HttpClients.createDefault();
			httpPost.setConfig(requestConfig);
			// 执行请求
			long execStart = System.currentTimeMillis();
			response = httpClient.execute(httpPost);
			long execEnd = System.currentTimeMillis();
			System.out.println("=================执行post请求耗时:"+(execEnd-execStart)+"ms");
			long getStart = System.currentTimeMillis();
			entity = response.getEntity();
			responseContent = EntityUtils.toString(entity, "UTF-8");
			long getEnd = System.currentTimeMillis();
			System.out.println("=================获取响应结果耗时:"+(getEnd-getStart)+"ms");
		} catch (Exception e) {
			e.printStackTrace();
		} finally {
			try {
				// 关闭连接,释放资源
				if (response != null) {
					response.close();
				}
				if (httpClient != null) {
					httpClient.close();
				}
			} catch (IOException e) {
				e.printStackTrace();
			}
		}
		return responseContent;
	}

	/**
	 * 发送 get请求
	 * @param httpUrl
	 */
	public String sendHttpGet(String httpUrl) {
		HttpGet httpGet = new HttpGet(httpUrl);// 创建get请求
		return sendHttpGet(httpGet);
	}

	/**
	 * 发送 get请求Https
	 * @param httpUrl
	 */
	public String sendHttpsGet(String httpUrl) {
		HttpGet httpGet = new HttpGet(httpUrl);// 创建get请求
		return sendHttpsGet(httpGet);
	}

	/**
	 * 发送Get请求
	 * @param httpGet
	 * @return
	 */
	private String sendHttpGet(HttpGet httpGet) {
		CloseableHttpClient httpClient = null;
		CloseableHttpResponse response = null;
		HttpEntity entity = null;
		String responseContent = null;
		try {
			// 创建默认的httpClient实例.


			httpClient = HttpClients.createDefault();

			httpGet.setConfig(requestConfig);
			// 执行请求
			response = httpClient.execute(httpGet);
			entity = response.getEntity();
			responseContent = EntityUtils.toString(entity, "UTF-8");
		} catch (Exception e) {
			e.printStackTrace();
		} finally {
			try {
				// 关闭连接,释放资源
				if (response != null) {
					response.close();
				}
				if (httpClient != null) {
					httpClient.close();
				}
			} catch (IOException e) {
				e.printStackTrace();
			}
		}
		return responseContent;
	}

	/**
	 * 发送Get请求Https
	 * @param httpGet
	 * @return
	 */
	private String sendHttpsGet(HttpGet httpGet) {
		CloseableHttpClient httpClient = null;
		CloseableHttpResponse response = null;
		HttpEntity entity = null;
		String responseContent = null;
		try {
			// 创建默认的httpClient实例.
			PublicSuffixMatcher publicSuffixMatcher = PublicSuffixMatcherLoader.load(new URL(httpGet.getURI().toString()));
			DefaultHostnameVerifier hostnameVerifier = new DefaultHostnameVerifier(publicSuffixMatcher);
			httpClient = HttpClients.custom().setSSLHostnameVerifier(hostnameVerifier).build();
			httpGet.setConfig(requestConfig);
			// 执行请求
			response = httpClient.execute(httpGet);
			entity = response.getEntity();
			responseContent = EntityUtils.toString(entity, "UTF-8");
		} catch (Exception e) {
			e.printStackTrace();
		} finally {
			try {
				// 关闭连接,释放资源
				if (response != null) {
					response.close();
				}
				if (httpClient != null) {
					httpClient.close();
				}
			} catch (IOException e) {
				e.printStackTrace();
			}
		}
		return responseContent;
	}

	/**
	 * 发送xml数据
	 * @param url
	 * @param xmlData
	 * @return
	 * @throws ClientProtocolException
	 * @throws IOException
	 */
	public static HttpResponse sendXMLDataByPost(String url, String xmlData)
			throws ClientProtocolException, IOException {
		HttpClient httpClient = HttpClients.createDefault();
		HttpPost httppost = new HttpPost(url);
		StringEntity entity = new StringEntity(xmlData);
		httppost.setEntity(entity);
		httppost.setHeader("Content-Type", "text/xml;charset=UTF-8");
		HttpResponse response = httpClient.execute(httppost);
		return response;
	}

	/**
	 * 获得响应HTTP实体内容
	 *
	 * @param response
	 * @return
	 * @throws IOException
	 * @throws UnsupportedEncodingException
	 */
	public static String getHttpEntityContent(HttpResponse response) throws IOException, UnsupportedEncodingException {
		HttpEntity entity = response.getEntity();
		if (entity != null) {
			InputStream is = entity.getContent();
			BufferedReader br = new BufferedReader(new InputStreamReader(is, "UTF-8"));
			String line = br.readLine();
			StringBuilder sb = new StringBuilder();
			while (line != null) {
				sb.append(line + "\n");
				line = br.readLine();
			}
			return sb.toString();
		}
		return "";
	}


}
- jwt加密和解密的工具类
package com.tigerhhzz.springbootvote.util;


import com.tigerhhzz.springbootvote.constant.JwtConstant;
import com.tigerhhzz.springbootvote.entity.CheckResult;
import io.jsonwebtoken.*;
import org.bouncycastle.util.encoders.Base64;

import javax.crypto.SecretKey;
import javax.crypto.spec.SecretKeySpec;
import java.util.Date;


/**
 * jwt加密和解密的工具类
 *
 * @author tigerhhzz
 * @date 2023/5/17 15:34
 */
public class JwtUtils {

    /**
     * 签发JWT
     * @param id
     * @param subject 可以是JSON数据 尽可能少
     * @param ttlMillis
     * @return
     */
    public static String createJWT(String id, String subject, long ttlMillis) {
        SignatureAlgorithm signatureAlgorithm = SignatureAlgorithm.HS256;
        long nowMillis = System.currentTimeMillis();
        Date now = new Date(nowMillis);
        SecretKey secretKey = generalKey();
        JwtBuilder builder = Jwts.builder()
                .setId(id)
                .setSubject(subject)   // 主题
                .setIssuer("tigerhhzz")     // 签发者
                .setIssuedAt(now)      // 签发时间
                .signWith(signatureAlgorithm, secretKey); // 签名算法以及密匙
        if (ttlMillis >= 0) {
            long expMillis = nowMillis + ttlMillis;
            Date expDate = new Date(expMillis);
            builder.setExpiration(expDate); // 过期时间
        }
        return builder.compact();
    }

    /**
     * 生成jwt token
     * @param username
     * @return
     */
    public static String genJwtToken(String username){
        return createJWT(username,username,60*60*1000);
    }

    /**
     * 验证JWT
     * @param jwtStr
     * @return
     */
    public static CheckResult validateJWT(String jwtStr) {
        CheckResult checkResult = new CheckResult();
        Claims claims = null;
        try {
            claims = parseJWT(jwtStr);
            checkResult.setSuccess(true);
            checkResult.setClaims(claims);
        } catch (ExpiredJwtException e) {
            checkResult.setErrCode(JwtConstant.JWT_ERRCODE_EXPIRE);
            checkResult.setSuccess(false);
        } catch (SignatureException e) {
            checkResult.setErrCode(JwtConstant.JWT_ERRCODE_FAIL);
            checkResult.setSuccess(false);
        } catch (Exception e) {
            checkResult.setErrCode(JwtConstant.JWT_ERRCODE_FAIL);
            checkResult.setSuccess(false);
        }
        return checkResult;
    }

    /**
     * 生成加密Key
     * @return
     */
    public static SecretKey generalKey() {
        byte[] encodedKey = Base64.decode(JwtConstant.JWT_SECERT);
        SecretKey key = new SecretKeySpec(encodedKey, 0, encodedKey.length, "AES");
        return key;
    }


    /**
     * 解析JWT字符串
     * @param jwt
     * @return
     * @throws Exception
     */
    public static Claims parseJWT(String jwt) {
        SecretKey secretKey = generalKey();
        return Jwts.parser()
                .setSigningKey(secretKey)
                .parseClaimsJws(jwt)
                .getBody();
    }

    public static void main(String[] args) throws InterruptedException {
        //小明失效 10s
        String sc = createJWT("1","小明", 60 * 60 * 1000);
        System.out.println(sc);
        System.out.println(validateJWT(sc).getErrCode());
        System.out.println(validateJWT(sc).getClaims().getId());
        System.out.println(validateJWT(sc).getClaims().getSubject());
        //Thread.sleep(3000);
        System.out.println(validateJWT(sc).getClaims());
        Claims claims = validateJWT(sc).getClaims();
        String sc2 = createJWT(claims.getId(),claims.getSubject(), JwtConstant.JWT_TTL);
        System.out.println(sc2);
    }

}
- 字符串工具类
package com.tigerhhzz.springbootvote.util;

import java.util.ArrayList;
import java.util.List;
import java.util.Random;

/**
 * 字符串工具类
 * @author
 *
 */
public class StringUtil {

	/**
	 * 判断是否是空
	 * @param str
	 * @return
	 */
	public static boolean isEmpty(String str){
		if(str==null||"".equals(str.trim())){
			return true;
		}else{
			return false;
		}
	}

	/**
	 * 判断是否不是空
	 * @param str
	 * @return
	 */
	public static boolean isNotEmpty(String str){
		if((str!=null)&&!"".equals(str.trim())){
			return true;
		}else{
			return false;
		}
	}

	/**
	 * 格式化模糊查询
	 * @param str
	 * @return
	 */
	public static String formatLike(String str){
		if(isNotEmpty(str)){
			return "%"+str+"%";
		}else{
			return null;
		}
	}

	/**
	 * 过滤掉集合里的空格
	 * @param list
	 * @return
	 */
	public static List<String> filterWhite(List<String> list){
		List<String> resultList=new ArrayList<String>();
		for(String l:list){
			if(isNotEmpty(l)){
				resultList.add(l);
			}
		}
		return resultList;
	}

	/**
	 * 去除html标签
	 */
	public static String stripHtml(String content) {
	    // <p>段落替换为换行
	    content = content.replaceAll("<p .*?>", "\r\n");
	    // <br><br/>替换为换行
	    content = content.replaceAll("<br\\s*/?>", "\r\n");
	    // 去掉其它的<>之间的东西
	    content = content.replaceAll("\\<.*?>", "");
	    // 去掉空格
	    content = content.replaceAll(" ", "");
	    return content;
	}

	/**
	 * 生成六位随机数
	 * @return
	 */
	public static String genSixRandomNum(){
		Random random = new Random();
		String result="";
		for (int i=0;i<6;i++)
		{
			result+=random.nextInt(10);
		}
		return result;
	}

	/**
	 * 生成由[A-Z,0-9]生成的随机字符串
	 * @param length  欲生成的字符串长度
	 * @return
	 */
	public static String getRandomString(int length){
		Random random = new Random();

		StringBuffer sb = new StringBuffer();

		for(int i = 0; i < length; ++i){
			int number = random.nextInt(2);
			long result = 0;

			switch(number){
				case 0:
					result = Math.round(Math.random() * 25 + 65);
					sb.append(String.valueOf((char)result));
					break;
				case 1:

					sb.append(String.valueOf(new Random().nextInt(10)));
					break;
			}
		}
		return sb.toString();
	}


}
2.5、mapper和service接口
微信用户mapper —WxUserInfoMapper
package com.tigerhhzz.springbootvote.mapper;

import com.baomidou.mybatisplus.core.mapper.BaseMapper;
import com.tigerhhzz.springbootvote.entity.WxUserInfo;
import org.springframework.stereotype.Repository;

/**
 * 微信用户mapper
 *
 * @author tigerhhzz
 * @date 2023/5/17 15:26
 */
@Repository
public interface WxUserInfoMapper extends BaseMapper<WxUserInfo> {

}
微信用户Service接口 —WxUserInfoService
package com.tigerhhzz.springbootvote.service;


import com.baomidou.mybatisplus.extension.service.IService;
import com.tigerhhzz.springbootvote.entity.WxUserInfo;


/**
 * 微信用户Service接口
 *
 * @author tigerhhzz
 * @date 2023/5/17 15:34
 */
public interface WxUserInfoService extends IService<WxUserInfo> {
}
2.5、Service实现类
WxUserInfoServiceImpl---- 实现WxUserInfoService 接口,并继承ServiceImpl实现类的泛型WxUserInfoMapper和WxUserInfo。
package com.tigerhhzz.springbootvote.service.impl;


import com.baomidou.mybatisplus.extension.service.impl.ServiceImpl;
import com.tigerhhzz.springbootvote.entity.WxUserInfo;
import com.tigerhhzz.springbootvote.mapper.WxUserInfoMapper;
import com.tigerhhzz.springbootvote.service.WxUserInfoService;

import org.springframework.stereotype.Service;


/**
 * 微信用户Service实现类
 *
 * @author tigerhhzz
 * @date 2023/5/17 15:34
 */
@Service //("wxUserInfoService")
public class WxUserInfoServiceImpl extends ServiceImpl<WxUserInfoMapper, WxUserInfo> implements WxUserInfoService {

    //@Autowired
    //private WxUserInfoMapper wxUserInfoMapper;
}
2.6、微信用户的控制层Controller
两个控制层请求接口
- /user/wxlogin
功能: 通过前端发送请求携带的参数code以及后端配置文件中的微信小程序appid和微信小程序密钥,后端拼接url向微信后台发送请求。
		 String jscode2sessionUrl=weixinProperties.getJscode2sessionUrl()+"?appid="+weixinProperties.getAppid()+"&secret="+weixinProperties.getSecret()+"&js_code="+wxUserInfo.getCode()+"&grant_type=authorization_code";
		// https://api.weixin.qq.com/sns/jscode2session?appid=wxa4de78832ea93858&secret=a2efb3b602d96b2dee615b7a4dee451a&js_code=0b1JwPkl2xqHkb4VEjml2vVdua3JwPkq&grant_type=authorization_code
        //后端向微信后台送发请求 获取openid
        String result = httpClientUtil.sendHttpGet(jscode2sessionUrl);
        System.out.println(result);
        //结果:{"session_key":"TPTXzC9MOe1owBJ8zrSWTw==","openid":"o2yqx5PBEW-ezFHA24ASqP0Lk1M0"}
通过拿到的openid,去数据库查询对应用户信息,如果没有openid的用户,进行新增操作;
如果存在openid的用户,进行更新操作。
最后利用jwt工具类生成token,返回前端
 // 利用jwt生成token返回到前端
  String token = JwtUtils.createJWT(openid, wxUserInfo.getNickName(), JwtConstant.JWT_TTL);
  Map<String,Object> resultMap=new HashMap<>();
  resultMap.put("token",token);
  resultMap.put("openid",openid);
  return R.ok(resultMap);
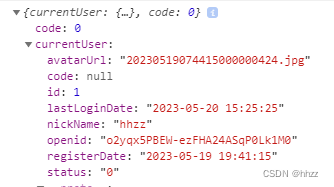
- /user/getUserInfo
功能: 通过前端发送请求,请求头中携带token参数,后端接受到token,然后进行token验证,拿到openid,通过openid去数据库中查询用户信息,并返回前端
//token验证
Claims claims = JwtUtils.validateJWT(token).getClaims();
获取当前微信登录用户信息:
WeixinUserController 完整代码:
package com.tigerhhzz.springbootvote.controller;

import com.alibaba.fastjson.JSON;
import com.alibaba.fastjson.JSONObject;
import com.baomidou.mybatisplus.core.conditions.query.QueryWrapper;
import com.baomidou.mybatisplus.core.conditions.update.UpdateWrapper;
import com.tigerhhzz.springbootvote.constant.JwtConstant;
import com.tigerhhzz.springbootvote.entity.R;
import com.tigerhhzz.springbootvote.entity.WxUserInfo;
import com.tigerhhzz.springbootvote.properties.WeixinProperties;
import com.tigerhhzz.springbootvote.service.WxUserInfoService;
import com.tigerhhzz.springbootvote.util.DateUtil;
import com.tigerhhzz.springbootvote.util.HttpClientUtil;
import com.tigerhhzz.springbootvote.util.JwtUtils;
import com.tigerhhzz.springbootvote.util.StringUtil;
import io.jsonwebtoken.Claims;
import org.apache.commons.io.FileUtils;
import org.springframework.beans.factory.annotation.Autowired;
import org.springframework.beans.factory.annotation.Value;
import org.springframework.web.bind.annotation.RequestBody;
import org.springframework.web.bind.annotation.RequestHeader;
import org.springframework.web.bind.annotation.RequestMapping;
import org.springframework.web.bind.annotation.RestController;
import org.springframework.web.multipart.MultipartFile;

import java.io.File;
import java.util.Date;
import java.util.HashMap;
import java.util.List;
import java.util.Map;

/**
 * 微信用户Controller
 *
 * @author tigerhhzz
 * @date 2023/5/17 15:34
 */
@RequestMapping("/user")
@RestController
public class WeixinUserController {

    @Autowired
    private WxUserInfoService wxUserInfoService;

    @Autowired
    private WeixinProperties weixinProperties;

    @Autowired
    private HttpClientUtil httpClientUtil;


    /**
     * 微信用户登录
     * @return
     */
    @RequestMapping("/wxlogin")
    public R wxLogin(@RequestBody WxUserInfo wxUserInfo){
        //拼接后端发送请求的URL 例如 https://api.weixin.qq.com/sns/jscode2session?appid=wxa4de78832ea93858&secret=a2efb3b602d96b2dee615b7a4dee451a&js_code=0b1JwPkl2xqHkb4VEjml2vVdua3JwPkq&grant_type=authorization_code
        String jscode2sessionUrl=weixinProperties.getJscode2sessionUrl()+"?appid="+weixinProperties.getAppid()+"&secret="+weixinProperties.getSecret()+"&js_code="+wxUserInfo.getCode()+"&grant_type=authorization_code";
        System.out.println(jscode2sessionUrl);

        //后端向微信后台送发请求 获取openid
        String result = httpClientUtil.sendHttpGet(jscode2sessionUrl);
        System.out.println(result); //结果:{"session_key":"TPTXzC9MOe1owBJ8zrSWTw==","openid":"o2yqx5PBEW-ezFHA24ASqP0Lk1M0"}

        //
        JSONObject jsonObject= JSON.parseObject(result);//转换成object
        String openid = jsonObject.get("openid").toString();//获取object中openid字段的值;
        System.out.println(openid);


        // 插入用户到数据库  假如说 用户不存在 我们插入用户  如果用户存在 我们更新用户
        WxUserInfo resultWxUserInfo = wxUserInfoService.getOne(new QueryWrapper<WxUserInfo>().eq("openid", openid));
        if(resultWxUserInfo==null){
            System.out.println("不存在 插入用户");
            wxUserInfo.setOpenid(openid);
            wxUserInfo.setRegisterDate(new Date());
            wxUserInfo.setLastLoginDate(new Date());
            wxUserInfoService.save(wxUserInfo);
        }else{
            System.out.println("存在 更新用户");
            // resultWxUserInfo.setNickName(wxUserInfo.getNickName());
            // resultWxUserInfo.setAvatarUrl(wxUserInfo.getAvatarUrl());
            resultWxUserInfo.setLastLoginDate(new Date());
            wxUserInfoService.updateById(resultWxUserInfo);
        }
        if(resultWxUserInfo!=null && resultWxUserInfo.getStatus().equals("1")){ // 被禁用
            return R.error(400,"用户被禁用,具体请联系管理员!");
        }else{
            // 利用jwt生成token返回到前端
            String token = JwtUtils.createJWT(openid, wxUserInfo.getNickName(), JwtConstant.JWT_TTL);
            Map<String,Object> resultMap=new HashMap<>();
            resultMap.put("token",token);
            resultMap.put("openid",openid);
            return R.ok(resultMap);
        }
    }

    /**
     * 获取当前用户信息
     * @return
     */
    @RequestMapping("/getUserInfo")
    public R getUserInfo(@RequestHeader String token){
        System.out.println("/getUserInfo----token="+token);
        Claims claims = JwtUtils.validateJWT(token).getClaims();
        System.out.println("openid="+claims.getId());
        WxUserInfo currentUser = wxUserInfoService.getOne(new QueryWrapper<WxUserInfo>().eq("openid", claims.getId()));
        Map<String,Object> map=new HashMap<>();
        map.put("currentUser",currentUser);
        return R.ok(map);
    }


}
前端源码下载地址 https://download.csdn.net/download/weixin_43025151/87803315
后端源码下载地址:https://download.csdn.net/download/weixin_43025151/87803318