文章目录
- 0.引言
- 1.创建示例工程
- 2.输入文本对话框布局和功能设计
- 3.主程序调用输入文本对话框
0.引言
笔者研究的课题涉及到安卓软件开发,在开发过程中,发现普通的显示消息对话框一般可以调用android自带包实现,而要通过文本框输入交互,则无法轻易实现。在查阅网络资料后,实现了自定义输入文本对话框的功能,本文记录实现自定义输入文本对话框的过程。
1.创建示例工程
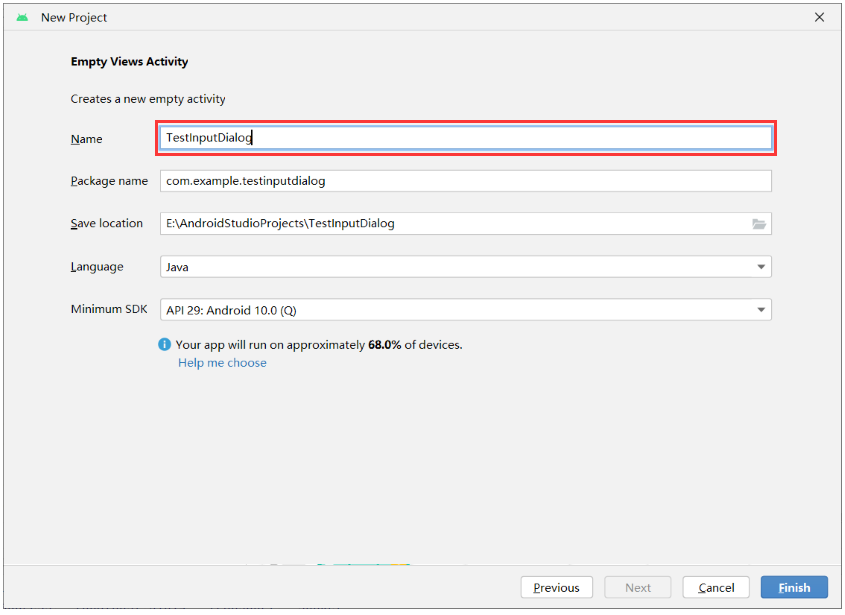
(1)创建TestInputDialog工程
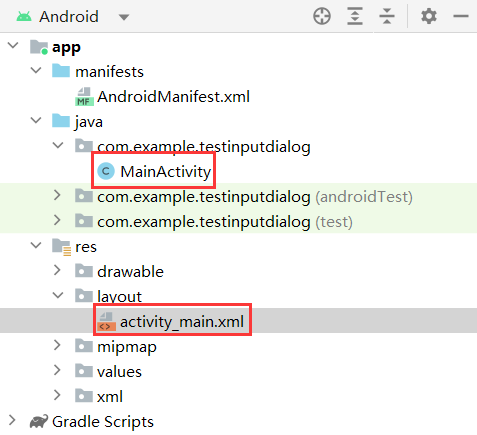
(2)生成主程序
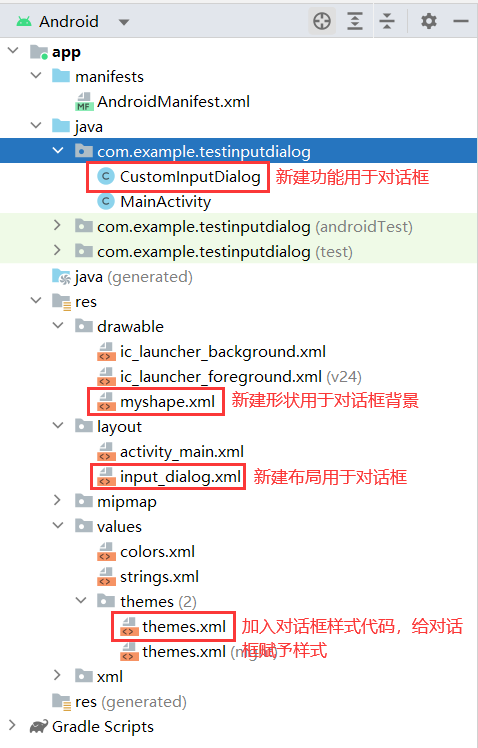
(3)新建输入文本对话框布局(.xml)和功能(.java)文件
2.输入文本对话框布局和功能设计
(1)新建形状文件(myshape.xml)
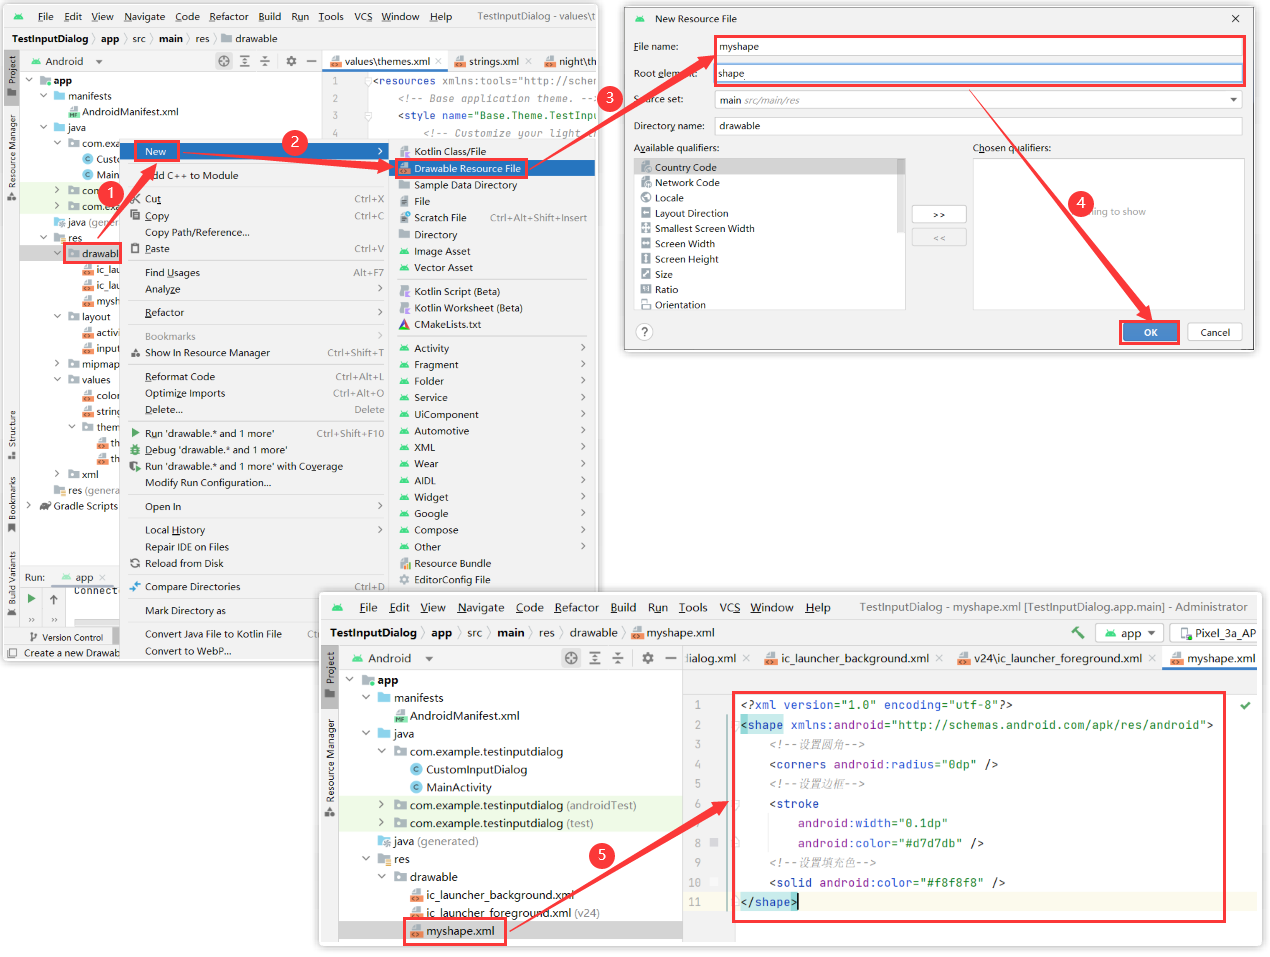
<?xml version="1.0" encoding="utf-8"?>
<shape xmlns:android="http://schemas.android.com/apk/res/android">
    <!--设置圆角-->
    <corners android:radius="0dp" />
    <!--设置边框-->
    <stroke
        android:width="0.1dp"
        android:color="#d7d7db" />
    <!--设置填充色-->
    <solid android:color="#f8f8f8" />
</shape>
(2)添加对话框样式(themes.xml)
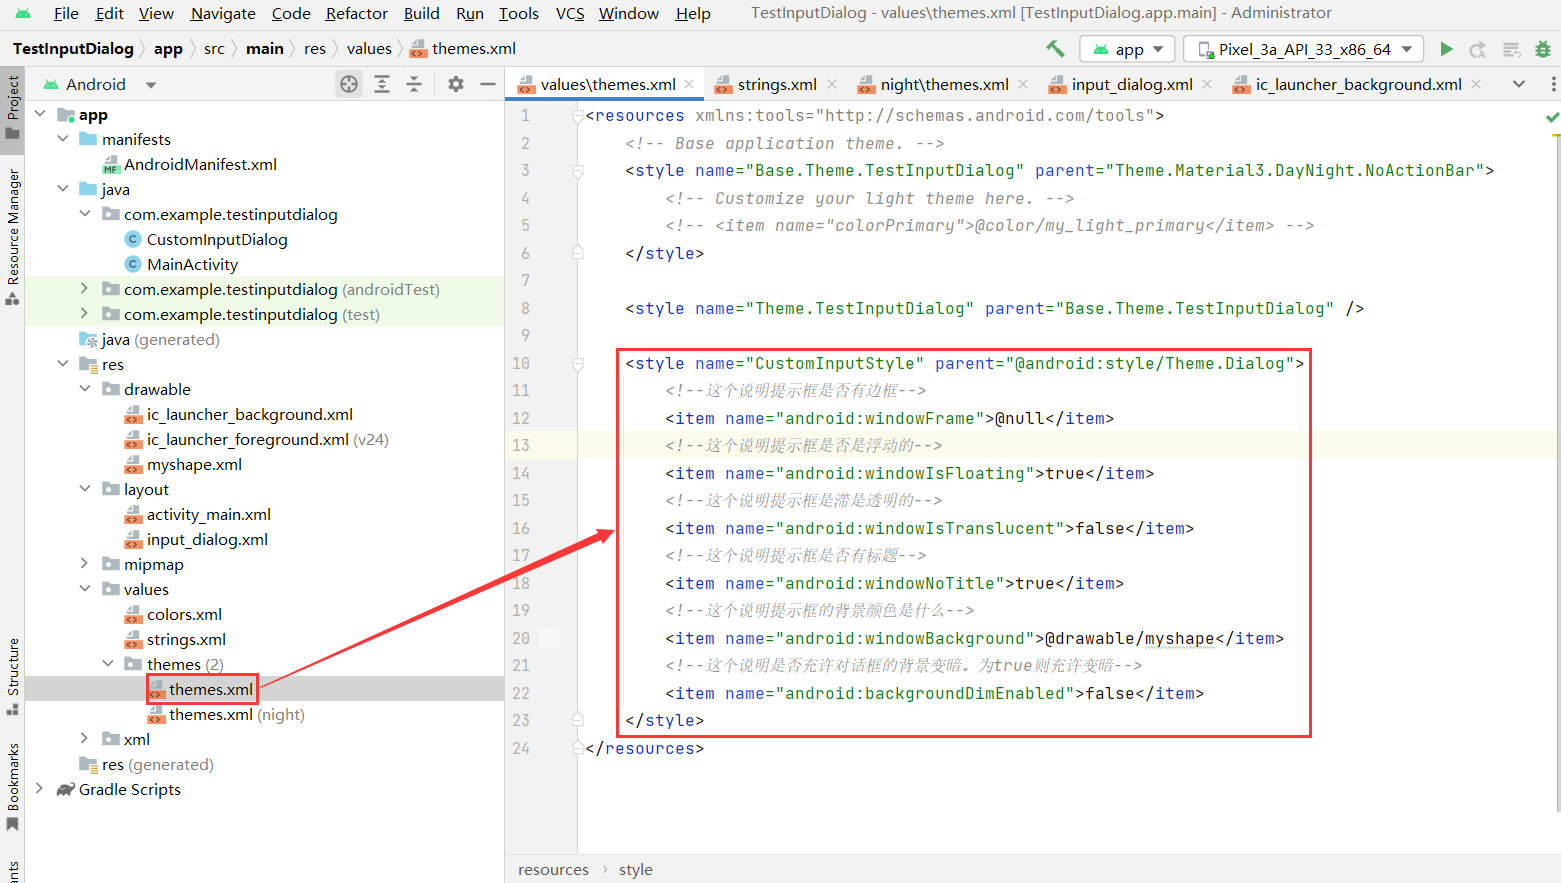
<style name="CustomInputStyle" parent="@android:style/Theme.Dialog">
    <!--这个说明提示框是否有边框-->
    <item name="android:windowFrame">@null</item>
    <!--这个说明提示框是否是浮动的-->
    <item name="android:windowIsFloating">true</item>
    <!--这个说明提示框是滞是透明的-->
    <item name="android:windowIsTranslucent">false</item>
    <!--这个说明提示框是否有标题-->
    <item name="android:windowNoTitle">true</item>
    <!--这个说明提示框的背景颜色是什么-->
    <item name="android:windowBackground">@drawable/myshape</item>
    <!--这个说明是否充许对话框的背景变暗。为true则充许变暗-->
    <item name="android:backgroundDimEnabled">false</item>
</style>
(3)新建对话框布局文件(input_dialog.xml)

<LinearLayout xmlns:android="http://schemas.android.com/apk/res/android"
    android:layout_width="match_parent"
    android:layout_height="match_parent"
    android:orientation="vertical">

    <LinearLayout
        android:layout_width="270dp"
        android:layout_height="wrap_content"
        android:orientation="vertical">

        <TextView
            android:id="@+id/title"
            android:layout_width="match_parent"
            android:layout_height="wrap_content"
            android:layout_marginLeft="15dp"
            android:layout_marginTop="15dp"
            android:layout_marginRight="15dp"
            android:gravity="center_horizontal"
            android:text="输入对话框"
            android:textSize="19sp" />

        <EditText
            android:id="@+id/et_input"
            android:layout_width="match_parent"
            android:layout_height="wrap_content"
            android:layout_marginLeft="15dp"
            android:layout_marginTop="10dp"
            android:layout_marginRight="15dp"
            android:layout_marginBottom="10dp"
            android:gravity="center_horizontal"
            android:hint="输入内容"
            android:lineSpacingExtra="5dp"
            android:textSize="17sp" />

        <View
            android:layout_width="match_parent"
            android:layout_height="1dp"
            android:background="#DFDFDF" />

        <LinearLayout
            android:layout_width="match_parent"
            android:layout_height="44dp"
            android:orientation="horizontal">

            <Button
                android:id="@+id/btn_ok"
                android:layout_width="wrap_content"
                android:layout_height="match_parent"
                android:layout_weight="1"
                android:clickable="true"
                android:gravity="center"
                android:text="确认"
                android:textSize="17sp" />

            <View
                android:layout_width="1dp"
                android:layout_height="match_parent"
                android:background="#DFDFDF" />

            <Button
                android:id="@+id/btn_cancel"
                android:layout_width="wrap_content"
                android:layout_height="match_parent"
                android:layout_weight="1"
                android:clickable="true"
                android:gravity="center"
                android:text="取消"
                android:textSize="17sp" />

        </LinearLayout>
    </LinearLayout>
</LinearLayout>
(4)新建对话框功能代码文件(CustomInputDialog.java)
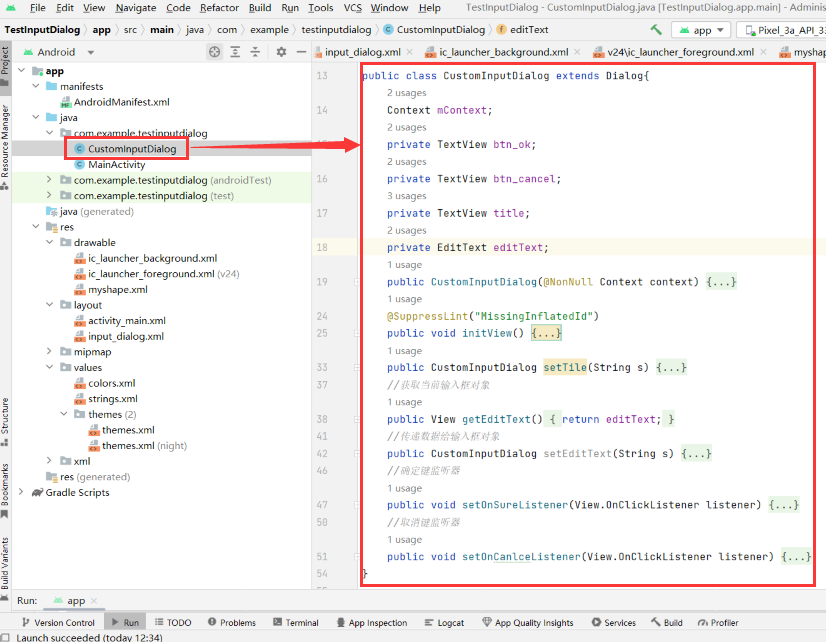
package com.example.testinputdialog;

import android.annotation.SuppressLint;
import android.app.Dialog;
import android.content.Context;
import android.view.LayoutInflater;
import android.view.View;
import android.widget.EditText;
import android.widget.TextView;

import androidx.annotation.NonNull;

public class CustomInputDialog extends Dialog{
    Context mContext;
    private TextView btn_ok;
    private TextView btn_cancel;
    private TextView title;
    private EditText editText;
    public CustomInputDialog(@NonNull Context context) {
        super(context, R.style.CustomInputStyle);
        this.mContext = context;
        initView();
    }
    @SuppressLint("MissingInflatedId")
    public void initView() {
        View view = LayoutInflater.from(mContext).inflate(R.layout.input_dialog, null);
        title = (TextView) view.findViewById(R.id.title);
        editText = (EditText) view.findViewById(R.id.et_input);
        btn_ok = (TextView) view.findViewById(R.id.btn_ok);
        btn_cancel = (TextView) view.findViewById(R.id.btn_cancel);
        super.setContentView(view);
    }
    public CustomInputDialog setTile(String s) {
        title.setText(s);
        return this;
    }
    //获取当前输入框对象
    public View getEditText() {
        return editText;
    }
    //传递数据给输入框对象
    public CustomInputDialog setEditText(String s) {
        title.setText(s);
        return this;
    }
    //确定键监听器
    public void setOnSureListener(View.OnClickListener listener) {
        btn_ok.setOnClickListener(listener);
    }
    //取消键监听器
    public void setOnCanlceListener(View.OnClickListener listener) {
        btn_cancel.setOnClickListener(listener);
    }
}
3.主程序调用输入文本对话框
(1)主程序布局实现

<?xml version="1.0" encoding="utf-8"?>
<androidx.constraintlayout.widget.ConstraintLayout xmlns:android="http://schemas.android.com/apk/res/android"
xmlns:app="http://schemas.android.com/apk/res-auto"
xmlns:tools="http://schemas.android.com/tools"
android:layout_width="match_parent"
android:layout_height="match_parent"
tools:context=".MainActivity">
<TextView
android:layout_width="wrap_content"
android:layout_height="wrap_content"
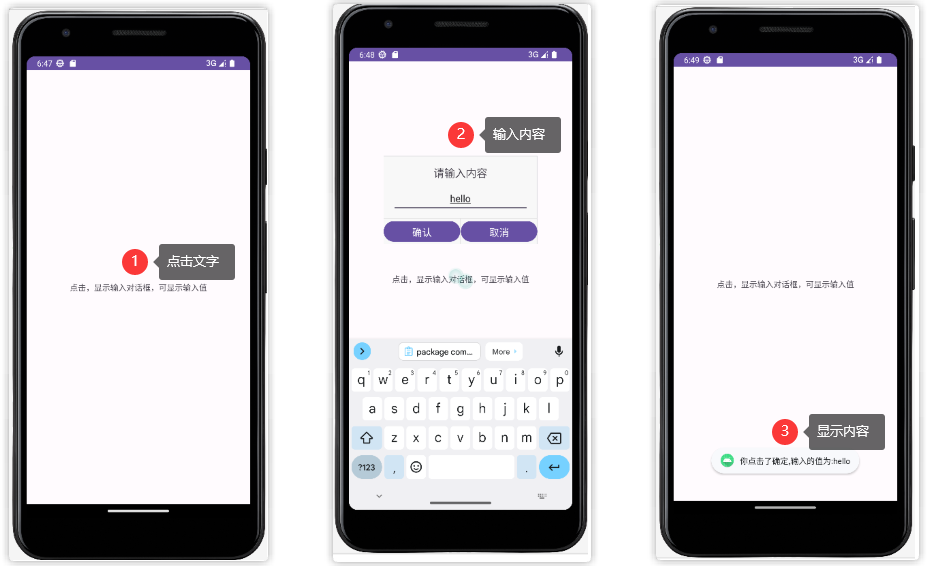
android:text="点击,显示输入对话框,可显示输入值"
android:onClick="showInput"
app:layout_constraintBottom_toBottomOf="parent"
app:layout_constraintEnd_toEndOf="parent"
app:layout_constraintStart_toStartOf="parent"
app:layout_constraintTop_toTopOf="parent" />
</androidx.constraintlayout.widget.ConstraintLayout>
(2)主程序功能实现
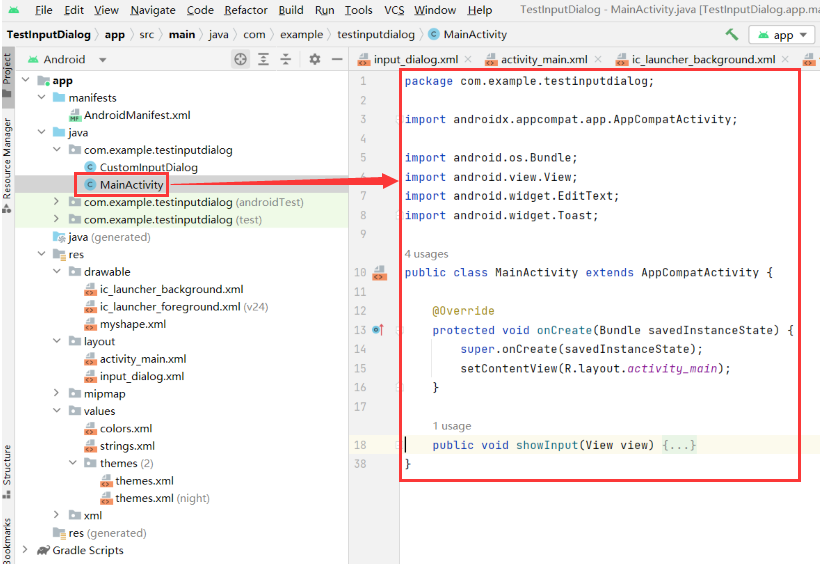
package com.example.testinputdialog;

import androidx.appcompat.app.AppCompatActivity;

import android.os.Bundle;
import android.view.View;
import android.widget.EditText;
import android.widget.Toast;

public class MainActivity extends AppCompatActivity {

    @Override
    protected void onCreate(Bundle savedInstanceState) {
        super.onCreate(savedInstanceState);
        setContentView(R.layout.activity_main);
    }

    public void showInput(View view) {
        final CustomInputDialog customDialog = new CustomInputDialog(this);
        final EditText editText = (EditText) customDialog.getEditText();//方法在CustomDialog中实现
        customDialog.setOnSureListener(new View.OnClickListener() {
            @Override
            public void onClick(View v) {
                Toast.makeText(MainActivity.this, "你点击了确定,输入的值为:"+editText.getText().toString(), Toast.LENGTH_SHORT).show();
                customDialog.dismiss();
            }
        });
        customDialog.setOnCanlceListener(new View.OnClickListener() {
            @Override
            public void onClick(View v) {
                Toast.makeText(MainActivity.this, "你点击了取消", Toast.LENGTH_SHORT).show();
                customDialog.dismiss();
            }
        });
        customDialog.setTile("请输入内容");
        customDialog.show();
    }
}
(3)结果展示
参考资料:
[1] yuan_fang_yan. android自定义普通对话框,输入框对话框; 2017-09-27 [accessed 2023-05-20].
[2] 晓艳考研. android点击按钮弹出输入框,android 弹出框(输入框和选择框); 2021-05-26 [accessed 2023-05-20].
[3] 李易-_-. Android 密码输入框; 2017-11-06 [accessed 2023-05-20].
[4] Android_xiong_st. (原创)安卓自定义shape方法; 2023-03-21 [accessed 2023-05-20].