前言:
👏作者简介:我是笑霸final,一名热爱技术的在校学生。
📝个人主页:个人主页1 || 笑霸final的主页2
📕系列专栏 JAVA专栏
📧如果文章知识点有错误的地方,请指正!和大家一起学习,一起进步👀
🔥如果感觉博主的文章还不错的话,👍点赞👍 + 👀关注👀 + 🤏收藏🤏
本博客视频教程地址链接 黑马程序员Netty全套教程, netty深入浅出Java网络编程教程
学习目标:
例如:
-
认识 Channel 、Buffer、Selector
学习内容:
一 Channel 、 Buffer 和 Selector
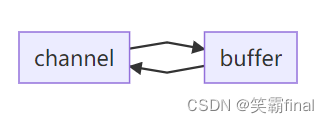
channel 有一点类似于 stream,它就是读写数据的双向通道,可以从 channel 将数据读入 buffer,也可以将 buffer 的数据写入 channel,而之前的 stream 要么是输入,要么是输出,channel 比 stream 更为底层
常见的 Channel 有
- FileChannel
- DatagramChannel
- SocketChannel
- ServerSocketChannel
buffer 则用来缓冲读写数据,常见的 buffer 有
- ByteBuffer
- MappedByteBuffer
- DirectByteBuffer
- HeapByteBuffer
- ShortBuffer
- IntBuffer
- LongBuffer
- FloatBuffer
- DoubleBuffer
- CharBuffer
selector 的作用就是配合一个线程来管理多个 channel,获取这些 channel 上发生的事件,这些 channel 工作在非阻塞模式下,不会让线程吊死在一个 channel 上。适合连接数特别多,但流量低的场景(low traffic)
调用 selector 的 select() 会阻塞直到 channel 发生了读写就绪事件,这些事件发生,select 方法就会返回这些事件交给 thread 来处理
二 ByteBuffer 与Channel的使用
用 FileChannel 来读取文件内容 。有一普通文本文件 data.txt,内容为
123456789@asdcvbnhj
demo01
//读取文件
        try(FileChannel channel = new FileInputStream("nettyStd/netty-demo/src/main/resources/data.txt").getChannel()){
            //准备缓冲区
            ByteBuffer allocate = ByteBuffer.allocate(10);//缓存区
            //向缓冲区里面写数据
            // 将字节序列从此通道读取到给定缓冲区中。
            //从此通道的当前文件位置开始读取字节,
           	// 然后使用实际读取的字节数更新文件位置。
            // 否则,此方法的行为与接口中 ReadableByteChannel
            //指定的完全一样。
            channel.read(allocate);

            //切换模式
            allocate.flip();

            while (allocate.hasRemaining()){
                byte b = allocate.get();
                //byte b1 = allocate.get(0);
                //注意带参数的不会影响读指指针的移动
                System.out.print((char) b);
            }

        } catch (FileNotFoundException e) {
            e.printStackTrace();
        } catch (IOException e) {
            e.printStackTrace();
        }
输出内容
123456789@
demo02
 try(FileChannel channel = new FileInputStream("nettyStd/netty-demo/src/main/resources/data.txt").getChannel()){

            ByteBuffer buffer = ByteBuffer.allocate(10);


            while (true){
            //会根据实际大小来读 返回-1则读取完毕
                int read = channel.read(buffer);
                log.info("当前 read的值 {} \t",read);
                if(read== -1)break;

                buffer.flip();//切换模式

                while (buffer.hasRemaining()){
                    byte b = buffer.get();
                    System.out.print((char) b);

                }
                System.out.println();
                //清除此缓冲区。位置设置为零,限制设置为容量,标记被丢弃
                buffer.clear();

            }


        } catch (FileNotFoundException e) {
            e.printStackTrace();
        } catch (IOException e) {
            e.printStackTrace();
        }
总结 ByteBuffer 正确使用姿势
- 向 buffer 写入数据,例如调用 channel.read(buffer)
- 调用 flip() 切换至读模式
- 从 buffer 读取数据,例如调用 buffer.get()
- 调用 clear() 或 compact() 切换至写模式: compact 方法,是把未读完的部分向前压缩,然后切换至写模式
2.1 ByteBuffer 结构
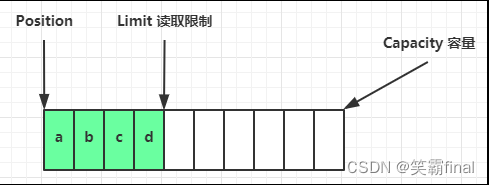
ByteBuffer 有以下重要属性:
- capacity 总容量
- position
- limit
1.
写模式下,position 是写入位置,limit 等于容量
2.flip() 动作发生后 (读模式),position 切换为读取位置,limit 切换为读取限制
三、ByteBuffer 的常见方法
1、分配空间
ByteBuffer.allocate(10)
2.写入数据
- 调用 channel 的 read() 方法
FileChannel channel = new FileInputStream("资源").getChannel();
 channel.read(allocate);
- 调用 buffer 自己的 put 方法
buffer.put("my name is xbfinal".getBytes());
3.从 buffer 读取数据
-
调用 channel 的 write 方法
将字节序列从给定缓冲区写入此通道
int writeBytes = channel.write(buf); -
调用 buffer 自己的 get 方法
byte b = buf.get();
get() 方法会让 position 读指针向后走,如果想重复读取数据,可以调用 rewind 方法将 position 重新置为 0或者调用 get(int i) 方法获取索引 i 的内容,它不会移动读指针
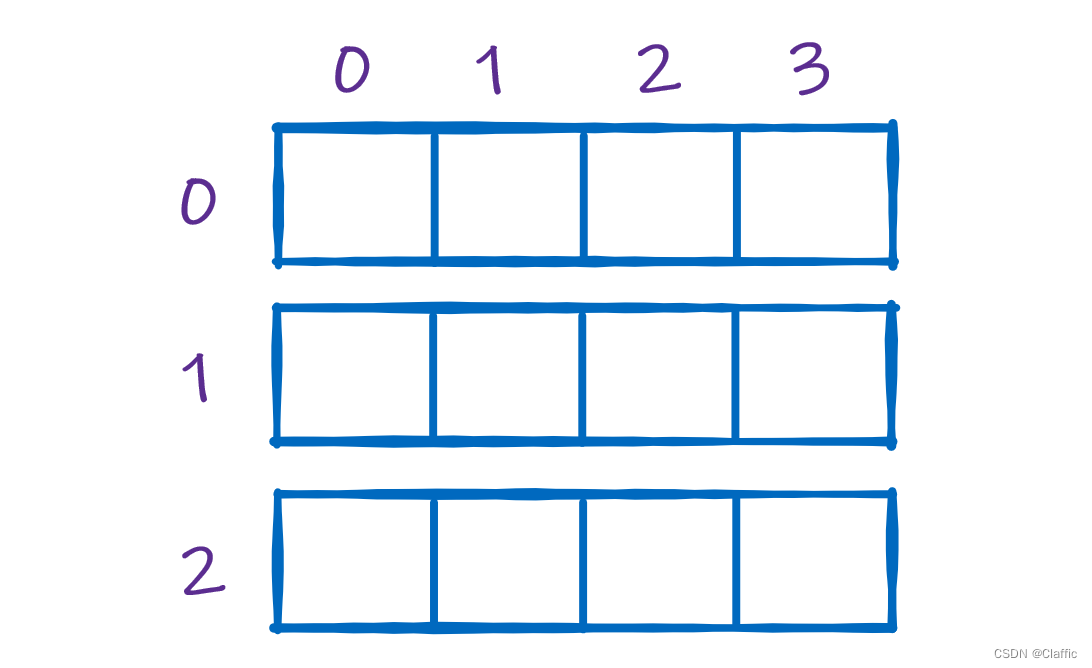
分散读取 Scattering Reads
有一个文本文件 3parts.tx内容如下:
onetwothree
demo
try (RandomAccessFile file = new RandomAccessFile("helloword/3parts.txt", "rw")) {
    FileChannel channel = file.getChannel();
    ByteBuffer a = ByteBuffer.allocate(3);
    ByteBuffer b = ByteBuffer.allocate(3);
    ByteBuffer c = ByteBuffer.allocate(5);
    channel.read(new ByteBuffer[]{a, b, c});
    a.flip();
    b.flip();
    c.flip();
    while (a.hasRemaining()){
    //allocate.get(0); 注意带参数的不会影响读指指针的移动
         System.out.print((char)  a.get());
     }
    while (b.hasRemaining()){
         System.out.print((char)  b.get());
     }
     while (c.hasRemaining()){
         System.out.print((char)  c.get());
     }
     a.clear();
     b.clear();
     c.clear();

} catch (IOException e) {
    e.printStackTrace();
}
分散写 Gathering Writes
try (RandomAccessFile file = new RandomAccessFile("helloword/3parts.txt", "rw")) {
    FileChannel channel = file.getChannel();
    ByteBuffer d = ByteBuffer.allocate(4);
    ByteBuffer e = ByteBuffer.allocate(4);
    channel.position(11);

    d.put(new byte[]{'f', 'o', 'u', 'r'});
    e.put(new byte[]{'f', 'i', 'v', 'e'});
    d.flip();
    e.flip();
    channel.write(new ByteBuffer[]{d, e});
} catch (IOException e) {
    e.printStackTrace();
}
四、字符串与 ByteBuffer 互转
字符串 转 byte
- 1.getBytes()
- 2 ByteBuffer.wrap
- 3 StandardCharsets.UTF_8.encode()
	log.info("字符串  ====》 byte  ");

    log.info("1.getBytes() ");
    ByteBuffer allocate = ByteBuffer.allocate(1024);
//  allocate.put(MY_STR.getBytes()); 默认使用系统自带的编码方式
    allocate.put(MY_STR1.getBytes(StandardCharsets.UTF_8));//不会自动转化为读模式
    allocate.flip();
   while (allocate.hasRemaining()){
         System.out.print( (char) allocate.get());
    }
   System.out.println("\n=================");

  log.info(" 2.wrap ");
  //会自动转化为读模式
  ByteBuffer wrap = ByteBuffer.wrap(MY_STR1.getBytes());
  while (wrap.hasRemaining()){
      System.out.print( (char) wrap.get());
 }
  System.out.println("\n=================");

  log.info(" 3.Charset ");
  //会自动转化为读模式
  ByteBuffer encode = StandardCharsets.UTF_8.encode(MY_STR1);  while (encode.hasRemaining()){
      System.out.print( (char) encode.get());
  }
  System.out.println("\n=================");
byte 转 字符串
		log.info(" byte  ====》 字符串   ");
        log.info(" 3.Charset ");
        //会自动转化为读模式
        ByteBuffer encode1 = StandardCharsets.UTF_8.encode(MY_STR);
        //调用这个之前一定要让ByteBuffer为读模式
        String s = StandardCharsets.UTF_8.decode(encode1).toString();
        System.out.println(s);
五、练习
网络上有多条数据发送给服务端,数据之间使用 \n 进行分隔
但由于某种原因这些数据在接收时,被进行了重新组合,例如原始数据有3条为
- Hello,world\n
- world\n
- my name is xbfinal\n
变成了下面的两个 byteBuffer (黏包,半包)- hello\nworld\nmy name i
- s xbfinal!\n
现在要求你编写程序,将错乱的数据恢复成原始的按 \n 分隔的数据
public class TestByBufferDemo01 {

    public static void main(String[] args) {
        ByteBuffer buffer = ByteBuffer.allocate(50);
        buffer.put("hello\nworld\nmy name i".getBytes()); //粘包 半包

        hello(buffer);//输出一部分
        buffer.put("s xbfinal!\n".getBytes());// 半包
        hello(buffer);
    }

    public static void hello(ByteBuffer buffer){
        //进来先转化为读模式
       buffer.flip();
       for (int i = buffer.position(); i <buffer.limit() ; i++) {
            if('\n' == buffer.get(i)){
                // 我们先存入新的ByteBuffer
                int len = i -buffer.position();
                ByteBuffer allocate = ByteBuffer.allocate(len);
                for (int j = 0; j < len; j++) {
                    allocate.put(buffer.get());
                }
                //输出
                allocate.flip();
                for (int j = 0; j < len; j++) {
                    System.out.print((char) allocate.get());
                }
            }
        }
        //这里由于有粘包 半包。不能用clear
        buffer.compact();
    }

}
学习产出:
- CSDN 技术博客 1 篇
- 笑霸final的私人技术博客 1 篇 链接http://www.xbfinal.top点此跳转
🔥如果感觉博主的文章还不错的话,👍点赞👍 + 👀关注👀 + 🤏收藏🤏
