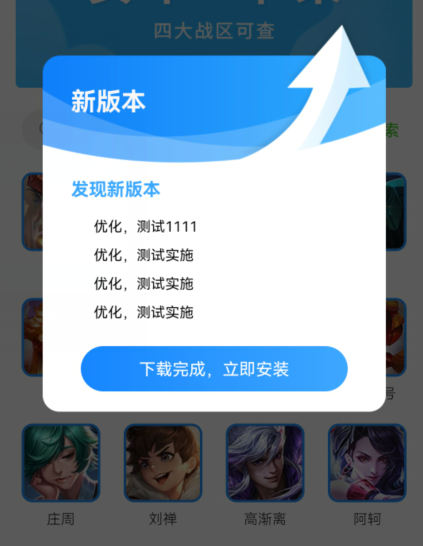
描述
app的版本管理和升级,是一个不可或缺的功能,而uniapp则是提供了一整套的流程,由于官方文档过于复杂,而且写的云里雾里的,所以个人记录一次我的操作,直到配置成功。
总体
一共分为2个部分,官方提供的两个插件(uni-upgrade-center - Admin 和uni-upgrade-center - App)配套使用,本文采用最简单粗暴的方式来实现。
前端设置
1 安装前端插件
插件uni-upgrade-center - App,将插件导入到你的项目里面。

2 添加路径
在pages.json文件,添加一个更新页面(官方已提供)
{
	"path": "uni_modules/uni-upgrade-center-app/pages/upgrade-popup",
	"style": {
		"disableScroll": true,
		"app-plus": {
			"backgroundColorTop": "transparent",
			"background": "transparent",
			"titleNView": false,
			"scrollIndicator": false,
			"popGesture": "none",
			"animationType": "fade-in",
			"animationDuration": 200
		}
	}
}
3 添加更新代码
将更新的代码,放在你要展示的位置
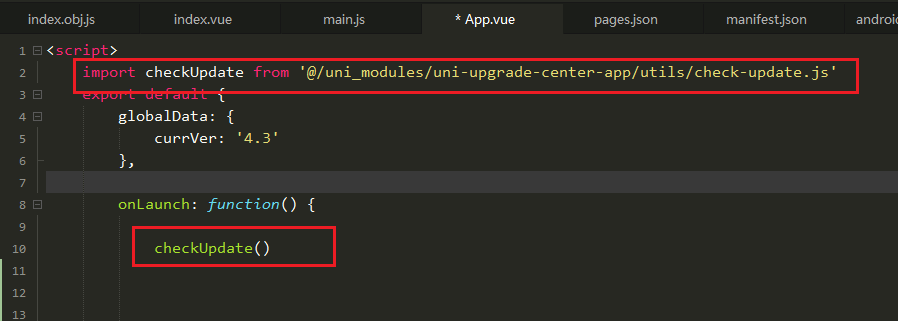
import checkUpdate from '@/uni_modules/uni-upgrade-center-app/utils/check-update.js'
例如,我写在App.vue里面,项目一打开就检测
后端设置
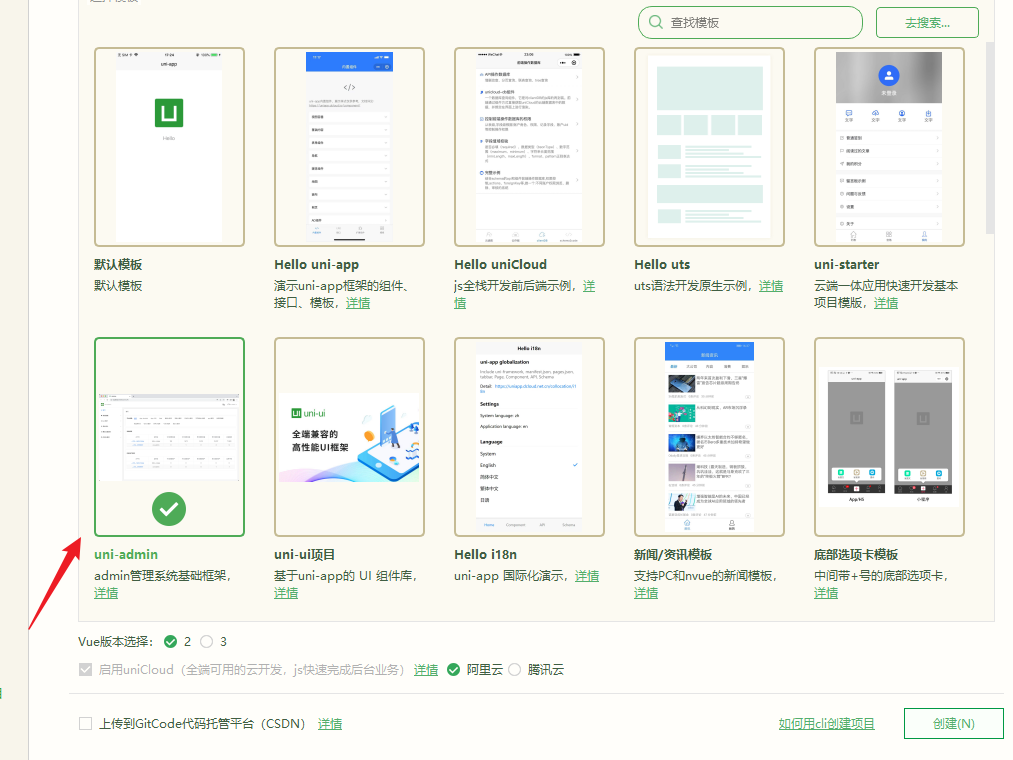
后端个人建议不要使用uni-upgrade-center - Admin,直接新建一个项目使用uni-admin这里面内置了升级中心,因为后续还有统计,还要用到uni-admin,所以我们直接用这个更简单
步骤
- 新建uni-admin 项目
- 使用新的云开发空间,不和app共用
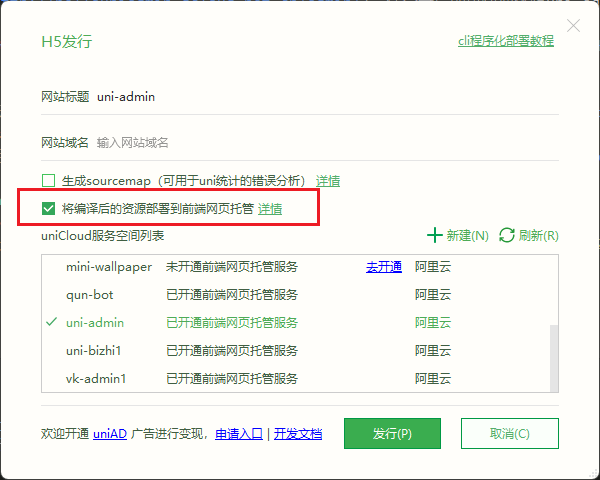
- 发布的时候直接上传到云托管
uni-admin项目基本没有什么改动,直接下载后上传就可以使用
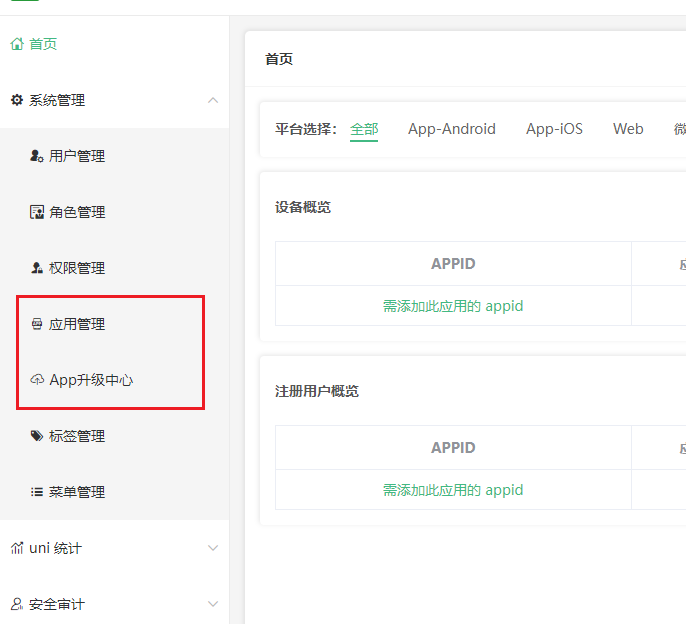
后端项目就搭建好了,进入后台,将你的APP添加进来
注意
1 云函数调整(必须)
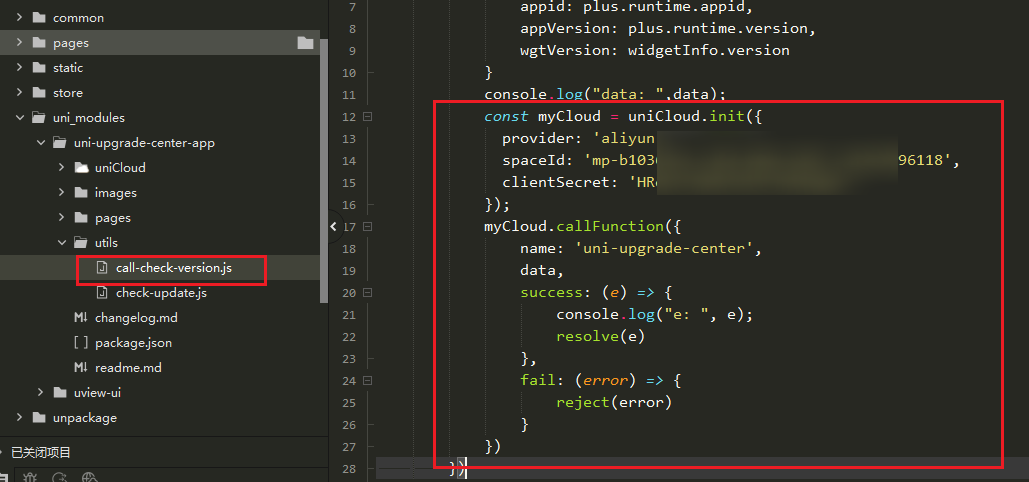
因为前后端是2个项目,所以我们需要修改更新的云函数,将服务空间指向uni-admin,才能调用更新云函数,参数在服务空间都可以看见
const myCloud = uniCloud.init({
  provider: 'aliyun',
  spaceId: 'mp-xxxxxxxxxxxxxxxxxxx',
  clientSecret: 'xxxxxxxxx'
});
myCloud.callFunction({
	name: 'uni-upgrade-center',
	data,
	success: (e) => {
		console.log("e: ", e);
		resolve(e)
	},
	fail: (error) => {
		reject(error)
	}
})
2 发布wgt包问题
打包前请务必将 manifest.json 中的版本名称修改为更高版本

3 发布新版本
在admin后台直接发布即可,app端就可以检查

4 如何测试
必须要打包apk安装到自己手机才行,我之前使用web端无法检查,以及使用hbuild基座APP也无法检查,
