文章目录
- openpnp - Smoothieware project debug
- 概述
- 笔记
- 记录一下工程中, 和调试相关的资料
- 备注
- END
openpnp - Smoothieware project debug
概述
迁出了Smoothieware工程, 想单步调试学习一下工程.
工程可以编译下载, 但是没有对单步调试方法做说明.
研究了几天, 大概知道咋回事了.
笔记
我只能说这个项目的开源大神的思路比较清奇.
这个工程的调试方式是MRI.
先将工程中加入MRI代码, 然后烧录到MCU中.
然后用串口连接MCU, 用GDB方式调试…
明明用的LPC1769, MCU就有JTAG接口, 为啥要用串口去调试呢? 又不是人家STC只能串口调试…
MRI只支持几种特定的MCU和开发板. 这个MRI工程的作者, 还不断更新工程. 不知道他咋想的.
好像唯一的好处是: 只用串口调试, 不需要额外的调试硬件.
但是, 这年头, 迁出了这个工程的人, 谁还缺个JLINK啊?
用过GDB的人就知道, 这是人用的调试器么? 又不是helloworld, 巨量的代码中, 让这个项目的小白用GDB调试试试?
如果这个世界上只有linux, 那用GDB调试没人吐槽啊.
再说了, 有几个人在windows下用GDB调试呢? 一声叹息啊.
每个MCU官方厂家都提供了专用的IDE(NXP有 MCUXpresso, ST有STM32CubeMX), 如果您不想用原厂提供的IDE, 厂家还提供了MDK, IAR的工程模板和对应的例程/库.
用MCU厂家提供的方式开发不香么?
大神们咋用这么膈应的东西…
如果不是作者或fork工程进行改进的大神, 基本上是不可能用MRI方式进行调试的.
只有是作者本人(或者对工程脉络很清楚的大神), 工程逐步迭代, 每次都调试一部分, 测试提交后, 都是没错误的实现. 这样才有可能用GDB调试要修改的那部分代码.
对于工程的学习者(这个项目的小白), 想随意调试学习想要的代码实现, 基本不可能.
记录一下工程中, 和调试相关的资料
这个工程使用MRI调试, 我是看到了工程中的mri目录, mbed目录, gcc-arm-none-eabi目录, 然后迁出MRI工程, 看说明, 基本可以断定, Smoothieware工程使用MRI调试的.
MRI 工程 https://github.com/adamgreen/mri/
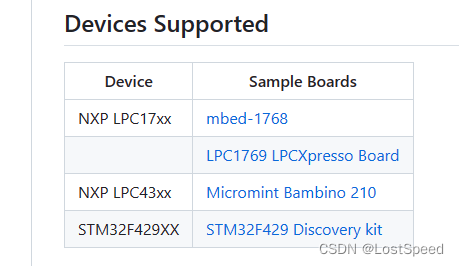
mri/README.md 中有MRI入门的资料

mri/notes/mri-getting-started.creole
There are a few things that you need to download and install before using MRI:
* Follow the instructions at [[https://github.com/adamgreen/gcc4mbed#quick-start]] to install the latest version of the GCC4MBED project which includes the MRI debug monitor.
* MRI doesn't work if the JTAG debug interface is actively being used on the device.  Any such JTAG usage will need to be disabled before you can use MRI.  What needs to be done will differ depending on your device:

...


===Connect GDB to mbed
We are now going to connect GDB to your mbed device over the USB virtual serial port.  The command you use to start GDB is similar across different operating systems and machines but the serial port identification portion at the end of the command line will depend on your particular machine.  Just replace that portion of the command line examples shown next with what you found in the first step of this Getting Started guide:
* **Windows:** {{{arm-none-eabi-gdb FileTest.elf --baud 460800 -ex "set target-charset ASCII" -ex "set print pretty on" -ex "set remotelogfile mri.log" -ex "target remote com3"}}}

...

===Let's do some debugging
GDB is now waiting for us to give it some debugging commands so let's start out by looking at the code around the line we are currently halted at to get a feel for where we are in the sample code.  We can do this by issuing the **list** command:
{{{
(gdb) list
32
33	    if (MRI_ENABLE)
34	    {
35	        mriInit(MRI_INIT_PARAMETERS);
36	        if (MRI_BREAK_ON_INIT)
37	            __debugbreak();
38	    }
39
40	    __libc_init_array();
41	    mainReturnValue = main();
}}}
So line 37 is actually a {{{__debugbreak()}}} instruction that was issued because the MRI_BREAK_ON_INIT variable was set in our debug build.  We can also see that {{{__libc_init_array()}}} and main() will actually be called after we start up the application again.
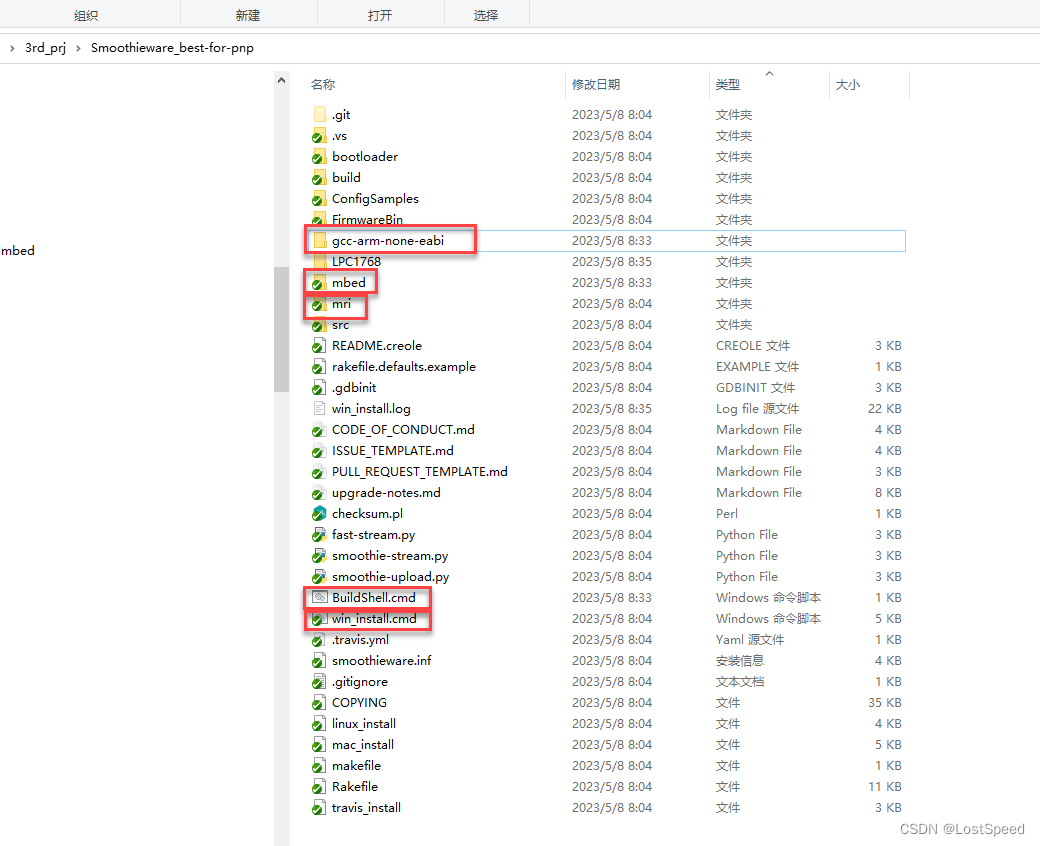
通过工程目录中出现的相关目录, 脚本, 基本可以断定, Smoothieware工程就是用MRI调试的.
但是我没有去实验, 毕竟一看就反胃, 提不起兴趣.
备注
我的想法: 将Smoothieware实现迁移到MCUXpresso或者MDK/IAR的工程上, 然后再学习这个工程.
这个迁移不难啊.
