前言
我们不希望任何设备都可以接入我们的IoT平台,所以一个设备正常的接入流程是这样的,
1、上位机软件通过串口或其他方式读取设备的唯一标识码UUID。
2、上位机调用IoT后台接口,发送UUID和ProductID。
3、后台接口判断设备是否注册过,如果没有注册过,就根据ProductID并按照一定规律生成DeviceName和Password通过接口返回给上位机软件。
4、上位机软件通过串口将接口返回的数据写入设备。
一、设备注册流程
这里主要涉及四个概念
1、UUID(设备唯一ID,一般为设备主控板编号)
2、ProductID(设备所属产品ID,在IoT后台定义)
3、DeviceName(设备在IoT平台或MQTT的名称,该名称大多与产品相关)
4、Password(设备连接MQTT的密码)
二、MQTT注册
1.在EMQX中添加认证方式

选择Built-in Database方式,内置数据库进行密码认证
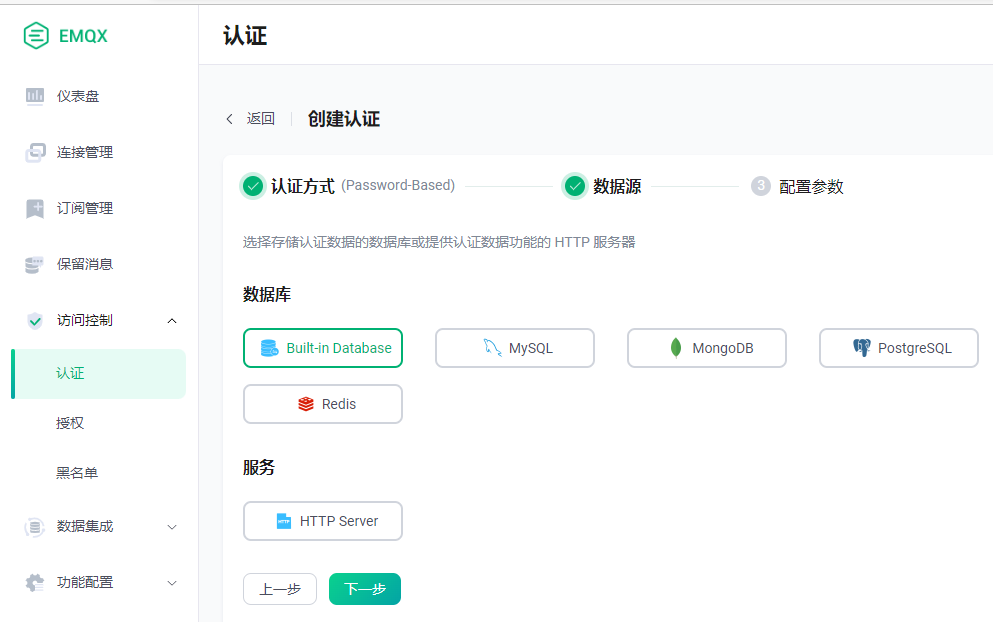
账号类型选择username,加密方式和加盐方式可以保持默认。
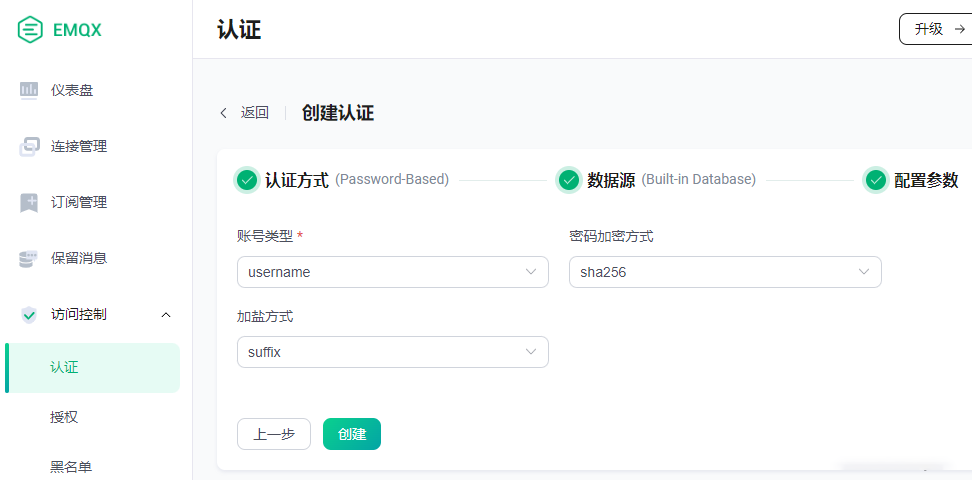
点击创建后可以在认证菜单中看到新建的认证方式,状态为:已连接。
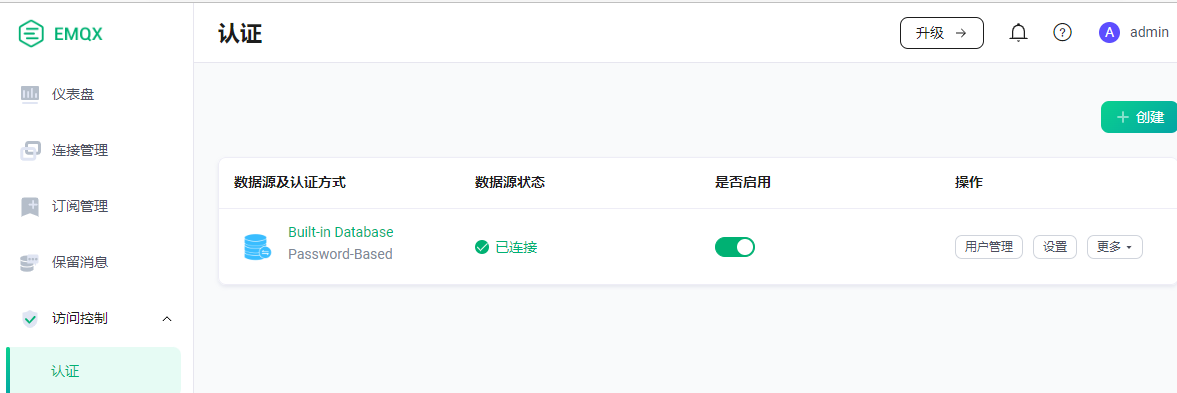
我们点击用户管理->添加 可以手动创建用户
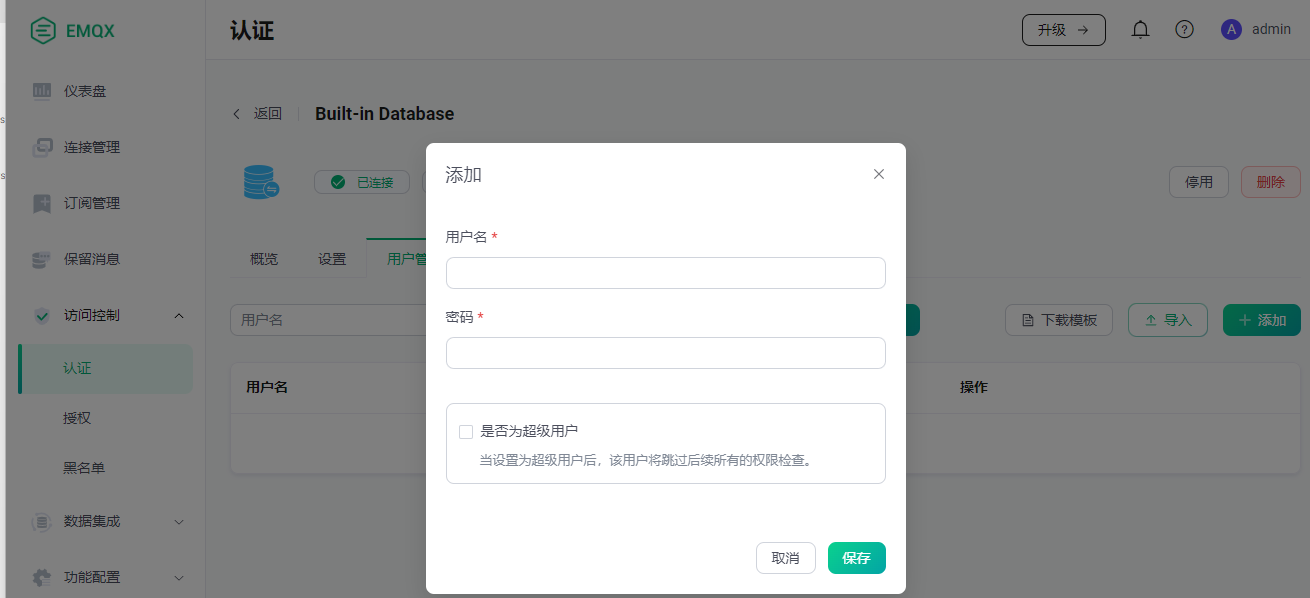
这里的场景我们是通过上位机调用IoT后端,IoT接口内部调用EMQX接口来实现自动创建用户的
2.创建Api Key
调用接口需要认证,这里我们使用Api key的方式,我们在系统设置->API密钥中创建一个API密钥
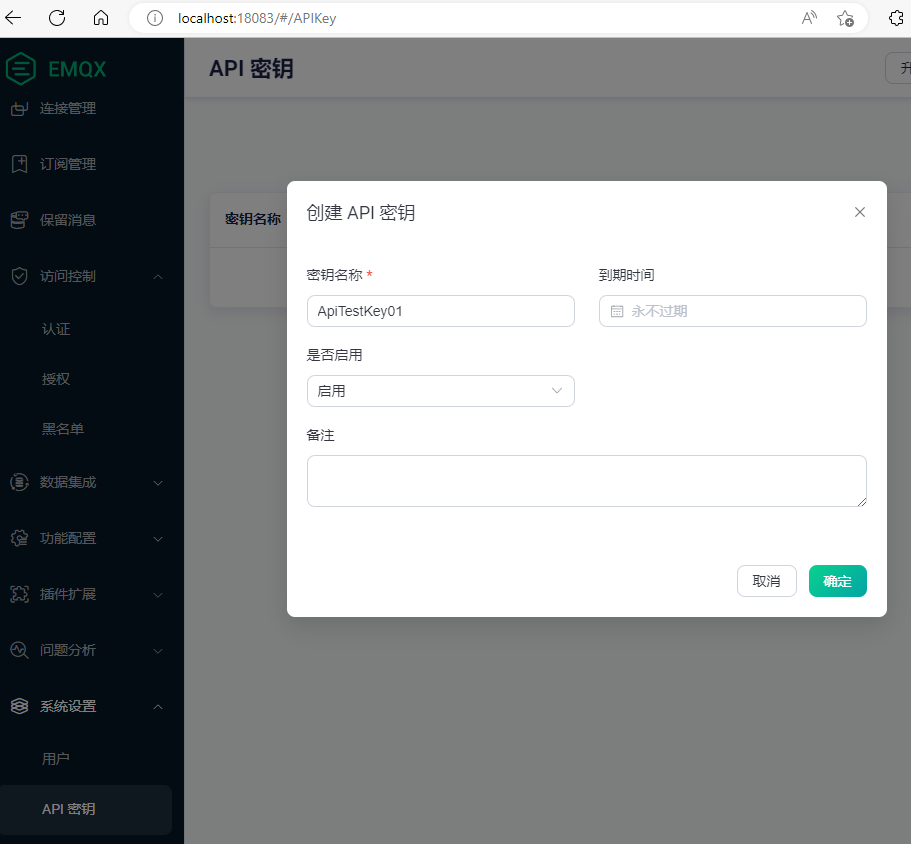
Secret Key 只有创建的时候才会显示明文,我们需要记录下API Key 和 Secret Key
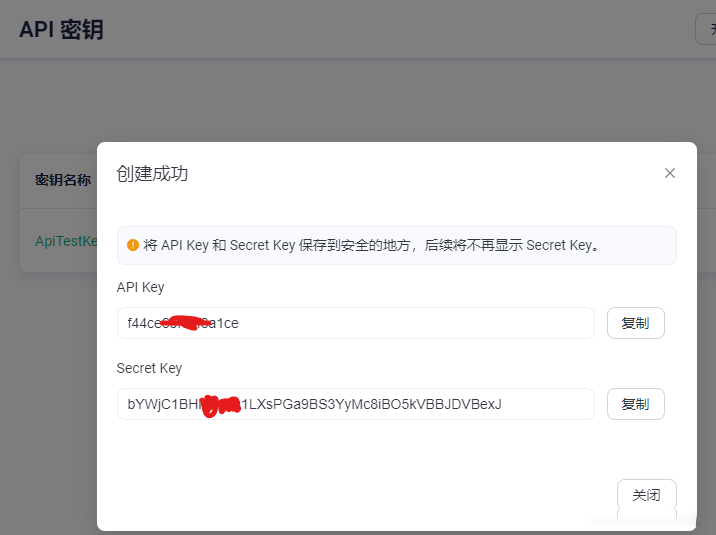
3.调用接口创建用户
我们在浏览器打开EMQX 的RestAPI swagger
http://localhost:18083/api-docs/index.html
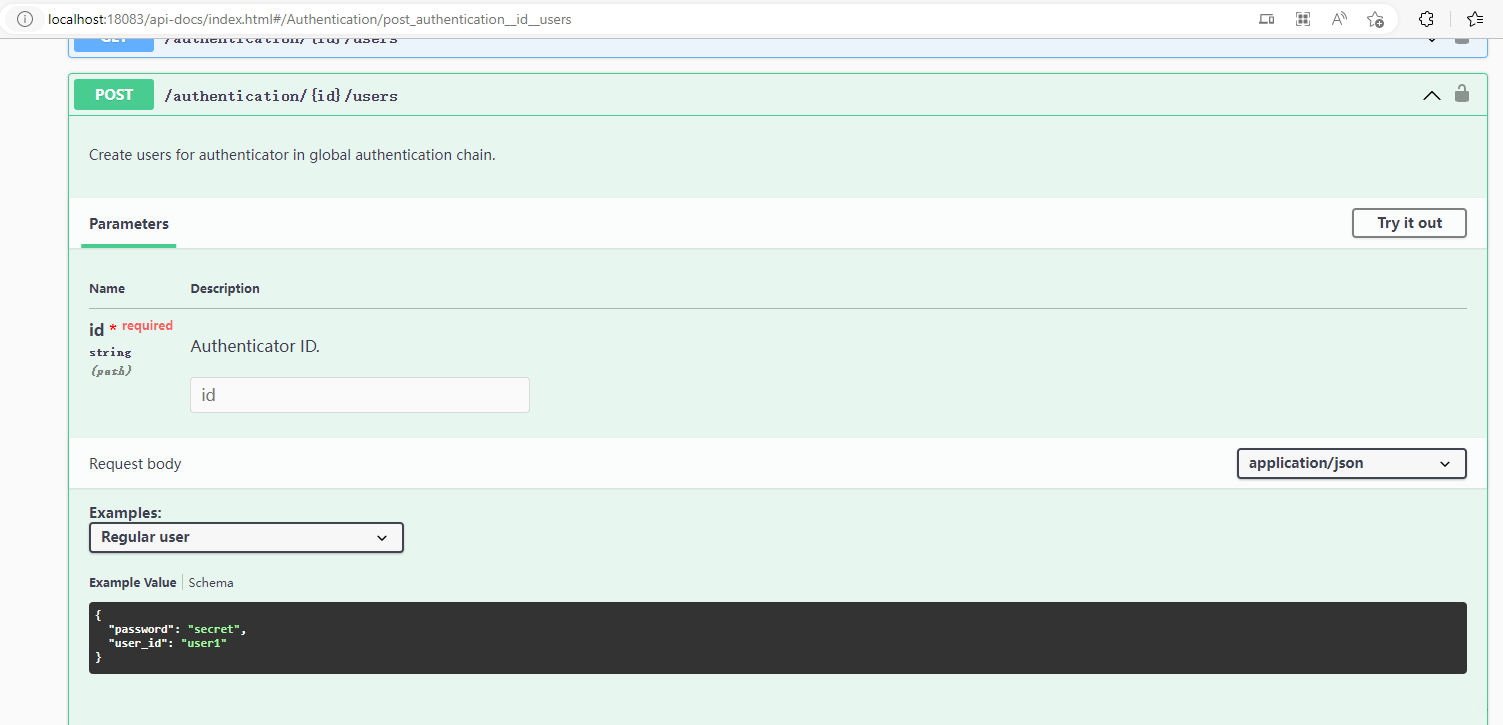
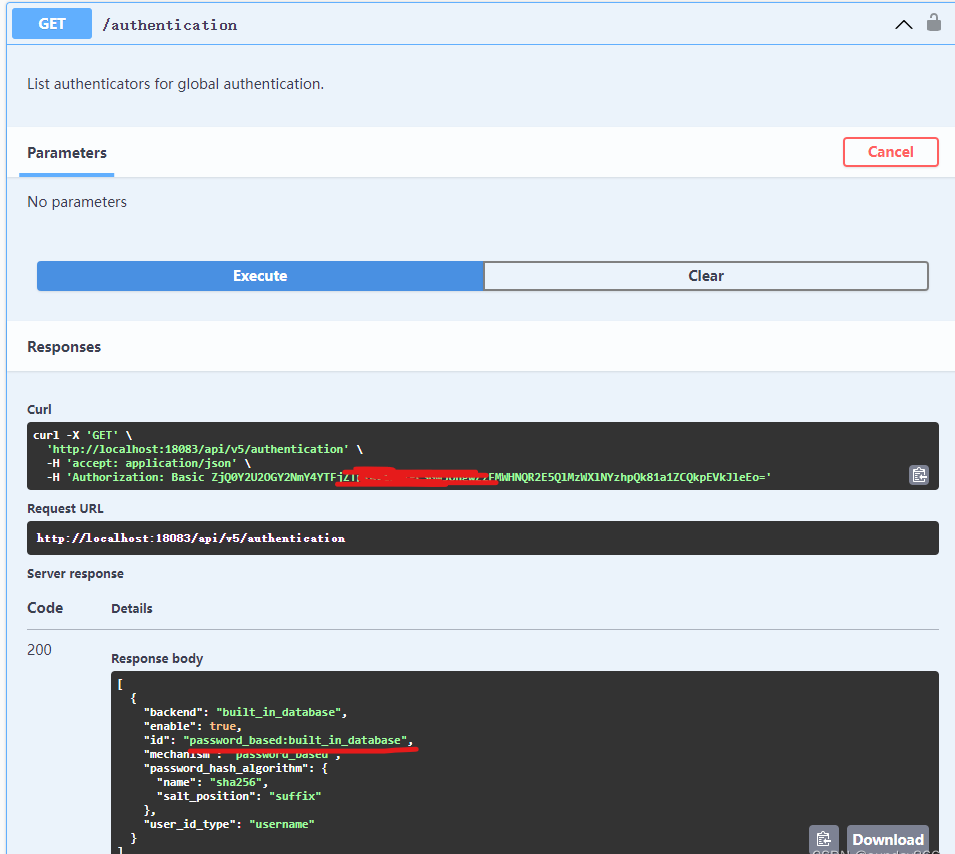
我们可以通过这个接口来创建用户,这里的Authenticator ID 就是我们上面创建的内置数据库 Password Based的ID,
这个ID的获取通过下面的authentication方法获取
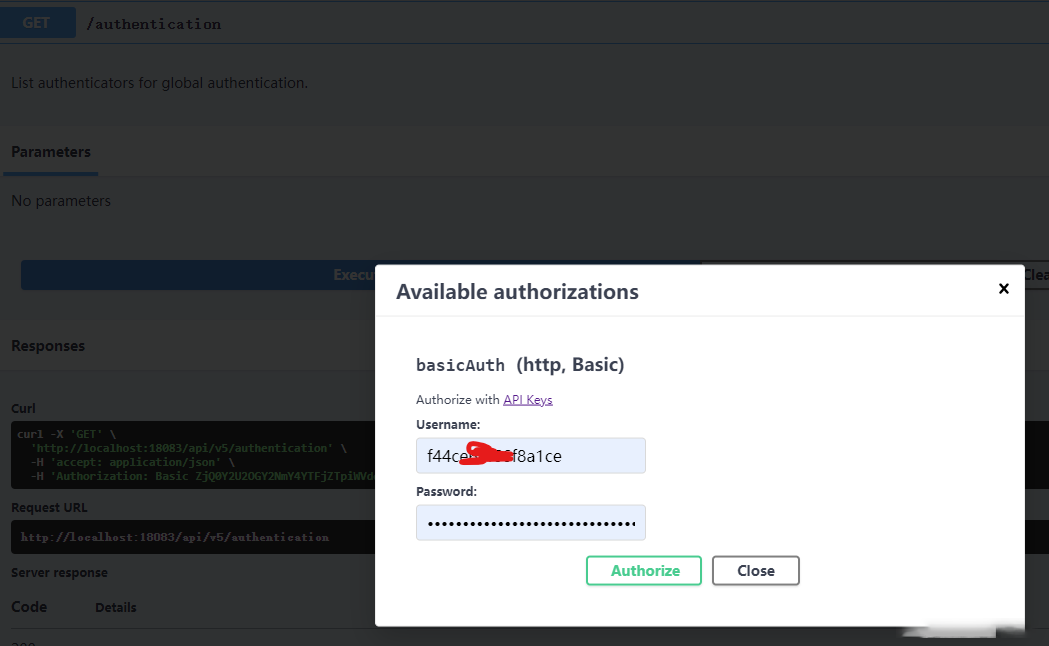
我们在认证中直接使用API Key 和 Secret Key,接口返回Id:password_based:built_in_database
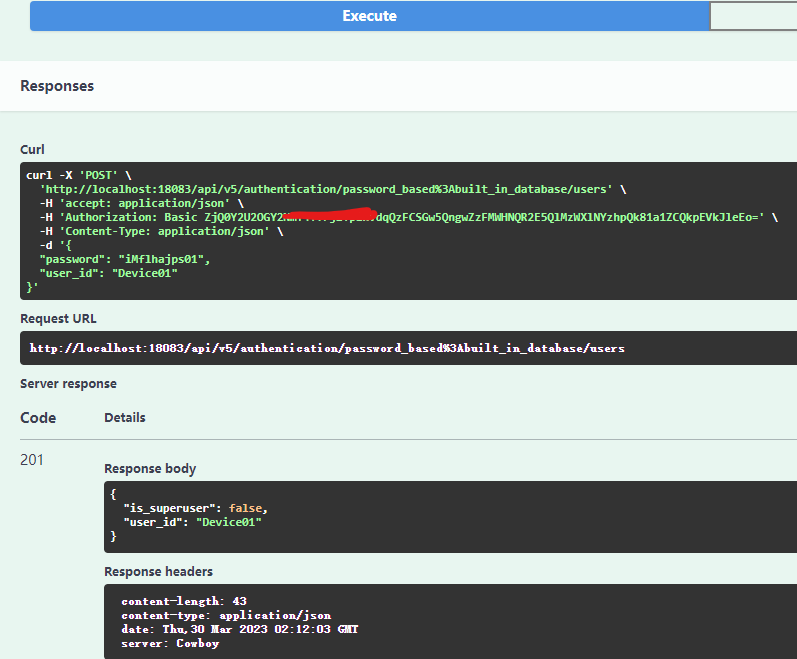
调用authentication的Post接口,在 id字段输入:password_based:built_in_database,Request body中输入设备的user_id和password即可成功创建用户。
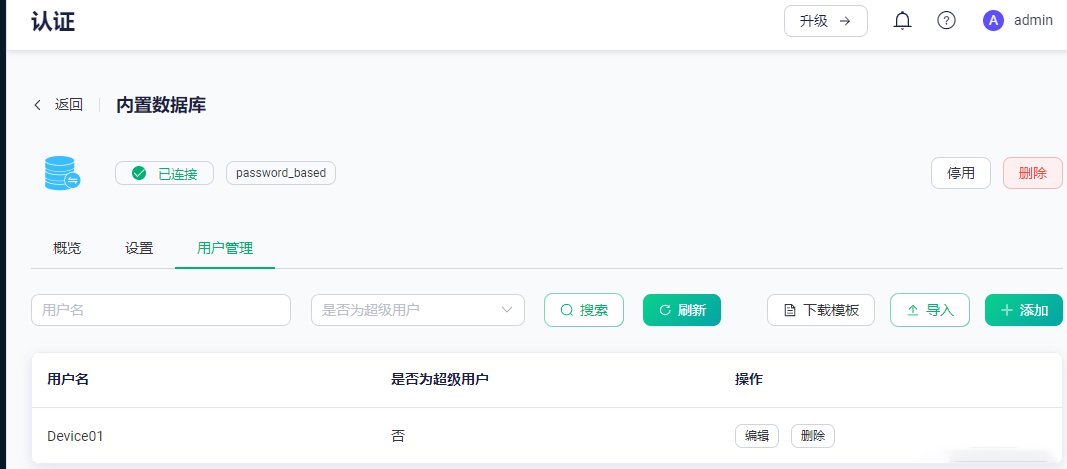
我们在Deshboard的界面中也可以看到刚刚创建的用户
三、测试设备连接
我们使用MQTTX来模拟客户端设备通过mqtt协议连接到EMQX,新建连接,填写地址、端口、和刚刚通过Api创建用户名密码。
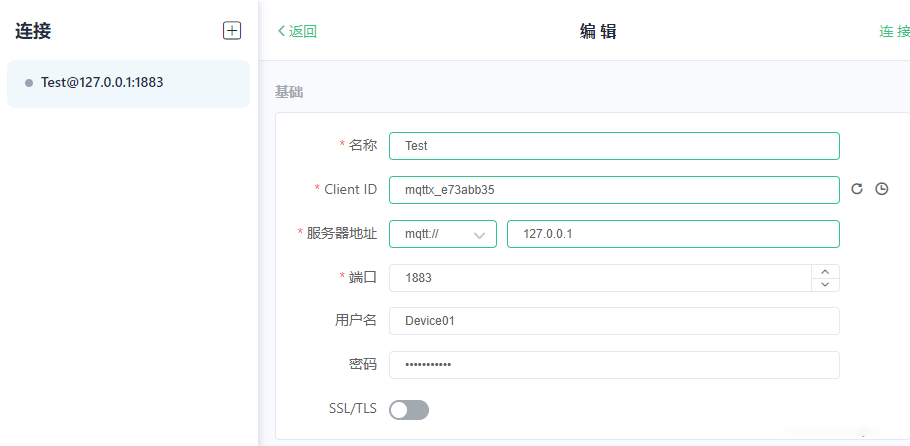
点击连接、发现设备已经可以正常连接mqtt了。

在Dashboard中也可以看到当前连接的客户端ID等信息。

四、编写代码
在MASA.IoT.WebApi项目种添加DeviceController控制器并添加DeviceRegAsync方法用于设备注册,设备如果没有注册过(UUID 数据库不存在),那么会根据ProductCode按照规律生成设备名称,名称以该产品供应商编号开头,后跟时间和序号。然后向EMQX添加设备,并同时存储到数据库中。
如果设备已经注册过,那么直接从数据库取出设备注册信息返回。
代码编写相对简单,不过多赘述。
//DeviceController
namespace MASA.IoT.WebApi.Controllers
{
    [Route("api/[controller]")]
    [ApiController]
    public class DeviceController : ControllerBase
    {
        private readonly IDeviceHandler _deviceHandler;

        public DeviceController(IDeviceHandler deviceHandler)
        {
            _deviceHandler = deviceHandler;
        }

        [HttpPost]

        public async Task<DeviceRegResponse> DeviceRegAsync(DeviceRegRequest request)
        {
            return await _deviceHandler.DeviceRegAsync(request);
        }
    }
}
//DeviceHandler
using MASA.IoT.WebApi.Contract;
using MASA.IoT.WebApi.IHandler;
using MASA.IoT.WebApi.Models.Models;
using Microsoft.EntityFrameworkCore;

namespace MASA.IoT.WebApi.Handler
{
    public class DeviceHandler : IDeviceHandler
    {
        private readonly MASAIoTContext _ioTDbContext;
        private readonly IMqttHandler _mqttHandler;

        public DeviceHandler(MASAIoTContext ioTDbContext, IMqttHandler mqttHandler)
        {
            _ioTDbContext = ioTDbContext;
            _mqttHandler = mqttHandler;
        }

        /// <summary>
        /// 注册设备
        /// </summary>
        /// <param name="request"></param>
        /// <returns>
        /// 设备注册信息
        /// </returns>
        public async Task<DeviceRegResponse> DeviceRegAsync(DeviceRegRequest request)
        {
            var productInfo =
                await _ioTDbContext.IoTProductInfo.FirstOrDefaultAsync(o => o.ProductCode == request.ProductCode);
            if (productInfo == null)
            {
                return new DeviceRegResponse
                {
                    Succeed = false,
                    ErrMsg = "ProductCode not found"
                };
            }
            var deviceRegInfo = await GetDeviceRegInfoAsync(request);
            if (deviceRegInfo != null) //已经注册过
            {
                return deviceRegInfo;
            }
            else //没有注册过
            {
                var deviceName = await GenerateDeviceNameAsync(productInfo.SupplyNo, request.ProductCode, request.UUID);
                var password = Guid.NewGuid().ToString("N");
                var addDeviceResponse = await _mqttHandler.DeviceRegAsync(deviceName, password);
                if (addDeviceResponse.user_id == deviceName) //注册成功
                {
                    deviceRegInfo = new DeviceRegResponse
                    {
                        DeviceName = deviceName,
                        Password = password,
                        Succeed = true,
                        ErrMsg = string.Empty
                    };
                    await _ioTDbContext.IoTDeviceInfo.AddAsync(new IoTDeviceInfo
                    {
                        Id = Guid.NewGuid(),
                        DeviceName = deviceName,
                        Password = password,
                        ProductInfoId = productInfo.Id,
                    });
                    await _ioTDbContext.SaveChangesAsync();
                    return deviceRegInfo;
                }

                return new DeviceRegResponse
                {
                    Succeed = false,
                    ErrMsg = addDeviceResponse.message
                };
            }
        }

        /// <summary>
        /// 获取设备注册信息
        /// </summary>
        /// <param name="request"></param>
        /// <returns>
        /// 设备已经注册返回设备注册信息,没有注册过返回null
        /// </returns>
        private async Task<DeviceRegResponse?> GetDeviceRegInfoAsync(DeviceRegRequest request)
        {
            var deviceware = await _ioTDbContext.IoTDevicewares.FirstOrDefaultAsync(o => o.ProductCode == request.ProductCode && o.UUID == request.UUID);

            if (deviceware == null)
            {
                return null;
            }
            else
            {
                var deviceInfo = await _ioTDbContext.IoTDeviceInfo.FirstAsync(o => o.DeviceName == deviceware.DeviceName);

                return new DeviceRegResponse
                {
                    DeviceName = deviceInfo.DeviceName,
                    Password = deviceInfo.Password,
                    Succeed = true,
                    ErrMsg = string.Empty
                };
            }
        }

        /// <summary>
        /// 生成设备名称
        /// </summary>
        /// <param name="supplyNo"></param>
        /// <param name="productCode"></param>
        /// <param name="uuid"></param>
        /// <returns>
        /// 设备Mqtt名称
        /// </returns>
        private async Task<string> GenerateDeviceNameAsync(string supplyNo, string productCode, string uuid)
        {
            var lastDeviceware = await _ioTDbContext.IoTDevicewares.Where(o => o.ProductCode == productCode).OrderByDescending(o => o.CreationTime).FirstOrDefaultAsync();

            var newDeviceware = new IoTDevicewares
            {
                Id = Guid.NewGuid(),
                UUID = uuid,
                ProductCode = productCode,
                CreationTime = DateTime.Now
            };

            if (lastDeviceware != null && lastDeviceware.DeviceName.StartsWith(supplyNo + DateTime.Today.ToString("yyyyMMdd")))
            {
                newDeviceware.DeviceName = (long.Parse(lastDeviceware.DeviceName) + 1).ToString();
            }
            else
            {
                newDeviceware.DeviceName = supplyNo + DateTime.Today.ToString("yyyyMMdd") + "0001";
            }
            await _ioTDbContext.IoTDevicewares.AddAsync(newDeviceware);
            await _ioTDbContext.SaveChangesAsync();

            return newDeviceware.DeviceName;
        }
    }
}
这里生成设备名称用了一个简单的算法
// MqttHandler
using Flurl.Http;
using MASA.IoT.WebApi.Contract.Mqtt;
using MASA.IoT.WebApi.IHandler;
using Microsoft.Extensions.Options;
using System.Net;

namespace MASA.IoT.WebApi.Handler
{
    public class MqttHandler : IMqttHandler
    {
        private readonly AppSettings _appSettings;
        public MqttHandler(IOptions<AppSettings> settings)
        {
            _appSettings = settings.Value;
        }

        public async Task<AddDeviceResponse> DeviceRegAsync(string deviceName,string password)
        {
            var url = $"{_appSettings.MqttSetting.Url}/api/v5/authentication/password_based:built_in_database/users";
            var response = await url.WithBasicAuth(_appSettings.MqttSetting.ApiKey, _appSettings.MqttSetting.SecretKey).AllowAnyHttpStatus().PostJsonAsync(new AddDeviceRequest
            {
                user_id = deviceName,
                password = password,
            }
            );
            if (response.StatusCode is (int)HttpStatusCode.Created or (int)HttpStatusCode.BadRequest or (int)HttpStatusCode.NotFound)
            {
                return await response.GetJsonAsync<AddDeviceResponse>();
            }
            else
            {
                throw new UserFriendlyException(await response.GetStringAsync());
            }
        }
    }
}
总结
以上就是本文要讲的内容,本文介绍了通过账号密码的方式通过接口在EMQX中创建用户,并连接EMQX的过程,EMQX支持的认账方式还有很多,例如JWT认证方式可以授权一次性密码认证,可以控制认证的有效期,我们在后面的章节具体应用中会进行说明。
完整代码在这里:https://github.com/sunday866/MASA.IoT-Training-Demos
如果你对我们的 MASA 感兴趣,无论是代码贡献、使用、提 Issue,欢迎联系我们
WeChat:MasaStackTechOps
QQ:7424099

