@Component、@Configuration、@ComponentScan、@Autowired、@Scope、@Value、@Resource、@Bean、@Qualifier、@PropertySource等注解
1. 注解和配置文件applicationContext.xml配合使用
现在有一个接口类Book3Dao、和其实现类Book3DaoImpl,利用注解和配置文件在测试类上调用其下的save方法。
Book3Dao
package com.bh.dao;

public interface Book3Dao {
    void save();
}
Book3DaoImpl
package com.bh.dao.Impl;

import com.bh.dao.Book3Dao;

@Component(value = "bookDao_1")
public class Book3DaoImpl implements Book3Dao {
    public void save() {
        System.out.println("已保存数据。。 Book3DaoImpl");
    }
}
【注】:Component里可以写value属性值,也可以不写,写上之后在测试类获取这个bean,就可以使用方法getBean(value属性值)获取Bean;否则只能通过getBean(Book3Dao.class)获取。
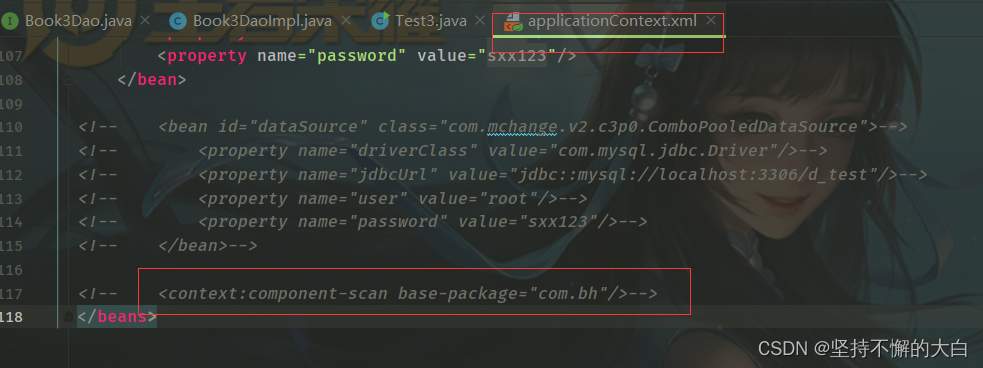
applicationContext.xml
<?xml version="1.0" encoding="UTF-8"?>
<beans xmlns="http://www.springframework.org/schema/beans"
       xmlns:xsi="http://www.w3.org/2001/XMLSchema-instance"

       xmlns:context="http://www.springframework.org/schema/context"

       xsi:schemaLocation=
               "http://www.springframework.org/schema/beans
                http://www.springframework.org/schema/beans/spring-beans.xsd

                http://www.springframework.org/schema/context
                http://www.springframework.org/schema/context/spring-context.xsd

">

    <context:component-scan base-package="com.bh"/>

</beans>
文件结构

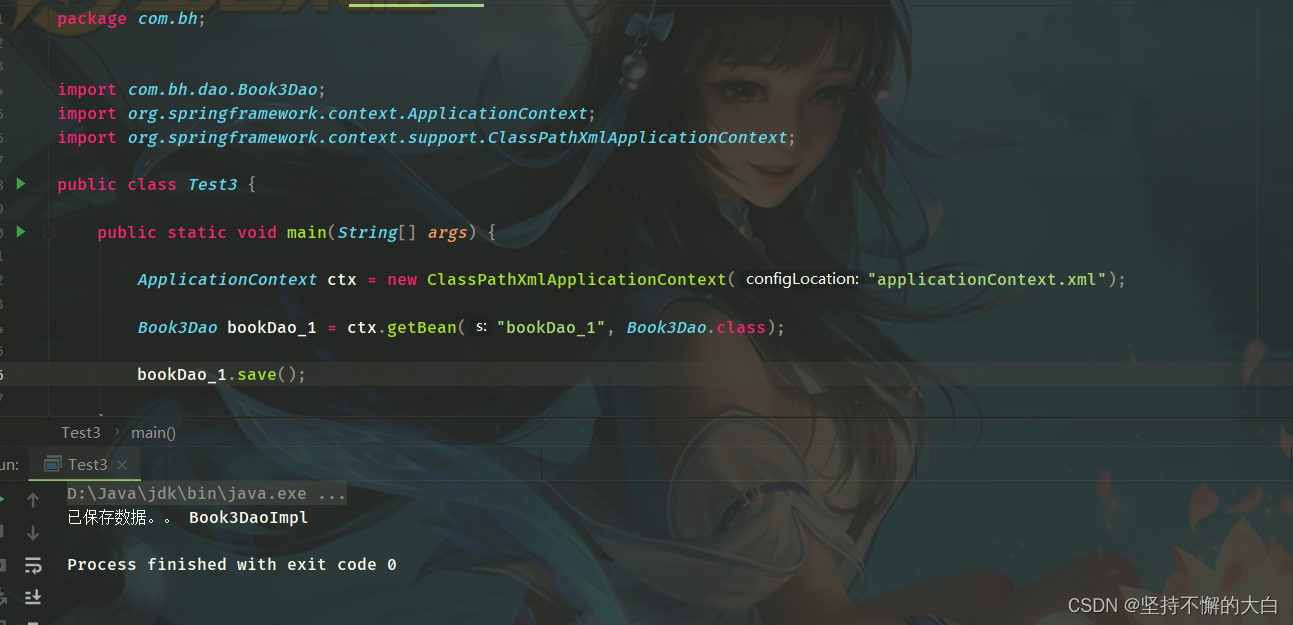
测试代码
package com.bh;


import com.bh.dao.Book3Dao;
import org.springframework.context.ApplicationContext;
import org.springframework.context.support.ClassPathXmlApplicationContext;

public class Test3 {

    public static void main(String[] args) {

        ApplicationContext ctx = new ClassPathXmlApplicationContext("applicationContext.xml");

        Book3Dao bookDao_1 = ctx.getBean("bookDao_1", Book3Dao.class);

        bookDao_1.save();

    }
}
运行结果:
上面这种实现方式还需要配合配置文件applicationContext.xml一起使用才能运行出结果,下面使用纯注解开发模式,实现上述效果。【注】:记得把这个注释掉。
2. 纯注解开发模式
不使用配置文件applicationContext.xml,需要一个Java配置类进行代替。
SpringConfig配置类
package com.bh.config;

import org.springframework.context.annotation.ComponentScan;
import org.springframework.context.annotation.Configuration;

@Configuration
@ComponentScan("com.bh")
public class SpringConfig {

}
测试代码
package com.bh;

import com.bh.config.SpringConfig;
import com.bh.dao.Book3Dao;
import org.springframework.context.ApplicationContext;
import org.springframework.context.annotation.AnnotationConfigApplicationContext;

public class Test3 {
    public static void main(String[] args) {
        ApplicationContext ctx = new AnnotationConfigApplicationContext(SpringConfig.class);
        Book3Dao bookDao_1 = ctx.getBean("bookDao_1", Book3Dao.class);
        bookDao_1.save();
    }
}
注意观察这个测试代码和上面那个测试代码之间的不同,运行结果和上述一致。
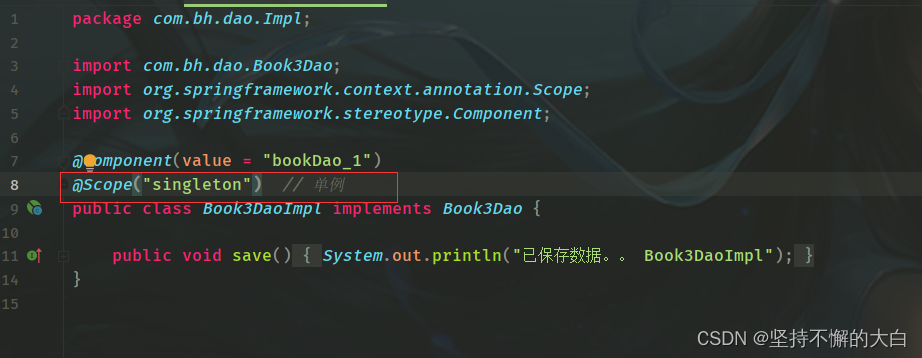
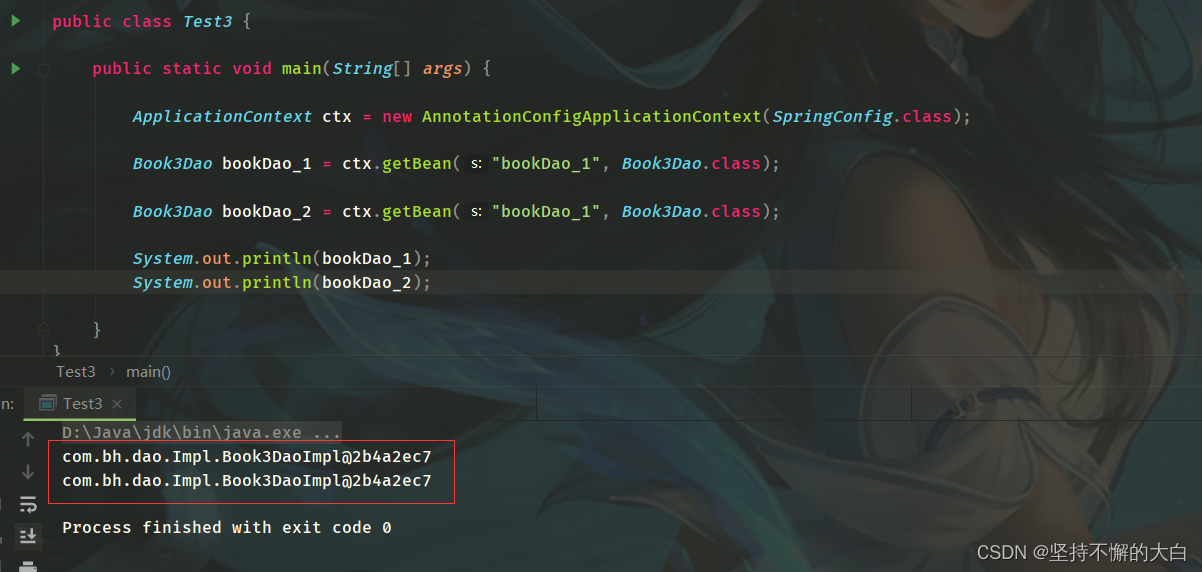
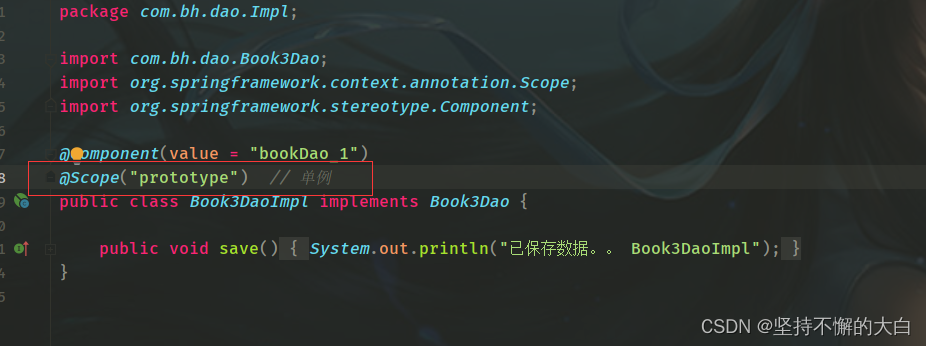
关于Bean的单例和非单例设置,在Java类上加注解==@Scope==,并设置值singleton或prototype,前者为单例,后者为非单例,如下:

3. 使用注解自动装配
现在在2的基础上新建接口Book3Service和其实现类Book3ServiceImpl,在Book3ServiceImpl类中使用自动装配的方式,从而使Book3Dao对象进行注入,如下:
Book3Service
package com.bh.service;

public interface Book3Service {

    void save();
}
Book3ServiceImpl
package com.bh.service.Impl;

import com.bh.dao.Book3Dao;
import com.bh.service.Book3Service;
import org.springframework.beans.factory.annotation.Autowired;
import org.springframework.stereotype.Component;

@Component
public class Book3ServiceImpl implements Book3Service {

    @Autowired
    private Book3Dao book3Dao;

    public void save() {
        book3Dao.save();
    }
}
运行结果:
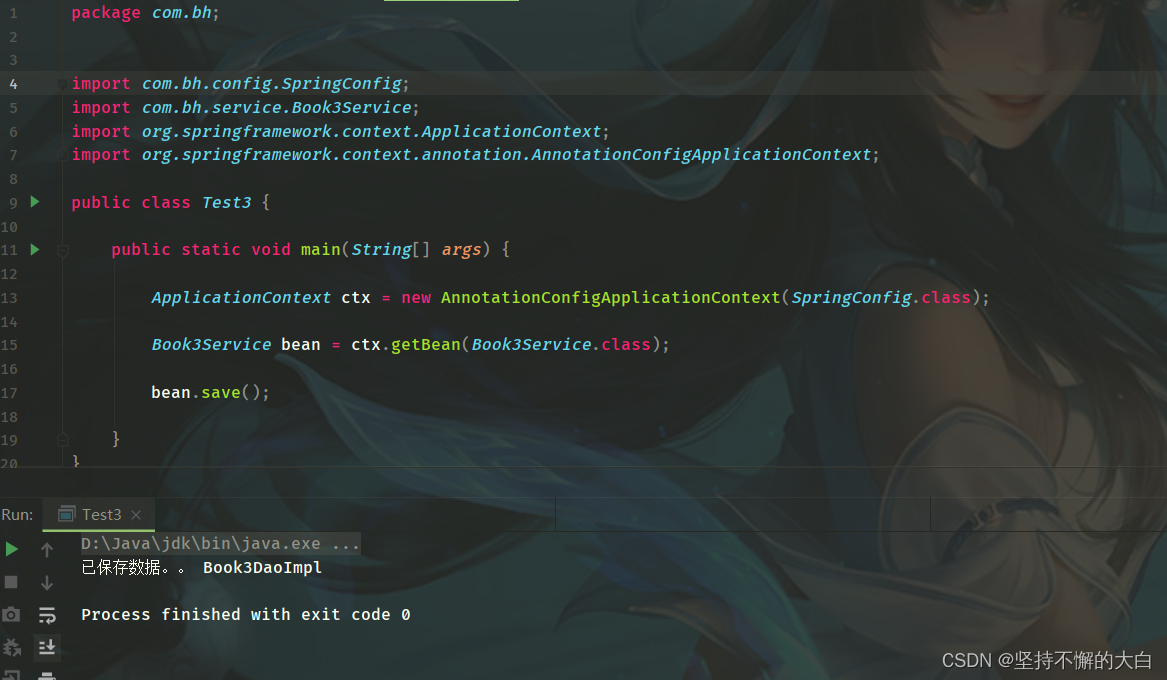
现在如果我新建一个java类Book4DaoImpl,让其实现Book3Dao接口(一般不会出现这种),如下:
Book4DaoImpl
package com.bh.dao.Impl;

import com.bh.dao.Book3Dao;
import org.springframework.context.annotation.Scope;
import org.springframework.stereotype.Component;

@Component
@Scope("prototype")  // 非单例
public class Book4DaoImpl implements Book3Dao {

    public void save() {
        System.out.println("已保存数据。。 Book4DaoImpl");
    }
}
之后再运行,就会出现报错,因为我这里定义了两个Book3Dao的bean,spring不知道是哪一个bean。

报错信息为:
No qualifying bean of type ‘com.bh.dao.Book3Dao’ available: expected single matching bean but found 2: book3DaoImpl,book4DaoImpl
解决办法就是再加一个注解@Qualifier,并设置其value值,如下:

此时运行没有问题,也可以使用注解@Resource,并设置其name值,如下:
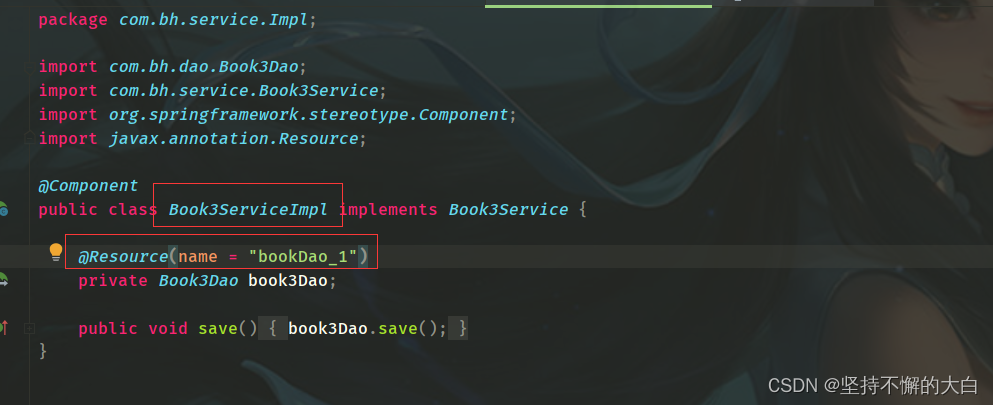
此时运行也是没有问题的。需要注意的是@Qualifier需要和@Autowired注解一起使用才行。
4. 第三方bean的定义
现在定义一个DruidDataSource的bean,直接再配置类上进行定义即可,如下:
SpringConfig
package com.bh.config;

import com.alibaba.druid.pool.DruidDataSource;
import org.springframework.context.annotation.Bean;
import org.springframework.context.annotation.ComponentScan;
import org.springframework.context.annotation.Configuration;
import javax.sql.DataSource;

@Configuration
@ComponentScan("com.bh")
public class SpringConfig {

    @Bean
    public DataSource dataSource(){
        DruidDataSource ds = new DruidDataSource();
        ds.setDriverClassName("com.mysql.jdbc.Driver");
        ds.setUrl("jdbc::mysql://localhost:3306/d_test");
        ds.setUsername("root");
        ds.setPassword("sxx123");

        return ds;
    }

}
测试代码
package com.bh;


import com.bh.config.SpringConfig;
import org.springframework.context.ApplicationContext;
import org.springframework.context.annotation.AnnotationConfigApplicationContext;

import javax.sql.DataSource;

public class Test3 {

    public static void main(String[] args) {

        ApplicationContext ctx = new AnnotationConfigApplicationContext(SpringConfig.class);
        DataSource bean = ctx.getBean(DataSource.class);
        System.out.println(bean);

    }
}
如果想读取properties文件相关配置信息,可以在Java配置类上加上@PropertySource注解,用来读取指定的peroperties文件,然后使用@Value注解进行占位符注入数据即可,如下:
jdbc.properties
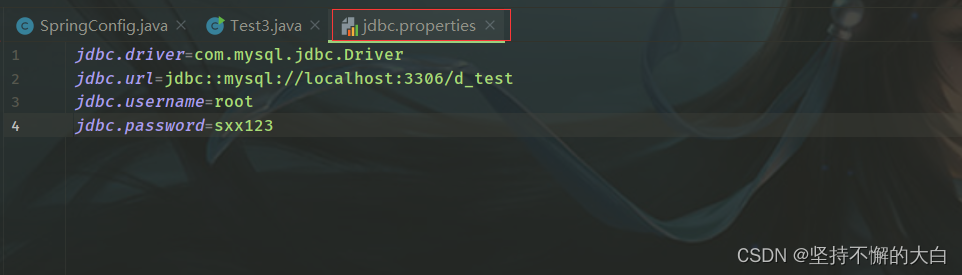
SpringConfig
package com.bh.config;

import com.alibaba.druid.pool.DruidDataSource;
import org.springframework.beans.factory.annotation.Value;
import org.springframework.context.annotation.Bean;
import org.springframework.context.annotation.ComponentScan;
import org.springframework.context.annotation.Configuration;
import org.springframework.context.annotation.PropertySource;

import javax.sql.DataSource;

@Configuration
@ComponentScan("com.bh")
@PropertySource("classpath:jdbc.properties")
public class SpringConfig {

    @Value("${jdbc.driver}")
    private String driverClassName;
    @Value("${jdbc.url}")
    private String url;
    @Value("${jdbc.username}")
    private String userName;
    @Value("${jdbc.password}")
    private String password;

    @Bean
    public DataSource dataSource(){
        DruidDataSource ds = new DruidDataSource();
        ds.setDriverClassName(driverClassName);
        ds.setUrl(url);
        ds.setUsername(userName);
        ds.setPassword(password);

        System.out.println(driverClassName);
        System.out.println(url);
        System.out.println(userName);
        System.out.println(password);
        return ds;
    }

}
运行结果: