微服务篇
我的一个微服务
手把手写微服务项目,从现在开始
文章目录
- 微服务篇
- 环境搭建
- 开发工具
- 开发环境
- 一、创建项目:创建gitee链接
- 1、登录 `gitee` 创建仓库
- 2、 给项目起一个名字(本地名字要跟远端一致哦) `panda`
- 3、打开IDEA创建项目 名称:`panda`
- 4、使用git.bash 执行命令
- 新仓库(使用本操作)
- 有仓库(使用如下操作)
- 注意事项
- 二、创建子项目
- PS
环境搭建
开发工具
| 工具 | 版本 | 官网 |
|---|---|---|
| IDEA | 2022.2.4 | https://www.jetbrains.com/idea/download |
| Typora | 0.9.98 | https://typora.io/ |
| Navicat | 15 | http://www.formysql.com/xiazai.html |
开发环境
| 工具 | 版本号 | 下载 |
|---|---|---|
| JDK | 1.8 | https://www.oracle.com/technetwork/java/javase/downloads/jdk8-downloads-2133151.html |
| Mysql | 8.0.32 | https://www.mysql.com/ |
| Redis | 5.X | https://redis.io/download |
| RabbitMQ | 3.7.14 | http://www.rabbitmq.com/download.html |
| Nginx | 1.10 | http://nginx.org/en/download.html |
| Elasticsearch | 7.6.2 | https://www.elastic.co/downloads/elasticsearch |
| Nacos | 2.0.0 | https://github.com/alibaba/nacos/releases |
| Logstash | 7.6.2 | https://www.elastic.co/cn/downloads/logstash |
一、创建项目:创建gitee链接
1、登录 gitee 创建仓库

2、 给项目起一个名字(本地名字要跟远端一致哦) panda

3、打开IDEA创建项目 名称:panda

`这里因为IDEA版本问题,最低SpingBoot版本就是2.7.12,一会我们更改build.gradle文件即可`
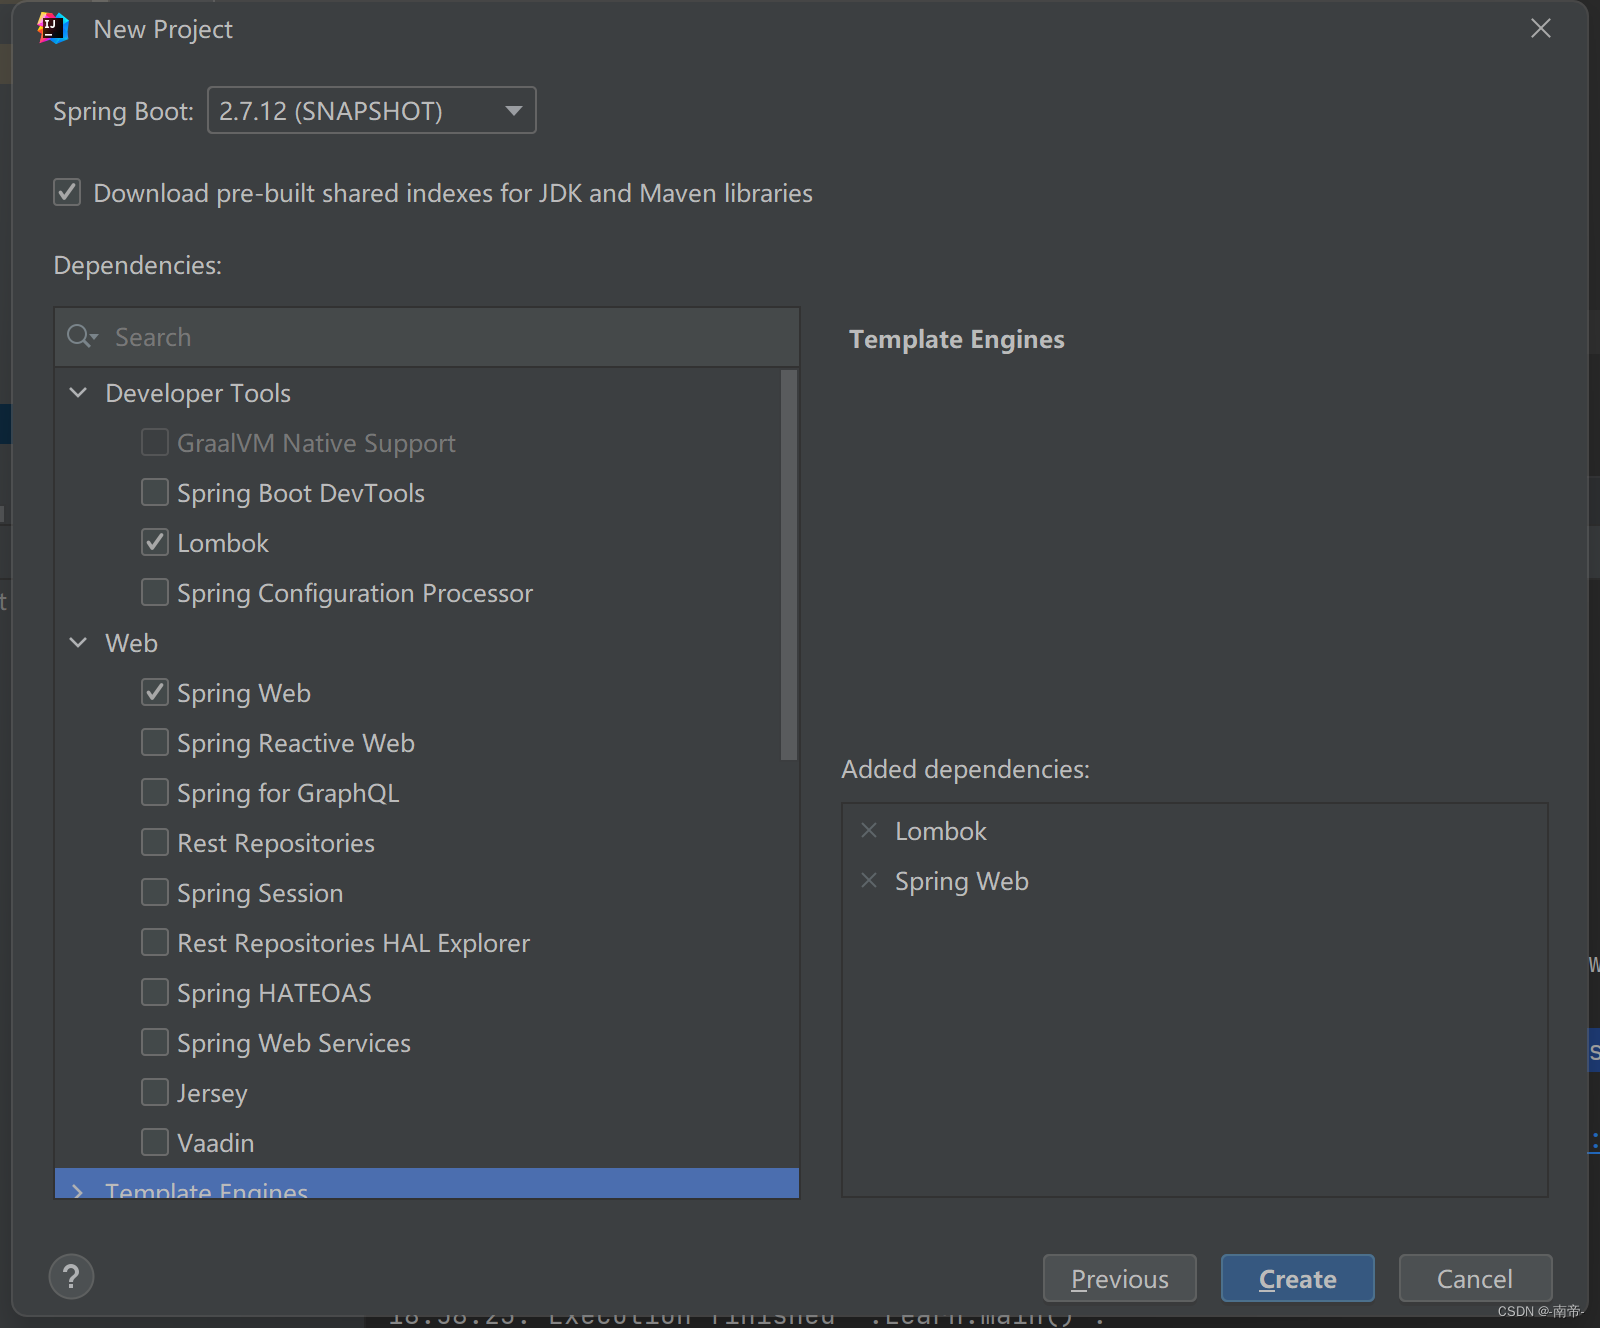
build.gradle文件
plugins {
    id 'java'
    id 'org.springframework.boot' version '2.5.12'
    id 'io.spring.dependency-management' version '1.0.15.RELEASE'
}
//id 'io.spring.dependency-management' version '1.0.15.RELEASE' 插件作用========
//类似Maven的dependencyManagement方式实现依赖管理
//1、 使用插件的DSL来直接配置依赖项
//2、导入一个或者多个已经存在的Maven bom文件
//===========================================================
group = 'com.example'
version = '0.0.1-SNAPSHOT'
sourceCompatibility = '1.8'

configurations {
    compileOnly {
        extendsFrom annotationProcessor
    }
}

repositories {
    mavenCentral()
}
//
//implementation(会将依赖项添加到编译类路径,并将依赖项打包到构建输出。) 该模块在编译时将该依赖项泄露给其他模块。也就是说,其他模块只有在运行时才能使用该依赖项。
//compileOnly (只会将依赖项添加到编译类路径(也就是说,不会将其添加到构建输出))
//annotationProcessor 如需添加对作为注解处理器的库的依赖,您必须使用 annotationProcessor 配置将其添加到注解处理器的类路径。这是因为,使用此配置可以将编译类路径与注释处理器类路径分开,从而提高构建性能。
//testImplementation    为 test source set 添加依赖
//androidTestImplementation  为 androidTest source set 添加依赖
dependencies {
    implementation 'org.springframework.boot:spring-boot-starter'
    compileOnly 'org.projectlombok:lombok'
    annotationProcessor 'org.projectlombok:lombok'
    testImplementation 'org.springframework.boot:spring-boot-starter-test'
    implementation 'org.springframework.boot:spring-boot-starter-web'
    // mysql
    implementation 'mysql:mysql-connector-java:8.0.32'
    /// mybatis \\\
    implementation 'org.mybatis.spring.boot:mybatis-spring-boot-starter:2.2.0'
    /// mybatis-plus 持久层 \\\
    implementation 'com.baomidou:mybatis-plus-boot-starter:3.4.3'

    /// velocity 模板引擎, Mybatis Plus 代码生成器需要 mybatis-plus \\\
    implementation 'org.apache.velocity:velocity-engine-core:2.3'
    /// groovy \\\
    implementation 'org.codehaus.groovy:groovy:3.0.10'

    /// jackson \\\
    implementation 'com.fasterxml.jackson.core:jackson-databind:2.12.7.1'
    //junit
    testImplementation 'org.junit.jupiter:junit-jupiter-api:5.6.3'
    //sdk
    implementation 'com.amazonaws:aws-java-sdk-s3:1.12.460'
    //fastjson
    implementation 'com.alibaba:fastjson:1.2.83'
    //gson
    implementation 'com.google.code.gson:gson:2.10.1'
    //druid
    implementation 'com.alibaba:druid:1.2.17'
    //commons
    implementation 'org.apache.commons:commons-lang3:3.12.0'
    //hutool
    implementation 'cn.hutool:hutool-all:5.8.18'
    //cloud
    implementation 'org.springframework.cloud:spring-cloud-dependencies:Hoxton.SR12'
    implementation 'com.alibaba.cloud:spring-cloud-alibaba-dependencies:2.2.6.RC1'
    //logback
    testImplementation 'ch.qos.logback:logback-classic:1.2.3'
    /// Spring \\\
    implementation 'org.springframework.amqp:spring-amqp'
    implementation 'org.springframework.amqp:spring-rabbit'
    implementation "org.springframework:spring-web"
    implementation "org.springframework:spring-webmvc"
    implementation "org.springframework:spring-aop"
    implementation "org.springframework:spring-core"
    implementation "org.springframework:spring-jcl"
    implementation "org.springframework:spring-beans"


}

tasks.named('test') {
    useJUnitPlatform()
}
4、使用git.bash 执行命令

新仓库(使用本操作)
git init
git add README.md
git commit -m “first commit”
git remote add origin https://gitee.com/xx/panda.git
git push -u origin master
有仓库(使用如下操作)
git remote add origin https://gitee.com/xx/panda.git
git push -u origin master
注意事项
- git init会在项目根目录下初始化一个.git目录,git仓库必须
- remote只需执行一次,yourRepository.git是你在github已有的一个仓库
- .gitignore,这个文件写入所有不需要加入版本管理的文件,尤其像node_modules
二、创建子项目
PS
今天先更到这里
