Fackbook AI 研究出从一张图片生成Mesh模型的算法PIFuHD

Paper: https://arxiv.org/pdf/2004.00452.pdf
Code: https://github.com/facebookresearch/pifuhd
一,Demo数据预处理
这里面需要先编译pifuhd和lightweight-human-pose-estimation.pytorch,后面会用到。
# 下载源码pifuhd
git clone https://github.com/facebookresearch/pifuhd
cd /home/panxiying/pifuhd/
# 编译源码pifuhd 记得把已编译的torch、torchvision、torchaudio用#注释掉
pip install -r requirements.txt -i https://pypi.tuna.tsinghua.edu.cn/simple

# 下载用于裁剪图像的预处理的源码lightweight-human-pose-estimation.pytorch
git clone https://github.com/Daniil-Osokin/lightweight-human-pose-estimation.pytorch.git
# 编译源码 lightweight-human-pose-estimation.pytorch,记得把已编译的torch、torchvision、torchaudio用#注释掉
pip install -r requirements.txt -i https://pypi.tuna.tsinghua.edu.cn/simple

# 下载已经得到的CheckPoints
!wget https://download.01.org/opencv/openvino_training_extensions/models/human_pose_estimation/checkpoint_iter_370000.pth
一般输入的图像在/home/xxxx/pifuhd/sample_images/中,make_recttxt.py中的filename 要修改成你要生成的图像的名字, 比如以下我是对girl.png进行数据预处理。
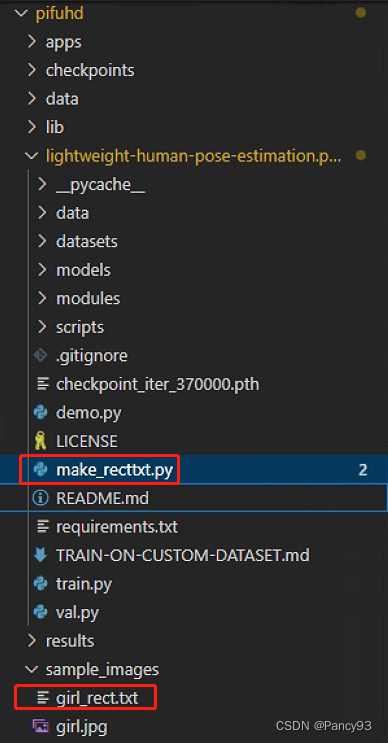
make_recttxt.py:主要定义get_rect,大部分调用的是lightweight-human-pose-estimation.pytorch里面的函数,使用姿态估计得到 人体信息。
import os

try:
  filename = 'girl.jpg'
  image_path = '/home/panxiying/pifuhd/sample_images/%s' % filename
except:
  image_path = '/home/panxiying/pifuhd/sample_images/test.png' # example image
image_dir = os.path.dirname(image_path)
file_name = os.path.splitext(os.path.basename(image_path))[0]

# output pathes
obj_path = '/home/panxiying/pifuhd/results/pifuhd_final/recon/result_%s_256.obj' % file_name
out_img_path = '/home/panxiying/pifuhd/results/pifuhd_final/recon/result_%s_256.png' % file_name
video_path = '/home/panxiying/pifuhd/results/pifuhd_final/recon/result_%s_256.mp4' % file_name
video_display_path = '/home/panxiying/pifuhd/results/pifuhd_final/result_%s_256_display.mp4' % file_name

import torch
import cv2
import numpy as np
from models.with_mobilenet import PoseEstimationWithMobileNet
from modules.keypoints import extract_keypoints, group_keypoints
from modules.load_state import load_state
from modules.pose import Pose, track_poses
import demo

def get_rect(net, images, height_size):
    net = net.eval()

    stride = 8
    upsample_ratio = 4
    num_keypoints = Pose.num_kpts
    previous_poses = []
    delay = 33
    for image in images:
        rect_path = image.replace('.%s' % (image.split('.')[-1]), '_rect.txt')
        img = cv2.imread(image, cv2.IMREAD_COLOR)
        orig_img = img.copy()
        orig_img = img.copy()
        heatmaps, pafs, scale, pad = demo.infer_fast(net, img, height_size, stride, upsample_ratio, cpu=False)

        total_keypoints_num = 0
        all_keypoints_by_type = []
        for kpt_idx in range(num_keypoints):  # 19th for bg
            total_keypoints_num += extract_keypoints(heatmaps[:, :, kpt_idx], all_keypoints_by_type, total_keypoints_num)

        pose_entries, all_keypoints = group_keypoints(all_keypoints_by_type, pafs)
        for kpt_id in range(all_keypoints.shape[0]):
            all_keypoints[kpt_id, 0] = (all_keypoints[kpt_id, 0] * stride / upsample_ratio - pad[1]) / scale
            all_keypoints[kpt_id, 1] = (all_keypoints[kpt_id, 1] * stride / upsample_ratio - pad[0]) / scale
        current_poses = []

        rects = []
        for n in range(len(pose_entries)):
            if len(pose_entries[n]) == 0:
                continue
            pose_keypoints = np.ones((num_keypoints, 2), dtype=np.int32) * -1
            valid_keypoints = []
            for kpt_id in range(num_keypoints):
                if pose_entries[n][kpt_id] != -1.0:  # keypoint was found
                    pose_keypoints[kpt_id, 0] = int(all_keypoints[int(pose_entries[n][kpt_id]), 0])
                    pose_keypoints[kpt_id, 1] = int(all_keypoints[int(pose_entries[n][kpt_id]), 1])
                    valid_keypoints.append([pose_keypoints[kpt_id, 0], pose_keypoints[kpt_id, 1]])
            valid_keypoints = np.array(valid_keypoints)

            if pose_entries[n][10] != -1.0 or pose_entries[n][13] != -1.0:
              pmin = valid_keypoints.min(0)
              pmax = valid_keypoints.max(0)

              center = (0.5 * (pmax[:2] + pmin[:2])).astype(np.int)
              radius = int(0.65 * max(pmax[0]-pmin[0], pmax[1]-pmin[1]))
            elif pose_entries[n][10] == -1.0 and pose_entries[n][13] == -1.0 and pose_entries[n][8] != -1.0 and pose_entries[n][11] != -1.0:
              # if leg is missing, use pelvis to get cropping
              center = (0.5 * (pose_keypoints[8] + pose_keypoints[11])).astype(np.int)
              radius = int(1.45*np.sqrt(((center[None,:] - valid_keypoints)**2).sum(1)).max(0))
              center[1] += int(0.05*radius)
            else:
              center = np.array([img.shape[1]//2,img.shape[0]//2])
              radius = max(img.shape[1]//2,img.shape[0]//2)

            x1 = center[0] - radius
            y1 = center[1] - radius

            rects.append([x1, y1, 2*radius, 2*radius])

        np.savetxt(rect_path, np.array(rects), fmt='%d')


if __name__ == '__main__':
    net = PoseEstimationWithMobileNet()
    checkpoint = torch.load('checkpoint_iter_370000.pth', map_location='cpu')
    load_state(net, checkpoint)

    print(image_path)
    print(os.path.exists(image_path))
    get_rect(net.cuda(), [image_path], 512)
执行 make_recttxt.py,生成girl_rect.txt
cd /home/panxiying/pifuhd/lightweight-human-pose-estimation.pytorch
python make_recttxt.py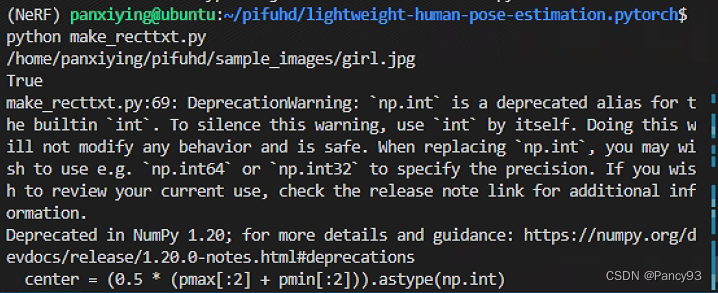
二,Demo测试
1. 下载预训练模型权重
cd /home/panxiying/pifuhd/
sh ./scripts/download_trained_model.sh
2. 调用apps/simple_test.py进行测试
python -m apps.simple_test -r 256 --use_rect -i sample_images/3.结果图
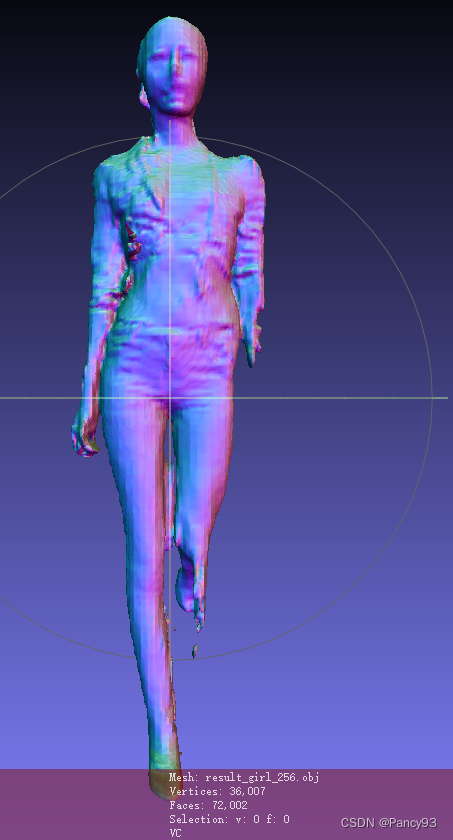
如果要图像生成质量好的话,最好不是裙子,背景比较单一,且身体没有重叠,如下图所示,可能是小腿部分有重叠,导致重建有点问题。

Mesh图: 把生成的result_girl_256.obj用软件Meshlab打开
