最近在学数据结构和算法,正好将学习的东西记录下来,我是跟着一个b站博主学习的,是使用js来进行讲解的,待会也会在文章后面附上视频链接地址,大家想学习的可以去看看
本文主要讲解单向链表,双向链表后续也会更新
一、什么是链表

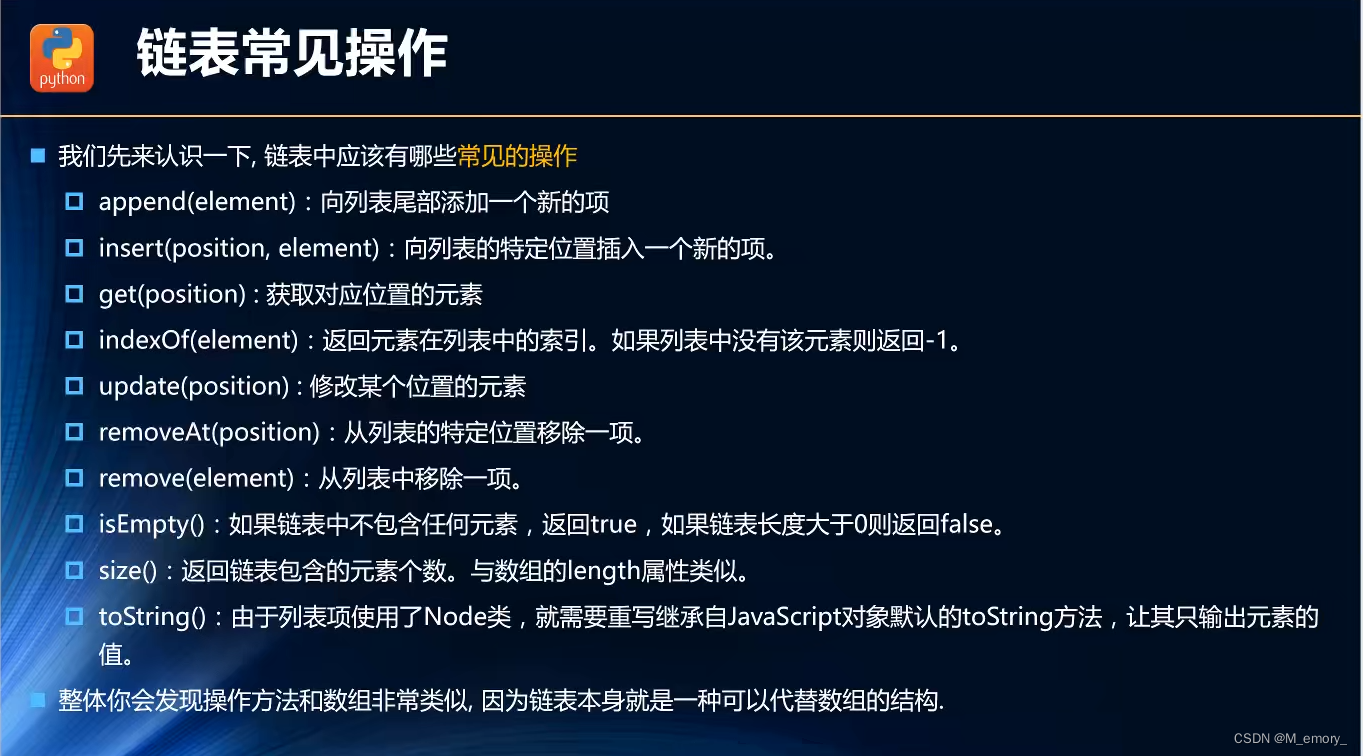
二、链表的的常见操作
三、链表的封装
1、append方法
// 封装 append 追加方法
LinkedList.prototype.append = function() {
    // 1、创建新的节点
    var newNode = new Node(data)

    // 2、判断添加的是否为第一个节点
    if (this.length == 0) { // 2.1 是第一个节点
        this.head = newNode
    } else { // 2.2 不是第一个节点
        // 找到最后一个节点
        var current = this.head
        while (current.next) { // 判断下一个节点是否为 null ,如果为 null 就跳出循环,如果不为 null ,就继续往后寻找,一直找到最后的节点
            current = current.next
        }

        // 最后节点的next指向新的节点
        current.next = newNode
    }

    this.length += 1
}
2、toString 方法
// 封装 toString 字符串方法
LinkedList.prototype.toString = function() {
    // 1、定义变量指向头结点
    var current = this.head
    var listString = "" // 定义变量存储字符串

    // 2、循环获取每一个节点
    while (current) {
        listString += current.data + " "
        current = current.next // 将头结点指向下一个节点
    }

    // 返回字符串
    return listString
}
3、insert 方法
// 封装 insert 插入方法
LinkedList.prototype.insert = function(position, data) { // position 为插入的位置,data 为插入的值
    // 1、对 position 进行越界判断
    if (position < 0 || position > this.length) return false

    // 2、根据 data 创建 newNode
    var newNode = new Node(data)

    // 3、判断插入的位置是否是第一个
    if (position == 0) {
        newNode.next = this.head // 先将新节点的 next 指向当前头节点,因为当前头节点指向下一个节点
        this.head = newNode // 再将头结点指向新节点
    } else {
        var index = 0 // 定义一个索引值
        var current = this.head // 定义一个当前的值为头节点
        var previous = null // 定义一个比当前节点靠前的一个节点
        while (index++ < position) { // 判断索引值与插入的位置进行比较,如果小于要插入的位置,就依次找到当前值与前一个值
            previous = current
            current = current.next
        }

        newNode.next = current // 将新节点的 next 指向当前的值
        previous.next = newNode // 将前一个值的 next 指向新的节点
    }

    // 4、更新长度 length+1
    this.length += 1

    return true
}
4、get 方法
// 4、封装 get 获取方法
LinkedList.prototype.get = function(position) {
    // 1、越界判断
    if(position < 0 || position >= this.length) return null

    // 2、获取对应的 data
    var current = this.head // 定义当前值为头节点
    var index = 0  // 定义索引值为0
    while(index++ < position){ // 循环找到需要的 position 对应位置的值
        current = current.next
    }

    return current.next
}
5、indexOf 方法
// 5、封装 indexOf 返回指定数据的下标值方法
LinkedList.prototype.indexOf = function(data) {
    // 1、定义变量
    var current = this.head
    var index = 0

    // 2、开始查找
    while (current) { // 判断current是否为null,如果为null才退出循环
        if (current.data == data) { // 判断当前current的值是否为要查找的值,如果是,直接返回对应下标,如果不是,继续往后找
            return index
        }
        current = current.next
        index += 1
    }

    // 3、找到最后没有找到,返回 -1
    return -1
}
6、update 方法
// 6、封装 update 更新指定位置数据的方法
LinkedList.prototype.update = function(position, newData) {
    // 1、越界判断
    if (position < 0 || position >= this.length) return false

    // 2、查找正确的节点
    var current = this.head
    var index = 0
    while (index++ < position) {
        current = current.next
    }

    // 3、将 position 位置的 node 的 data 修改成 newData
    current.data = newData

    return true
}
7、removeAt 方法
// 7、封装 removeAt 删除指定位置的节点方法
LinkedList.prototype.removeAt = function(position) {
    // 1、越界判断
    if (position < 0 || position >= this.length) return null

    // 2、判断是否删除的是第一个节点
    var current = this.head
    if (position == 0) {
        this.head = this.head.next // 如果删除的是第一个节点,直接将头节点指向下一个节点
    } else {
        var index = 0
        var previous = null
        while (index++ < position) {
            previous = current
            current = current.next
        }

        // 找到要删除的节点,然后将这个节点的前一个节点的 next 指向这个节点的下个节点
        previous.next = current.next
    }

    // 3、length-1
    this.length -= 1

    return current.data // 删除节点一般会返回要删除的这个值
}
8、remove 方法
// 8、封装 remove 删除指定数据的节点的方法
LinkedList.prototype.remove = function(data) {
    // 1、获取 data 在列表中的位置
    var position = this.indexOf(data)

    // 2、根据位置信息,删除节点
    return this.removeAt(position)
}
9、isEmpty方法
// 9、封装 isEmpty 判断链表是否为空方法
LinkedList.prototype.isEmpty = function() {
    return this.length == 0
}
10、size方法
// 10、封装 size 返回链表长度方法
LinkedList.prototype.size = function() {
    return this.length
}
完整代码加测试代码
 // 封装链表类
function LinkedList() {
    // 封装内部的类:节点类
    function Node(data) {
        this.data = data
        this.next = null
    }

    // 封装属性
    this.head = null
    // 封装链表的长度
    this.length = 0

    // 1、封装 append 追加方法
    LinkedList.prototype.append = function(data) {
        // 1、创建新的节点
        var newNode = new Node(data)

        // 2、判断添加的是否为第一个节点
        if (this.length == 0) { // 2.1 是第一个节点
            this.head = newNode
        } else { // 2.2 不是第一个节点
            // 找到最后一个节点
            var current = this.head
            while (current.next) { // 判断下一个节点是否为 null ,如果为 null 就跳出循环,如果不为 null ,就继续往后寻找,一直找到最后的节点
                current = current.next
            }

            // 最后节点的next指向新的节点
            current.next = newNode
        }

        this.length += 1
    }

    // 2、封装 toString 字符串方法
    LinkedList.prototype.toString = function() {
        // 1、定义变量指向头结点
        var current = this.head
        var listString = "" // 定义变量存储字符串

        // 2、循环获取每一个节点
        while (current) {
            listString += current.data + " "
            current = current.next // 将头结点指向下一个节点
        }

        // 返回字符串
        return listString
    }

    // 3、封装 insert 插入方法
    LinkedList.prototype.insert = function(position, data) { // position 为插入的位置,data 为插入的值
        // 1、对 position 进行越界判断
        if (position < 0 || position > this.length) return false

        // 2、根据 data 创建 newNode
        var newNode = new Node(data)

        // 3、判断插入的位置是否是第一个
        if (position == 0) {
            newNode.next = this.head // 先将新节点的 next 指向当前头节点,因为当前头节点指向下一个节点
            this.head = newNode // 再将头结点指向新节点
        } else {
            var index = 0 // 定义一个索引值
            var current = this.head // 定义一个当前的值为头节点
            var previous = null // 定义一个比当前节点靠前的一个节点
            while (index++ < position) { // 判断索引值与插入的位置进行比较,如果小于要插入的位置,就依次找到当前值与前一个值
                previous = current
                current = current.next
            }

            newNode.next = current // 将新节点的 next 指向当前的值
            previous.next = newNode // 将前一个值的 next 指向新的节点
        }

        // 4、更新长度 length+1
        this.length += 1

        return true
    }

    // 4、封装 get 获取方法
    LinkedList.prototype.get = function(position) {
        // 1、越界判断
        if (position < 0 || position >= this.length) return null

        // 2、获取对应的 data
        var current = this.head // 定义当前值为头节点
        var index = 0 // 定义索引值为0
        while (index++ < position) { // 循环找到需要的 position 对应位置的值
            current = current.next
        }

        return current.data
    }

    // 5、封装 indexOf 返回指定数据的下标值方法
    LinkedList.prototype.indexOf = function(data) {
        // 1、定义变量
        var current = this.head
        var index = 0

        // 2、开始查找
        while (current) { // 判断current是否为null,如果为null才退出循环
            if (current.data == data) { // 判断当前current的值是否为要查找的值,如果是,直接返回对应下标,如果不是,继续往后找
                return index
            }
            current = current.next
            index += 1
        }

        // 3、找到最后没有找到,返回 -1
        return -1
    }

    // 6、封装 update 更新指定位置数据的方法
    LinkedList.prototype.update = function(position, newData) {
        // 1、越界判断
        if (position < 0 || position >= this.length) return false

        // 2、查找正确的节点
        var current = this.head
        var index = 0
        while (index++ < position) {
            current = current.next
        }

        // 3、将 position 位置的 node 的 data 修改成 newData
        current.data = newData

        return true
    }

    // 7、封装 removeAt 删除指定位置的节点方法
    LinkedList.prototype.removeAt = function(position) {
        // 1、越界判断
        if (position < 0 || position >= this.length) return null

        // 2、判断是否删除的是第一个节点
        var current = this.head
        if (position == 0) {
            this.head = this.head.next // 如果删除的是第一个节点,直接将头节点指向下一个节点
        } else {
            var index = 0
            var previous = null
            while (index++ < position) {
                previous = current
                current = current.next
            }

            // 找到要删除的节点,然后将这个节点的前一个节点的 next 指向这个节点的下个节点
            previous.next = current.next
        }

        // 3、length-1
        this.length -= 1

        return current.data // 删除节点一般会返回要删除的这个值
    }

    // 8、封装 remove 删除指定数据的节点的方法
    LinkedList.prototype.remove = function(data) {
        // 1、获取 data 在列表中的位置
        var position = this.indexOf(data)

        // 2、根据位置信息,删除节点
        return this.removeAt(position)
    }

    // 9、封装 isEmpty 判断链表是否为空方法
    LinkedList.prototype.isEmpty = function() {
        return this.length == 0
    }

    // 10、封装 size 返回链表长度方法
    LinkedList.prototype.size = function() {
        return this.length
    }

}

// 测试代码
// 1、创建LinkedList
var list = new LinkedList()

// 2、测试append方法
list.append('abc')
list.append('tng')
console.log(list.toString());

// 3、测试insert方法
list.insert(1, '12')
list.insert(2, '333')
console.log(list.toString());

// 4、测试get方法
console.log(list.get(0));
console.log(list.get(1));
console.log(list.get(2));
console.log(list.get(3));

// 5、测试indexOf方法
console.log(list.indexOf('333'));

// 6、测试update方法
list.update(0, '999')
list.update(1, '888')
console.log(list.toString());

// 7、测试removeAt方法
list.removeAt(0)
console.log(list.removeAt(1));
console.log(list.toString());

// 8、测试remove方法
list.remove('tng')
console.log(list.toString());

// 9、测试isEmpty方法
list.isEmpty()
console.log(list.isEmpty());

// 10、测试size方法
list.size()
console.log(list.size());下面附上b站视频链接,需要学习的可以去看看(JavaScript算法与数据结构)
