引言
这是一个闪耀的时刻,因为我们即将能生产出令人惊叹的3D效果!
变换
向量和矩阵变换包括太多内容,但由于学过线性代数和GAMES101,因此不在此做过多阐述。仅阐述包括代码的GLM内容。
GLM的使用
(1)GLM的配置
GLM是OpenGL Mathematics的缩写,它是一个只有头文件的库,也就是说我们只需包含对应的头文件就行了,不用链接和编译。GLM可以在它们的网站上下载。把头文件的根目录复制到你的includes文件夹,然后你就可以使用这个库了。
我们需要的GLM的大多数功能都可以从下面这3个头文件中找到:
#include <glm/glm.hpp>
#include <glm/gtc/matrix_transform.hpp>
#include <glm/gtc/type_ptr.hpp>
(2)GLM中类型的使用
例子1:定义向量(1,0,0),并使其位移(1,1,0)。注意需要把他定义为一个glm::vec4类型的值,并且其次坐标设定为1.0。
    // 使用glm::vec4定义一个四维向量(齐次坐标为1.0)
    glm::vec4 vec(1.0f, 0.0f, 0.0f, 1.0f);
    // 使用glm::mat4定义一个4x4的矩阵
    // glm::mat4如果不初始化则数据会是未知的,所以用以下方式初始化为单位矩阵
    glm::mat4 trans = glm::mat4(1.0f);
    // 使用glm::translate(变换矩阵,位移向量)
    // glm::translate返回变换矩阵添加位移效果后得到的矩阵
    trans = glm::translate(trans, glm::vec3(1.0f, 1.0f, 0.0f));
    // 使用 变换矩阵✖四维向量= 变换后的向量
    vec = trans * vec;
    std::cout << vec.x << vec.y << vec.z << std::endl;
例子2:我们来旋转和缩放之前教程中的那个箱子。首先我们把箱子逆时针旋转90度。然后缩放0.5倍,使它变成原来的一半大。我们来创建变换矩阵:
	glm::mat4 trans;
    trans = glm::rotate(trans, 90.0f, glm::vec3(0.0, 0, 1.0));
    trans = glm::scale(trans, glm::vec3(0.5, 0.5, 0.5));
针对变换顺序的讨论:
绝大多数情况下,我们约定的变换顺序是先缩放,再旋转,最后平移。这样变换顺序的依据是,比如我们Blender里面建模了一个可乐罐,我们要将它从自己的局部坐标转换到世界坐标,比如我们希望它:位移到桌子上、倾斜45°、x和y轴均匀缩放至0.5倍。我们可以试想,如果先将可乐瓶倾斜45°再缩放的话,原本针对x轴和y轴的缩放应将可乐瓶的半径和高进行缩放至一半,但是现在可乐瓶倾斜了,导致缩放不是针对可乐瓶的半径和高了(即可乐瓶的半径不在x轴上,高不在y轴上),由此我们得出结论:缩放要在旋转之前进行,因为我们潜意识里的缩放就是针对模型未旋转时体态的缩放。还有一个很重要的事情是,我们推导旋转矩阵是基于旋转中心在原点时,因此我们使用旋转矩阵务必要保证旋转中心在原点,试想我们从Blender中建模的对象,其所在局部坐标一定旋转中心是在原点的,但是当我们对他进行平移之后,它的几何中心就不在原点了。因此我们的旋转应该是针对物体最初的位置进行的,所以我们得到结论:旋转需要在位移之前。综上所述,我们就明白了,需要先缩放、再旋转、最后位移。
设变换矩阵初始为M0单位矩阵,设我们需要变换的坐标为 ve4,设我们需要对ve4做的一系列顺序变换为(S1,S2,S3),设这一系列变换对应的变换矩阵为(M1,M2,M3)。则我们应该做的是:M3✖M2✖M1✖ve4,这样我们则对ve4按顺序执行了变换。那么如果我们要使用一个变换矩阵M包含所有的变换怎么办呢?
由于矩阵乘法满足结合律,即A✖B✖C=(A✖B)✖C=A✖(B✖C)。因此M3✖M2✖M1✖ve4=(M3✖M2✖M1)✖ve4,M=(M3✖M2✖M1)。我们要先计M3再乘M2再乘M1,即可得到M变换矩阵。而对于平移旋转缩放而言,优先级为平移<旋转<缩放,所以应算平移矩阵、再旋转、再计算缩放。如此就可以解释上文中对图形先缩放再旋转的变化顺序,也可以解释代码中先对变化矩阵进行了旋转,再对变换矩阵进行了缩放。

如果在后续程序中你的笑脸旋转了,但是不是正确你预料之中的角度,那么可能是下图的问题。如果你不对你程序中的glm::mat4对象初始化,可能你就看不到你的笑脸了。 顶点着色器:
// 声明OpenGL版本
#version 330 core
// 定义包含位置值的输入变量
layout  (location = 0) in vec3 position;	// 顶点位置
layout (location = 1) in vec3 color;	// 顶点颜色
layout (location = 2) in vec3 textCoord;	// 顶点的纹理坐标
// 定义输出变量(到片段着色器)
out vec3 ourColor;	//	顶点颜色
out vec2 TexCoord;	//	顶点的纹理坐标

uniform mat4 transform;	// 	变换矩阵

void main()
{
	// 使用变换矩阵左乘顶点位置得到变换后位置并赋值
	gl_Position = transform * vec4(position, 1.0f);
	// 将顶点颜色输出给片段着色器
	ourColor = color;
	// 顶点的纹理坐标(由于图片是反的,所以纹理坐标的y值“取反”)
	TexCoord = vec2(texCoord.x , 1.0 - texCoord.y);
}

我们现在需要把变换矩阵传递给着色器:
#version 330 core
in vec3 ourColor;
in vec2 TexCoord;

out vec4 color;

uniform float mixValue;

// Texture samplers
uniform sampler2D ourTexture1;
uniform sampler2D ourTexture2;

void main()
{
	// Linearly interpolate between both textures (second texture is only slightly combined)
	color = mix(texture(ourTexture1, TexCoord), texture(ourTexture2, TexCoord), mixValue);
}
GLuint transformLoc = glGetUniformLocation(ourShader.Program,"transform");
glUniformMatrix4v(transformLoc, 1, GL_FALSE, glm::value_ptr(trans));
最终效果:
完整代码:
#include <iostream>

// GLEW
#define GLEW_STATIC
#include <GL/glew.h>

// GLFW
#include <GLFW/glfw3.h>

// Other Libs
#include <SOIL.H>

// Other includes
#include "Shader.h"

#include <glm/glm.hpp>
#include <glm/gtc/matrix_transform.hpp>
#include <glm/gtc/type_ptr.hpp>


// Function prototypes
void key_callback(GLFWwindow* window, int key, int scancode, int action, int mode);

// Window dimensions
const GLuint WIDTH = 800, HEIGHT = 600;

GLfloat mixValue = 0.2f;

// The MAIN function, from here we start the application and run the game loop
int main()
{
    glm::mat4 trans = glm::mat4(1.0f);
    trans = glm::rotate(trans,glm::radians(90.0f), glm::vec3(0.0, 0, 1.0));
    trans = glm::scale(trans, glm::vec3(0.5, 0.5, 0.5));

    // Init GLFW
    glfwInit();
    // Set all the required options for GLFW
    glfwWindowHint(GLFW_CONTEXT_VERSION_MAJOR, 3);
    glfwWindowHint(GLFW_CONTEXT_VERSION_MINOR, 3);
    glfwWindowHint(GLFW_OPENGL_PROFILE, GLFW_OPENGL_CORE_PROFILE);
    glfwWindowHint(GLFW_RESIZABLE, GL_FALSE);

    // Create a GLFWwindow object that we can use for GLFW's functions
    GLFWwindow* window = glfwCreateWindow(WIDTH, HEIGHT, "LearnOpenGL", nullptr, nullptr);
    glfwMakeContextCurrent(window);

    // Set the required callback functions
    glfwSetKeyCallback(window, key_callback);

    // Set this to true so GLEW knows to use a modern approach to retrieving function pointers and extensions
    glewExperimental = GL_TRUE;
    // Initialize GLEW to setup the OpenGL Function pointers
    glewInit();

    // Define the viewport dimensions
    glViewport(0, 0, WIDTH, HEIGHT);


    // Build and compile our shader program
    Shader ourShader("C:\\Users\\32156\\source\\repos\\LearnOpenGL\\Shader\\vertexShader.txt", "C:\\Users\\32156\\source\\repos\\LearnOpenGL\\Shader\\fragmentShader.txt");


    // Set up vertex data (and buffer(s)) and attribute pointers
    GLfloat vertices[] = {
        // Positions          // Colors           // Texture Coords
         0.5f,  0.5f, 0.0f,   1.0f, 0.0f, 0.0f,   1.0f, 1.0f, // Top Right
         0.5f, -0.5f, 0.0f,   0.0f, 1.0f, 0.0f,   1.0f, 0.0f, // Bottom Right
        -0.5f, -0.5f, 0.0f,   0.0f, 0.0f, 1.0f,   0.0f, 0.0f, // Bottom Left
        -0.5f,  0.5f, 0.0f,   1.0f, 1.0f, 0.0f,   0.0f, 1.0f  // Top Left
    };
    GLuint indices[] = {  // Note that we start from 0!
        0, 1, 3, // First Triangle
        1, 2, 3  // Second Triangle
    };
    GLuint VBO, VAO, EBO;
    glGenVertexArrays(1, &VAO);
    glGenBuffers(1, &VBO);
    glGenBuffers(1, &EBO);

    glBindVertexArray(VAO);

    glBindBuffer(GL_ARRAY_BUFFER, VBO);
    glBufferData(GL_ARRAY_BUFFER, sizeof(vertices), vertices, GL_STATIC_DRAW);

    glBindBuffer(GL_ELEMENT_ARRAY_BUFFER, EBO);
    glBufferData(GL_ELEMENT_ARRAY_BUFFER, sizeof(indices), indices, GL_STATIC_DRAW);

    // Position attribute
    glVertexAttribPointer(0, 3, GL_FLOAT, GL_FALSE, 8 * sizeof(GLfloat), (GLvoid*)0);
    glEnableVertexAttribArray(0);
    // Color attribute
    glVertexAttribPointer(1, 3, GL_FLOAT, GL_FALSE, 8 * sizeof(GLfloat), (GLvoid*)(3 * sizeof(GLfloat)));
    glEnableVertexAttribArray(1);
    // TexCoord attribute
    glVertexAttribPointer(2, 2, GL_FLOAT, GL_FALSE, 8 * sizeof(GLfloat), (GLvoid*)(6 * sizeof(GLfloat)));
    glEnableVertexAttribArray(2);

    glBindVertexArray(0); // Unbind VAO


    // Load and create a texture
    GLuint texture1;
    GLuint texture2;
    // ====================
    // Texture 1
    // ====================
    glGenTextures(1, &texture1);
    glBindTexture(GL_TEXTURE_2D, texture1); // All upcoming GL_TEXTURE_2D operations now have effect on our texture object
    // Set our texture parameters
    glTexParameteri(GL_TEXTURE_2D, GL_TEXTURE_WRAP_S, GL_CLAMP_TO_EDGE);	// Set texture wrapping to GL_REPEAT
    glTexParameteri(GL_TEXTURE_2D, GL_TEXTURE_WRAP_T, GL_CLAMP_TO_EDGE);
    // Set texture filtering
    glTexParameteri(GL_TEXTURE_2D, GL_TEXTURE_MIN_FILTER, GL_NEAREST);
    glTexParameteri(GL_TEXTURE_2D, GL_TEXTURE_MAG_FILTER, GL_NEAREST);
    // Load, create texture and generate mipmaps
    int width, height;
    unsigned char* image = SOIL_load_image("C:\\Users\\32156\\source\\repos\\LearnOpenGL\\Resource\\container.jpg", &width, &height, 0, SOIL_LOAD_RGB);
    glTexImage2D(GL_TEXTURE_2D, 0, GL_RGB, width, height, 0, GL_RGB, GL_UNSIGNED_BYTE, image);
    glGenerateMipmap(GL_TEXTURE_2D);
    SOIL_free_image_data(image);
    glBindTexture(GL_TEXTURE_2D, 0); // Unbind texture when done, so we won't accidentily mess up our texture.
    // ===================
    // Texture 2
    // ===================
    glGenTextures(1, &texture2);
    glBindTexture(GL_TEXTURE_2D, texture2);
    // Set our texture parameters
    glTexParameteri(GL_TEXTURE_2D, GL_TEXTURE_WRAP_S, GL_CLAMP_TO_BORDER);
    glTexParameteri(GL_TEXTURE_2D, GL_TEXTURE_WRAP_T, GL_CLAMP_TO_BORDER);

    float borderColor[] = { 1.0f, 1.0f , 0.0f, 1.0f };
    glTexParameterfv(GL_TEXTURE_2D, GL_TEXTURE_BORDER_COLOR, borderColor);

    // Set texture filtering
    glTexParameteri(GL_TEXTURE_2D, GL_TEXTURE_MIN_FILTER, GL_LINEAR);
    glTexParameteri(GL_TEXTURE_2D, GL_TEXTURE_MAG_FILTER, GL_LINEAR);
    // Load, create texture and generate mipmaps
    image = SOIL_load_image("C:\\Users\\32156\\source\\repos\\LearnOpenGL\\Resource\\awesomeface.png", &width, &height, 0, SOIL_LOAD_RGB);
    glTexImage2D(GL_TEXTURE_2D, 0, GL_RGB, width, height, 0, GL_RGB, GL_UNSIGNED_BYTE, image);
    glGenerateMipmap(GL_TEXTURE_2D);
    SOIL_free_image_data(image);
    glBindTexture(GL_TEXTURE_2D, 0);


    // Game loop
    while (!glfwWindowShouldClose(window))
    {
        // Check if any events have been activiated (key pressed, mouse moved etc.) and call corresponding response functions
        glfwPollEvents();

        // Render
        // Clear the colorbuffer
        glClearColor(0.2f, 0.3f, 0.3f, 1.0f);
        glClear(GL_COLOR_BUFFER_BIT);

        // Activate shader
        ourShader.Use();

        // Bind Textures using texture units
        glActiveTexture(GL_TEXTURE0);
        glBindTexture(GL_TEXTURE_2D, texture1);
        glUniform1i(glGetUniformLocation(ourShader.Program, "ourTexture1"), 0);
        glActiveTexture(GL_TEXTURE1);
        glBindTexture(GL_TEXTURE_2D, texture2);
        glUniform1i(glGetUniformLocation(ourShader.Program, "ourTexture2"), 1);

        GLuint transformLoc = glGetUniformLocation(ourShader.Program, "transform");
        glUniformMatrix4fv(transformLoc, 1, GL_FALSE, glm::value_ptr(trans));

        // 设置混合参数
        glUniform1f(glGetUniformLocation(ourShader.Program,"mixValue"),mixValue);

        // Draw container
        glBindVertexArray(VAO);
        glDrawElements(GL_TRIANGLES, 6, GL_UNSIGNED_INT, 0);
        glBindVertexArray(0);

        // Swap the screen buffers
        glfwSwapBuffers(window);
    }
    // Properly de-allocate all resources once they've outlived their purpose
    glDeleteVertexArrays(1, &VAO);
    glDeleteBuffers(1, &VBO);
    glDeleteBuffers(1, &EBO);
    // Terminate GLFW, clearing any resources allocated by GLFW.
    glfwTerminate();
    return 0;
}

// Is called whenever a key is pressed/released via GLFW
void key_callback(GLFWwindow* window, int key, int scancode, int action, int mode)
{
    if (key == GLFW_KEY_ESCAPE && action == GLFW_PRESS)
        glfwSetWindowShouldClose(window, GL_TRUE);
    if (key == GLFW_KEY_UP && action == GLFW_PRESS)
    {
        mixValue += 0.1f;
        if (mixValue >= 1.0f)
            mixValue = 1.0f;
    }
    if (key == GLFW_KEY_DOWN && action == GLFW_PRESS)
    {
        mixValue -= 0.1f;
        if (mixValue <= 0.0f)
            mixValue = 0.0f;
    }
}
(3)随时间旋转的笑脸
我们可以定义一个无限数量的变换,把它们组合为仅仅一个矩阵,如果愿意的话我们还可以重复使用它。在着色器中使用矩阵可以省去重新定义顶点数据的功夫,它也能够节省处理时间,因为我们没有一直重新发送我们的数据(这是个非常慢的过程)。
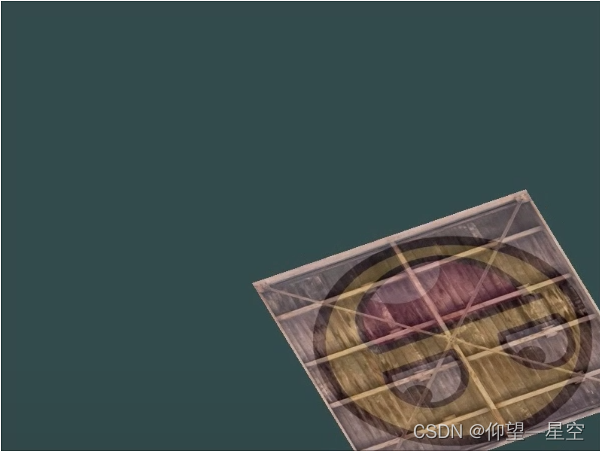
上文中的旋转还是很呆,因为是一个不会动的旋转后笑脸。所以我们现在打算让他动起来,即旋转角度会根据时间变换生成变换矩阵即可。
效果:
代码如下:
glm::mat4 trans;
trans = glm::translate(trans, glm::vec3(0.5f, -0.5f, 0.0f));
trans = glm::rotate(trans,(GLfloat)glfwGetTime() * 50.0f, glm::vec3(0.0f, 0.0f, 1.0f));
完整代码:
#include <iostream>

// GLEW
#define GLEW_STATIC
#include <GL/glew.h>

// GLFW
#include <GLFW/glfw3.h>

// Other Libs
#include <SOIL.H>

// Other includes
#include "Shader.h"

#include <glm/glm.hpp>
#include <glm/gtc/matrix_transform.hpp>
#include <glm/gtc/type_ptr.hpp>


// Function prototypes
void key_callback(GLFWwindow* window, int key, int scancode, int action, int mode);

// Window dimensions
const GLuint WIDTH = 800, HEIGHT = 600;

GLfloat mixValue = 0.2f;

// The MAIN function, from here we start the application and run the game loop
int main()
{

    // Init GLFW
    glfwInit();
    // Set all the required options for GLFW
    glfwWindowHint(GLFW_CONTEXT_VERSION_MAJOR, 3);
    glfwWindowHint(GLFW_CONTEXT_VERSION_MINOR, 3);
    glfwWindowHint(GLFW_OPENGL_PROFILE, GLFW_OPENGL_CORE_PROFILE);
    glfwWindowHint(GLFW_RESIZABLE, GL_FALSE);

    // Create a GLFWwindow object that we can use for GLFW's functions
    GLFWwindow* window = glfwCreateWindow(WIDTH, HEIGHT, "LearnOpenGL", nullptr, nullptr);
    glfwMakeContextCurrent(window);

    // Set the required callback functions
    glfwSetKeyCallback(window, key_callback);

    // Set this to true so GLEW knows to use a modern approach to retrieving function pointers and extensions
    glewExperimental = GL_TRUE;
    // Initialize GLEW to setup the OpenGL Function pointers
    glewInit();

    // Define the viewport dimensions
    glViewport(0, 0, WIDTH, HEIGHT);


    // Build and compile our shader program
    Shader ourShader("C:\\Users\\32156\\source\\repos\\LearnOpenGL\\Shader\\vertexShader.txt", "C:\\Users\\32156\\source\\repos\\LearnOpenGL\\Shader\\fragmentShader.txt");


    // Set up vertex data (and buffer(s)) and attribute pointers
    GLfloat vertices[] = {
        // Positions          // Colors           // Texture Coords
         0.5f,  0.5f, 0.0f,   1.0f, 0.0f, 0.0f,   1.0f, 1.0f, // Top Right
         0.5f, -0.5f, 0.0f,   0.0f, 1.0f, 0.0f,   1.0f, 0.0f, // Bottom Right
        -0.5f, -0.5f, 0.0f,   0.0f, 0.0f, 1.0f,   0.0f, 0.0f, // Bottom Left
        -0.5f,  0.5f, 0.0f,   1.0f, 1.0f, 0.0f,   0.0f, 1.0f  // Top Left
    };
    GLuint indices[] = {  // Note that we start from 0!
        0, 1, 3, // First Triangle
        1, 2, 3  // Second Triangle
    };
    GLuint VBO, VAO, EBO;
    glGenVertexArrays(1, &VAO);
    glGenBuffers(1, &VBO);
    glGenBuffers(1, &EBO);

    glBindVertexArray(VAO);

    glBindBuffer(GL_ARRAY_BUFFER, VBO);
    glBufferData(GL_ARRAY_BUFFER, sizeof(vertices), vertices, GL_STATIC_DRAW);

    glBindBuffer(GL_ELEMENT_ARRAY_BUFFER, EBO);
    glBufferData(GL_ELEMENT_ARRAY_BUFFER, sizeof(indices), indices, GL_STATIC_DRAW);

    // Position attribute
    glVertexAttribPointer(0, 3, GL_FLOAT, GL_FALSE, 8 * sizeof(GLfloat), (GLvoid*)0);
    glEnableVertexAttribArray(0);
    // Color attribute
    glVertexAttribPointer(1, 3, GL_FLOAT, GL_FALSE, 8 * sizeof(GLfloat), (GLvoid*)(3 * sizeof(GLfloat)));
    glEnableVertexAttribArray(1);
    // TexCoord attribute
    glVertexAttribPointer(2, 2, GL_FLOAT, GL_FALSE, 8 * sizeof(GLfloat), (GLvoid*)(6 * sizeof(GLfloat)));
    glEnableVertexAttribArray(2);

    glBindVertexArray(0); // Unbind VAO


    // Load and create a texture
    GLuint texture1;
    GLuint texture2;
    // ====================
    // Texture 1
    // ====================
    glGenTextures(1, &texture1);
    glBindTexture(GL_TEXTURE_2D, texture1); // All upcoming GL_TEXTURE_2D operations now have effect on our texture object
    // Set our texture parameters
    glTexParameteri(GL_TEXTURE_2D, GL_TEXTURE_WRAP_S, GL_CLAMP_TO_EDGE);	// Set texture wrapping to GL_REPEAT
    glTexParameteri(GL_TEXTURE_2D, GL_TEXTURE_WRAP_T, GL_CLAMP_TO_EDGE);
    // Set texture filtering
    glTexParameteri(GL_TEXTURE_2D, GL_TEXTURE_MIN_FILTER, GL_NEAREST);
    glTexParameteri(GL_TEXTURE_2D, GL_TEXTURE_MAG_FILTER, GL_NEAREST);
    // Load, create texture and generate mipmaps
    int width, height;
    unsigned char* image = SOIL_load_image("C:\\Users\\32156\\source\\repos\\LearnOpenGL\\Resource\\container.jpg", &width, &height, 0, SOIL_LOAD_RGB);
    glTexImage2D(GL_TEXTURE_2D, 0, GL_RGB, width, height, 0, GL_RGB, GL_UNSIGNED_BYTE, image);
    glGenerateMipmap(GL_TEXTURE_2D);
    SOIL_free_image_data(image);
    glBindTexture(GL_TEXTURE_2D, 0); // Unbind texture when done, so we won't accidentily mess up our texture.
    // ===================
    // Texture 2
    // ===================
    glGenTextures(1, &texture2);
    glBindTexture(GL_TEXTURE_2D, texture2);
    // Set our texture parameters
    glTexParameteri(GL_TEXTURE_2D, GL_TEXTURE_WRAP_S, GL_CLAMP_TO_BORDER);
    glTexParameteri(GL_TEXTURE_2D, GL_TEXTURE_WRAP_T, GL_CLAMP_TO_BORDER);

    float borderColor[] = { 1.0f, 1.0f , 0.0f, 1.0f };
    glTexParameterfv(GL_TEXTURE_2D, GL_TEXTURE_BORDER_COLOR, borderColor);

    // Set texture filtering
    glTexParameteri(GL_TEXTURE_2D, GL_TEXTURE_MIN_FILTER, GL_LINEAR);
    glTexParameteri(GL_TEXTURE_2D, GL_TEXTURE_MAG_FILTER, GL_LINEAR);
    // Load, create texture and generate mipmaps
    image = SOIL_load_image("C:\\Users\\32156\\source\\repos\\LearnOpenGL\\Resource\\awesomeface.png", &width, &height, 0, SOIL_LOAD_RGB);
    glTexImage2D(GL_TEXTURE_2D, 0, GL_RGB, width, height, 0, GL_RGB, GL_UNSIGNED_BYTE, image);
    glGenerateMipmap(GL_TEXTURE_2D);
    SOIL_free_image_data(image);
    glBindTexture(GL_TEXTURE_2D, 0);


    // Game loop
    while (!glfwWindowShouldClose(window))
    {
        // Check if any events have been activiated (key pressed, mouse moved etc.) and call corresponding response functions
        glfwPollEvents();

        // Render
        // Clear the colorbuffer
        glClearColor(0.2f, 0.3f, 0.3f, 1.0f);
        glClear(GL_COLOR_BUFFER_BIT);

        // Activate shader
        ourShader.Use();

        glm::mat4 trans = glm::mat4(1.0f);
        trans = glm::rotate(trans, glm::radians((GLfloat)glfwGetTime()*50.0f), glm::vec3(0.0, 0, 1.0));
        trans = glm::scale(trans, glm::vec3(0.5, 0.5, 0.5));

        // Bind Textures using texture units
        glActiveTexture(GL_TEXTURE0);
        glBindTexture(GL_TEXTURE_2D, texture1);
        glUniform1i(glGetUniformLocation(ourShader.Program, "ourTexture1"), 0);
        glActiveTexture(GL_TEXTURE1);
        glBindTexture(GL_TEXTURE_2D, texture2);
        glUniform1i(glGetUniformLocation(ourShader.Program, "ourTexture2"), 1);

        GLuint transformLoc = glGetUniformLocation(ourShader.Program, "transform");
        glUniformMatrix4fv(transformLoc, 1, GL_FALSE, glm::value_ptr(trans));

        // 设置混合参数
        glUniform1f(glGetUniformLocation(ourShader.Program,"mixValue"),mixValue);

        // Draw container
        glBindVertexArray(VAO);
        glDrawElements(GL_TRIANGLES, 6, GL_UNSIGNED_INT, 0);
        glBindVertexArray(0);

        // Swap the screen buffers
        glfwSwapBuffers(window);
    }
    // Properly de-allocate all resources once they've outlived their purpose
    glDeleteVertexArrays(1, &VAO);
    glDeleteBuffers(1, &VBO);
    glDeleteBuffers(1, &EBO);
    // Terminate GLFW, clearing any resources allocated by GLFW.
    glfwTerminate();
    return 0;
}

// Is called whenever a key is pressed/released via GLFW
void key_callback(GLFWwindow* window, int key, int scancode, int action, int mode)
{
    if (key == GLFW_KEY_ESCAPE && action == GLFW_PRESS)
        glfwSetWindowShouldClose(window, GL_TRUE);
    if (key == GLFW_KEY_UP && action == GLFW_PRESS)
    {
        mixValue += 0.1f;
        if (mixValue >= 1.0f)
            mixValue = 1.0f;
    }
    if (key == GLFW_KEY_DOWN && action == GLFW_PRESS)
    {
        mixValue -= 0.1f;
        if (mixValue <= 0.0f)
            mixValue = 0.0f;
    }
}
变换的练习
练习一
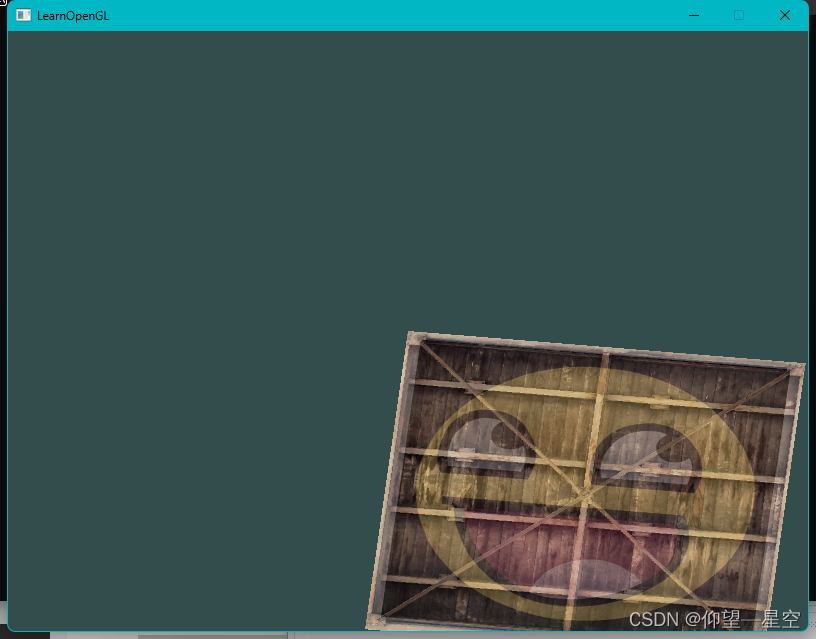
使用应用在箱子上的最后一个变换,尝试将其改变为先旋转,后位移。看看发生了什么,试着想想为什么会发生这样的事情。
诸如我们上文所说,旋转矩阵的运算是针对旋转中心在原点的,代码中先将矩阵旋转再位移,相当于对矩阵先位移再旋转。这时会发现笑脸绕着窗口中心原点不停的逆时针旋转。这是由于旋转中心的不同导致的差距。当先进行移动后,笑脸的几何中心就不在原点了,原本打算让它绕着几何中心旋转变成了绕着原点(非几何中心)旋转。
结果:
源代码:
#include <iostream>

// GLEW
#define GLEW_STATIC
#include <GL/glew.h>

// GLFW
#include <GLFW/glfw3.h>

// Other Libs
#include <SOIL.H>

// Other includes
#include "Shader.h"

#include <glm/glm.hpp>
#include <glm/gtc/matrix_transform.hpp>
#include <glm/gtc/type_ptr.hpp>


// Function prototypes
void key_callback(GLFWwindow* window, int key, int scancode, int action, int mode);

// Window dimensions
const GLuint WIDTH = 800, HEIGHT = 600;

GLfloat mixValue = 0.2f;

// The MAIN function, from here we start the application and run the game loop
int main()
{

   // Init GLFW
   glfwInit();
   // Set all the required options for GLFW
   glfwWindowHint(GLFW_CONTEXT_VERSION_MAJOR, 3);
   glfwWindowHint(GLFW_CONTEXT_VERSION_MINOR, 3);
   glfwWindowHint(GLFW_OPENGL_PROFILE, GLFW_OPENGL_CORE_PROFILE);
   glfwWindowHint(GLFW_RESIZABLE, GL_FALSE);

   // Create a GLFWwindow object that we can use for GLFW's functions
   GLFWwindow* window = glfwCreateWindow(WIDTH, HEIGHT, "LearnOpenGL", nullptr, nullptr);
   glfwMakeContextCurrent(window);

   // Set the required callback functions
   glfwSetKeyCallback(window, key_callback);

   // Set this to true so GLEW knows to use a modern approach to retrieving function pointers and extensions
   glewExperimental = GL_TRUE;
   // Initialize GLEW to setup the OpenGL Function pointers
   glewInit();

   // Define the viewport dimensions
   glViewport(0, 0, WIDTH, HEIGHT);


   // Build and compile our shader program
   Shader ourShader("C:\\Users\\32156\\source\\repos\\LearnOpenGL\\Shader\\vertexShader.txt", "C:\\Users\\32156\\source\\repos\\LearnOpenGL\\Shader\\fragmentShader.txt");


   // Set up vertex data (and buffer(s)) and attribute pointers
   GLfloat vertices[] = {
       // Positions          // Colors           // Texture Coords
        0.5f,  0.5f, 0.0f,   1.0f, 0.0f, 0.0f,   1.0f, 1.0f, // Top Right
        0.5f, -0.5f, 0.0f,   0.0f, 1.0f, 0.0f,   1.0f, 0.0f, // Bottom Right
       -0.5f, -0.5f, 0.0f,   0.0f, 0.0f, 1.0f,   0.0f, 0.0f, // Bottom Left
       -0.5f,  0.5f, 0.0f,   1.0f, 1.0f, 0.0f,   0.0f, 1.0f  // Top Left
   };
   GLuint indices[] = {  // Note that we start from 0!
       0, 1, 3, // First Triangle
       1, 2, 3  // Second Triangle
   };
   GLuint VBO, VAO, EBO;
   glGenVertexArrays(1, &VAO);
   glGenBuffers(1, &VBO);
   glGenBuffers(1, &EBO);

   glBindVertexArray(VAO);

   glBindBuffer(GL_ARRAY_BUFFER, VBO);
   glBufferData(GL_ARRAY_BUFFER, sizeof(vertices), vertices, GL_STATIC_DRAW);

   glBindBuffer(GL_ELEMENT_ARRAY_BUFFER, EBO);
   glBufferData(GL_ELEMENT_ARRAY_BUFFER, sizeof(indices), indices, GL_STATIC_DRAW);

   // Position attribute
   glVertexAttribPointer(0, 3, GL_FLOAT, GL_FALSE, 8 * sizeof(GLfloat), (GLvoid*)0);
   glEnableVertexAttribArray(0);
   // Color attribute
   glVertexAttribPointer(1, 3, GL_FLOAT, GL_FALSE, 8 * sizeof(GLfloat), (GLvoid*)(3 * sizeof(GLfloat)));
   glEnableVertexAttribArray(1);
   // TexCoord attribute
   glVertexAttribPointer(2, 2, GL_FLOAT, GL_FALSE, 8 * sizeof(GLfloat), (GLvoid*)(6 * sizeof(GLfloat)));
   glEnableVertexAttribArray(2);

   glBindVertexArray(0); // Unbind VAO


   // Load and create a texture
   GLuint texture1;
   GLuint texture2;
   // ====================
   // Texture 1
   // ====================
   glGenTextures(1, &texture1);
   glBindTexture(GL_TEXTURE_2D, texture1); // All upcoming GL_TEXTURE_2D operations now have effect on our texture object
   // Set our texture parameters
   glTexParameteri(GL_TEXTURE_2D, GL_TEXTURE_WRAP_S, GL_CLAMP_TO_EDGE);	// Set texture wrapping to GL_REPEAT
   glTexParameteri(GL_TEXTURE_2D, GL_TEXTURE_WRAP_T, GL_CLAMP_TO_EDGE);
   // Set texture filtering
   glTexParameteri(GL_TEXTURE_2D, GL_TEXTURE_MIN_FILTER, GL_NEAREST);
   glTexParameteri(GL_TEXTURE_2D, GL_TEXTURE_MAG_FILTER, GL_NEAREST);
   // Load, create texture and generate mipmaps
   int width, height;
   unsigned char* image = SOIL_load_image("C:\\Users\\32156\\source\\repos\\LearnOpenGL\\Resource\\container.jpg", &width, &height, 0, SOIL_LOAD_RGB);
   glTexImage2D(GL_TEXTURE_2D, 0, GL_RGB, width, height, 0, GL_RGB, GL_UNSIGNED_BYTE, image);
   glGenerateMipmap(GL_TEXTURE_2D);
   SOIL_free_image_data(image);
   glBindTexture(GL_TEXTURE_2D, 0); // Unbind texture when done, so we won't accidentily mess up our texture.
   // ===================
   // Texture 2
   // ===================
   glGenTextures(1, &texture2);
   glBindTexture(GL_TEXTURE_2D, texture2);
   // Set our texture parameters
   glTexParameteri(GL_TEXTURE_2D, GL_TEXTURE_WRAP_S, GL_CLAMP_TO_BORDER);
   glTexParameteri(GL_TEXTURE_2D, GL_TEXTURE_WRAP_T, GL_CLAMP_TO_BORDER);

   float borderColor[] = { 1.0f, 1.0f , 0.0f, 1.0f };
   glTexParameterfv(GL_TEXTURE_2D, GL_TEXTURE_BORDER_COLOR, borderColor);

   // Set texture filtering
   glTexParameteri(GL_TEXTURE_2D, GL_TEXTURE_MIN_FILTER, GL_LINEAR);
   glTexParameteri(GL_TEXTURE_2D, GL_TEXTURE_MAG_FILTER, GL_LINEAR);
   // Load, create texture and generate mipmaps
   image = SOIL_load_image("C:\\Users\\32156\\source\\repos\\LearnOpenGL\\Resource\\awesomeface.png", &width, &height, 0, SOIL_LOAD_RGB);
   glTexImage2D(GL_TEXTURE_2D, 0, GL_RGB, width, height, 0, GL_RGB, GL_UNSIGNED_BYTE, image);
   glGenerateMipmap(GL_TEXTURE_2D);
   SOIL_free_image_data(image);
   glBindTexture(GL_TEXTURE_2D, 0);


   // Game loop
   while (!glfwWindowShouldClose(window))
   {
       // Check if any events have been activiated (key pressed, mouse moved etc.) and call corresponding response functions
       glfwPollEvents();

       // Render
       // Clear the colorbuffer
       glClearColor(0.2f, 0.3f, 0.3f, 1.0f);
       glClear(GL_COLOR_BUFFER_BIT);

       // Activate shader
       ourShader.Use();

       glm::mat4 trans = glm::mat4(1.0f);

       trans = glm::rotate(trans, (GLfloat)glfwGetTime() * 2.0f, glm::vec3(0.0f, 0.0f, 1.0f));
       trans = glm::translate(trans, glm::vec3(0.5f, -0.5f, 0.0f));

       // Bind Textures using texture units
       glActiveTexture(GL_TEXTURE0);
       glBindTexture(GL_TEXTURE_2D, texture1);
       glUniform1i(glGetUniformLocation(ourShader.Program, "ourTexture1"), 0);
       glActiveTexture(GL_TEXTURE1);
       glBindTexture(GL_TEXTURE_2D, texture2);
       glUniform1i(glGetUniformLocation(ourShader.Program, "ourTexture2"), 1);

       GLuint transformLoc = glGetUniformLocation(ourShader.Program, "transform");
       glUniformMatrix4fv(transformLoc, 1, GL_FALSE, glm::value_ptr(trans));

       // 设置混合参数
       glUniform1f(glGetUniformLocation(ourShader.Program,"mixValue"),mixValue);

       // Draw container
       glBindVertexArray(VAO);
       glDrawElements(GL_TRIANGLES, 6, GL_UNSIGNED_INT, 0);
       glBindVertexArray(0);

       // Swap the screen buffers
       glfwSwapBuffers(window);
   }
   // Properly de-allocate all resources once they've outlived their purpose
   glDeleteVertexArrays(1, &VAO);
   glDeleteBuffers(1, &VBO);
   glDeleteBuffers(1, &EBO);
   // Terminate GLFW, clearing any resources allocated by GLFW.
   glfwTerminate();
   return 0;
}

// Is called whenever a key is pressed/released via GLFW
void key_callback(GLFWwindow* window, int key, int scancode, int action, int mode)
{
   if (key == GLFW_KEY_ESCAPE && action == GLFW_PRESS)
       glfwSetWindowShouldClose(window, GL_TRUE);
   if (key == GLFW_KEY_UP && action == GLFW_PRESS)
   {
       mixValue += 0.1f;
       if (mixValue >= 1.0f)
           mixValue = 1.0f;
   }
   if (key == GLFW_KEY_DOWN && action == GLFW_PRESS)
   {
       mixValue -= 0.1f;
       if (mixValue <= 0.0f)
           mixValue = 0.0f;
   }
}
练习二
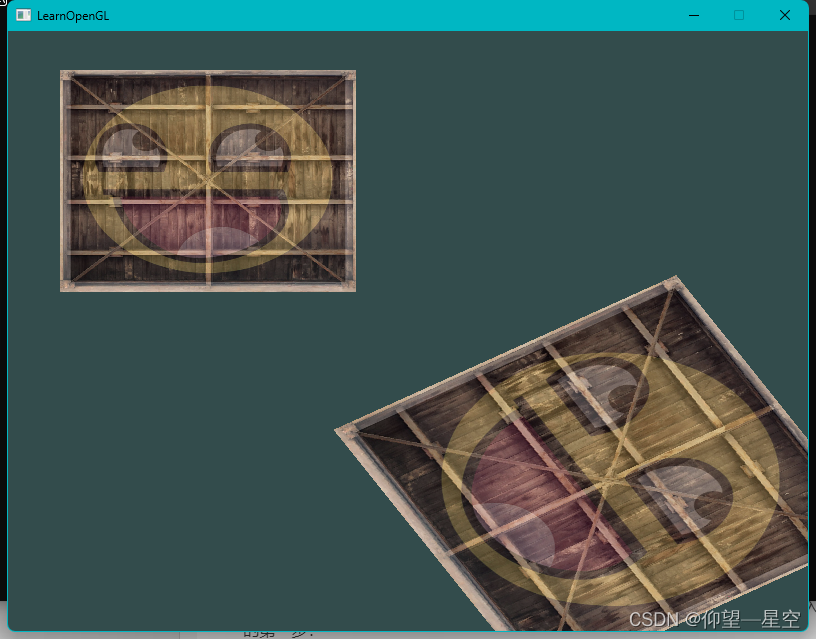
尝试再次调用glDrawElements画出第二个箱子,只使用变换将其摆放在不同的位置。让这个箱子被摆放在窗口的左上角,并且会不断的缩放(而不是旋转)。sin函数在这里会很有用,不过注意使用sin函数时应用负值会导致物体被翻转。
最终效果:
其实还是很简单的,直接上核心代码:
while (!glfwWindowShouldClose(window))
    {
        // Check if any events have been activiated (key pressed, mouse moved etc.) and call corresponding response functions
        glfwPollEvents();

        // Render
        // Clear the colorbuffer
        glClearColor(0.2f, 0.3f, 0.3f, 1.0f);
        glClear(GL_COLOR_BUFFER_BIT);

        // Activate shader
        ourShader.Use();

		// 计算右下角笑脸的变换矩阵
        glm::mat4 trans = glm::mat4(1.0f);
        trans = glm::translate(trans, glm::vec3(0.5f, -0.5f, 0.0f));
        trans = glm::rotate(trans, (GLfloat)glfwGetTime() * 2.0f, glm::vec3(0.0f, 0.0f, 1.0f));

        GLuint transformLoc = glGetUniformLocation(ourShader.Program, "transform");
        glUniformMatrix4fv(transformLoc, 1, GL_FALSE, glm::value_ptr(trans));

        // Bind Textures using texture units
        glActiveTexture(GL_TEXTURE0);
        glBindTexture(GL_TEXTURE_2D, texture1);
        glUniform1i(glGetUniformLocation(ourShader.Program, "ourTexture1"), 0);
        glActiveTexture(GL_TEXTURE1);
        glBindTexture(GL_TEXTURE_2D, texture2);
        glUniform1i(glGetUniformLocation(ourShader.Program, "ourTexture2"), 1);

        // 设置混合参数
        glUniform1f(glGetUniformLocation(ourShader.Program,"mixValue"),mixValue);

        // Draw container
        glBindVertexArray(VAO);
        glDrawElements(GL_TRIANGLES, 6, GL_UNSIGNED_INT, 0);

		// 计算左上角笑脸的变换矩阵
        trans = glm::mat4(1.0f);
        trans = glm::translate(trans, glm::vec3(-0.5f, 0.5f, 0.0f));
        // 利用sin/2+0.5,将时间 0到正无穷 转换为 0到1
        GLfloat scaleValue = sin((GLfloat)glfwGetTime()) / 2 + 0.5;
        trans = glm::scale(trans, glm::vec3(scaleValue,scaleValue,scaleValue));
        glUniformMatrix4fv(transformLoc, 1, GL_FALSE, glm::value_ptr(trans));

        glDrawElements(GL_TRIANGLES, 6, GL_UNSIGNED_INT, 0);
        glBindVertexArray(0);

        // Swap the screen buffers
        glfwSwapBuffers(window);
    }
