1. 编译Livox-SDK2
官方地址:https://github.com/Livox-SDK/Livox-SDK2
执行一下命令:
git clone https://github.com/Livox-SDK/Livox-SDK2.git
cd ./Livox-SDK2/
mkdir build
cd build
cmake .. && make
sudo make install
如上就安装完成了Livox-SDK2,会安装如下内容:
-- Installing: /usr/local/lib/liblivox_lidar_sdk_static.a
-- Installing: /usr/local/include/livox_lidar_def.h
-- Installing: /usr/local/include/livox_lidar_api.h
-- Installing: /usr/local/include/livox_lidar_cfg.h
-- Installing: /usr/local/lib/liblivox_lidar_sdk_shared.so
如需删除,执行如下命令:
sudo rm -rf /usr/local/lib/liblivox_lidar_sdk_*
sudo rm -rf /usr/local/include/livox_lidar_*
2.编译livox_ros_driver2
官方地址:https://github.com/Livox-SDK/livox_ros_driver2
2.1.克隆源代码
打开终端执行如下命令,会将源代码clone在/home/ws_livox/src/livox_ros_driver2目录下,这步创建了ROS2需要使用的工作空间。
git clone https://github.com/Livox-SDK/livox_ros_driver2.git ws_livox/src/livox_ros_driver22.2.编译
终端进入到/src/livox_ros_driver2目录下,执行如下命令:
source /opt/ros/humble/setup.sh
./build.sh humble第一行命令是将基于Ubuntu22.04的ROS2 humble引入环境变量(如果已经配置了环境变量,则不需要执行这一步);
第二行命令是构建基于humble的ROS2下的livox_ros_driver2,读者可以根据自己的目标系统编译对应的驱动,详细命令可以参见官网内容;
2.3.配置文件说明
2.3.1.launch文件说明
首先根据传感器修改对应参数,笔者使用的是Livox-Mid360,读者可以根据自己的传感器修改对应参数文件。
Launch文件在 ws_livox/src/livox_ros_driver2/launch_ROS2 文件夹内,包括:
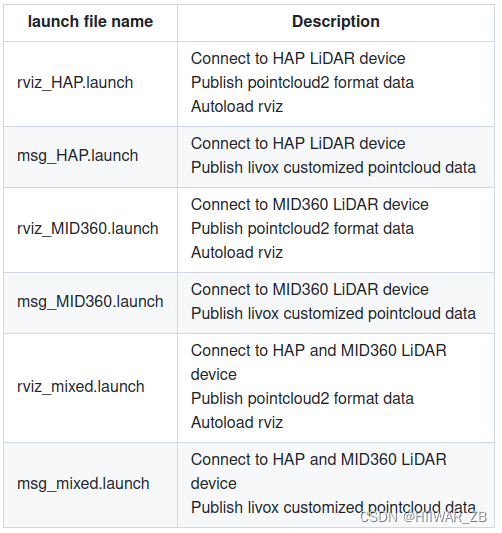
根据不同的应用场景,启动不同的节点和配置。
笔者使用的单个mid360,会用到 rviz_MID360.launch 和 msg_MID360.launch 两个文件。
其中rviz方式的是连接到传感器,发布pointcloud2格式的数据,并且启动rviz显示点云。
其中msg方式的是连接到传感器,发布livox customized格式的点云数据。
也可以根据自己的需求编写launch文件,launch文档中可以配置一些参数,例如发布频率、点云格式等。
2.3.2.config文件说明
使用官方提供的launch启动时,会使用 ws_livox/install/livox_ros_driver2/share/livox_ros_driver2/config 文件夹内的配置文件。
其内容如下:
{
  "lidar_summary_info" : {
    "lidar_type": 8
  },
  "MID360": {
    "lidar_net_info" : {
      "cmd_data_port": 56100,
      "push_msg_port": 56200,
      "point_data_port": 56300,
      "imu_data_port": 56400,
      "log_data_port": 56500
    },
    "host_net_info" : {
      "cmd_data_ip" : "192.168.1.222",
      "cmd_data_port": 56101,
      "push_msg_ip": "192.168.1.222",
      "push_msg_port": 56201,
      "point_data_ip": "192.168.1.222",
      "point_data_port": 56301,
      "imu_data_ip" : "192.168.1.222",
      "imu_data_port": 56401,
      "log_data_ip" : "",
      "log_data_port": 56501
    }
  },
  "lidar_configs" : [
    {
      "ip" : "192.168.1.106",
      "pcl_data_type" : 1,
      "pattern_mode" : 0,
      "extrinsic_parameter" : {
        "roll": 0.0,
        "pitch": 0.0,
        "yaw": 0.0,
        "x": 0,
        "y": 0,
        "z": 0
      }
    }
  ]
}上面的配置中,host_net_info 中对应的IP需要配置成主机对应网卡的IP地址,笔者连接该设备的网口IP为192.168.1.222。lidar_configs 的IP需要配置成lidar设备的IP,如果不知道该IP,可以启动Livox Viewer2 软件查看设备IP,笔者的设备IP为192.168.1.106。
其他的配置内容可以详细参考官方解释,上述的修改了以后就可以正常启动连接设备。
2.4.运行驱动
笔者启动rviz_MID360_launch,输入如下命令:
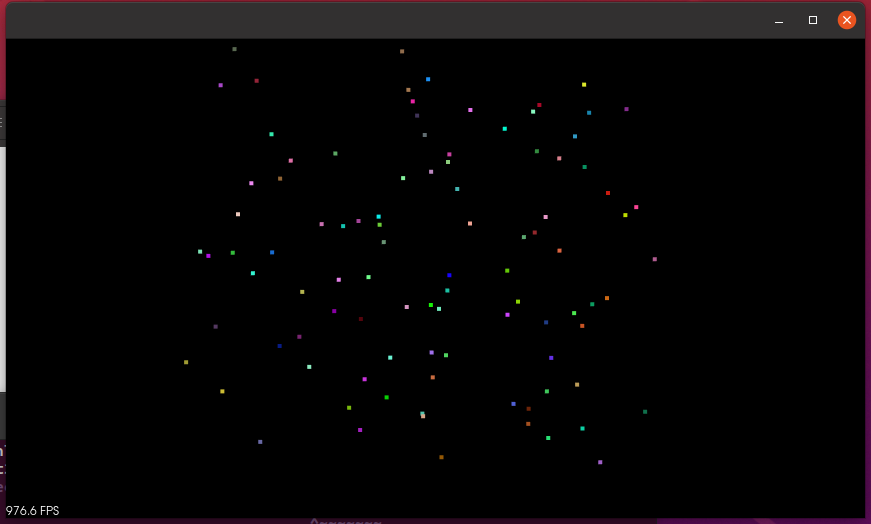
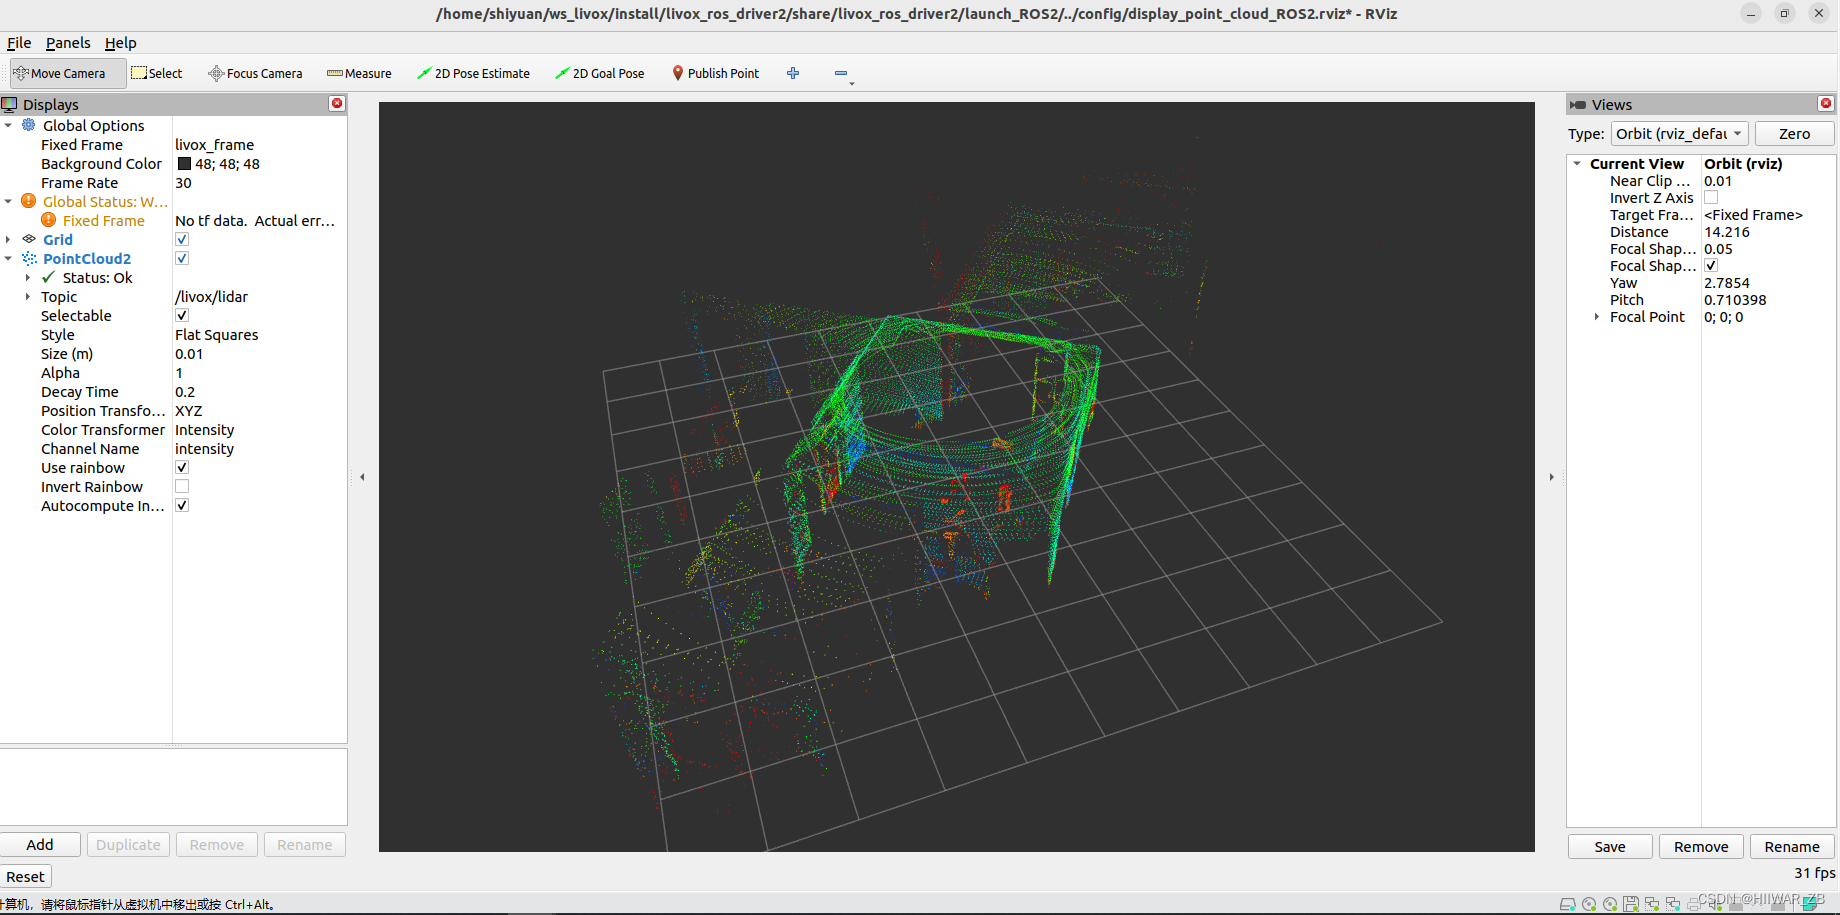
ros2 launch livox_ros_driver2 rviz_MID360_launch.py正常启动的情况下,就会连接设备并采集发布点云,自动启动rviz显示点云,如下图:
问题1:
如果报错没有发现 liblivox_sdk_shared.so,则先在命令行中运行export LD_LIBRARY_PATH=${LD_LIBRARY_PATH}:/usr/local/lib,也可以将该命令添加到~/.bashrc中,永久添加到环境变量中。
