本人刚学OpenGL不久且自学,文中定有代码、术语等错误,欢迎指正
我写的项目地址:https://github.com/liujianjie/LearnOpenGLProject
文章目录
- 模型加载重要代码
- 读取3D模型
- 递归处理结点的网格
- 加载纹理优化
- 程序代码
- Model类加载模型流程
- 例子1:渲染模型
- 例子2:添加点光源
模型加载重要代码
这点需结合代码全部才好理解,可以跳过此点直接看程序代码
读取3D模型
Assimp::Importer importer;
const aiScene *scene = importer.ReadFile(path, aiProcess_Triangulate | aiProcess_FlipUVs);
ReadFile的第二个参数是一些后期处理(Post-processing)的选项
- aiProcess_Triangulate:如果模型不是(全部)由三角形组成,它需要将模型所有的图元形状变换为三角形
- aiProcess_FlipUVs:在处理的时候翻转y轴的纹理坐标
- aiProcess_GenNormals:如果模型不包含法向量的话,就为每个顶点创建法线。
- aiProcess_SplitLargeMeshes:将比较大的网格分割成更小的子网格,如果你的渲染有最大顶点数限制,只能渲染较小的网格,那么它会非常有用。
- aiProcess_OptimizeMeshes:和上个选项相反,它会将多个小网格拼接为一个大的网格,减少绘制调用从而进行优化。
递归处理结点的网格
-
代码
void processNode(aiNode *node, const aiScene *scene) { // 处理节点所有的网格(如果有的话) for(unsigned int i = 0; i < node->mNumMeshes; i++) { aiMesh *mesh = scene->mMeshes[node->mMeshes[i]]; meshes.push_back(processMesh(mesh, scene)); } // 递归接下来对它的子节点重复这一过程 for(unsigned int i = 0; i < node->mNumChildren; i++) { processNode(node->mChildren[i], scene); } } -
说明
本可以不用递归处理任何节点,渲染时只需要遍历场景对象的所有网格即可
-
为什么要递归处理网格
使用节点的最初想法是将网格之间定义一个父子关系。通过这样递归地遍历这层关系,我们就能将某个网格定义为另一个网格的父网格了。
-
例子
位移一个汽车的网格时,你可以保证它的所有子网格(比如引擎网格、方向盘网格、轮胎网格)都会随着一起位移。这样的系统能够用父子关系很容易地实现。
-
加载纹理优化
大多数场景都会在多个网格中重用部分纹理,所以不需要每次加载网格用的纹理,应该存储到vector中判断是否加载过,是加载过就只需将加载过的纹理放到vector的后面就行
vector<Texture> loadMaterialTextures(aiMaterial *mat, aiTextureType type, string typeName)
{
    vector<Texture> textures;
    for(unsigned int i = 0; i < mat->GetTextureCount(type); i++)
    {
        aiString str;
        mat->GetTexture(type, i, &str);
        bool skip = false;
        for(unsigned int j = 0; j < textures_loaded.size(); j++)
        {
            if(std::strcmp(textures_loaded[j].path.data(), str.C_Str()) == 0)
            {
                textures.push_back(textures_loaded[j]);
                skip = true;
                break;
            }
        }
        if(!skip)
        {   // 如果纹理还没有被加载,则加载它
            Texture texture;
            texture.id = TextureFromFile(str.C_Str(), directory);
            texture.type = typeName;
            texture.path = str.C_Str();
            textures.push_back(texture);
            textures_loaded.push_back(texture); // 添加到已加载的纹理中
        }
    }
    return textures;
}
程序代码
Model类加载模型流程

例子1:渲染模型
-
代码
model.h
#pragma once
#include <glad/glad.h>

#include <glm/glm.hpp>
#include <glm/gtc/matrix_transform.hpp>
#include <stb_image.h>
#include <assimp/Importer.hpp>
#include <assimp/scene.h>
#include <assimp/postprocess.h>

//#include <learnopengl/mesh.h>
//#include <learnopengl/shader.h>
#include "Mesh.h"
#include "Core/Shader/Shader.h"

#include <string>
#include <fstream>
#include <sstream>
#include <iostream>
#include <map>
#include <vector>
using namespace std;

// 辅助方法:从路径中加载材质
//unsigned int TextureFromFile(const char* path, const string& directory, bool gamma = false);
unsigned int TextureFromFile(const char* path, const string& directory, bool gamma = false) {
    string filename = string(path);
    filename = directory + '/' + filename;

    unsigned int textureID;
    glGenTextures(1, &textureID);

    int width, height, nrComponents;
    unsigned char* data = stbi_load(filename.c_str(), &width, &height, &nrComponents, 0);
    if (data)
    {
        GLenum format;
        if (nrComponents == 1)
            format = GL_RED;
        else if (nrComponents == 3)
            format = GL_RGB;
        else if (nrComponents == 4)
            format = GL_RGBA;

        glBindTexture(GL_TEXTURE_2D, textureID);
        glTexImage2D(GL_TEXTURE_2D, 0, format, width, height, 0, format, GL_UNSIGNED_BYTE, data);
        glGenerateMipmap(GL_TEXTURE_2D);

        glTexParameteri(GL_TEXTURE_2D, GL_TEXTURE_WRAP_S, GL_REPEAT);
        glTexParameteri(GL_TEXTURE_2D, GL_TEXTURE_WRAP_T, GL_REPEAT);
        glTexParameteri(GL_TEXTURE_2D, GL_TEXTURE_MIN_FILTER, GL_LINEAR_MIPMAP_LINEAR);
        glTexParameteri(GL_TEXTURE_2D, GL_TEXTURE_MAG_FILTER, GL_LINEAR);

        stbi_image_free(data);
    }
    else
    {
        std::cout << "Texture failed to load at path: " << path << std::endl;
        stbi_image_free(data);
    }
    return textureID;
}
class Model
{
public:
    vector<Texture> textures_loaded;
    vector<Mesh> meshes;
    string directory;
    bool gammaCorrection;

    // 构造函数
    Model(string const& path, bool gamma = false) : gammaCorrection(gamma) {
        loadModel(path);
    }
    // 绘画
    void Draw(Shader& shader) {
        for (unsigned int i = 0; i < meshes.size(); i++) {
            meshes[i].Draw(shader);
        }
    }
private:
    // 加载模型
    void loadModel(string const &path) {
        Assimp::Importer importer;
        const aiScene* scene = importer.ReadFile(path, aiProcess_Triangulate | aiProcess_GenSmoothNormals | aiProcess_FlipUVs | aiProcess_CalcTangentSpace);
        if (!scene || scene->mFlags & AI_SCENE_FLAGS_INCOMPLETE || !scene->mRootNode) {
            cout << "ERROR::ASSIMP:: " << importer.GetErrorString() << endl;
            return;
        }
        directory = path.substr(0, path.find_last_of("/"));// 保存目录
        // 处理结点
        processNode(scene->mRootNode, scene);
    }
    /// <summary>
    /// 递归处理结点下的网格,处理完网格就新建一个自定义的mesh类并添加到vector中存储所有网格
    /// </summary>
    /// <param name="node">根结点,递归过程中变成子结点</param>
    /// <param name="scene">场景</param>
    void processNode(aiNode* node, const aiScene* scene) {
        // 处理当前结点下的每一个网格
        for (unsigned int i = 0; i < node->mNumMeshes; i++) {
            aiMesh* mesh = scene->mMeshes[node->mMeshes[i]];// 在scene哪个网格
            meshes.push_back(processMesh(mesh, scene));// 处理网格后,保存为我们自己的类
        }
        // 递归处理子节点
        for (unsigned int i = 0; i < node->mNumChildren; i++) {
            processNode(node->mChildren[i], scene);
        }
    }
    /// <summary>
    /// 处理结点下的网格,读取绘制网格所需的顶点、法线、贴图
    /// </summary>
    /// <param name="mesh">具体的网格数据</param>
    /// <param name="scene">哪个场景下</param>
    /// <returns>返回自定义mesh类</returns>
    Mesh processMesh(aiMesh* mesh, const aiScene* scene) {
        vector<Vertex> vertices;
        vector<unsigned int> indices;
        vector<Texture> textures;

        for (unsigned int i = 0; i < mesh->mNumVertices; i++) {
            Vertex vertex;
            glm::vec3 vector;
            vector.x = mesh->mVertices[i].x;
            vector.y = mesh->mVertices[i].y;
            vector.z = mesh->mVertices[i].z;
            vertex.Position = vector;
            if (mesh->HasNormals()) {
                vector.x = mesh->mNormals[i].x;
                vector.y = mesh->mNormals[i].y;
                vector.z = mesh->mNormals[i].z;
            }
            vertex.Normal = vector;
            if (mesh->mTextureCoords[0]) {
                glm::vec2 vec;
                vec.x = mesh->mTextureCoords[0][i].x;
                vec.y = mesh->mTextureCoords[0][i].y;
                vertex.TexCoords = vec;
                // tangent
                vector.x = mesh->mTangents[i].x;
                vector.y = mesh->mTangents[i].y;
                vector.z = mesh->mTangents[i].z;
                vertex.Tangent = vector;
                // bitangent
                vector.x = mesh->mBitangents[i].x;
                vector.y = mesh->mBitangents[i].y;
                vector.z = mesh->mBitangents[i].z;
                vertex.Bitangent = vector;
            }
            else {
                vertex.TexCoords = glm::vec2(0.0f, 0.0f);
            }
            vertices.push_back(vertex);
        }
        // 网格下有众多面,面的绘制索引存储起来
        for (unsigned int i = 0; i < mesh->mNumFaces; i++) {
            aiFace face = mesh->mFaces[i];
            for (unsigned int j = 0; j < face.mNumIndices; j++) {
                indices.push_back(face.mIndices[j]);
            }
        }
        aiMaterial* material = scene->mMaterials[mesh->mMaterialIndex];
        // 1.漫反射贴图
        vector<Texture> diffuseMaps = loadMaterialTextures(material, aiTextureType_DIFFUSE, "texture_diffuse");
        textures.insert(textures.end(), diffuseMaps.begin(), diffuseMaps.end());
        // 2.镜面光贴图
        vector<Texture> specularMaps = loadMaterialTextures(material, aiTextureType_SPECULAR, "texture_specular");
        textures.insert(textures.end(), specularMaps.begin(), specularMaps.end());
        // 3.法线贴图
        vector<Texture> normalMaps = loadMaterialTextures(material, aiTextureType_HEIGHT, "texture_normal");
        textures.insert(textures.end(), normalMaps.begin(), normalMaps.end());
        // 4.高度图
        vector<Texture> heightMaps = loadMaterialTextures(material, aiTextureType_AMBIENT, "texture_height");
        textures.insert(textures.end(), heightMaps.begin(), heightMaps.end());

        return Mesh(vertices, indices, textures);
    }
    /// <summary>
    /// 处理网格的辅助方法:加载一个网格下对应的类型贴图
    /// </summary>
    /// <param name="mat">场景下网格对应的材质</param>
    /// <param name="type">材质类型</param>
    /// <param name="typeName">自定义格式名</param>
    /// <returns>返回这个网格下,对应材质类型的材质</returns>
    vector<Texture> loadMaterialTextures(aiMaterial* mat, aiTextureType type, string typeName) {
        vector<Texture> textures;
        for (unsigned int i = 0; i < mat->GetTextureCount(type); i++) {
            aiString str;
            mat->GetTexture(type, i, &str);
            bool skip = false;
            for (unsigned int j = 0; j < textures_loaded.size(); j++) {
                // 加载过
                if (std::strcmp(textures_loaded[j].path.data(), str.C_Str()) == 0) {
                    textures.push_back(textures_loaded[i]);// 放在后面
                    skip = true;
                    break;
                }
            }
            if (!skip) {
                Texture texture;
                texture.id = TextureFromFile(str.C_Str(), this->directory);
                texture.type = typeName;
                texture.path = str.C_Str();
                textures.push_back(texture);        // 未知也要增加
                textures_loaded.push_back(texture);// 添加到已知
            }
        }
        return textures;
    }
};
cpp
#include <glad/glad.h>
#include <GLFW/glfw3.h>
#include <stb_image.h>

#include <glm/glm.hpp>
#include <glm/gtc/matrix_transform.hpp>
#include <glm/gtc/type_ptr.hpp>

#include "Core/Shader/Shader.h"
#include "Core/Camera/Camera.h"
#include "Core/LoadModel/Model.h"

#include <iostream>
#include "MyFileSystem.h"

void framebuffer_size_callback(GLFWwindow* window, int width, int height);
void mouse_callback(GLFWwindow* window, double xpos, double ypos);
void scroll_callback(GLFWwindow* window, double xoffset, double yoffset);
void processInput(GLFWwindow* window);
unsigned int loadTexture(const char* path);

// settings
const unsigned int SCR_WIDTH = 1920;
const unsigned int SCR_HEIGHT = 1080;

// camera
Camera camera(glm::vec3(0.0f, 0.0f, 3.0f));
float lastX = SCR_WIDTH / 2.0f;
float lastY = SCR_HEIGHT / 2.0f;
bool firstMouse = true;

// timing
float deltaTime = 0.0f;
float lastFrame = 0.0f;
// lighting
glm::vec3 lightPos(1.2f, 1.0f, 2.0f);

int main()
{
    // glfw: initialize and configure
    // ------------------------------
    glfwInit();
    glfwWindowHint(GLFW_CONTEXT_VERSION_MAJOR, 3);
    glfwWindowHint(GLFW_CONTEXT_VERSION_MINOR, 3);
    glfwWindowHint(GLFW_OPENGL_PROFILE, GLFW_OPENGL_CORE_PROFILE);

#ifdef __APPLE__
    glfwWindowHint(GLFW_OPENGL_FORWARD_COMPAT, GL_TRUE);
#endif

    // glfw window creation
    // --------------------
    GLFWwindow* window = glfwCreateWindow(SCR_WIDTH, SCR_HEIGHT, "LearnOpenGL", NULL, NULL);
    if (window == NULL)
    {
        std::cout << "Failed to create GLFW window" << std::endl;
        glfwTerminate();
        return -1;
    }
    glfwMakeContextCurrent(window);
    glfwSetFramebufferSizeCallback(window, framebuffer_size_callback);
    glfwSetCursorPosCallback(window, mouse_callback);
    glfwSetScrollCallback(window, scroll_callback);

    // tell GLFW to capture our mouse
    glfwSetInputMode(window, GLFW_CURSOR, GLFW_CURSOR_DISABLED);

    // glad: load all OpenGL function pointers
    // ---------------------------------------
    if (!gladLoadGLLoader((GLADloadproc)glfwGetProcAddress))
    {
        std::cout << "Failed to initialize GLAD" << std::endl;
        return -1;
    }

    // configure global opengl state
    // -----------------------------
    glEnable(GL_DEPTH_TEST);

    // build and compile our shader zprogram
    // ------------------------------------
    //Shader lightingShader("1.colors.vs", "1.colors.fs");
    // 物体的光照shader
    Shader ourShader("assest/shader/3模型/3.1.模型加载.vs", "assest/shader/3模型/3.1.模型加载.fs");

    // 加载模型
    Model ourModel(FileSystem::getPath("assest/model/nanosuit/nanosuit.obj"));

    // render loop
    // -----------
    while (!glfwWindowShouldClose(window))
    {
        // per-frame time logic
        // --------------------
        float currentFrame = static_cast<float>(glfwGetTime());
        deltaTime = currentFrame - lastFrame;
        lastFrame = currentFrame;

        // input
        // -----
        processInput(window);

        // render
        // ------
        glClearColor(0.1f, 0.1f, 0.1f, 1.0f);
        glClear(GL_COLOR_BUFFER_BIT | GL_DEPTH_BUFFER_BIT);

        // be sure to activate shader when setting uniforms/drawing objects
        ourShader.use();

        // view/projection transformations
        glm::mat4 projection = glm::perspective(glm::radians(camera.Zoom), (float)SCR_WIDTH / (float)SCR_HEIGHT, 0.1f, 100.0f);
        glm::mat4 view = camera.GetViewMatrix();
        ourShader.setMat4("projection", projection);
        ourShader.setMat4("view", view);

        // 渲染这个模型
        glm::mat4 model = glm::mat4(1.0f);
        model = glm::translate(model, glm::vec3(0.0f, 0.0f, 0.0f));
        model = glm::scale(model, glm::vec3(1.0f, 1.0f, 1.0f));
        ourShader.setMat4("model", model);
        ourModel.Draw(ourShader);

        // glfw: swap buffers and poll IO events (keys pressed/released, mouse moved etc.)
        // -------------------------------------------------------------------------------
        glfwSwapBuffers(window);
        glfwPollEvents();
    }
    // glfw: terminate, clearing all previously allocated GLFW resources.
    // ------------------------------------------------------------------
    glfwTerminate();
    return 0;
}
....
glsl
#version 330 core layout (location = 0) in vec3 aPos; layout (location = 1) in vec3 aNormal; layout (location = 2) in vec2 aTexCoords; out vec2 TexCoords; uniform mat4 model; uniform mat4 view; uniform mat4 projection; void main() { TexCoords = aTexCoords; gl_Position = projection * view * model * vec4(aPos, 1.0); }#version 330 core out vec4 FragColor; in vec2 TexCoords; uniform sampler2D texture_diffuse1; void main(){ FragColor = texture(texture_diffuse1, TexCoords); } -
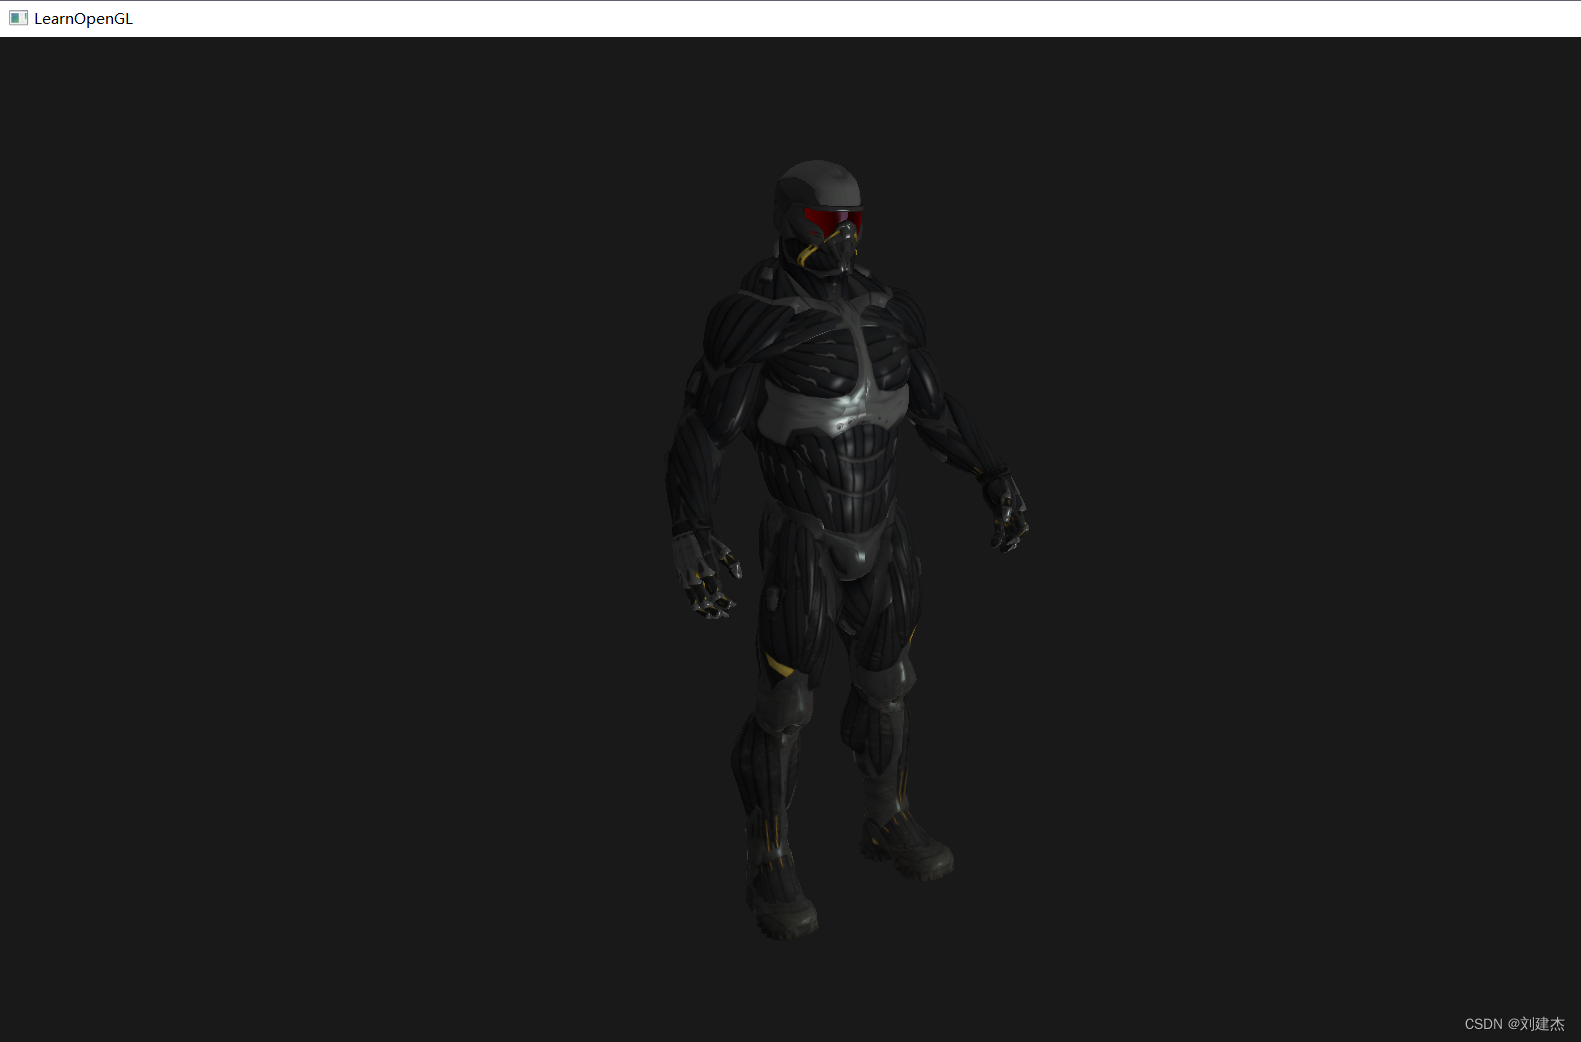
效果

例子2:添加点光源
-
代码
#version 330 core layout (location = 0) in vec3 aPos; layout (location = 1) in vec3 aNormal; layout (location = 2) in vec2 aTexCoords; out vec3 FragPos; out vec3 Normal; out vec2 TexCoords; uniform mat4 model; uniform mat4 view; uniform mat4 projection; void main() { gl_Position = projection * view * model * vec4(aPos, 1.0); FragPos = vec3(model * vec4(aPos, 1.0)); Normal = mat3(transpose(inverse(model))) * aNormal; TexCoords = aTexCoords; }#version 330 core out vec4 FragColor; in vec3 FragPos; in vec3 Normal; in vec2 TexCoords;// 纹理坐标 uniform vec3 viewPos; uniform sampler2D texture_diffuse1;// 纹理单元 uniform sampler2D texture_specular1;// 纹理单元 // 点光源 struct PointLight { vec3 position; vec3 ambient; vec3 diffuse; vec3 specular; float constant; // 常数 float linear; // 一次项 float quadratic;// 二次项 }; #define NR_POINT_LIGHTS 2 uniform PointLight pointLights[NR_POINT_LIGHTS]; // 计算点光源影响当前片段的颜色 vec3 CalcPointLight(PointLight light, vec3 normal, vec3 fragPos, vec3 viewDir){ vec3 lightDir = normalize(light.position - fragPos); // 漫反射光照分量 float diff = max(dot(normal, lightDir), 0.0); // 镜面光光照分量 vec3 reflectDir = reflect(-lightDir, normal); float spec = pow(max(dot(viewDir, reflectDir), 0.0), 32); // 衰减 float distance = length(light.position - fragPos); float attenuation = 1.0 / (light.constant + light.linear * distance + light.quadratic * distance * distance); // 合并结果 vec3 ambient = light.ambient * vec3(texture(texture_diffuse1, TexCoords)); vec3 diffuse = light.diffuse * diff * vec3(texture(texture_diffuse1, TexCoords)); vec3 specular = light.specular * spec * vec3(texture(texture_specular1, TexCoords)); ambient *= attenuation; diffuse *= attenuation; specular *= attenuation; return (ambient + diffuse + specular); } void main(){ // 属性 vec3 norm = normalize(Normal); vec3 viewDir = normalize(viewPos - FragPos); vec3 result; // 点光源 for(int i = 0; i < NR_POINT_LIGHTS; i++){ result += CalcPointLight(pointLights[i], norm, FragPos, viewDir); } //vec4 diffuse = texture(texture_diffuse1, TexCoords); //vec4 specular = texture(texture_specular1, TexCoords); FragColor = vec4(result, 1.0); }// 点光源 ourShader.use(); ourShader.setVec3("pointLights[0].position", pointLightPositions[0]); ourShader.setVec3("pointLights[0].ambient", 0.4f, 0.4f, 0.4f); ourShader.setVec3("pointLights[0].diffuse", 0.8f, 0.8f, 0.8f); ourShader.setVec3("pointLights[0].specular", 1.0f, 1.0f, 1.0f); ourShader.setFloat("pointLights[0].constant", 1.0f); ourShader.setFloat("pointLights[0].linear", 0.09f); ourShader.setFloat("pointLights[0].quadratic", 0.032f); ourShader.setVec3("pointLights[1].position", pointLightPositions[1]); ourShader.setVec3("pointLights[1].ambient", 0.4f, 0.4f, 0.4f); ourShader.setVec3("pointLights[1].diffuse", 0.8f, 0.8f, 0.8f); ourShader.setVec3("pointLights[1].specular", 1.0f, 1.0f, 1.0f); ourShader.setFloat("pointLights[1].constant", 1.0f); ourShader.setFloat("pointLights[1].linear", 0.09f); ourShader.setFloat("pointLights[1].quadratic", 0.032f); while (!glfwWindowShouldClose(window)) { ourShader.use(); ourShader.setVec3("viewPos", camera.Position); // view/projection transformations glm::mat4 projection = glm::perspective(glm::radians(camera.Zoom), (float)SCR_WIDTH / (float)SCR_HEIGHT, 0.1f, 100.0f); glm::mat4 view = camera.GetViewMatrix(); ourShader.setMat4("projection", projection); ourShader.setMat4("view", view); // 渲染这个模型 glm::mat4 model = glm::mat4(1.0f); model = glm::translate(model, glm::vec3(0.0f, 0.0f, 0.0f)); model = glm::scale(model, glm::vec3(0.1f, 0.1f, 0.1f)); ourShader.setMat4("model", model); ourModel.Draw(ourShader); ...... // 上一节自定义mesh写的函数 void Draw(Shader& shader) { // 绑定适合的纹理 unsigned int diffuseNr = 1; unsigned int specularNr = 1; unsigned int normalNr = 1; unsigned int heightNr = 1; for (unsigned int i = 0; i < textures.size(); i++) { glActiveTexture(GL_TEXTURE0 + i); string number; string name = textures[i].type; if (name == "texture_diffuse") { number = std::to_string(diffuseNr++); }else if (name == "texture_specular") { number = std::to_string(specularNr++); }else if (name == "texture_normal") { number = std::to_string(normalNr++); }else if (name == "texture_height") { number = std::to_string(heightNr++); } // 给shader的采样器设置纹理单元 glUniform1i(glGetUniformLocation(shader.ID, (name + number).c_str()), i); glBindTexture(GL_TEXTURE_2D, textures[i].id); } // 绘画 glBindVertexArray(VAO); glDrawElements(GL_TRIANGLES, static_cast<unsigned int>(indices.size()), GL_UNSIGNED_INT, 0); // 绘画完设为默认值 glActiveTexture(GL_TEXTURE0); } -
效果