文章目录
- 1. 获取用户登录信息
- 1. 用户信息共享的ThreadLocal类 UserInfoShareHolder
- 2. 写一个拦截器 UserInfoInterceptor
- 3. 配置拦截器 CommonWebMvcAutoConfiguration
- 2. 源码分析
- 1. 认证用户通过access_token访问受限资源
- 2. 进入过滤器 OAuth2AuthenticationProcessingFilter#doFilter方法
- 3. 进入拦截器 UserInfoInterceptor#preHandle方法
- 4. 进入HttpServletRequest#getUserPrincipal方法
- 5.进入SecurityContextHolderAwareRequestWrapper#getUserPrincipal方法
- 6. 进入控制器 HelloController#hello方法
- 3. 源码分析
- 1. 未认证用户获取access_token
- 2. 进入过滤器 OAuth2AuthenticationProcessingFilter#doFilter方法
- 3. 进入拦截器 UserInfoInterceptor#preHandle 方法
- 4. 进入 HttpServlet3RequestFactory#authenticate方
- 4. 源码分析
上一讲已经我们分析了/oauth/token认证流程,明白了整个认证过程核心做了哪些事情,这一讲看一下如何配置拦截器判断用户是否登录并获取用户登录信息,同时将获取的登录信息存储到本地线程中,主要分为两点展开说明:
- 首先,获取用户登录信息并存储到本地线程功能实现;
- 其次,debug断点分析整个源码流程;
1. 获取用户登录信息
1. 用户信息共享的ThreadLocal类 UserInfoShareHolder
/**
 * 用户信息共享的ThreadLocal类
 */
public class UserInfoShareHolder {

    private static final ThreadLocal<UserInfo> USER_INFO_THREAD_LOCAL = new TransmittableThreadLocal<>();

    /**
     * 存储用户信息
     */
    public static void setUserInfo(UserInfo userInfo) {
        USER_INFO_THREAD_LOCAL.set(userInfo);
    }

    /**
     * 获取用户相关信息
     */
    public static UserInfo getUserInfo() {
        return USER_INFO_THREAD_LOCAL.get();
    }

    /**
     * 清除ThreadLocal信息
     */
    public static void remove() {
        USER_INFO_THREAD_LOCAL.remove();
    }
}
2. 写一个拦截器 UserInfoInterceptor
/**
 * 拦截器:用户信息本地线程存储
 */
public class UserInfoInterceptor extends HandlerInterceptorAdapter {
    /**
     * 拦截所有请求,在Controller层方法之前调用
     */
    @Override
    public boolean preHandle(HttpServletRequest request, HttpServletResponse response, Object handler) throws Exception {
        // 判断用户是否被认证,如果没有认证不放行
        boolean isAuthenticated = request.authenticate(response);
        if (!isAuthenticated) {
            return false;
        }
        // 存储用户信息到本地线程
        Principal userPrincipal = request.getUserPrincipal();
        OAuth2Authentication oAuth2Authentication = (OAuth2Authentication) userPrincipal;
        AuthUser ngsocUser = (AuthUser) oAuth2Authentication.getUserAuthentication().getPrincipal();
        UserInfo userInfo = ngsocUser.getUserInfo();
        UserInfoShareHolder.setUserInfo(userInfo);
        // 放行,继续执行Controller层的方法
        return true;
    }

    @Override
    public void afterCompletion(HttpServletRequest request, HttpServletResponse response, Object handler, Exception ex) throws Exception {
        UserInfoShareHolder.remove();
        super.afterCompletion(request, response, handler, ex);
    }
}
3. 配置拦截器 CommonWebMvcAutoConfiguration
/**
 * 配置拦截器
 */
@Configuration
@EnableWebMvc
public class CommonWebMvcAutoConfiguration implements WebMvcConfigurer {

    @Bean
    public UserInfoInterceptor userInfoInterceptor() {
        return new UserInfoInterceptor();
    }

    @Override
    public void addInterceptors(@NonNull InterceptorRegistry registry) {
        // 注意:这里的excludePath不需要自己再加上contextPath, spring会自动加
        // 添加存储用户信息的拦截器,配置拦截请求路径
        // 拦截器会拦截所有请求,需要配置放行的请求
        registry.addInterceptor(userInfoInterceptor())
                // 放行的请求
                .excludePathPatterns("/api/v1/login");
    }
}
2. 源码分析
1. 认证用户通过access_token访问受限资源
@RestController
@RequestMapping("/api/v1")
public class HelloController {

    @GetMapping("/hello")
    public String hello(HttpServletRequest request){
        String username = UserInfoShareHolder.getUserInfo().getUsername();
        return username;
    }
}

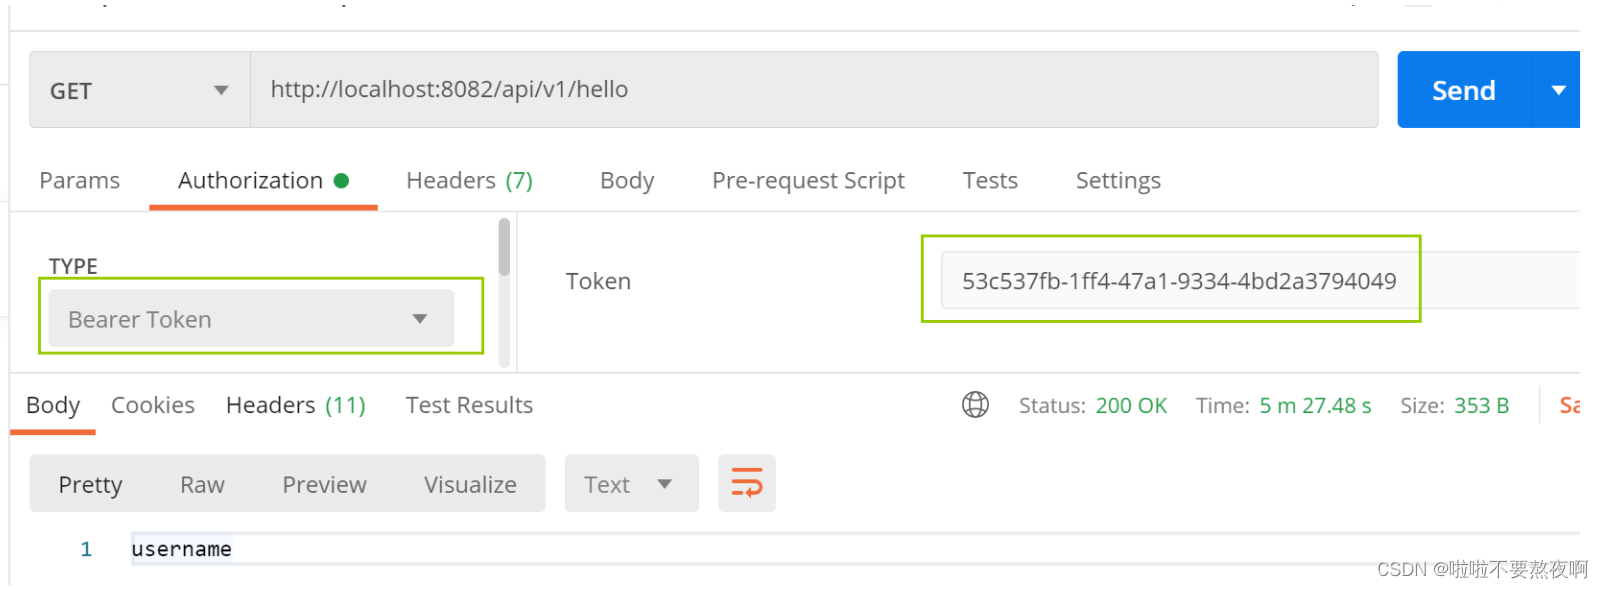
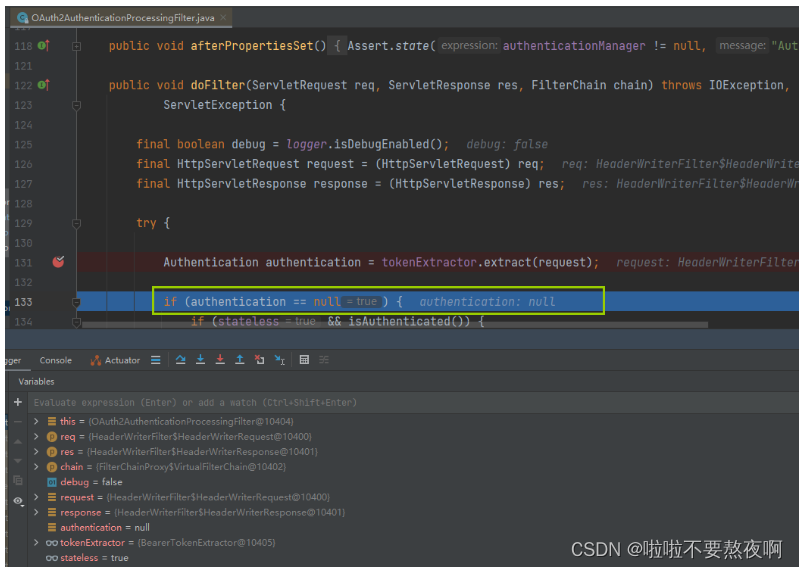
2. 进入过滤器 OAuth2AuthenticationProcessingFilter#doFilter方法
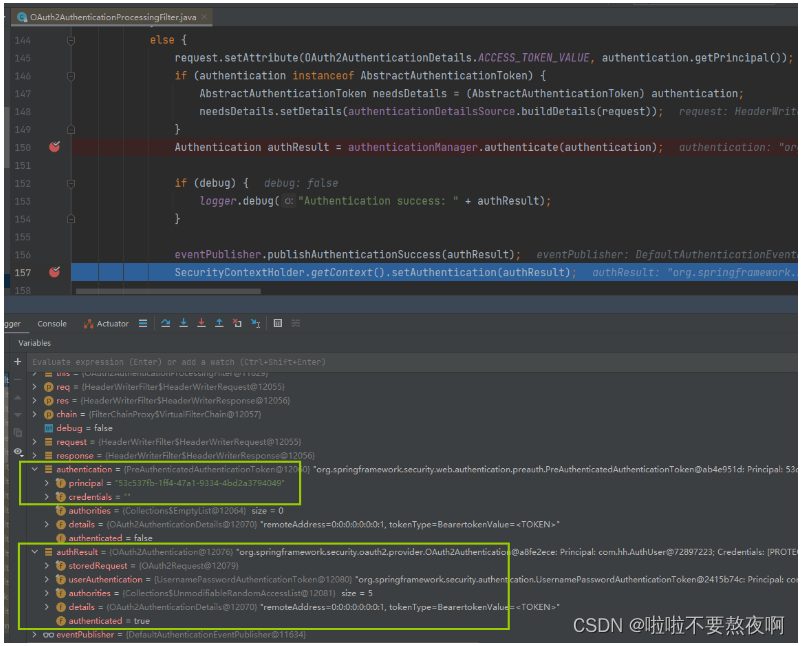
当一个认证用户访问系统的受限资源时,请求首先被OAuth2AuthenticationProcessingFilter过滤器拦截,在该过滤器的doFilter方法中主要做了以下事情:
- 从请求中提取 token 并获取待认证的Authentication 对象:
Authentication authentication = tokenExtractor.extract(request); request.setAttribute(OAuth2AuthenticationDetails.ACCESS_TOKEN_VALUE, authentication.getPrincipal());- 通过待认证的Authentication对象倒TokenStore中获取完成的Authentication对象:
Authentication authResult = authenticationManager.authenticate(authentication); - 发布认证成功的事件通知:
eventPublisher.publishAuthenticationSuccess(authResult); SecurityContextHolder.getContext().setAuthentication(authResult);- 进行过滤器链中的下一个过滤器;
所以在请求一开始就把完成的认证对象的放在SecurityContextHolder.getContext()中,我们就可以从SecurityContextHolder.getContext()中获取Authentication对象了。
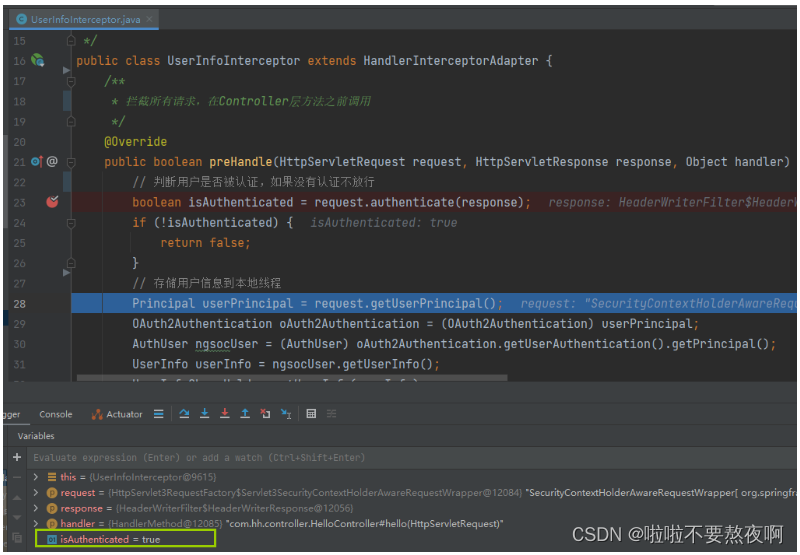
3. 进入拦截器 UserInfoInterceptor#preHandle方法
经过SpringSecurity的一系列过滤器链后,会进入UserInfoInterceptor#preHandle方法
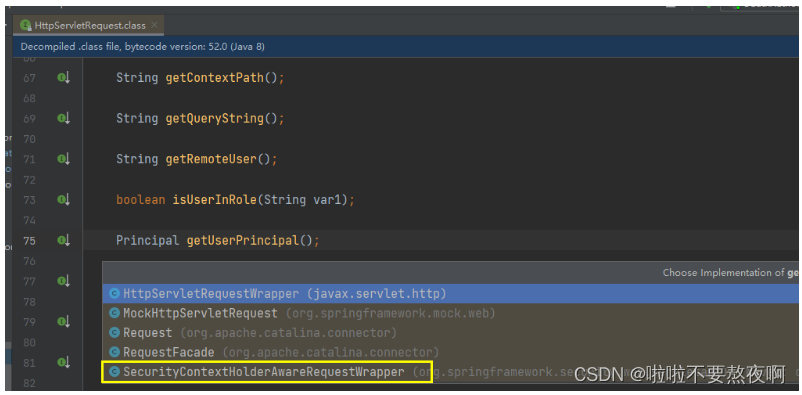
4. 进入HttpServletRequest#getUserPrincipal方法
public interface HttpServletRequest extends ServletRequest {
    Principal getUserPrincipal();
}
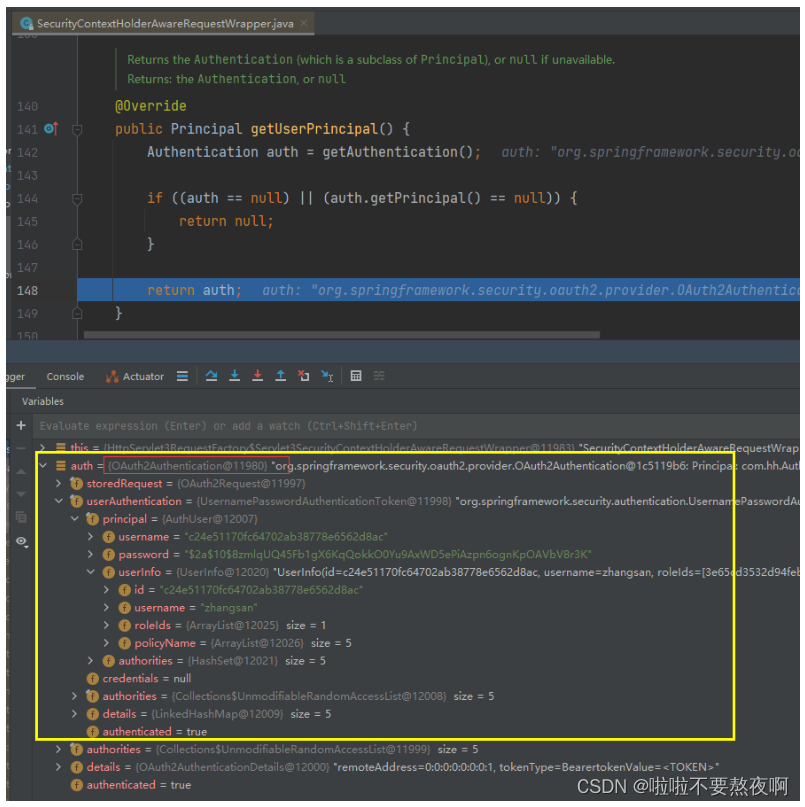
5.进入SecurityContextHolderAwareRequestWrapper#getUserPrincipal方法
public class SecurityContextHolderAwareRequestWrapper extends HttpServletRequestWrapper {

	private Authentication getAuthentication() {
        //从SecurityContextHolder.getContext()中Authentication对象
		Authentication auth = SecurityContextHolder.getContext().getAuthentication();
		if (!trustResolver.isAnonymous(auth)) {
			return auth;
		}
		return null;
	}

	@Override
	public Principal getUserPrincipal() {
		Authentication auth = getAuthentication();
		if ((auth == null) || (auth.getPrincipal() == null)) {
			return null;
		}
		return auth;
	}
}
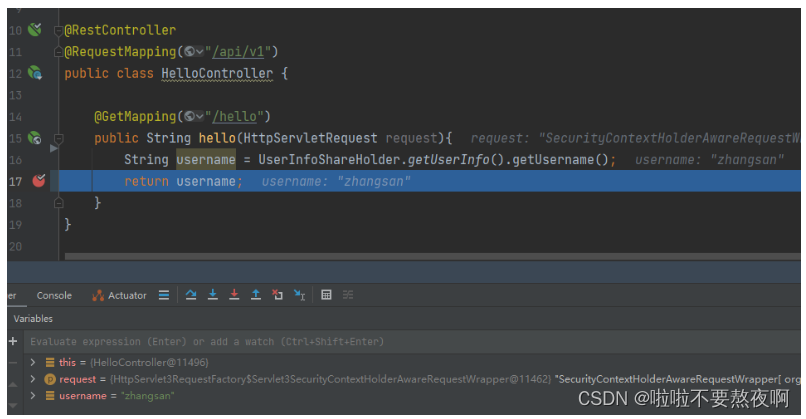
6. 进入控制器 HelloController#hello方法
@RestController
@RequestMapping("/api/v1")
public class HelloController {

    @GetMapping("/hello")
    public String hello(HttpServletRequest request){
        String username = UserInfoShareHolder.getUserInfo().getUsername();
        return username;
    }
}
3. 源码分析
假如我们在配置拦截器时,拦截所有请求,不放行/api/v1/login请求会如何?
/**
 * 配置拦截器
 */
@Configuration
@EnableWebMvc
public class CommonWebMvcAutoConfiguration implements WebMvcConfigurer {

    @Bean
    public UserInfoInterceptor userInfoInterceptor() {
        return new UserInfoInterceptor();
    }

    @Override
    public void addInterceptors(@NonNull InterceptorRegistry registry) {
        // 注意:这里的excludePath不需要自己再加上contextPath, spring会自动加
        // 拦截器会拦截所有请求,需要配置放行的请求
        registry.addInterceptor(userInfoInterceptor());
    }
}
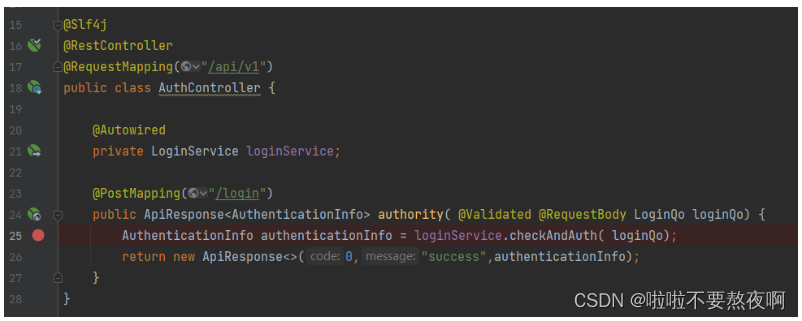
1. 未认证用户获取access_token
注意:资源服务器配置类 ResourceServerAutoConfiguration 中已经配置了该请求接口不需要认证就能访问
@Configuration
@EnableResourceServer
@EnableGlobalMethodSecurity(prePostEnabled = true)
public class ResourceServerAutoConfiguration extends ResourceServerConfigurerAdapter {
    @Autowired
    private TokenStore tokenStore;

    @Value("${spring.application.name}")
    private String appName;

    @Override
    public void configure(ResourceServerSecurityConfigurer resources) {
        resources.resourceId(appName);
        resources.tokenStore(tokenStore);
    }
    @Override
    public void configure(HttpSecurity http) throws Exception {
        http.authorizeRequests()
            // 配置不需要认证就可以访问的请求
            .antMatchers("/api/v1/login").permitAll()
            // 其他请求必须认证才能访问
            .anyRequest().authenticated()
            .and()
            .csrf().disable();
    }
}
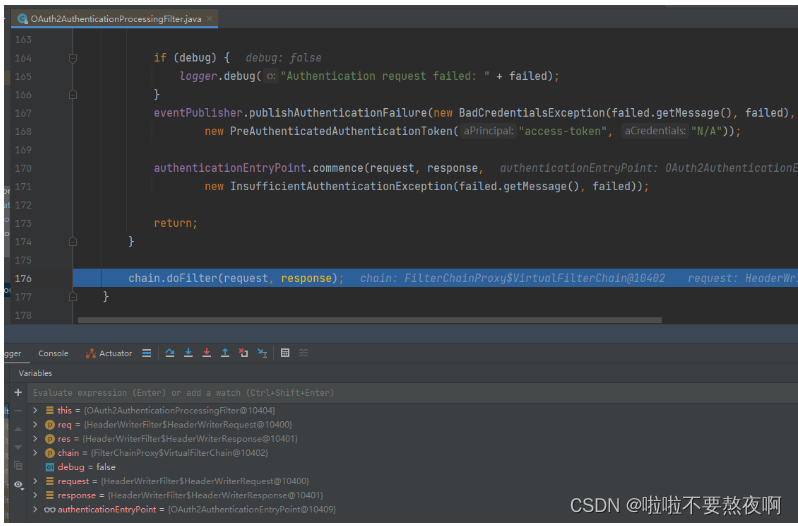
2. 进入过滤器 OAuth2AuthenticationProcessingFilter#doFilter方法
3. 进入拦截器 UserInfoInterceptor#preHandle 方法
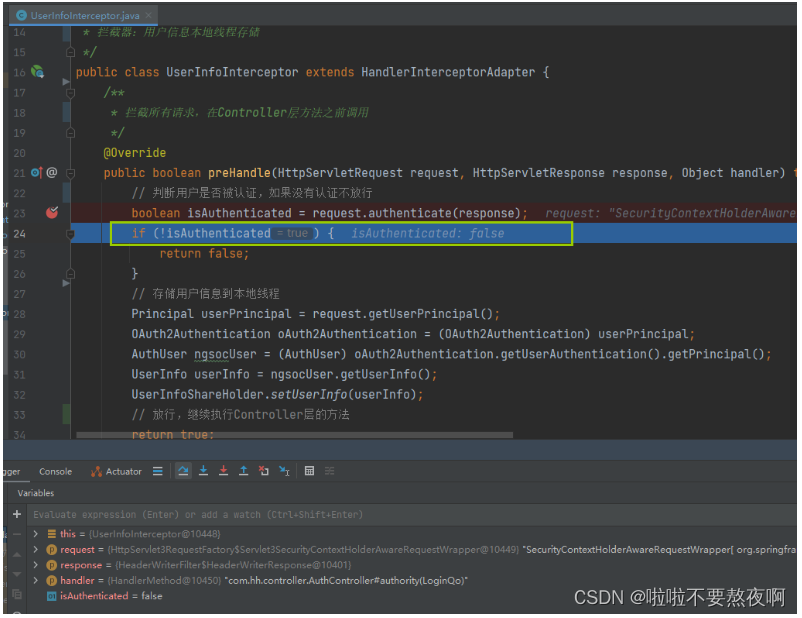
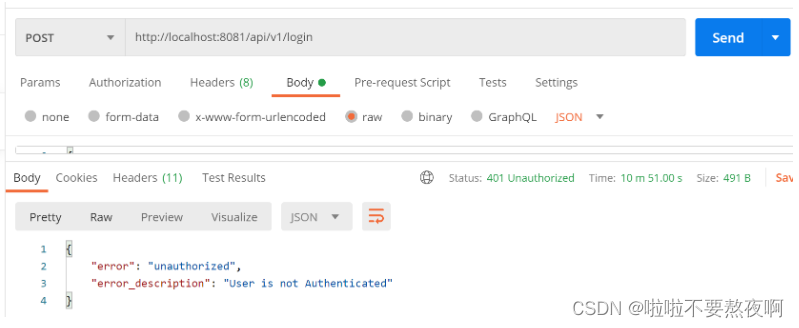
结论:资源服务器配置类 ResourceServerAutoConfiguration 中已经配置了该请求接口不需要认证就能访问,但是拦截器UserInfoInterceptor#preHandle 方法会在AuthController#authority方法执行之前执行,在该拦截器中从请求中获取Authentication对象判断用户是否认证,如果用户未认证则不放行,因此就不会执行AuthController#authority方法,所以拦截器必须配置不拦截的请求路径;
4. 进入 HttpServlet3RequestFactory#authenticate方
final class HttpServlet3RequestFactory implements HttpServletRequestFactory {
      @Override
      public boolean authenticate(HttpServletResponse response)
throws IOException, ServletException {
         AuthenticationEntryPoint entryPoint
             		= HttpServlet3RequestFactory.this.authenticationEntryPoint;
         if (entryPoint == null) {
            return super.authenticate(response);
         }
         if (isAuthenticated()) {
            return true;
         }
         // 异常处理
         entryPoint.commence(this, response,
               new AuthenticationCredentialsNotFoundException( "User is not Authenticated"));
         return false;
      }
   }
}
4. 源码分析
假如我们在配置拦截器时放行了/api/v1/login请求,但是资源服务器中没有放行/api/v1/login请求的认证会如何?
@Configuration
@EnableResourceServer
@EnableGlobalMethodSecurity(prePostEnabled = true)
public class ResourceServerAutoConfiguration extends ResourceServerConfigurerAdapter {
    @Autowired
    private TokenStore tokenStore;

    @Value("${spring.application.name}")
    private String appName;

    @Override
    public void configure(ResourceServerSecurityConfigurer resources) {
        resources.resourceId(appName);
        resources.tokenStore(tokenStore);
    }
    @Override
    public void configure(HttpSecurity http) throws Exception {
        http.authorizeRequests()
            // 所有请求必须认证才能访问
            .anyRequest().authenticated()
            .and()
            .csrf().disable();
    }
}
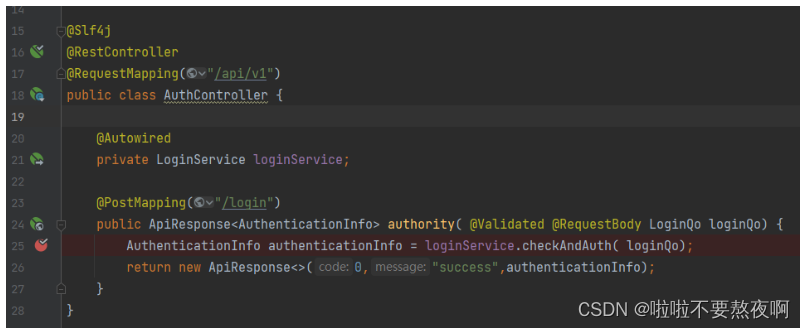
经过debug发现,请求首先会进入过滤器OAuth2AuthenticationProcessingFilter#doFilter方法,然后判断用户未登录,但是最终不会进入AuthController#authority方法。
