Flutter Scrollable 中ViewPort滚动原理

news2024/9/16 14:33:11

关于Flutter Sliver组件内容可以参考下面这位博主博客,写的已经非常好了,这里就不再赘述。

38、Flutter之 可滚动组件简介_flutter 可滑动_风雨「83」的博客-CSDN博客

通过阅读上面的博客,我们已经知道了Scrollable和Viewport基础概念,接下来跟随作者一起,结合Flutter源码分析下ViewPort是如何滚动。

先看一个简单的demo

MaterialApp(
      home: Scaffold(
        body: Center(
            child: Container(
                height: 300,
                child: Scrollable(
                  viewportBuilder: (BuildContext context, ViewportOffset position) {
                    return Viewport(
                      offset: position,
                      slivers: [
                        SliverToBoxAdapter(
                          child: Container(
                            width: 100,
                            height: 100,
                            color: Colors.lightBlue,
                          ),
                        ),
                        SliverToBoxAdapter(
                          child: Container(
                            width: 100,
                            height: 100,
                            color: Colors.pink,
                          ),
                        ),
                        SliverToBoxAdapter(
                          child: Container(
                            width: 100,
                            height: 100,
                            color: Colors.green,
                          ),
                        ),
                        SliverToBoxAdapter(
                          child: Container(
                            width: 100,
                            height: 100,
                            color: Colors.black,
                          ),
                        ),
                        SliverToBoxAdapter(
                          child: Container(
                            width: 100,
                            height: 100,
                            color: Colors.red,
                          ),
                        )
                      ],
                    );
                  },
                ))),
      ),
    )

就是一个简单的滚动列表,可以上下滚动。

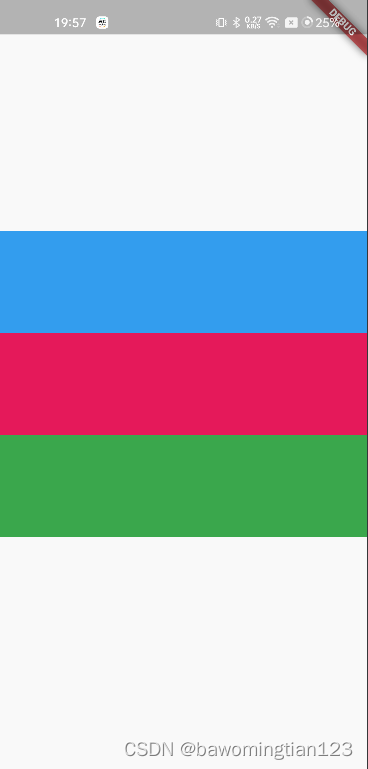
 上面是一个简单的滚动列表,当手指触摸屏幕时,内容随之发上移动(滚动)。

下面我们从Flutter刷新机制来梳理下列表里面的组件是在什么时机,由谁触发重新布局的(组件的位移就是重新布局的体现)。

class Viewport extends MultiChildRenderObjectWidget {
  
  ......

  @override
  RenderViewport createRenderObject(BuildContext context) {
    return RenderViewport(
      axisDirection: axisDirection,
      crossAxisDirection: crossAxisDirection ?? Viewport.getDefaultCrossAxisDirection(context, axisDirection),
      anchor: anchor,
      offset: offset,
      cacheExtent: cacheExtent,
      cacheExtentStyle: cacheExtentStyle,
      clipBehavior: clipBehavior,
    );
  }

  @override
  void updateRenderObject(BuildContext context, RenderViewport renderObject) {
    renderObject
      ..axisDirection = axisDirection
      ..crossAxisDirection = crossAxisDirection ?? Viewport.getDefaultCrossAxisDirection(context, axisDirection)
      ..anchor = anchor
      ..offset = offset
      ..cacheExtent = cacheExtent
      ..cacheExtentStyle = cacheExtentStyle
      ..clipBehavior = clipBehavior;
  }

Viewport 继承MultiChildRenderObjectWidget,与之对应的RenderObject是RenderViewport,相关布局逻辑肯定是在RenderViewport 内部实现。

class RenderViewport extends RenderViewportBase<SliverPhysicalContainerParentData> {
  
  RenderViewport({
    super.axisDirection,
    required super.crossAxisDirection,
    required super.offset,
    double anchor = 0.0,
    List<RenderSliver>? children,
    RenderSliver? center,
    super.cacheExtent,
    super.cacheExtentStyle,
    super.clipBehavior,
  })

这里我们重点关注offset这个参数(其他参数不是本篇内容考虑的范围),这个参数在刚刚Viewport 里面赋值,这个参数是重点,后面会用到。

我们知道RenderViewport管理一个List<RenderSliver> 列表,列表内容滚动就是该父组件对子组件列表重新布局的结果,我们直接找到其performLayou方法

  @override
  void performLayout() {
    ......
    int count = 0;
    do {
      assert(offset.pixels != null);
      correction = _attemptLayout(mainAxisExtent, crossAxisExtent, offset.pixels + centerOffsetAdjustment);
      if (correction != 0.0) {
        offset.correctBy(correction);
      } else {
        if (offset.applyContentDimensions(
              math.min(0.0, _minScrollExtent + mainAxisExtent * anchor),
              math.max(0.0, _maxScrollExtent - mainAxisExtent * (1.0 - anchor)),
           )) {
          break;
        }
      }
      count += 1;
    } while (count < _maxLayoutCycles);
    ......
    }());
  }

performLayout方法中 

correction = _attemptLayout(mainAxisExtent, crossAxisExtent, offset.pixels + centerOffsetAdjustment);

是我们关注的重点。

  double _attemptLayout(double mainAxisExtent, double crossAxisExtent, double correctedOffset) {
    ......
    // positive scroll offsets
    return layoutChildSequence(
      child: center,
      scrollOffset: math.max(0.0, -centerOffset),
      overlap: leadingNegativeChild == null ? math.min(0.0, -centerOffset) : 0.0,
      layoutOffset: centerOffset >= mainAxisExtent ? centerOffset: reverseDirectionRemainingPaintExtent,
      remainingPaintExtent: forwardDirectionRemainingPaintExtent,
      mainAxisExtent: mainAxisExtent,
      crossAxisExtent: crossAxisExtent,
      growthDirection: GrowthDirection.forward,
      advance: childAfter,
      remainingCacheExtent: forwardDirectionRemainingCacheExtent,
      cacheOrigin: clampDouble(centerOffset, -_calculatedCacheExtent!, 0.0),
    );
  }

我们找到了layoutChildSequence方法,从方法名就能知道,这个方法功能就是对子组件列表按照顺序重新布局的。

  @protected
  double layoutChildSequence({
    required RenderSliver? child,
    required double scrollOffset,
    required double overlap,
    required double layoutOffset,
    required double remainingPaintExtent,
    required double mainAxisExtent,
    required double crossAxisExtent,
    required GrowthDirection growthDirection,
    required RenderSliver? Function(RenderSliver child) advance,
    required double remainingCacheExtent,
    required double cacheOrigin,
  }) {
    ......

    while (child != null) {

    ......

      child.layout(SliverConstraints(
        axisDirection: axisDirection,
        growthDirection: growthDirection,
        userScrollDirection: adjustedUserScrollDirection,
        scrollOffset: sliverScrollOffset,
        precedingScrollExtent: precedingScrollExtent,
        overlap: maxPaintOffset - layoutOffset,
        remainingPaintExtent: math.max(0.0, remainingPaintExtent - layoutOffset + initialLayoutOffset),
        crossAxisExtent: crossAxisExtent,
        crossAxisDirection: crossAxisDirection,
        viewportMainAxisExtent: mainAxisExtent,
        remainingCacheExtent: math.max(0.0, remainingCacheExtent + cacheExtentCorrection),
        cacheOrigin: correctedCacheOrigin,
      ), parentUsesSize: true);

    ......

      // move on to the next child
      child = advance(child);
    }

    // we made it without a correction, whee!
    return 0.0;
  }

 这个方法就是在不停循环获取下一个child,直到最后一个需要布局的child组件。

大体流程就是这样的,细心的你一定发现,上面没有说明组件是如何根据手指滑动滚动的,也就是如何触发RenderViewport 执行performLayout方法。

不要急,下面就来说明这一点。

还记得上面提到的offset这个参数吗?重头戏就是它。

  set offset(ViewportOffset value) {
    assert(value != null);
    if (value == _offset) {
      return;
    }
    if (attached) {
      _offset.removeListener(markNeedsLayout);
    }
    _offset = value;
    if (attached) {
      _offset.addListener(markNeedsLayout);
    }
    // We need to go through layout even if the new offset has the same pixels
    // value as the old offset so that we will apply our viewport and content
    // dimensions.
    markNeedsLayout();
  }

当上面我们给RenderViewport 配置offset参数是,offset是一个ChangeNotifer ,可以添加变化监听

abstract class ViewportOffset extends ChangeNotifier {
  /// Default constructor.
  ///
  /// Allows subclasses to construct this object directly.
  ViewportOffset();
......
}

当offset 只有的变量更新后,通知监听它的回调函数markNeedsLayout,这里就回到了Flutter组件渲染大流程里面了。

这个流程下来是不是非常巧妙,希望大家阅读完后,也能写出如此巧妙的架构。

本文来自互联网用户投稿,该文观点仅代表作者本人,不代表本站立场。本站仅提供信息存储空间服务,不拥有所有权,不承担相关法律责任。如若转载,请注明出处:http://www.coloradmin.cn/o/378353.html

如若内容造成侵权/违法违规/事实不符,请联系多彩编程网进行投诉反馈,一经查实,立即删除!

相关文章

【手把手一起学习】(七) Altium Designer 20常用PCB设计规则

1 常用PCB设计规则 PCB规则设计是PCB设计中至关重要的环节&#xff0c;它约束了电气要求、布线方式、器件摆放位置等&#xff0c;为后续的手动布局、布线提供依据。完善的PCB规则设计&#xff0c;可以减少设计中的错误&#xff0c;提高PCB设计效率。 1.1 PCB设计规则管理器 …

Aspect-Based Sentiment Analysis Model with Bi-Guide Attention Network 论文阅读笔记

一、作者 Xie Jun, Wang Yuzhu, Chen Bo, Zhang Zehua, and Liu Qin College of Information and Computer, Taiyuan University of Technology, Jinzhong, Shanxi 二、背景 在应用于方面情感分析的深度神经网络中&#xff0c;序列型神经网络能捕获句子的上下文语义信息&am…

血脂高的全身表现,这几种吃法改善

血脂变化总是不知不觉的&#xff0c;很多人没有明显的不适&#xff0c;但是血脂已经慢慢升高&#xff0c;随之而来的就是各种心血管疾病。好在血脂高还有一些外在表现&#xff0c;出现这些变化&#xff0c;多加注意。经常头晕头痛、睡不好、健忘、手脚发麻、午后犯困、夜晚清醒…

TencentOS 3.1安装MySQL 8.0.32

到官网下载安装包&#xff1a;https://dev.mysql.com/downloads/mysql/ 使用如下命令解包。 tar xf mysql-8.0.32-1.el8.x86_64.rpm-bundle.tar 使用rpm -qa |grep mysql 和rpm -qa |grep mariadb检查是否安装过mysql 如果有&#xff0c;使用下命令移除&#xff1a; rpm -e …

6 集成学习及Python实现

1 主要思想 集成学习: 三个臭裨将, 顶个诸葛亮 Bagging: 数据随机重抽样, 并行构建分类器, 投票&#xff1b;Boosting: 关注被错分的样本, 串行构建分类器, 加权投票。 2 理论 AdaBoost (Adaptive Boosting)示意图1 错误率: εEN\varepsilon \frac{E}{N}εNE​ 其中NNN为…

【halcon】dev_set_part / set_part

前言&#xff1a; dev_set_part / set_part 其实功能是一样的。下面就set_part 进行讲解。 背景 我在写程序的时候需要一个诉求&#xff0c;我找了很多瑕疵&#xff0c;每个瑕疵都有一个位置&#xff0c;这些位置在一个数据的列表&#xff0c;我希望在列表点到瑕疵位置的时…

mysql数据库常用字符串函数

文章目录一、字符串函数详解二、文档下载地址一、字符串函数详解 1、ascii(str) 返回值为字符串str 的最左字符的数值,即取得最左字符的ascii码。假如str为空字符串&#xff0c;则返回值为 0 。假如str 为null&#xff0c;则返回值为 null。 2、bin(n) 返回值为n的二进制值的…

了解Maven的作用

专门用于管理和构建Java的工具&#xff0c;主要功能有如下: 1.提供一套标准化的项目结构 在不同的Java ide上面创建项目结构&#xff0c;比如说IDEA和eclipse这些ide上创建Java项目都有所不同 但是使用Maven创建项目可以使得项目结构标准化&#xff0c;如下图所示就是使用IDE…

LeetCode 700. 二叉搜索树中的搜索

LeetCode 700. 二叉搜索树中的搜索 难度&#xff1a;easy\color{Green}{easy}easy 难度&#xff1a;middle\color{orange}{middle}middle 难度&#xff1a;hard\color{red}{hard}hard 题目描述 给定二叉搜索树&#xff08;BST&#xff09;的根节点 rootrootroot 和一个整数值…

Go defer用法

defer概览 defer是go语言里的一个关键字,在 函数内部使用;defer关键字后面跟一个 函数或匿名函数; defer用法 执行一些资源的收尾工作,如 关闭数据库连接,关闭文件描述符,释放资源等等;结合recover()函数使用,防止函数内部的异常导致整个程序停止;defer在遇到panic后,仍然会…

Javascript的API基本内容(六)

一、正则表达式 1.定义规则 const reg /表达式/ 其中/ /是正则表达式字面量正则表达式也是对象 2.使用正则 test()方法 用来查看正则表达式与指定的字符串是否匹配如果正则表达式与指定的字符串匹配 &#xff0c;返回true&#xff0c;否则false 3.元字符 比如&#xff0…

论文阅读:Self-Supervised Monocular Depth Estimation with Internal Feature Fusion

中文标题&#xff1a;基于内部特征融合的自监督单目深度估计 创新点 参照HR-Net在网络上下采样的过程中充分利用语义信息。设计了一个注意力模块处理跳接。提出了一个扩展的评估策略&#xff0c;其中方法可以使用基准数据中的困难的情况进行进一步测试&#xff0c;以一种自我…

【 PMU】信号生成、采样、分割、估计器应用和误差计算(Matlab代码实现)

&#x1f468;‍&#x1f393;个人主页&#xff1a;研学社的博客&#x1f4a5;&#x1f4a5;&#x1f49e;&#x1f49e;欢迎来到本博客❤️❤️&#x1f4a5;&#x1f4a5;&#x1f3c6;博主优势&#xff1a;&#x1f31e;&#x1f31e;&#x1f31e;博客内容尽量做到思维缜密…

Active Directory管理帮助台

随着组织规模扩大&#xff0c;需要大幅增加Active Directory帮助台指派。随着组织开始在新地点开设办事处&#xff0c;管理员管理所有地点的用户变得极为繁琐。在这样的情况下&#xff0c;帮助台指派需要横跨不同的域以方便多域管理。尝试使用本机AD工具或PowerShell执行帮助台…

HyperLPR3-五分钟搞定: 中文车牌识别光速部署与使用

简介HyperLPR在2023年初已经更新到了v3的版本&#xff0c;该版本与先前的版本一样都是用于识别中文车牌的开源图像算法项目&#xff0c;最新的版本的源码可从github中提取&#xff1a;https://github.com/szad670401/HyperLPR快速安装使用Python平台可以直接使用pip进行安装&am…

(五十二)大白话不断在表中插入数据时,物理存储是如何进行页分裂的?.md

上回我们讲到了数据页的物理存储结构&#xff0c;数据页之间是组成双向链表的&#xff0c;数据页内部的数据行是组成单向链表的&#xff0c;每个数据页内根据主键做了一个页目录 然后一般来说&#xff0c;你没有索引的情况下&#xff0c;所有的数据查询&#xff0c;其实在物理…

Java Map集合体系(HashMap、LinkedHashMap、TreeMap、集合嵌套)

目录Map集合体系一、Map集合的概述二、Map集合体系特点三、Map集合常用API四、Map集合的遍历4.1 Map集合的遍历方式一&#xff1a;键找值4.2 Map集合的遍历方式二&#xff1a;键值对4.3 Map集合的遍历方式三&#xff1a;lambda表达式五、Map集合案例-统计投票人数六、Map集合的…

Vue2.0开发之——ref引用实例-文本框和按钮的按需展示(42)

一 概述 文本框和按钮按需展示功能实现了解this.$nextTick的应用场景updated为啥不行 二 文本框和按钮按需展示功能实现 2.1 布局文件 <template><div class"app-container"><input type"text" v-if"inputVisible" blur"…

ffmpeg多路同时推流

一、ffmpeg常见使用方法1.1利用FFMPEG命令进行文件分割1.2转换格式1.3推流配置方法一&#xff1a;ngnix&#xff08;不推荐&#xff0c;推流不好使&#xff09;方法二&#xff1a;srs&#xff08;强烈推荐&#xff09;1.4查看nginx启动是否成功二、ffmpeg推流——>ngnix单路…

Shell高级——Linux中的文件描述符(本质是数组的下标)

以下内容源于C语言中文网的学习与整理&#xff0c;非原创&#xff0c;如有侵权请告知删除。 前言 Linux中一切接文件&#xff0c;比如 C 源文件、视频文件、Shell脚本、可执行文件等&#xff0c;就连键盘、显示器、鼠标等硬件设备也都是文件。 一个 Linux 进程可以打开成百上…