- windows上 CUDAtoolkit+cudnn的安装
CUDAtoolkit+cudnn的安装
须知
- use command
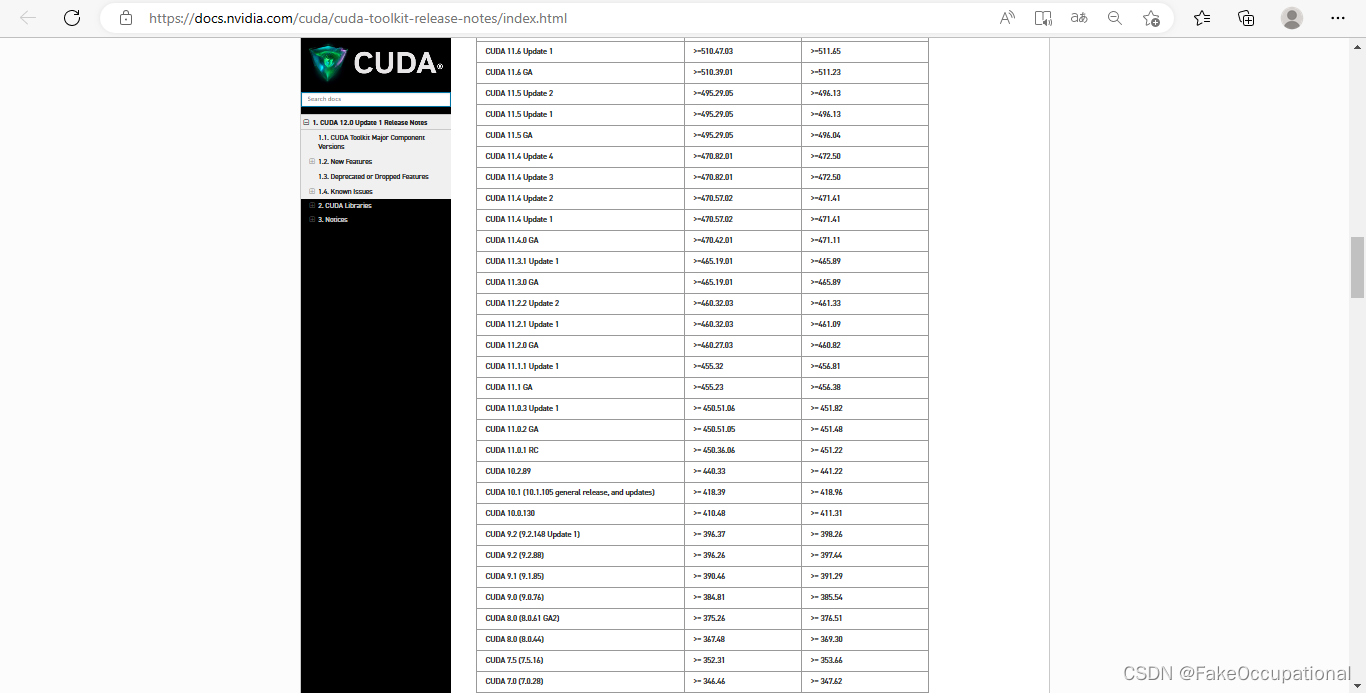
ubuntu-drivers devices查看你的显卡类型和推荐的驱动版本 - 百度 nvidia-driver-*** 支持的 cuda 或 去文档查找驱动(比如450,460)匹配的cuda版本
下载
网盘下载
-
https://www.aliyundrive.com/s/VXfZQfRqf1y
-
cuda11.4版本的网页下载链接
| NAME | DIR |
|---|---|
| CUDA_TOOLKIT | https://musetransfer.com/s/ty5q8bfjm 请点击链接获取《无主题 - cuda_11.4.0_470.42.01_linux.run》, 有效期至3月3日 |
| CUDNN | https://musetransfer.com/s/0wjwsgw9a 请点击链接获取《无主题 - cudnn-linux-x86_64-8.8.0.121_cuda11-archi…》, 有效期至3月3日 |
官方下载
cuda_11.0.3_450.51.06_linux.run这里安装的是11.0(之前用的是10.2,lsb_release -a)
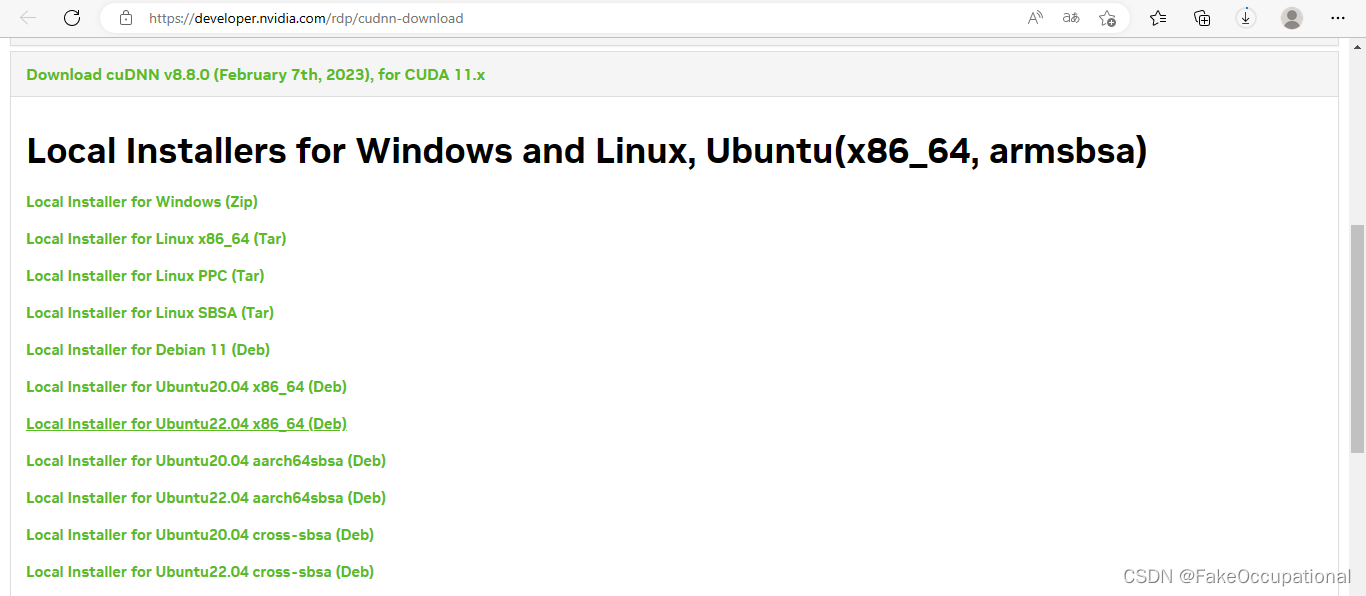
https://developer.nvidia.com/rdp/cudnn-download
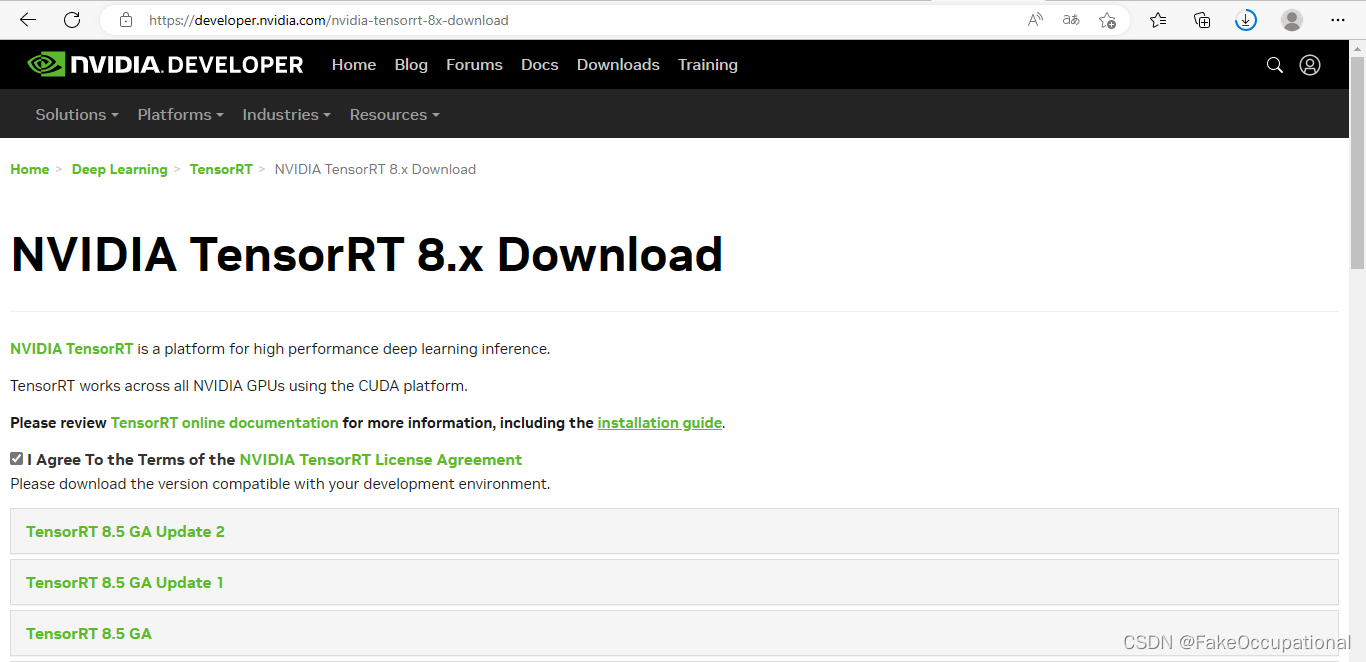
tensorrt
https://developer.nvidia.com/nvidia-tensorrt-8x-download
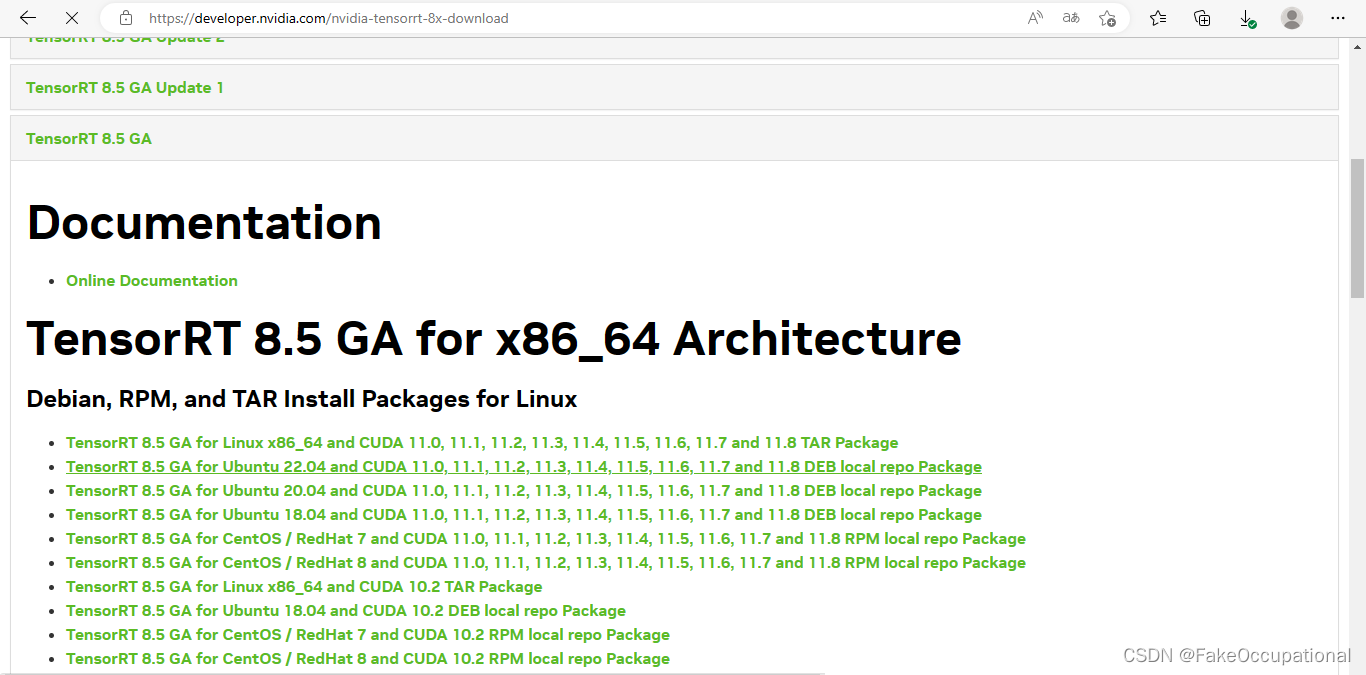
- 下载链接
- https://developer.nvidia.com/compute/machine-learning/tensorrt/secure/8.5.1/tars/TensorRT-8.5.1.7.Linux.x86_64-gnu.cuda-11.8.cudnn8.6.tar.gz
- https://developer.nvidia.com/compute/machine-learning/tensorrt/secure/8.5.1/tars/TensorRT-8.5.1.7.Linux.x86_64-gnu.cuda-10.2.cudnn8.6.tar.gz
安装
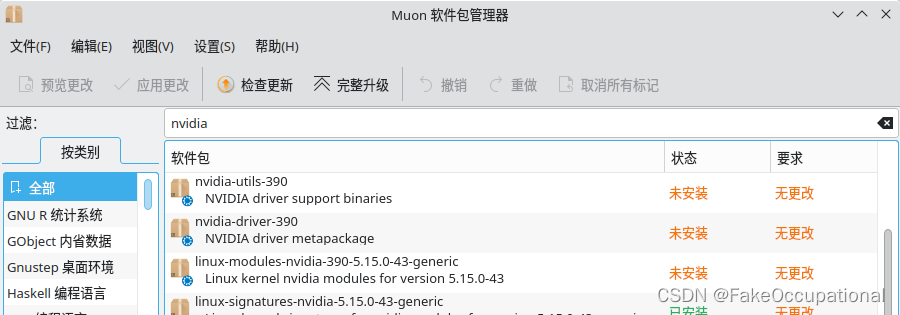
检测是否已安装
~/文档/cuda$ nvidia-smi
Command 'nvidia-smi' not found, but can be installed with:
sudo apt install nvidia-utils-390         # version 390.157-0ubuntu0.22.04.1, or
sudo apt install nvidia-utils-450-server  # version 450.216.04-0ubuntu0.22.04.1
sudo apt install nvidia-utils-470         # version 470.161.03-0ubuntu0.22.04.1
sudo apt install nvidia-utils-470-server  # version 470.161.03-0ubuntu0.22.04.1
sudo apt install nvidia-utils-510         # version 510.108.03-0ubuntu0.22.04.1
sudo apt install nvidia-utils-515         # version 515.86.01-0ubuntu0.22.04.1
sudo apt install nvidia-utils-515-server  # version 515.86.01-0ubuntu0.22.04.1
sudo apt install nvidia-utils-525         # version 525.78.01-0ubuntu0.22.04.1
sudo apt install nvidia-utils-525-server  # version 525.60.13-0ubuntu0.22.04.1
sudo apt install nvidia-utils-418-server  # version 418.226.00-0ubuntu4
sudo apt install nvidia-utils-510-server  # version 510.47.03-0ubuntu3

NVIDIA-SMI has failed because it couldn't communicate with the NVIDIA driver. Make sure that the latest NVIDIA driver is installed and running.
安装步骤(driver+toolkit)
-
ubuntu-drivers devices查看你的显卡类型和推荐的驱动版本 -
sudo apt-get install nvidia-driver-460(11.0需要450.80以上的driver)或sudo apt install nvidia-driver-470 -
(11.0需要450.80以上的driver,如果不满足,remove命令)
sudo apt-get remove nvidia-driver-460,sudo apt autoremove -
sudo reboot -
nvidia-smi -
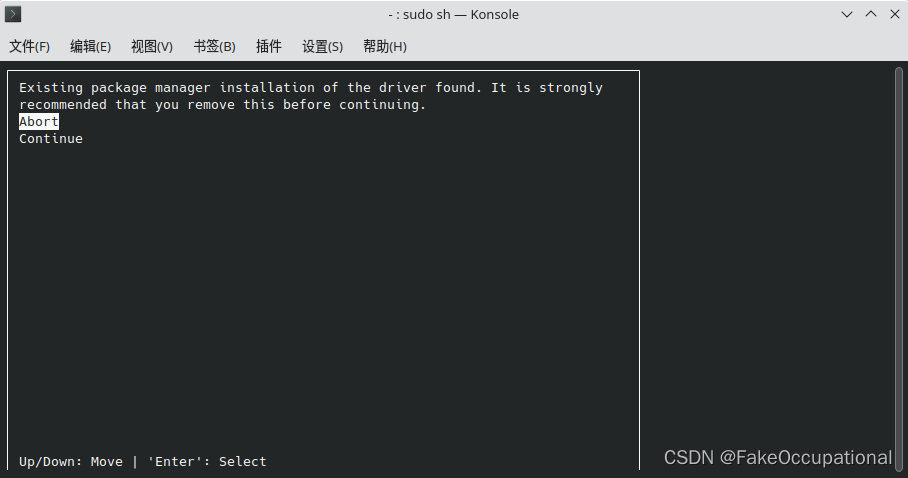
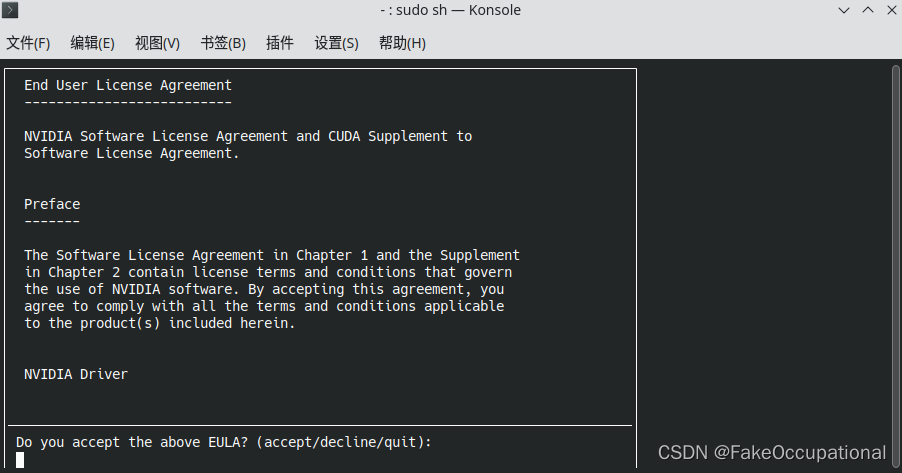
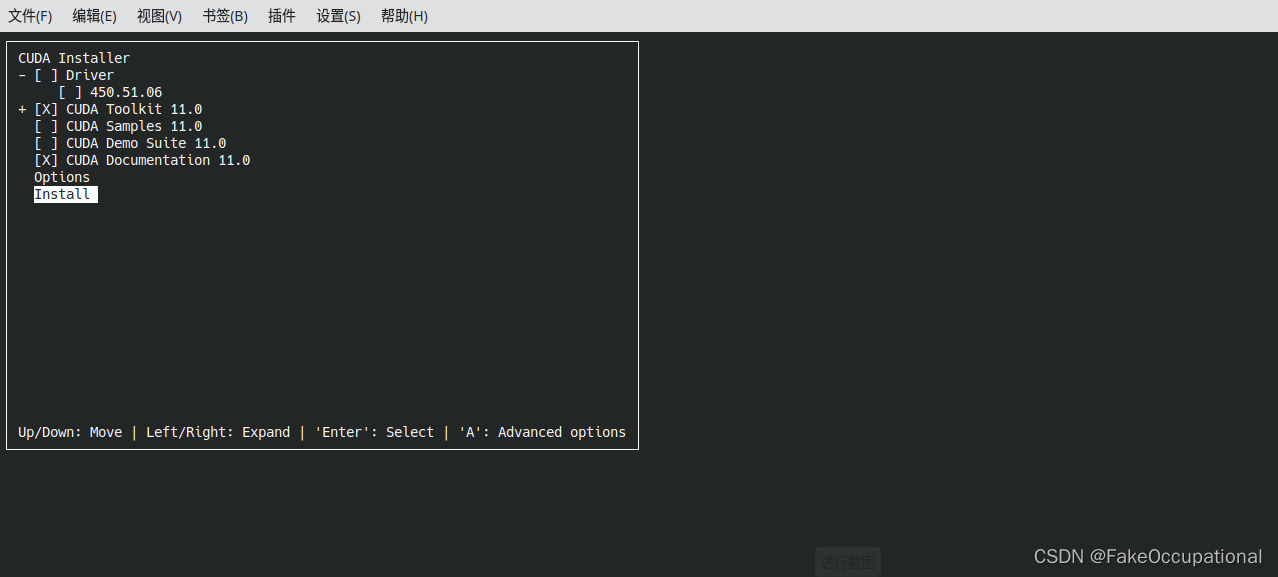
sudo sh cuda_11.0.3_450.51.06_linux.run -
然后有两个选择 abort和continue,是否继续,选择continue
-
若:Failed to verify gcc version. See log at /var/log/cuda-installer.log for details.Error: unsupported compiler: 11.3.0. Use --override to override this check.
则:
sudo sh cuda_11.0.3_450.51.06_linux.run --override
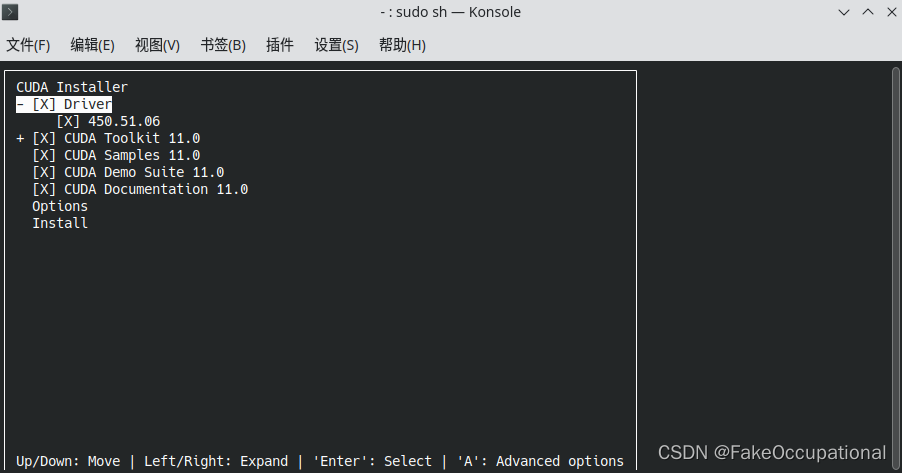
- 选中toolkit即可
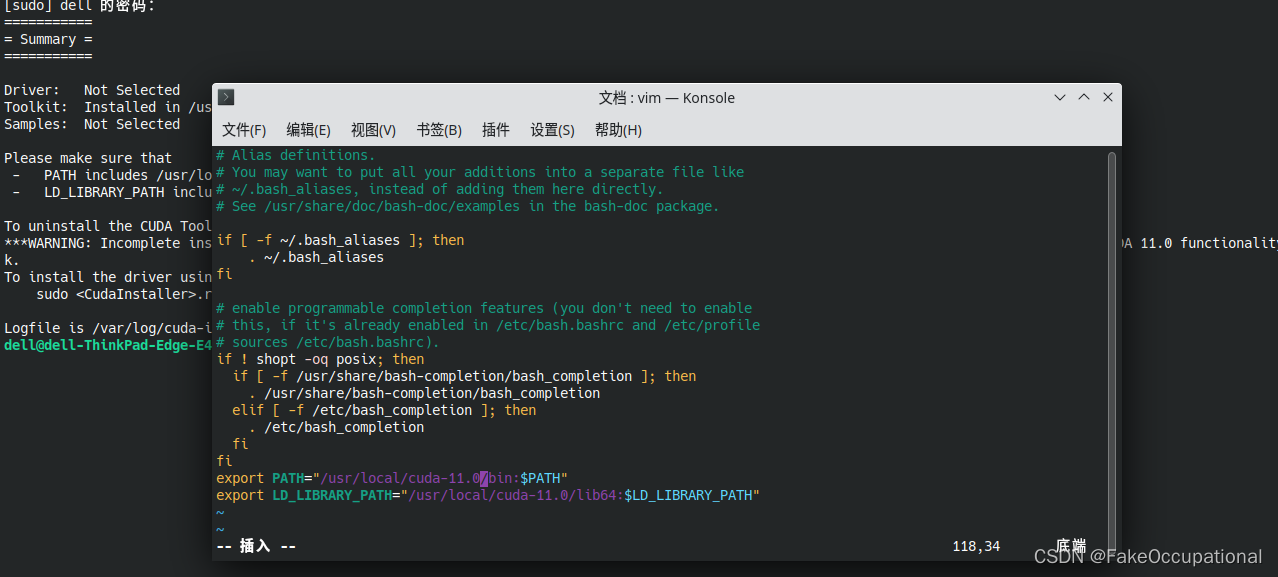
dell@dell-ThinkPad-Edge:~/文档$ sudo sh cuda_11.0.3_450.51.06_linux.run --override
[sudo] dell 的密码:
===========
= Summary =
===========
Driver: Not Selected
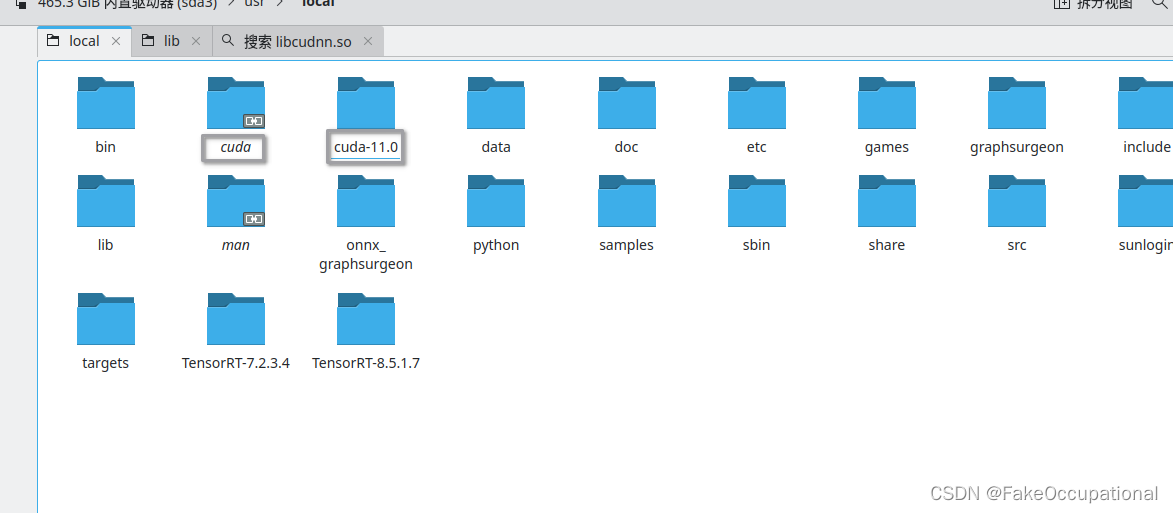
Toolkit: Installed in /usr/local/cuda-11.0/
Samples: Not Selected
Please make sure that
- PATH includes /usr/local/cuda-11.0/bin
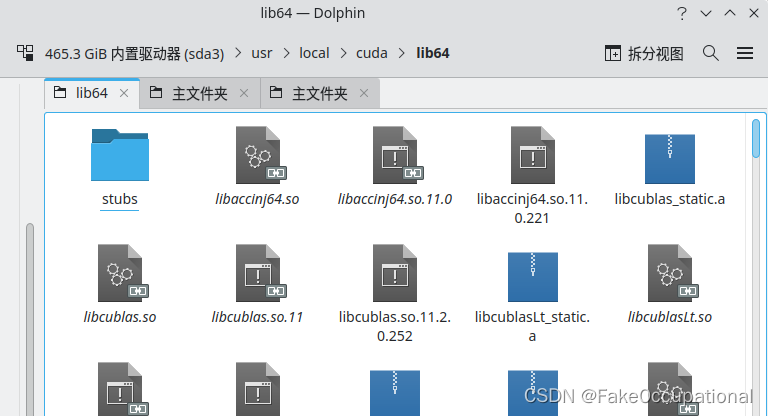
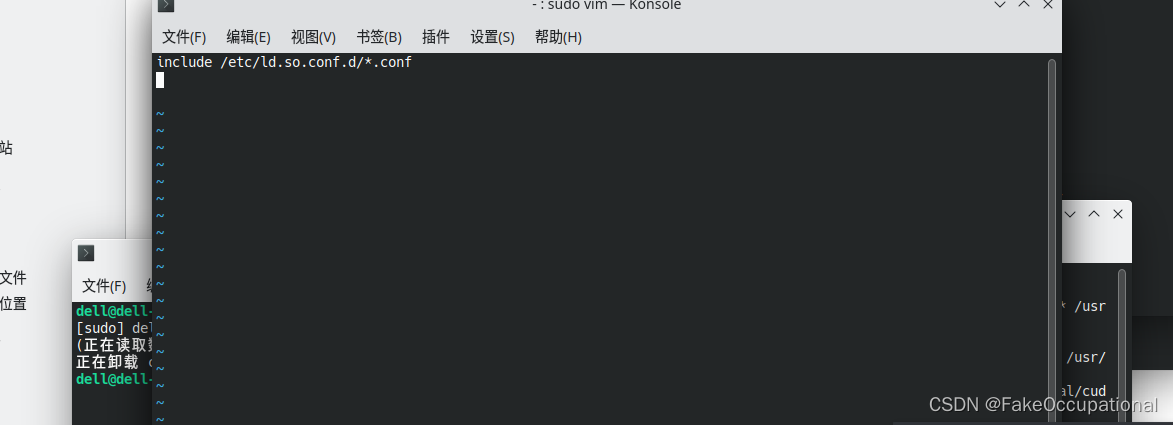
- LD_LIBRARY_PATH includes /usr/local/cuda-11.0/lib64, or, add /usr/local/cuda-11.0/lib64 to /etc/ld.so.conf and run ldconfig as root
To uninstall the CUDA Toolkit, run cuda-uninstaller in /usr/local/cuda-11.0/bin
***WARNING: Incomplete installation! This installation did not install the CUDA Driver. A driver of version at least .00 is required for CUDA 11.0 functionality to work.
To install the driver using this installer, run the following command, replacing <CudaInstaller> with the name of this run file:
sudo <CudaInstaller>.run --silent --driver
Logfile is /var/log/cuda-installer.log
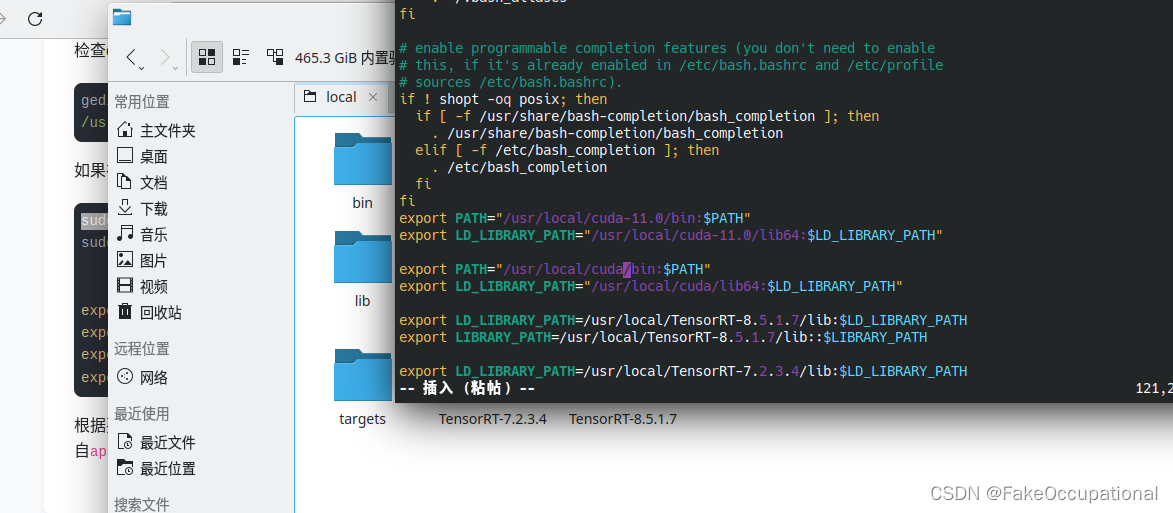
vim ~/.bashrc添加如下到末尾:
export PATH="/usr/local/cuda-11.0/bin:$PATH"
export LD_LIBRARY_PATH="/usr/local/cuda-11.0/lib64:$LD_LIBRARY_PATH"
source ~/.bashrcnvcc --version
nvcc: NVIDIA (R) Cuda compiler driver
Copyright (c) 2005-2020 NVIDIA Corporation
Built on Wed_Jul_22_19:09:09_PDT_2020
Cuda compilation tools, release 11.0, V11.0.221
Build cuda_11.0_bu.TC445_37.28845127_0
cudatoolkit remove
cudnn
- below there 2 install way
安装法
sudo dpkg -i cudnn-local-repo-ubuntu2204-8.8.0.121_1.0-1_amd64.deb
dell@dell-ThinkPad-Edge:~/文档$ sudo dpkg -i cudnn-local-repo-ubuntu2204-8.8.0.121_1.0-1_amd64.deb
[sudo] dell 的密码:
正在选中未选择的软件包 cudnn-local-repo-ubuntu2204-8.8.0.121。
(正在读取数据库 ... 系统当前共安装有 236160 个文件和目录。)
准备解压 cudnn-local-repo-ubuntu2204-8.8.0.121_1.0-1_amd64.deb  ...
正在解压 cudnn-local-repo-ubuntu2204-8.8.0.121 (1.0-1) ...
正在设置 cudnn-local-repo-ubuntu2204-8.8.0.121 (1.0-1) ...
The public cudnn-local-repo-ubuntu2204-8.8.0.121 GPG key does not appear to be installed.
To install the key, run this command:
sudo cp /var/cudnn-local-repo-ubuntu2204-8.8.0.121/cudnn-local-B66125A0-keyring.gpg /usr/share/keyrings/
dell@dell-ThinkPad-Edge:~/文档$ sudo dpkg -i cudnn-local-repo-ubuntu2204-8.8.0.121_1.0-1_amd64.deb
(正在读取数据库 ... 系统当前共安装有 236176 个文件和目录。)
准备解压 cudnn-local-repo-ubuntu2204-8.8.0.121_1.0-1_amd64.deb  ...
正在解压 cudnn-local-repo-ubuntu2204-8.8.0.121 (1.0-1) 并覆盖 (1.0-1) ...
正在设置 cudnn-local-repo-ubuntu2204-8.8.0.121 (1.0-1) ...
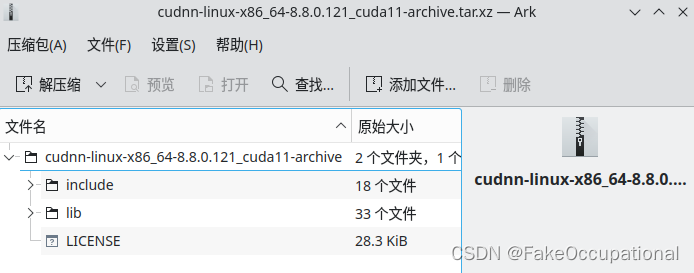
直接复制法
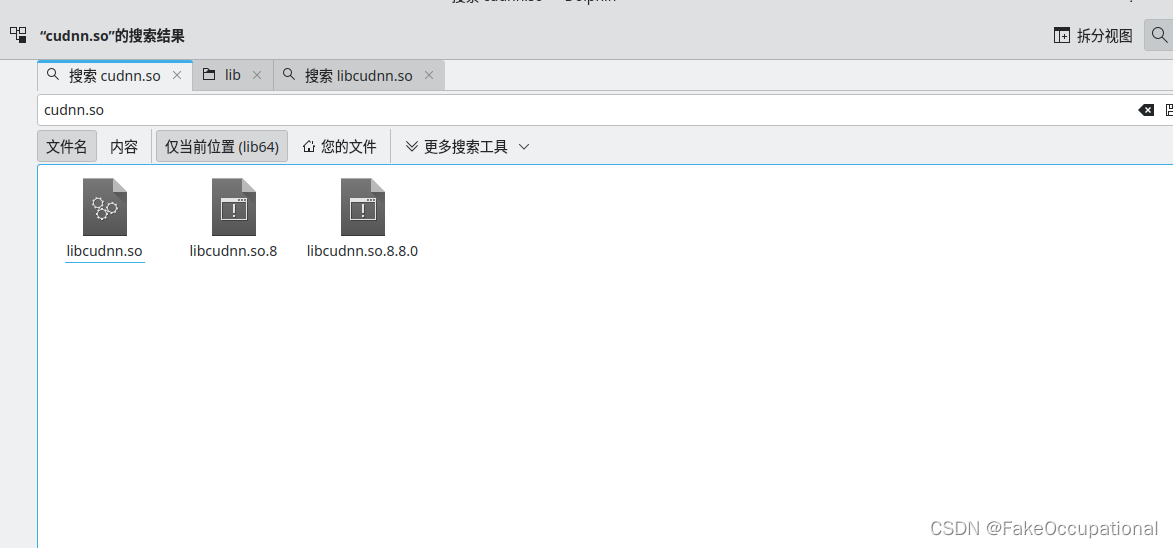
tar -xf cudnn-linux-x86_64-8.8.0.121_cuda11-archive.tar.xz- 复制文件到cuda的对应文件夹下,并给予文件的执行权限
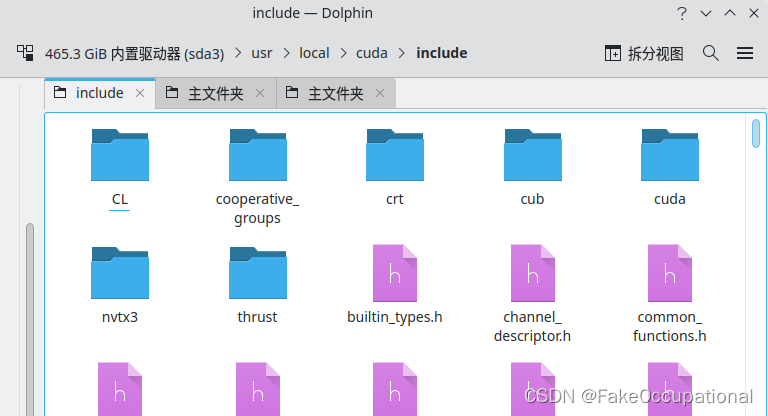
sudo cp ./include/cudnn* /usr/local/cuda-11.0/include
sudo cp ./lib/libcudnn* /usr/local/cuda-11.0/lib64
sudo chmod 777 /usr/local/cuda-11.0/include/cudnn* /usr/local/cuda-11.0/lib64/libcudnn*
tensorrt 官方指导
注意安装tensorrt的版本许多模型是在TensorRT 7.x运行的,这里测试的为TensorRT 8.x.
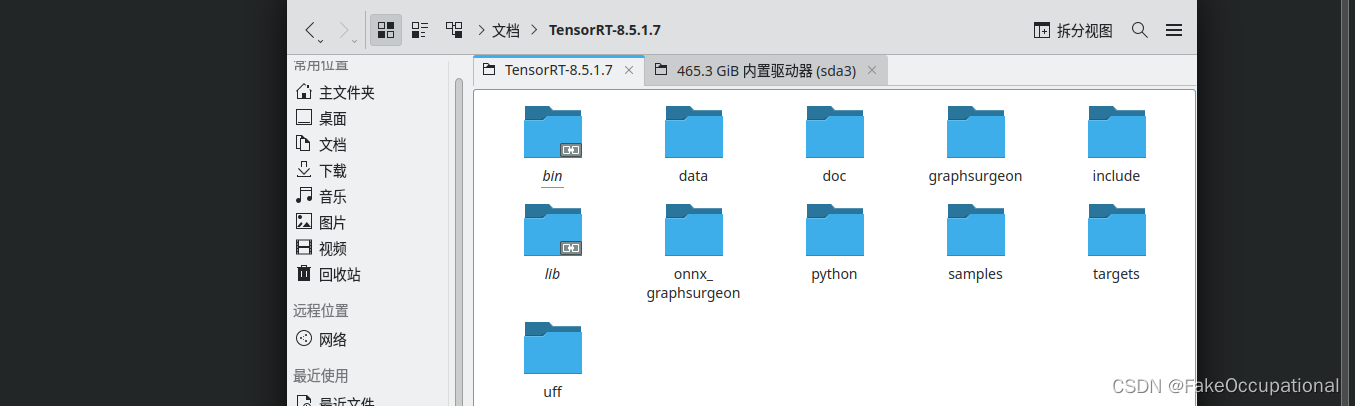
tar -xf TensorRT-8.5.1.7.Linux.x86_64-gnu.cuda-11.8.cudnn8.6.tar.gz
- 复制文件
sudo cp -r ./TensorRT-8.5.1.7 /usr/localsudo chmod -R 777 /usr/local/TensorRT-8.5.1.7vim ~/.bashrcexport LD_LIBRARY_PATH=/usr/local/TensorRT-8.5.1.7/lib:$LD_LIBRARY_PATHexport LIBRARY_PATH=/usr/local/TensorRT-8.5.1.7/lib::$LIBRARY_PATH
export LD_LIBRARY_PATH=/path/TensorRT-8.5.1.7/lib:$LD_LIBRARY_PATH
export LIBRARY_PATH=/path/TensorRT-8.5.1.7/lib::$LIBRARY_PATH

LIBRARY_PATH is used by gcc before compilation to search for directories containing libraries that need to be linked to your program.
LD_LIBRARY_PATH is used by your program to search for directories containing the libraries after it has been successfully compiled and linked.
source ~/.bashrc
使用实例
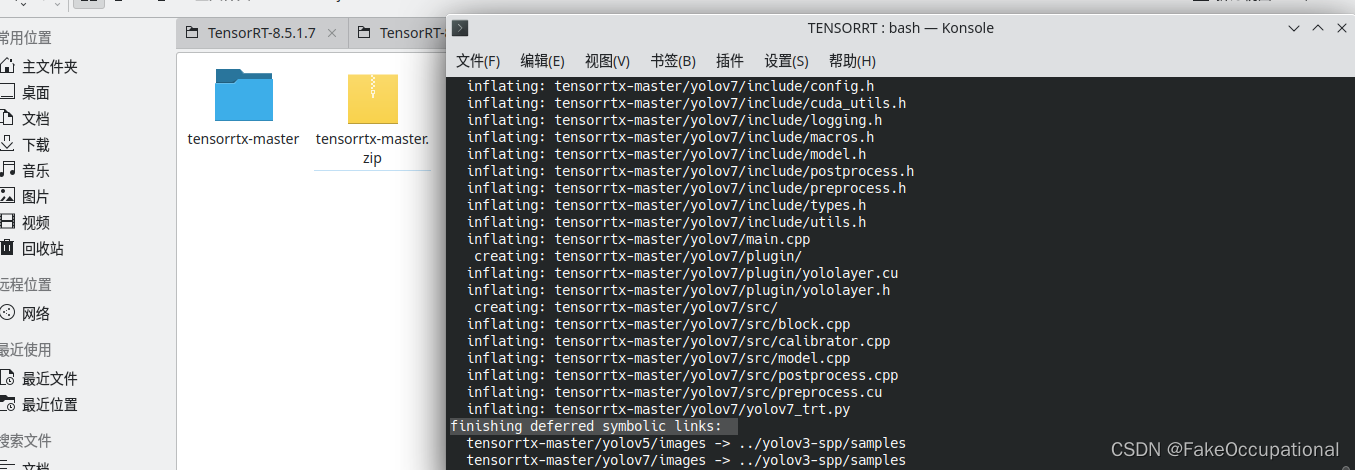
- https://github.com/wang-xinyu/tensorrtx
- https://github.com/wang-xinyu/tensorrtx/blob/master/tutorials/getting_started.md
- TensorRT 7.x
https://www.5axxw.com/questions/content/lkk5xr
- 由于使用了较新的API,本工程只适用于TensorRT8.2.3+,但可自行查文档修改相应的API
使用过conda环境的torch,然后发现速度会相对较慢(6ms->30ms)
cmake_minimum_required(VERSION 2.6)

project(alexnet)

add_definitions(-std=c++11)

option(CUDA_USE_STATIC_CUDA_RUNTIME OFF)
set(CMAKE_CXX_STANDARD 11)
set(CMAKE_BUILD_TYPE Debug)

include_directories(${PROJECT_SOURCE_DIR}/include)
# include and link dirs of cuda and tensorrt, you need adapt them if yours are different
# cuda
include_directories(/usr/local/cuda/include)
link_directories(/usr/local/cuda/lib64/)
link_directories(/usr/local/cuda-11.0/lib6m4/libcudnn.som.8)
# tensorrt
include_directories(/usr/local/TensorRT-7.2.3.4/include)
link_directories(/usr/local/TensorRT-7.2.3.4/lib/)

#include_directories(/usr/include/x86_64-linux-gnu/)
#link_directories(/usr/lib/x86_64-linux-gnu/)

add_executable(alexnet ${PROJECT_SOURCE_DIR}/alex.cpp)
target_link_libraries(alexnet nvinfer)
target_link_libraries(alexnet cudart)

add_definitions(-O2 -pthread)
set(CMAKE_CXX_FLAGS "-Wno-error=deprecated-declarations -Wno-deprecated-declarations ")# https://blog.csdn.net/weixin_42156097/article/details/106091555

target_link_libraries(alexnet "/usr/local/cuda-11.0/lib64/libcudnn.so.8")
#include "NvInfer.h"
#include "cuda_runtime_api.h"
#include "logging.h"
#include <fstream>
#include <map>
#include <chrono>

#define CHECK(status) \
    do\
    {\
        auto ret = (status);\
        if (ret != 0)\
        {\
            std::cerr << "Cuda failure: " << ret << std::endl;\
            abort();\
        }\
    } while (0)

// stuff we know about the network and the input/output blobs
static const int INPUT_H = 224;
static const int INPUT_W = 224;
static const int OUTPUT_SIZE = 1000;

const char* INPUT_BLOB_NAME = "data";
const char* OUTPUT_BLOB_NAME = "prob";

using namespace nvinfer1;

static Logger gLogger;

// Load weights from files shared with TensorRT samples.
// TensorRT weight files have a simple space delimited format:
// [type] [size] <data x size in hex>
std::map<std::string, Weights> loadWeights(const std::string file)
{
    std::cout << "Loading weights: " << file << std::endl;
    std::map<std::string, Weights> weightMap;

    // Open weights file
    std::ifstream input(file);
    assert(input.is_open() && "Unable to load weight file.");

    // Read number of weight blobs
    int32_t count;
    input >> count;
    assert(count > 0 && "Invalid weight map file.");

    while (count--)
    {
        Weights wt{DataType::kFLOAT, nullptr, 0};
        uint32_t size;

        // Read name and type of blob
        std::string name;
        input >> name >> std::dec >> size;
        wt.type = DataType::kFLOAT;

        // Load blob
        uint32_t* val = reinterpret_cast<uint32_t*>(malloc(sizeof(val) * size));
        for (uint32_t x = 0, y = size; x < y; ++x)
        {
            input >> std::hex >> val[x];
        }
        wt.values = val;

        wt.count = size;
        weightMap[name] = wt;
    }

    return weightMap;
}

// Creat the engine using only the API and not any parser.
ICudaEngine* createEngine(unsigned int maxBatchSize, IBuilder* builder, IBuilderConfig* config, DataType dt)
{
    INetworkDefinition* network = builder->createNetworkV2(0U);

    // Create input tensor of shape { 1, 1, 32, 32 } with name INPUT_BLOB_NAME
    ITensor* data = network->addInput(INPUT_BLOB_NAME, dt, Dims3{3, INPUT_H, INPUT_W});
    assert(data);

    std::map<std::string, Weights> weightMap = loadWeights("../alexnet.wts");
    Weights emptywts{DataType::kFLOAT, nullptr, 0};

    IConvolutionLayer* conv1 = network->addConvolutionNd(*data, 64, DimsHW{11, 11}, weightMap["features.0.weight"], weightMap["features.0.bias"]);
    assert(conv1);
    conv1->setStrideNd(DimsHW{4, 4});
    conv1->setPaddingNd(DimsHW{2, 2});

    // Add activation layer using the ReLU algorithm.
    IActivationLayer* relu1 = network->addActivation(*conv1->getOutput(0), ActivationType::kRELU);
    assert(relu1);

    // Add max pooling layer with stride of 2x2 and kernel size of 2x2.
    IPoolingLayer* pool1 = network->addPoolingNd(*relu1->getOutput(0), PoolingType::kMAX, DimsHW{3, 3});
    assert(pool1);
    pool1->setStrideNd(DimsHW{2, 2});

    IConvolutionLayer* conv2 = network->addConvolutionNd(*pool1->getOutput(0), 192, DimsHW{5, 5}, weightMap["features.3.weight"], weightMap["features.3.bias"]);
    assert(conv2);
    conv2->setPaddingNd(DimsHW{2, 2});
    IActivationLayer* relu2 = network->addActivation(*conv2->getOutput(0), ActivationType::kRELU);
    assert(relu2);
    IPoolingLayer* pool2 = network->addPoolingNd(*relu2->getOutput(0), PoolingType::kMAX, DimsHW{3, 3});
    assert(pool2);
    pool2->setStrideNd(DimsHW{2, 2});

    IConvolutionLayer* conv3 = network->addConvolutionNd(*pool2->getOutput(0), 384, DimsHW{3, 3}, weightMap["features.6.weight"], weightMap["features.6.bias"]);
    assert(conv3);
    conv3->setPaddingNd(DimsHW{1, 1});
    IActivationLayer* relu3 = network->addActivation(*conv3->getOutput(0), ActivationType::kRELU);
    assert(relu3);

    IConvolutionLayer* conv4 = network->addConvolutionNd(*relu3->getOutput(0), 256, DimsHW{3, 3}, weightMap["features.8.weight"], weightMap["features.8.bias"]);
    assert(conv4);
    conv4->setPaddingNd(DimsHW{1, 1});
    IActivationLayer* relu4 = network->addActivation(*conv4->getOutput(0), ActivationType::kRELU);
    assert(relu4);

    IConvolutionLayer* conv5 = network->addConvolutionNd(*relu4->getOutput(0), 256, DimsHW{3, 3}, weightMap["features.10.weight"], weightMap["features.10.bias"]);
    assert(conv5);
    conv5->setPaddingNd(DimsHW{1, 1});
    IActivationLayer* relu5 = network->addActivation(*conv5->getOutput(0), ActivationType::kRELU);
    assert(relu5);
    IPoolingLayer* pool3 = network->addPoolingNd(*relu5->getOutput(0), PoolingType::kMAX, DimsHW{3, 3});
    assert(pool3);
    pool3->setStrideNd(DimsHW{2, 2});

    IFullyConnectedLayer* fc1 = network->addFullyConnected(*pool3->getOutput(0), 4096, weightMap["classifier.1.weight"], weightMap["classifier.1.bias"]);
    assert(fc1);

    IActivationLayer* relu6 = network->addActivation(*fc1->getOutput(0), ActivationType::kRELU);
    assert(relu6);

    IFullyConnectedLayer* fc2 = network->addFullyConnected(*relu6->getOutput(0), 4096, weightMap["classifier.4.weight"], weightMap["classifier.4.bias"]);
    assert(fc2);

    IActivationLayer* relu7 = network->addActivation(*fc2->getOutput(0), ActivationType::kRELU);
    assert(relu7);

    IFullyConnectedLayer* fc3 = network->addFullyConnected(*relu7->getOutput(0), 1000, weightMap["classifier.6.weight"], weightMap["classifier.6.bias"]);
    assert(fc3);

    fc3->getOutput(0)->setName(OUTPUT_BLOB_NAME);
    std::cout << "set name out" << std::endl;
    network->markOutput(*fc3->getOutput(0));

    // Build engine
    builder->setMaxBatchSize(maxBatchSize);
    config->setMaxWorkspaceSize(1 << 20);
    ICudaEngine* engine = builder->buildEngineWithConfig(*network, *config);
    std::cout << "build out" << std::endl;

    // Don't need the network any more
    network->destroy();

    // Release host memory
    for (auto& mem : weightMap)
    {
        free((void*) (mem.second.values));
    }

    return engine;
}

void APIToModel(unsigned int maxBatchSize, IHostMemory** modelStream)
{
    // Create builder
    IBuilder* builder = createInferBuilder(gLogger);
    IBuilderConfig* config = builder->createBuilderConfig();

    // Create model to populate the network, then set the outputs and create an engine
    ICudaEngine* engine = createEngine(maxBatchSize, builder, config, DataType::kFLOAT);
    assert(engine != nullptr);

    // Serialize the engine
    (*modelStream) = engine->serialize();

    // Close everything down
    engine->destroy();
    builder->destroy();
}

void doInference(IExecutionContext& context, float* input, float* output, int batchSize)
{
    const ICudaEngine& engine = context.getEngine();

    // Pointers to input and output device buffers to pass to engine.
    // Engine requires exactly IEngine::getNbBindings() number of buffers.
    assert(engine.getNbBindings() == 2);
    void* buffers[2];

    // In order to bind the buffers, we need to know the names of the input and output tensors.
    // Note that indices are guaranteed to be less than IEngine::getNbBindings()
    const int inputIndex = engine.getBindingIndex(INPUT_BLOB_NAME);
    const int outputIndex = engine.getBindingIndex(OUTPUT_BLOB_NAME);

    // Create GPU buffers on device
    CHECK(cudaMalloc(&buffers[inputIndex], batchSize * 3 * INPUT_H * INPUT_W * sizeof(float)));
    CHECK(cudaMalloc(&buffers[outputIndex], batchSize * OUTPUT_SIZE * sizeof(float)));

    // Create stream
    cudaStream_t stream;
    CHECK(cudaStreamCreate(&stream));

    // DMA input batch data to device, infer on the batch asynchronously, and DMA output back to host
    CHECK(cudaMemcpyAsync(buffers[inputIndex], input, batchSize * 3 * INPUT_H * INPUT_W * sizeof(float), cudaMemcpyHostToDevice, stream));
    context.enqueue(batchSize, buffers, stream, nullptr);
    CHECK(cudaMemcpyAsync(output, buffers[outputIndex], batchSize * OUTPUT_SIZE * sizeof(float), cudaMemcpyDeviceToHost, stream));
    cudaStreamSynchronize(stream);

    // Release stream and buffers
    cudaStreamDestroy(stream);
    CHECK(cudaFree(buffers[inputIndex]));
    CHECK(cudaFree(buffers[outputIndex]));
}

//int main(int argc, char** argv)
//{
//    if (argc != 2) {
//        std::cerr << "arguments not right!" << std::endl;
//        std::cerr << "./alexnet -s   // serialize model to plan file" << std::endl;
//        std::cerr << "./alexnet -d   // deserialize plan file and run inference" << std::endl;
//        return -1;
//    }
int main() // char *str[] = {"hello","world"}; char **ch = str ;
{
    char *argv[] = {"-s","-s"};

    // create a model using the API directly and serialize it to a stream
    char *trtModelStream{nullptr};
    size_t size{0};

    if (std::string(argv[1]) == "-s") {
        IHostMemory* modelStream{nullptr};
        APIToModel(1, &modelStream);
        assert(modelStream != nullptr);

        std::ofstream p("alexnet.engine", std::ios::binary);
        if (!p)
        {
            std::cerr << "could not open plan output file" << std::endl;
            return -1;
        }
        p.write(reinterpret_cast<const char*>(modelStream->data()), modelStream->size());
        modelStream->destroy();
        return 1;
    } else if (std::string(argv[1]) == "-d") {
        std::ifstream file("alexnet.engine", std::ios::binary);
        if (file.good()) {
            file.seekg(0, file.end);
            size = file.tellg();
            file.seekg(0, file.beg);
            trtModelStream = new char[size];
            assert(trtModelStream);
            file.read(trtModelStream, size);
            file.close();
        }
    } else {
        return -1;
    }


    // Subtract mean from image
    float data[3 * INPUT_H * INPUT_W];
    for (int i = 0; i < 3 * INPUT_H * INPUT_W; i++)
        data[i] = 1;

    IRuntime* runtime = createInferRuntime(gLogger);
    assert(runtime != nullptr);
    ICudaEngine* engine = runtime->deserializeCudaEngine(trtModelStream, size, nullptr);
    assert(engine != nullptr);
    IExecutionContext* context = engine->createExecutionContext();
    assert(context != nullptr);

    // Run inference
    float prob[OUTPUT_SIZE];
    for (int i = 0; i < 100; i++) {
        auto start = std::chrono::system_clock::now();
        doInference(*context, data, prob, 1);
        auto end = std::chrono::system_clock::now();
        std::cout << std::chrono::duration_cast<std::chrono::milliseconds>(end - start).count() << "ms" << std::endl;
    }

    // Destroy the engine
    context->destroy();
    engine->destroy();
    runtime->destroy();

    // Print histogram of the output distribution
    std::cout << "\nOutput:\n\n";
    for (unsigned int i = 0; i < OUTPUT_SIZE; i++)
    {
        std::cout << prob[i] << ", ";
        if (i % 10 == 0) std::cout << i / 10 << std::endl;
    }
    std::cout << std::endl;

    return 0;
}
总找不到动态链接库->
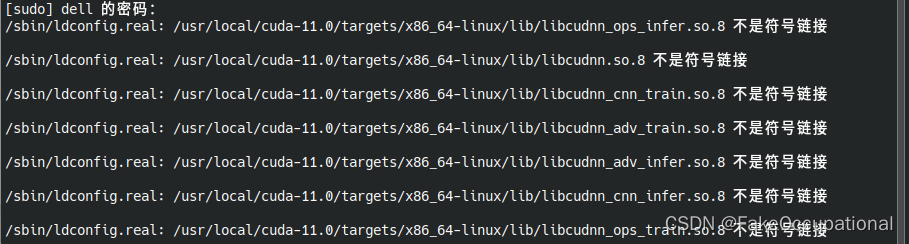
sudo zip -r -q lib.zip ./lib # 先给/usr/lib/保存一下
sudo cp ./lib64/* /usr/lib/
sudo rm -f /usr/local/cuda-11.0/include/cudnn* /usr/local/cuda-11.0/lib64/libcudnn*
Linux找不到动态链接库 .so文件的解决方法
总找不到动态链接库<-
[E] [TRT] CUDA initialization failure with error 35. Please check your CUDA installation:
| TensorRT-7.2.3.4 | TensorRT-7.2.3.4.Ubuntu-18.04.x86_64-gnu.cuda-11.0.cudnn8.1 | |
|---|---|---|
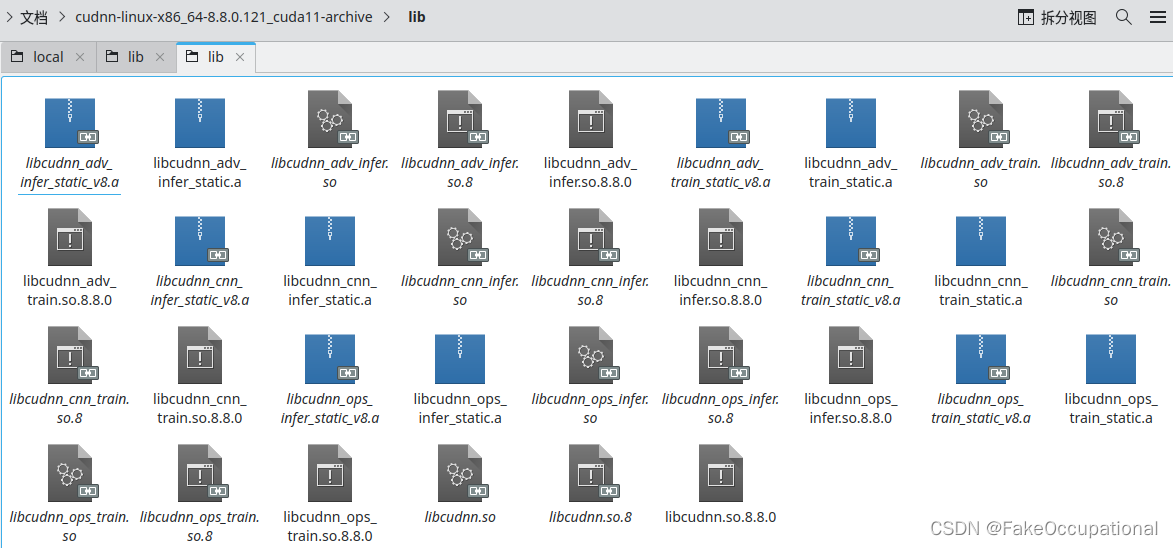
$~/文档$ tar -xzvf cudnn-11.2-linux-x64-v8.1.0.77.tgz
cuda/include/cudnn.h
cuda/include/cudnn_adv_infer.h……
sudo rm -f /usr/local/cuda-11.0/include/cudnn* /usr/local/cuda-11.0/lib64/libcudnn*
sudo cp ./include/cudnn* /usr/local/cuda-11.0/include
sudo cp ./lib64/libcudnn* /usr/local/cuda-11.0/lib64
sudo chmod 777 /usr/local/cuda-11.0/include/cudnn* /usr/local/cuda-11.0/lib64/libcudnn*
CG
// https://zhuanlan.zhihu.com/p/430470397
为了防止找不到 TensorRT 的库,建议把 TensorRT 的库和头文件链接一下

sudo ln -s /usr/local/TensorRT-7.0.0.11/lib/* /usr/lib/
sudo ln -s /usr/local/TensorRT-7.0.0.11/include/* /usr/include/
-
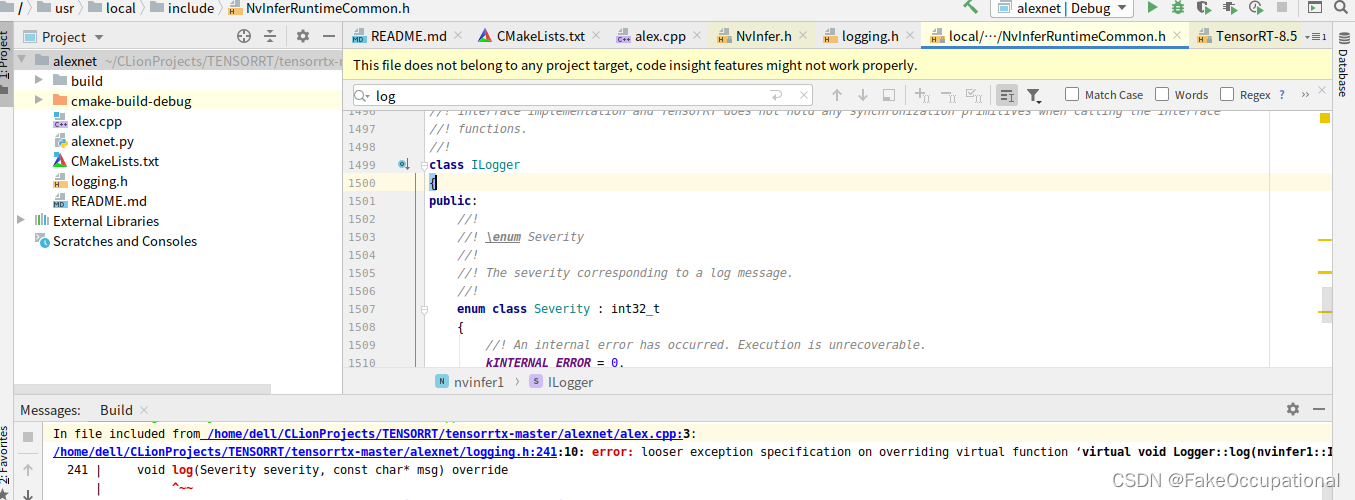
/home/dell/CLionProjects/TENSORRT/tensorrtx-master/alexnet/cmake-build-debug/alexnet: error while loading shared libraries: libcudnn.so.7: cannot open shared object file: No such file or directory
-
finishing deferred symbolic links:

sudo ldconfig
https://github.com/dlunion/tensorRTIntegrate
-
https://github.com/ttanzhiqiang/onnx_tensorrt_project
-
5.5https://github.com/iwatake2222/InferenceHelper
-
5.9采用TensorRT的C++接口进行ONNX模型转TRT,并进行Inference推理。https://github.com/MAhaitao999/ONNX_TRT_CPP
-
6/0Deploy an ONNX model to TensorRT usingOpenCV for I/O https://github.com/FauxShow/trt_cpp_opencv
-
https://zhuanlan.zhihu.com/p/430470397
-
添加链接描述
-
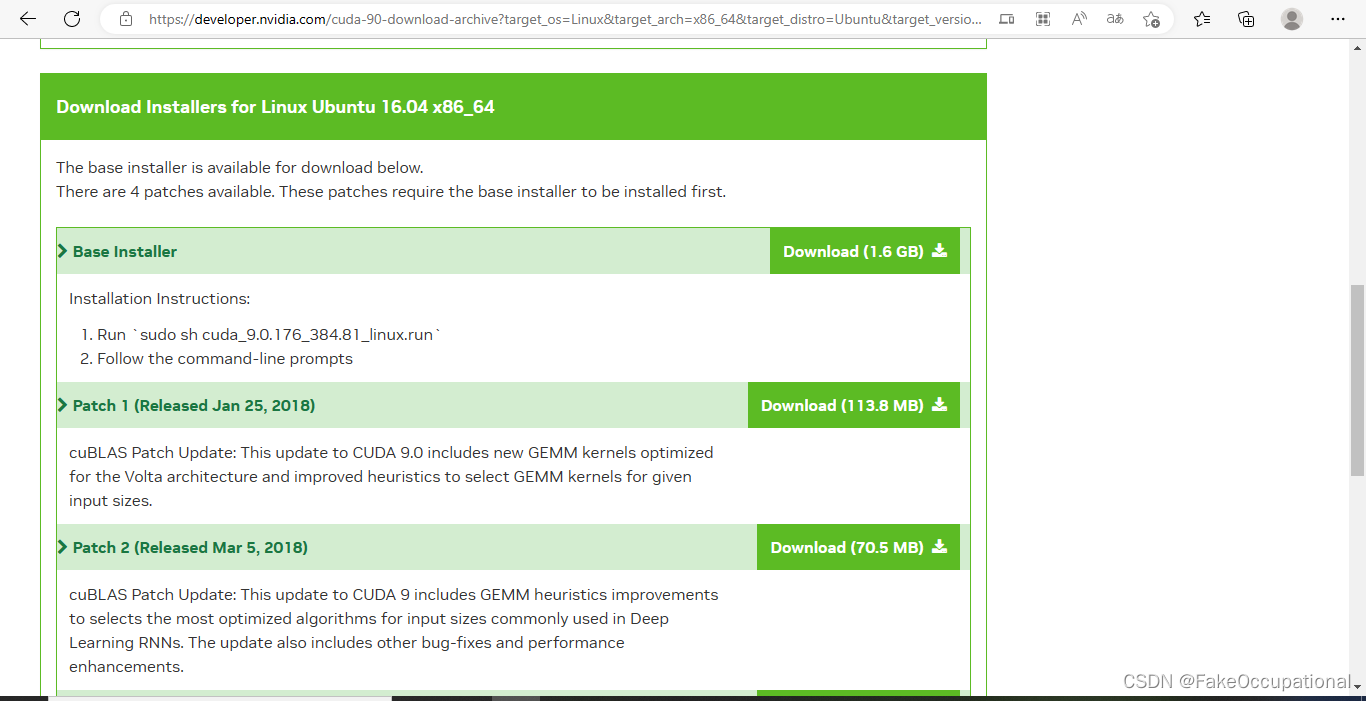
Cuda与GPU显卡驱动版本一览(哈哈,这哥们博客下咋还有个相亲广告(希望他早日成功))
sudo sh cuda_9.0.176_384.81_linux.run https://developer.nvidia.com/cuda-90-download-archive?
- 如果你的系统突然断电 ,可能报错 : NVIDIA-SMI has failed because it couldn’t communicate with the NVIDIA driver. Make sure that the latest NVIDIA driver is installed and running.再重装驱动即可
(base):~/Documents/node-v18.10.0-linux-x64/bin$ sudo apt install nvidia-driver-470
[sudo] pdd 的密码:
正在读取软件包列表... 完成
正在分析软件包的依赖关系树... 完成
正在读取状态信息... 完成
下列软件包是自动安装的并且现在不需要了:
  fcitx-config-common fcitx-config-gtk fcitx-frontend-all fcitx-frontend-gtk2 fcitx-frontend-gtk3 fcitx-frontend-qt5 fcitx-module-dbus
  fcitx-module-kimpanel fcitx-module-lua fcitx-module-quickphrase-editor5 fcitx-module-x11 fcitx-modules fcitx-ui-classic g++-11 libfcitx-config4
  libfcitx-core0 libfcitx-gclient1 libfcitx-qt5-1 libfcitx-qt5-data libfcitx-utils0 libgettextpo0 libpresage-data libpresage1v5 libstdc++-11-dev
  libtinyxml2.6.2v5 presage
使用'sudo apt autoremove'来卸载它(它们)。
将会同时安装下列软件:
  dkms gcc nvidia-dkms-470
建议安装:
  menu gcc-multilib flex bison gcc-doc
下列【新】软件包将被安装:
  dkms gcc nvidia-dkms-470 nvidia-driver-470
升级了 0 个软件包,新安装了 4 个软件包,要卸载 0 个软件包,有 196 个软件包未被升级。
需要下载 0 B/559 kB 的归档。
解压缩后会消耗 2,064 kB 的额外空间。
您希望继续执行吗? [Y/n] y
正在选中未选择的软件包 gcc。
(正在读取数据库 ... 系统当前共安装有 240297 个文件和目录。)
准备解压 .../gcc_4%3a11.2.0-1ubuntu1_amd64.deb  ...
正在解压 gcc (4:11.2.0-1ubuntu1) ...
正在选中未选择的软件包 dkms。
准备解压 .../dkms_2.8.7-2ubuntu2.1_all.deb  ...
正在解压 dkms (2.8.7-2ubuntu2.1) ...
正在选中未选择的软件包 nvidia-dkms-470。
准备解压 .../nvidia-dkms-470_470.161.03-0ubuntu0.22.04.1_amd64.deb  ...
正在解压 nvidia-dkms-470 (470.161.03-0ubuntu0.22.04.1) ...
正在选中未选择的软件包 nvidia-driver-470。
准备解压 .../nvidia-driver-470_470.161.03-0ubuntu0.22.04.1_amd64.deb  ...
正在解压 nvidia-driver-470 (470.161.03-0ubuntu0.22.04.1) ...
正在设置 gcc (4:11.2.0-1ubuntu1) ...
正在设置 dkms (2.8.7-2ubuntu2.1) ...
正在设置 nvidia-dkms-470 (470.161.03-0ubuntu0.22.04.1) ...
update-initramfs: deferring update (trigger activated)
INFO:Enable nvidia
DEBUG:Parsing /usr/share/ubuntu-drivers-common/quirks/lenovo_thinkpad
DEBUG:Parsing /usr/share/ubuntu-drivers-common/quirks/dell_latitude
DEBUG:Parsing /usr/share/ubuntu-drivers-common/quirks/put_your_quirks_here
Loading new nvidia-470.161.03 DKMS files...
Building for 5.15.0-60-generic
Building for architecture x86_64
Building initial module for 5.15.0-60-generic
Secure Boot not enabled on this system.
Done.

nvidia.ko:
Running module version sanity check.
 - Original module
   - No original module exists within this kernel
 - Installation
   - Installing to /lib/modules/5.15.0-60-generic/updates/dkms/

nvidia-modeset.ko:
Running module version sanity check.
 - Original module
   - No original module exists within this kernel
 - Installation
   - Installing to /lib/modules/5.15.0-60-generic/updates/dkms/

nvidia-drm.ko:
Running module version sanity check.
 - Original module
   - No original module exists within this kernel
 - Installation
   - Installing to /lib/modules/5.15.0-60-generic/updates/dkms/

nvidia-uvm.ko:
Running module version sanity check.
 - Original module
   - No original module exists within this kernel
 - Installation
   - Installing to /lib/modules/5.15.0-60-generic/updates/dkms/

nvidia-peermem.ko:
Running module version sanity check.
 - Original module
   - No original module exists within this kernel
 - Installation
   - Installing to /lib/modules/5.15.0-60-generic/updates/dkms/

depmod......
正在设置 nvidia-driver-470 (470.161.03-0ubuntu0.22.04.1) ...
正在处理用于 man-db (2.10.2-1) 的触发器 ...
正在处理用于 initramfs-tools (0.140ubuntu13) 的触发器 ...
update-initramfs: Generating /boot/initrd.img-5.15.0-60-generic
(base) :~/Documents/node-v18.10.0-linux-x64/bin$ nvidia-smi
NVIDIA-SMI has failed because it couldn't communicate with the NVIDIA driver. Make sure that the latest NVIDIA driver is installed and running.