目录
- 一、对象存储OSS
- 1、开通“对象存储OSS”服务
- 2、创建Bucket
- 3、上传默认头像
- 4、创建RAM用户
- 5、使用SDK
- 二、后端集成OSS
- 1、新建云存储微服务
- 2、实现文件上传接口
- 三、用户认证功能
- 1、用户认证需求分析
- 2、开发用户认证接口
- 3、用户认证前端
一、对象存储OSS
用户认证需要上传证件图片、首页轮播也需要上传图片,因此我们要做文件服务,阿里云oss是一个很好的分布式文件服务系统,所以我们只需要集成阿里云oss即可
1、开通“对象存储OSS”服务
(1)申请阿里云账号
(2)实名认证
(3)开通“对象存储OSS”服务
(4)进入管理控制台
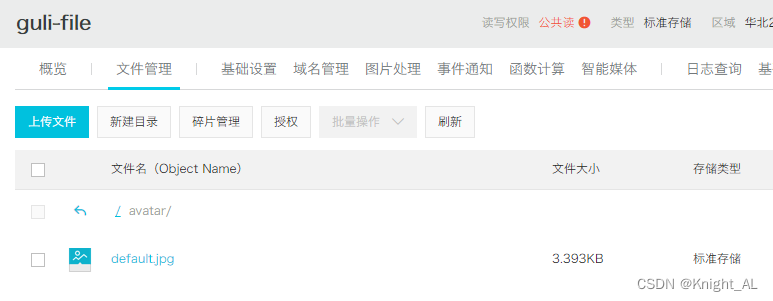
2、创建Bucket
选择:标准存储、公共读、不开通

3、上传默认头像
创建文件夹avatar,上传默认的用户头像
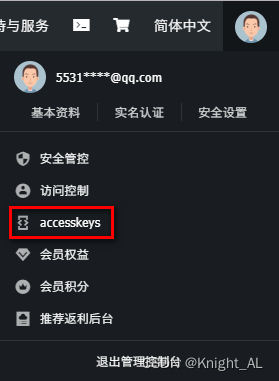
4、创建RAM用户
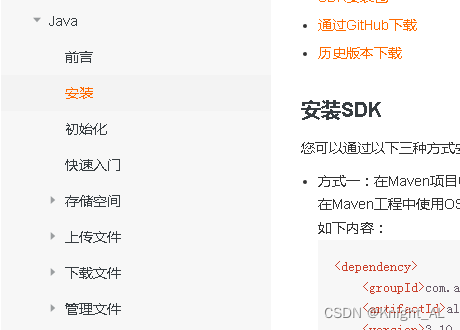
5、使用SDK
二、后端集成OSS
1、新建云存储微服务
1、在service模块下创建子模块service_oss
2、配置pom.xml
service-oss上级模块service已经引入service的公共依赖,service-oss模块只需引入阿里云oss相关依赖
<dependencies>
    <!-- 阿里云oss依赖 -->
    <dependency>
        <groupId>com.aliyun.oss</groupId>
        <artifactId>aliyun-sdk-oss</artifactId>
    </dependency>

    <!-- 日期工具栏依赖 -->
    <dependency>
        <groupId>joda-time</groupId>
        <artifactId>joda-time</artifactId>
    </dependency>
</dependencies>
3、配置application.properties
#服务端口
server.port=8205
#服务名
spring.application.name=service-oss

#环境设置:dev、test、prod
spring.profiles.active=dev

#上传单个文件的最大值1G
spring.servlet.multipart.max-file-size=1024MB
#一次请求上传的所有文件的总大小1G
spring.servlet.multipart.max-request-size=1024MB

#阿里云 OSS
#不同的服务器,地址不同
aliyun.oss.file.endpoint=oss-cn-beijing.aliyuncs.com
aliyun.oss.file.keyid=your accessKeyId
aliyun.oss.file.keysecret=your accessKeySecret
#bucket可以在控制台创建,也可以使用java代码创建
aliyun.oss.file.bucketname=guli-file
4、创建启动类
创建OssApplication.java
import org.springframework.boot.SpringApplication;
import org.springframework.boot.autoconfigure.SpringBootApplication;
import org.springframework.boot.autoconfigure.jdbc.DataSourceAutoConfiguration;
import org.springframework.context.annotation.ComponentScan;

@SpringBootApplication(exclude = DataSourceAutoConfiguration.class)
@ComponentScan(basePackages = {"com.donglin"})
public class OssApplication {

    public static void main(String[] args) {
        SpringApplication.run(OssApplication.class, args);
    }
}
2、实现文件上传接口
1、从配置文件读取常量
创建常量读取工具类:ConstantPropertiesUtil.java
使用@Value读取application.properties里的配置内容
用spring的 InitializingBean 的 afterPropertiesSet 来初始化配置信息,这个方法将在所有的属性被初始化后调用。
/**
 * 常量类,读取配置文件application.properties中的配置
 */
@Component
//@PropertySource("classpath:application.properties")
public class ConstantPropertiesUtil implements InitializingBean {

    @Value("${aliyun.oss.file.endpoint}")
    private String endpoint;

    @Value("${aliyun.oss.file.keyid}")
    private String keyId;

    @Value("${aliyun.oss.file.keysecret}")
    private String keySecret;

    @Value("${aliyun.oss.file.bucketname}")
    private String bucketName;

    public static String END_POINT;
    public static String ACCESS_KEY_ID;
    public static String ACCESS_KEY_SECRET;
    public static String BUCKET_NAME;

    @Override
    public void afterPropertiesSet() throws Exception {
        END_POINT = endpoint;
        ACCESS_KEY_ID = keyId;
        ACCESS_KEY_SECRET = keySecret;
        BUCKET_NAME = bucketName;
    }
}
2、文件上传
创建Service接口:OssService .java
public interface OssService {

    String upload(MultipartFile file);
}
实现:OssServiceImpl.java
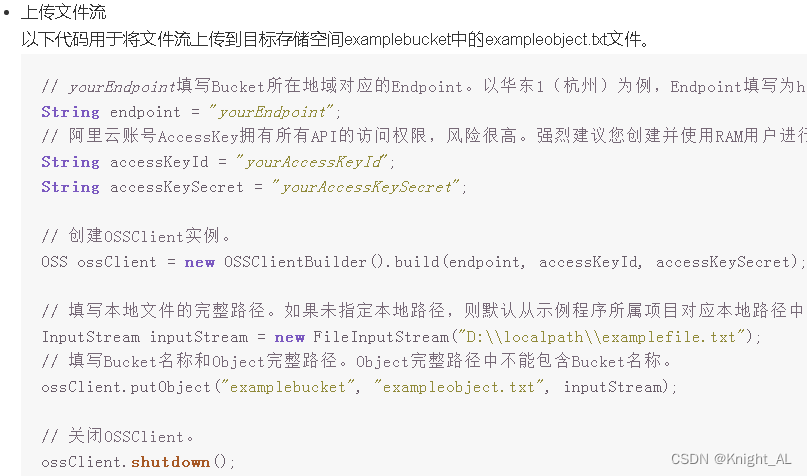
参考SDK中的:Java->上传文件->简单上传->流式上传->上传文件流
@Service
public class OssServiceImpl implements OssService {
    @Override
    public String upload(MultipartFile file) {
        // Endpoint以华东1(杭州)为例,其它Region请按实际情况填写。
        String endpoint = ConstantPropertiesUtil.END_POINT;
        // 阿里云账号AccessKey拥有所有API的访问权限,风险很高。强烈建议您创建并使用RAM用户进行API访问或日常运维,请登录RAM控制台创建RAM用户。
        String accessKeyId = ConstantPropertiesUtil.ACCESS_KEY_ID;
        String accessKeySecret = ConstantPropertiesUtil.ACCESS_KEY_SECRET;
        // 填写Bucket名称,例如examplebucket。
        String bucketName = ConstantPropertiesUtil.BUCKET_NAME;
        // 创建OSSClient实例。
        OSS ossClient = new OSSClientBuilder().build(endpoint, accessKeyId, accessKeySecret);
        try {
            // 上传文件流。
            InputStream inputStream = file.getInputStream();
            String fileName = file.getOriginalFilename();
            //生成随机唯一值,使用uuid,添加到文件名称里面
            String uuid = UUID.randomUUID().toString().replaceAll("-","");
            fileName = uuid+fileName;
            //按照当前日期,创建文件夹,上传到创建文件夹里面
            //  2021/02/02/01.jpg
            String timeUrl = new DateTime().toString("yyyy/MM/dd");
            fileName = timeUrl+"/"+fileName;
            //调用方法实现上传
            ossClient.putObject(bucketName, fileName, inputStream);
            //上传之后文件路径
            // https://yygh-donglin.oss-cn-chengdu.aliyuncs.com/01.jpg
            String url = "https://"+bucketName+"."+endpoint+"/"+fileName;
            //返回
            return url;
        }  catch (IOException e) {
            e.printStackTrace();
            return null;
        } finally {
            if (ossClient != null) {
                ossClient.shutdown();
            }
        }
    }
}
3、创建Controller
FileUploadController.java
@Api(tags="阿里云文件管理")
@RestController
@RequestMapping("/admin/oss/file")
public class FileUploadController {

    @Autowired
    private OssService ossService;

    /**
     * 文件上传
     */
    @ApiOperation(value = "文件上传")
    @PostMapping("upload")
    public R upload(MultipartFile file){
        String uploadUrl = ossService.upload(file);
        return R.ok().data("url",uploadUrl);
    }

}
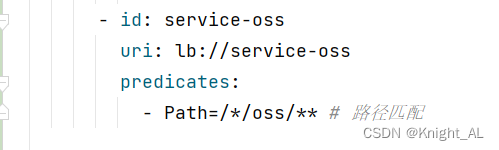
4、配置网关
properties
#设置路由id
spring.cloud.gateway.routes[5].id=service-oss
#设置路由的uri
spring.cloud.gateway.routes[5].uri=lb://service-oss
#设置路由断言,代理servicerId为auth-service的/auth/路径
spring.cloud.gateway.routes[5].predicates= Path=/*/oss/**
yml
三、用户认证功能
1、用户认证需求分析
1、需求分析
用户登录成功后都要进行身份认证,认证通过后才可以预约挂号
认证过程:用户填写信息(姓名、证件类型、证件号码和证件照片)==> 平台审批
用户认证设计接口:
1、提交认证
2、上传证件图片
3、获取提交认证信息

2、开发用户认证接口
操作service_user模块
1、添加service接口及实现
(1)在UserInfoService类添加接口
    //用户认证
    UserInfo getUserInfo(Long userId);
(2)在UserInfoServiceImpl添加实现
    @Override
    public UserInfo getUserInfo(Long userId) {
        UserInfo userInfo = baseMapper.selectById(userId);
        userInfo.getParam().put("authStatusString", AuthStatusEnum.getStatusNameByStatus(userInfo.getStatus()));
        return userInfo;
    }
2、添加controller方法
在UserInfoController类添加方法
//    //获取用户id信息接口
//    @GetMapping("auth/getUserInfo")
//    public R getUserInfo(HttpServletRequest request) {
//        Long userId = AuthContextHolder.getUserId(request);
//        UserInfo userInfo = userInfoService.getById(userId);
//        return R.ok().data("userInfo",userInfo);
//    }

    //查询用户信息
    @GetMapping("/info")
    public R getUserInfo(@RequestHeader String token){
        Long userId = JwtHelper.getUserId(token);
        UserInfo byId = userInfoService.getUserInfo(userId);
        return R.ok().data("user",byId);
    }

    //提交之后修改用户信息
    @PutMapping("/update")
    public R update(@RequestHeader String token, @RequestBody UserAuthVo userAuthVo){
        Long userId = JwtHelper.getUserId(token);
        UserInfo userInfo = new UserInfo();
        userInfo.setId(userId);
        userInfo.setName(userAuthVo.getName());
        userInfo.setCertificatesType(userAuthVo.getCertificatesType());
        userInfo.setCertificatesNo(userAuthVo.getCertificatesNo());
        userInfo.setCertificatesUrl(userAuthVo.getCertificatesUrl());
        userInfo.setAuthStatus(AuthStatusEnum.AUTH_RUN.getStatus());
        userInfoService.updateById(userInfo);

        return R.ok();
    }
3、用户认证前端
1、封装api请求
在api/userInfo.js添加方法
import request from '@/utils/request'

const api_name = `/user/userinfo`

export default {

    getUserInfo() {
        return request({
            url: `${api_name}/info`,
            method: `get`
        })
    },

    saveUserAuah(userAuah) {
        return request({
             url: `${api_name}/update`,
             method: 'put',
             data: userAuah
        })
    }
}
2、页面展示
(1)myheader.vue页面添加方法
loginMenu(command) {
    if('/logout' == command) {
        cookie.set('name', '', {domain: 'localhost'})
        cookie.set('token', '', {domain: 'localhost'})

        //跳转页面
        window.location.href = '/'
    } else {
        window.location.href = command
    }
}
(2)修改utils/request.js文件
//引入js-cookie
import cookie from 'js-cookie'

// http request 拦截器   //浏览器访问服务器
service.interceptors.request.use(
    config => {
    // token 先不处理,后续使用时在完善
    if (cookie.get('token')) {
        //cookie本身不能跨域
        config.headers['token'] = cookie.get('token')
    }
    return config
},
  err => {
    return Promise.reject(err)
})
(3)创建pages/user/index.vue
我们需要在pages下user文件下创建

<template>
<!-- header -->
<div class="nav-container page-component">
<!--左侧导航 #start -->
<div class="nav left-nav">
<div class="nav-item selected">
<span class="v-link selected dark" onclick="javascript:window.location='/user'">实名认证 </span>
</div>
<div class="nav-item">
<span class="v-link selected dark" onclick="javascript:window.location='/order'"> 挂号订单 </span>
</div>
<div class="nav-item ">
<span class="v-link clickable dark" onclick="javascript:window.location='/patient'"> 就诊人管理 </span>
</div>
<div class="nav-item ">
<span class="v-link clickable dark"> 修改账号信息 </span>
</div>
<div class="nav-item ">
<span class="v-link clickable dark"> 意见反馈 </span>
</div>
</div>
<!-- 左侧导航 #end -->
<!-- 右侧内容 #start -->
<div class="page-container">
<div>
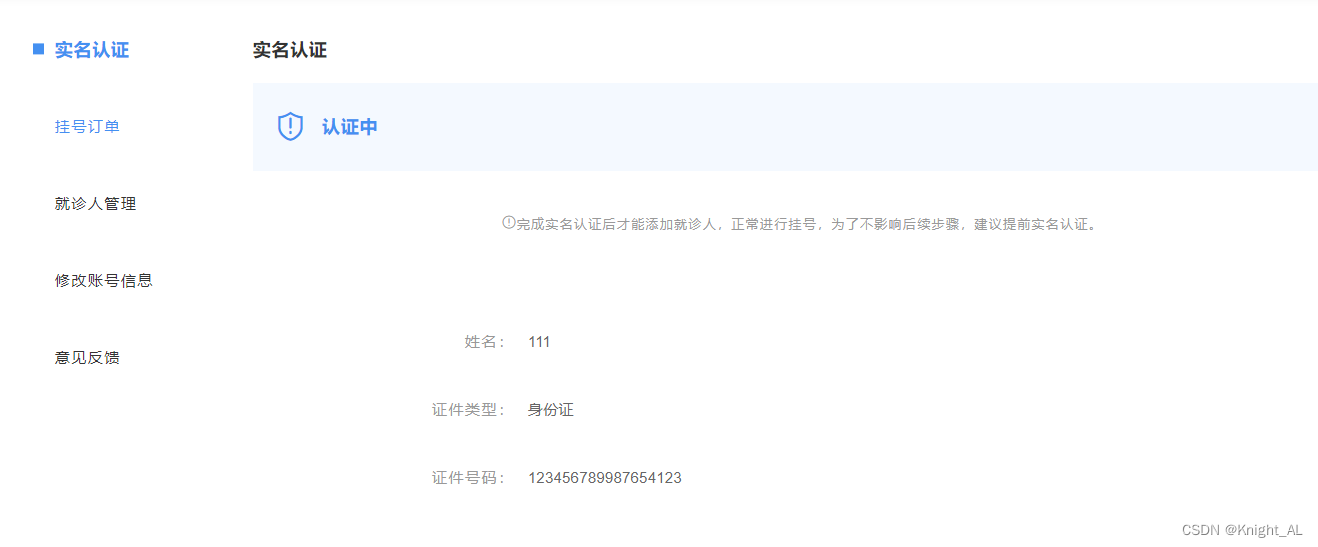
<div class="title"> 实名认证</div>
<div class="status-bar">
<div class="status-wrapper"><span class="iconfont"></span>{{ userInfo.param.authStatusString }}</div>
</div>
<div class="tips"><span class="iconfont"></span>
完成实名认证后才能添加就诊人,正常进行挂号,为了不影响后续步骤,建议提前实名认证。
</div>
<div class="form-wrapper" v-if="userInfo.authStatus == 0">
<div>
<el-form :model="userAuah" label-width="110px" label-position="left">
<el-form-item prop="name" label="姓名:" class="form-normal">
<div class="name-input">
<el-input v-model="userAuah.name" placeholder="请输入联系人姓名全称" class="input v-input"/>
</div>
</el-form-item>
<el-form-item prop="certificatesType" label="证件类型:">
<el-select v-model="userAuah.certificatesType" placeholder="请选择证件类型" class="v-select patient-select">
<el-option
v-for="item in certificatesTypeList"
:key="item.value"
:label="item.name"
:value="item.name">
</el-option>
</el-select>
</el-form-item>
<el-form-item prop="certificatesNo" label="证件号码:">
<el-input v-model="userAuah.certificatesNo" placeholder="请输入联系人证件号码" class="input v-input"/>
</el-form-item>
<el-form-item prop="name" label="上传证件:">
<div class="upload-wrapper">
<div class="avatar-uploader">
<el-upload
class="avatar-uploader"
:action="fileUrl"
:show-file-list="false"
:on-success="onUploadSuccess">
<div class="upload-inner-wrapper">
<img v-if="userAuah.certificatesUrl" :src="userAuah.certificatesUrl" class="avatar">
<i v-else class="el-icon-plus avatar-uploader-icon"></i>
<div v-if="!userAuah.certificatesUrl" class="text"> 上传证件合照</div>
</div>
</el-upload>
</div>
<img src="//img.114yygh.com/static/web/auth_example.png" class="example">
</div>
</el-form-item>
</el-form>
<div class="bottom-wrapper">
<div class="button-wrapper">
<div class="v-button" @click="saveUserAuah()">{{ submitBnt }}</div>
</div>
</div>
</div>
</div>
<div class="context-container" v-if="userInfo.authStatus != 0">
<div>
<el-form :model="formData" label-width="110px" label-position="right">
<el-form-item prop="name" label="姓名:" class="form-normal">
<div class="name-input">
{{ userInfo.name }}
</div>
</el-form-item>
<el-form-item prop="name" label="证件类型:">
{{ userInfo.certificatesType }}
</el-form-item>
<el-form-item prop="name" label="证件号码:">
{{ userInfo.certificatesNo }}
</el-form-item>
</el-form>
</div>
</div>
</div>
</div><!-- 右侧内容 #end -->
<!-- 登录弹出框 -->
</div>
<!-- footer -->
</template>
<script>
import '~/assets/css/hospital_personal.css'
import '~/assets/css/hospital.css'
import '~/assets/css/personal.css'
import dictApi from '@/api/dict'
import userInfoApi from '@/api/userInfo'
const defaultForm = {
name: '',
certificatesType: '',
certificatesNo: '',
certificatesUrl: ''
}
export default {
data() {
return {
formData:{},
userAuah: defaultForm,
certificatesTypeList: [],
fileUrl:'http://localhost:8222/admin/oss/file/upload',
userInfo: {
param: {}
},
submitBnt: '提交'
}
},
//create 钩子函数:发送预请求----》请求到后端接口,自己写的请求
//mouted 钩子函数:发送预请求----》不会请求到后端接口,自己写的请求
mounted() {
this.init()
},
methods: {
init() {
this.getUserInfo()
this.getDict()
},
getUserInfo() {
userInfoApi.getUserInfo().then(response => {
this.userInfo = response.data.user
})
},
saveUserAuah() {
if(this.submitBnt == '正在提交...') {
this.$message.info('重复提交')
return
}
this.submitBnt = '正在提交...'
userInfoApi.saveUserAuah(this.userAuah).then(response => {
this.$message.success("提交成功")
window.location.reload()
}).catch(e => {
this.submitBnt = '提交'
})
},
getDict() {
dictApi.getChildList(20000).then(response => {
this.certificatesTypeList = response.data.items
})
},
//axios:Response.data---->R对象
//el-upload:response----->对象
onUploadSuccess(response, file) {
if(response.code !== 20000) {
this.$message.error("上传失败")
return
}
// 填充上传文件列表
this.userAuah.certificatesUrl = response.data.url
}
}
}
</script>
<style>
.header-wrapper .title {
font-size: 16px;
margin-top: 0;
}
.content-wrapper {
margin-left: 0;
}
.patient-card .el-card__header .detail {
font-size: 14px;
}
.page-container .title {
letter-spacing: 1px;
font-weight: 700;
color: #333;
font-size: 16px;
margin-top: 0;
margin-bottom: 20px;
}
.page-container .tips {
width: 100%;
padding-left: 0;
}
.page-container .form-wrapper {
padding-left: 92px;
width: 580px;
}
.form-normal {
height: 40px;
}
.bottom-wrapper{
width: 100%;
padding: 0;
margin-top: 0;
}
</style>
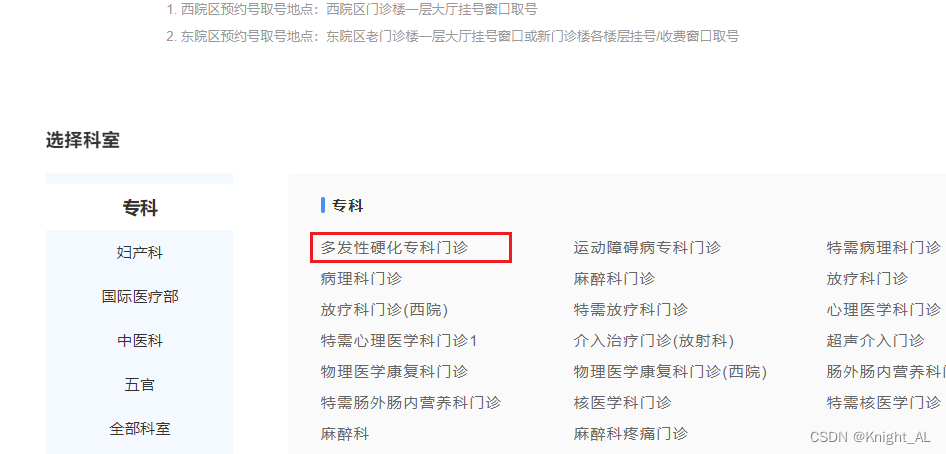
 3、预约挂号页面跳转
点击门诊信息,你注册过了,判断实名认证过了没有,没有就不能跳到门诊信息里面,返回到实名认证页面
import cookie from 'js-cookie' //引入cookie
import userInfoApi from '@/api/userInfo'

    schedule(depcode) {
      // 登录判断
      let token = cookie.get('token')
      if (!token) {
        loginEvent.$emit('loginDialogEvent')
        return
       }
      //判断认证
       userInfoApi.getUserInfo().then(response => {
        let authStatus = response.data.user.authStatus
        // 状态为2认证通过
        if (!authStatus || authStatus != 2) {
           window.location.href = '/user'
           return
        }else{
            window.location.href = '/hospital/schedule?hoscode=' + this.hospital.hoscode + "&depcode="+ depcode
    }
 })
}