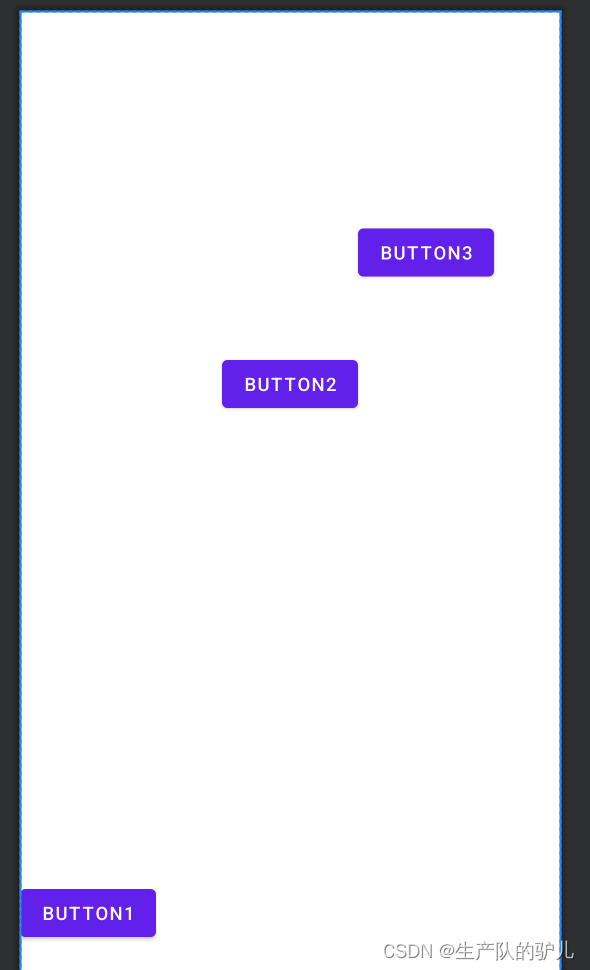
Relative Layout
前端界面代码
<?xml version="1.0" encoding="utf-8"?>
<RelativeLayout xmlns:android="http://schemas.android.com/apk/res/android"
    xmlns:app="http://schemas.android.com/apk/res-auto"
    xmlns:tools="http://schemas.android.com/tools"
    android:layout_width="match_parent"
    android:layout_height="match_parent"
    tools:context=".MainActivity">

    <Button
        android:layout_width="wrap_content"
        android:layout_height="wrap_content"
        android:text="button1"
        android:layout_alignParentBottom="true"
        android:layout_marginBottom="20dp"/>

    <Button
        android:id="@+id/btn_2"
        android:layout_width="wrap_content"
        android:layout_height="wrap_content"
        android:text="button2"
        android:layout_centerHorizontal="true"
        android:layout_marginTop="260dp"/>

    <Button
        android:layout_width="wrap_content"
        android:layout_height="wrap_content"
        android:text="button3"
        android:layout_toRightOf="@+id/btn_2"
        android:layout_alignBottom="@+id/btn_2"
        android:layout_marginBottom="100dp"
        />

</RelativeLayout>
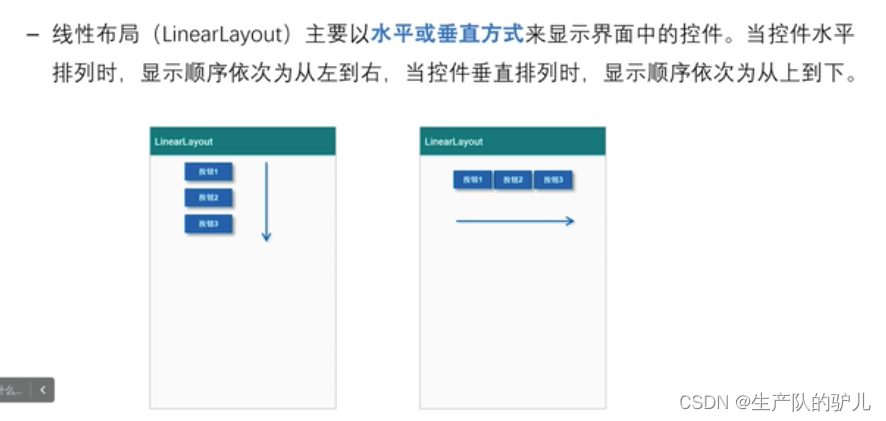
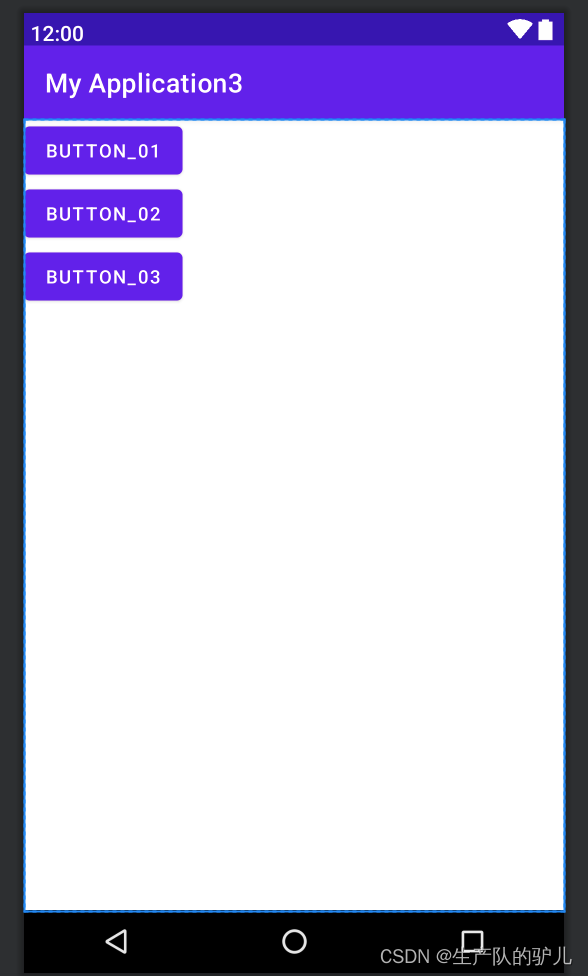
LinearLayout
线性布局(LinearLayout)主要以水平或垂直方式来显示界面中的控件。当控件水平排列时,显示顺序依次为从左到右,当控件垂直排列时,显示顺序依次为从上到下。
<?xml version="1.0" encoding="utf-8"?>
<LinearLayout xmlns:android="http://schemas.android.com/apk/res/android"
    xmlns:app="http://schemas.android.com/apk/res-auto"
    xmlns:tools="http://schemas.android.com/tools"
    android:layout_width="match_parent"
    android:layout_height="match_parent"
    android:orientation="vertical"
    tools:context=".MainActivity">

    <Button
        android:layout_width="wrap_content"
        android:layout_height="wrap_content"
        android:text="button_01"/>

    <Button
        android:layout_width="wrap_content"
        android:layout_height="wrap_content"
        android:text="button_02"/>

    <Button
        android:layout_width="wrap_content"
        android:layout_height="wrap_content"
        android:text="button_03"/>


</LinearLayout>
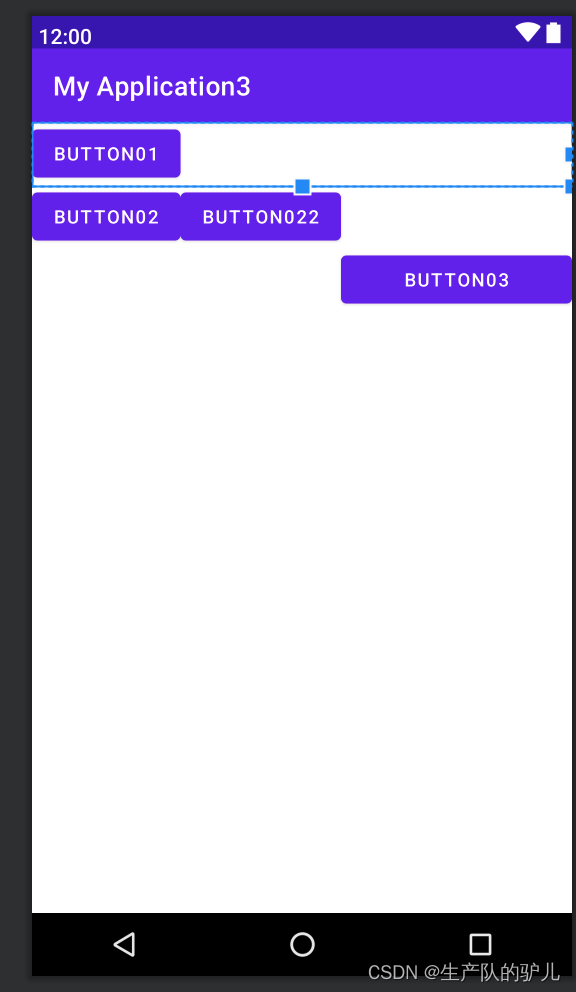
TableLayout 布局
<?xml version="1.0" encoding="utf-8"?>
<TableLayout xmlns:android="http://schemas.android.com/apk/res/android"
    xmlns:app="http://schemas.android.com/apk/res-auto"
    xmlns:tools="http://schemas.android.com/tools"
    android:layout_width="match_parent"
    android:layout_height="match_parent"
    android:orientation="vertical"
    tools:context=".MainActivity"
    android:stretchColumns="2"
    >

    <TableRow>
        <Button
            android:layout_width="wrap_content"
            android:layout_height="wrap_content"
            android:text="button01"
            />
    </TableRow>
    <TableRow>
        <Button
            android:layout_width="wrap_content"
            android:layout_height="wrap_content"
            android:text="button02"
            />
        <Button
            android:layout_width="wrap_content"
            android:layout_height="wrap_content"
            android:text="button022"
            />
    </TableRow>

    <TableRow>
        <Button
            android:layout_width="wrap_content"
            android:layout_height="wrap_content"
            android:text="button03"
            android:layout_column="2"
            />

    </TableRow>
</TableLayout>
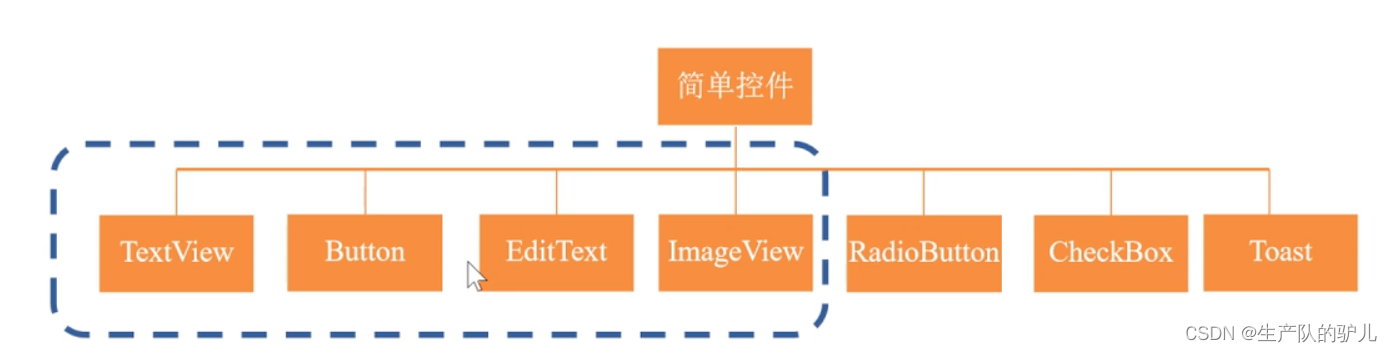
简单控件
控件 : 页面的组成的主要元素,用于 和 用户进行交互。
控件分类
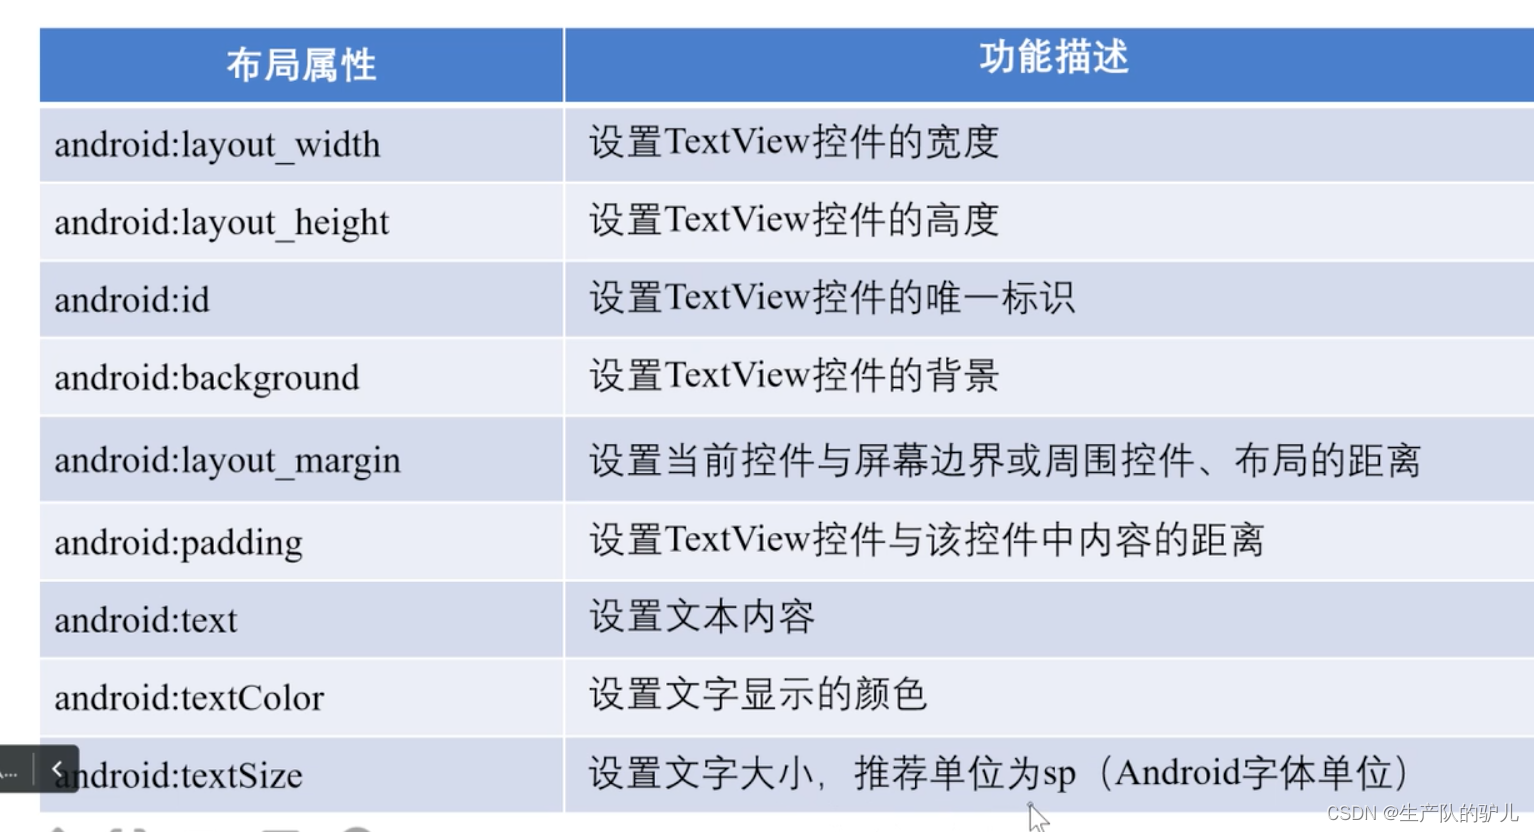
控件属性
控件布局
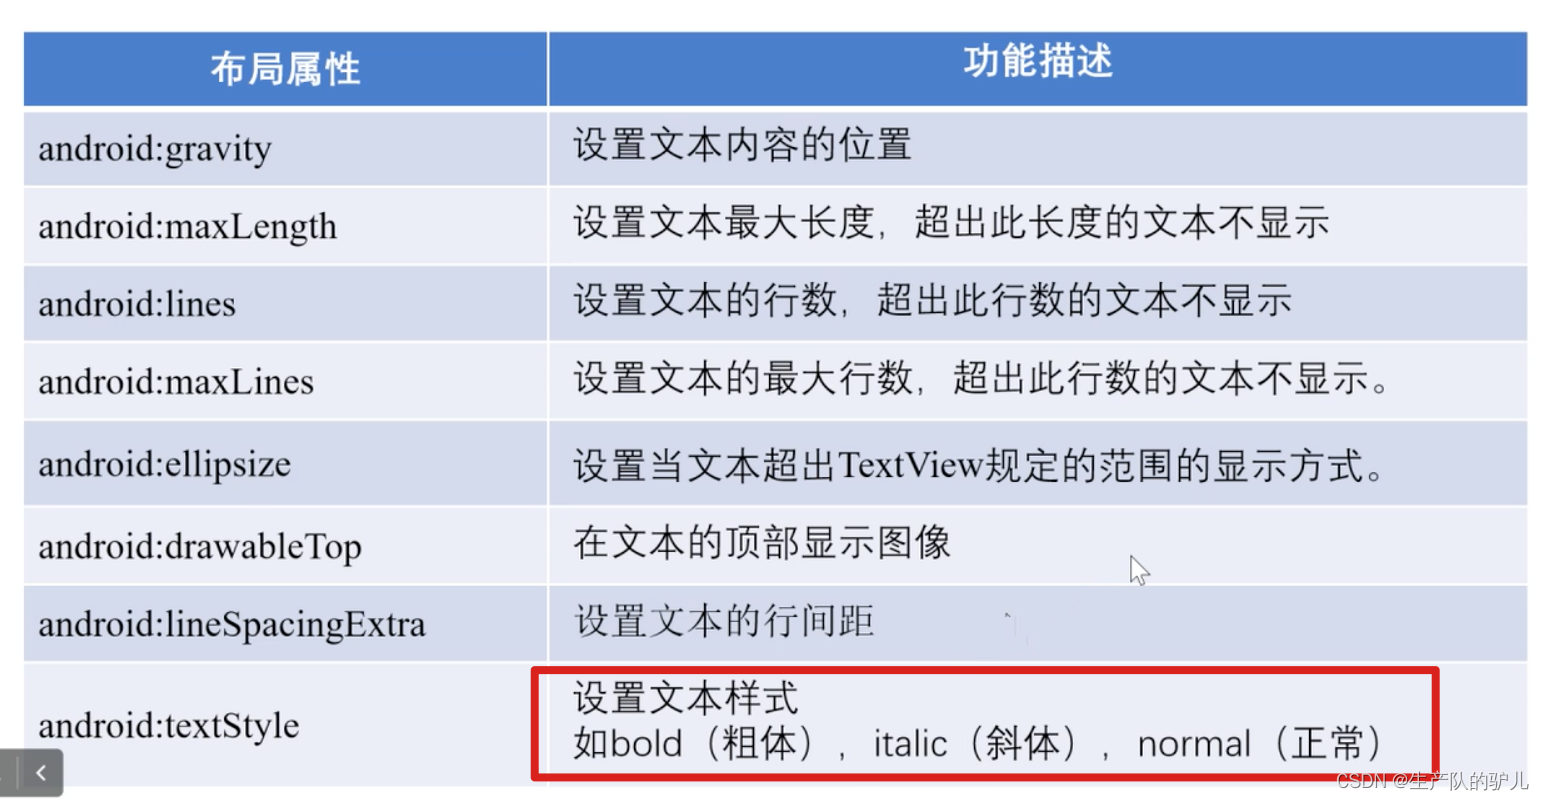
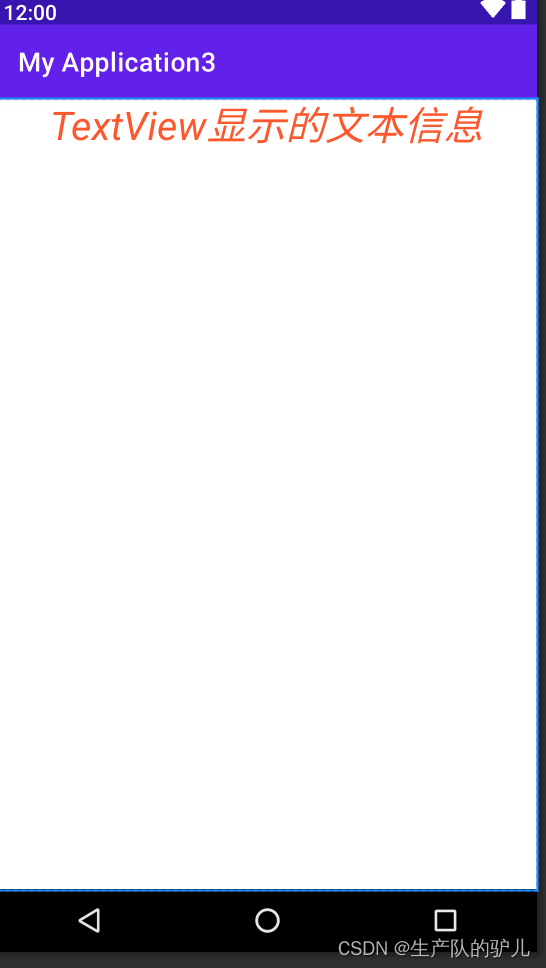
TextView
<?xml version="1.0" encoding="utf-8"?>
<RelativeLayout xmlns:android="http://schemas.android.com/apk/res/android"
    xmlns:app="http://schemas.android.com/apk/res-auto"
    xmlns:tools="http://schemas.android.com/tools"
    android:layout_width="match_parent"
    android:layout_height="match_parent"
    tools:context=".MainActivity">

    <TextView
        android:layout_width="wrap_content"
        android:layout_height="wrap_content"
        android:text="TextView显示的文本信息"
        android:textSize="30sp"
        android:textColor="#FF5722"
        android:textStyle="italic"
        android:layout_centerHorizontal="true"
        />


</RelativeLayout>
设置布局的步骤
1.确定布局 Determine the layout
2.多少控件 How many controls?
3.格局 和 位置 Pattern and Locations
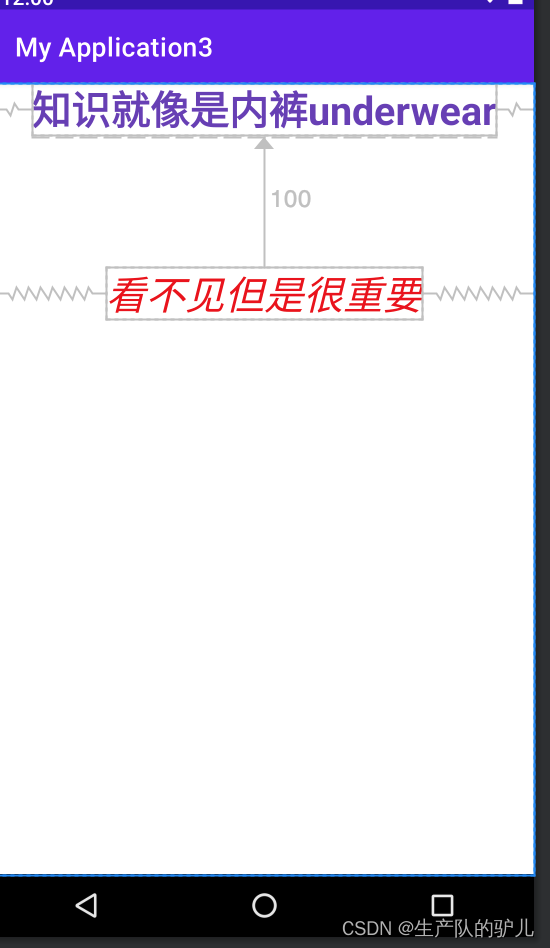
小案例
<?xml version="1.0" encoding="utf-8"?>
<RelativeLayout xmlns:android="http://schemas.android.com/apk/res/android"
    xmlns:app="http://schemas.android.com/apk/res-auto"
    xmlns:tools="http://schemas.android.com/tools"
    android:layout_width="match_parent"
    android:layout_height="match_parent"
    tools:context=".MainActivity">

    <TextView
        android:id="@+id/tv_1"
        android:layout_width="wrap_content"
        android:layout_height="wrap_content"
        android:text="知识就像是内裤underwear"
        android:textSize="30sp"
        android:textColor="#673AB7"
        android:textStyle="bold"
        android:layout_centerHorizontal="true"
        />

    <TextView
        android:id="@+id/tv_2"
        android:layout_width="wrap_content"
        android:layout_height="wrap_content"
        android:text="看不见但是很重要"
        android:layout_centerHorizontal="true"
        android:layout_below="@+id/tv_1"
        android:layout_marginTop="100dp"
        android:textSize="30sp"
        android:textColor="#EC0A0A"
        android:textStyle="italic"
        />

</RelativeLayout>
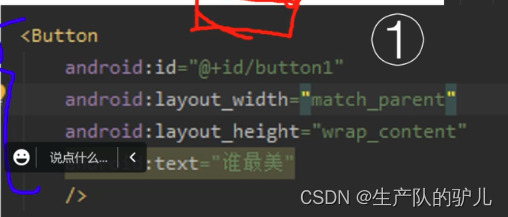
Button
Buton控件继承自 TexView控件,既可以显示文本,又可以显示图片,同时允许用户通过点击来执行操作,当Button控件被点击时,被按下与弹起的背景会有个动态的切换效果,这个效果就是点击效果。
最重要的作用:响应用户的点击事件
实现方式
1 在xml文件中添加按钮控件
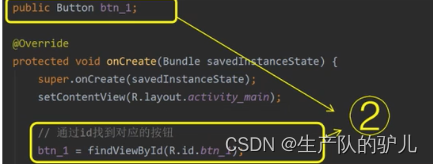
2 在对应Java文件中获取按钮
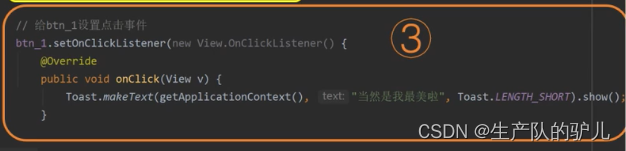
3 给按钮设置点击事件
案例
设置前端布局
<?xml version="1.0" encoding="utf-8"?>
<RelativeLayout xmlns:android="http://schemas.android.com/apk/res/android"
    xmlns:app="http://schemas.android.com/apk/res-auto"
    xmlns:tools="http://schemas.android.com/tools"
    android:layout_width="match_parent"
    android:layout_height="match_parent"
    tools:context=".MainActivity">

    <Button
        android:id="@+id/btn"
        android:layout_width="wrap_content"
        android:layout_height="wrap_content"
        android:text="我美吗"
        android:textSize="30sp"
        />

</RelativeLayout>
后端逻辑
package edu.northeastern.myapplication3;
import androidx.appcompat.app.AppCompatActivity;
import android.annotation.SuppressLint;
import android.os.Bundle;
import android.view.View;
import android.widget.Button;
import android.widget.Toast;
public class MainActivity extends AppCompatActivity {
private Button btn;
@Override
protected void onCreate(Bundle savedInstanceState) {
super.onCreate(savedInstanceState);
setContentView(R.layout.activity_main);
// 2. 通过id获取按钮
btn = findViewById(R.id.btn);
// 3. 给btn按钮设置监听事件
btn.setOnClickListener(new View.OnClickListener() {
@Override
public void onClick(View v) {
// 4. 监听到点击之后,要做的事情
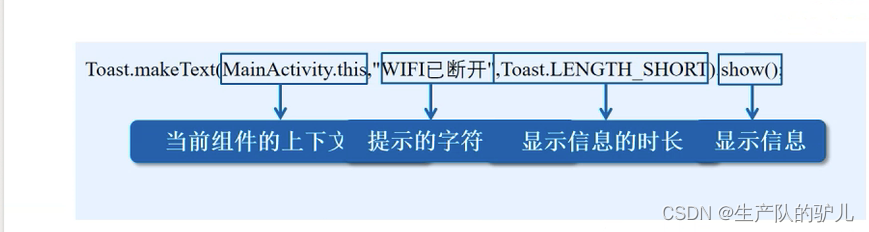
Toast.makeText(getApplicationContext(),"当然是你最美了",Toast.LENGTH_SHORT).show();
}
});
}
}
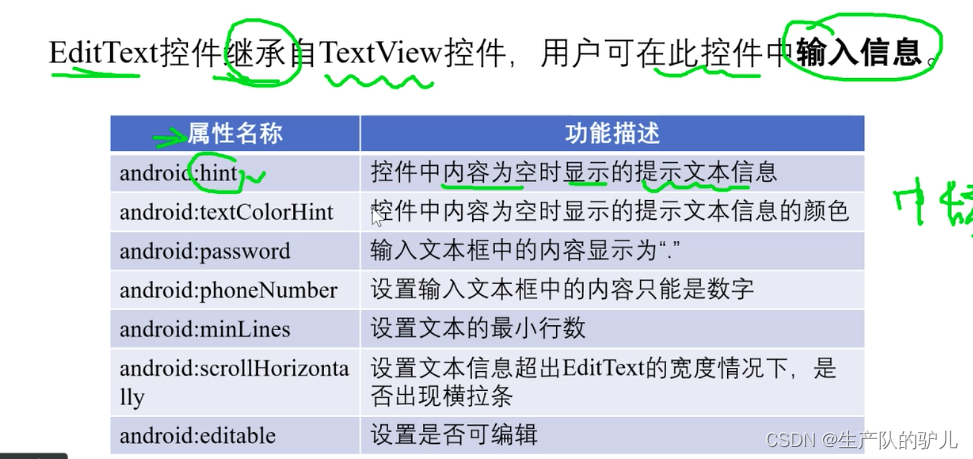
EditText
输入框,编辑框
属性
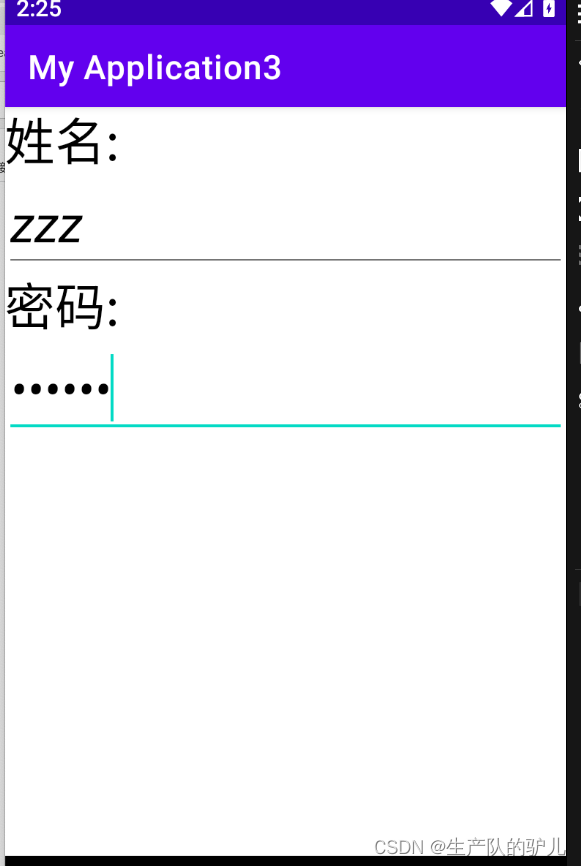
案例
布局
<?xml version="1.0" encoding="utf-8"?><TextView
android:layout_width="wrap_content"
android:layout_height="wrap_content"
android:text="姓名: "
android:textSize="30sp"
android:textColor="#000"/>
<EditText
android:layout_width="match_parent"
android:layout_height="wrap_content"
android:hint="请输入名字"
android:maxLines="2"
android:textColor="#000"
android:textStyle="italic"
android:textSize="30sp"/>
<TextView
android:layout_width="wrap_content"
android:layout_height="wrap_content"
android:text="密码: "
android:textSize="30sp"
android:textColor="#000"/>
<EditText
android:layout_width="match_parent"
android:layout_height="wrap_content"
android:hint="请输入密码"
android:maxLines="2"
android:textColor="#000"
android:textStyle="italic"
android:textSize="30sp"
android:password="true"
/>
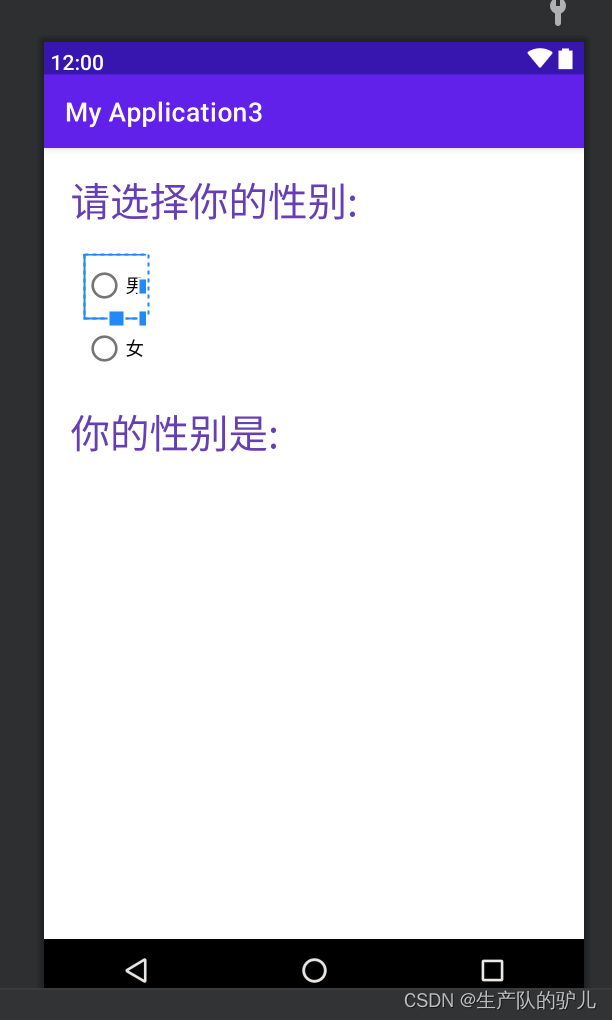
RadioButton 单选按钮
RadioButton控件继承自Button控件,表示单选按钮通过android.checked属性指定是否选中
RadioGroup 单选组合框
容纳多个 单选,组合在一起,实现单选状态
案例
前端布局
<?xml version="1.0" encoding="utf-8"?>
<LinearLayout xmlns:android="http://schemas.android.com/apk/res/android"
    xmlns:tools="http://schemas.android.com/tools"
    android:layout_width="match_parent"
    android:layout_height="match_parent"
    android:orientation="vertical"
    tools:context=".MainActivity">

    <TextView
        android:id="@+id/tv_select"
        android:layout_width="match_parent"
        android:layout_height="wrap_content"
        android:text="请选择你的性别: "
        android:textSize="30sp"
        android:textColor="#673AB7"
        android:layout_margin="20dp"
        />

    <RadioGroup
        android:id="@+id/rdg"
        android:layout_width="wrap_content"
        android:layout_height="wrap_content">

        <RadioButton
            android:id="@+id/btn_man"
            android:layout_width="wrap_content"
            android:layout_height="wrap_content"
            android:text="男"
            android:layout_marginLeft="30dp"
            />

        <RadioButton
            android:id="@+id/btn_woman"
            android:layout_width="wrap_content"
            android:layout_height="wrap_content"
            android:text="女"
            android:layout_marginLeft="30dp"
            />
    </RadioGroup>

    <TextView
        android:id="@+id/tv_out"
        android:layout_width="match_parent"
        android:layout_height="wrap_content"
        android:text="你的性别是: "
        android:textSize="30sp"
        android:textColor="#673AB7"
        android:layout_margin="20dp"
        />

    <TextView
        android:id="@+id/tv_context"
        android:layout_width="wrap_content"
        android:layout_height="wrap_content"
        android:textColor="#F44336"
        android:layout_margin="20dp"
        />


</LinearLayout>
后端逻辑
package edu.northeastern.myapplication3;

import androidx.appcompat.app.AppCompatActivity;

import android.annotation.SuppressLint;
import android.os.Bundle;
import android.view.View;
import android.widget.Button;
import android.widget.RadioButton;
import android.widget.RadioGroup;
import android.widget.TextView;
import android.widget.Toast;

public class MainActivity extends AppCompatActivity {

    RadioGroup rdg;
    RadioButton btn_man, btn_woman;
    TextView tv_content;

    @Override
    protected void onCreate(Bundle savedInstanceState) {
        super.onCreate(savedInstanceState);
        setContentView(R.layout.activity_main);
        // 初始化
        rdg = findViewById(R.id.rdg);
        btn_man = findViewById(R.id.btn_man);
        btn_woman = findViewById(R.id.btn_woman);
        tv_content = findViewById(R.id.tv_context);

        // 点击监听
        rdg.setOnCheckedChangeListener(new RadioGroup.OnCheckedChangeListener() {
            @Override
            public void onCheckedChanged(RadioGroup group, int checkedId) {
                // 用户点击之后,我们需要执行的操作
                if (checkedId == R.id.btn_man) {
                    // 用户选择了男
                    tv_content.setText("男");
                } else {
                    tv_content.setText("女");
                }
            }
        });
    }
}
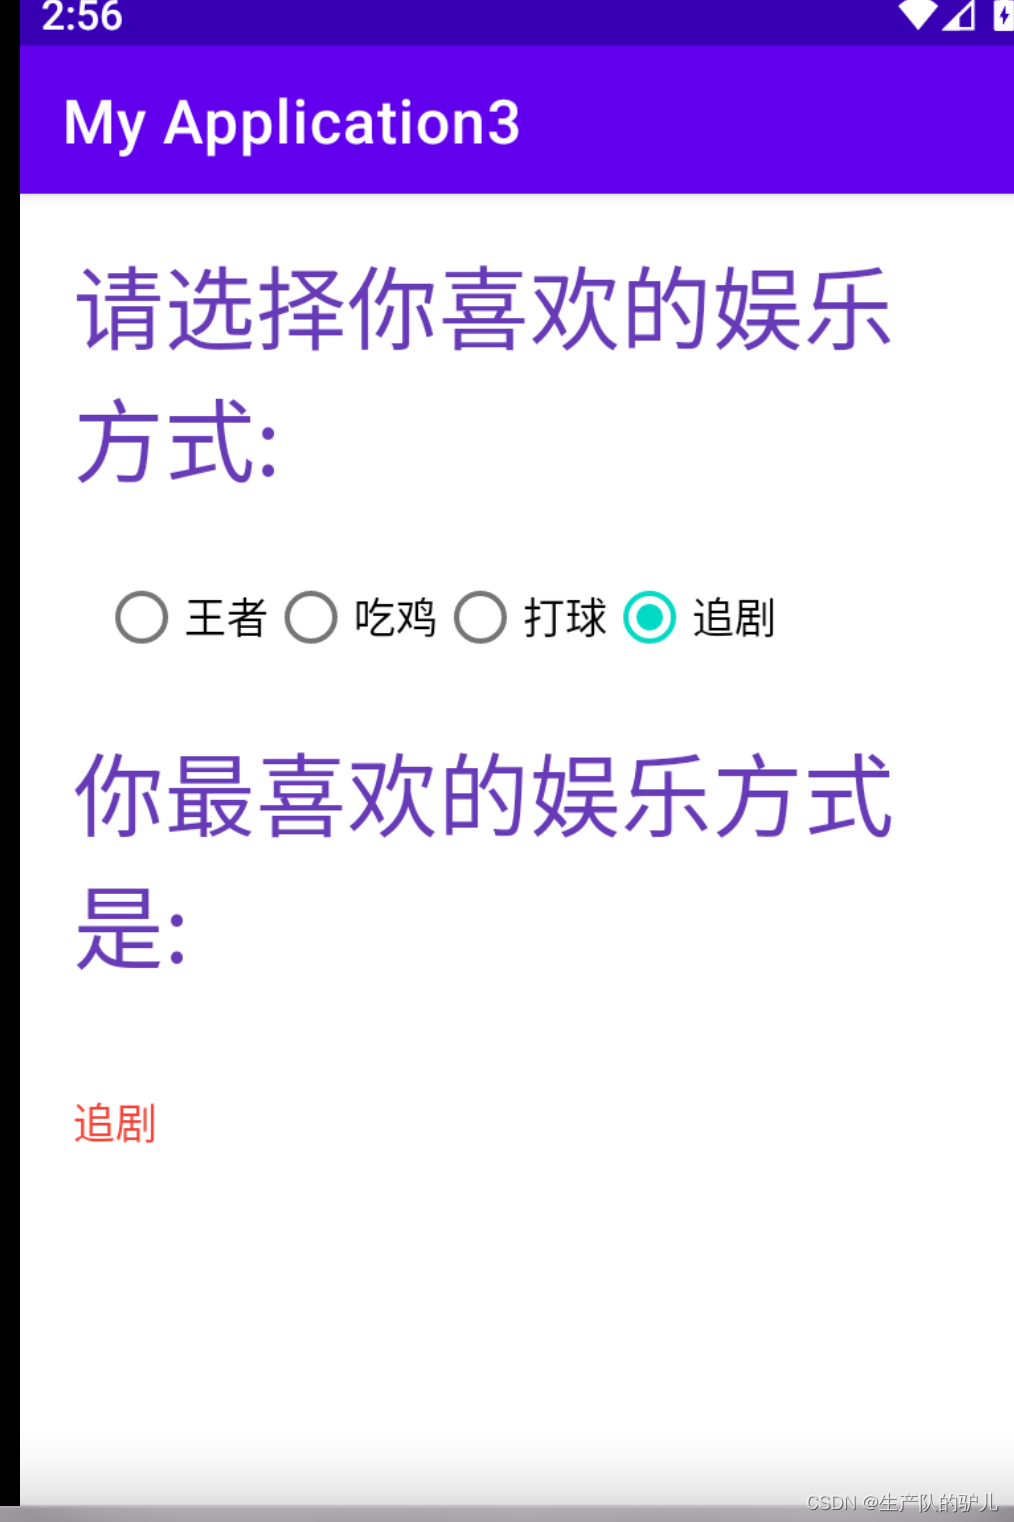
案例2
案例1看懂不用看案例2了
前端
<?xml version="1.0" encoding="utf-8"?>
<LinearLayout xmlns:android="http://schemas.android.com/apk/res/android"
    xmlns:tools="http://schemas.android.com/tools"
    android:layout_width="match_parent"
    android:layout_height="match_parent"
    android:orientation="vertical"
    tools:context=".MainActivity">

    <TextView
        android:id="@+id/tv_select"
        android:layout_width="match_parent"
        android:layout_height="wrap_content"
        android:text="请选择你喜欢的娱乐方式: "
        android:textSize="30sp"
        android:textColor="#673AB7"
        android:layout_margin="20dp" />

    <RadioGroup
        android:id="@+id/rdg"
        android:layout_width="wrap_content"
        android:layout_height="wrap_content"
        android:orientation="horizontal"
        android:layout_marginLeft="30dp">

        <RadioButton
            android:id="@+id/btn_wz"
            android:layout_width="wrap_content"
            android:layout_height="wrap_content"
            android:text="王者" />

        <RadioButton
            android:id="@+id/btn_cc"
            android:layout_width="wrap_content"
            android:layout_height="wrap_content"
            android:text="吃鸡" />

        <RadioButton
            android:id="@+id/btn_dq"
            android:layout_width="wrap_content"
            android:layout_height="wrap_content"
            android:text="打球" />

        <RadioButton
            android:id="@+id/btn_zj"
            android:layout_width="wrap_content"
            android:layout_height="wrap_content"
            android:text="追剧"/>

    </RadioGroup>

    <TextView
        android:id="@+id/tv_out"
        android:layout_width="match_parent"
        android:layout_height="wrap_content"
        android:text="你最喜欢的娱乐方式是: "
        android:textSize="30sp"
        android:textColor="#673AB7"
        android:layout_margin="20dp"
        />

    <TextView
        android:id="@+id/tv_context"
        android:layout_width="wrap_content"
        android:layout_height="wrap_content"
        android:textColor="#F44336"
        android:layout_margin="20dp"
        />


</LinearLayout>
后端代码
package edu.northeastern.myapplication3;

import androidx.appcompat.app.AppCompatActivity;

import android.annotation.SuppressLint;
import android.os.Bundle;
import android.view.View;
import android.widget.Button;
import android.widget.RadioButton;
import android.widget.RadioGroup;
import android.widget.TextView;
import android.widget.Toast;

public class MainActivity extends AppCompatActivity {

    RadioGroup rdg;
    RadioButton btn_wz, btn_cc, btn_dq, btn_zj;
    TextView tv_content;

    @Override
    protected void onCreate(Bundle savedInstanceState) {
        super.onCreate(savedInstanceState);
        setContentView(R.layout.activity_main);
        // 初始化
        rdg = findViewById(R.id.rdg);
        btn_wz = findViewById(R.id.btn_wz);
        btn_cc = findViewById(R.id.btn_cc);
        btn_dq = findViewById(R.id.btn_dq);
        btn_zj = findViewById(R.id.btn_zj);
        tv_content = findViewById(R.id.tv_context);

        // 点击监听
        rdg.setOnCheckedChangeListener(new RadioGroup.OnCheckedChangeListener() {
            @Override
            public void onCheckedChanged(RadioGroup group, int checkedId) {
                // 用户点击之后,我们需要执行的操作
                if (checkedId == R.id.btn_wz) {
                    // 用户选择了男
                    tv_content.setText("王者");
                } else if (checkedId == R.id.btn_cc){
                    tv_content.setText("吃鸡");
                } else if (checkedId == R.id.btn_dq){
                    tv_content.setText("打球");
                }else if (checkedId == R.id.btn_zj){
                    tv_content.setText("追剧");
                }
            }
        });
    }
}
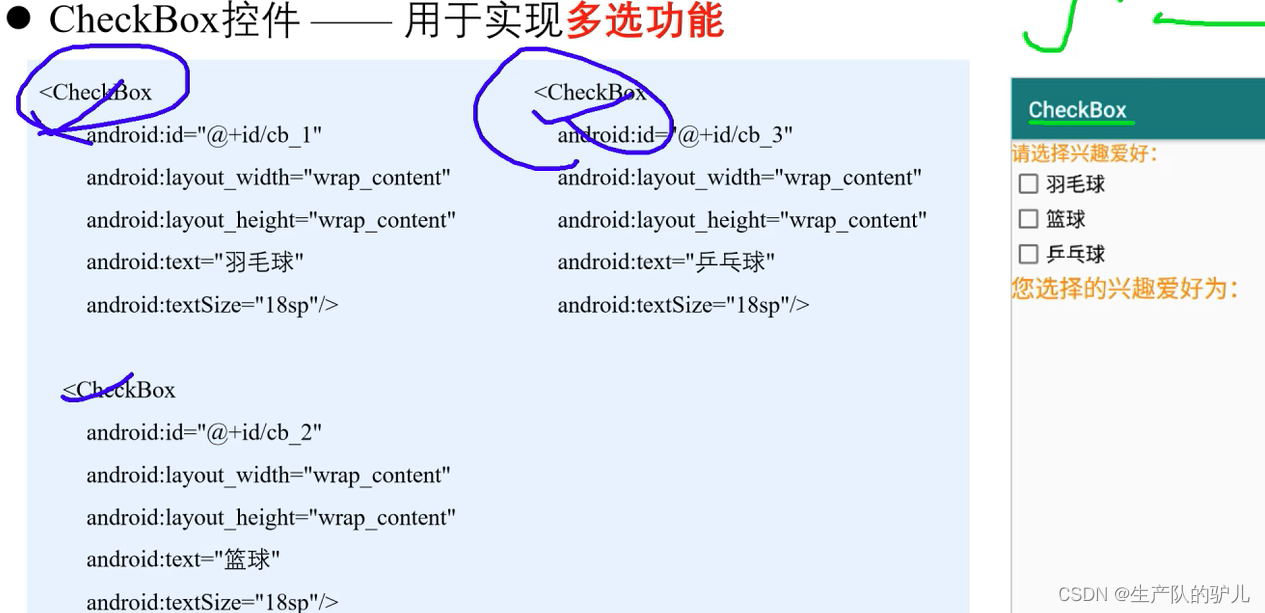
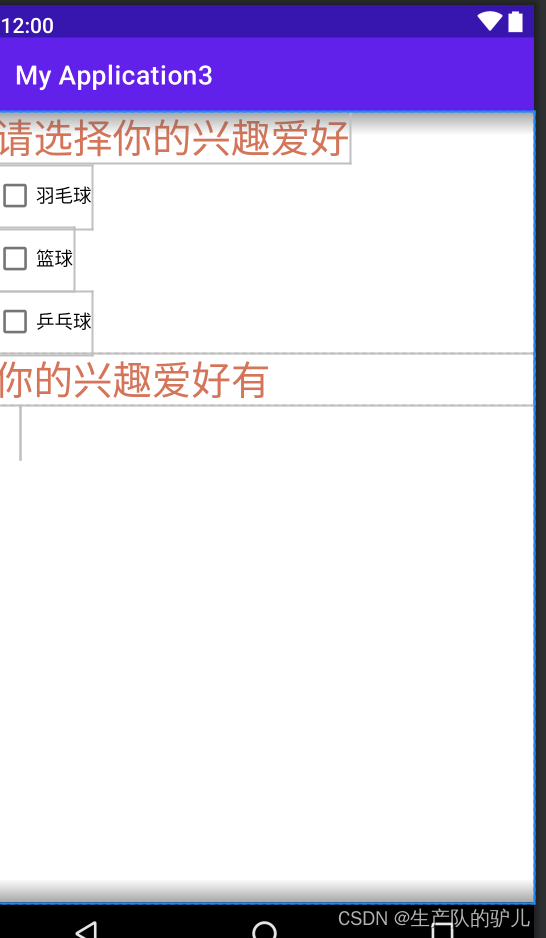
CheckBox 用于多选
案例
<?xml version="1.0" encoding="utf-8"?>
<LinearLayout xmlns:android="http://schemas.android.com/apk/res/android"
    xmlns:tools="http://schemas.android.com/tools"
    android:layout_width="match_parent"
    android:layout_height="match_parent"
    android:orientation="vertical"
    tools:context=".MainActivity">

    <TextView
        android:layout_width="wrap_content"
        android:layout_height="wrap_content"
        android:text="请选择你的兴趣爱好"
        android:textSize="30sp"
        android:textColor="#D67455"/>

    <CheckBox
        android:id="@+id/cb_1"
        android:layout_width="wrap_content"
        android:layout_height="wrap_content"
        android:text="羽毛球"/>
    <CheckBox
        android:id="@+id/cb_2"
        android:layout_width="wrap_content"
        android:layout_height="wrap_content"
        android:text="篮球"/>
    <CheckBox
        android:id="@+id/cb_3"
        android:layout_width="wrap_content"
        android:layout_height="wrap_content"
        android:text="乒乓球"/>

    <TextView
        android:layout_width="match_parent"
        android:layout_height="wrap_content"
        android:text="你的兴趣爱好有"
        android:textSize="30sp"
        android:textColor="#D67455"/>

    <TextView
        android:id="@+id/tv_res"
        android:layout_width="wrap_content"
        android:layout_height="wrap_content"
        android:textSize="30sp"
        android:layout_marginLeft="20dp"
        />
</LinearLayout>
package edu.northeastern.myapplication3;

import androidx.appcompat.app.AppCompatActivity;

import android.os.Bundle;
import android.view.View;
import android.widget.Button;
import android.widget.CheckBox;
import android.widget.CompoundButton;
import android.widget.RadioButton;
import android.widget.RadioGroup;
import android.widget.TextView;
import android.widget.Toast;

public class MainActivity extends AppCompatActivity {

    private CheckBox cb_1, cb_2, cb_3;
    private TextView tv_res;
    private String hobbies;

    @Override
    protected void onCreate(Bundle savedInstanceState) {
        super.onCreate(savedInstanceState);
        setContentView(R.layout.activity_main);

        cb_1 = findViewById(R.id.cb_1);
        cb_2 = findViewById(R.id.cb_2);
        cb_3 = findViewById(R.id.cb_3);
        tv_res = findViewById(R.id.tv_res);
        hobbies = "";

        // 点击1后监听事件
        cb_1.setOnCheckedChangeListener(new CompoundButton.OnCheckedChangeListener() {
            @Override
            public void onCheckedChanged(CompoundButton buttonView, boolean isChecked) {
                // 获取当前多选按钮的文本形象
                String text = buttonView.getText().toString();

                if (isChecked) {
                    hobbies += text + " "; // 拼接文本
                    // 设置textView添加文本
                    tv_res.setText(hobbies);
                } else {
                    // 没选择,去除当前选项文字
                    hobbies = hobbies.replace(text, "");
                    tv_res.setText(hobbies);
                }
            }
        });

        cb_2.setOnCheckedChangeListener(new CompoundButton.OnCheckedChangeListener() {
            @Override
            public void onCheckedChanged(CompoundButton buttonView, boolean isChecked) {
                // 获取当前多选按钮的文本形象
                String text = buttonView.getText().toString();

                if (isChecked) {
                    hobbies += text + " "; // 拼接文本
                    // 设置textView添加文本
                    tv_res.setText(hobbies);
                } else {
                    // 没选择,去除当前选项文字
                    hobbies = hobbies.replace(text, "");
                    tv_res.setText(hobbies);
                }
            }
        });

        cb_3.setOnCheckedChangeListener(new CompoundButton.OnCheckedChangeListener() {
            @Override
            public void onCheckedChanged(CompoundButton buttonView, boolean isChecked) {
                // 获取当前多选按钮的文本形象
                String text = buttonView.getText().toString();

                if (isChecked) {
                    hobbies += text + ""; // 拼接文本
                    // 设置textView添加文本
                    tv_res.setText(hobbies);
                } else {
                    // 没选择,去除当前选项文字
                    hobbies = hobbies.replace(text, "");
                    tv_res.setText(hobbies);
                }
            }
        });


    }
}
Toast
Toast是Android系统提供的轻量级信息提醒机制,用于向用户提示即时消息, 它显示在应用程序界面的最上层,显示一段时间后自动消失不会打断当前操作, 也不获得焦点。
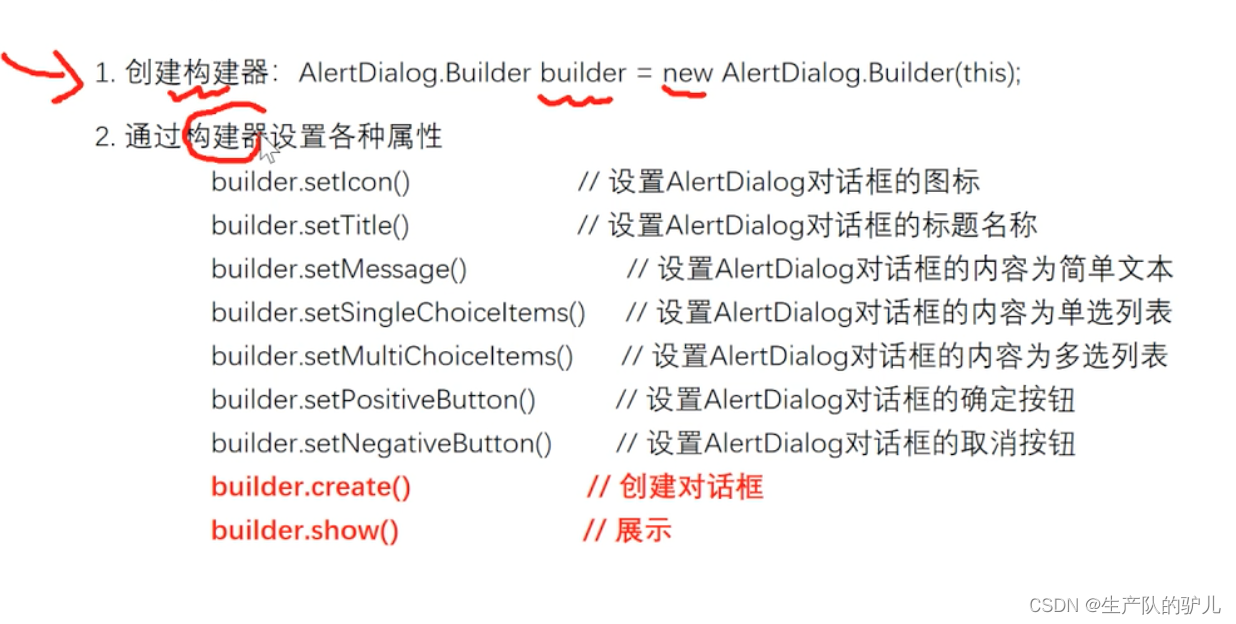
AlertDialog对话框
简单案例

<?xml version="1.0" encoding="utf-8"?>
<LinearLayout xmlns:android="http://schemas.android.com/apk/res/android"
    xmlns:tools="http://schemas.android.com/tools"
    android:layout_width="match_parent"
    android:layout_height="match_parent"
    android:orientation="vertical"
    tools:context=".MainActivity">

    <Button
        android:id="@+id/btn"
        android:layout_width="wrap_content"
        android:layout_height="wrap_content"
        android:text="点击"/>

</LinearLayout>
package edu.northeastern.myapplication3;

import androidx.appcompat.app.AlertDialog;
import androidx.appcompat.app.AppCompatActivity;

import android.content.DialogInterface;
import android.os.Bundle;
import android.view.View;
import android.widget.Button;
import android.widget.CheckBox;
import android.widget.CompoundButton;
import android.widget.RadioButton;
import android.widget.RadioGroup;
import android.widget.TextView;
import android.widget.Toast;

public class MainActivity extends AppCompatActivity {

    private Button btn;

    @Override
    protected void onCreate(Bundle savedInstanceState) {
        super.onCreate(savedInstanceState);
        setContentView(R.layout.activity_main);
        btn = this.<Button>findViewById(R.id.btn);

        btn.setOnClickListener(new View.OnClickListener() {
            @Override
            public void onClick(View v) {
                // 创建构建器
                AlertDialog.Builder builder = new AlertDialog.Builder(MainActivity.this);
                // 设置属性
                builder.setIcon(R.mipmap.ic_launcher)
                        .setTitle("普通对话框")
                        .setMessage("是否要退出应用")
                        .setPositiveButton("确定", new DialogInterface.OnClickListener() {
                            @Override
                            public void onClick(DialogInterface dialog, int which) {
                                // 用户点击,直接退出
                                dialog.dismiss();
                                MainActivity.this.finish();// 退出当前应用
                            }
                        })
                        .setNegativeButton("取消", new DialogInterface.OnClickListener() {
                            @Override
                            public void onClick(DialogInterface dialog, int which) {
                                // 关闭 对话框
                                dialog.dismiss(); // 关闭alertdiag对话框
                            }
                        })
                        .create()// 创建
                        .show(); // 展示给用户
            }
        });
    }
}
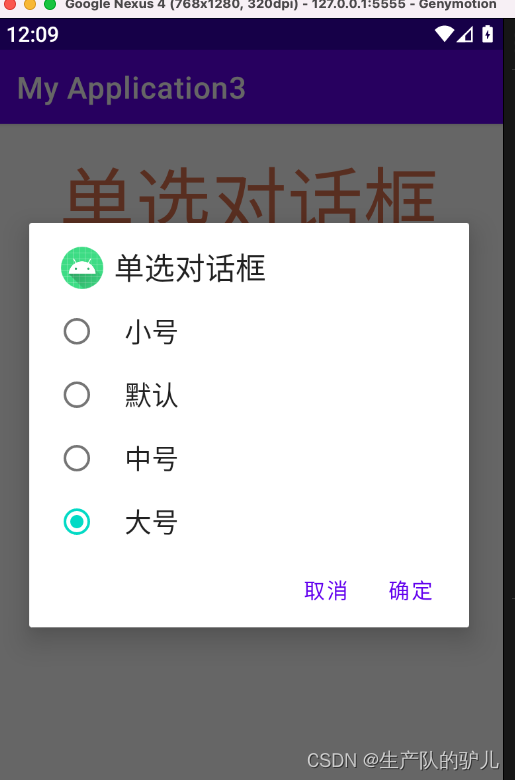
案例2
设置对话框,编辑字体大小
<?xml version="1.0" encoding="utf-8"?>
<RelativeLayout xmlns:android="http://schemas.android.com/apk/res/android"
    xmlns:tools="http://schemas.android.com/tools"
    android:layout_width="match_parent"
    android:layout_height="match_parent"
    android:orientation="vertical"
    tools:context=".MainActivity">

    <TextView
        android:id="@+id/tv_1"
        android:layout_width="wrap_content"
        android:layout_height="wrap_content"
        android:text="单选对话框"
        android:layout_centerHorizontal="true"
        android:textSize="20sp"
        android:textColor="#DD7250"
        android:layout_marginTop="20dp"/>

    <Button
        android:id="@+id/btn"
        android:layout_width="wrap_content"
        android:layout_height="wrap_content"
        android:layout_below="@id/tv_1"
        android:layout_centerHorizontal="true"
        android:text="点击"/>

</RelativeLayout>
package edu.northeastern.myapplication3;

import androidx.appcompat.app.AlertDialog;
import androidx.appcompat.app.AppCompatActivity;

import android.content.DialogInterface;
import android.os.Bundle;
import android.view.View;
import android.widget.Button;
import android.widget.CheckBox;
import android.widget.CompoundButton;
import android.widget.RadioButton;
import android.widget.RadioGroup;
import android.widget.TextView;
import android.widget.Toast;

public class MainActivity extends AppCompatActivity {

    private TextView tv;
    private Button btn;
    private int userChoice = 1; // 记录用户选择
    private int[] textSizeArray = {10, 20, 30, 50}; // 字体大小对应的数据

    @Override
    protected void onCreate(Bundle savedInstanceState) {
        super.onCreate(savedInstanceState);
        setContentView(R.layout.activity_main);
        btn = findViewById(R.id.btn);
        tv = findViewById(R.id.tv_1);

        btn.setOnClickListener(new View.OnClickListener() {
            @Override
            public void onClick(View v) {
                // 弹出单选对话框
                // 1 构建器
                AlertDialog.Builder builder = new AlertDialog.Builder(MainActivity.this);
                // 2 设置属性
                 builder.setIcon(R.mipmap.ic_launcher)
                        .setTitle("单选对话框")
                        // 设置单选列表
                        /**
                         * 设置单选列表
                         * 参数1 单选列表(数组)
                         */
                        .setSingleChoiceItems(new String[]{"小号", "默认 ", "中号", "大号"}, userChoice, new DialogInterface.OnClickListener() {
                            @Override
                            public void onClick(DialogInterface dialog, int which) {
                                // 记录用户选择
                                userChoice = which; // which 是记录到的选择,传递给参数userChoice
                            }
                        })
                        .setPositiveButton("确定", new DialogInterface.OnClickListener() {
                            @Override
                            public void onClick(DialogInterface dialog, int which) {
                                // 修改字体大小
                                tv.setTextSize(textSizeArray[userChoice]);
                                dialog.dismiss();
                            }
                        })
                        .setNegativeButton("取消", new DialogInterface.OnClickListener() {
                            @Override
                            public void onClick(DialogInterface dialog, int which) {
                                // 关闭对话框
                                dialog.dismiss();
                            }
                        })
                         .create()
                         .show();
            }
        });

    }
}
AlertDialog对话框

<?xml version="1.0" encoding="utf-8"?>
<LinearLayout xmlns:android="http://schemas.android.com/apk/res/android"
    xmlns:tools="http://schemas.android.com/tools"
    android:layout_width="match_parent"
    android:layout_height="match_parent"
    android:orientation="vertical"
    tools:context=".MainActivity">

    <Button
        android:id="@+id/btn"
        android:layout_width="wrap_content"
        android:layout_height="wrap_content"
        android:text="退出应用"/>


</LinearLayout>

package edu.northeastern.myapplication3;

import androidx.appcompat.app.AlertDialog;
import androidx.appcompat.app.AppCompatActivity;

import android.content.DialogInterface;
import android.os.Bundle;
import android.view.View;
import android.widget.Button;
import android.widget.CheckBox;
import android.widget.CompoundButton;
import android.widget.RadioButton;
import android.widget.RadioGroup;
import android.widget.TextView;
import android.widget.Toast;

public class MainActivity extends AppCompatActivity {

    private TextView tv;
    private Button btn;
    private int userChoice = 1; // 记录用户选择
    private int[] textSizeArray = {10, 20, 30, 50}; // 字体大小对应的数据

    @Override
    protected void onCreate(Bundle savedInstanceState) {
        super.onCreate(savedInstanceState);
        setContentView(R.layout.activity_main);
        btn = findViewById(R.id.btn);


        btn.setOnClickListener(new View.OnClickListener() {
            @Override
            public void onClick(View v) {
                // 监听到用户点击退出,弹出AlertDialog对话框
                AlertDialog.Builder builder = new AlertDialog.Builder(MainActivity.this);
                builder.setIcon(R.mipmap.ic_launcher)
                        .setTitle("普通对话框")
                        .setPositiveButton("确定", new DialogInterface.OnClickListener() {
                            @Override
                            public void onClick(DialogInterface dialog, int which) {
                                // 用户点击确定,直接退出应用
                                dialog.dismiss();
                                MainActivity.this.finish(); // 退出应用
                            }
                        })
                        .setNegativeButton("取消", new DialogInterface.OnClickListener() {
                            @Override
                            public void onClick(DialogInterface dialog, int which) {
                                // 关闭alertdialog对话框
                                dialog.dismiss();
                            }
                        }).create().show();
            }
        });

    }
}
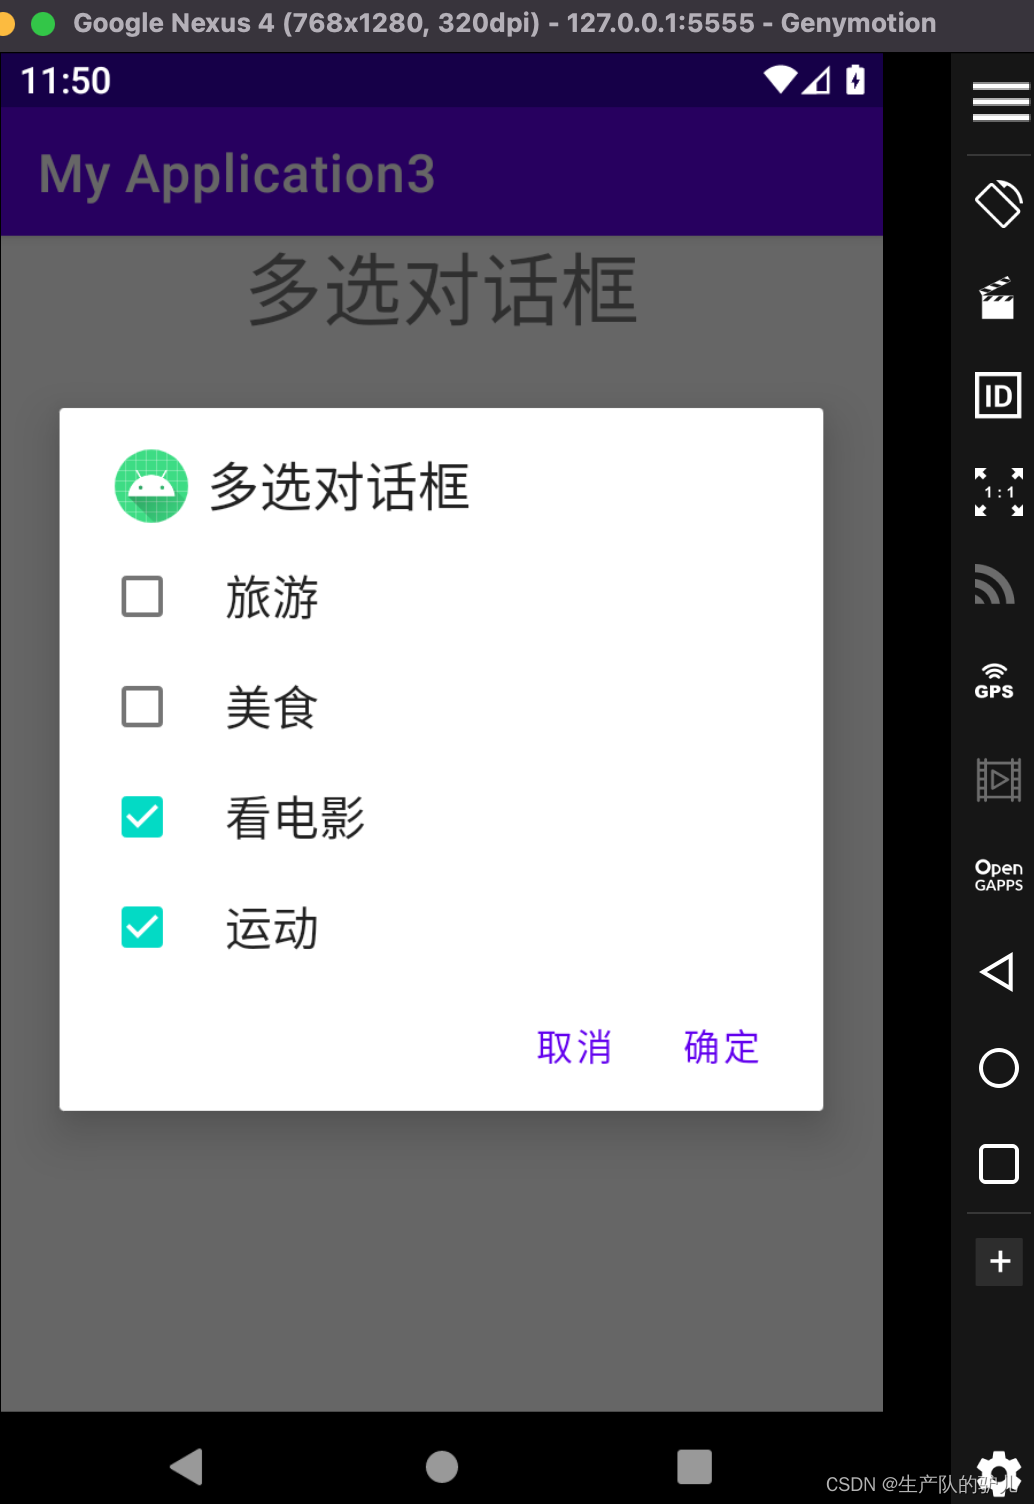
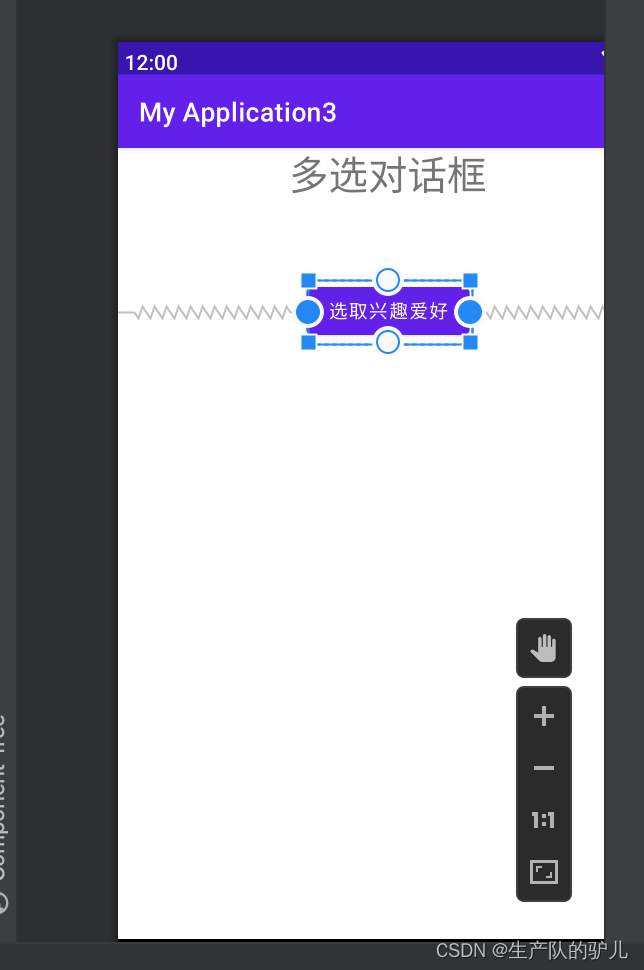
多选对话框
<?xml version="1.0" encoding="utf-8"?>
<RelativeLayout xmlns:android="http://schemas.android.com/apk/res/android"
    xmlns:tools="http://schemas.android.com/tools"
    android:layout_width="match_parent"
    android:layout_height="match_parent"
    android:orientation="vertical"
    tools:context=".MainActivity">


    <TextView
        android:id="@+id/tv"
        android:layout_width="wrap_content"
        android:layout_height="wrap_content"
        android:layout_centerHorizontal="true"
        android:textSize="30sp"
        android:text="多选对话框"/>

    <Button
        android:id="@+id/btn_01"
        android:layout_width="wrap_content"
        android:layout_height="wrap_content"
        android:text="选取兴趣爱好"
        android:layout_centerHorizontal="true"
        android:layout_marginTop="100dp"/>

    <TextView
        android:id="@+id/tv_res"
        android:layout_width="wrap_content"
        android:layout_height="wrap_content"
        android:textSize="30sp"
        android:text=""
        android:layout_centerHorizontal="true"
        android:layout_below="@id/btn_01"/>
</RelativeLayout>
package edu.northeastern.myapplication3;

import androidx.appcompat.app.AlertDialog;
import androidx.appcompat.app.AppCompatActivity;

import android.content.DialogInterface;
import android.os.Bundle;
import android.view.View;
import android.widget.Button;
import android.widget.TextView;

public class MainActivity extends AppCompatActivity {
    private Button btn;
    private TextView tv_res;
    private String[] hobbies = {"旅游", "美食", "看电影", "运动"}; // 多选列表
    private boolean[] userChoice = {false, false, false, false}; // userChoice 用户选择的选项
    private String text = new String();


    @Override
    protected void onCreate(Bundle savedInstanceState) {
        super.onCreate(savedInstanceState);
        setContentView(R.layout.activity_main);
        btn = findViewById(R.id.btn_01);
        tv_res = findViewById(R.id.tv_res);

        btn.setOnClickListener(new View.OnClickListener() {
            @Override
            public void onClick(View v) {
                AlertDialog.Builder builder = new AlertDialog.Builder(MainActivity.this);
                builder.setIcon(R.mipmap.ic_launcher)
                        .setTitle("多选对话框")
                        /**
                         * 设置单选对话框
                         * 参数1 多选列表(数组)
                         *
                         */
                        .setMultiChoiceItems(hobbies, userChoice, new DialogInterface.OnMultiChoiceClickListener() {


                            @Override
                            public void onClick(DialogInterface dialog, int which, boolean isChecked) {
                                // 捕捉用户的选择
                                text = "";
                                for (int i = 0; i < userChoice.length; i++) {
                                    if (userChoice[i]) { // 表示用户选择了
                                        text = text + hobbies[i];
                                    } else {// 用户没选择
                                        text = text.replace(hobbies[i], "");
                                    }
                                }
                            }
                        })
                        .setPositiveButton("确定", new DialogInterface.OnClickListener() {
                            @Override
                            public void onClick(DialogInterface dialog, int which) {
                                // 展示用户的选择
                                tv_res.setText(text);
                                dialog.dismiss();
                            }
                        })
                        .setNegativeButton("取消", new DialogInterface.OnClickListener() {
                            @Override
                            public void onClick(DialogInterface dialog, int which) {
                                dialog.dismiss();
                            }
                        })
                        .create()
                        .show();
            }
        });
    }
}
ImageView
图片嵌入框