一 项目架构
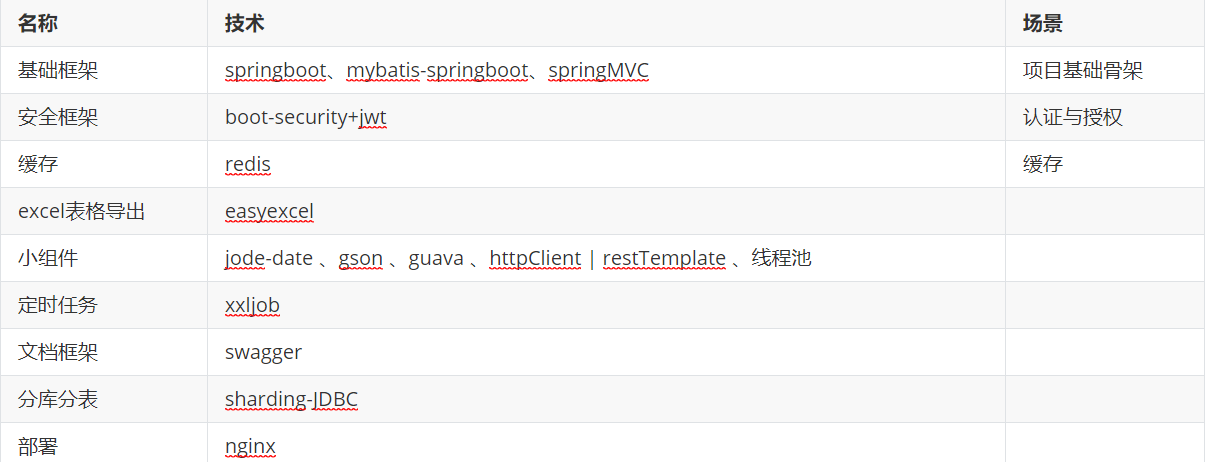
1.1 今日指数技术选型
【1】前端技术

【2】后端技术栈
【3】整体概览

1.2 核心业务介绍
【1】业务结构预览
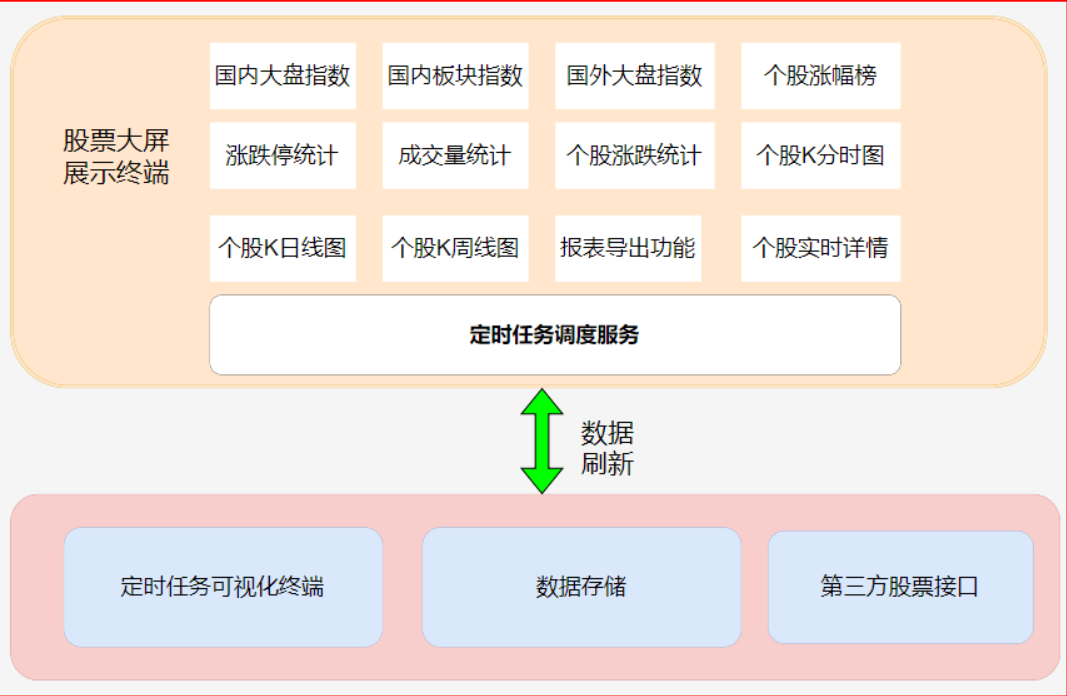
【2】业务结构预览
1.定时任务调度服务
    XXL-JOB通过RestTemplate+多线程动态拉去股票接口数据,刷入数据库;
2.国内指数服务
3.板块指数服务
4.涨幅榜展示功能
5.涨停跌停数展示功能
6.成交量对比展示功能
7.个股涨停服务展示功能
8.个股详情展示功能
       包含分时行情、日k线、周K线图等
9.个股描述服务;
10.报表导出服务
二 后端开发环境搭建
开发工具版本要求:

2.1 数据库环境搭建
【1】表结构介绍

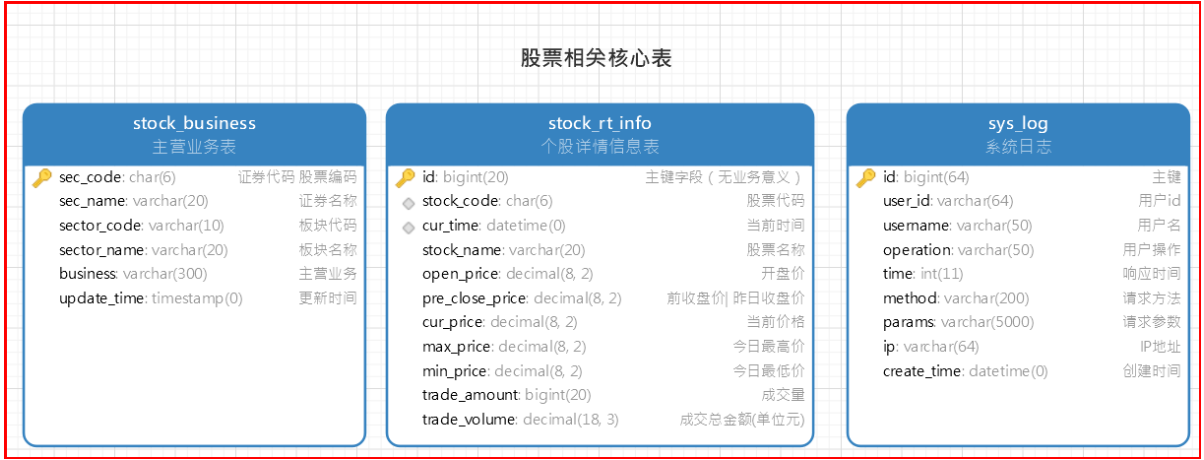

注意事项:后期股票相关的数据量非常庞大,表与表之间尽量不要构建外键约束(提升数据库性能),同时也为后期分库分表准备!
【2】数据导入
因为我边的CentOS7连接不上 所以在这里面 用本地(windoms)运行
数据库可视化选用 SQLyog - 64 bit mysql用的是5.7.24
2.2后端工程搭建
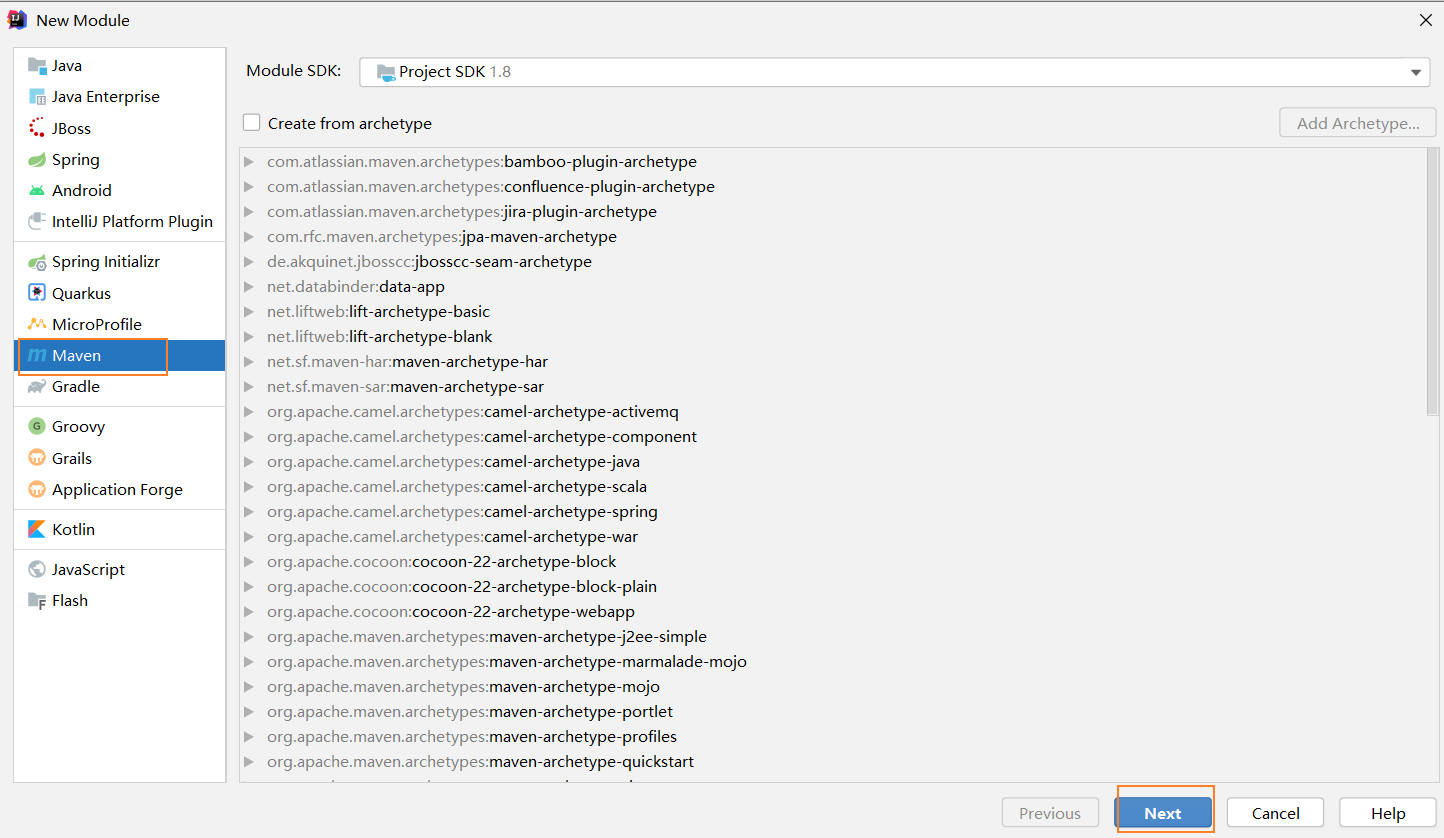
【1】构建stock_parent父工程
创建stock_parent maven工程:
接下来 复制以下maven到pom.xml
 <packaging>pom</packaging>
    <properties>
                <!--工程构建的代码格式为UTF-8-->
        <project.build.sourceEncoding>UTF-8</project.build.sourceEncoding>
           <!--编译-->
        <maven.compiler.encoding>UTF-8</maven.compiler.encoding>
          <!--编译原文件-->
        <maven.compiler.source>8</maven.compiler.source>
          <!--生成的编译目录-->
        <maven.compiler.target>8</maven.compiler.target>
         <!--打包时跳过测试-->
        <maven.test.skip>true</maven.test.skip>
        <!--mybatis整合spring-boot场景依赖-->
        <mybatis-spring-boot-starter.version>2.1.4</mybatis-spring-boot-starter.version>
          <!--pagehelper版本-->
        <pagehelper-spring-boot-starter.version>1.2.12</pagehelper-spring-boot-starter.version>
          <!--mysql驱动包-->
        <mysql-driver.version>5.1.49</mysql-driver.version>
             <!--fastjson工具-->
        <fastjson.version>1.2.71</fastjson.version>
          <!--依赖的版本-->
        <springfox-swagger2.version>2.9.2</springfox-swagger2.version>
            <!--druid的场景依赖-->
        <druid-spring-boot-starter.version>1.1.22</druid-spring-boot-starter.version>
        <!--druid的核心依赖-->
        <druid-core-version>1.2.8</druid-core-version>
        <!--分库分表对应的版本-->
        <sharding-jdbc.version>4.0.0-RC1</sharding-jdbc.version>
           <!--jwt-->
        <jjwt.version>0.9.1</jjwt.version>
           <!--easyExcel  报表导入导出-->
        <easyExcel.version>3.0.4</easyExcel.version>
           <!--xxl-job-->
        <xxl-job-core.version>2.3.0</xxl-job-core.version>
           <!--spring-boot版本-->
        <spring-boot.version>2.5.3</spring-boot.version>
            <!--日期小插件-->
        <joda-time.version>2.10.5</joda-time.version>
             <!--google.guava-->
        <google.guava.version>30.0-jre</google.guava.version>
    </properties>
    <!--定义依赖版本锁定-->
    <dependencyManagement>
        <dependencies>
            <!--引入springboot依赖-->
            <dependency>
                <groupId>org.springframework.boot</groupId>
                <artifactId>spring-boot-starter-parent</artifactId>
                <version>${spring-boot.version}</version>
                <type>pom</type>
                <scope>import</scope>
            </dependency>
            <!--引入mybatis场景依赖-->
            <dependency>
                <groupId>org.mybatis.spring.boot</groupId>
                <artifactId>mybatis-spring-boot-starter</artifactId>
                <version>${mybatis-spring-boot-starter.version}</version>
            </dependency>
            <!--pageHelper场景依赖-->
            <dependency>
                <groupId>com.github.pagehelper</groupId>
                <artifactId>pagehelper-spring-boot-starter</artifactId>
                <version>${pagehelper-spring-boot-starter.version}</version>
            </dependency>
            <!--mysql驱动包-->
            <dependency>
                <groupId>mysql</groupId>
                <artifactId>mysql-connector-java</artifactId>
                <version>${mysql-driver.version}</version>
            </dependency>
            <!--shardingjdbc分库分表-->
            <dependency>
                <groupId>org.apache.shardingsphere</groupId>
                <artifactId>sharding-jdbc-spring-boot-starter</artifactId>
                <version>${sharding-jdbc.version}</version>
            </dependency>
            <!--json工具包-->
            <dependency>
                <groupId>com.alibaba</groupId>
                <artifactId>fastjson</artifactId>
                <version>${fastjson.version}</version>
            </dependency>
            <!--druid-boot依赖-->
            <dependency>
                <groupId>com.alibaba</groupId>
                <artifactId>druid-spring-boot-starter</artifactId>
                <version>${druid-spring-boot-starter.version}</version>
            </dependency>
            <!--druid core-->
            <dependency>
                <groupId>com.alibaba</groupId>
                <artifactId>druid</artifactId>
                <version>${druid-core-version}</version>
            </dependency>
            <!--swagger文档依赖-->
            <dependency>
                <groupId>io.springfox</groupId>
                <artifactId>springfox-swagger2</artifactId>
                <version>${springfox-swagger2.version}</version>
            </dependency>
            <dependency>
                <groupId>io.springfox</groupId>
                <artifactId>springfox-swagger-ui</artifactId>
                <version>${springfox-swagger2.version}</version>
            </dependency>
            <!--引入jwt依赖-->
            <dependency>
                <groupId>io.jsonwebtoken</groupId>
                <artifactId>jjwt</artifactId>
                <version>${jjwt.version}</version>
            </dependency>
            <!-- 导出 excel -->
            <dependency>
                <groupId>com.alibaba</groupId>
                <artifactId>easyexcel</artifactId>
                <version>${easyExcel.version}</version>
            </dependency>
            <!--xxl-job定义任务框架支持-->
            <dependency>
                <groupId>com.xuxueli</groupId>
                <artifactId>xxl-job-core</artifactId>
                <version>${xxl-job-core.version}</version>
            </dependency>
            <!--时间小工具-->
            <dependency>
                <groupId>joda-time</groupId>
                <artifactId>joda-time</artifactId>
                <version>${joda-time.version}</version>
            </dependency>
            <!--引入google的工具集-->
            <dependency>
                <groupId>com.google.guava</groupId>
                <artifactId>guava</artifactId>
                <version>${google.guava.version}</version>
            </dependency>
        </dependencies>
    </dependencyManagement>

    <build>
        <pluginManagement>
            <plugins>
                <!--Springboot核心插件-->
                <plugin>
                    <groupId>org.springframework.boot</groupId>
                    <artifactId>spring-boot-maven-plugin</artifactId>
                    <version>${spring-boot.version}</version>
                    <configuration>
                        <excludes>
                            <!--插件运行时排除依赖-->
                            <exclude>
                                <groupId>org.springframework.boot</groupId>
                                <artifactId>spring-boot-configuration-processor</artifactId>
                            </exclude>
                        </excludes>
                    </configuration>
                </plugin>
                <!--打包跳过test -->
                <plugin>
                    <groupId>org.apache.maven.plugins</groupId>
                    <artifactId>maven-surefire-plugin</artifactId>
                    <configuration>
                        <skip>${maven.test.skip}</skip>
                    </configuration>
                </plugin>
            </plugins>
        </pluginManagement>
    </build>
注意事项:
1.打包方式:pom
2.通过dependencyManagement、pluginManagement锁定开发中的依赖和插件的版本;
接下来 删除父工程的src

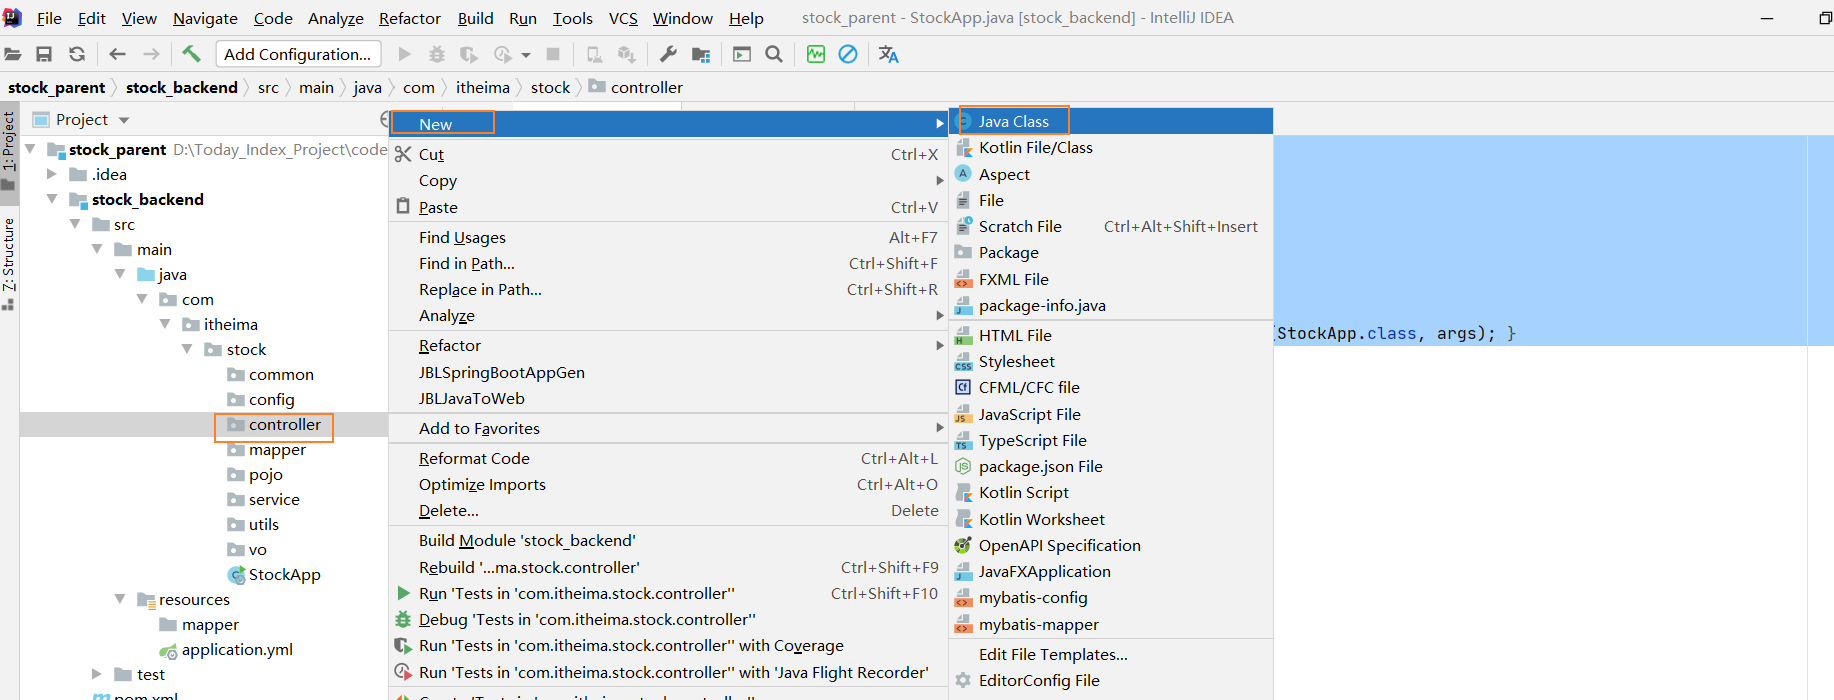
【2】构建stock_backend基础工程
创建stock_parent的maven子工程stock_backend:


【2.1】引入依赖
stock_backend工程被stock_parent父工程聚合,pom配置如下:
<packaging>jar</packaging>
    <artifactId>stock_backend</artifactId>

    <properties>
        <maven.compiler.source>8</maven.compiler.source>
        <maven.compiler.target>8</maven.compiler.target>
    </properties>

    <dependencies>
        <!-- 基本依赖   web的场景依赖-->
        <dependency>
            <groupId>org.springframework.boot</groupId>
            <artifactId>spring-boot-starter-web</artifactId>
        </dependency>
        <!--日志-->
        <dependency>
            <groupId>org.springframework.boot</groupId>
            <artifactId>spring-boot-starter-aop</artifactId>
        </dependency>
        <!--mysql-->
        <dependency>
            <groupId>mysql</groupId>
            <artifactId>mysql-connector-java</artifactId>
        </dependency>
        <!--单元测试-->
        <dependency>
            <groupId>org.springframework.boot</groupId>
            <artifactId>spring-boot-starter-test</artifactId>
            <scope>test</scope>
        </dependency>
         <!--lombok-->
        <dependency>
            <groupId>org.projectlombok</groupId>
            <artifactId>lombok</artifactId>
            <optional>true</optional>
        </dependency>

          <!--mybatis整合spring-boot-->
        <dependency>
            <groupId>org.mybatis.spring.boot</groupId>
            <artifactId>mybatis-spring-boot-starter</artifactId>
        </dependency>
            <!--分页-->
        <dependency>
            <groupId>com.github.pagehelper</groupId>
            <artifactId>pagehelper-spring-boot-starter</artifactId>
        </dependency>

        <!--druid-->
        <dependency>
            <groupId>com.alibaba</groupId>
            <artifactId>druid-spring-boot-starter</artifactId>
        </dependency>

        <!--配置提示-->
        <dependency>
            <groupId>org.springframework.boot</groupId>
            <artifactId>spring-boot-configuration-processor</artifactId>
            <optional>true</optional>
        </dependency>
        <!--时间小工具-->
        <dependency>
            <groupId>joda-time</groupId>
            <artifactId>joda-time</artifactId>
        </dependency>
    </dependencies>

    <build>
        <!--打包名称-->
        <finalName>${project.artifactId}</finalName>
        <plugins>
            <plugin>
                <groupId>org.springframework.boot</groupId>
                <artifactId>spring-boot-maven-plugin</artifactId>
            </plugin>
            <!-- 打包跳过test -->
            <plugin>
                <groupId>org.apache.maven.plugins</groupId>
                <artifactId>maven-surefire-plugin</artifactId>
            </plugin>
        </plugins>
    </build>
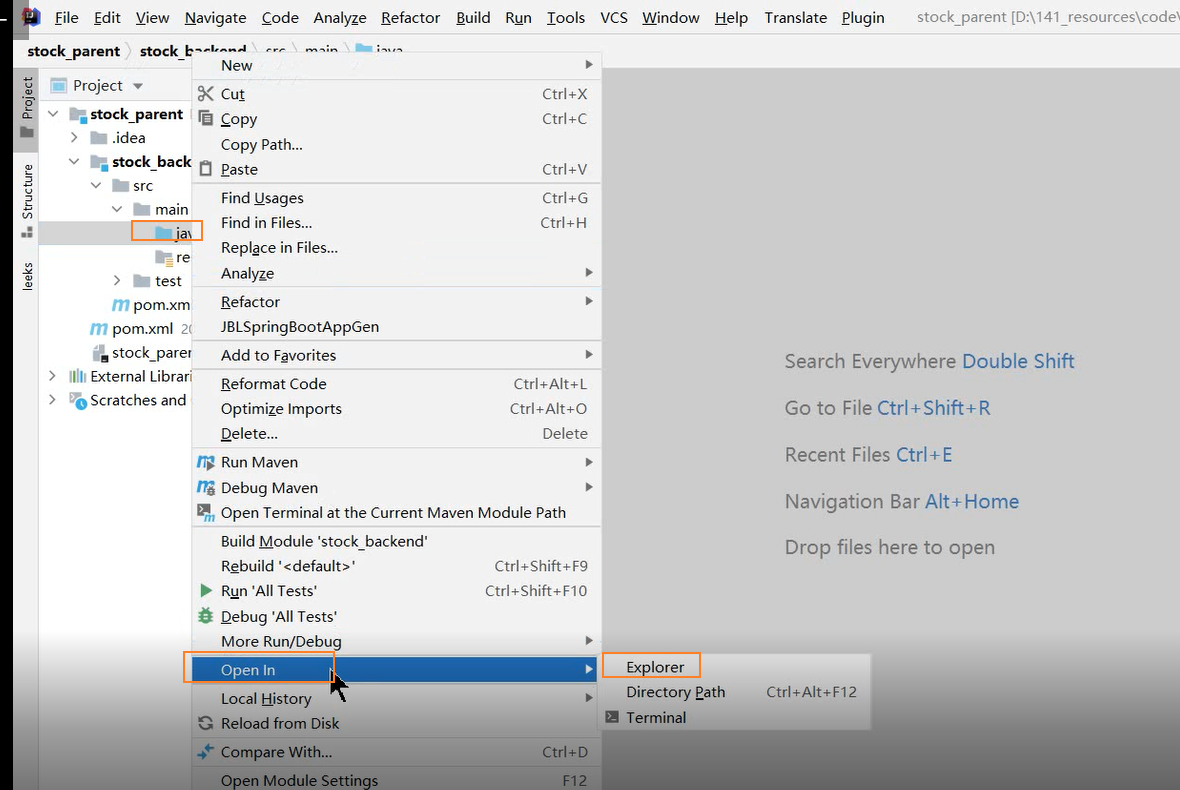
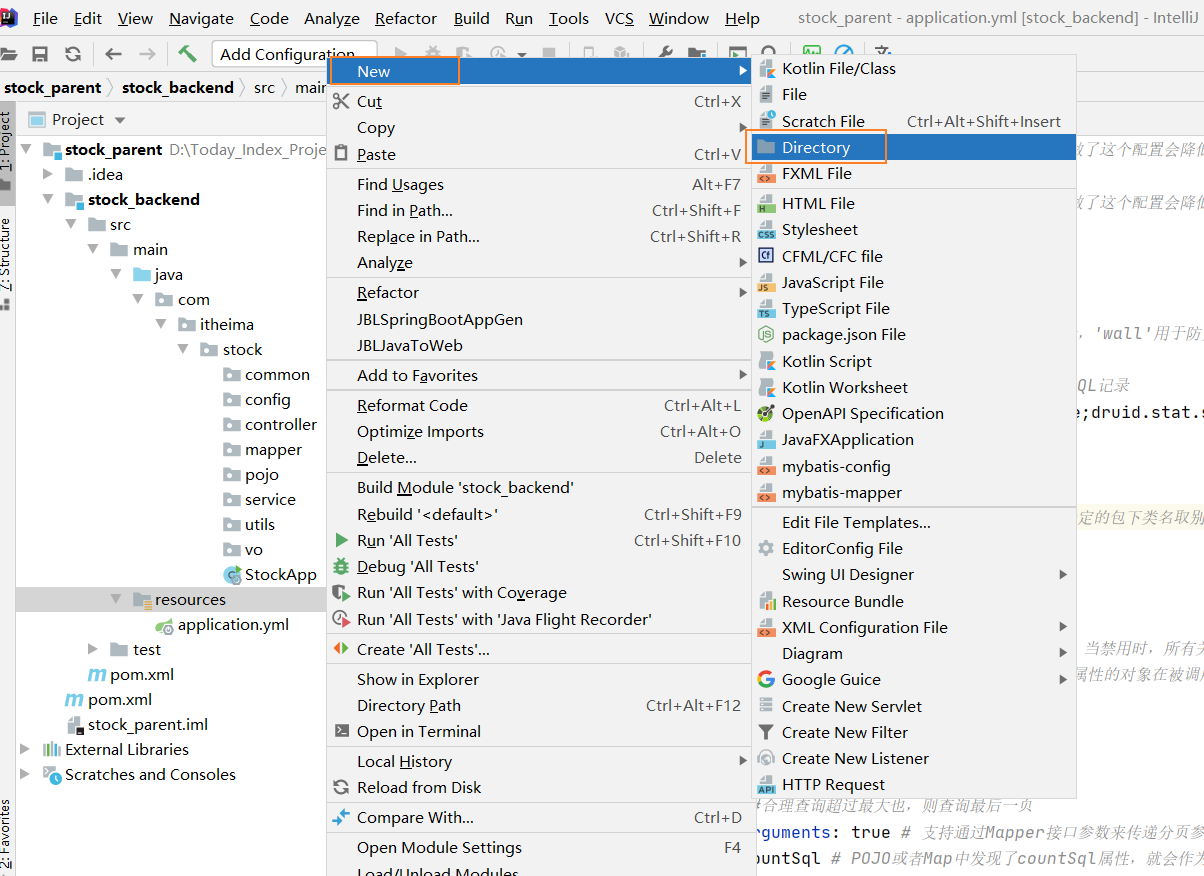
【2.2】创建公共包结构
找到资料中的公共包结构

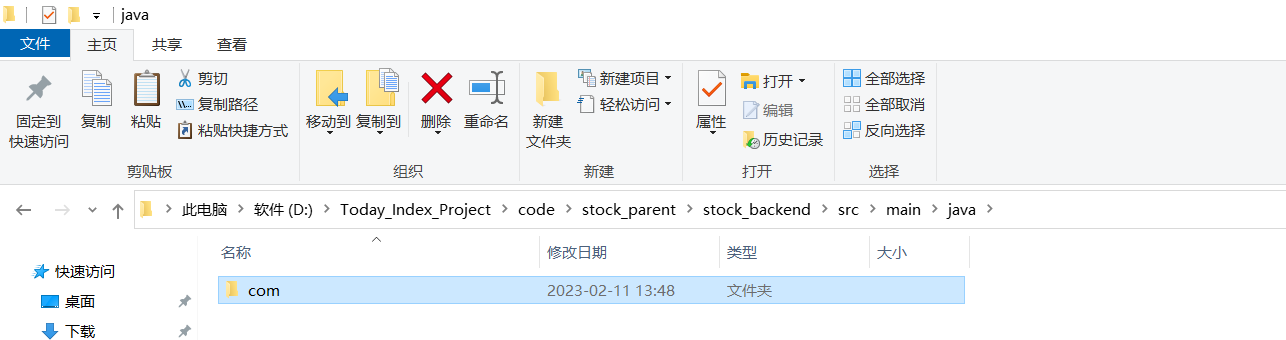
复制com

进入到项目的物理路径(IntelliJ IDEA 2020.1.3 x64)

不同的idea进行项目物理环境的选项不同

把刚才复制过来的com复制到main/java下面
这样就能得到目录结构(里面为空目录) 这样做的目的是不能一次次创建目录结构

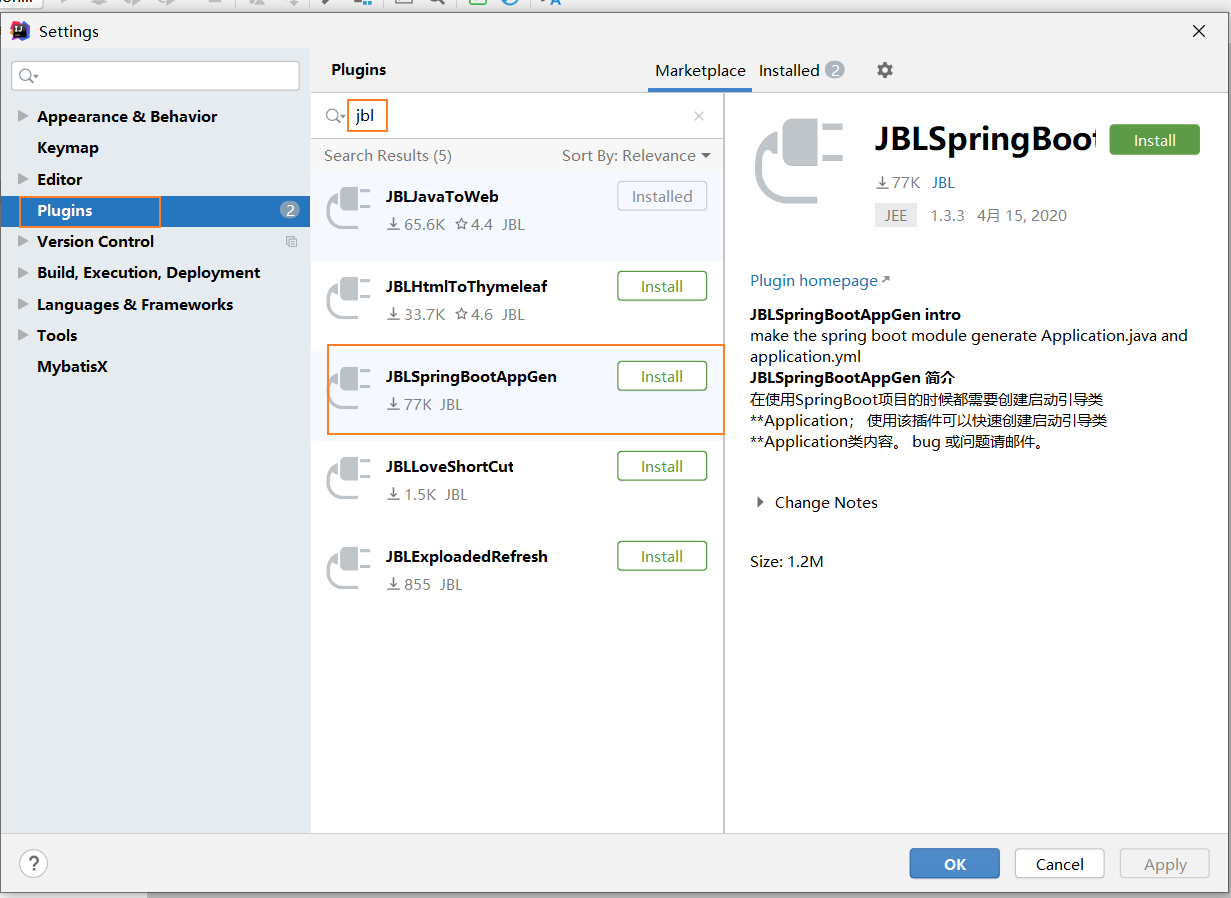
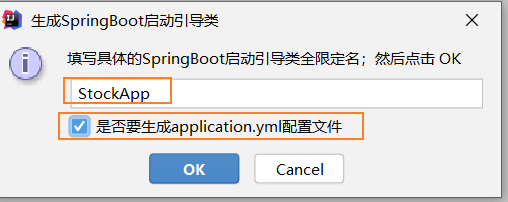
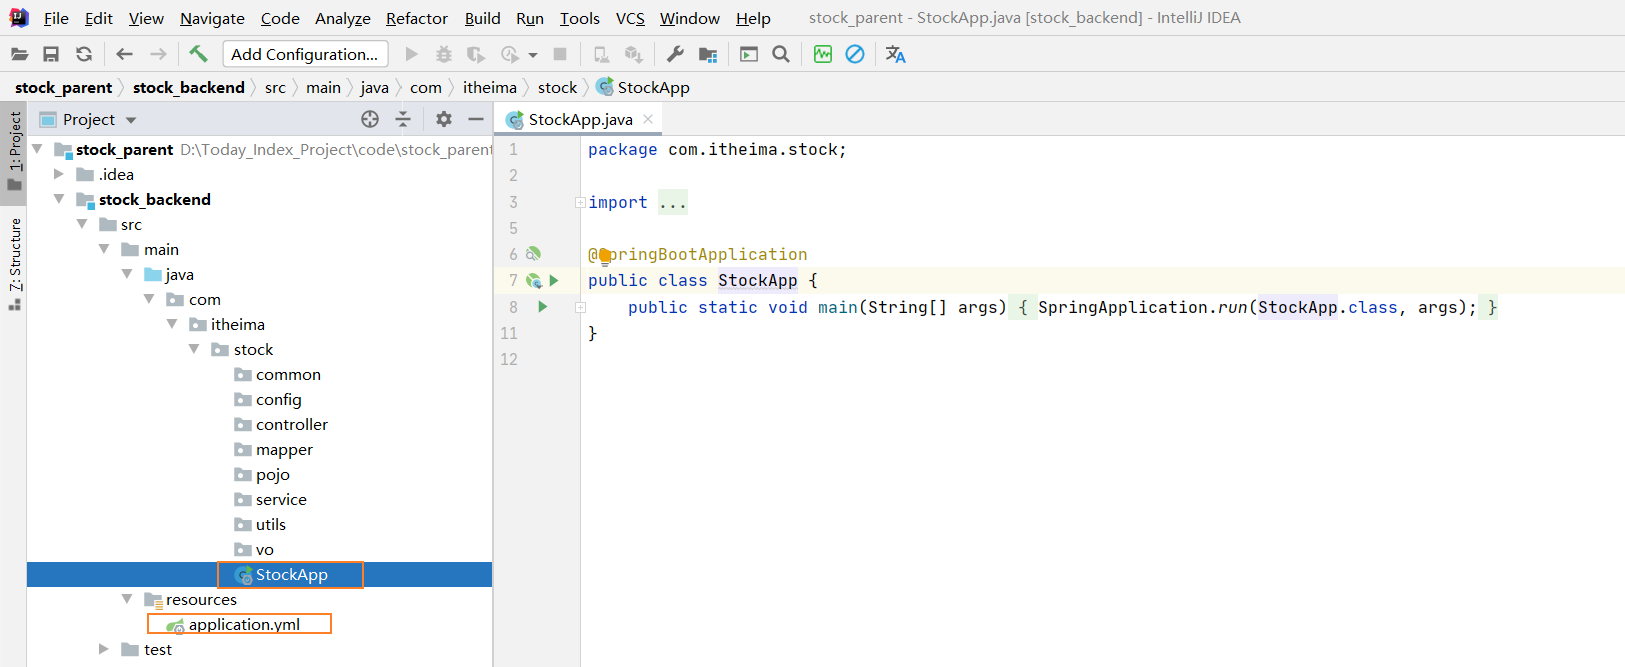
【2.3】快速生成yml和main启动类的插件JBL SpringbootAppGen
安装
使用

生成效果
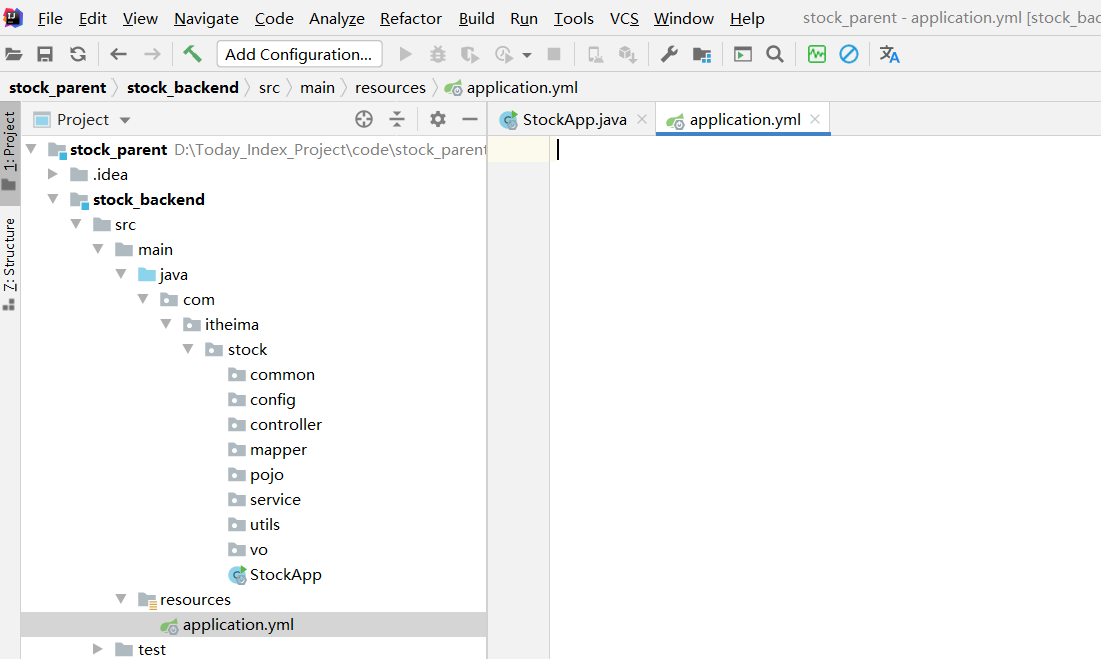
【2.4】配置yml
# web定义
server:
port: 8081 #指定当前端口号
spring:
# 配置mysql数据源
datasource:
druid:
username: root
password: root
url: jdbc:mysql://127.0.0.1:3306/stock_db?useUnicode=true&characterEncoding=UTF-8&allowMultiQueries=true&useSSL=false&serverTimezone=Asia/Shanghai
driver-class-name: com.mysql.jdbc.Driver
# 初始化时建立物理连接的个数。初始化发生在显示调用 init 方法,或者第一次 getConnection 时
initialSize: 6
# 最小连接池数量
minIdle: 2
# 最大连接池数量
maxActive: 20
# 获取连接时最大等待时间,单位毫秒。配置了 maxWait 之后,缺省启用公平锁,
# 并发效率会有所下降,如果需要可以通过配置 useUnfairLock 属性为 true 使用非公平锁。
maxWait: 60000
# 配置间隔多久才进行一次检测,检测需要关闭的空闲连接,单位是毫秒
timeBetweenEvictionRunsMillis: 60000
# 配置一个连接在池中最小生存的时间,单位是毫秒
minEvictableIdleTimeMillis: 300000
# 用来检测连接是否有效的 sql 因数据库方言而差, 例如 oracle 应该写成 SELECT 1 FROM DUAL
validationQuery: SELECT 1 FROM DUAL
# 建议配置为 true,不影响性能,并且保证安全性。申请连接的时候检测,
# 如果空闲时间大于 timeBetweenEvictionRunsMillis,执行 validationQuery 检测连接是否有效。
testWhileIdle: true
# 申请连接时执行 validationQuery 检测连接是否有效,做了这个配置会降低性能。
testOnBorrow: false
# 归还连接时执行 validationQuery 检测连接是否有效,做了这个配置会降低性能。
testOnReturn: false
# 是否自动回收超时连接
poolPreparedStatements: true
maxPoolPreparedStatementPerConnectionSize: 20
# 配置监控统计拦截的filters,去掉后监控界面sql无法统计,'wall'用于防火墙
filters: stat,wall
# 通过connectProperties属性来打开mergeSql功能;慢SQL记录
connectionProperties: druid.stat.mergeSql=true;druid.stat.slowSqlMillis=5000
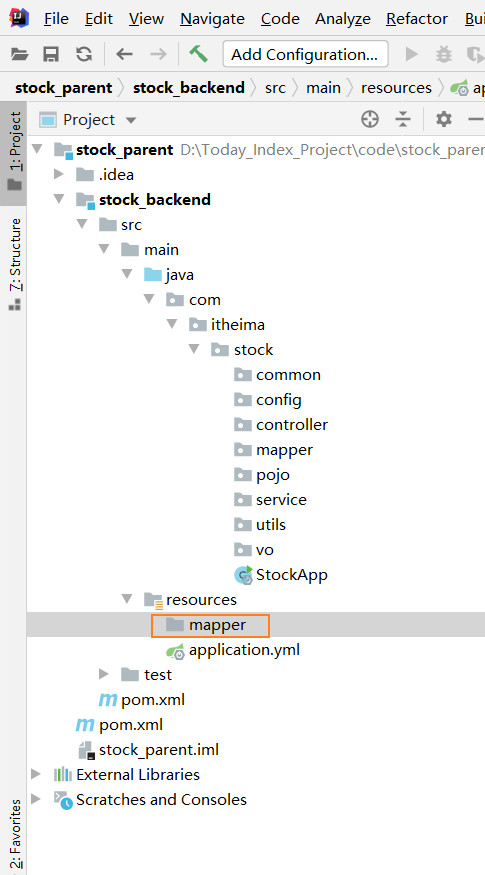
# 配置mybatis
mybatis:
type-aliases-package: com.itheima.stock.pojo #指定的包下类名取别名
mapper-locations: classpath:mapper/*.xml
configuration:
map-underscore-to-camel-case: true #开启驼峰映射
cache-enabled: false #使全局的映射器启用或禁用缓存。
lazy-loading-enabled: false #全局启用或禁用延迟加载。当禁用时,所有关联对象都会即时加载。
aggressive-lazy-loading: true #当启用时,有延迟加载属性的对象在被调用时将会完全加载任意属性。否则,每种属性将会按需要加载。
# pagehelper配置
pagehelper:
helper-dialect: mysql #指定分页数据库类型(方言)
reasonable: true #合理查询超过最大也,则查询最后一页
support-methods-arguments: true # 支持通过Mapper接口参数来传递分页参数,默认false
params: pacount=countSql # POJO或者Map中发现了countSql属性,就会作为count参数使用
returnPageInfo: check # always总是返回PageInfo类型,check检查返回类型是否为PageInfo,none返回Page因为上面配置了少了一个mapper 所以我们现 在创建这个包

注意:
第一点
url: jdbc:mysql://127.0.0.1:3306/stock_db?useUnicode=true&characterEncoding=UTF-8&allowMultiQueries=true&useSSL=false&serverTimezone=Asia/Shanghai这里面的url 如果是连接的是linux的 刚要写成Linux上的Ip 如果连接的是本地(win)则url 刚要写成
jdbc:mysql:///数据库名称或jdbc:mysql://localhost:3306/数据库名称jdbc:mysql://127.0.0.1:3306/数据库名称
第二点 本项目用到的mysql为5.7 不是8.0 所以把
driver-class-name: com.mysql.cj.jdbc.Driver 把cj删除补充知识
driver-class-name: com.mysql.cj.jdbc.Driver   mysql8.0
driver-class-name: com.mysql.jdbc.Driver    mysql5.7
第三点 接口扫描
IntelliJ IDEA 2020.1.3 x64版本复制路径写法
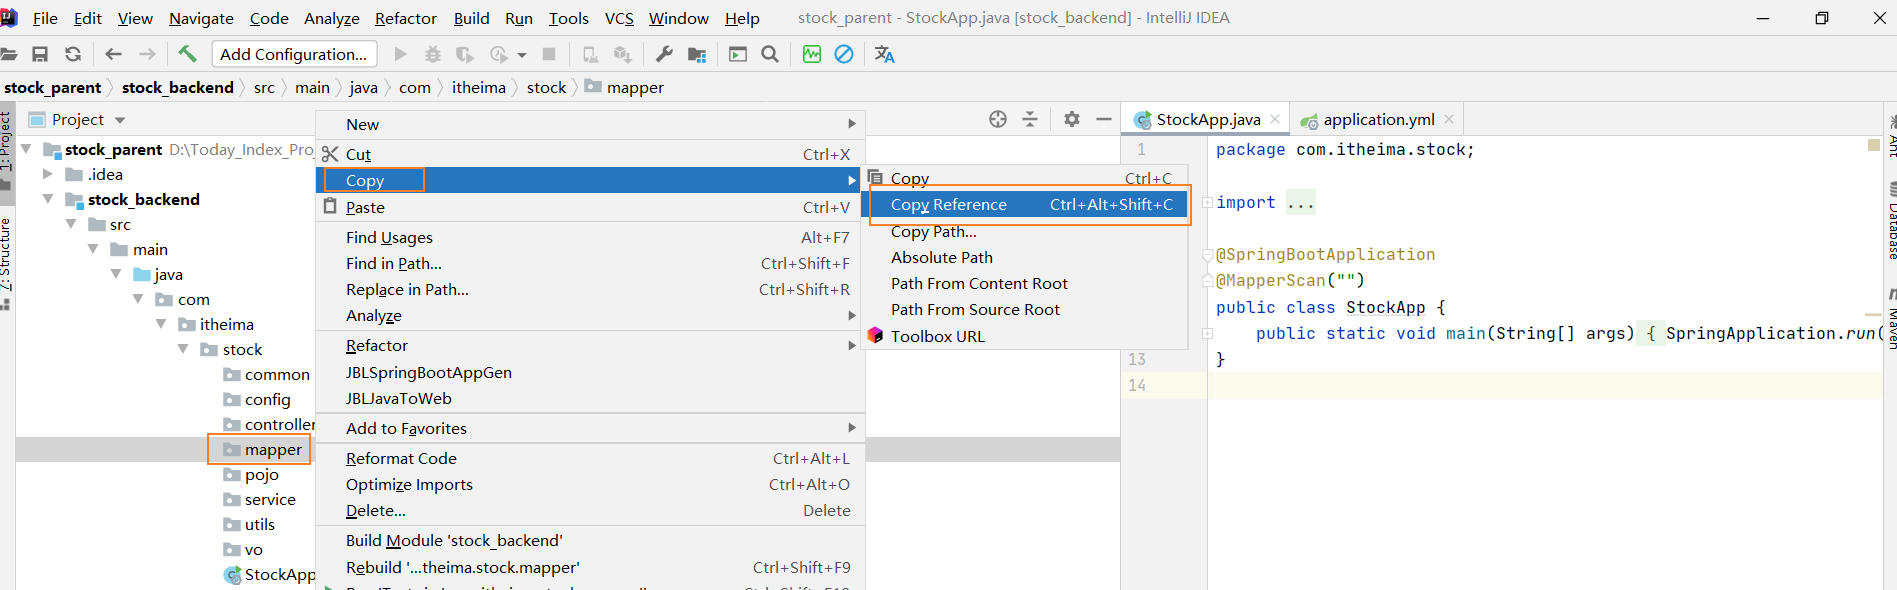
视频中的idea版本复制路径写法


然后把复制过来的路径给放在下图所示
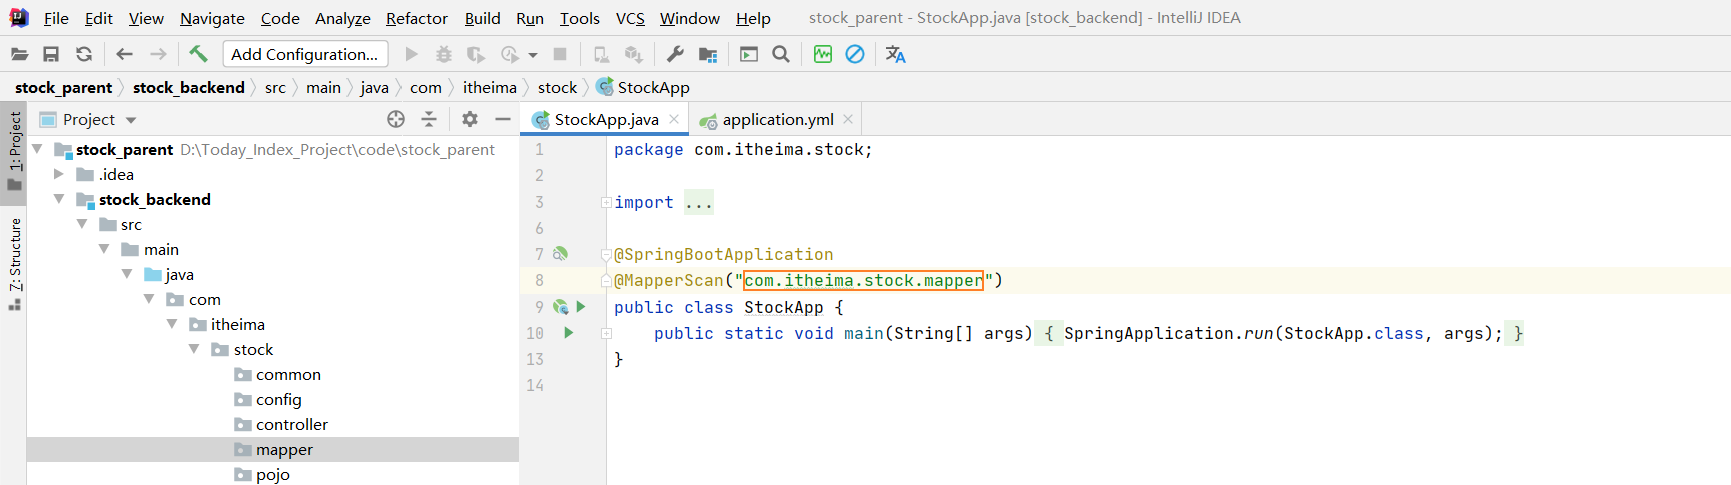
【2.5】定义main启动类
package com.itheima.stock;
import org.mybatis.spring.annotation.MapperScan;
import org.springframework.boot.SpringApplication;
import org.springframework.boot.autoconfigure.SpringBootApplication;
@SpringBootApplication
@MapperScan("com.itheima.stock.mapper")
public class StockApp {
public static void main(String[] args) {
SpringApplication.run(StockApp.class, args);
}
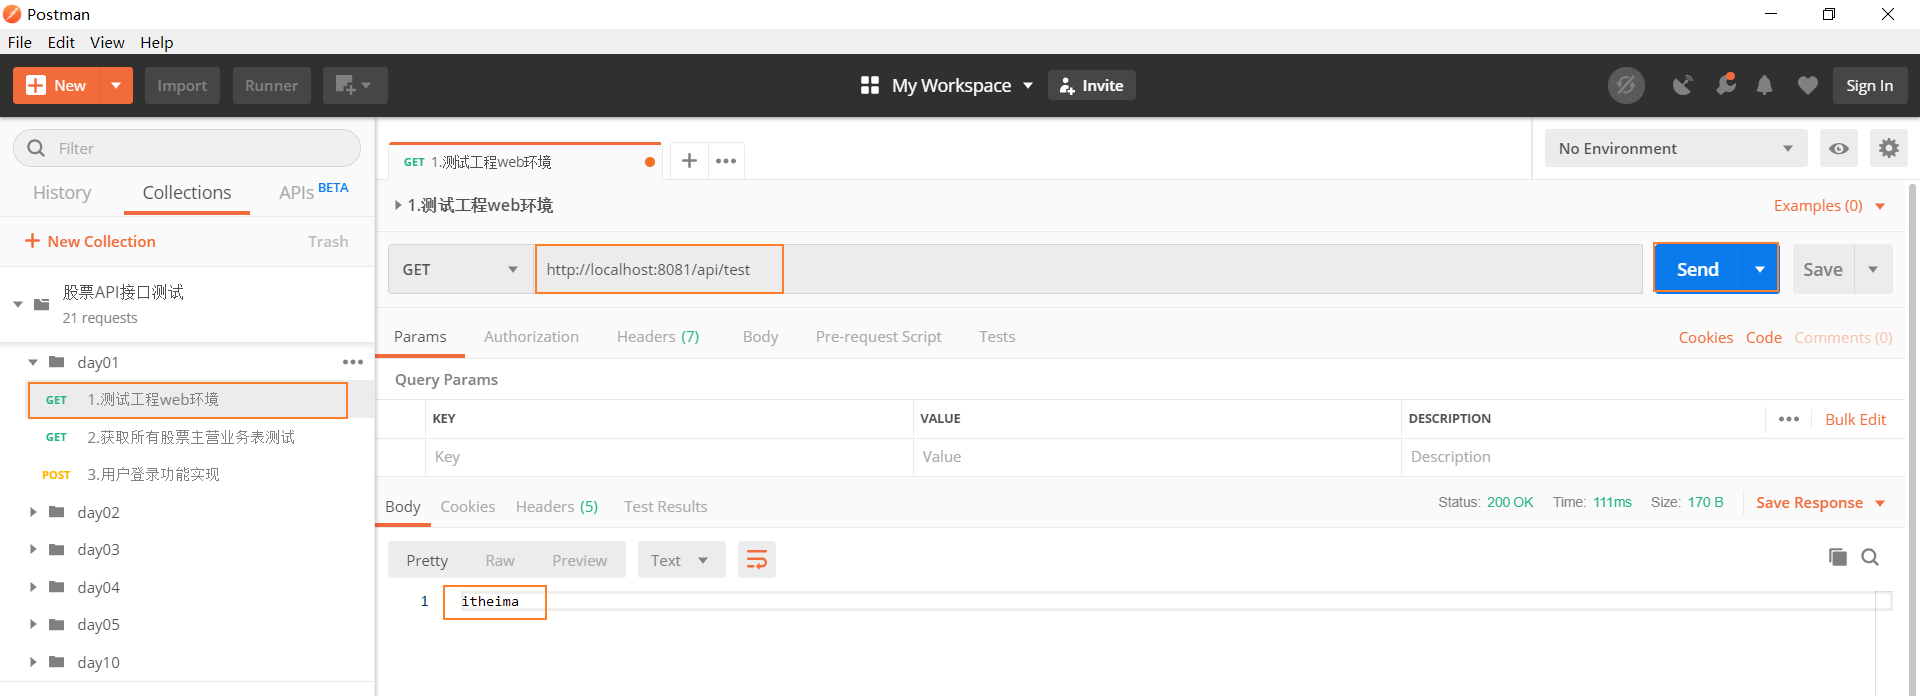
}【2.6】定义web测试接口
package com.itheima.stock.controller;
import org.springframework.web.bind.annotation.GetMapping;
import org.springframework.web.bind.annotation.RequestMapping;
import org.springframework.web.bind.annotation.RestController;
@RestController
@RequestMapping("/api")
public class UserController {
@GetMapping("/test")
public String getName(){
return "itheima";
}
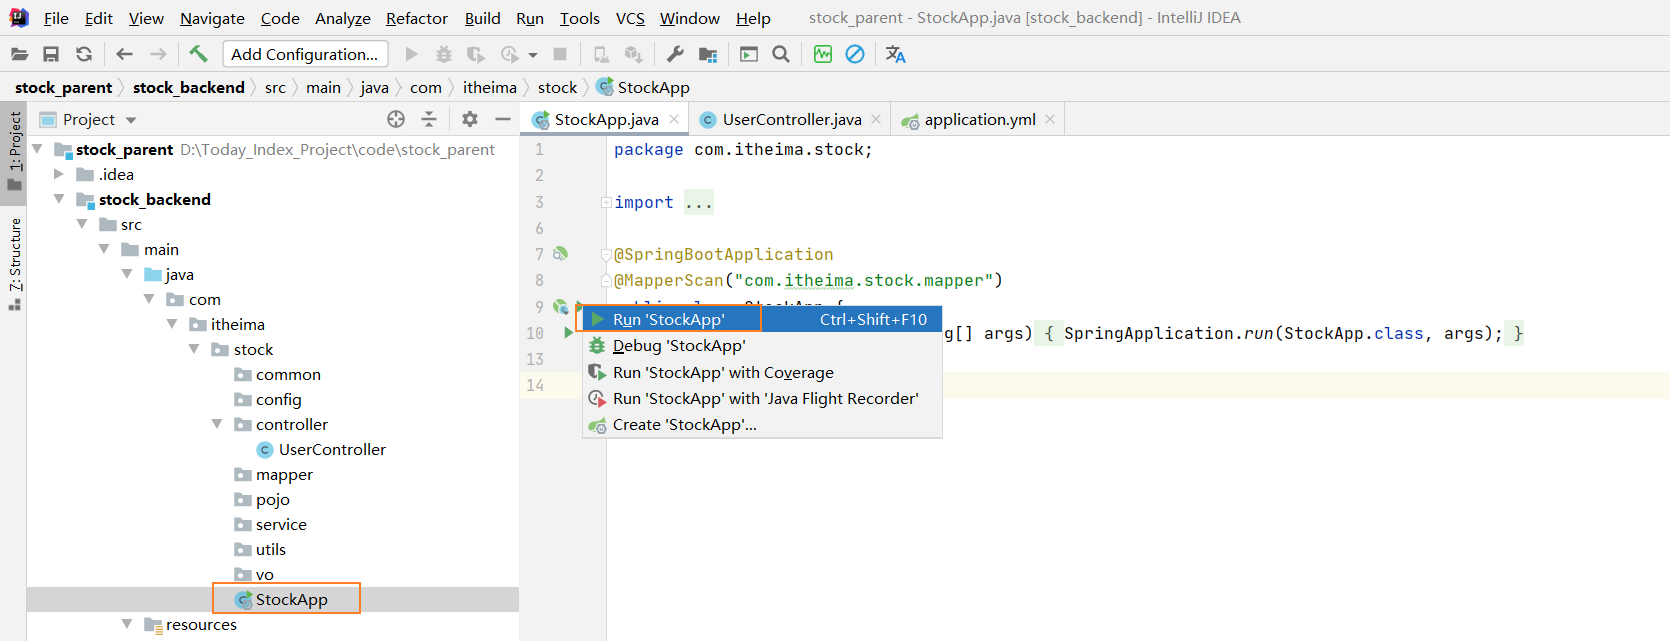
}启动:
注意:这里面启动时 要注意你连接的mysql是linux的还是本地的 要注意他们的账户和密码否正确
启动成功

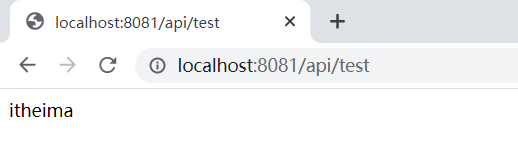
在浏览器上测试能够获取到
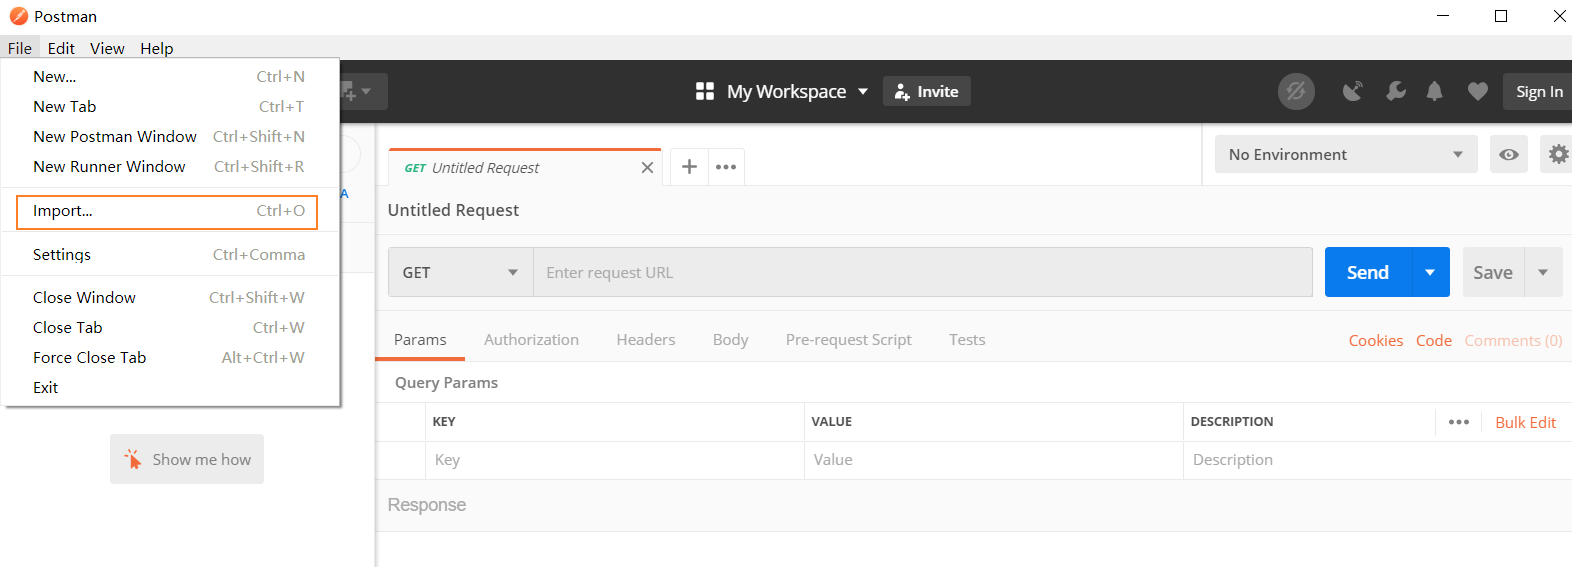
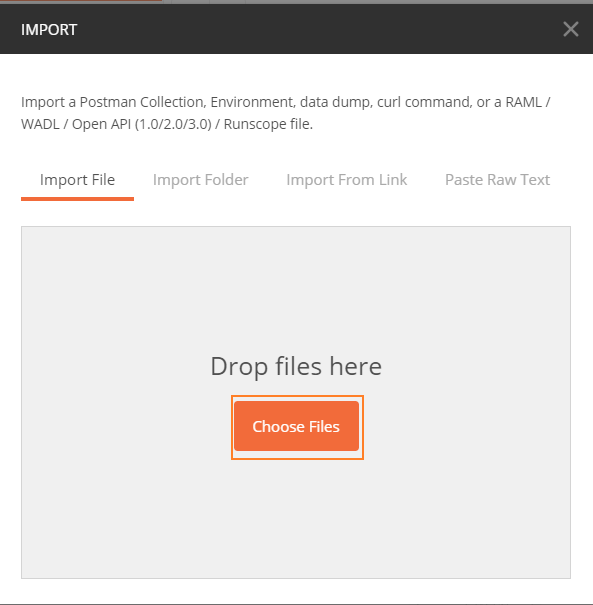
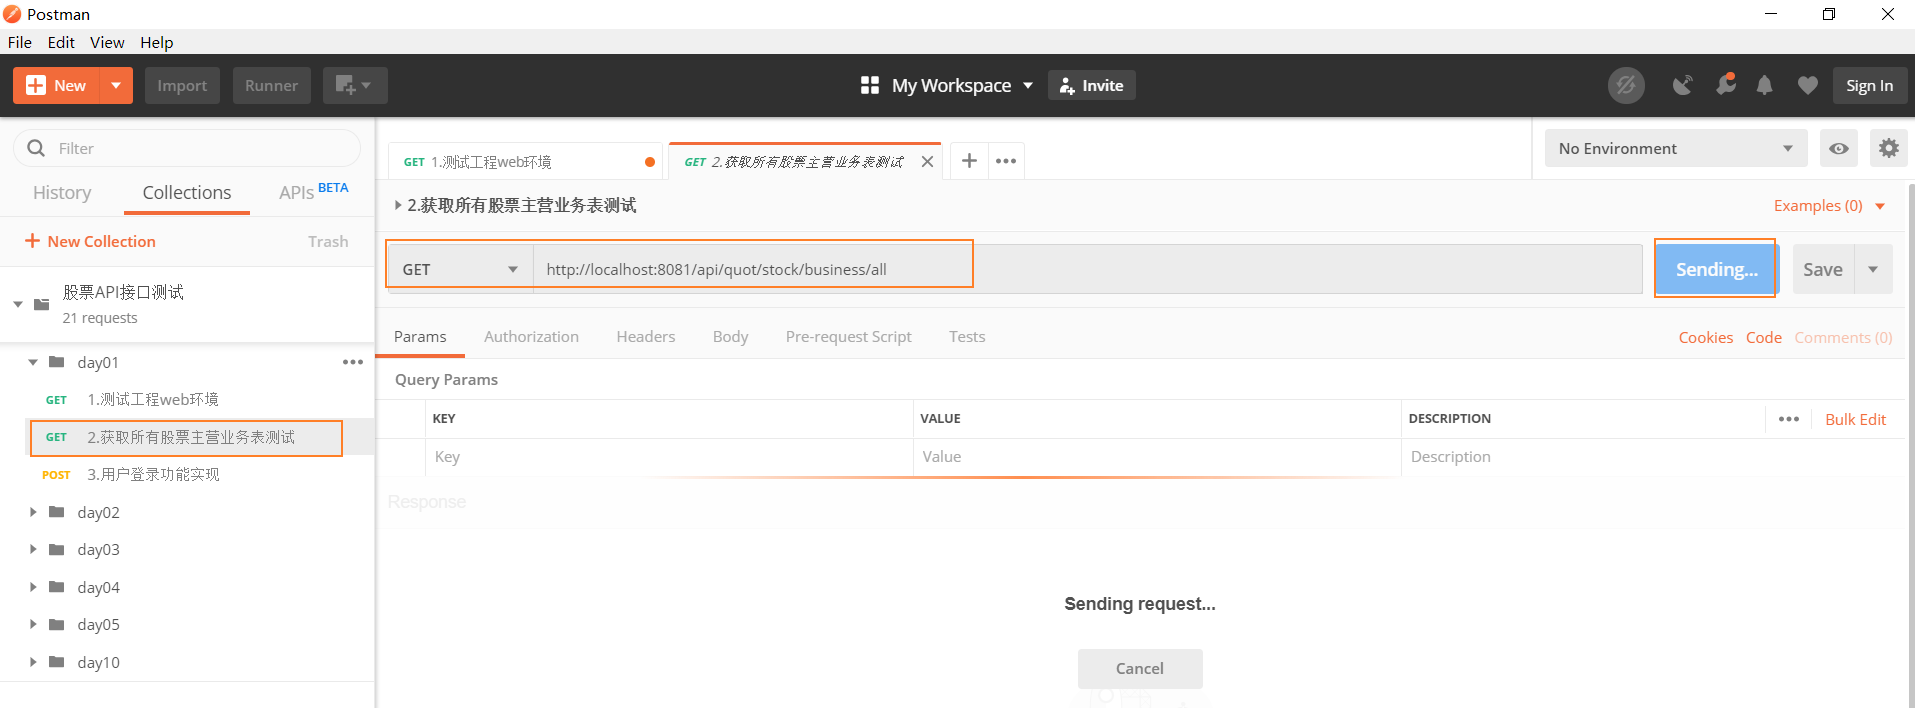
在做接口调试的时候 在这里面建议用postman 因为用浏览器只能用到git
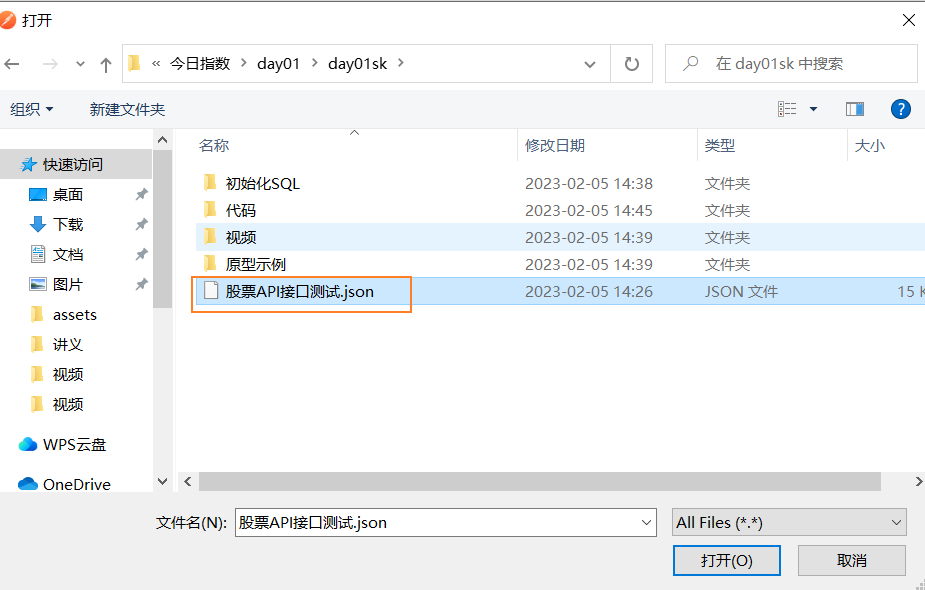
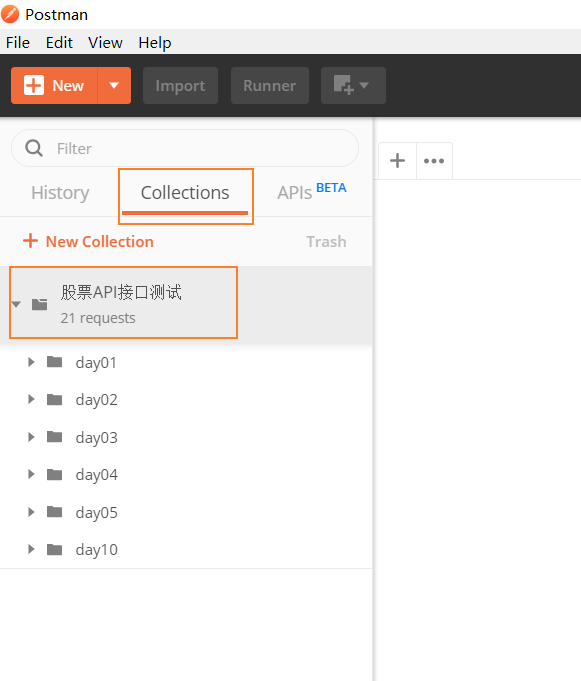
演示使用课程资料中的------股票API接口测试.json
至此,工程基础环境搭建完毕!
2.3 快速构建mybatis业务开发环境
【1】安装插件mybatisX工具

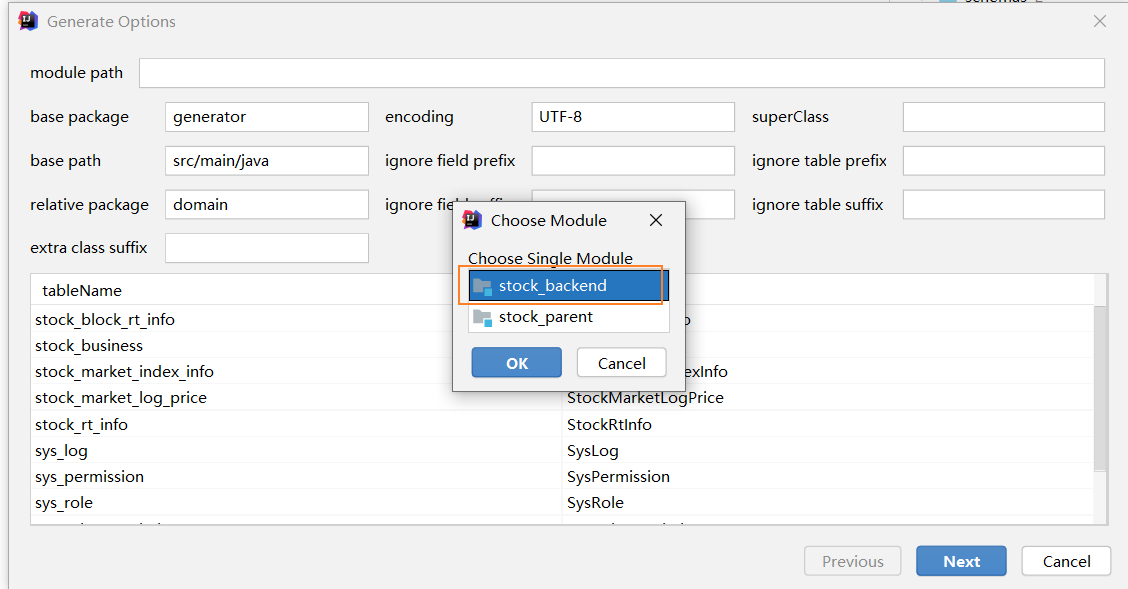
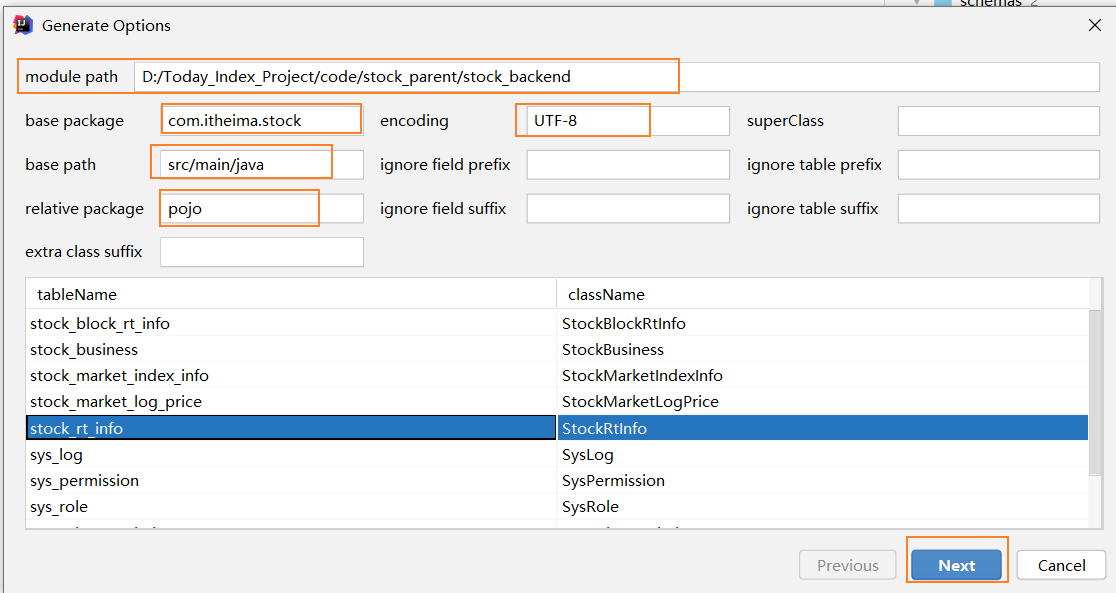
我们可借助mybatisX工具生成基础代码,步骤如下:
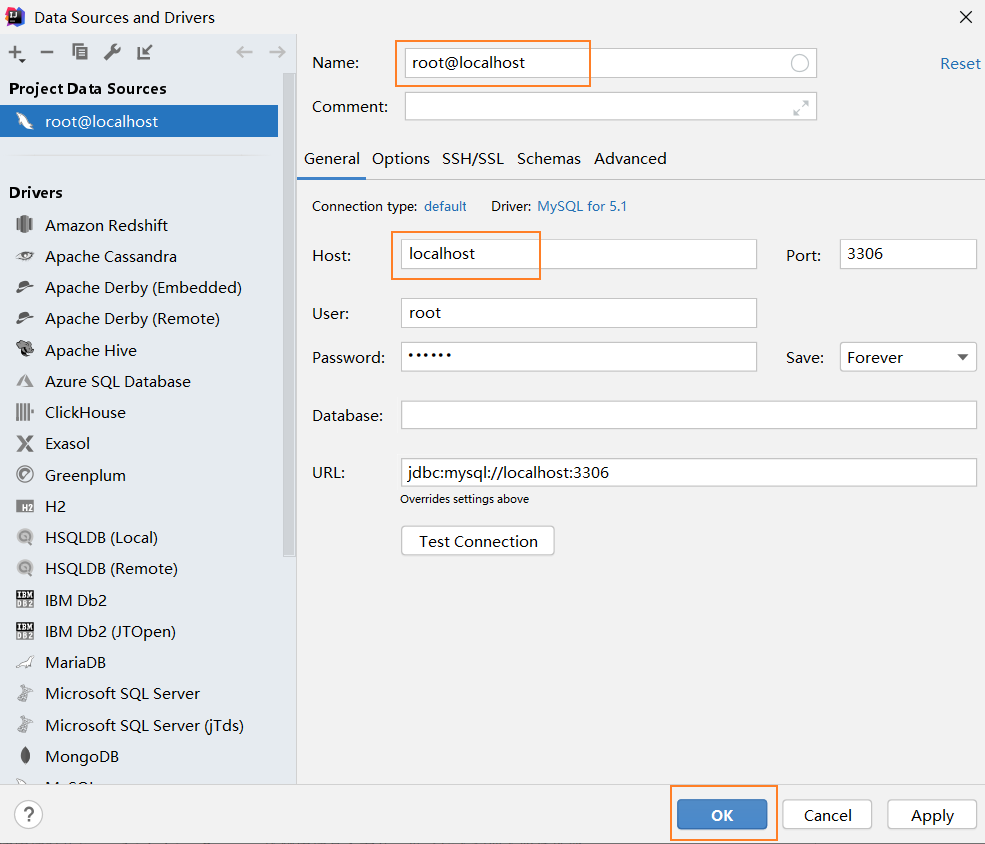
第一步:通过idea自带的database组件连接数据库:

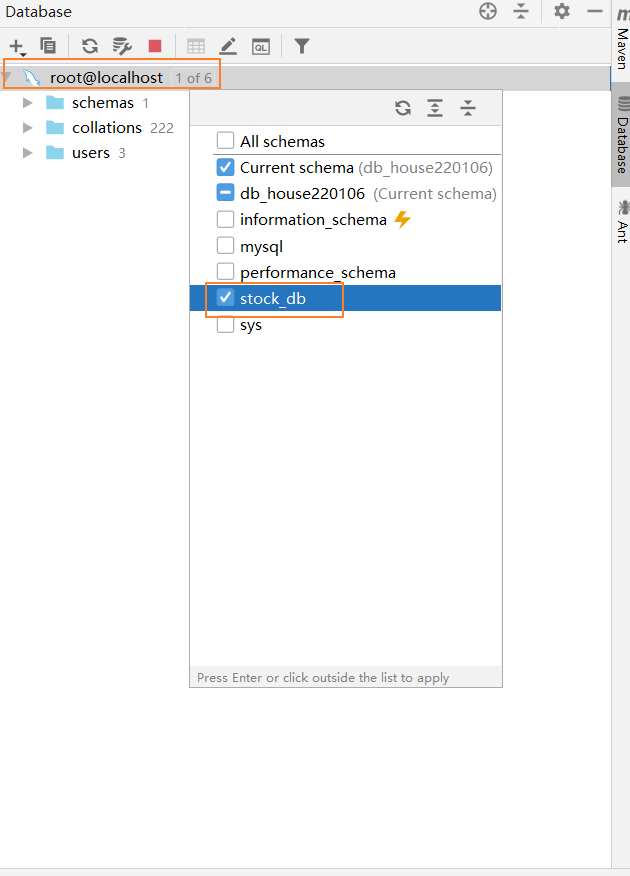
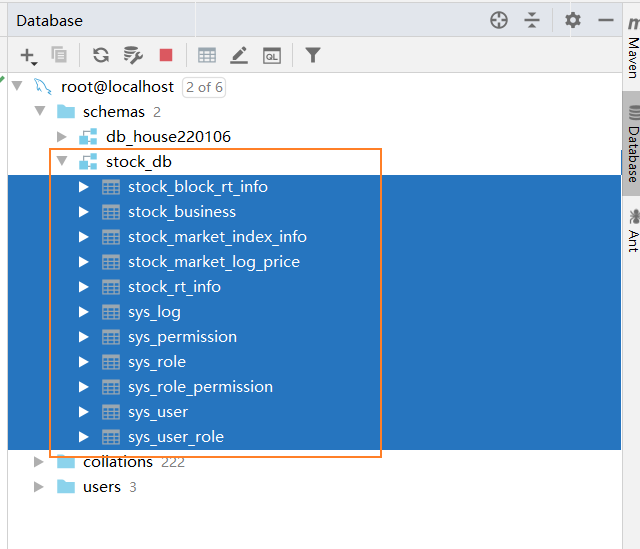
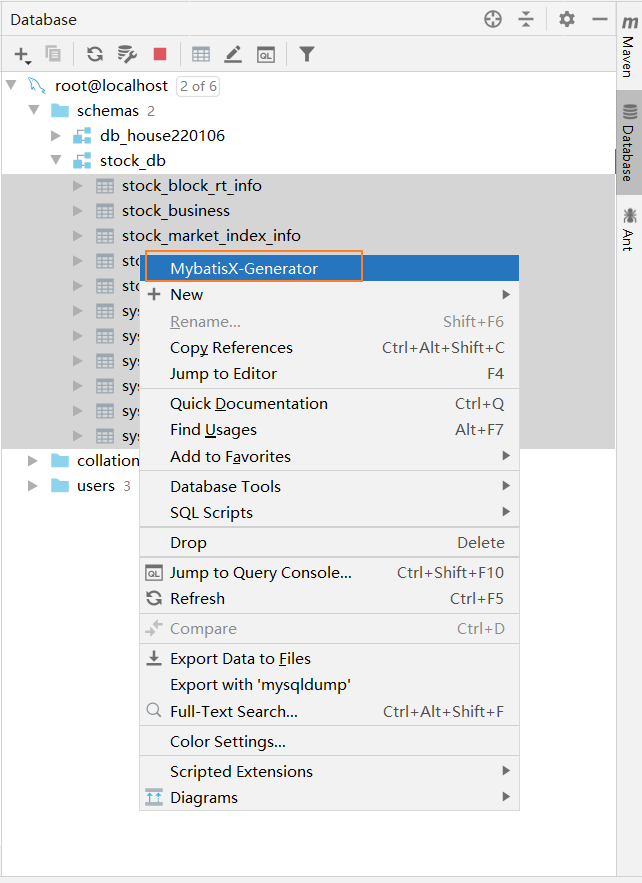
全选11张表 点击第一张表 按住Shist 在点击最后一张表
右击
第二步:配置pojo实体类选项


【2】集成mybatis的工程结构

【3】环境整体测试
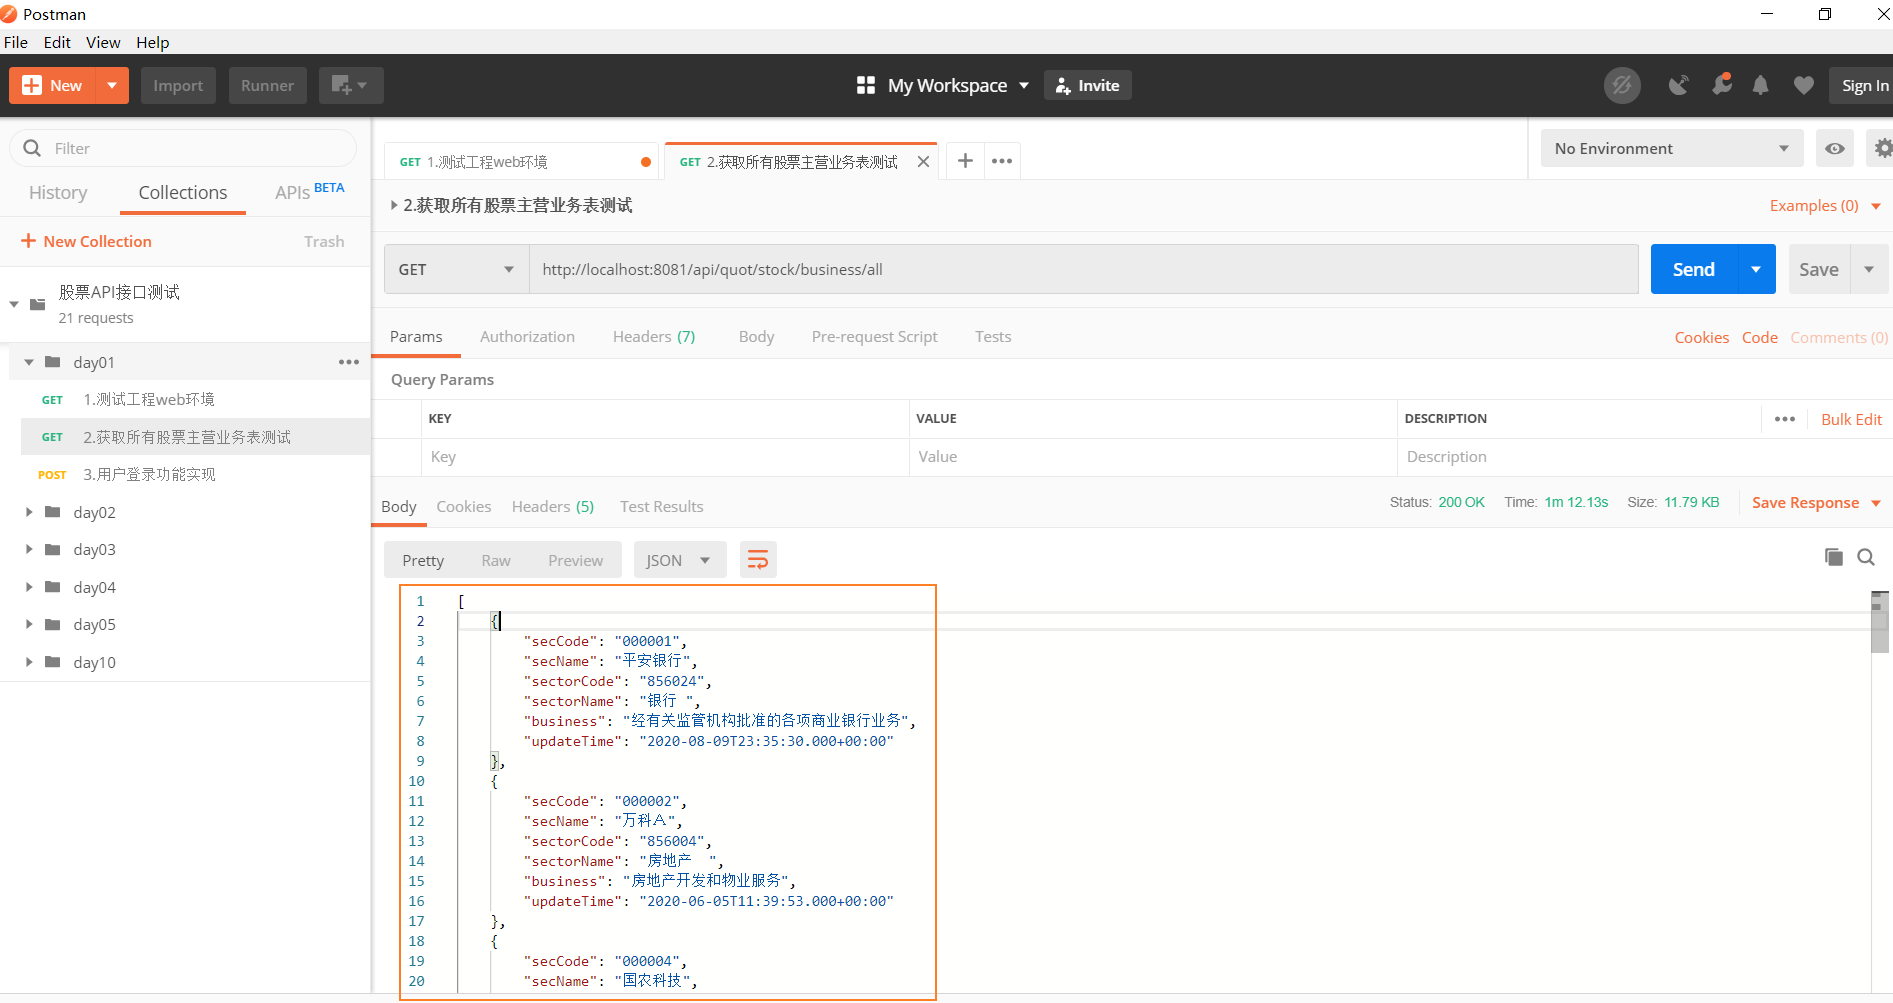
目的:我们通过一个简单的web接口访问数据库,验证工程搭建情况
接口功能说明:查询所有上市公司主营业务数据
接口url:/api/quot/stock/business/all
【3.1】定义mapper接口方法
StockBusinessMapper接口和xml定义查询所有股票业务信息的接口方法:
List<StockBusiness> findall();
  <select id="findall" resultMap="BaseResultMap">
        select
        <include refid="Base_Column_List" />
        from stock_business
    </select>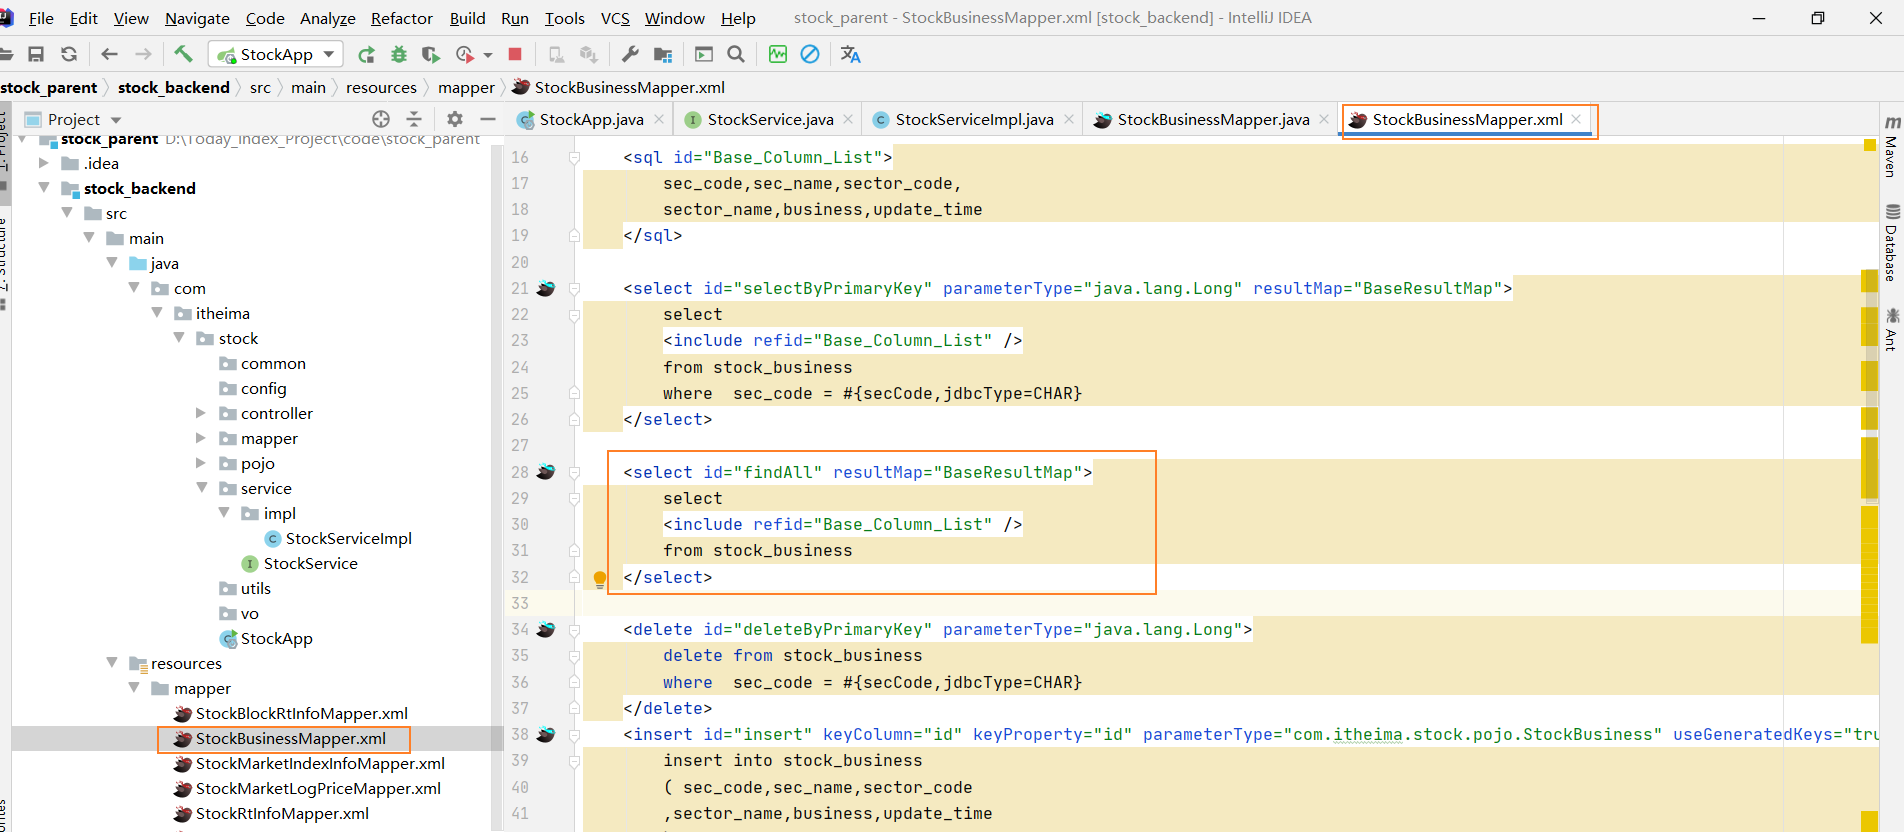
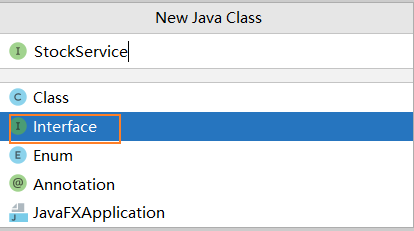
【3.2】定义服务接口及实现
定义服务接口:

package com.itheima.stock.service;
import com.itheima.stock.pojo.StockBusiness;
import java.util.List;
/*定义股票服务接口*/
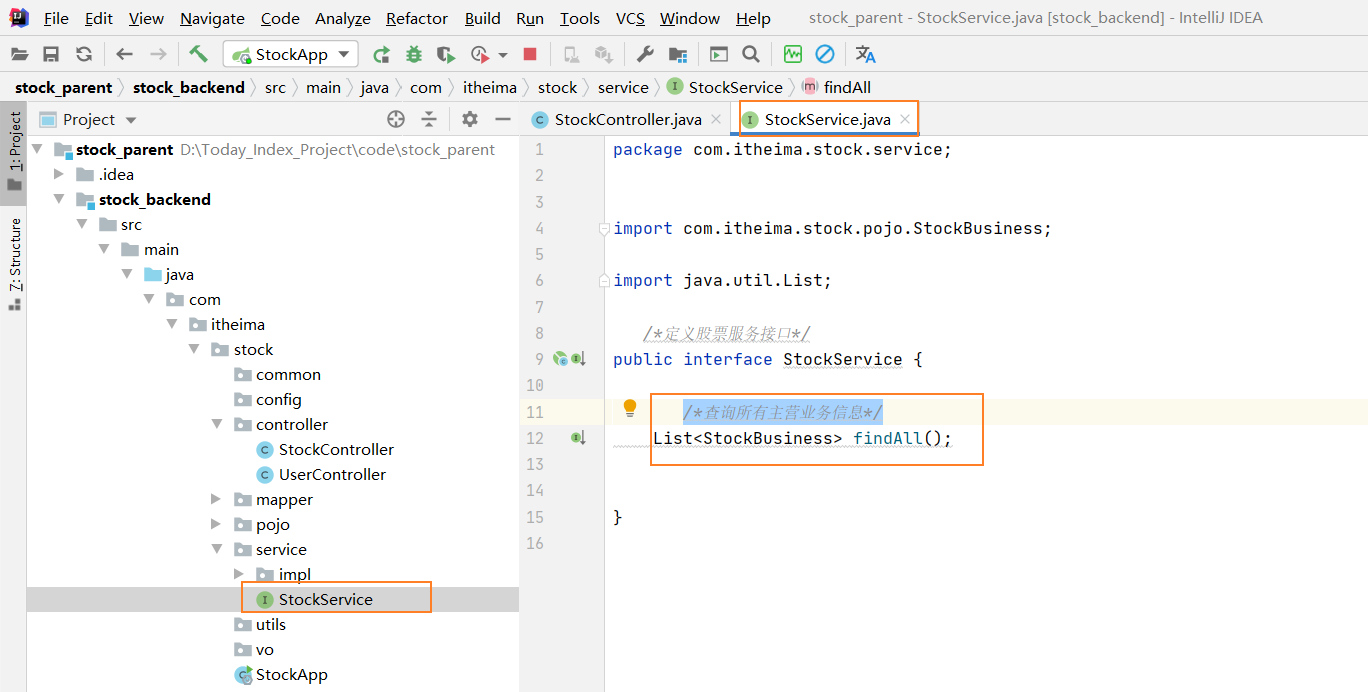
public interface StockService {
/*查询所有主营业务信息*/
List<StockBusiness> findAll();
}
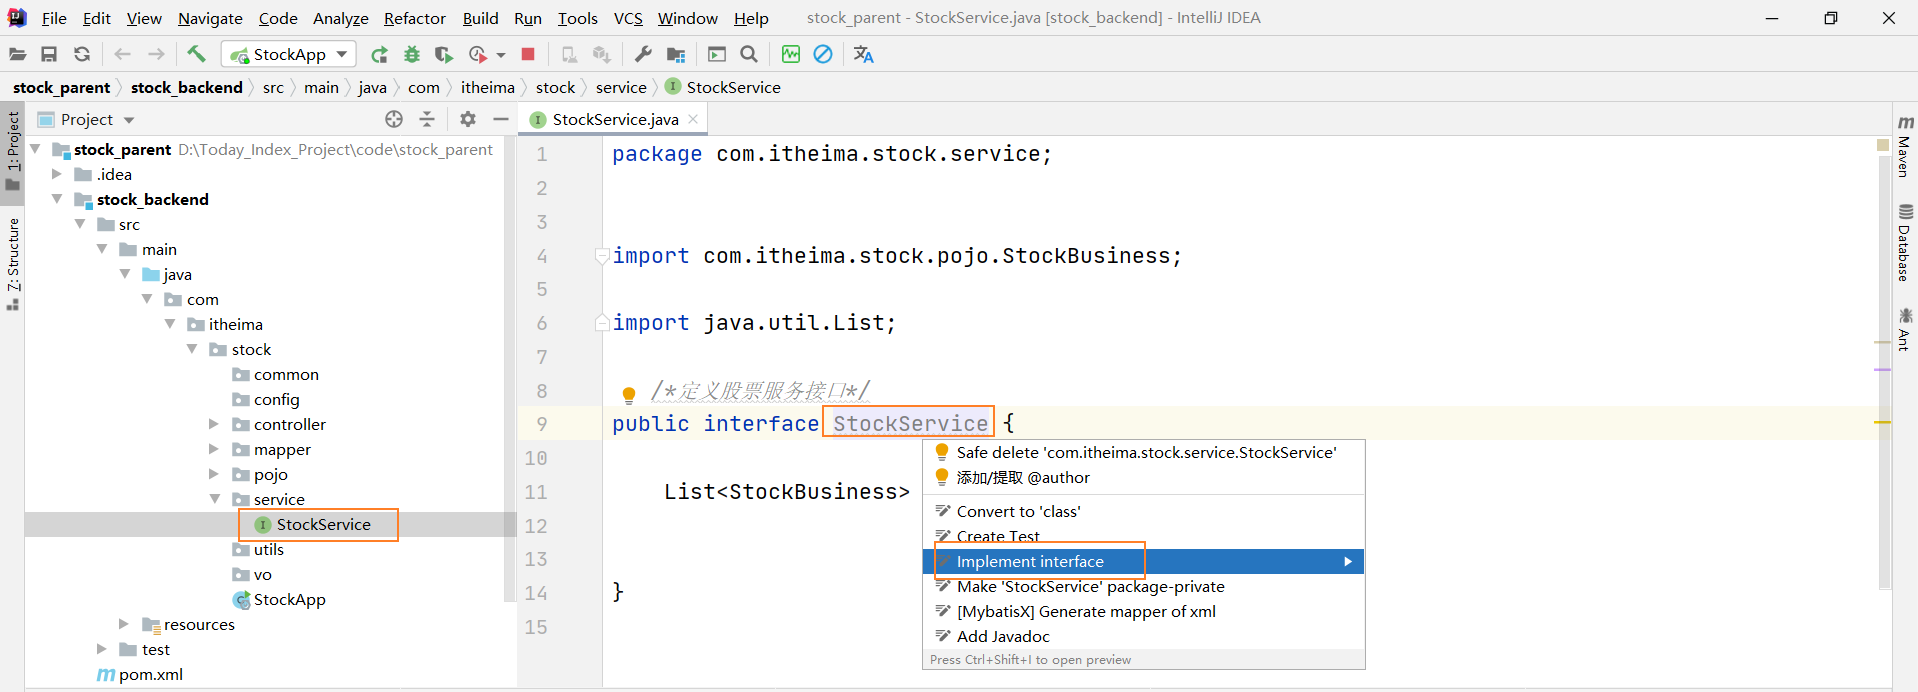
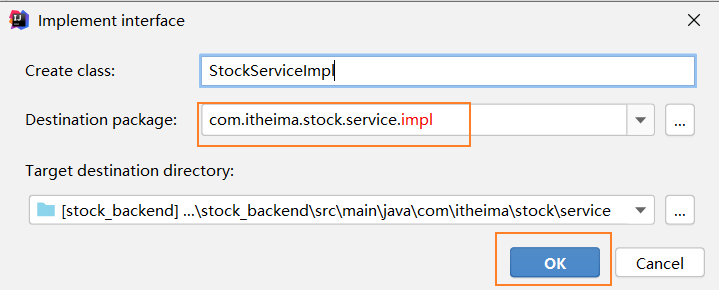
定义服务接口实现:
Alt+Enter


package com.itheima.stock.service.impl;

import com.itheima.stock.mapper.StockBusinessMapper;
import com.itheima.stock.pojo.StockBusiness;
import com.itheima.stock.service.StockService;
import org.springframework.beans.factory.annotation.Autowired;
import org.springframework.stereotype.Service;

import java.util.List;


@Service("stockService")
public class StockServiceImpl implements StockService {

    @Autowired
    private StockBusinessMapper stockBusinessMapper;

    @Override
    public List<StockBusiness> findAll() {
        return stockBusinessMapper.findAll();
    }
}
【3.3】定义web访问接口

package com.itheima.stock.controller;


import com.itheima.stock.pojo.StockBusiness;
import com.itheima.stock.service.StockService;
import org.springframework.beans.factory.annotation.Autowired;
import org.springframework.web.bind.annotation.GetMapping;
import org.springframework.web.bind.annotation.RequestMapping;
import org.springframework.web.bind.annotation.RestController;

import java.util.List;

@RestController
@RequestMapping("/api/quot")
public class StockController {

    @Autowired
    private StockService stockService;

    @GetMapping("/stock/business/all")
    public List<StockBusiness> findAllBusiness(){
        return stockService.findAll();
    }

}

【3.4】启动项目测试

成功启动
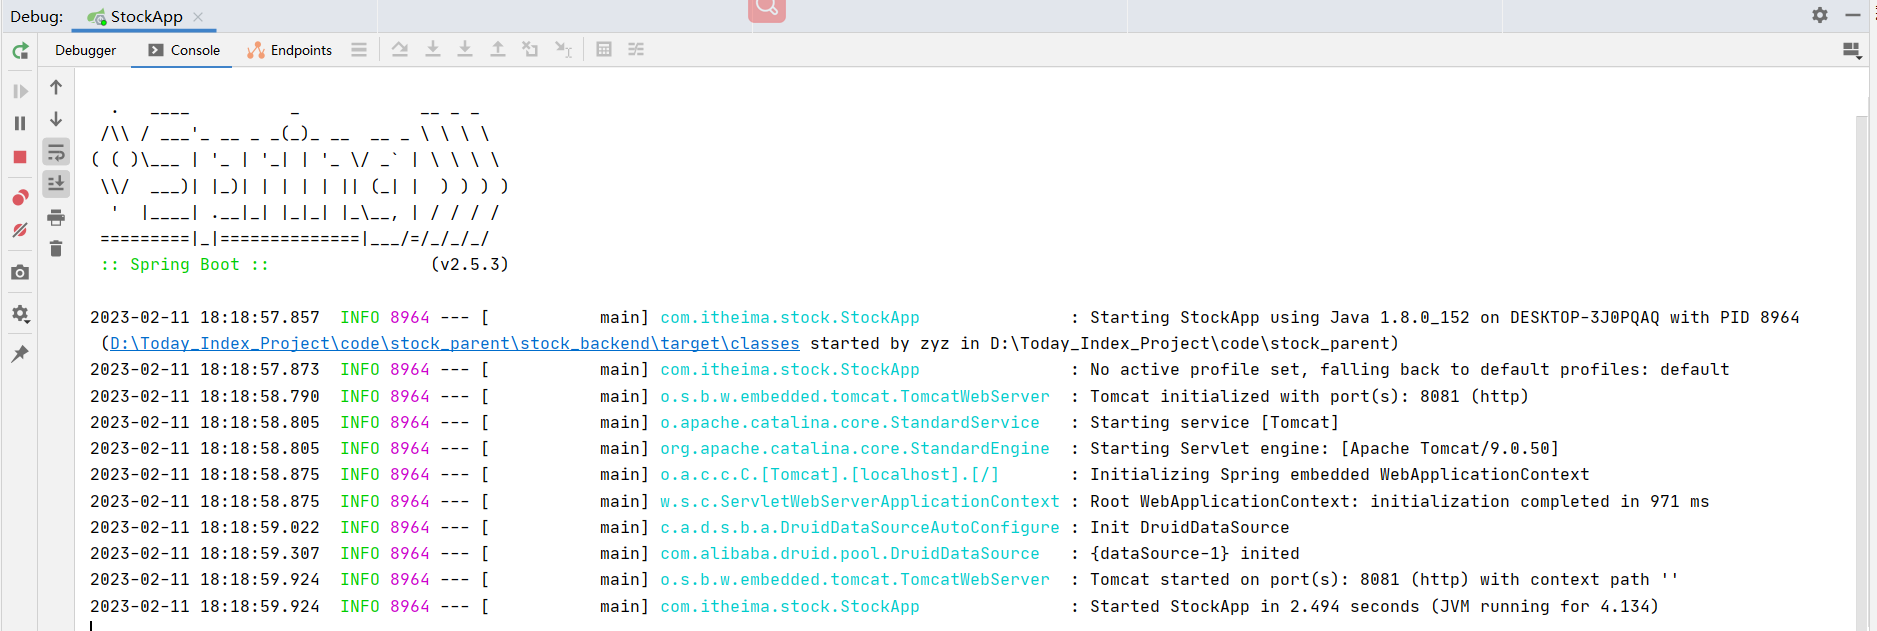


至此,后台基本开发环境构建完毕!
3.前端开发环境搭建
3.1 前端环境准备
【1】node安装
前端node版本:

详见资料:

【2】vs导入前端代码
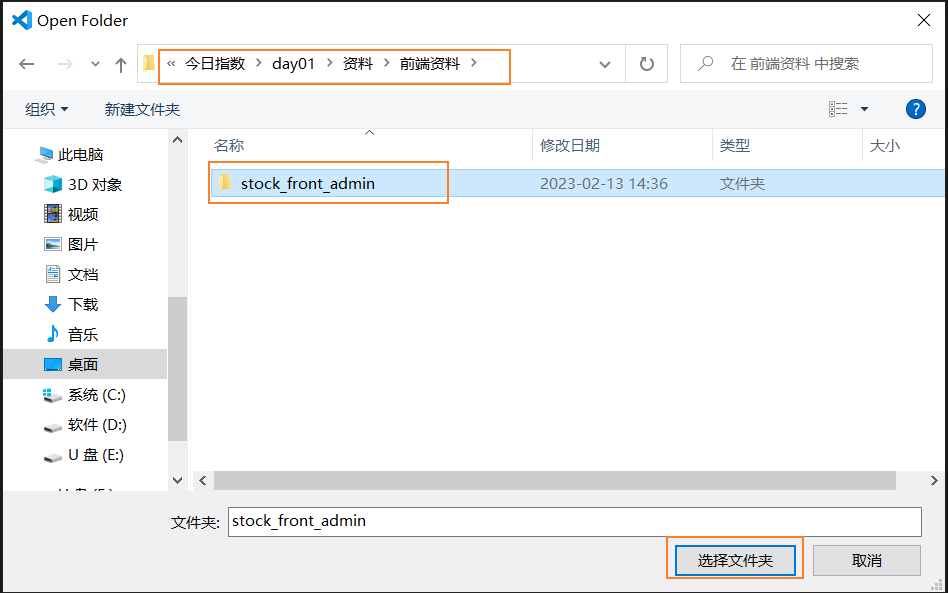
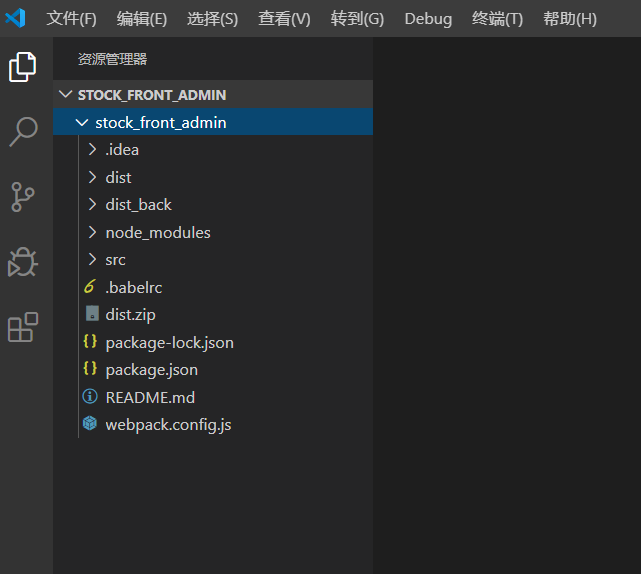
资料:day01\资料\前端资料\stock_front_admin
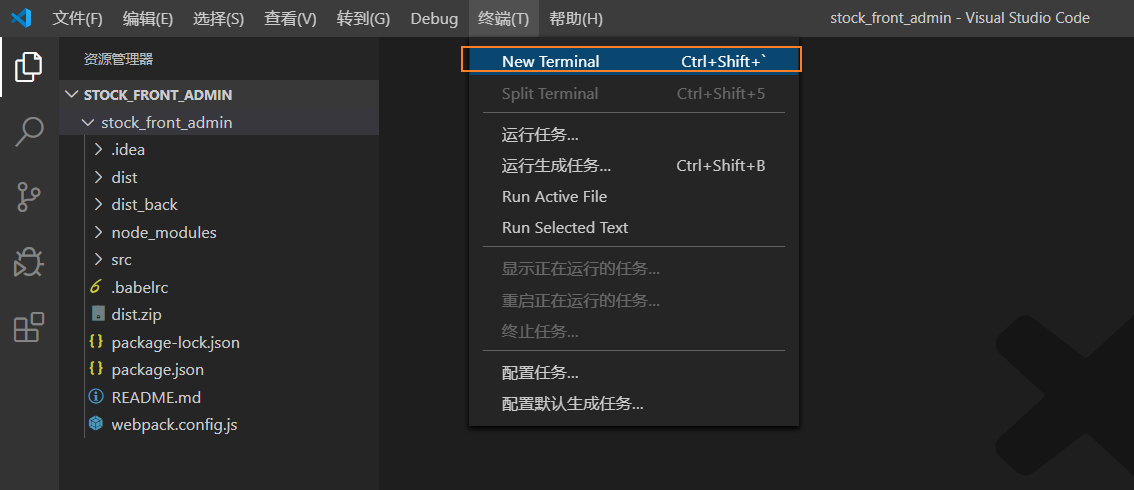
使用vscode打开工程:
效果如下:
【3】前端工程启动


npm run dev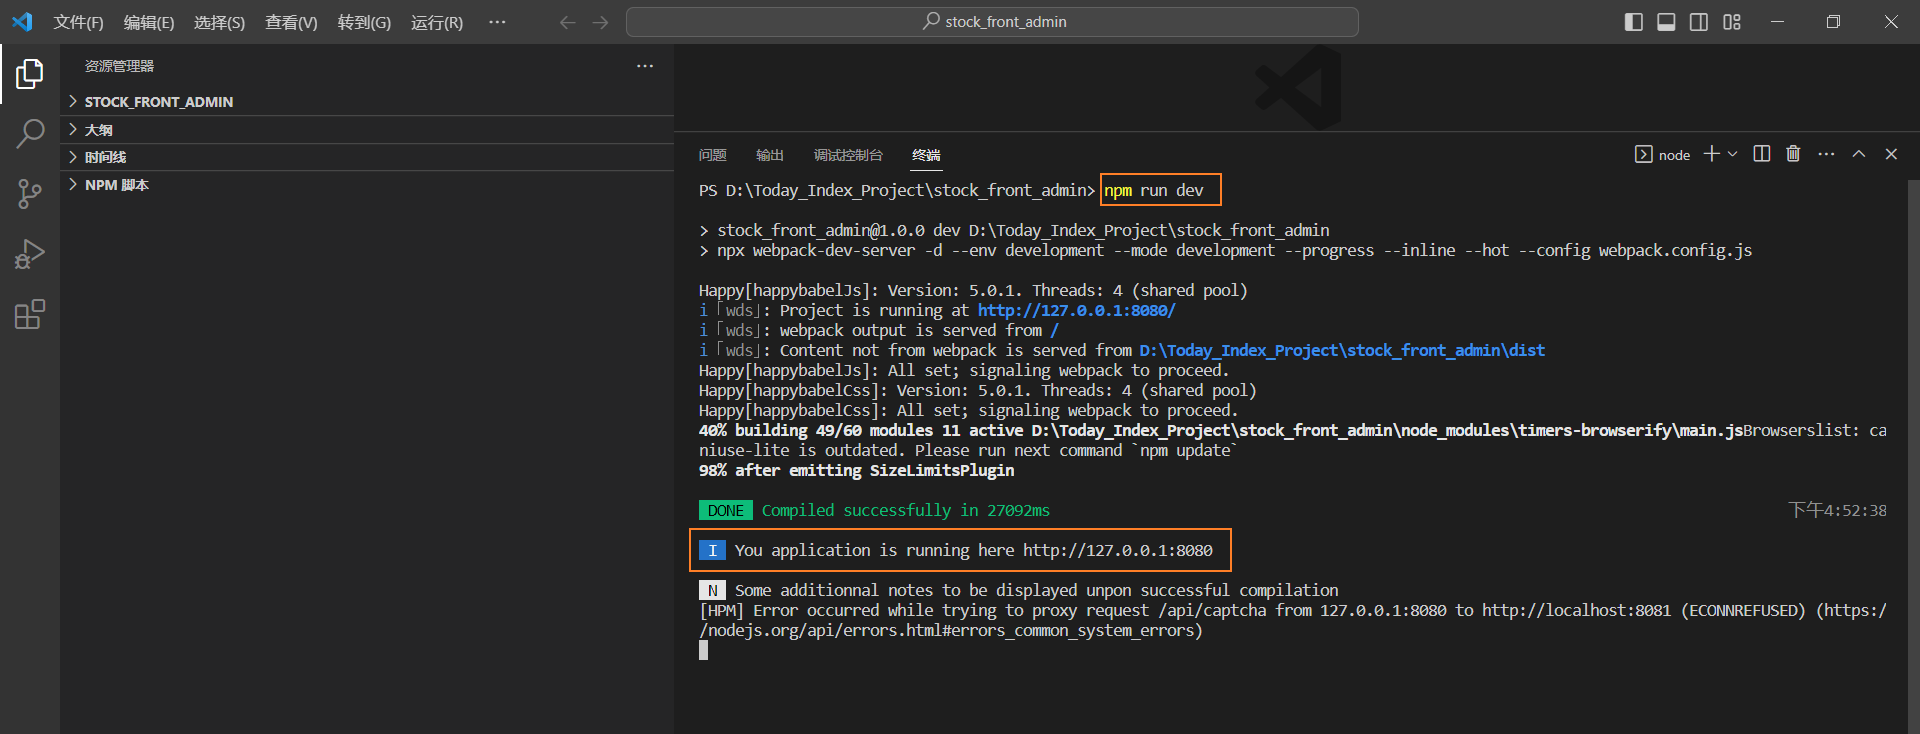
这里面是8080 但是我们后端是8081 所以这里面要注意一下
注意事项:如果启动报错,重新npm install 或者cnpm install
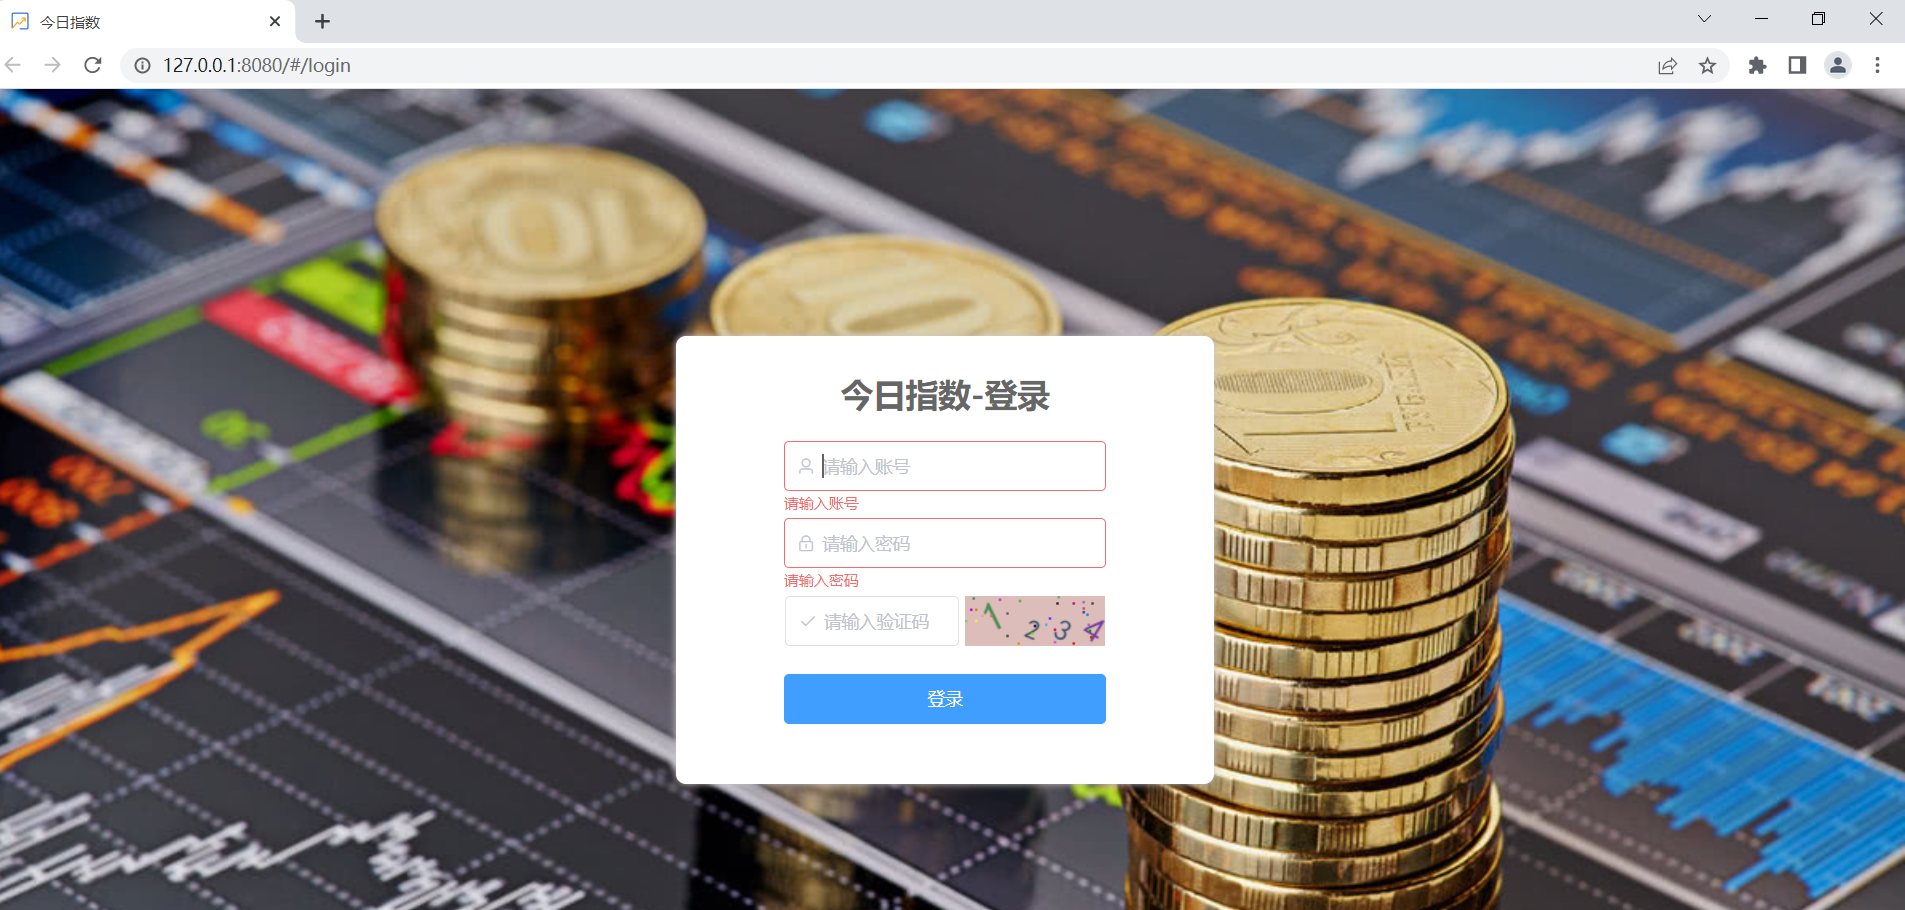
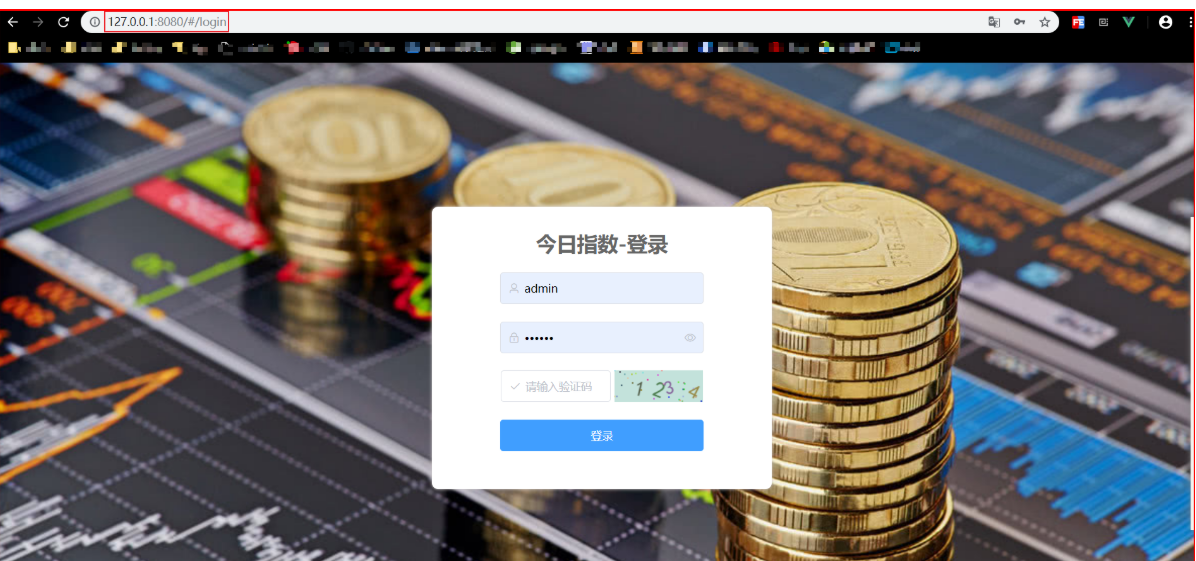
【4】页面效果
3.2 前后端分离跨域问题
在前面的知识中,我们已经了解到项目进行前后端分离后,存在跨域问题,只需在前端进行简单配置,即可解决该问题;
【1】前后端跨域配置
在stock_front_admin\src\settings.js文件下配置跨域:
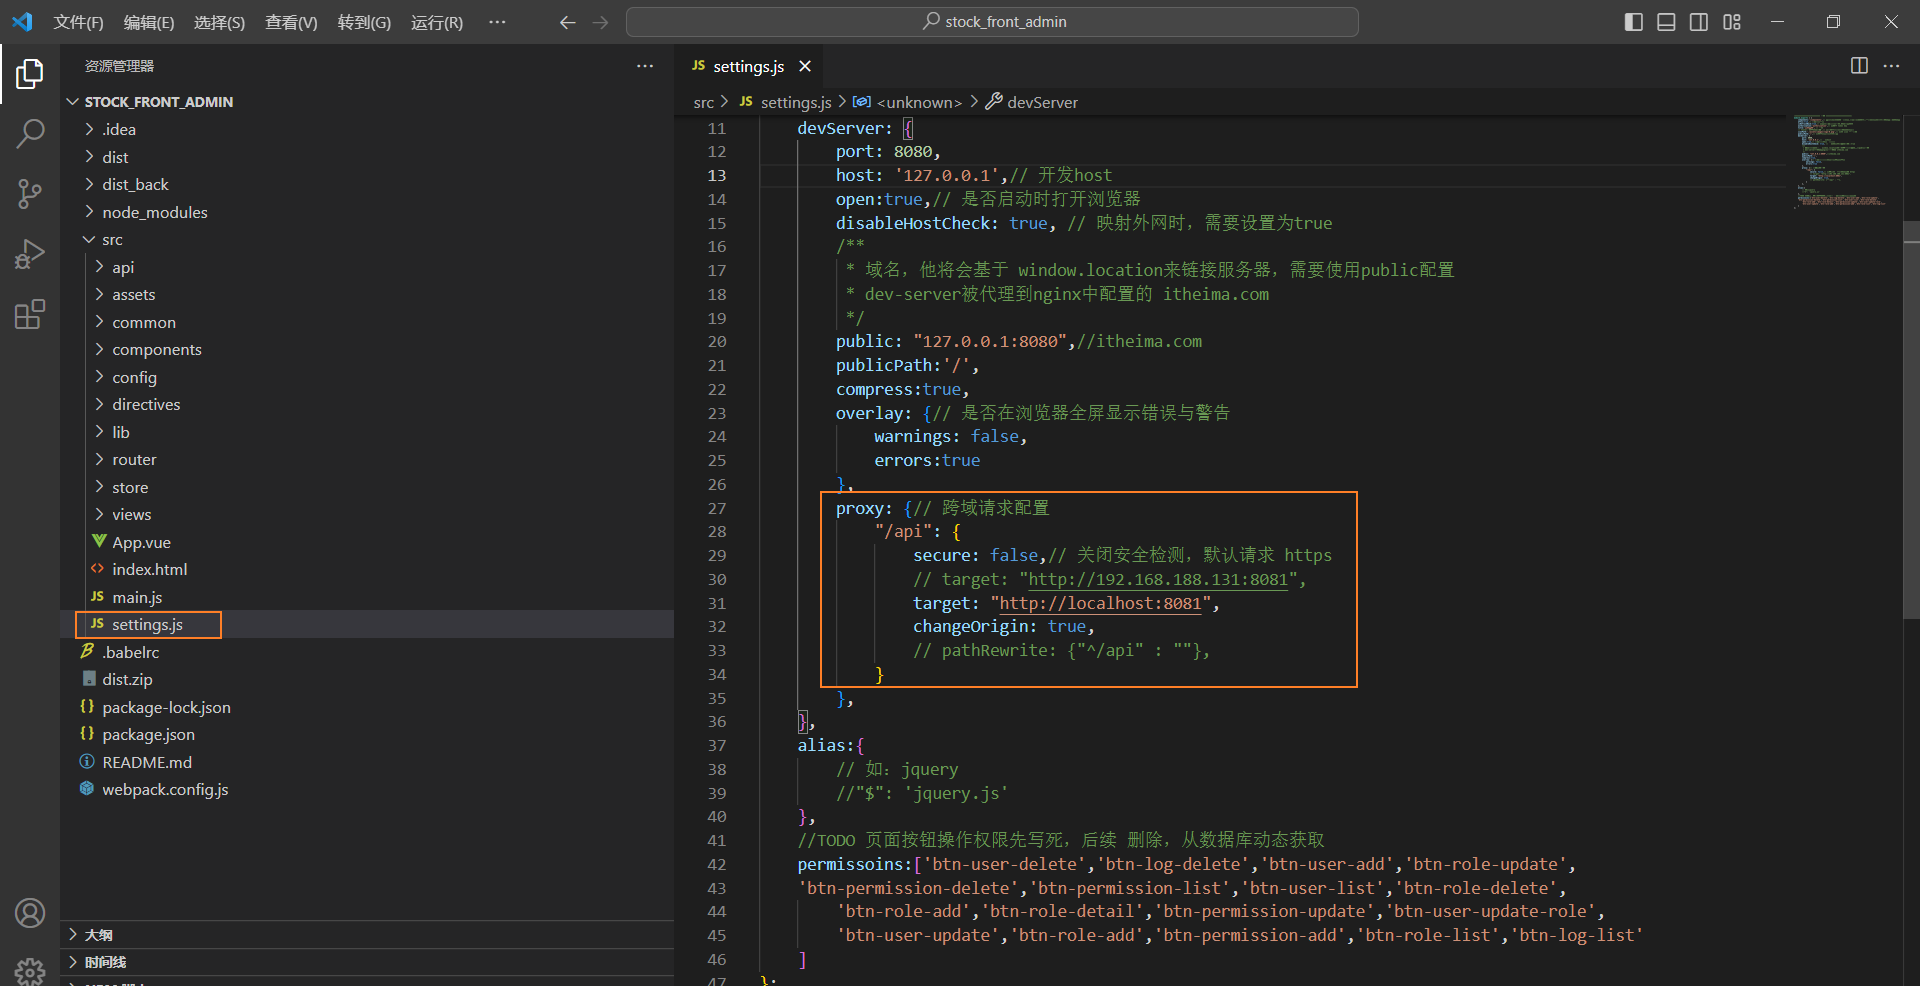
    devServer: {
        port: 8080,
        host: '127.0.0.1',// 开发host
        open:true,// 是否启动时打开浏览器
        disableHostCheck: true, // 映射外网时,需要设置为true
        /**
         * 域名,他将会基于 window.location来链接服务器,需要使用public配置
         * dev-server被代理到nginx中配置的 itheima.com
         */
        public: "127.0.0.1:8080",//itheima.com
        publicPath:'/',
        compress:true,
        overlay: {// 是否在浏览器全屏显示错误与警告
            warnings: false,
            errors:true
        },
        proxy: {// 跨域请求配置
            "/api": {
                secure: false,// 关闭安全检测,默认请求 https
                //target: "http://192.168.188.131:8081",
                target: "http://localhost:8081",
                changeOrigin: true,
                // pathRewrite: {"^/api" : ""},
            }
        },
    },
【2】前后端交互数据格式
前端与后端使用json格式进行交互。
4.登录功能实现
4.1 需求分析
1)页面原型效果
2)相关的表结构
sys_user表如下:

3)访问接口定义
      请求接口:/api/login
请求方式:POST
请求数据示例:
    {
       username:'zhangsan',//用户名
       password:'666',//密码
       code:'1234' //校验码
    }
响应数据:
    {
        "code": 1,//成功1 失败0
        "data": {
        "id":"1237365636208922624",
        "username":"zhangsan",
        "nickName":"xiaozhang",
        "phone":"1886702304"
        }
    }
4)封装请求和响应vo
请求vo封装:


package com.itheima.stock.vo.req;

import lombok.Data;

/*用户登录请求vo*/

@Data
public class LoginReqVo {

    /**
     * 用户名
     */
    private String username;
    /**
     * 密码
     */
    private String password;
    /**
     * 前端发送的验证码
     */
    private String code;

}
}
响应vo:

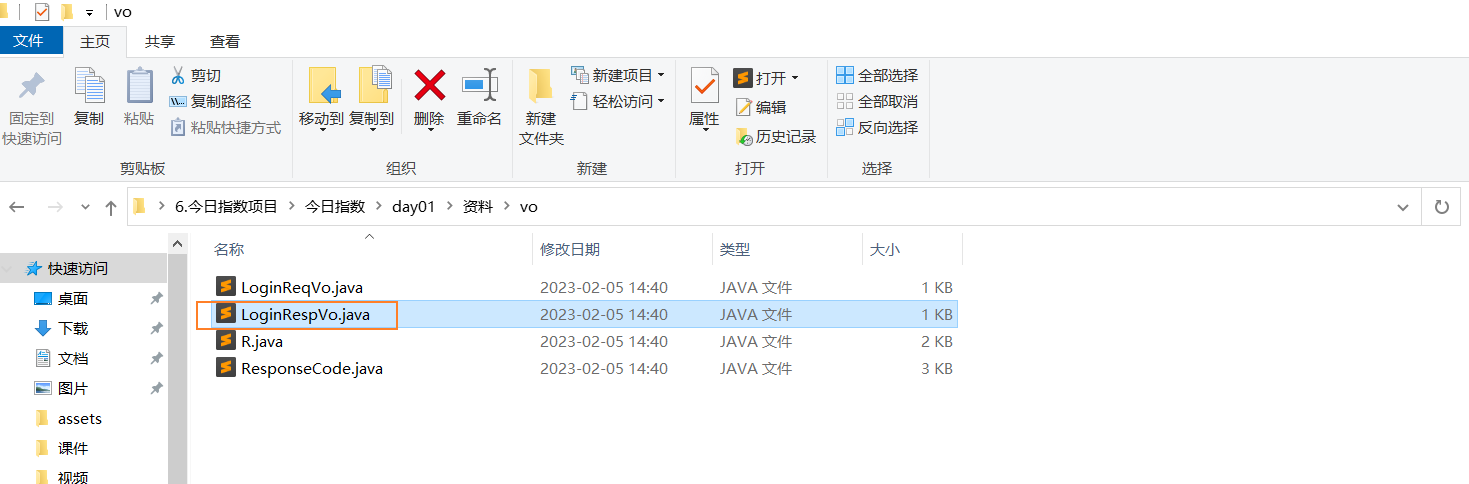
把资料中的LoginRespVo复制到idea中
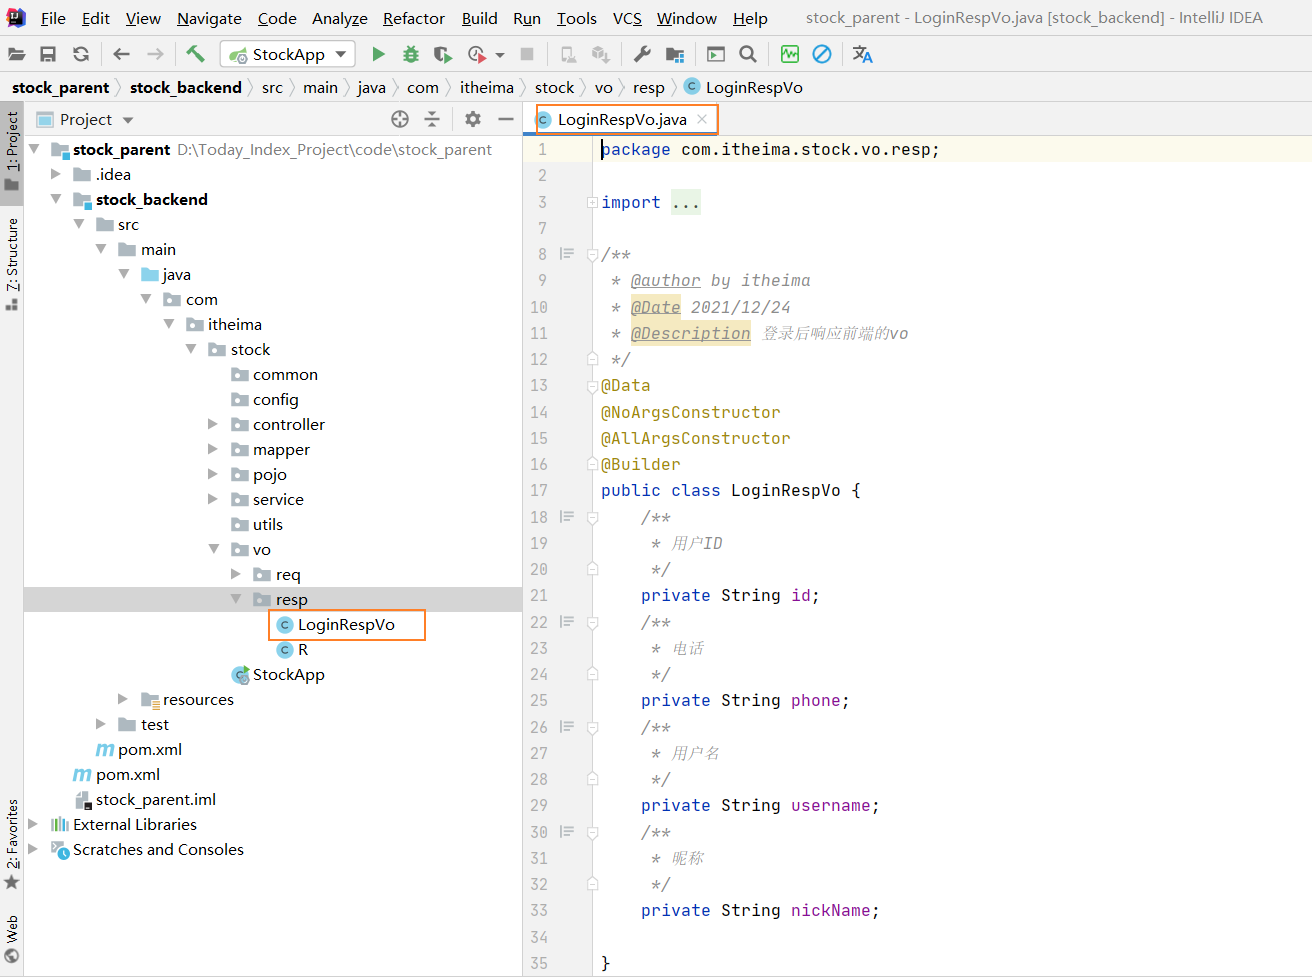
package com.itheima.stock.vo.resp;

import lombok.AllArgsConstructor;
import lombok.Builder;
import lombok.Data;
import lombok.NoArgsConstructor;

/**
 * @author by itheima
 * @Date 2021/12/24
 * @Description 登录后响应前端的vo
 */
@Data
@NoArgsConstructor
@AllArgsConstructor
@Builder
public class LoginRespVo {
    /**
     * 用户ID
     */
    private String id;
    /**
     * 电话
     */
    private String phone;
    /**
     * 用户名
     */
    private String username;
    /**
     * 昵称
     */
    private String nickName;

}
定义公共响应vo:
把资料中的R复制过来


package com.itheima.stock.vo.resp;

import com.fasterxml.jackson.annotation.JsonInclude;

import java.io.Serializable;

/**
 * 返回数据类
 * @param <T>
 */
//保证序列化json的时候,如果是null的对象,key也会消失
@JsonInclude(JsonInclude.Include.NON_NULL)
public class R<T> implements Serializable {
    private static final long serialVersionUID = 7735505903525411467L;

    // 成功值
    private static final int SUCCESS_CODE = 1;
    // 失败值
    private static final int ERROR_CODE = 0;

    //状态码
    private int code;
    //消息
    private String msg;
    //返回数据
    private T data;

    private R(int code){
        this.code = code;
    }
    private R(int code, T data){
        this.code = code;
        this.data = data;
    }
    private R(int code, String msg){
        this.code = code;
        this.msg = msg;
    }
    private R(int code, String msg, T data){
        this.code = code;
        this.msg = msg;
        this.data = data;
    }

    public static <T> R<T> ok(){
        return new R<T>(SUCCESS_CODE,"success");
    }
    public static <T> R<T> ok(String msg){
        return new R<T>(SUCCESS_CODE,msg);
    }
    public static <T> R<T> ok(T data){
        return new R<T>(SUCCESS_CODE,data);
    }
    public static <T> R<T> ok(String msg, T data){
        return new R<T>(SUCCESS_CODE,msg,data);
    }

    public static <T> R<T> error(){
        return new R<T>(ERROR_CODE,"error");
    }
    public static <T> R<T> error(String msg){
        return new R<T>(ERROR_CODE,msg);
    }
    public static <T> R<T> error(int code, String msg){
        return new R<T>(code,msg);
    }

    public int getCode(){
        return code;
    }
    public String getMsg(){
        return msg;
    }
    public T getData(){
        return data;
    }
}
定义响应状态枚举:
把资料中的ResponseCode复制到idea中

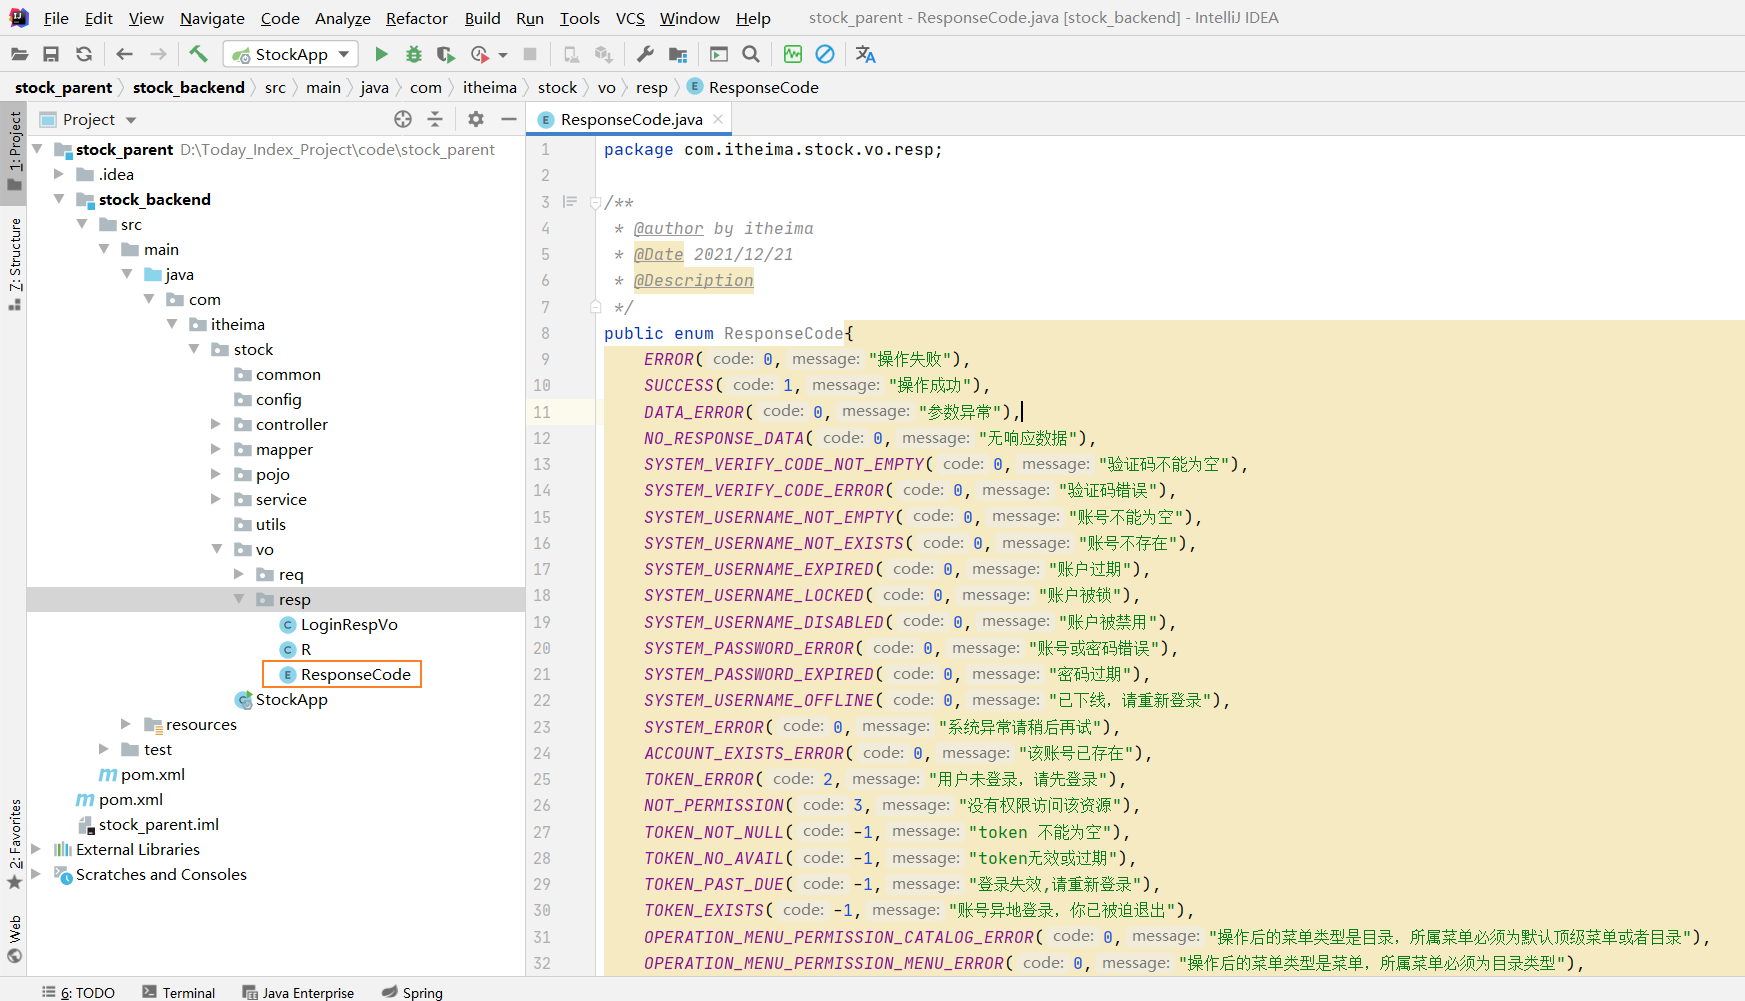
package com.itheima.stock.common.enums;

/**
 * @author by itheima
 * @Date 2021/12/21
 * @Description
 */
public enum ResponseCode{
    ERROR(0,"操作失败"),
    SUCCESS(1,"操作成功"),
    DATA_ERROR(0,"参数异常"),
    NO_RESPONSE_DATA(0,"无响应数据"),
    SYSTEM_VERIFY_CODE_NOT_EMPTY(0,"验证码不能为空"),
    SYSTEM_VERIFY_CODE_ERROR(0,"验证码错误"),
    SYSTEM_USERNAME_NOT_EMPTY(0,"账号不能为空"),
    SYSTEM_USERNAME_NOT_EXISTS(0,"账号不存在"),
    SYSTEM_USERNAME_EXPIRED(0,"账户过期"),
    SYSTEM_USERNAME_LOCKED(0,"账户被锁"),
    SYSTEM_USERNAME_DISABLED(0,"账户被禁用"),
    SYSTEM_PASSWORD_ERROR(0,"账号或密码错误"),
    SYSTEM_PASSWORD_EXPIRED(0,"密码过期"),
    SYSTEM_USERNAME_OFFLINE(0,"已下线,请重新登录"),
    SYSTEM_ERROR(0,"系统异常请稍后再试"),
    ACCOUNT_EXISTS_ERROR(0,"该账号已存在"),
    TOKEN_ERROR(2,"用户未登录,请先登录"),
    NOT_PERMISSION(3,"没有权限访问该资源"),
    TOKEN_NOT_NULL(-1,"token 不能为空"),
    TOKEN_NO_AVAIL(-1,"token无效或过期"),
    TOKEN_PAST_DUE(-1,"登录失效,请重新登录"),
    TOKEN_EXISTS(-1,"账号异地登录,你已被迫退出"),
    OPERATION_MENU_PERMISSION_CATALOG_ERROR(0,"操作后的菜单类型是目录,所属菜单必须为默认顶级菜单或者目录"),
    OPERATION_MENU_PERMISSION_MENU_ERROR(0,"操作后的菜单类型是菜单,所属菜单必须为目录类型"),
    OPERATION_MENU_PERMISSION_BTN_ERROR(0,"操作后的菜单类型是按钮,所属菜单必须为菜单类型"),
    OPERATION_MENU_PERMISSION_URL_NOT_NULL(0,"菜单权限的url不能为空"),
    OPERATION_MENU_PERMISSION_URL_PERMS_NULL(0,"菜单权限的标识符不能为空"),
    OPERATION_MENU_PERMISSION_URL_METHOD_NULL(0,"菜单权限的请求方式不能为空"),
    OPERATION_MENU_PERMISSION_URL_CODE_NULL(0,"菜单权限的按钮标识不能为空"),
    OPERATION_MENU_PERMISSION_UPDATE(0,"操作的菜单权限存在子集关联不允许变更"),
    ROLE_PERMISSION_RELATION(0, "该菜单权限存在子集关联,不允许删除"),
    OLD_PASSWORD_ERROR(0,"旧密码不匹配");
    private int code;
    private String message;

    ResponseCode(int code, String message) {
        this.code = code;
        this.message = message;
    }

    public int getCode() {
        return 0;
    }

    public String getMessage() {
        return null;
    }
}说明:上述的vo对象直接在:今日指数\day01\资料\vo导入即可;
4.2 登录功能开发实现
stock_backend导入依赖资源
<!--apache工具包-->
<dependency>
    <groupId>org.apache.commons</groupId>
    <artifactId>commons-lang3</artifactId>
</dependency>
<!--密码加密和校验工具包-->
<dependency>
    <groupId>org.springframework.security</groupId>
    <artifactId>spring-security-crypto</artifactId>
</dependency>
<!--工具包-->
<dependency>
    <groupId>com.google.guava</groupId>
    <artifactId>guava</artifactId>
</dependency>
配置密码加密服务
package com.itheima.stock.config;

import org.springframework.context.annotation.Bean;
import org.springframework.context.annotation.Configuration;
import org.springframework.security.crypto.bcrypt.BCryptPasswordEncoder;
import org.springframework.security.crypto.password.PasswordEncoder;

/*定义公共配置类*/

@Configuration
public class CommonConfig {

    /**
     * 密码加密器   定义密码加密器和解密器 bean
     * BCryptPasswordEncoder方法采用SHA-256对密码进行加密
     * @return
     */
    @Bean
    public PasswordEncoder passwordEncoder(){
        return new BCryptPasswordEncoder();
    }


}

密码加密测试:
登录接口方法定义
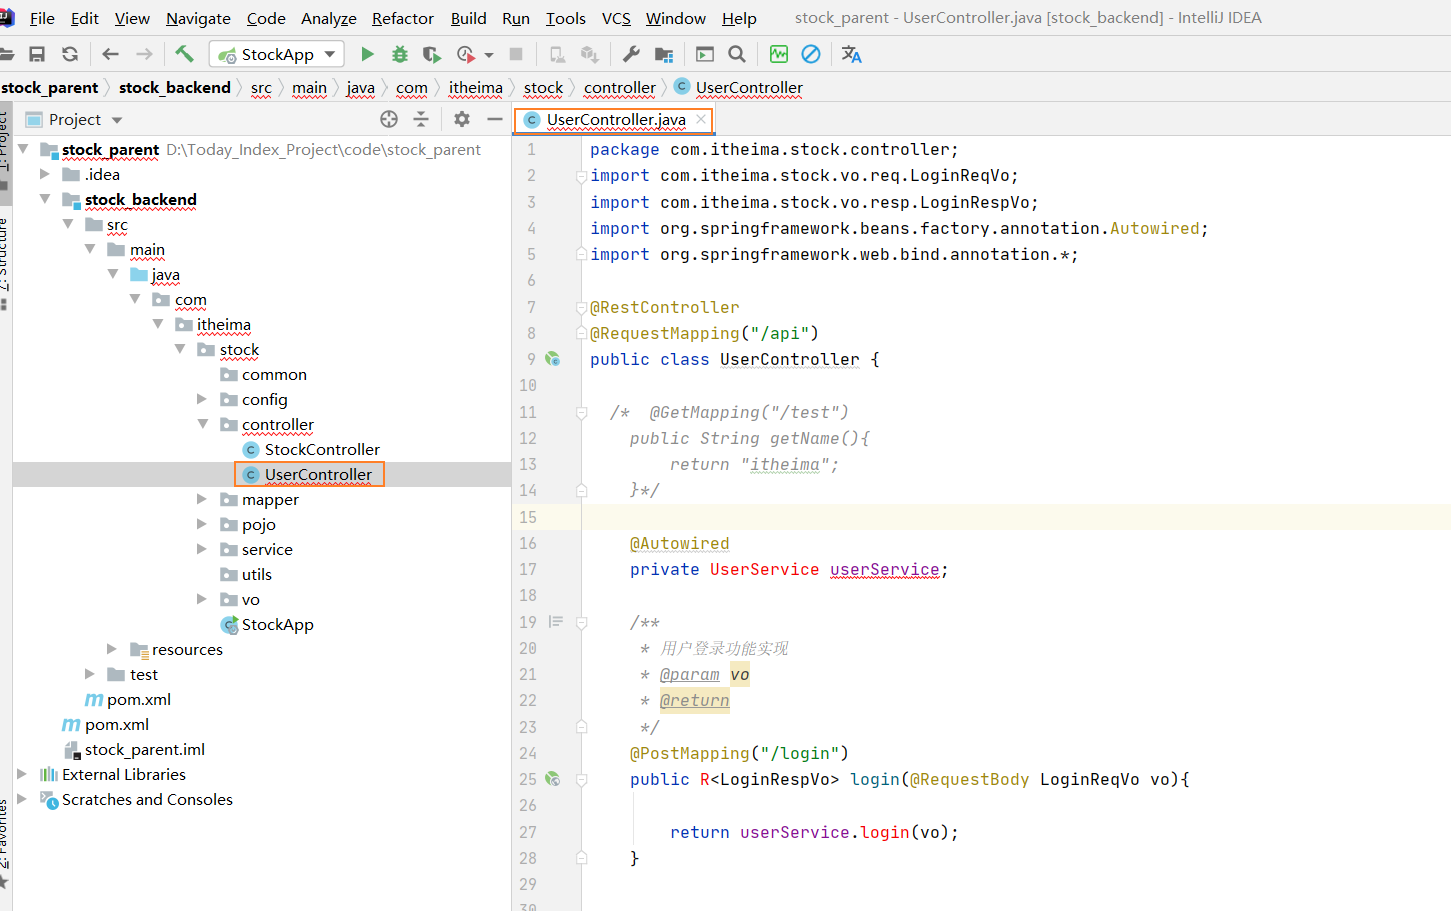
package com.itheima.stock.controller;
import com.itheima.stock.vo.req.LoginReqVo;
import com.itheima.stock.vo.resp.LoginRespVo;
import org.springframework.beans.factory.annotation.Autowired;
import org.springframework.web.bind.annotation.*;
@RestController
@RequestMapping("/api")
public class UserController {
/* @GetMapping("/test")
public String getName(){
return "itheima";
}*/
@Autowired
private UserService userService;
/**
* 用户登录功能实现
* @param vo
* @return
*/
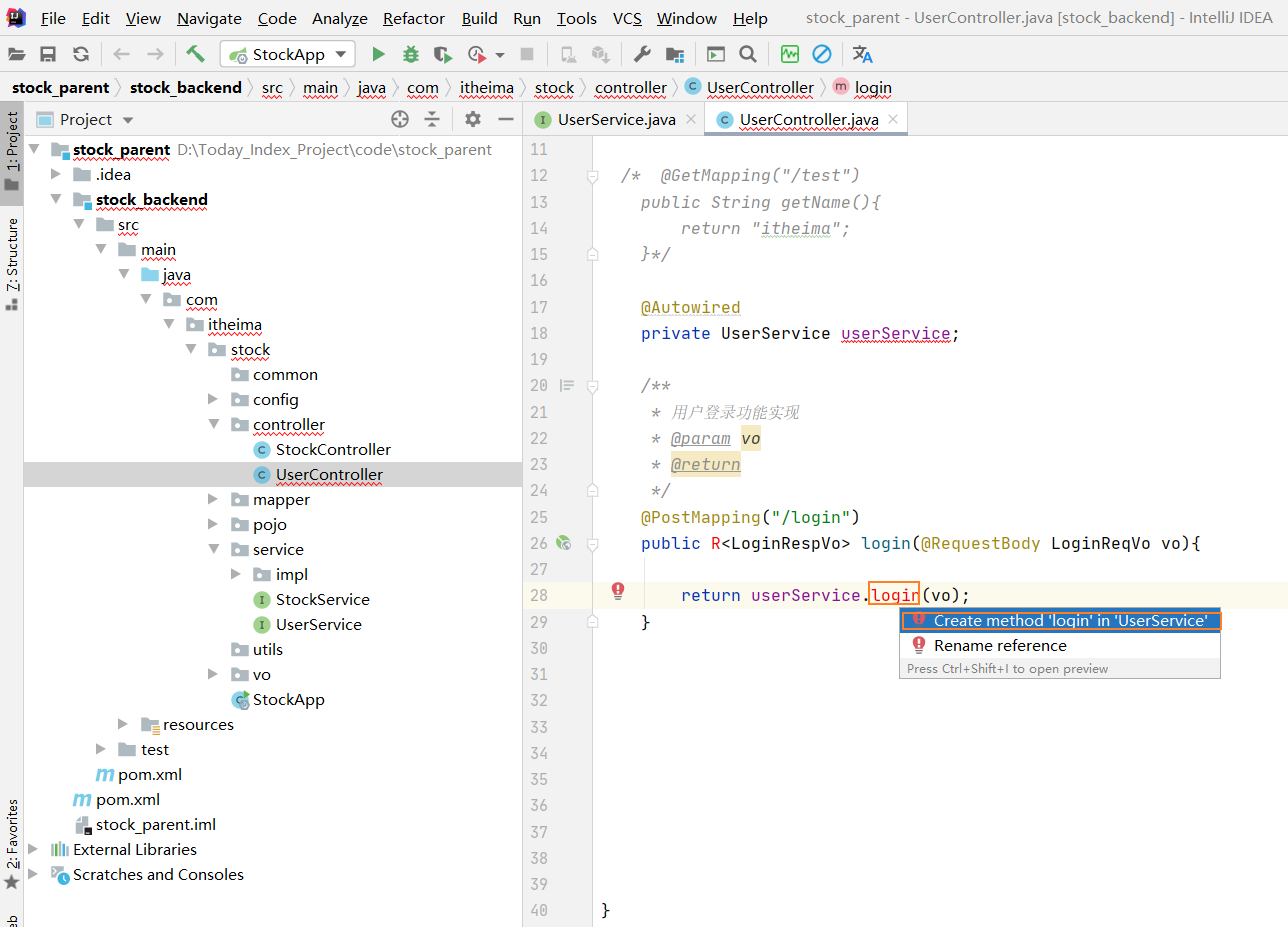
@PostMapping("/login")
public R<LoginRespVo> login(@RequestBody LoginReqVo vo){
return userService.login(vo);
}
}
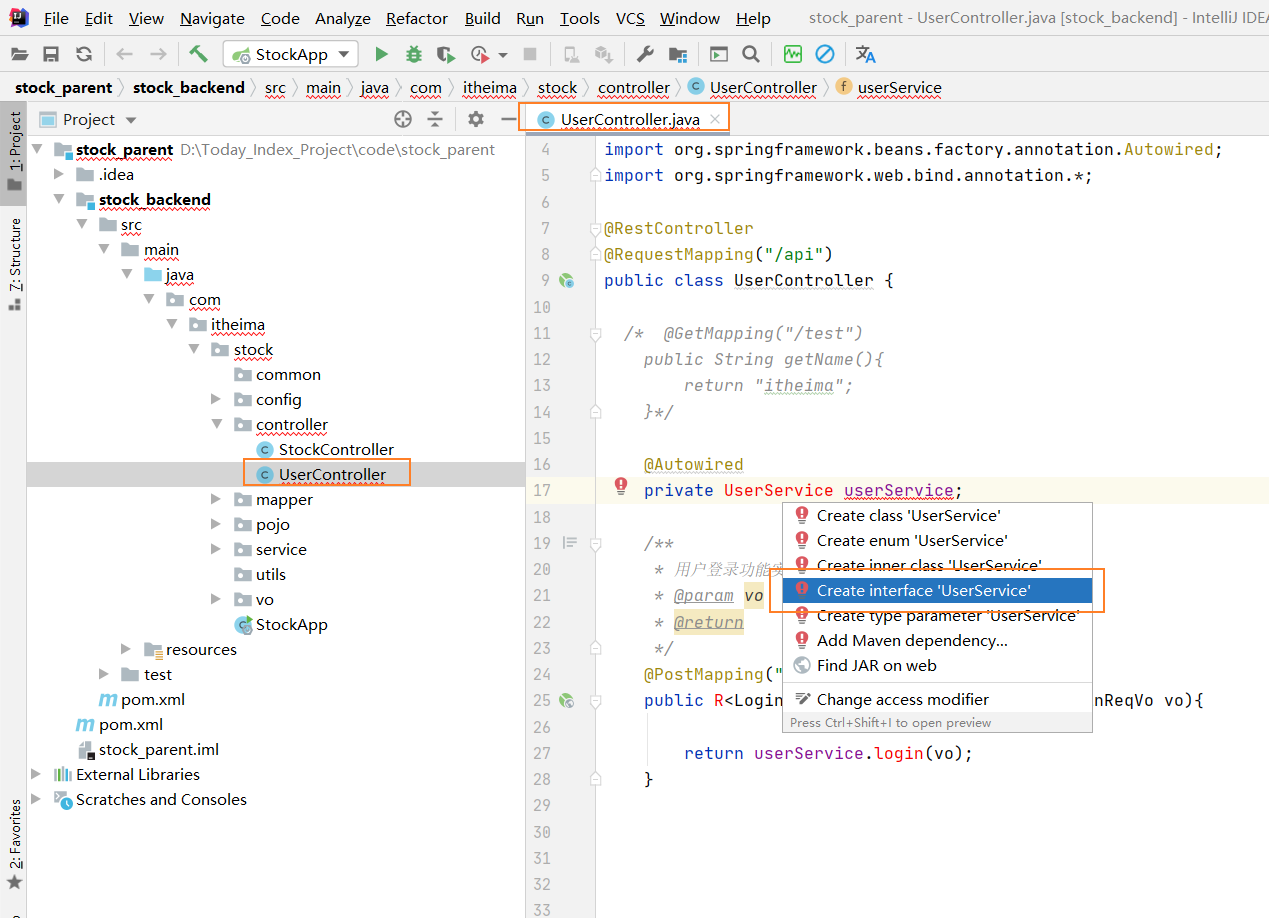
4)定义登录服务接口和实现
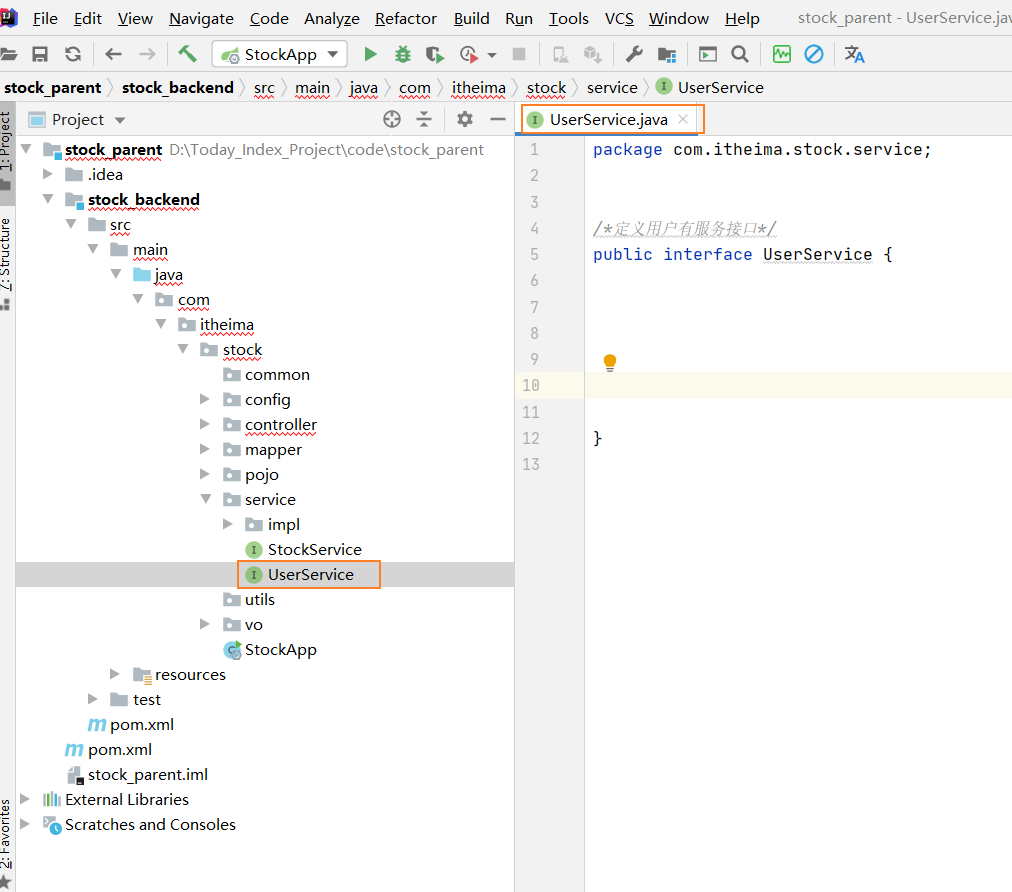
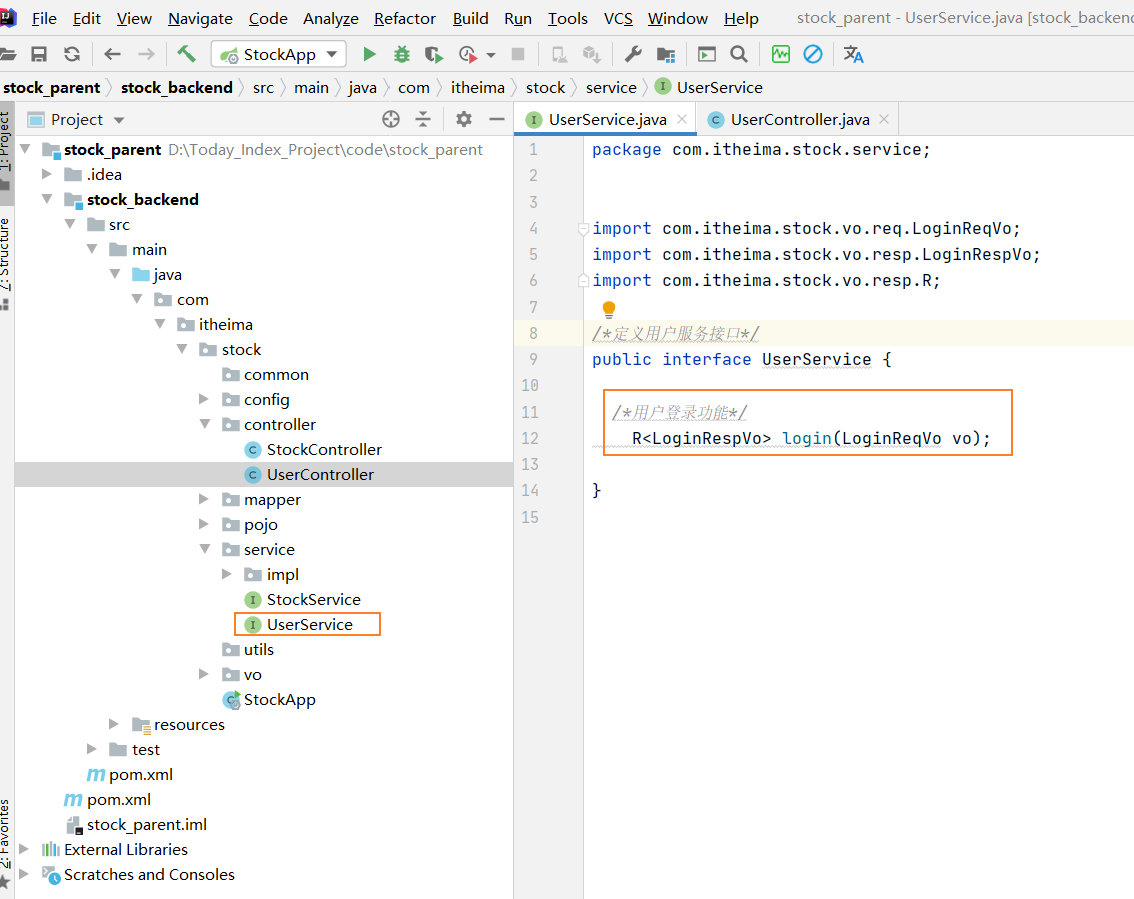
服务接口:
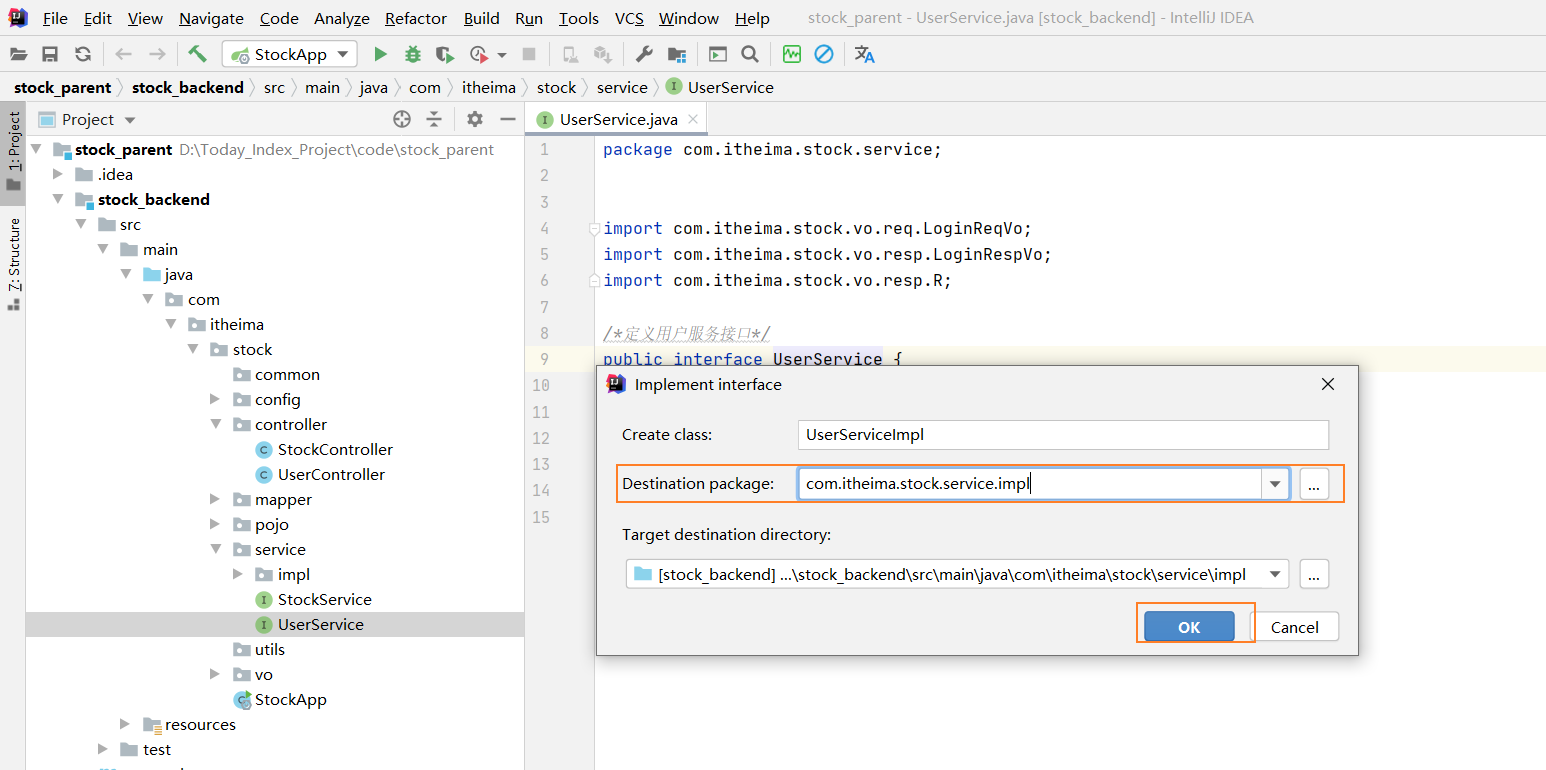
Alt+Enter 选择以下图上所示

接口服务实现:
Alt+Enter


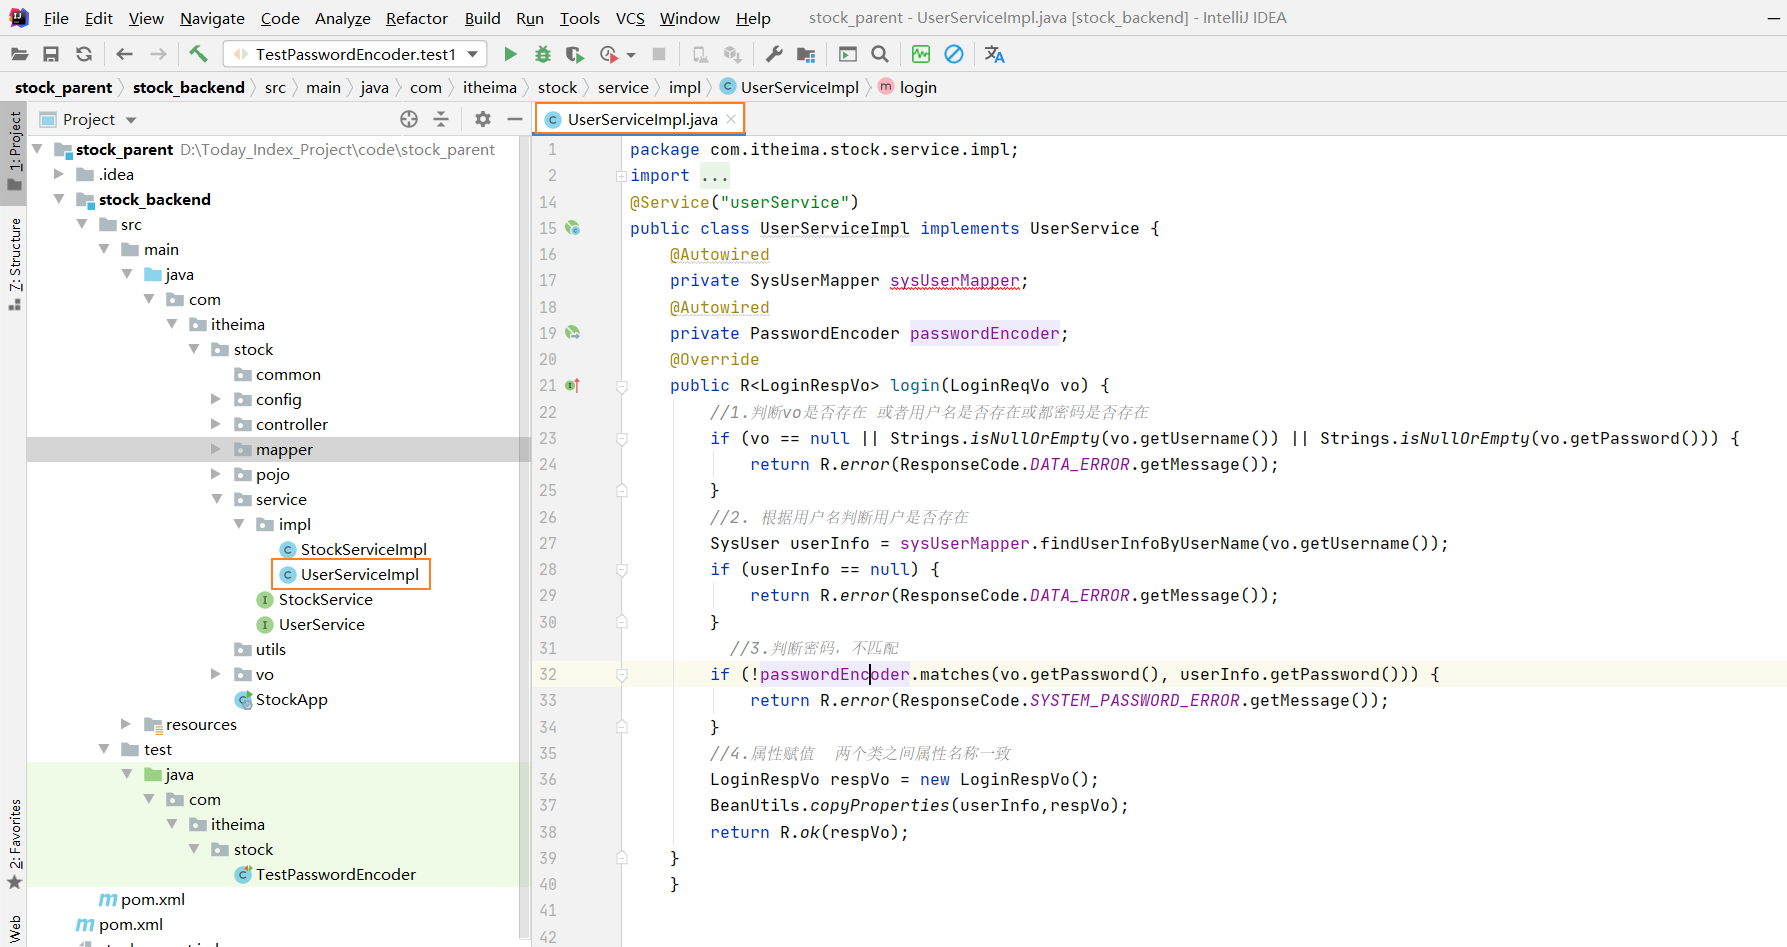
package com.itheima.stock.service.impl;
import com.google.common.base.Strings;
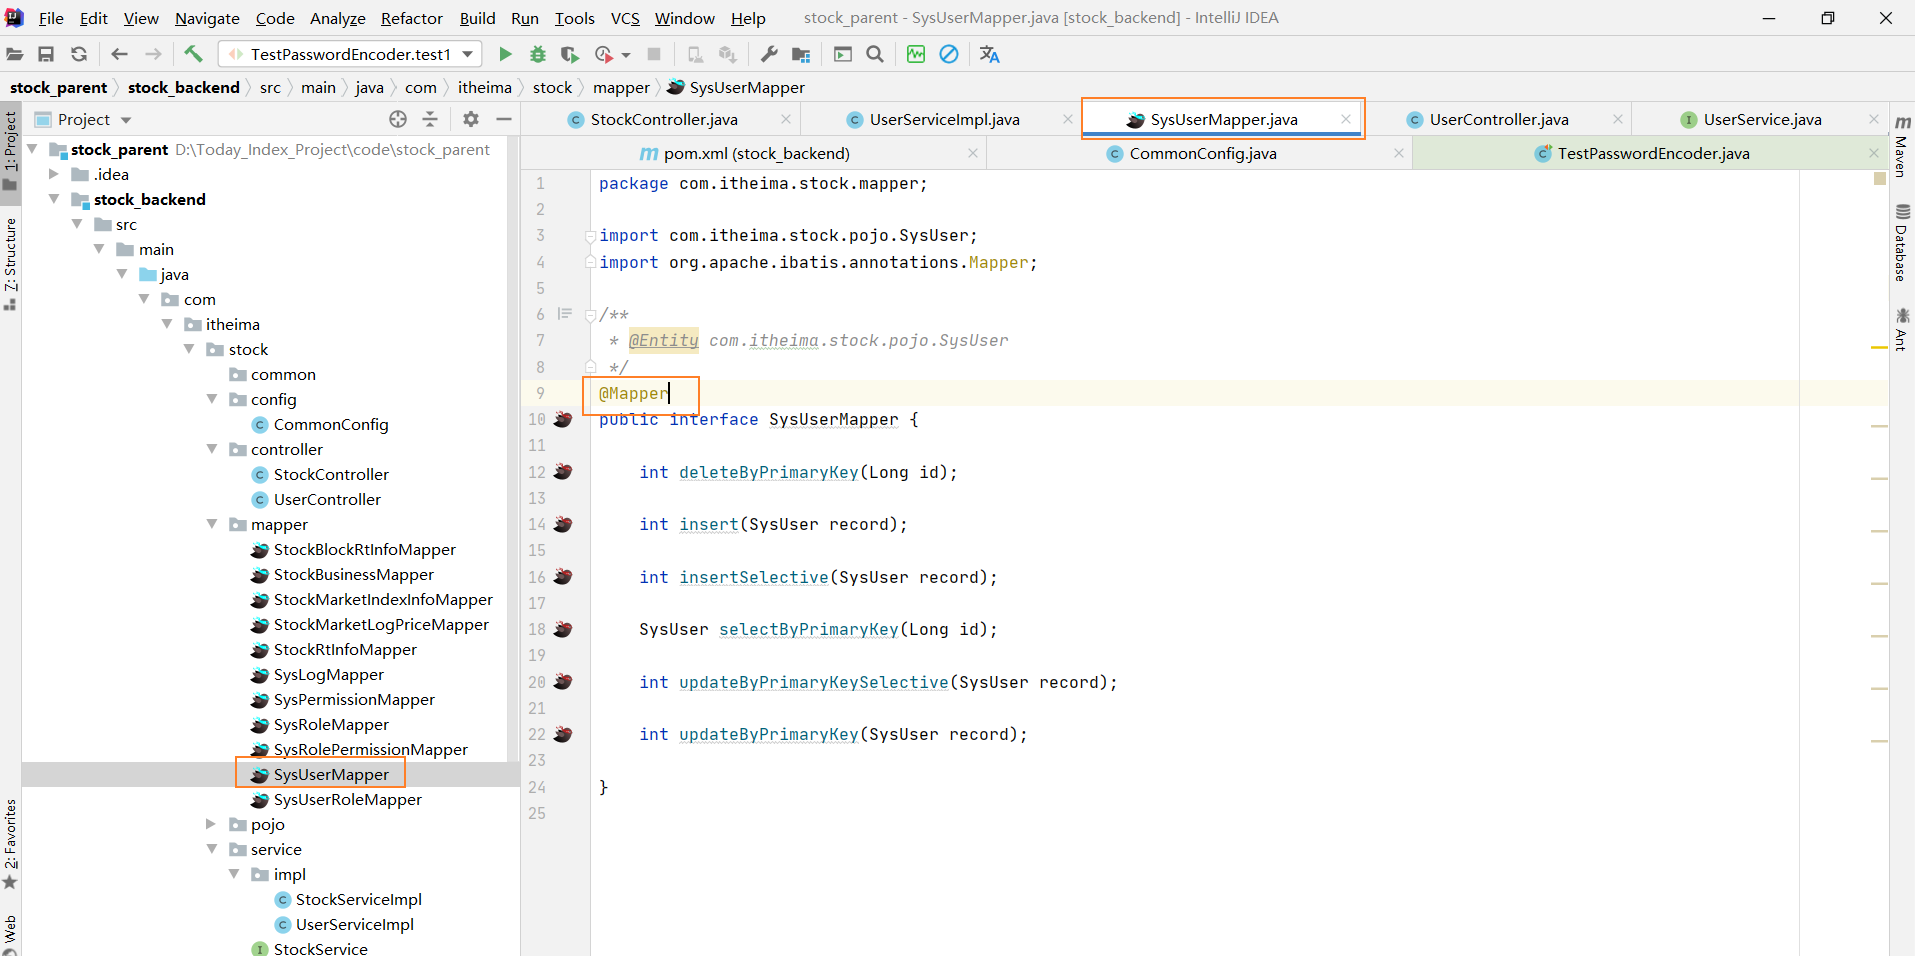
import com.itheima.stock.mapper.SysUserMapper;
import com.itheima.stock.pojo.SysUser;
import com.itheima.stock.service.UserService;
import com.itheima.stock.vo.req.LoginReqVo;
import com.itheima.stock.vo.resp.LoginRespVo;
import com.itheima.stock.vo.resp.R;
import com.itheima.stock.vo.resp.ResponseCode;
import org.springframework.beans.BeanUtils;
import org.springframework.beans.factory.annotation.Autowired;
import org.springframework.security.crypto.password.PasswordEncoder;
import org.springframework.stereotype.Service;
@Service("userService")
public class UserServiceImpl implements UserService {
@Autowired
private SysUserMapper sysUserMapper;
@Autowired
private PasswordEncoder passwordEncoder;
@Override
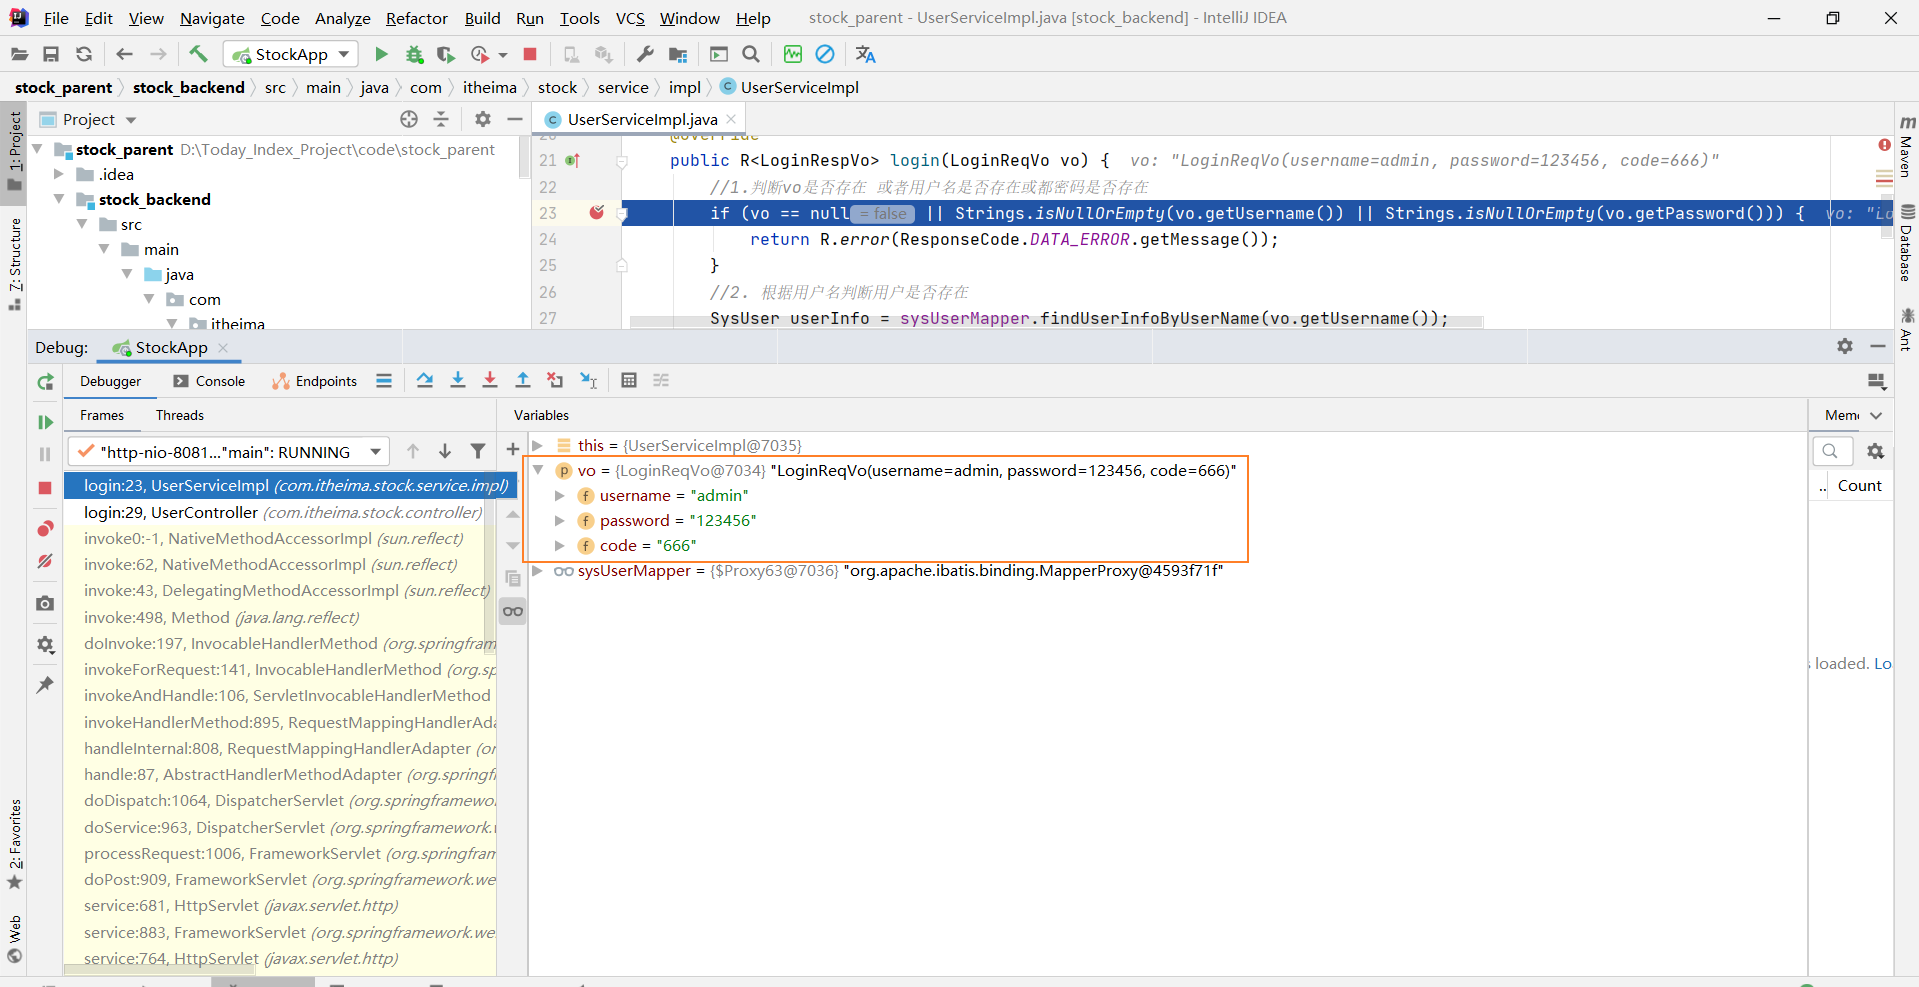
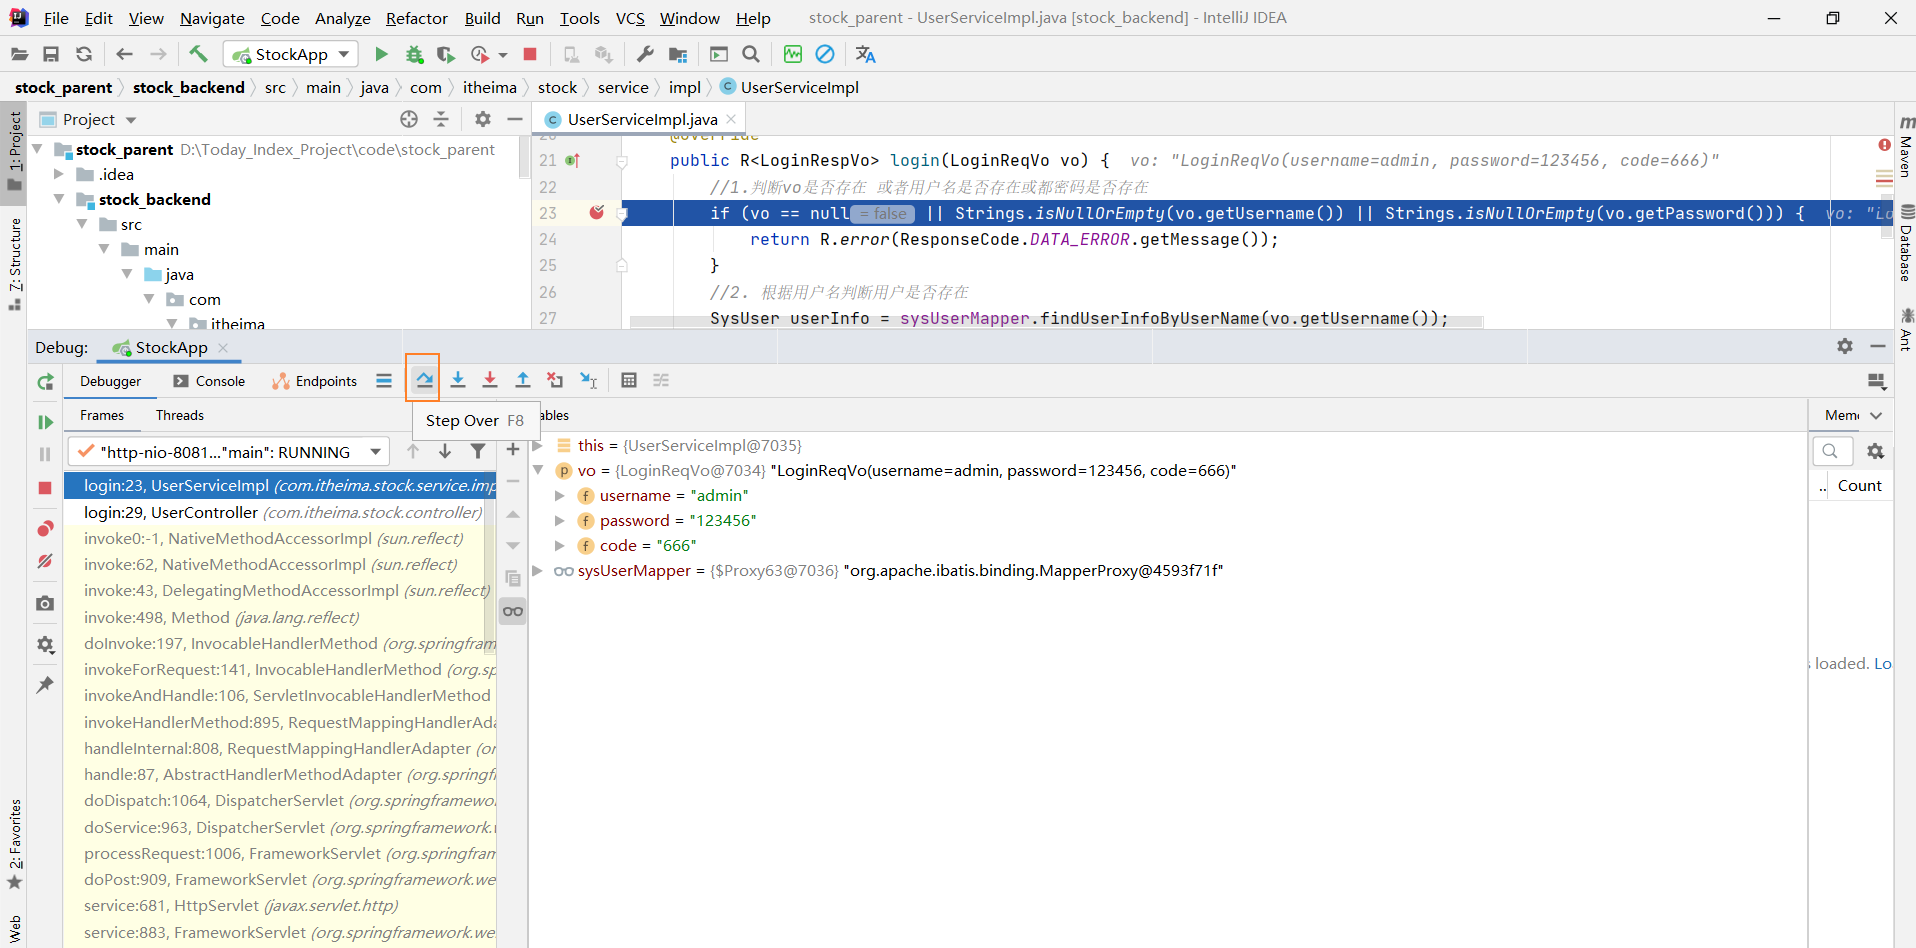
public R<LoginRespVo> login(LoginReqVo vo) {
//1.判断vo是否存在 或者用户名是否存在或都密码是否存在
if (vo == null || Strings.isNullOrEmpty(vo.getUsername()) || Strings.isNullOrEmpty(vo.getPassword())) {
return R.error(ResponseCode.DATA_ERROR.getMessage());
}
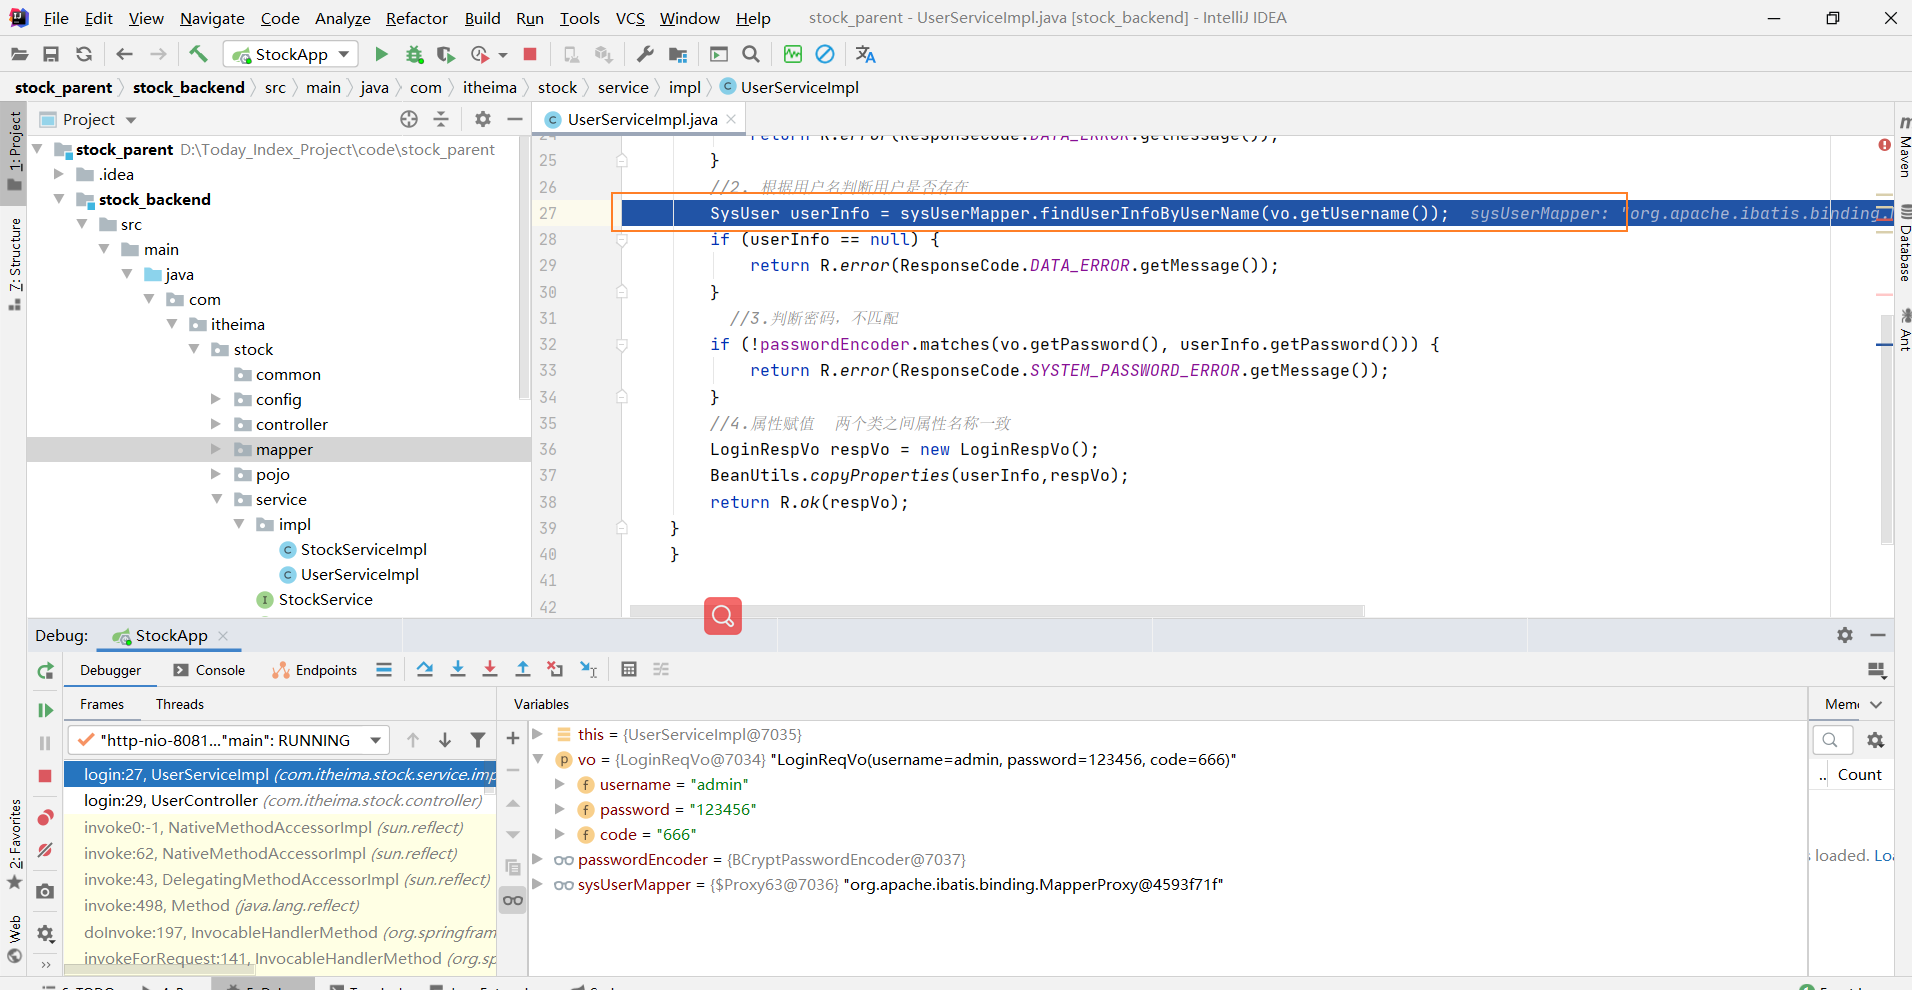
//2. 根据用户名判断用户是否存在
SysUser userInfo = sysUserMapper.findUserInfoByUserName(vo.getUsername());
if (userInfo == null) {
return R.error(ResponseCode.DATA_ERROR.getMessage());
}
//3.判断密码,不匹配
if (!passwordEncoder.matches(vo.getPassword(), userInfo.getPassword())) {
return R.error(ResponseCode.SYSTEM_PASSWORD_ERROR.getMessage());
}
//4.属性赋值 两个类之间属性名称一致
LoginRespVo respVo = new LoginRespVo();
BeanUtils.copyProperties(userInfo,respVo);
return R.ok(respVo);
}
}
测试
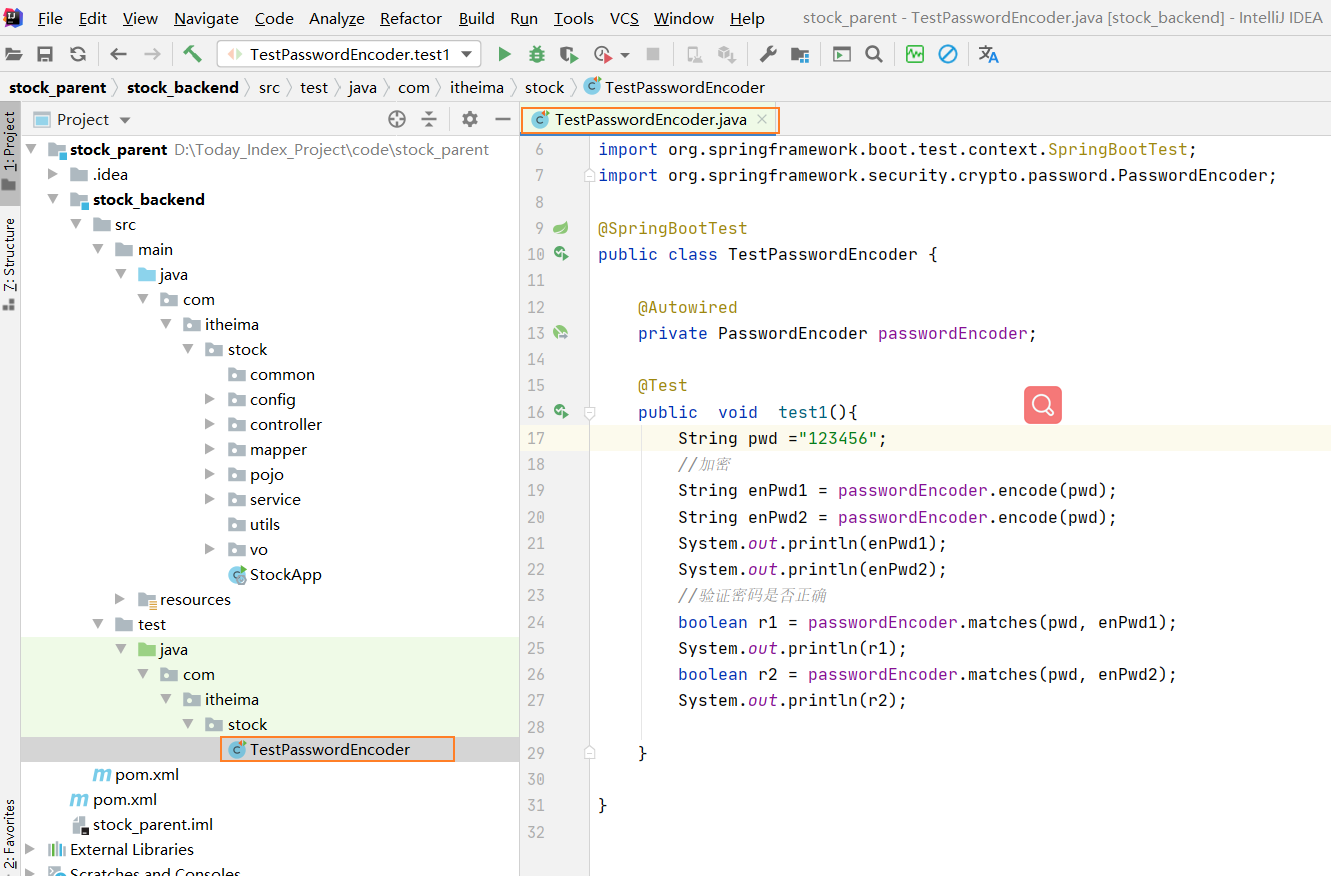
package com.itheima.stock;


import org.junit.jupiter.api.Test;
import org.springframework.beans.factory.annotation.Autowired;
import org.springframework.boot.test.context.SpringBootTest;
import org.springframework.security.crypto.password.PasswordEncoder;

@SpringBootTest
public class TestPasswordEncoder {

    @Autowired
    private PasswordEncoder passwordEncoder;

    @Test
    public  void  test1(){
        String pwd ="123456";
        //加密
        String enPwd1 = passwordEncoder.encode(pwd);
        String enPwd2 = passwordEncoder.encode(pwd);
        System.out.println(enPwd1);
        System.out.println(enPwd2);
        //验证密码是否正确
        boolean r1 = passwordEncoder.matches(pwd, enPwd1);
        System.out.println(r1);
        boolean r2 = passwordEncoder.matches(pwd, enPwd2);
        System.out.println(r2);

    }

}

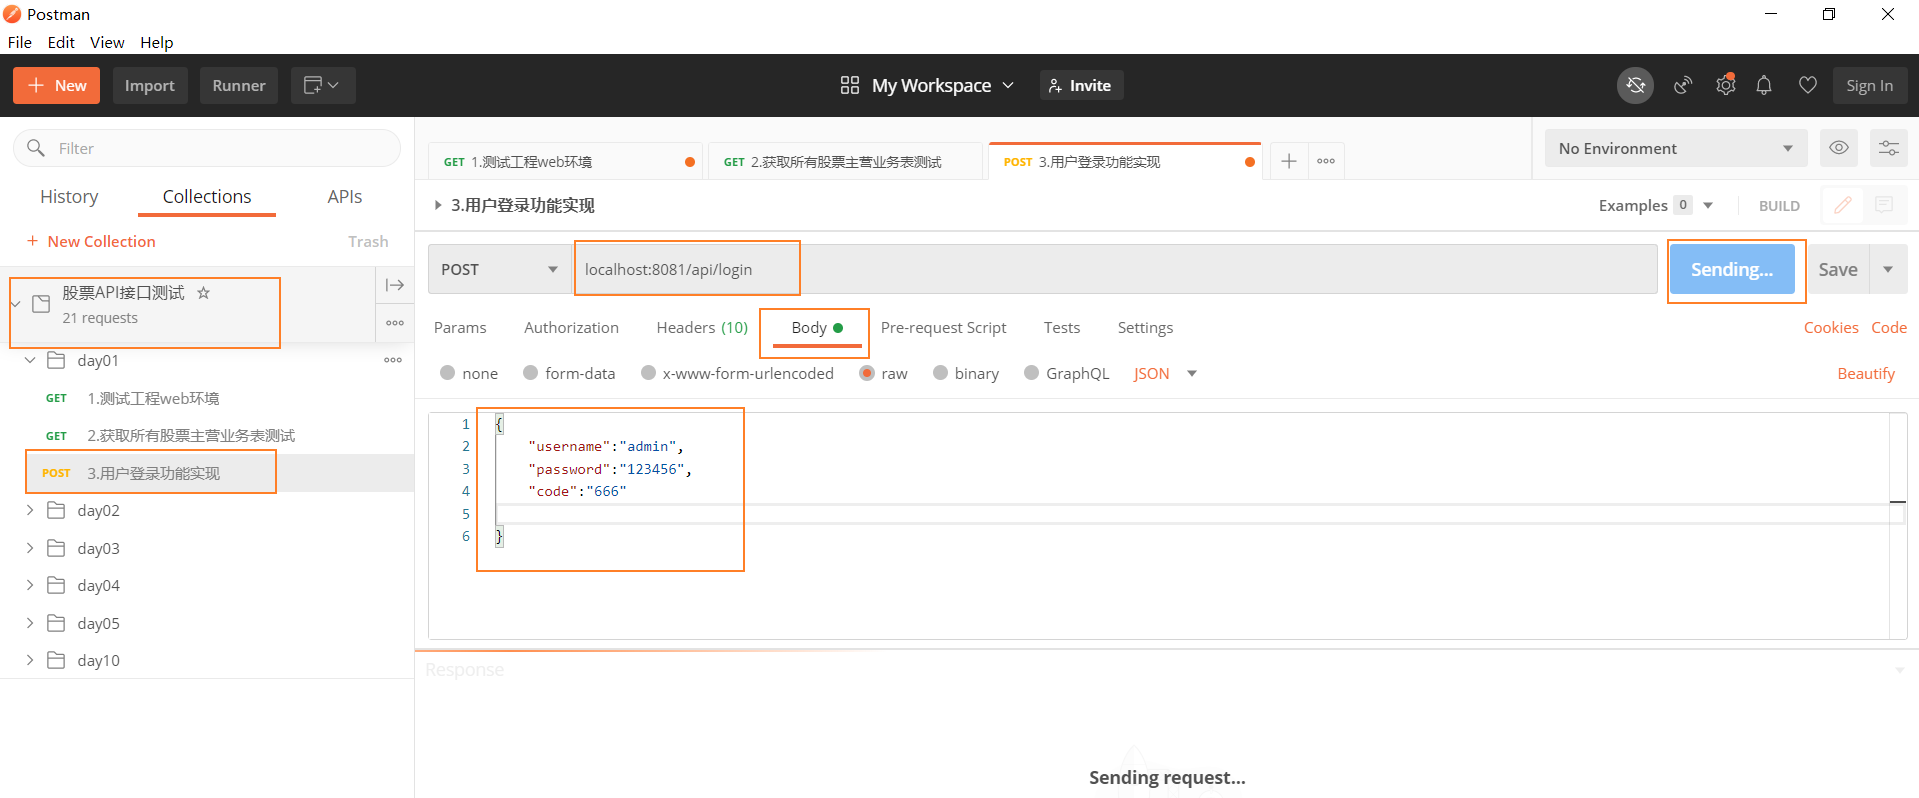
5)Postman测试