目录
- 一、第三方医院系统简介及运行
- 二、上传医院接口
- 1、数据分析
- 2、添加service接口
- 3、添加repository接口
- 4、添加controller接口
- 5、添加帮助类
- 6、图片base64说明
- 7、base64码通过http传输问题
- 三、查询医院接口
- 1、添加service方法
- 2、添加controller
- 四、上传科室接口
- 1、添加科室基础类
- 2、上传科室实现
- 2.1 接口数据分析
- 2.2 添加service方法和实现
- 2.3 添加repository方法
- 2.4 添加controller
- 五、查询科室接口
- 1、添加service接口和实现
- 2、添加controller接口
- 六、删除科室接口
- 1、添加service方法和实现
- 2、添加controller接口
- 七、上传排班接口
- 1、添加排班基础类
- 2、上传排班实现
- 2.1 接口数据分析
- 2.2 添加service方法和实现
- 2.3 添加repository方法
- 2.4 添加controller
- 九、查询排班接口
- 1、添加service接口和实现
- 2、添加controller接口
- 十、删除科室接口
- 1、添加service方法和实现
- 2、添加 controller
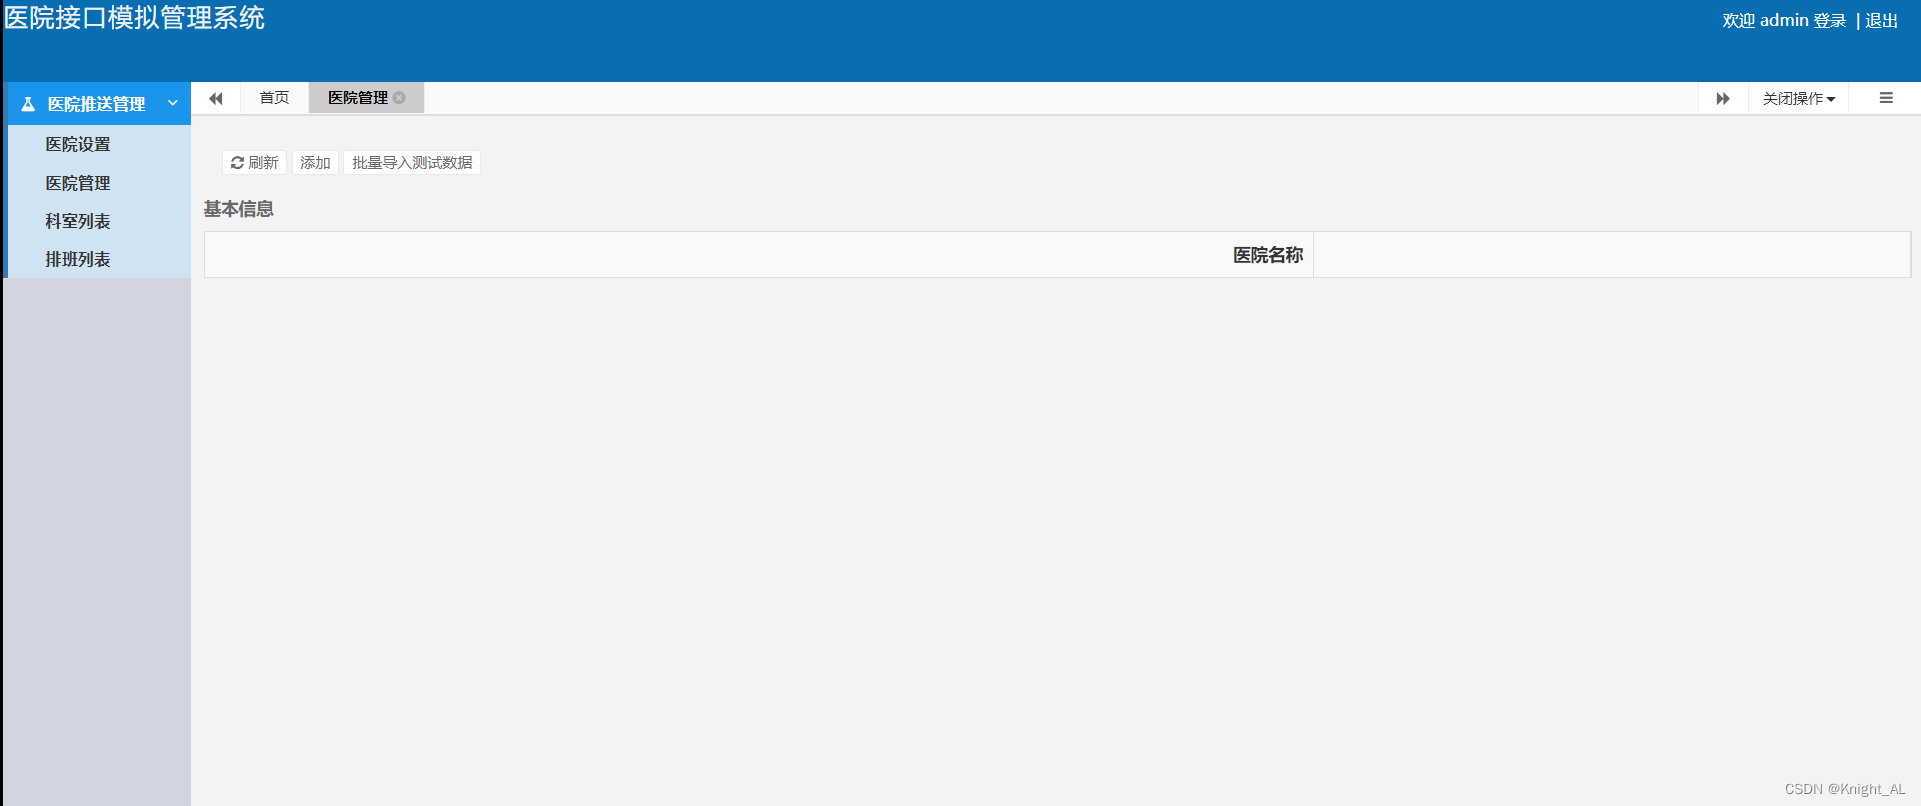
一、第三方医院系统简介及运行
1、找到资源文件夹下面的hospital-manage项目,导入idea
2、修改application-dev.yml文件数据库连接
3、启动项目
访问浏览器:http://localhost:9998/
二、上传医院接口
请求参数
| 字段名 | 类型 | 长度 | 必输 | 说明 |
|---|---|---|---|---|
| hoscode | string | 30 | 是 | 给医院分配的唯一标识 |
| hosname | string | 50 | 是 | 医院名称 |
| hostype | string | 1 | 是 | 医院类型(1:三级甲等,2:三级乙等,3:二级甲等,4:二级乙等,5:一级) |
| provinceCode | string | 18 | 是 | 省code(国家统计局对应省的code) |
| cityCode | string | 50 | 是 | 市code(国家统计局对应市的code) |
| districtCode | string | 10 | 是 | 区code(国家统计局对应区的code) |
| address | string | 20 | 是 | 详情地址 |
| logoData | string | 11 | 是 | 医院logo(转换为base64字符串) |
| intro | string | 是 | 医院简介 | |
| route | string | 255 | 是 | 坐车路线 |
| bookingRule | string | 8000 | 是 | 预约规则,json数据 |
| timestamp | long | 是 | 时间戳。从1970-01-01 00:00:00算起的毫秒数 | |
| sign | string | 32 | 是 | 验签参数。 |
同步返回
| 字段名 | 类型 | 长度 | 必输 | 说明 |
|---|---|---|---|---|
| code | string | 是 | 结果编码。200:请求成功 不等于200:请求失败(message:失败原因) | |
| message | string | 100 | 是 | 结果描述 |
| data | string | 5000 | 是 | 业务数据 |
1、数据分析
提交地址
http://localhost:8201/api/hosp/saveHospital
{
    "hoscode": "1000_0",
    "hosname": "北京协和医院",
    "hostype": "1",
    "provinceCode": "110000",
    "cityCode": "110100",
    "districtCode": "110102",
    "address": "大望路",
    "intro": "北京协和医院是集医疗、教学、科研于一体的大型三级甲等综合医院,是国家卫生计生委...目标而继续努力。",
    "route": "东院区乘车路线:106、...更多乘车路线详见须知。",
    "logoData": "iVBORw0KGgoAAAA...NSUhEUg==",
    "bookingRule": {
    "cycle": "1",
    "releaseTime": "08:30",
    "stopTime": "11:30",
    "quitDay": "-1",
    "quitTime": "15:30",
    "rule": [
        "西院区预约号取号地点:西院区门诊楼一层大厅挂号窗口取号",
        "东院区预约号取号地点:东院区老门诊楼一层大厅挂号窗口或新门诊楼各楼层挂号/收费窗口取号"
        ]
  }
}
说明:
1,数据分为医院基本信息与预约规则信息
2,医院logo转换为base64字符串
3,预约规则信息属于医院基本信息的一个属性
4,预约规则rule,以数组形式传递
5,数据传递过来我们还要验证签名,只允许平台开通的医院可以上传数据,保证数据安全性
2、添加service接口
import java.util.Map;

public interface HospitalService {
    void saveHospital(Map<String, Object> resultMap);

    String getSignKeyWithHoscode(String requestHoscode);

}
在HospitalServiceImpl类添加实现
@Service
public class HospitalServiceImpl implements HospitalService {

    @Autowired
    private HospitalRepository hospitalRepository;

    @Autowired
    private HospitalSetMapper hospitalSetMapper;


    @Override
    public void saveHospital(Map<String, Object> resultMap) {
        String s = JSONObject.toJSONString(resultMap);
        Hospital hospital = JSONObject.parseObject(s, Hospital.class);
        //如果医院两次保存那么会保存两次,如果数据没有就保存,数据有就更新     save既可以保存,也可以更新
        String hoscode = hospital.getHoscode();
        Hospital collection = hospitalRepository.findByHoscode(hoscode);
        if (collection == null){   //平台上没有该医院信息做添加
            hospital.setStatus(0);
            hospital.setCreateTime(new Date());
            hospital.setUpdateTime(new Date());
            hospital.setIsDeleted(0);
            hospitalRepository.save(hospital);
        }else {  //平台上有医院信息做修改
            hospital.setStatus(collection.getStatus());
            hospital.setCreateTime(collection.getCreateTime());
            hospital.setUpdateTime(new Date());
            hospital.setIsDeleted(collection.getIsDeleted());
            //要进行id进行修改
            hospital.setId(collection.getId());
            hospitalRepository.save(hospital);
        }

    }

    @Override
    public String getSignKeyWithHoscode(String requestHoscode) {
        QueryWrapper<HospitalSet> wrapper = new QueryWrapper<>();
        wrapper.eq("hoscode",requestHoscode);
        HospitalSet hospitalSet = hospitalSetMapper.selectOne(wrapper);
        if (hospitalSet == null){
            throw new YyghException(20001,"该医院信息不存在");
        }
        return hospitalSet.getSignKey();
    }
}
3、添加repository接口
在HospitalRepository类添加接口
public interface HospitalRepository extends MongoRepository<Hospital,String> {
    Hospital findByHoscode(String hoscode);
}
4、添加controller接口
@RestController
@RequestMapping("/api/hosp")
public class HospitalController {

    @Autowired
    private HospitalService hospitalService;

    @PostMapping("/saveHospital")
    public Result saveHospital(HttpServletRequest request){
        //1.获取所有的参数(发现一个键对应多个值,需要转换一个键对应一个值) 因为我们的数据都一个键对用一个值
        Map<String, String[]> parameterMap = request.getParameterMap();
        Map<String, Object> resultMap = HttpRequestHelper.switchMap(parameterMap);
        String requestSignKey = (String) resultMap.get("sign");
        String requestHoscode = (String) resultMap.get("hoscode");
        String platformSignKey = hospitalService.getSignKeyWithHoscode(requestHoscode);
        String encrypt = MD5.encrypt(platformSignKey);
        if (!StringUtils.isEmpty(requestSignKey)&&!StringUtils.isEmpty(requestHoscode)&& encrypt.equals(requestSignKey)){
            String logoData = (String) resultMap.get("logoData");

            String result = logoData.replaceAll(" ", "+");
            resultMap.put("logoData",result);
            hospitalService.saveHospital(resultMap);
            return Result.ok();
        }else {
            throw new YyghException(20001,"保存失败");
        }
    }
}
5、添加帮助类
Map<String, String[]> 转换成Map<String, Object>
public class HttpRequestHelper {

    public static Map<String, Object> switchMap(Map<String, String[]> parameterMap) {
        Map<String, Object> map = new HashMap<>();
        Set<Map.Entry<String, String[]>> entries = parameterMap.entrySet();
        for (Map.Entry<String, String[]> entry : entries) {
            String key = entry.getKey();
            String value = entry.getValue()[0];
            map.put(key,value);
        }
        return map;
    }
}
6、图片base64说明
图片的base64编码就是可以将一张图片数据编码成一串字符串,使用该字符串代替图像地址url
在前端页面中常见的base64图片的引入方式:
<html>
<head>
</head>
<body>
<img src="data:image/png;base64,iVBORw0K....">
</body>
</html>
7、base64码通过http传输问题
base64码通过http传输 +号变 空格 问题解决
解决方案
url = url.replaceAll(" ","+");
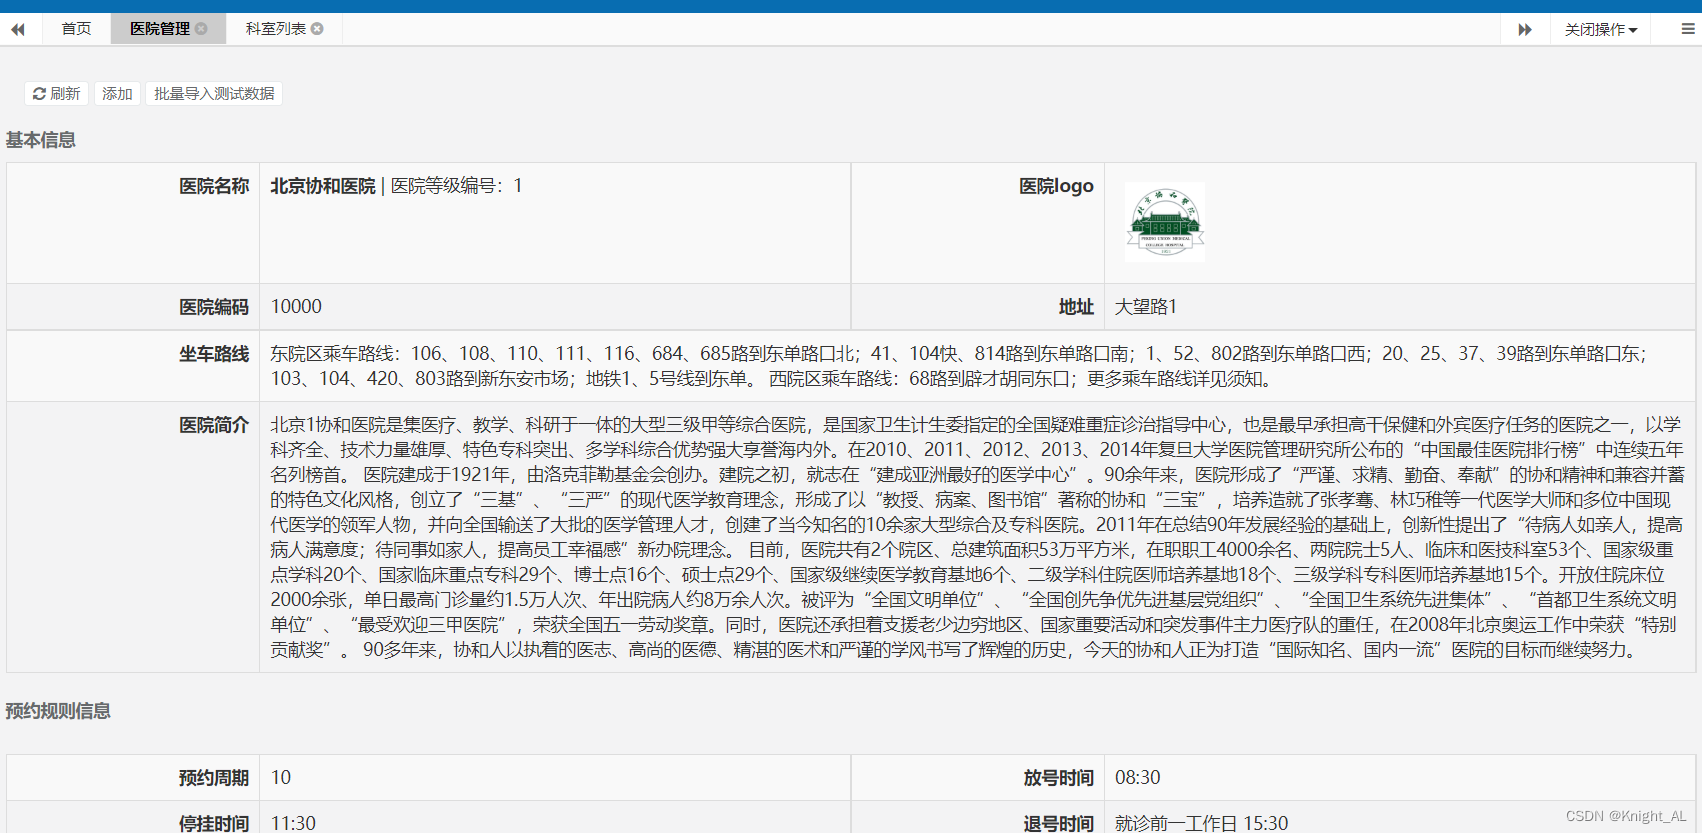
三、查询医院接口
提交地址
http://localhost:8201/api/hosp/hospital/show
请求参数
| 字段名 | 类型 | 长度 | 必输 | 说明 |
|---|---|---|---|---|
| hoscode | string | 30 | 是 | 给医院分配的唯一标识 |
| timestamp | long | 是 | 时间戳。从1970-01-01 00:00:00算起的毫秒数 | |
| sign | string | 32 | 是 | 验签参数。 |
同步返回
| 字段名 | 类型 | 长度 | 必输 | 说明 |
|---|---|---|---|---|
| code | string | 是 | 结果编码。200:请求成功 不等于200:请求失败(message:失败原因) | |
| message | string | 100 | 是 | 结果描述 |
| data | string | 5000 | 是 | 业务数据 |
1、添加service方法
HospitalService
Hospital getByHoscode(String hoscode);
HospitalServiceImpl
    @Override
    public Hospital getByHoscode(String hoscode) {
        Hospital hospital = hospitalRepository.findByHoscode(hoscode);
        return hospital;
    }
2、添加controller
HospitalController
    @PostMapping("/hospital/show")
    public Result hospitalShow(HttpServletRequest request){
        Map<String, String[]> map = request.getParameterMap();
        Map<String, Object> switchMap = HttpRequestHelper.switchMap(map);
        //必须参数校验
        String hoscode = (String) switchMap.get("hoscode");
        if (StringUtils.isEmpty(hoscode)){
            throw new YyghException(20001,"失败");
        }
        //签名验证  略
        Hospital hospital = hospitalService.getByHoscode(hoscode);
        return Result.ok(hospital);
    }
四、上传科室接口
提交地址
http://localhost:8201/api/hosp/saveDepartment
请求参数
| 字段名 | 类型 | 长度 | 必输 | 说明 |
|---|---|---|---|---|
| hoscode | string | 30 | 是 | 给医院分配的唯一标识 |
| depcode | string | 50 | 是 | 科室编号 |
| depname | string | 1 | 是 | 科室名称 |
| intro | string | 18 | 是 | 科室描述 |
| bigcode | string | 50 | 是 | 大科室编号 |
| bigname | string | 10 | 是 | 大科室名称 |
| address | string | 20 | 是 | 详情地址 |
| timestamp | long | 是 | 时间戳。从1970-01-01 00:00:00算起的毫秒数 | |
| sign | string | 32 | 是 | 验签参数。 |
同步返回
| 字段名 | 类型 | 长度 | 必输 | 说明 |
|---|---|---|---|---|
| code | string | 是 | 结果编码。200:请求成功不等于200:请求失败(message:失败原因) | |
| message | string | 100 | 是 | 结果描述 |
| data | string | 5000 | 是 | 业务数据 |
1、添加科室基础类
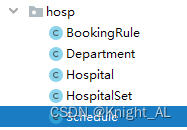
说明:由于实体对象没有逻辑,我们已经统一导入

添加repository
@Repository
public interface DepartmentRepository extends MongoRepository<Department,String> {
}
添加service接口和实现类
public interface DepartmentService {
}

@Service
public class DepartmentServiceImpl implements DepartmentService {

    @Autowired
    private DepartmentRepository departmentRepository;

}
2、上传科室实现
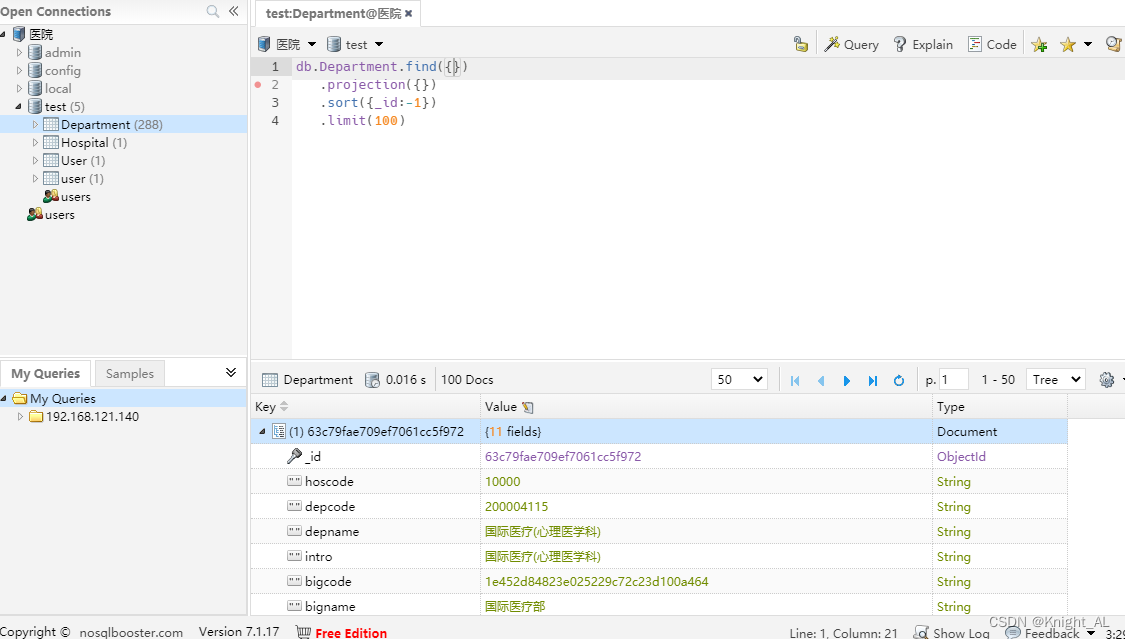
2.1 接口数据分析
{
    "hoscode": "1000_0",
    "depcode": "200050923",
    "depname": "门诊部核酸检测门诊(东院)",
    "intro": "门诊部核酸检测门诊(东院)",
    "bigcode": "44f162029abb45f9ff0a5f743da0650d",
    "bigname": "体检科"
}
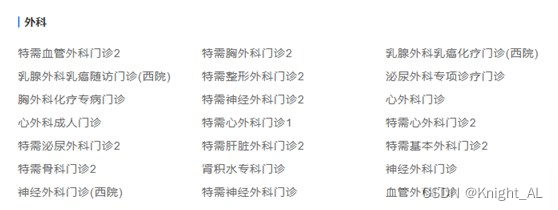
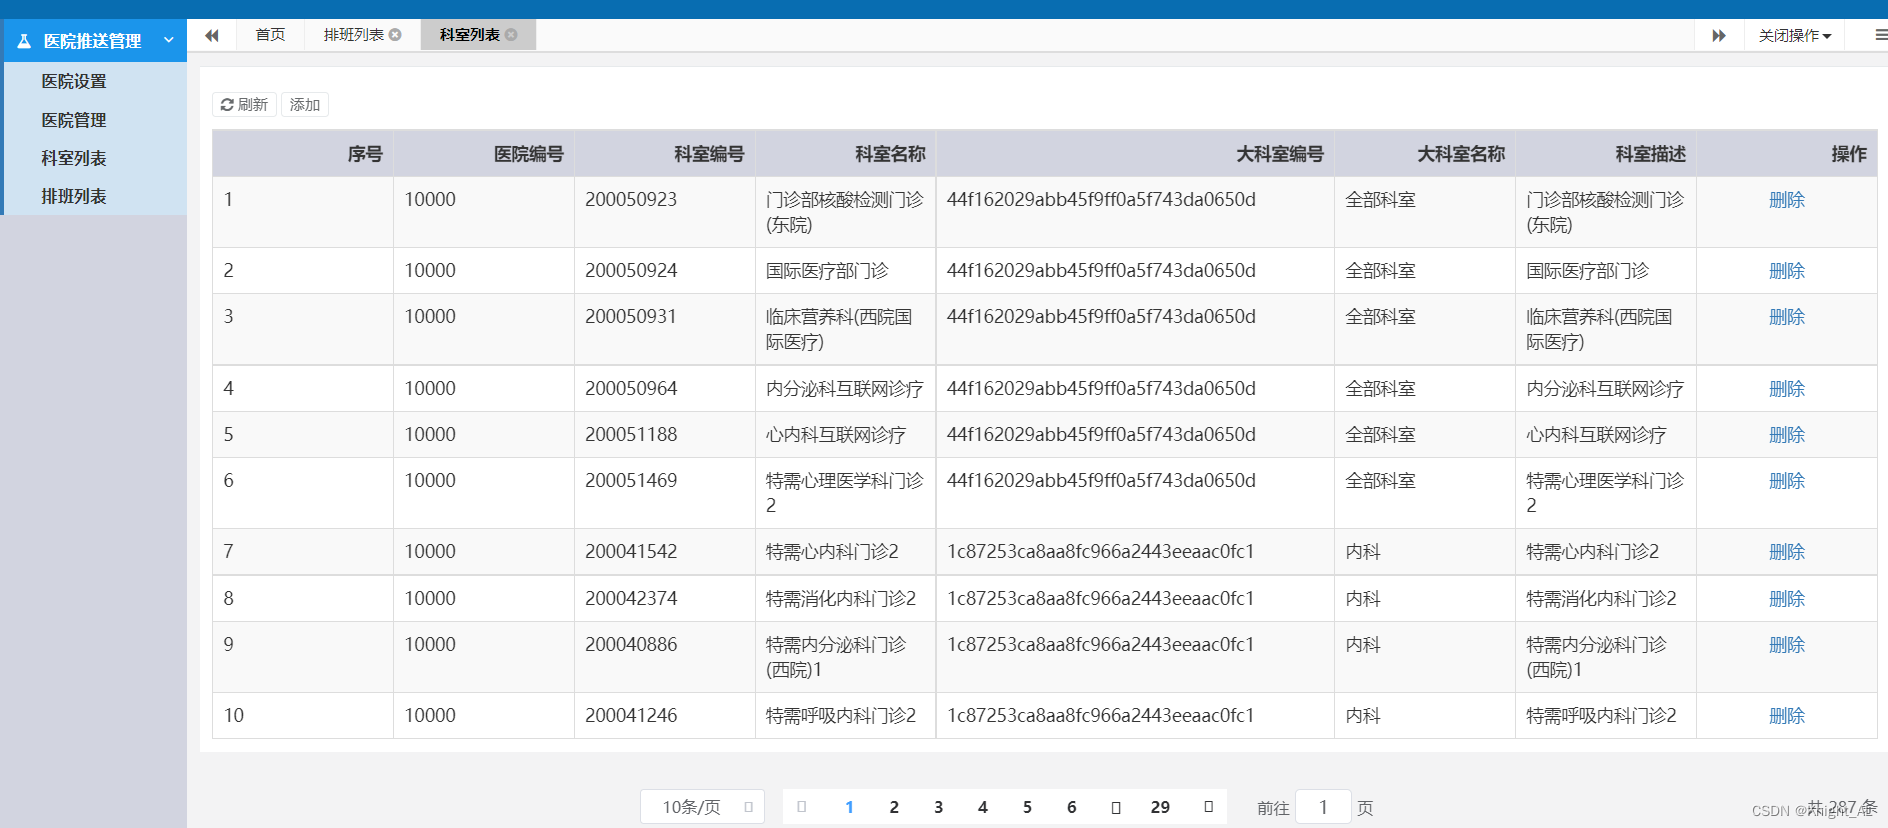
说明:一个大科室下可以有多个小科室,如图:
2.2 添加service方法和实现
/**
 * 上传科室信息
 * @param paramMap
*/
void save(Map<String, Object> paramMap);

@Service
public class DepartmentServiceImpl implements DepartmentService {

    @Autowired
    private DepartmentRepository departmentRepository;

    @Override
    public void save(Map<String, Object> map) {
        //map 转换department对象
        String jsonString = JSONObject.toJSONString(map);
        Department department = JSONObject.parseObject(jsonString, Department.class);
        //根据医院编号 和 科室编号查询
        Department departmentExist = departmentRepository.getDepartmentByHoscodeAndDepcode(department.getHoscode(),department.getDepcode());
        if (departmentExist == null){
            department.setCreateTime(new Date());
            department.setUpdateTime(new Date());
            department.setIsDeleted(0);
            departmentRepository.save(department);
        }else {
            department.setCreateTime(departmentExist.getCreateTime());
            department.setUpdateTime(new Date());
            department.setIsDeleted(departmentExist.getIsDeleted());
            departmentRepository.save(department);
        }

    }
}
2.3 添加repository方法
@Repository
public interface DepartmentRepository extends MongoRepository<Department,String> {
    Department getDepartmentByHoscodeAndDepcode(String hoscode, String depcode);
}
2.4 添加controller
DepartmentController
@RestController
@RequestMapping("/api/hosp")
public class DepartmentController {

    @Autowired
    private DepartmentService departmentService;

    @ApiOperation(value = "上传科室")
    @PostMapping("saveDepartment")
    public Result saveDepartment(HttpServletRequest request){
        Map<String, Object> map = HttpRequestHelper.switchMap(request.getParameterMap());
        //必须参数校验 略
        //签名校验
        departmentService.save(map);
        return Result.ok();
    }
}
五、查询科室接口
一个医院有多个科室,因此我们采取分页查询方式
提交地址
http://localhost:8201/api/hosp/department/list
请求参数
| 字段名 | 类型 | 长度 | 必输 | 说明 |
|---|---|---|---|---|
| hoscode | string | 30 | 是 | 给医院分配的唯一标识 |
| page | Int | 是 | 第几页 | |
| list | Int | 是 | 每页个数 | |
| timestamp | long | 是 | 时间戳。从1970-01-01 00:00:00算起的毫秒数 | |
| sign | string | 32 | 是 | 验签参数。 |
同步返回
| 字段名 | 类型 | 长度 | 必输 | 说明 |
|---|---|---|---|---|
| code | string | 是 | 结果编码。200:请求成功不等于200:请求失败(message:失败原因) | |
| message | string | 100 | 是 | 结果描述 |
| data | string | 5000 | 是 | 业务数据 |
1、添加service接口和实现
/**
 * 分页查询
 * @param page 当前页码
 * @param limit 每页记录数
 * @param departmentQueryVo 查询条件
 * @return
*/
Page<Department> getDepartmentPage(Map<String, Object> map);

    //分页实现
    @Override
    public Page<Department> getDepartmentPage(Map<String, Object> map) {
        Integer page = Integer.parseInt((String) map.get("page"));
        Integer limit = Integer.parseInt((String) map.get("limit"));
        //0默认是第一页
        PageRequest pageable = PageRequest.of(page - 1, limit);
        Department department = new Department();
        department.setHoscode((String) map.get("hoscode"));
        Example<Department> example = Example.of(department);
        Page<Department> all = departmentRepository.findAll(example, pageable);
        return all;
    }
2、添加controller接口
    @ApiOperation(value = "获取分页列表")
    @PostMapping("department/list")
    public Result department(HttpServletRequest request){
        Map<String, Object> map = HttpRequestHelper.switchMap(request.getParameterMap());
        //必须参数校验 略
        //签名校验
        Page<Department> page = departmentService.getDepartmentPage(map);
        return Result.ok(page);
    }
六、删除科室接口
提交地址
http://localhost:8201/api/hosp/department/remove
请求参数
| 字段名 | 类型 | 长度 | 必输 | 说明 |
|---|---|---|---|---|
| hoscode | string | 30 | 是 | 给医院分配的唯一标识 |
| depcode | string | 30 | 是 | 科室编号 |
| timestamp | long | 是 | 时间戳。从1970-01-01 00:00:00算起的毫秒数 | |
| sign | string | 32 | 是 | 验签参数。 |
同步返回
| 字段名 | 类型 | 长度 | 必输 | 说明 |
|---|---|---|---|---|
| code | string | 是 | 结果编码。200:请求成功不等于200:请求失败(message:失败原因) | |
| message | string | 100 | 是 | 结果描述 |
| data | string | 5000 | 是 | 业务数据 |
1、添加service方法和实现
/**
     * 删除科室
     * @param hoscode
     * @param depcode
     */
void remove(Map<String, Object> map);

    @Override
    public void remove(Map<String, Object> map) {
        String hoscode = (String)map.get("hoscode");
        String depcode = (String)map.get("depcode");
        Department department = departmentRepository.getDepartmentByHoscodeAndDepcode(hoscode, depcode);
        if (department != null){
            departmentRepository.deleteById(department.getId());
        }
    }
2、添加controller接口
    @ApiOperation(value = "删除科室")
    @PostMapping("department/remove")
    public Result remove(HttpServletRequest request){
        Map<String, Object> map = HttpRequestHelper.switchMap(request.getParameterMap());
        //必须参数校验 略
        departmentService.remove(map);
        return Result.ok();
    }
七、上传排班接口
提交地址
http://localhost:8201/api/hosp/saveSchedule
请求参数
| 字段名 | 类型 | 长度 | 必输 | 说明 |
|---|---|---|---|---|
| hoscode | string | 30 | 是 | 给医院分配的唯一标识 |
| depcode | string | 20 | 是 | 科室编号 |
| title | string | 30 | 是 | 职称 |
| docname | string | 30 | 是 | 医生名称 |
| skill | string | 300 | 是 | 擅长技能 |
| workDate | string | 10 | 是 | 安排日期(yyyy-MM-dd) |
| workTime | int | 是 | 安排时间(0:上午 1:下午) | |
| reservedNumber | int | 可预约数 | ||
| availableNumber | int | 剩余预约数 | ||
| amount | string | 5 | 挂号费 | |
| status | int | 排班状态(-1:停诊 0:停约 1:可约) | ||
| hosScheduleId | string | 30 | 排班编号(医院自己的排班主键) | |
| timestamp | long | 是 时间戳。从1970-01-01 00:00:00算起的毫秒数 | ||
| sign | string | 32 | 是 | 验签参数。 |
同步返回
| 字段名 | 类型 | 长度 | 必输 | 说明 |
|---|---|---|---|---|
| code | string | 是 | 结果编码。200:请求成功不等于200:请求失败(message:失败原因) | |
| message | string | 100 | 是 | 结果描述 |
| data | string | 5000 | 是 | 业务数据 |
1、添加排班基础类
添加repository
@Repository
public interface ScheduleRepository extends MongoRepository<Schedule,String> {
}
添加service接口和实现类
public interface ScheduleService {
}

@Service
public class ScheduleServiceImpl implements ScheduleService {

    @Autowired
    private ScheduleRepository scheduleRepository;
}
2、上传排班实现
2.1 接口数据分析
{
    "hoscode": "1000_0",
    "depcode": "200040878",
    "title": "医师",
    "docname": "",
    "skill": "内分泌科常见病。",
    "workDate": "2020-06-22",
    "workTime": 0,
    "reservedNumber": 33,
    "availableNumber": 22,
    "amount": "100",
    "status": 1,
    "hosScheduleId": "1"
}
2.2 添加service方法和实现
public interface ScheduleService {
    void saveSchedule(Map<String, Object> map);
}

@Service
public class ScheduleServiceImpl implements ScheduleService {

    @Autowired
    private ScheduleRepository scheduleRepository;

    @Override
    public void saveSchedule(Map<String, Object> map) {
        Schedule schedule = JSONObject.parseObject(JSONObject.toJSONString(map), Schedule.class);
        String hoscode = schedule.getHoscode();
        String depcode = schedule.getDepcode();
        String hosScheduleId = schedule.getHosScheduleId();
        Schedule platformSchedule = scheduleRepository.findByHoscodeAndDepcodeAndHosScheduleId(hoscode,depcode,hosScheduleId);

        if (platformSchedule == null){
            schedule.setCreateTime(new Date());
            schedule.setUpdateTime(new Date());
            schedule.setIsDeleted(0);
            scheduleRepository.save(schedule);
        }else {
            schedule.setCreateTime(new Date());
            schedule.setUpdateTime(platformSchedule.getUpdateTime());
            schedule.setIsDeleted(platformSchedule.getIsDeleted());
            schedule.setId(platformSchedule.getId());
            scheduleRepository.save(schedule);
        }
    }
}
2.3 添加repository方法
@Repository
public interface ScheduleRepository extends MongoRepository<Schedule,String> {
    Schedule findByHoscodeAndDepcodeAndHosScheduleId(String hoscode, String depcode, String hosScheduleId);
}
2.4 添加controller
ScheduleController
@RestController
@RequestMapping("/api/hosp")
public class ScheduleController {

    @Autowired
    private ScheduleService scheduleService;

    @ApiOperation(value = "上传排班")
    @PostMapping("saveSchedule")
    public Result saveSchedule(HttpServletRequest request){
        Map<String, Object> map = HttpRequestHelper.switchMap(request.getParameterMap());
        //验证signKey  略
        scheduleService.saveSchedule(map);
        return Result.ok();
    }

}
九、查询排班接口
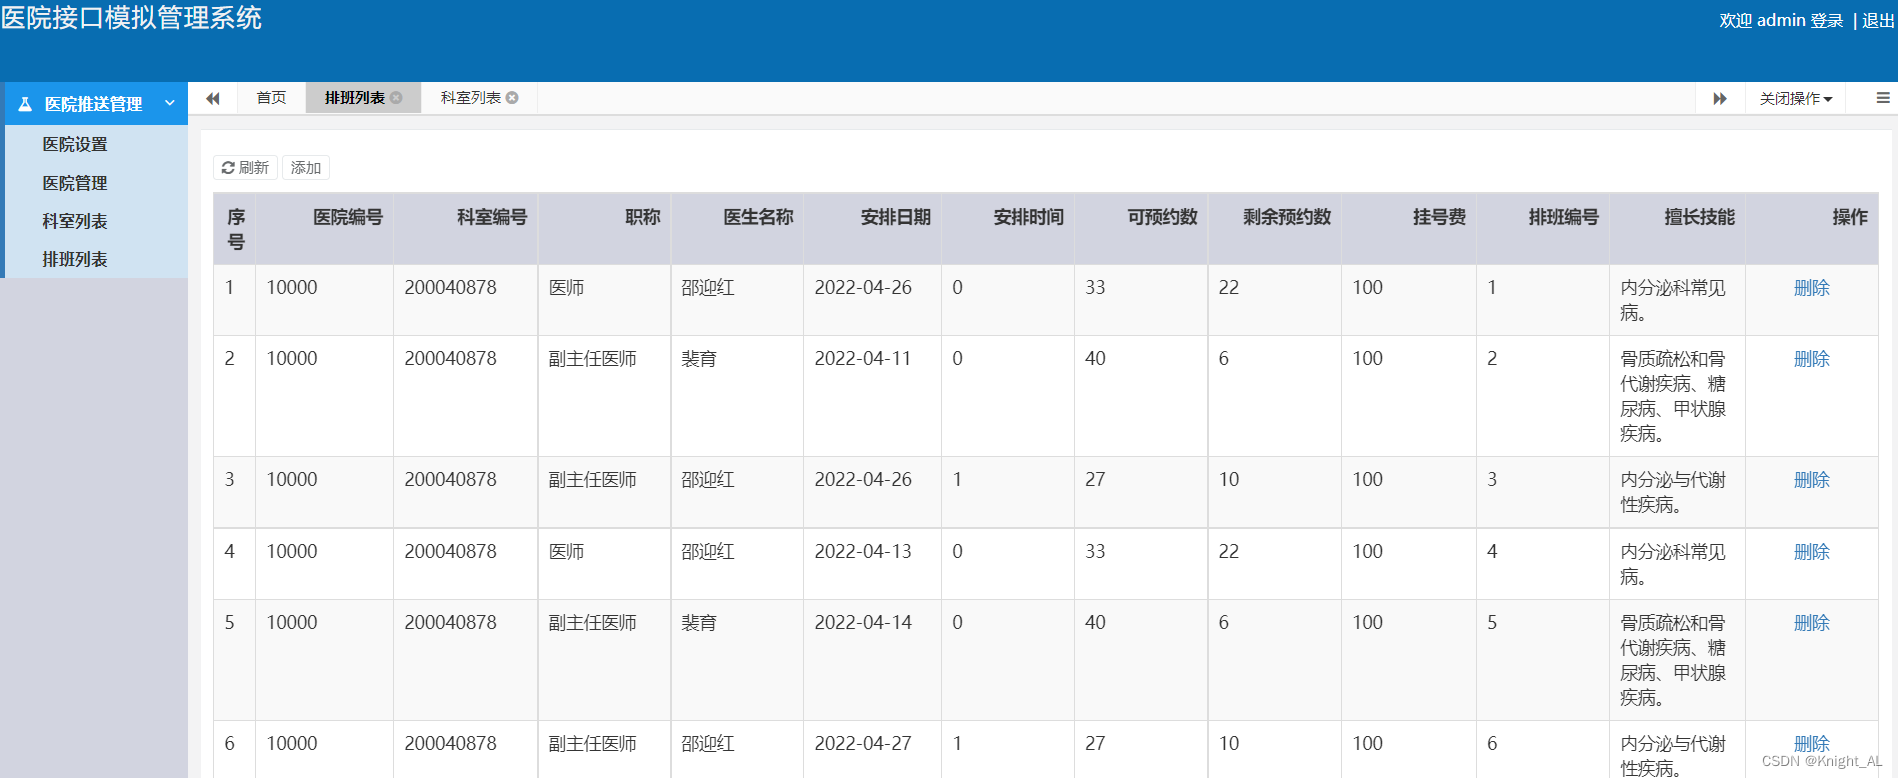
一个科室有多个科室,因此我们采取分页查询方式
提交地址
http://localhost:8201/api/hosp/schedule/list
请求参数
| 字段名 | 类型 | 长度 | 必输 | 说明 |
|---|---|---|---|---|
| hoscode | string | 30 | 是 | 给医院分配的唯一标识 |
| pageNum | Int | 是 | 第几页 | |
| pageSize | Int | 是 | 每页个数 | |
| timestamp | long | 是 | 时间戳。从1970-01-01 00:00:00算起的毫秒数 | |
| sign | string | 32 | 是 | 验签参数。 |
同步返回
| 字段名 | 类型 | 长度 | 必输 | 说明 |
|---|---|---|---|---|
| code | string | 是 | 结果编码。200:请求成功不等于200:请求失败(message:失败原因) | |
| message | string | 100 | 是 | 结果描述 |
| data | string | 5000 | 是 | 业务数据 |
1、添加service接口和实现
/**
     * 分页查询
     * @param page 当前页码
     * @param limit 每页记录数
     * @param scheduleQueryVo 查询条件
     * @return
*/
Page<Schedule> getSchedulePage(Map<String, Object> map);

@Override
    public Page<Schedule> getSchedulePage(Map<String, Object> map) {
        Integer page = Integer.parseInt((String) map.get("page"));
        Integer limit = Integer.parseInt((String) map.get("limit"));
        //0为第一页
        Pageable pageable = PageRequest.of(page-1, limit, Sort.by("createTime").ascending());
        String hoscode = (String)map.get("hoscode");
        Schedule schedule = new Schedule();
        schedule.setHoscode(hoscode);
        Example<Schedule> scheduleExample = Example.of(schedule);
        Page<Schedule> pages = scheduleRepository.findAll(scheduleExample, pageable);
        return pages;
    }
2、添加controller接口
    @ApiOperation(value = "获取排班分页列表")
    @PostMapping("/schedule/list")
    public Result getSchedulePage(HttpServletRequest request){
        Map<String, Object> map = HttpRequestHelper.switchMap(request.getParameterMap());
        //验证signKey  略
        Page<Schedule> schedulePage = scheduleService.getSchedulePage(map);
        return Result.ok(schedulePage);
    }
十、删除科室接口
提交地址
http://localhost/api/hosp/department/remove
请求参数
| 字段名 | 类型 | 长度 | 必输 | 说明 |
|---|---|---|---|---|
| hoscode | string | 30 | 是 | 给医院分配的唯一标识 |
| hosScheduleId | string | 30 | 是 | 科室编号 |
| timestamp | long | 是 | 时间戳。从1970-01-01 00:00:00算起的毫秒数 | |
| sign | string | 32 | 是 | 验签参数。 |
同步返回
| 字段名 | 类型 | 长度 | 必输 | 说明 |
|---|---|---|---|---|
| code | string | 是 | 结果编码。200:请求成功不等于200:请求失败(message:失败原因) | |
| message | string | 100 | 是 | 结果描述 |
| data | string | 5000 | 是 | 业务数据 |
根据医院编号与排班编号删除科室
1、添加service方法和实现
/**
     * 删除排班
     * @param hoscode
     * @param hosScheduleId
     */
void remove(Map<String, Object> map);

//实现方法
    @Override
    public void remove(Map<String, Object> map) {
        String hoscode = (String)map.get("hoscode");
        String hosScheduleId = (String)map.get("hosScheduleId");
        Schedule schedule = scheduleRepository.findByHoscodeAndHosScheduleId(hoscode,hosScheduleId);
        if (schedule!=null){
            scheduleRepository.deleteById(schedule.getId());
        }
    }
2、添加 controller
    @ApiOperation(value = "删除排班")
    @PostMapping("schedule/remove")
    public Result remove(HttpServletRequest httpServletRequest){
        Map<String, Object> map = HttpRequestHelper.switchMap(httpServletRequest.getParameterMap());
        //验证signKey  略
        scheduleService.remove(map);
        return Result.ok();
    }
