Gateway路由网关
Spring Cloud
Spring Cloud Gateway统一访问接口的路由管理方式
作用
- 整合各个微服务功能,形成一套系统
- 微服务网关实现日志统一纪录
- 实现用户的操作跟踪
- 统一用户权限认证
- 路由转发、跨域设置、负载均衡、服务限流
- 反向代理
微服务网关的概述
不同的微服务一般会有不同的网络地址,而外部客户端可能需要调用多个服务的接口才能完成一个业务需求,如果让客户端直接与各个微服务通信,会有以下的问题:
- 客户端会多次请求不同的微服务,增加了客户端的复杂性
- 存在跨域请求,在一定场景下处理相对复杂
- 认证复杂,每个服务都需要独立认证
- 难以重构,随着项目的迭代,可能需要重新划分微服务。例如,可能将多个服务合并成一个或者将一个服务拆分成多个。如果客户端直接与微服务通信,那么重构将会很难实施
- 某些微服务可能使用了防火墙 / 浏览器不友好的协议,直接访问会有一定的困难
以上这些问题可以借助网关解决。
网关是介于客户端和服务器端之间的中间层,所有的外部请求都会先经过 网关这一层。也就是说,API 的实现方面更多的考虑业务逻辑,而安全、性能、监控可以交由 网关来做,这样既提高业务灵活性又不缺安全性,典型的架构图如图所示:

优点如下:
- 安全 ,只有网关系统对外进行暴露,微服务可以隐藏在内网,通过防火墙保护。
- 前端直接访问网关服务,不需要区分各种ip端口服务,全部打到网关,网关对应路由。
- 易于监控。可以在网关收集监控数据并将其推送到外部系统进行分析。
- 易于认证。可以在网关上进行认证,然后再将请求转发到后端的微服务,而无须在每个微服务中进行认证。
- 减少了客户端与各个微服务之间的交互次数
- 易于统一授权。
总结:微服务网关就是一个系统,通过暴露该微服务网关系统,方便我们进行相关的鉴权,安全控制,日志统一处理,易于监控的相关功能。(只暴露网关端口,防止系统被大面积攻击)
微服务网关技术
实现微服务网关的技术有很多,
- nginx Nginx (tengine x) 是一个高性能的HTTP和反向代理web服务器,同时也提供了IMAP/POP3/SMTP服务
- zuul ,Zuul 是 Netflix 出品的一个基于 JVM 路由和服务端的负载均衡器。已淘汰
- spring-cloud-gateway, 是spring 出品的 基于spring 的网关项目,集成断路器,路径重写,性能比Zuul好。
我们使用gateway这个网关技术,无缝衔接到基于spring cloud的微服务开发中来。
gateway官网:
https://spring.io/projects/spring-cloud-gateway

实际开发是多个微服务网关。
跨域
- 跨域:指的是浏览器不能执行其他网站的脚本。它是由浏览器的同源策略造成的,是浏览器对js施加的安全限制。(ajax可以)
- 同源策略:是指
协议,域名,端囗都要相同,其中有一个不同都会产生跨域;
| URL | 说明 | 是否允许通信 |
|---|---|---|
| http://www.a.com/a.js http://www.a.com/b.js | 同一域名下 | 允许 |
| http://www.a.com/lab/a.js http://www.a.com/script/b.js | 同一域名下不同文件夹 | 允许 |
| http://www.a.com:8000/a.js http://www.a.com/b.js | 同一域名,不同端口 | 不允许 |
| http://www.a.com/a.js https://www.a.com/b.js | 同一域名,不同协议 | 不允许 |
| http://www.a.com/a.js http://70.32.92.74/b.js | 域名和域名对应ip | 不允许 |
| http://www.a.com/a.js http://script.a.com/b.js | 主域相同,子域不同 | 不允许 |
| http://www.a.com/a.js http://a.com/b.js | 同一域名,不同二级域名(同上) | 不允许(cookie这种情况下也不允许访问) |
| http://www.cnblogs.com/a.js http://www.a.com/b.js | 不同域名 | 不允许 |
跨域流程:
这个跨域请求的实现是通过预检请求实现的,先发送一个OPSTIONS探路,收到响应允许跨域后再发送真实请求
什么意思呢?跨域是要请求的、新的端口那个服务器限制的,不是浏览器限制的。
跨域请求流程:
非简单请求(PUT、DELETE)等,需要先发送预检请求


       -----1、预检请求、OPTIONS ------>
       <----2、服务器响应允许跨域 ------
浏览器 |                               |  服务器
       -----3、正式发送真实请求 -------->
       <----4、响应数据   --------------
跨域的解决方案
- 方法1:设置nginx包含admin和gateway。都先请求nginx,这样端口就统一了

- 方法2:让服务器告诉预检请求能跨域
Access-Control-Allow-Origin : 支持哪些来源的请求跨域
Access-Control-Allow-Method : 支持那些方法跨域
Access-Control-Allow-Credentials :跨域请求默认不包含cookie,设置为true可以包含cookie
Access-Control-Expose-Headers : 跨域请求暴露的字段
CORS请求时,XMLHttpRequest对象的getResponseHeader()方法只能拿到6个基本字段:
Cache-Control、Content-Language、Content-Type、Expires、Last-Modified、Pragma
如果想拿到其他字段,就必须在Access-Control-Expose-Headers里面指定。
Access-Control-Max-Age :表明该响应的有效时间为多少秒。在有效时间内,浏览器无须为同一请求再次发起预检请求。请注意,浏览器自身维护了一个最大有效时间,如果该首部字段的值超过了最大有效时间,将失效
网关配置跨域:
spring:
  application:
    name: gateway

  #同源策略:是指协议,域名,端囗都要相同,其中有一个不同都会产生跨域;
  cloud:
    gateway:
      globalcors:
        cors-configurations:
          '[/**]': # 匹配所有请求
            allowedOrigins: "*" #跨域处理 允许所有的域
            allowedMethods: # 支持的方法
              - GET
              - POST
              - PUT
              - DELETE
或者配置类:
import org.springframework.context.annotation.Bean;
import org.springframework.context.annotation.Configuration;
import org.springframework.web.cors.CorsConfiguration;
import org.springframework.web.cors.reactive.CorsWebFilter;
import org.springframework.web.cors.reactive.UrlBasedCorsConfigurationSource;

@Configuration // gateway
public class CorsConfiguration {

    @Bean // 添加过滤器,注入容器中则生效
    public CorsWebFilter corsWebFilter(){
        // 基于url跨域,选择reactive包下的
        UrlBasedCorsConfigurationSource source=new UrlBasedCorsConfigurationSource();
        // 跨域配置信息
        CorsConfiguration corsConfiguration = new CorsConfiguration();
        // 允许跨域的头
        corsConfiguration.addAllowedHeader("*");
        // 允许跨域的请求方式
        corsConfiguration.addAllowedMethod("*");
        // 允许跨域的请求来源
        corsConfiguration.addAllowedOrigin("*");
        // 是否允许携带cookie跨域
        corsConfiguration.setAllowCredentials(true);
        // 任意url都要进行跨域配置
        source.registerCorsConfiguration("/**",corsConfiguration);
        return new CorsWebFilter(source);
    }
}
网关统一设置跨域后,业务微服务就不需要配置跨域了。
依赖
<!-- Spring Cloud -->
<dependency>
    <groupId>org.springframework.cloud</groupId>
    <artifactId>spring-cloud-starter-gateway</artifactId>
</dependency>
启动类
import org.springframework.boot.SpringApplication;
import org.springframework.boot.autoconfigure.SpringBootApplication;
import org.springframework.cloud.netflix.eureka.EnableEurekaClient;

@SpringBootApplication
//@EnableEurekaClient
public class GatewayApplication {

    public static void main(String[] args) {
        SpringApplication.run(GatewayWebApplication.class,args);
    }
}
import org.springframework.boot.SpringApplication;
import org.springframework.boot.autoconfigure.SpringBootApplication;
import org.springframework.cloud.client.discovery.DiscoveryClient;
import org.springframework.cloud.client.discovery.EnableDiscoveryClient;
import org.springframework.cloud.gateway.discovery.DiscoveryClientRouteDefinitionLocator;
import org.springframework.cloud.gateway.discovery.DiscoveryLocatorProperties;
import org.springframework.cloud.gateway.route.RouteDefinitionLocator;
import org.springframework.context.annotation.Bean;
import org.springframework.http.HttpHeaders;
import org.springframework.http.HttpMethod;
import org.springframework.http.HttpStatus;
import org.springframework.http.codec.ServerCodecConfigurer;
import org.springframework.http.codec.support.DefaultServerCodecConfigurer;
import org.springframework.http.server.reactive.ServerHttpRequest;
import org.springframework.http.server.reactive.ServerHttpResponse;
import org.springframework.web.cors.reactive.CorsUtils;
import org.springframework.web.server.ServerWebExchange;
import org.springframework.web.server.WebFilter;
import org.springframework.web.server.WebFilterChain;
import reactor.core.publisher.Mono;

//Spring Cloud Gateway
@SpringBootApplication
//@EnableDiscoveryClient
//@EnableEurekaClient
public class GatewayApplication {

    // ----------------------------- 解决跨域 Begin -----------------------------

    private static final String ALL = "*";
    private static final String MAX_AGE = "3600L";

    @Bean
    public RouteDefinitionLocator discoveryClientRouteDefinitionLocator(DiscoveryClient discoveryClient, DiscoveryLocatorProperties properties) {
        return new DiscoveryClientRouteDefinitionLocator(discoveryClient, properties);
    }

    @Bean
    public ServerCodecConfigurer serverCodecConfigurer() {
        return new DefaultServerCodecConfigurer();
    }

    @Bean
    public WebFilter corsFilter() {
        return (ServerWebExchange ctx, WebFilterChain chain) -> {
            ServerHttpRequest request = ctx.getRequest();
            if (!CorsUtils.isCorsRequest(request)) {
                return chain.filter(ctx);
            }
            HttpHeaders requestHeaders = request.getHeaders();
            ServerHttpResponse response = ctx.getResponse();
            HttpMethod requestMethod = requestHeaders.getAccessControlRequestMethod();
            HttpHeaders headers = response.getHeaders();
            headers.add(HttpHeaders.ACCESS_CONTROL_ALLOW_ORIGIN, requestHeaders.getOrigin());
            headers.addAll(HttpHeaders.ACCESS_CONTROL_ALLOW_HEADERS, requestHeaders.getAccessControlRequestHeaders());
            if (requestMethod != null) {
                headers.add(HttpHeaders.ACCESS_CONTROL_ALLOW_METHODS, requestMethod.name());
            }
            headers.add(HttpHeaders.ACCESS_CONTROL_ALLOW_CREDENTIALS, "true");
            headers.add(HttpHeaders.ACCESS_CONTROL_EXPOSE_HEADERS, ALL);
            headers.add(HttpHeaders.ACCESS_CONTROL_MAX_AGE, MAX_AGE);
            if (request.getMethod() == HttpMethod.OPTIONS) {
                response.setStatusCode(HttpStatus.OK);
                return Mono.empty();
            }
            return chain.filter(ctx);
        };
    }

    // ----------------------------- 解决跨域 End -----------------------------

    public static void main(String[] args) {
        SpringApplication.run(GatewayApplication.class, args);
    }

}
简单配置
#eureka

server:
  port: 8001

spring:
  application:
    name: gateway

  #同源策略:是指协议,域名,端囗都要相同,其中有一个不同都会产生跨域;
  cloud:
    gateway:
      globalcors:
        cors-configurations:
          '[/**]': # 匹配所有请求
            allowedOrigins: "*" #跨域处理 允许所有的域
            allowedMethods: # 支持的方法
              - GET
              - POST
              - PUT
              - DELETE

eureka:
  client:
    service-url:
      defaultZone: http://127.0.0.1:7001/eureka
  instance:
    prefer-ip-address: true

management:
  endpoint:
    gateway:
      enabled: true
    web:
      exposure:
        include: true
#nacos 注册中心,使得网关能获取到能访问的服务,并路由过去

base:
  config:
    nacos:
      hostname: 注册中心ip地址
      port: 80

spring:
  application:
    # 应用名称
    name: gateway
  main:
    allow-bean-definition-overriding: true
  cloud:
    # 使用 Nacos 作为服务注册发现
    nacos:
      discovery:
        server-addr: ${base.config.nacos.hostname}:${base.config.nacos.port}
    # 路由网关配置
    gateway:
      # 设置与服务注册发现组件结合,这样可以采用服务名的路由策略
      discovery:
        locator:
          enabled: true
      # 配置路由规则
      routes:
        # 采用自定义路由 ID(有固定用法,不同的 id 有不同的功能,详见:https://cloud.spring.io/spring-cloud-gateway/2.0.x/single/spring-cloud-gateway.html#gateway-route-filters)
        - id: BUSINESS-OAUTH2
          # 采用 LoadBalanceClient 方式请求,以 lb:// 开头,后面的是注册在 Nacos 上的服务名
          #https://www.jianshu.com/p/9994b2da8645 LoadBalanceClient解释
          uri: lb://business-oauth2
          # Predicate 翻译过来是“谓词”的意思,必须,主要作用是匹配用户的请求,有很多种用法
          predicates:
            # 路径匹配,以 api 开头,直接配置是不生效的,看 filters 配置
            - Path=/api/user/**
          filters:
            # 前缀过滤,默认配置下,我们的请求路径是 http://localhost:8888/business-oauth2/** 这时会路由到指定的服务
            # 此处配置去掉 1 个路径前缀,再配置上面的 Path=/api/**,就能按照 http://localhost:8888/api/** 的方式访问了
            - StripPrefix=1
        - id: BUSINESS-PROFILE
          uri: lb://business-profile
          predicates:
            - Path=/api/profile/**
          filters:
            - StripPrefix=1
        - id: CLOUD-UPLOAD
          uri: lb://cloud-upload
          predicates:
            - Path=/api/upload/**
          filters:
            - StripPrefix=1

server:
  port: 8888

# 配置日志级别,方便调试
logging:
  level:
    org.springframework.cloud.gateway: debug
全局异常拦截
import org.slf4j.Logger;
import org.slf4j.LoggerFactory;
import org.springframework.boot.web.reactive.error.ErrorWebExceptionHandler;
import org.springframework.cloud.gateway.support.NotFoundException;
import org.springframework.http.HttpStatus;
import org.springframework.http.MediaType;
import org.springframework.http.codec.HttpMessageReader;
import org.springframework.http.codec.HttpMessageWriter;
import org.springframework.http.server.reactive.ServerHttpRequest;
import org.springframework.util.Assert;
import org.springframework.web.reactive.function.BodyInserters;
import org.springframework.web.reactive.function.server.RequestPredicates;
import org.springframework.web.reactive.function.server.RouterFunctions;
import org.springframework.web.reactive.function.server.ServerRequest;
import org.springframework.web.reactive.function.server.ServerResponse;
import org.springframework.web.reactive.result.view.ViewResolver;
import org.springframework.web.server.ResponseStatusException;
import org.springframework.web.server.ServerWebExchange;
import reactor.core.publisher.Mono;

import java.util.Collections;
import java.util.HashMap;
import java.util.List;
import java.util.Map;

/**
 * 全局系统异常拦截
 * <p>
 * Description:
 * </p>
 *
 * @author Lusifer
 * @version v1.0.0
 * @date 2019-10-23 17:11:57
 * @see com.funtl.myshop.plus.gateway.exception
 */
public class JsonExceptionHandler implements ErrorWebExceptionHandler {

    private static final Logger log = LoggerFactory.getLogger(JsonExceptionHandler.class);

    private List<HttpMessageReader<?>> messageReaders = Collections.emptyList();
    private List<HttpMessageWriter<?>> messageWriters = Collections.emptyList();
    private List<ViewResolver> viewResolvers = Collections.emptyList();
    private ThreadLocal<Map<String, Object>> exceptionHandlerResult = new ThreadLocal<>();

    public void setMessageReaders(List<HttpMessageReader<?>> messageReaders) {
        Assert.notNull(messageReaders, "'messageReaders' must not be null");
        this.messageReaders = messageReaders;
    }

    public void setViewResolvers(List<ViewResolver> viewResolvers) {
        this.viewResolvers = viewResolvers;
    }

    public void setMessageWriters(List<HttpMessageWriter<?>> messageWriters) {
        Assert.notNull(messageWriters, "'messageWriters' must not be null");
        this.messageWriters = messageWriters;
    }

    protected Mono<ServerResponse> renderErrorResponse(ServerRequest request) {
        Map<String, Object> result = exceptionHandlerResult.get();
        return ServerResponse.status((HttpStatus) result.get("httpStatus"))
                .contentType(MediaType.APPLICATION_JSON_UTF8)
                .body(BodyInserters.fromObject(result.get("body")));
    }

    private Mono<? extends Void> write(ServerWebExchange exchange, ServerResponse response) {
        exchange.getResponse().getHeaders().setContentType(response.headers().getContentType());
        return response.writeTo(exchange, new ResponseContext());
    }

    private class ResponseContext implements ServerResponse.Context {
        @Override
        public List<HttpMessageWriter<?>> messageWriters() {
            return JsonExceptionHandler.this.messageWriters;
        }

        @Override
        public List<ViewResolver> viewResolvers() {
            return JsonExceptionHandler.this.viewResolvers;
        }
    }

    @Override
    public Mono<Void> handle(ServerWebExchange serverWebExchange, Throwable throwable) {
        // 按照异常类型进行处理
        HttpStatus httpStatus;
        String body;
        if (throwable instanceof NotFoundException) {
            httpStatus = HttpStatus.NOT_FOUND;
            body = "Service Not Found";
        } else if (throwable instanceof ResponseStatusException) {
            ResponseStatusException responseStatusException = (ResponseStatusException) throwable;
            httpStatus = responseStatusException.getStatus();
            body = responseStatusException.getMessage();
        } else {
            httpStatus = HttpStatus.INTERNAL_SERVER_ERROR;
            body = "Internal Server Error";
        }

        // 封装响应结果
        Map<String, Object> result = new HashMap<>(2, 1);
        result.put("httpStatus", httpStatus);

        String msg = "{\"code\":" + httpStatus.value() + ",\"message\": \"" + body + "\"}";
        result.put("body", msg);

        // 错误日志
        ServerHttpRequest request = serverWebExchange.getRequest();
        log.error("[全局系统异常]\r\n请求路径:{}\r\n异常记录:{}", request.getPath(), throwable.getMessage());

        if (serverWebExchange.getResponse().isCommitted()) {
            return Mono.error(throwable);
        }
        exceptionHandlerResult.set(result);
        ServerRequest newRequest = ServerRequest.create(serverWebExchange, this.messageReaders);
        return RouterFunctions.route(RequestPredicates.all(), this::renderErrorResponse).route(newRequest)
                .switchIfEmpty(Mono.error(throwable))
                .flatMap((handler) -> handler.handle(newRequest))
                .flatMap((response) -> write(serverWebExchange, response));
    }
}
全局异常处理
import org.springframework.beans.factory.ObjectProvider;
import org.springframework.boot.web.reactive.error.ErrorWebExceptionHandler;
import org.springframework.context.annotation.Bean;
import org.springframework.context.annotation.Configuration;
import org.springframework.context.annotation.Primary;
import org.springframework.core.Ordered;
import org.springframework.core.annotation.Order;
import org.springframework.http.codec.ServerCodecConfigurer;
import org.springframework.web.reactive.result.view.ViewResolver;

import java.util.Collections;
import java.util.List;

/**
 * 全局异常处理
 * <p>
 * Description:
 * </p>
 *
 * @author Lusifer
 * @version v1.0.0
 * @date 2019-10-23 17:05:31
 * @see com.funtl.myshop.plus.gateway.exception
 */
@Configuration
public class ExceptionConfiguration {

    @Primary
    @Bean
    @Order(Ordered.HIGHEST_PRECEDENCE)
    public ErrorWebExceptionHandler errorWebExceptionHandler(ObjectProvider<List<ViewResolver>> viewResolversProvider, ServerCodecConfigurer serverCodecConfigurer) {
        JsonExceptionHandler jsonExceptionHandler = new JsonExceptionHandler();
        jsonExceptionHandler.setViewResolvers(viewResolversProvider.getIfAvailable(Collections::emptyList));
        jsonExceptionHandler.setMessageWriters(serverCodecConfigurer.getWriters());
        jsonExceptionHandler.setMessageReaders(serverCodecConfigurer.getReaders());
        return jsonExceptionHandler;
    }

}
网关断言过滤

- Route(路由):路由是构建网关的基本模块,它由ID,目标URI,一系列的断言和过滤器组成,如断言为true则匹配该路由
- Predicate(断言):参考的是Java8的java.util.function.Predicate
开发人员可以匹配HTTP请求中的所有内容(例如请求头或请求参数),如果请求与断言相匹配则进行路由,可以理解为路由条件,符合才可以路由过去。 - Filter(过滤):指的是Spring框架中GatewayFilter的实例,使用过滤器,可以在请求被路由前或者之后对请求进行修改
工作流程:

路由过滤器允许以某种方式修改传入的HTTP请求或传出的HTTP响应。 路径过滤器的范围限定为特定路径。 Spring Cloud Gateway包含许多内置的GatewayFilter工厂。如上图,根据请求路径路由到不同微服务去,这块可以使用Gateway的路由过滤功能实现。根据路径前缀分配到对应微服务。
过滤器 有 20 多个 实现 类, 包括头部过滤器、 路径类过滤器、 Hystrix过滤器 和 变更 请求 URL 的 过滤器, 还有 参数 和 状态 码 等 其他 类型 的 过滤器。
内置的过滤器工厂有22个实现类,包括头部过滤器、路径过滤器、Hystrix过滤器 、请求URL 变更过滤器,还有参数和状态码等其他类型的过滤器。根据过滤器工厂的用途来划分,可以分为以下几种:Header、Parameter、Path、Body、Status、Session、Redirect、Retry、RateLimiter和Hystrix。
配置文件添加:
一个微服务一个路由配置,就是一个微服务对应一个- id配置
spring:
  cloud:
    gateway:
      globalcors:
        cors-configurations:
          '[/**]': # 匹配所有请求
            allowedOrigins: "*" #跨域处理 允许所有的域
            allowedMethods: # 支持的方法
              - GET
              - POST
              - PUT
              - DELETE

      routes:
          # 唯一标识,对应某个微服务
        - id: changgou_goods_route
          # 该路由的ip地址,指定过去的微服务地址
          uri: http://localhost:18081
          # 路由断言,路由规则配置
          predicates:
            # 用户请求域名规则配置,所有以cloud.itheima.com为域名的请求都路由到该微服务
            - Host=cloud.itheima.com**
            # 路径过滤,/api/brand/后的全通过
            - Path=/api/brand/**
            # 网关自动去掉设置的前缀api后再路由到微服务
            filters:
              #将请求路径的第一个去掉,即是去掉api
              #- StripPrefix=1
              #请求路径前面加上一些自定义路径,加上/api/brand,默认/**,添加下面效果一样
              - PrefixPath=/api/brand

         - id: changgou_user_route
断言cookie,Query(url参数),Header,Method等字段,官网使用文档:https://docs.spring.io/spring-cloud-gateway/docs/3.0.3-SNAPSHOT/reference/html/
Host 路由
用户请求cloud.itheima.com的时候,可以将请求路由给http://localhost:18081微服务处理
routes:
  # 唯一标识,对应某个微服务
  - id: changgou_goods_route
  # 该路由的ip地址,指定过去的微服务地址
  uri: http://localhost:18081
  # 路由断言,路由规则配置
predicates:
  # 用户请求域名规则配置,所有以cloud.itheima.com为域名的请求都路由到该微服务
  - Host=cloud.itheima.com**
路径匹配过滤配置
根据请求的路径,设置这个路径的通过
routes:
  # 唯一标识,对应某个微服务
  - id: changgou_goods_route
  # 该路由的ip地址,指定过去的微服务地址
  uri: http://localhost:18081
  # 路由断言,路由规则配置
  predicates:
    # 路径过滤,/api/brand/后的全通过
    - Path=/api/brand/**
PrefixPath 过滤配置
请求路径前面加上一些自定义路径
routes:
  # 唯一标识,对应某个微服务
  - id: changgou_goods_route
  # 该路由的ip地址,指定过去的微服务地址
  uri: http://localhost:18081
  # 路由断言,路由规则配置
  predicates:
    # 用户请求域名规则配置,所有以cloud.itheima.com为域名的请求都路由到该微服务
    - Host=cloud.itheima.com**
    # 路径过滤,都通过
    - Path=/**
    # 网关自动去掉设置的前缀api后再路由到微服务
    filters:
      #在原来的请求路径前面加上/api/brand,最终是/api/brand/**
      - PrefixPath=/api/brand
StripPrefix 过滤配置
很多时候也会有这么一种请求,用户请求路径是/api/brand,而真实路径是/brand,这时候我们需要去掉/api才是真实路径。
routes:
  # 唯一标识,对应某个微服务
  - id: changgou_goods_route
  # 该路由的ip地址,指定过去的微服务地址
  uri: http://localhost:18081
  # 路由断言,路由规则配置
  predicates:
    # 用户请求域名规则配置,所有以cloud.itheima.com为域名的请求都路由到该微服务
    - Host=cloud.itheima.com**
    # 路径过滤,/api/brand/后的全通过
    - Path=/api/brand/**
    # 网关自动去掉设置的前缀api后再路由到微服务
    filters:
      #将请求路径的第一个去掉,即是去掉api,如果是2则去掉2个
      - StripPrefix=1
RewritePath过滤配置
   filters:
      #/api/brand/**路径替换为/xxx/brand/**
      - RewritePath=/api/brand/?(?<segment>.*), /xxx/brand$\{segment}
LoadBalancerClient 路由过滤器(客户端负载均衡)
上面的路由配置每次都会将请求给指定的URL处理,但如果在以后生产环境,并发量较大的时候,我们需要根据服务的名称判断来做负载均衡操作,可以使用LoadBalancerClientFilter来实现负载均衡调用。LoadBalancerClientFilter会作用在url以lb开头的路由,然后利用loadBalancer来获取服务实例,构造目标requestUrl,设置到GATEWAY_REQUEST_URL_ATTR属性中,供NettyRoutingFilter使用。
routes:
  # 唯一标识,对应某个微服务
  - id: changgou_goods_route
  # 该路由的ip地址,指定过去的微服务地址
  #uri: http://localhost:18081

  # 所有的请求都交给goods微服务处理
  # goods是微服务名称,这里使用集群,搭建多个goods微服务
  uri: lb://goods

  # 路由断言,路由规则配置
  predicates:
    # 路径过滤,/api/brand/后的全通过
    - Path=/api/brand/**
    # 网关自动去掉设置的前缀api后再路由到微服务
    filters:
      #将请求路径的第一个去掉,即是去掉api
      - StripPrefix=1
网关限流
网关可以做很多的事情,比如,限流,当我们的系统被频繁的请求的时候,就有可能将系统压垮,所以 为了解决这个问题,需要在每一个微服务中做限流操作,但是如果有了网关,那么就可以在网关系统做限流,因为所有的请求都需要先通过网关系统才能路由到微服务中。

令牌桶算法
令牌桶算法是比较常见的限流算法之一,大概描述如下:
1)所有的请求在处理之前都需要拿到一个可用的令牌才会被处理;
2)根据限流大小,设置按照一定的速率往桶里添加令牌;
3)桶设置最大的放置令牌限制,当桶满时、新添加的令牌就被丢弃或者拒绝;
4)请求达到后首先要获取令牌桶中的令牌,拿着令牌才可以进行其他的业务逻辑,处理完业务逻辑之后,将令牌直接删除;
5)令牌桶有最低限额,当桶中的令牌达到最低限额的时候,请求处理完之后将不会删除令牌,以此保证足够的限流
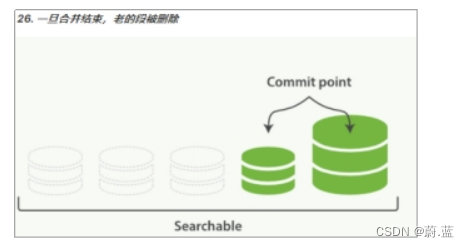
如下图:

这个算法的实现,有很多技术,Guaua是其中之一,redis客户端也有其实现。
(1)引入redis依赖
pom.xml中引入redis的依赖
springBoot自带
<!-- redis reactive-->
<dependency>
    <groupId>org.springframework.boot</groupId>
    <artifactId>spring-boot-starter-data-redis-reactive</artifactId>
</dependency>
(2)定义KeyResolver
在Applicatioin引导类中添加如下代码,KeyResolver用于计算某一个类型的限流的KEY也就是说,可以通过KeyResolver来指定限流的Key。
我们可以根据IP来限流,比如每个IP每秒钟只能请求一次,在启动类GatewayApplication定义key的获取,获取客户端IP,将IP作为key,如下代码:
    /***
     * IP限流
     * @return
     */
    @Bean(name="ipKeyResolver")
    public KeyResolver userKeyResolver() {
        return new KeyResolver() {
            @Override
            public Mono<String> resolve(ServerWebExchange exchange) {
                //获取远程客户端IP
                String hostName = exchange.getRequest().getRemoteAddress().getHostString();
                System.out.println("访问的hostName:"+hostName);
                return Mono.just(hostName);
            }
        };
    }
(3)修改application.yml中配置项,指定限制流量的配置以及REDIS的配置
      routes:
        - id: changgou_goods_route
          uri: lb://goods
          predicates:
            - Path=/api/brand**
          filters:
            - StripPrefix=1
            # 局部限流过滤器
            - name: RequestRateLimiter #请求数限流 名字不能随便写 ,使用默认的facatory
              args:
                #用户身份唯一识别标识符
                key-resolver: "#{@ipKeyResolver}"
                #每秒只允许有1个请求通过
                redis-rate-limiter.replenishRate: 1
                #允许并发有4分请求
                redis-rate-limiter.burstCapacity: 4

spring:
  #Redis配置
  redis:
    host: 192.168.169.140
    port: 6379
解释:
redis-rate-limiter.replenishRate是您希望允许用户每秒执行多少请求,而不会丢弃任何请求。这是令牌桶填充的速率
redis-rate-limiter.burstCapacity是指令牌桶的容量,允许在一秒钟内完成的最大请求数,将此值设置为零将阻止所有请求。
key-resolver: “#{@ipKeyResolver}” 用于通过SPEL表达式来指定使用哪一个KeyResolver.
如上配置:
表示一秒内,允许一个请求通过,令牌桶的填充速率也是一秒钟添加一个令牌。
最大突发状况 也只允许 一秒内有4次请求,可以根据业务来调整 。
整体配置代码例子
server:
  port: 8001

spring:
  application:
    name: gateway

  #Redis配置
  redis:
    host: 192.168.169.140
    port: 6379

  cloud:
    gateway:
      globalcors:
        cors-configurations:
          '[/**]': # 匹配所有请求
            allowedOrigins: "*" #跨域处理 允许所有的域
            allowedMethods: # 支持的方法
              - GET
              - POST
              - PUT
              - DELETE

      routes:
        #goods微服务
        - id: changgou_goods_route
          uri: lb://goods
          predicates:
            - Path=/api/goods/**
          filters:
            - StripPrefix=1
            - name: RequestRateLimiter #请求数限流 名字不能随便写 ,使用默认的facatory
              args:
                key-resolver: "#{@ipKeyResolver}"
                redis-rate-limiter.replenishRate: 1
                redis-rate-limiter.burstCapacity: 1
        #用户微服务
        - id: changgou_user_route
          uri: lb://user
          predicates:
            - Path=/api/user/**,/api/address/**,/api/areas/**,/api/cities/**,/api/provinces/**
          filters:
            - StripPrefix=1


eureka:
  client:
    service-url:
      defaultZone: http://127.0.0.1:7001/eureka
  instance:
    prefer-ip-address: true

management:
  endpoint:
    gateway:
      enabled: true
    web:
      exposure:
        include: true
网关过滤器全部代码
结合springSecurity实现统一过滤token。
统一网关认证授权的话,访问后台都是需要携带请求头的,但是登录注册等url是不用权限的,结合
Security放行的路径,也需要在网关设置放行的路径。
public class URLFilter {

    /**
     * 要放行的路径,添加到这里
     */
    private static final String NO_AUTHORIZE_URLS = "/api/user/add,/api/user/login";


    /**
     * 判断当前的请求的地址中是否在已有的不拦截的地址中存在,如果存在则返回true表示不拦截   false表示拦截
     *
     * @param uri 获取到的当前的请求的地址
     * @return
     */
    public static boolean hasAuthorize(String uri) {
        String[] split = noAuthorizeurls.split(",");

        for (String s : split) {
            if (s.equals(uri)) {
                return true;
            }
        }
        return false;
    }
}
过滤器代码如下:
package com.changgou.gateway.web.filter;

import com.changgou.gateway.web.util.JwtUtil;
import io.jsonwebtoken.Claims;
import org.springframework.cloud.gateway.filter.GatewayFilterChain;
import org.springframework.cloud.gateway.filter.GlobalFilter;
import org.springframework.core.Ordered;
import org.springframework.http.HttpCookie;
import org.springframework.http.HttpStatus;
import org.springframework.http.server.reactive.ServerHttpRequest;
import org.springframework.http.server.reactive.ServerHttpResponse;
import org.springframework.stereotype.Component;
import org.springframework.util.StringUtils;
import org.springframework.web.server.ServerWebExchange;
import reactor.core.publisher.Mono;

/**
 * Title:全局过滤器类
 * Description:
 * @author WZQ
 * @version 1.0.0
 * @date 2020/3/10
 */
@Component
public class AuthorizeFilter implements GlobalFilter, Ordered {

    //令牌头名字
    private static final String AUTHORIZE_TOKEN = "Authorization";

    //登录页面url,前后分离的话给前端实现
    //private static final String loginURL = "http://localhost:9001/oauth/login";

    /***
     * 全局过滤器
     * @param exchange
     * @param chain
     * @return
     */
    @Override
    public Mono<Void> filter(ServerWebExchange exchange, GatewayFilterChain chain) {
        //获取Request、Response对象
        ServerHttpRequest request = exchange.getRequest();
        ServerHttpResponse response = exchange.getResponse();

        //获取请求的URI
        String path = request.getURI().getPath();

        //如果是登录,注册等请求,一律放行
        if(URLFilter.hasAuthorize(path)){
            //放行
            return chain.filter(exchange);
        }

        //不在头文件中,则在这里封装到头文件中,资源服务器才可以访问,如果结合spring security的话,
        //都是放在请求头
        boolean hasToken = true;

        //1.获取头文件中的令牌信息
        String tokent = request.getHeaders().getFirst(AUTHORIZE_TOKEN);

        //2.如果头文件中没有,则从请求参数中获取
        if (StringUtils.isEmpty(tokent)) {
            tokent = request.getQueryParams().getFirst(AUTHORIZE_TOKEN);
            hasToken = false;
        }

        //3.都没有则从cookie中获取
        if (StringUtils.isEmpty(tokent)) {
            HttpCookie cookie = request.getCookies().getFirst(AUTHORIZE_TOKEN);
            if (cookie!=null){
                tokent = cookie.getValue();
                hasToken = false;
            }
        }

        //如果全为空,没有令牌,则拦截
        if (StringUtils.isEmpty(tokent)) {
            //设置没有权限的状态码,401没有权限
            response.setStatusCode(HttpStatus.UNAUTHORIZED);
            //返回
            return response.setComplete();
            //跳转到登录页面
            //return response.getHeaders().set("Location",loginURL+"?From="+request.getURI().toString());
        }

        //看情况,可能需要统一加上“bearer ”,cookie无法加
        //如果全为空,没有令牌,则拦截
        if (StringUtils.isEmpty(tokent)) {
            //设置没有权限的状态码,401没有权限
            response.setStatusCode(HttpStatus.UNAUTHORIZED);
            //返回
            return response.setComplete();
        }else{
            //有令牌
            //解析令牌数据
            //Claims claims = JwtUtil.parseJWT(tokent);
            //判断是否有前缀"bearer "
            if (!tokent.startsWith("bearer ") || !tokent.startsWith("Bearer ")){
                tokent = "bearer "+tokent;
            }
        }

        //请求头没有,添加进去
        if (!hasToken){
            //将令牌封装到头文件中,让其访问其他资源服务器
            request.mutate().header(AUTHORIZE_TOKEN,tokent);
        }

        //不是在请求头拿到的token
        if (!hasToken){
            //将令牌封装到头文件中,让其访问其他资源服务器
            request.mutate().header(AUTHORIZE_TOKEN,tokent);
        }

        //放行
        return chain.filter(exchange);
    }


    /***
     * 过滤器执行顺序
     * @return
     */
    @Override
    public int getOrder() {
        return 0;
    }
}


