所需下载地址:
通过网盘分享的文件:rtmp
链接: https://pan.baidu.com/s/1t21J7cOzQR1ASLrsmrYshA?pwd=0000 提取码: 0000
window:
解压 win目录下的 nginx-rtmp-module-1.2.2.zip和nginx 1.7.11.3 Gryphon.zip安装包,解压时选择 解压到 nginx-rtmp-module-1.2.2 或者 nginx 1.7.11.3 Gryphon (这样是带目录结构的!)
将解压后的 nginx-rtmp-module-1.2.2 移动到 nginx 1.7.11.3 Gryphon 目录下
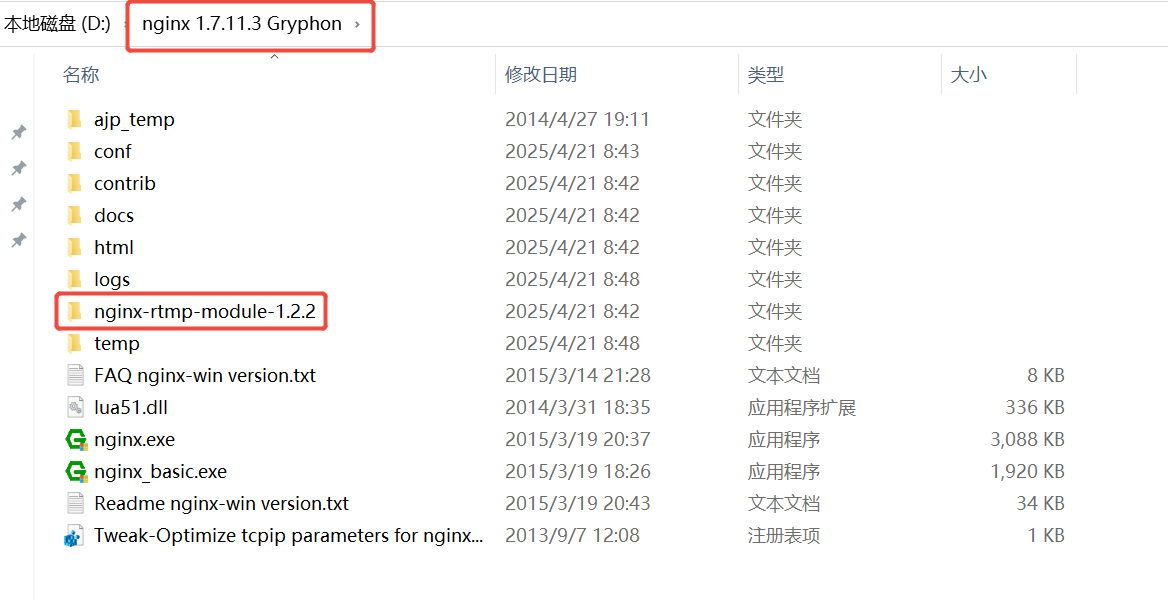
在conf目录下新建nginx.conf配置文件,记录最好用文版编辑工具(notepad++.exe 等)UTF-8 编码,内容如下:
记得手动创建 流媒体文件存储目录 D:/tmp/hls D:/tmp/av
worker_processes  2;

events {
    worker_connections  1024;
}

#RTMP服务
rtmp {
	server {
		listen		1935;	#监听端口
		chunk_size	4096;	#数据传输块大小
		#application live{	#创建名为"live"的应用
		#  live on;
		#}
		application my_live {  # 创建rtmp应用hls
			live on;  # 当路径匹配时,开始播放
			# 记录所有发布的流。
			record all;
			# 指定录制文件的存储路径为 /tmp/av。
			record_path D:/tmp/av;
			# 设置每个录制文件的最大大小为 1KB。
			record_max_size 10M;
            # 记录文件的扩展名
            record_suffix .flv;
			# 为每个录制文件添加当前时间戳,确保文件名唯一。
			record_unique on;
			# 只允许本地主机(127.0.0.1)发布流。
			allow publish all;
			# 允许所有客户端播放
			allow play all;
			#HLS协议进行m3u8实时直播.如果是http-flv不需要配置下面的
			wait_key on;#保护TS切片
			hls on;  #实时回访
			hls_nested on;#每个流都自动创建一个文件夹
			hls_path D:/tmp/hls; #媒体块ts的位置
			hls_fragment 5s; #每个ts文件为5s的样子
			hls_playlist_length 30s;  #保存m3u8列表长度时间,默认是30秒,可考虑三小时10800秒
			hls_cleanup off; #是否删除列表中已经没有的媒体块TS文件,默认是开启
			hls_continuous on; #连续模式
       	}
    }
}

#HTTP服务,可以通过浏览器访问 http://localhost:9091/stat 查看服务器状态(9091为你配置的端口号,可以自由设置)
http {
    include       mime.types;
    default_type  application/octet-stream;
    sendfile      on;
    keepalive_timeout  65;

	# 定义内网 IP 段
    geo $internal {
        default 0;
        10.0.0.0/8 1;
        172.16.0.0/12 1;
        192.168.0.0/16 1;
    }

    server {
        listen       9091;
        server_name  localhost;

		location /stat {
			rtmp_stat all;
			rtmp_stat_stylesheet stat.xsl;
			# 仅允许内网访问
            if ($internal = 0) {
                return 403;
            }
		}

		location /stat.xsl {
			root ./nginx-rtmp-module-1.2.2/;	#rtmp拓展包目录
		}

        #location / {
        #    root   html;
        #    index  index.html index.htm;
		#	 add_header Access-Control-Allow-Origin *; # 配置跨域
        #    add_header Access-Control-Allow-Headers "Origin, X-Requested-With, Content-Type, Accept";
        #    add_header Access-Control-Allow-Methods "GET, POST, OPTIONS";
        #}

		#location /control {
		#	rtmp_control all;
			# 仅允许内网访问
        #    if ($internal = 0) {
        #        return 403;
        #    }
		#}

		#location /rtmp-publisher {
		#	root nginx-rtmp-module/test;
		#}
		#加入hls支持
        location /hls {
            types {
                application/vnd.apple.mpegurl m3u8;
                #或 application/x-mpegURL
                video/mp2t ts;
            }
            alias D:/tmp/hls;  #视频流文件目录(自己创建)
            expires -1;
            add_header Cache-Control no-cache; #跨域支持
            add_header Access-Control-Allow-Origin *;
            add_header Access-Control-Allow-Headers "Origin, X-Requested-With, Content-Type, Accept";
            add_header Access-Control-Allow-Methods "GET, POST, OPTIONS";
        }

        error_page   500 502 503 504  /50x.html;
        location = /50x.html {
            root   html;
        }
    }
}
然后使用 win+r 打开cmd窗口,找到 nginx.exe 目录 ,输入 nginx 运行nginx,此时在window rtmp流媒体服务搭建完成。
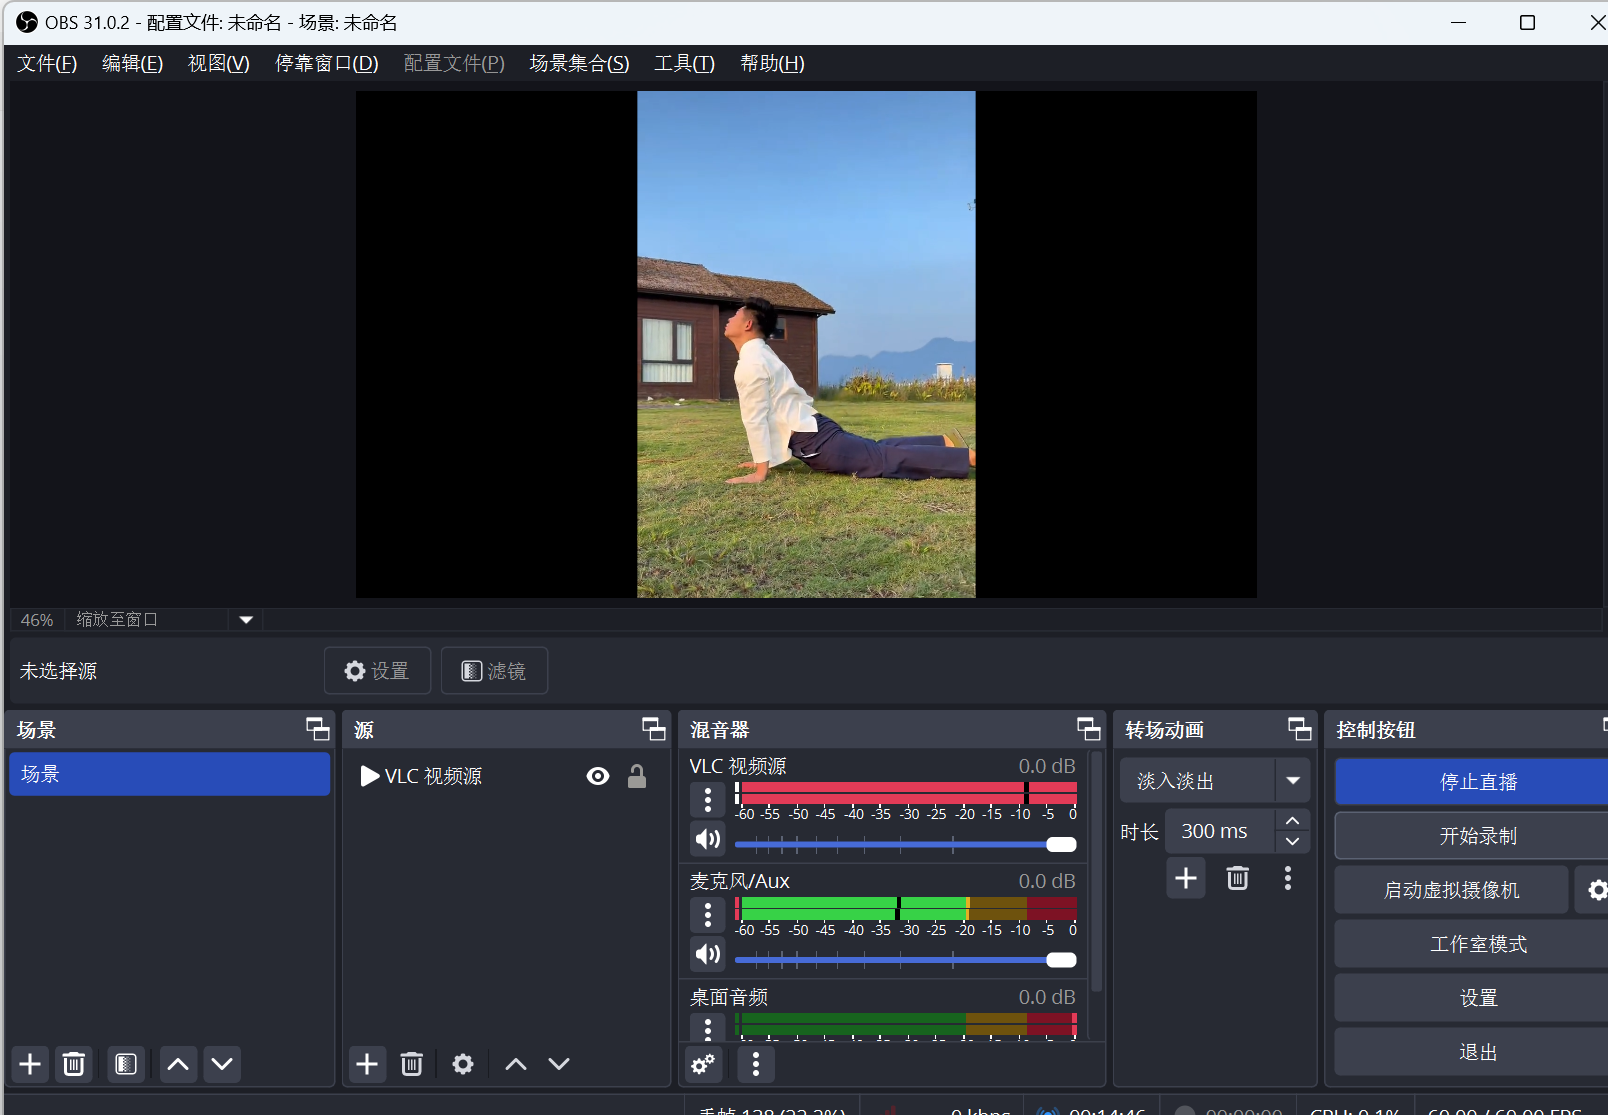
验证:安装 vlc-3.0.21-win64 和 OBS-Studio-31.0.2-Windows-Installer
安装完成后 按照以下截图进行验证,分享系统了一个DY短视频,可以用作测试
打开OBS
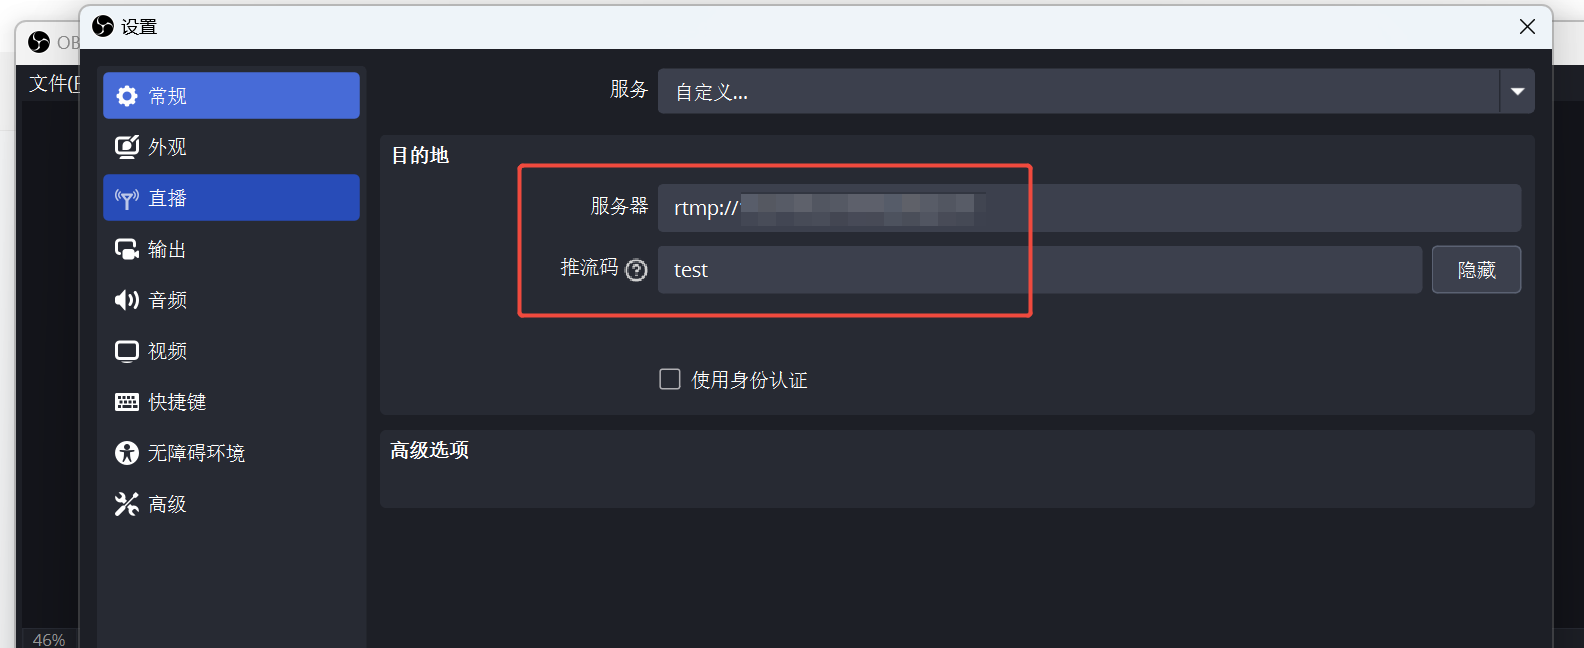
点击左上角 文件 -> 设置 -> 直播:
输入服务器地址:rtmp默认端口为:1935,所以不需要指定端口,比如我的IP是192.168.0.100
rtmp://192.168.0.100/my_live (my_live 是nginx配置得 application的名称)
推流码一般为自定义的唯一值,可以自定义输入,方便后续开启直播时使用,输入完成后点击应用、确定
鼠标右键添加 VLC视频源


添加提供的video.mp4 文件 或者 自己下载的视频文件都可
点击 开始直播,鼠标放到视频画面上可以上下左右拖动直播时画面显示位置,默认靠左
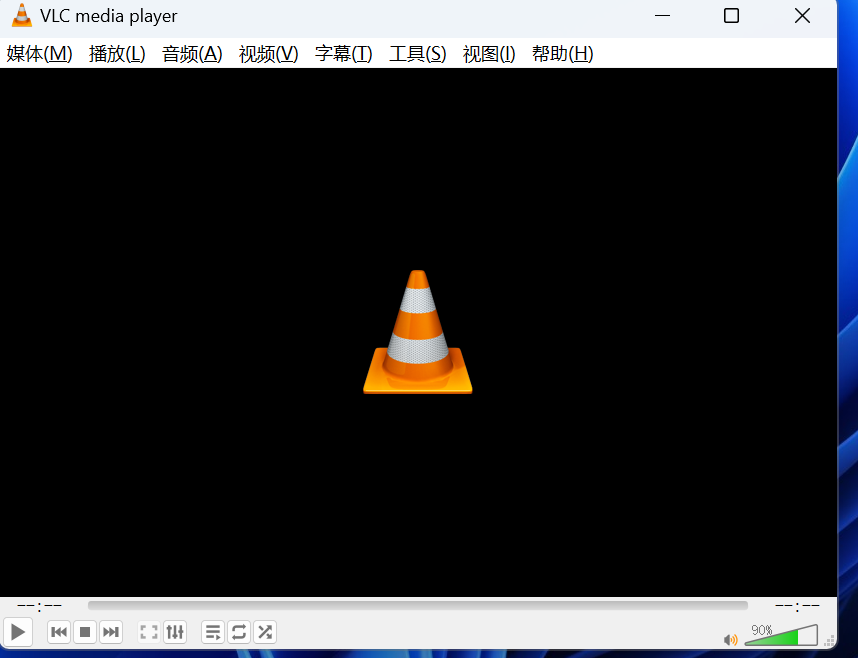
打开 VLC media player
点击 媒体 -> 打开网络串流,输入
rtpm://192.168.0.100/my_live/test
你的IP,你配置的 application my_live(应用名称),test: 在obs设置的推流码 一般是唯一值, 如果可以正常播放,表示流媒体搭建完成了
使用自定义html测试
<!DOCTYPE html>
<html>
<head>
    <title>直播测试</title>
    <!-- 引入 HLS.js 和 FLV.js 播放器库 -->
    <link href="https://cdnjs.cloudflare.com/ajax/libs/video.js/7.10.2/video-js.min.css" rel="stylesheet">
    <script src="https://cdnjs.cloudflare.com/ajax/libs/video.js/7.10.2/video.min.js"></script>
</head>
<body>
    <h2>HLS 直播</h2>
    <video id="hlsPlayer" class="video-js vjs-default-skin" controls width="800"></video>
    <script>
        // 配置参数
        const SERVER_IP = "192.168.0.100:9091"; // 例如 "192.168.1.100"
        const STREAM_KEY = "test"; // 推流时设置的流名称,例如 "mystream"

        // ========================= HLS 播放 =========================
        const hlsPlayer = videojs('hlsPlayer', {
            autoplay: true,
            controls: true,
            sources: [{
                // 注意这里修改了路径,增加了流名称的子文件夹
                src: `http://${SERVER_IP}/hls/${STREAM_KEY}/index.m3u8`,
                type: 'application/x-mpegURL'
            }]
        });

    </script>
</body>
</html>
linux安装流媒体:
将linux目录下的文件上传到对应的服务器,解压,目录结构win一样,我是把 nginx-rtmp-module-1.2.2目录 重命名为 nginx-rtmp-module ,所以我的安装命令是 --add-module=./nginx-rtmp-module
配置文件和测试原理一样,记得把文件路径修改为linux目录下的,需要自行创建目录,并且赋予权限,nginx linux下运行的用户需要拥有目录权限才行,如果是root也需要自行创建目录 给予权限
执行以下命令进行安装
# centos命令,ubuntu自行转换即可  记得修改 --add-module=./nginx-rtmp-module 目录名称

mkdir /tmp/av /tmp/hls

sudo chmod 600 /tmp/av

sudo chmod 600 /tmp/hls

yum install -y gcc gcc-c++ make pcre-devel zlib-devel openssl-devel

./configure --prefix=/usr/local/nginx --add-module=./nginx-rtmp-module  --with-http_ssl_module --with-http_v2_module --with-http_realip_module --with-http_addition_module --with-http_sub_module --with-http_dav_module --with-http_flv_module --with-http_mp4_module --with-http_gunzip_module --with-http_gzip_static_module --with-http_auth_request_module --with-http_random_index_module --with-http_secure_link_module --with-http_degradation_module --with-http_slice_module --with-http_stub_status_module --with-mail --with-mail_ssl_module --with-stream --with-stream_ssl_module --with-stream_realip_module --with-pcre

make && make install