文章目录
- 一、概述
- 二、Trino 环境部署
- 1)安装JDK
- 2)安装python
- 3)安装Trino
- 1、下载解压并配置环境变量
- 2、修改配置
- 3、启动服务
- 4、测试验证
- 三、在Hive中创建表关联Hudi表
- 1)添加jar包
- 2)创建库表关联Hudi
- 四、Hudi 与 Trino集成
一、概述
Apache Hudi是一个快速增长的数据湖存储系统,可帮助组织构建和管理PB级数据湖。Hudi通过引入诸如升序、删除和增量查询之类的原语,将流式处理引入到批处理式大数据中。这些功能有助于在统一服务层上更快、更新鲜的数据。Hudi表可以存储在Hadoop分布式文件系统(HDFS)或云存储上,并与流行的查询引擎(如Presto(Trino)、Apache Hive、ApacheSpark和Apache Impala)集成良好。鉴于Hudi开创了一种新的模型,它不仅仅是将文件写入到一个更受管理的存储层,该存储层可以与所有主要的查询引擎进行互操作,因此在集成点是如何演变的方面有了有趣的经验。
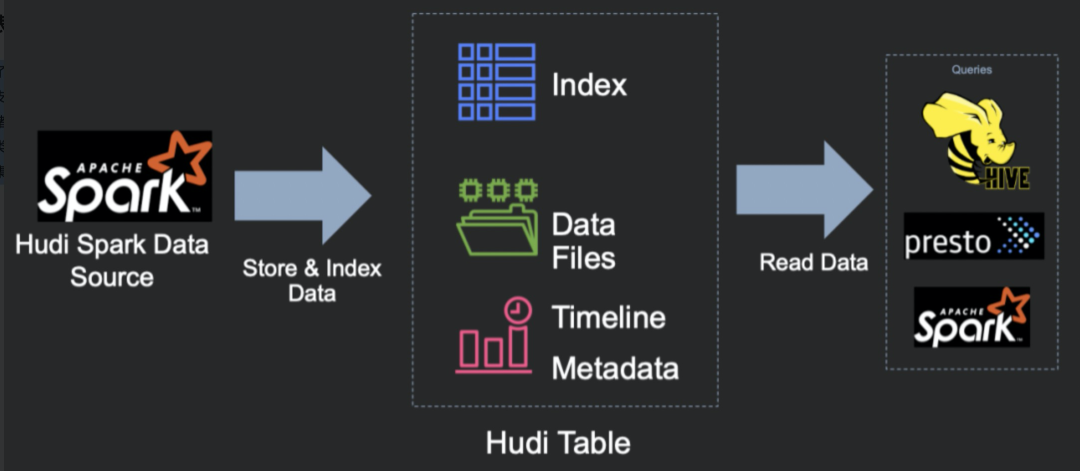
使用presto或者trino分析hudi表数据,最终将结果存储到mysql表中。
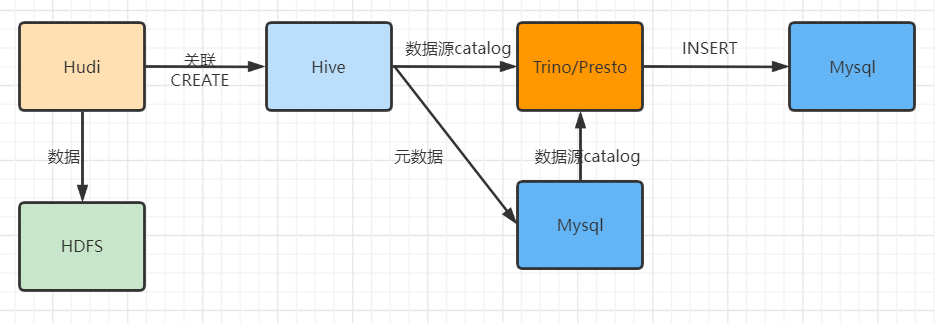
- Hive中创建表,关联Hudi表
- Presto集成Hive,加载Hive表数据
- Presto集成MySQL,读取或者保存数据
二、Trino 环境部署
关于trino或者presto的介绍,可以参考我这篇文章:大数据Hadoop之——基于内存型SQL查询引擎Presto(Presto-Trino环境部署),这里部署trino单机版进行测试。
1)安装JDK
【注意】Trino不同的版本要求的JDK版本也不一样的。这里我安装Trino最新版,JDK也安装最新版本。
wget https://cdn.azul.com/zulu/bin/zulu19.30.11-ca-jdk19.0.1-linux_x64.zip
unzip zulu19.30.11-ca-jdk19.0.1-linux_x64.zip
配置环境变量
# /etc/profile文件中追加如下内容:
export JAVA_HOME=/opt/bigdata/trino/zulu19.30.11-ca-jdk19.0.1-linux_x64
export PATH=$JAVA_HOME/bin:$PATH
export CLASSPATH=.:$JAVA_HOME/lib/dt.jar:$JAVA_HOME/lib/tools.jar

# 加载生效
source /etc/profile
2)安装python
# version 2.6.x, 2.7.x, or 3.x
yum -y install python3
python3 --version
ln -s /usr/bin/python3 /usr/bin/python
3)安装Trino
这里部署单机版,Coordinator和Worker同进程。
1、下载解压并配置环境变量
wget https://repo1.maven.org/maven2/io/trino/trino-server/401/trino-server-401.tar.gz
tar -xf trino-server-401.tar.gz

# 配置环境变量/etc/profile
export TRINO_HOME=/opt/bigdata/trino/trino-server-401
export PATH=$TRINO_HOME/bin:$PATH
2、修改配置
首先创建etc和data目录,后面配置文件需要用到
cd $TRINO_HOME
mkdir -p data etc/catalog
node.properties
cat << EOF > $TRINO_HOME/etc/node.properties
# 环境的名字。集群中所有的Trino节点必须具有相同的环境名称。
node.environment=dev
# 此Trino安装的唯一标识符。这对于每个节点都必须是唯一的。
node.id=trino-worker
# 数据目录的位置(文件系统路径)。Trino在这里存储日志和其他数据。
node.data-dir=/opt/bigdata/trino/trino-server-401/data
EOF
jvm.config
cat << EOF > $TRINO_HOME/etc/jvm.config
-server
-Xmx2G
-XX:+UseG1GC
-XX:G1HeapRegionSize=32M
-XX:+ExplicitGCInvokesConcurrent
-XX:+ExitOnOutOfMemoryError
-XX:+HeapDumpOnOutOfMemoryError
-XX:-OmitStackTraceInFastThrow
-XX:ReservedCodeCacheSize=512M
-XX:PerMethodRecompilationCutoff=10000
-XX:PerBytecodeRecompilationCutoff=10000
-Djdk.attach.allowAttachSelf=true
-Djdk.nio.maxCachedBufferSize=2000000
EOF
config.properties
cat << EOF > $TRINO_HOME/etc/config.properties
# 设置该节点为coordinator节点
coordinator=true
# 允许在协调器上调度工作,也就是coordinator节点又充当worker节点用
node-scheduler.include-coordinator=true
# 指定HTTP服务器的端口。Trino使用HTTP进行内部和外部web的所有通信。
http-server.http.port=9000
# 查询可以使用的最大分布式内存。【注意】不能配置超过jvm配置的最大堆栈内存大小
query.max-memory=1GB
# 查询可以在任何一台机器上使用的最大用户内存。【注意】也是不能配置超过jvm配置的最大堆栈内存大小
query.max-memory-per-node=1GB
# hadoop-node1也可以是IP
discovery.uri=http://local-168-182-130:9000
EOF
log.properties
cat << EOF > $TRINO_HOME/etc/log.properties
# 设置日志级别,有四个级别:DEBUG, INFO, WARN and ERROR
io.trino=INFO
EOF
- 配置hive数据源,
hive.properties
cat << EOF > $TRINO_HOME/etc/catalog/hive.properties
connector.name=hive
hive.metastore.uri=thrift://local-168-182-130:9083
hive.config.resources=/opt/bigdata/hadoop/hadoop-3.3.2/etc/hadoop/core-site.xml,/opt/bigdata/hadoop/hadoop-3.3.2/etc/hadoop/hdfs-site.xml
EOF
- 配置mysql数据源,
mysql.properties
# 所有节点都得添加
cat << EOF > $TRINO_HOME/etc/catalog/mysql.properties
connector.name=mysql
connection-url=jdbc:mysql://local-168-182-130:3306
connection-user=root
connection-password=123456
EOF
3、启动服务
$TRINO_HOME/bin/launcher start

# 查看日志
tail -f $TRINO_HOME/data/var/log/server.log

netstat -tnlp|grep :9000
4、测试验证
web访问验证:http://local-168-182-130:9000
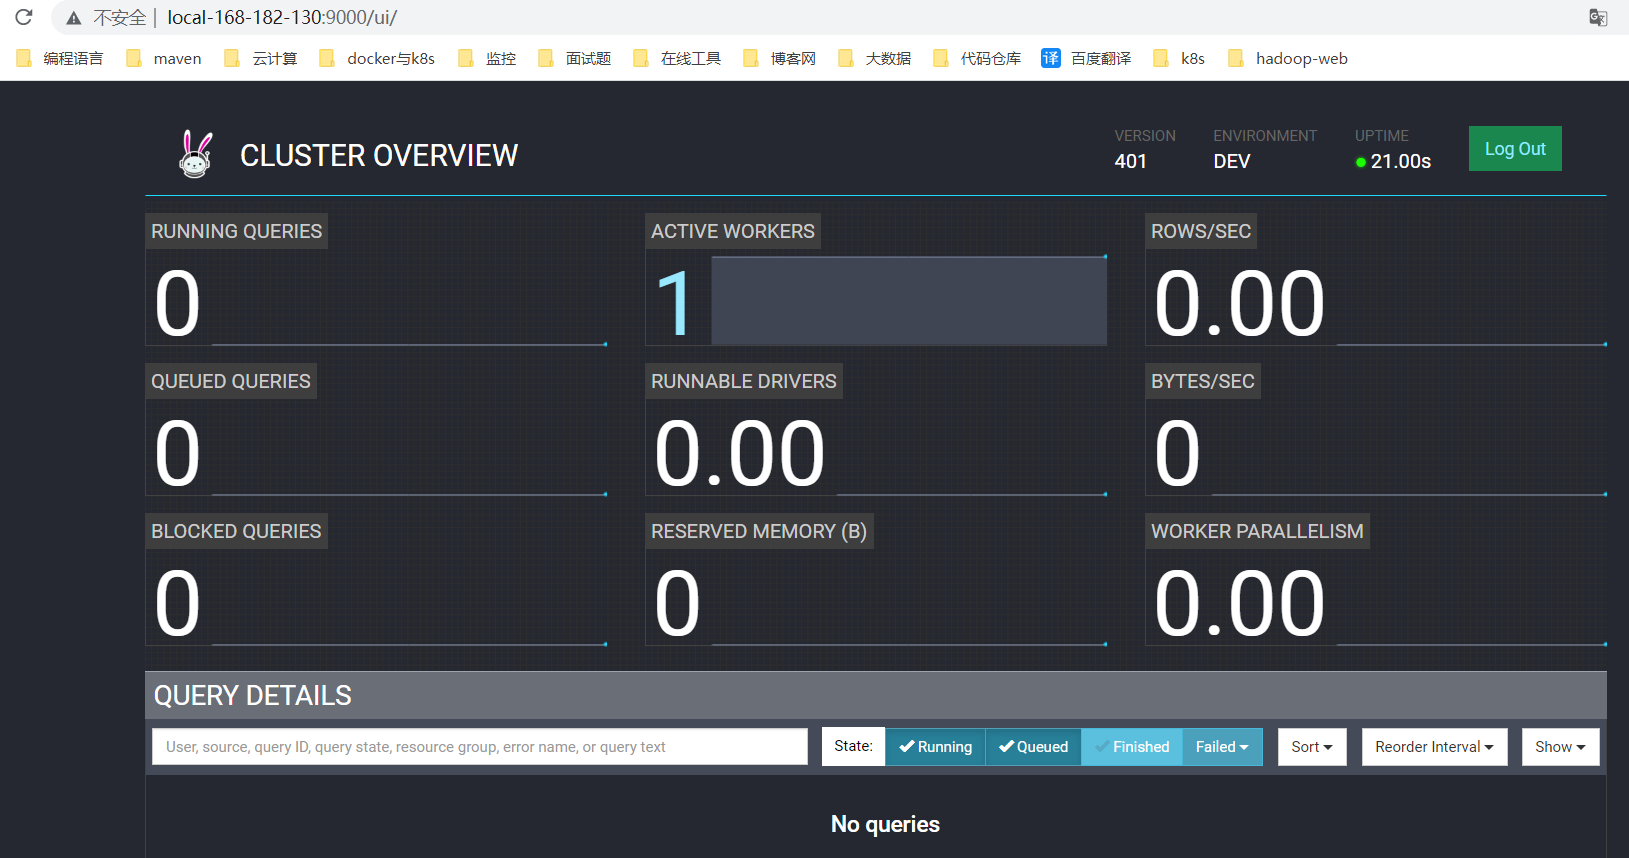
下载对应trino版本的客户端进行连接测试
cd $TRINO_HOME/bin/
wget https://repo1.maven.org/maven2/io/trino/trino-cli/401/trino-cli-401-executable.jar

# 改名,加执行权限
mv trino-cli-401-executable.jar trino
chmod +x trino

# 非交互式连接操作
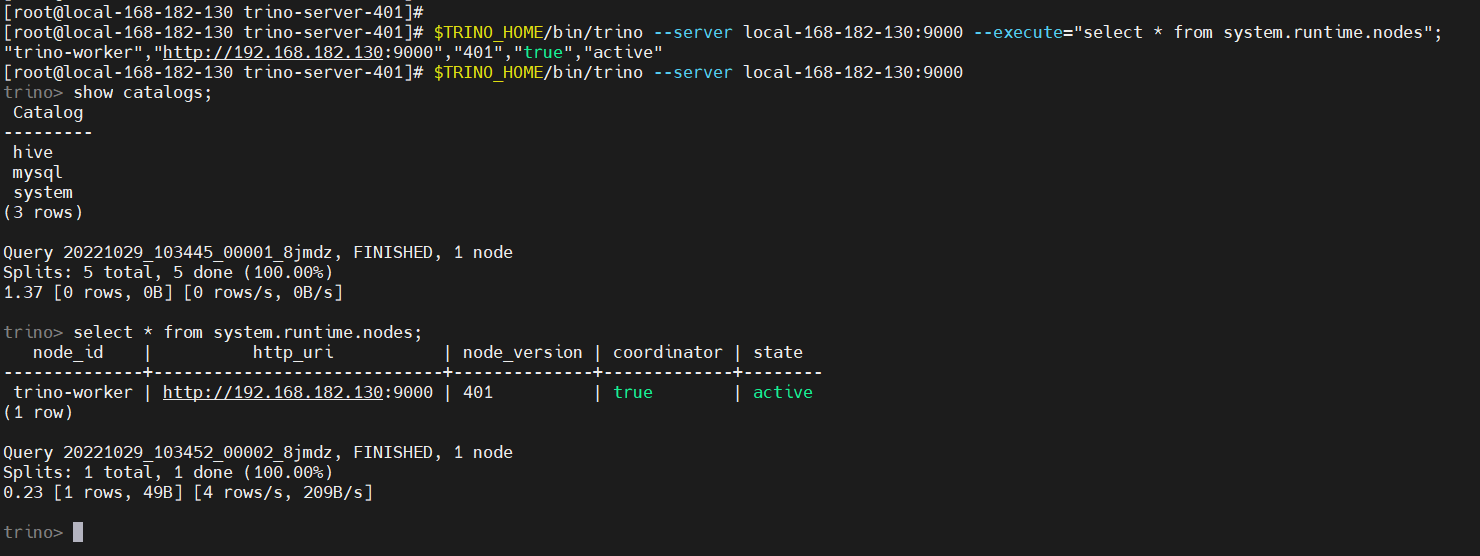
$TRINO_HOME/bin/trino --server local-168-182-130:9000 --execute="select * from system.runtime.nodes";

### 交互式连接测试
$TRINO_HOME/bin/trino --server local-168-182-130:9000

# 命令不区分大小写
show catalogs;
# 查库
show schemas from system;
# 查表
show tables from system.runtime;
# 查具体记录,查看当前node节点记录
select * from system.runtime.nodes;
三、在Hive中创建表关联Hudi表
hive 查询hudi 数据主要是在hive中建立外部表,数据路径指向hdfs 路径,同时hudi 重写了inputformat 和outpurtformat。因为hudi 在读的数据的时候会读元数据来决定我要加载那些parquet文件,而在写的时候会写入新的元数据信息到hdfs路径下。所以hive 要集成hudi 查询要把编译的jar 包放到HIVE-HOME/lib 下面。否则查询时找不到inputformat和outputformat的类。
1)添加jar包
cp hudi/hudi-0.12.0/packaging/hudi-hive-sync-bundle/target/hudi-hive-sync-bundle-0.12.0.jar $HIVE_HOME/lib

# 重启metastore服务
nohup hive --service metastore &

# 重启hiverserver2
nohup hive --service hiveserver2 > /dev/null 2>&1 &

# 查看日志
tail -f /tmp/root/hive.log

# 连接
beeline -u jdbc:hive2://local-168-182-130:10000  -n root
2)创建库表关联Hudi
### 1、创建数据库
CREATE DATABASE IF NOT EXISTS hudi_hive;
USE hudi_hive;

### 2、创建hive表,指定数据存储路径,关联hudi表路径。
beeline -u jdbc:hive2://local-168-182-130:10000  -n root

CREATE EXTERNAL TABLE hudi_hive.tbl_customer(
id string,
customer_relationship_id string,
create_date_time string,
update_date_time string,
deleted string,
name string,
idcard string,
birth_year string,
gender string,
phone string,
wechat string,
qq string,
email string,
area string,
leave_school_date string,
graduation_date string,
bxg_student_id string,
creator string,
origin_type string,
origin_channel string,
tenant string,
md_id string
)PARTITIONED BY (day_str string)
ROW FORMAT SERDE
'org.apache.hadoop.hive.ql.io.parquet.serde.ParquetHiveSerDe'
STORED AS INPUTFORMAT
'org.apache.hudi.hadoop.HoodieParquetInputFormat'
OUTPUTFORMAT
'org.apache.hadoop.hive.ql.io.parquet.MapredParquetOutputFormat'
LOCATION
'/hudi-hive/customer_hudi' ;
就会在DFS上创建相关的目录
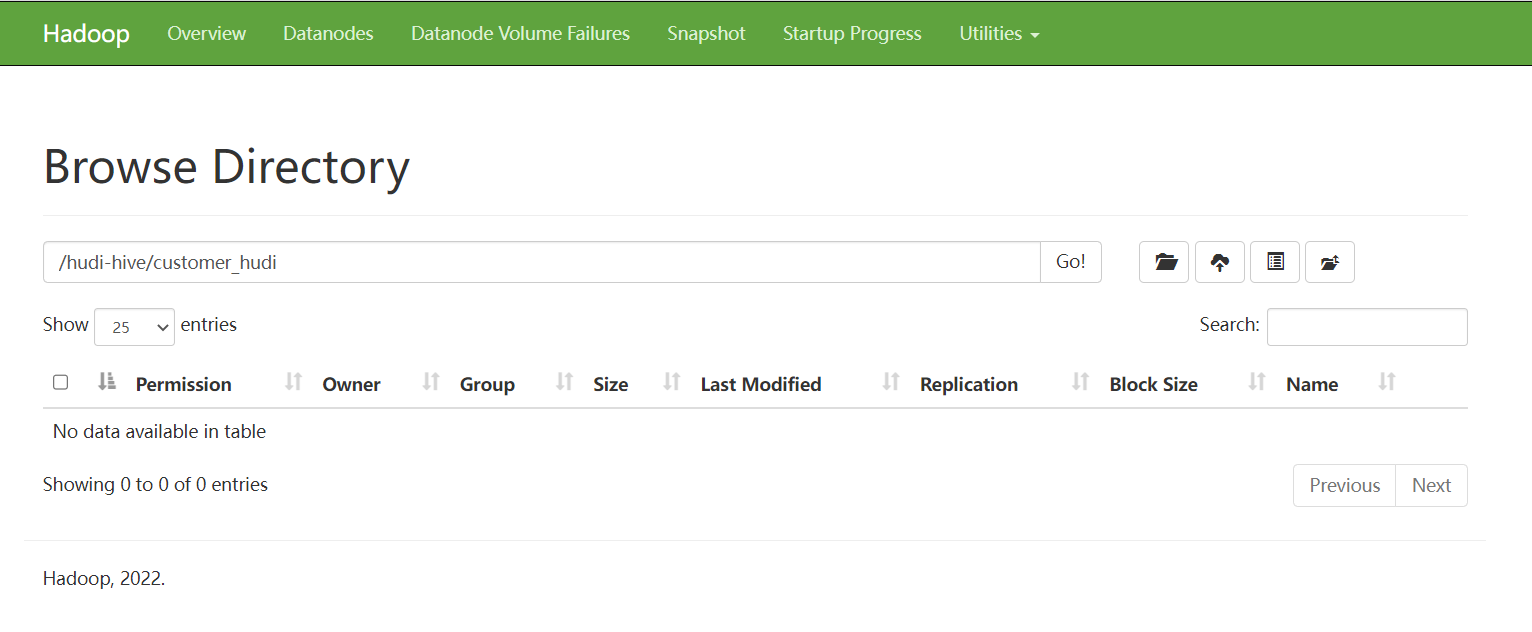
数据来源可以是flink或者spark任务去写数据,根据具体场景而定。
四、Hudi 与 Trino集成
trino 集成hudi 是基于hive catalog, 同样是访问hive 外表进行查询,如果要集成,需要把hudi trino jar包copy 到trino plugin hive插件下面。
cp hudi/hudi-0.12.0/packaging/hudi-trino-bundle/target/hudi-trino-bundle-0.12.0.jar $TRINO_HOME/plugin/hive/
查询
$TRINO_HOME/bin/trino --server local-168-182-130:9000

show schemas from hive;
show tables from hive.hudi_hive;

select * from hive.hudi_hive.tbl_customer;
trino或者presto将需要查询的数据进行统计写入到其它数据源,这是trino/presto的优势,因为trino/presto本身支持很多种数据源(catalog)。
Hudi与Trino(Presto)的集成讲解就先到这里了,有任何疑问欢迎给我留言,后面会持续更新【大数据+云原生】相关的文章,请小伙伴耐心等待~

