Material Design 之 CoordinatorLayout
第一次接触CoordinatorLayout 你可能有这些疑问,CoordinatorLayout 到底是个什么玩意儿呢?它到底能帮我们做什么?我们要了解它,肯定是先看官方文档了。文档的第一句话就非常醒目:CoordinatorLayout is a super-powered FrameLayout,非常明了,CoordinatorLayout 继承于ViewGroup,它就是一个超级强大Framelayout。CoordinatorLayout的作用就是协调子View。
它有两种使用场景:
1,作为 一个应用顶层的装饰布局,也就是一个Activity Layout 的最外一层布局。
2,As a container for a specific interaction with one or more child views,作为一个或多个有特定响应动作的容器。
CoordinatorLayout 可以协调子View,而这些子View 的具体响应动作是通过 behavior 来指定的。如果你有特定的需求,你就需要自己定义一个特定的 Behavior,Google 也给我们定义了一些常用的Behavior,如后面要用的到的 appbar_scrolling_view_behavior ,用于协调 AppbarLayout 与 ScrollView 滑动的Behavior:
<android.support.v4.widget.NestedScrollView
        android:layout_width="match_parent"
        android:layout_height="match_parent"
        app:layout_behavior="@string/appbar_scrolling_view_behavior"
        >
        <TextView
            android:layout_width="wrap_content"
            android:layout_height="wrap_content"
            android:layout_margin="18dp"
            android:text="@string/large_text"/>
    </android.support.v4.widget.NestedScrollView>
还可以看下这篇文章:
CoordinatorLayout的使用如此简单
Material Design 之 AppbarLayout
要认识AppbarLayout,我们先来看一下官方文档
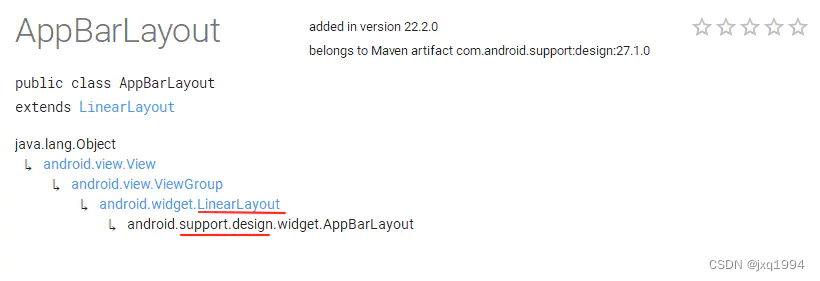
从文档中可以看出,AppBarLayout 存在于 design 包中,是一个垂直布局的 LinearLayout,并且添加了许多材料设计的概念,其主要功能是可以让其子View可以响应对位于与 AppBarLayout 同一层级的某个可滚动View(可理解为 ScrollView)的滚动事件(也就是说,当与 AppBarLayout 同一层级的某个可滚动View发生滚动时,你可以定制让 AppBarLayout 的子View响应这些滚动事件(比如让子View发生滚动,或者保持不动等等)。
注意这里是让AppBarLayout中的子View响应和AppBarLayout同一层级的ScrollView/RecyclerView等的滚动事件。
AppBarLayout 使用
从上面的讲述中,我们可以概括出 AppBarLayout 最主要的3个方面内容:
- 功能:作为父布局,让其子View能够响应与 AppBarLayout 的兄弟节点(ScrollView)的滚动事件。
- 可滚动View:作为 AppBarLayout 的兄弟节点,共享其滚动事件。
- 子View:作为 AppBarLayout 的子控件,响应其传递过来的外部ScrollView的滚动事件。
所以, AppBarLayout 其实更多的是作为一个中介,将兄弟节点的滚动事件传递给到其子View,让子View响应这些事件。
注意:AppbarLayout 严重依赖于CoordinatorLayout,必须用于CoordinatorLayout 的直接子View,如果你将AppbarLayout 放在其他的ViewGroup 里面,那么它的这些功能是无效的。
通过使用 CoordinatorLayout 包裹 AppBarLayout 和 ScrollView,并提供适当的 Behavior,就可以完成这两者的交互了。而这个 Behavior 就是 AppBarLayout.ScrollingViewBehavior,我们可以直接为ScrollView绑定这个 AppBarLayout.ScrollingViewBehavior(绑定的方法可以通过配置xml文件:app:layout_behavior="@string/appbar_scrolling_view_behavior",这个 Google 为我们提供的appbar_scrolling_view_behavior其实就是 AppBarLayout.ScrollingViewBehavior 的类名:android.support.design.widget.AppBarLayout$ScrollingViewBehavior),这样,AppBarLayout 就能接收到ScrollView的滚动事件了。
如何定制子View响应滚动的行为,并且其行为都有哪些:
上面说了 AppbarLayout 可以定制当某个可滑动的View滑动手势改变时内部子View的动作,通过app:layout_scrollFlags来指定,那么现在我们就看一下layout_scrollFlags有哪几种动作。layout_scrollFlags有5种动作,分别是 scroll,enterAlways,enterAlwaysCollapsed,exitUntilCollapsed,snap。我们来分别看一下这五种动作的含义和效果。
代码如下:
<?xml version="1.0" encoding="utf-8"?>
<android.support.design.widget.CoordinatorLayout xmlns:android="http://schemas.android.com/apk/res/android"
    xmlns:app="http://schemas.android.com/apk/res-auto"
    android:layout_width="match_parent"
    android:layout_height="match_parent">

    <android.support.design.widget.AppBarLayout
        android:layout_width="match_parent"
        android:layout_height="wrap_content">

        <android.support.v7.widget.Toolbar
            android:id="@+id/toolbar"
            android:layout_width="match_parent"
            android:layout_height="200dp"
            android:background="?attr/colorPrimary"
            android:minHeight="?android:attr/actionBarSize"
            app:layout_scrollFlags="scroll|exitUntilCollapsed"
            app:title="I am Toolbar"
            app:titleMarginTop="140dp"
            app:titleTextAppearance="@style/ToolbarTitle">

        </android.support.v7.widget.Toolbar>
    </android.support.design.widget.AppBarLayout>

    <android.support.v4.widget.NestedScrollView
        android:layout_width="match_parent"
        android:layout_height="wrap_content"
        app:layout_behavior="@string/appbar_scrolling_view_behavior">

        <TextView
            android:layout_width="match_parent"
            android:layout_height="wrap_content"
            android:text="@string/large_text" />
    </android.support.v4.widget.NestedScrollView>

</android.support.design.widget.CoordinatorLayout>
1)
scroll:子View会跟随滚动事件一起发生移动。效果就如同子View是与ScrollView一体。
具体效果如下图所示:app:layout_scrollFlags="scroll"
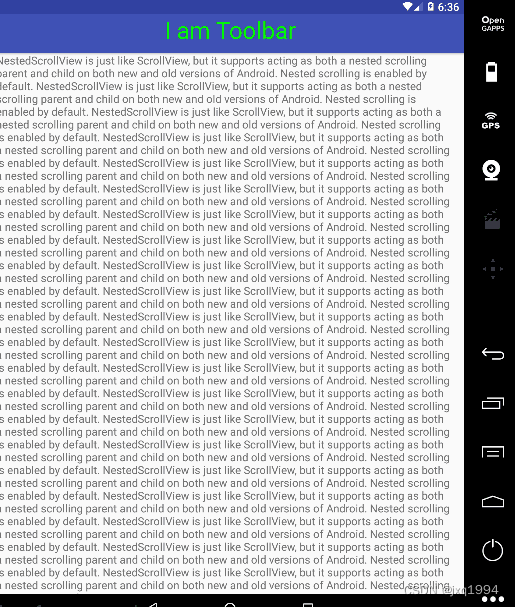
从效果图中可以看到,app:layout_scrollFlags="scroll"的效果就是:当ScrollView滚动时, AppBarLayout 的子View也跟随一起滚动,就好像子View是隶属于ScrollView一样。
2)
enterAlways:当ScrollView向下 滚动时,子View会向下 滚动,直到达到最小高度。
效果图如下:app:layout_scrollFlags="scroll|enterAlways"
简单的说,enterAlways的效果就是:向下滚动时,当 AppBarLayout 未达到其最小高度时,滚动事件由其子View消费(即子View滚动);当达到最小高度后,滚动事件由ScrollView消费(即ScrollView滚动)。
结合scroll|enterAlways可以达到的效果就是:ScrollView向上滚动时,Toolbar(AppBarLayout 子View)移出屏幕;ScrollView向下滚动时,Toolbar 进入屏幕。
3)
enterAlwaysCollapsed:该选项是enterAlways的附加选项,一般跟enterAlways一起使用,它的效果是:当ScrollView向下滚动时,子View会向下滚动,直到达到最小高度(到此为止是enterAlways的效果),然后当ScrollView滚动到顶部时,子View又会响应滚动事件,继续向下滚动,直到子View完全显示。
效果图如下:app:layout_scrollFlags="scroll|enterAlways|enterAlwaysCollapsed",这里为了让效果出现,将子View大小设置为200dp。
简单的说,enterAlwaysCollapsed的效果就是:向下滚动时,滚动事件由其子View消费(即子View滚动),直到达到子View的最小高度;当达到最小高度后,滚动事件由ScrollView消费(即ScrollView滚动),直到达到ScrollView的顶部;当达到ScrollView的顶部时,滚动事件由子View消费(即子View滚动),直到子View完全显示。
4)
exitUntilCollapsed:当ScrollView向上 滚动时,子View会向上 滚动,直到达到最小高度。
效果图如下:app:layout_scrollFlags="scroll|exitUntilCollapsed",这里为了让效果出现,将子View大小设置为200dp。
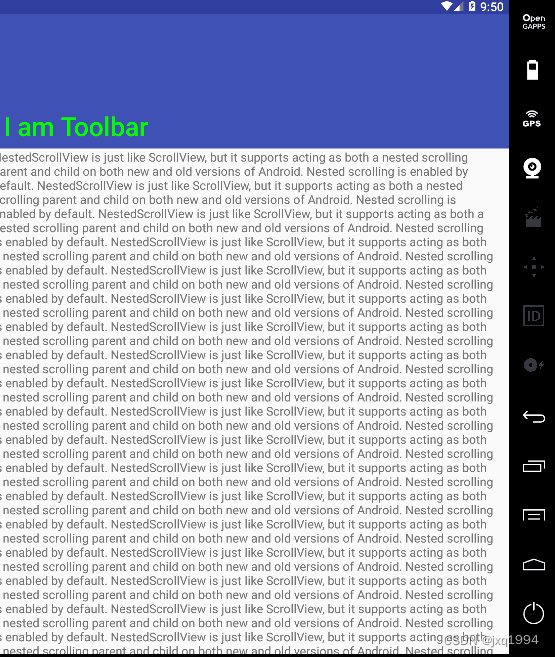
简单的说,exitUntilCollapsed的效果就是:向上滚动时,当 AppBarLayout 的子View未达到其最小高度时,滚动事件由子View消费(即子View滚动);当达到最小高度后,滚动事件由ScrollView消费(即ScrollView滚动)。
5)
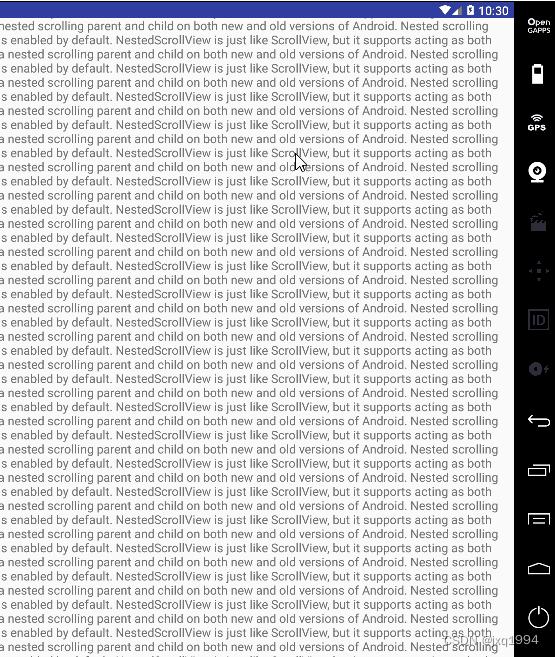
snap:该选项效果为:当我们滑动ScrollView时,如果此时ScrollView位于顶部,那么滚动事件由AppBarLayout的子View接收;当AppBarLayout滑出屏幕的部分大于剩余可视区域,松开手指,AppBarLayout就会自动滑出屏幕;当AppBarLayout滑出屏幕的部分小于剩余可视区域,松开手指,AppBarLayout就会自动滑进屏幕。
效果图如下:app:layout_scrollFlags="scroll|snap"
注:AppBarLayout 的子View的layout_scrollFlags都要加上scroll,否则没有效果。
AppbarLayout 的几个重要方法
-
addOnOffsetChangedListener: 当AppbarLayout 的偏移发生改变的时候回调,也就是子View滑动。 -
getTotalScrollRange: 返回AppbarLayout 所有子View的滑动范围 -
removeOnOffsetChangedListener: 移除监听器 -
setExpanded (boolean expanded, boolean animate):设置AppbarLayout 是展开状态还是折叠状态,animate 参数控制切换到新的状态时是否需要动画 -
setExpanded (boolean expanded): 设置AppbarLayout 是展开状态还是折叠状态,默认有动画
Material Design之 CollapsingToolbarLayout
CollapsingToolbarLayout 是对Toolbar的包装并且实现了折叠app bar效果,使用时,要作为 AppbarLayout 的直接子View。CollapsingToolbarLayout有以下特性:
常用属性
//是否显示标题
app:titleEnabled="true"
//标题内容
app:title="CollapsingToolbarLayout"
//扩展后Title的位置
app:expandedTitleGravity="left|bottom"
//收缩后Title的位置
app:collapsedTitleGravity="left"
//CollapsingToolbarLayout收缩后Toolbar的背景颜色
app:contentScrim ="@color/colorPrimary"
//CollapsingToolbarLayout收缩时颜色变化的持续时间
app:scrimAnimationDuration="1200"
//颜色从可见高度的什么位置开始变化
app:scrimVisibleHeightTrigger="150dp"
//状态颜色变化(Android 5.0)
app:statusBarScrim="@color/colorAccent"
//设置滑动组件与手势之间的关系
app:layout_scrollFlags="scroll|exitUntilCollapsed"
对于 Title 当折叠布局完全可见时 Title 变大,可折叠布局随着向上滑动可见范围变小 Title 也变小,可以通过如下方式设置 Title 的颜色,具体如下:
//设置标题
ctlCollapsingLayout.setTitle("CollapsingToolbarLayout");
//设置CollapsingToolbarLayout扩展时的颜色
ctlCollapsingLayout.setExpandedTitleColor(Color.parseColor("#ffffff"));
//设置CollapsingToolbarLayout收缩时的颜色
ctlCollapsingLayout.setCollapsedTitleTextColor(Color.parseColor("#46eada"));
两个标志位
单独在说一下两个重要属性,可以作为一个标志位来记:
layout_scrollFlags
layout_collapseMode
layout_scrollFlags:一般使用 CoordinatorLayout、AppBarLayout等这些组件构成的界面,一般都有一个滚动视图,如 NestedScrollView,滚动视图一般设置了系统默认的 Behavior,我们在前面介绍过了。
layout_collapseMode:layout_collapseMode 有两个值可以选择,如果设置了 pin 的 View 会随着页面向上滚动固定到顶部,如果设置了 parallax 的 View 会随着页面的滚动而滚动,此时可以结合另一个属性 layout_collapseParallaxMultiplier 形成视差滚动的效果。
折叠标题栏
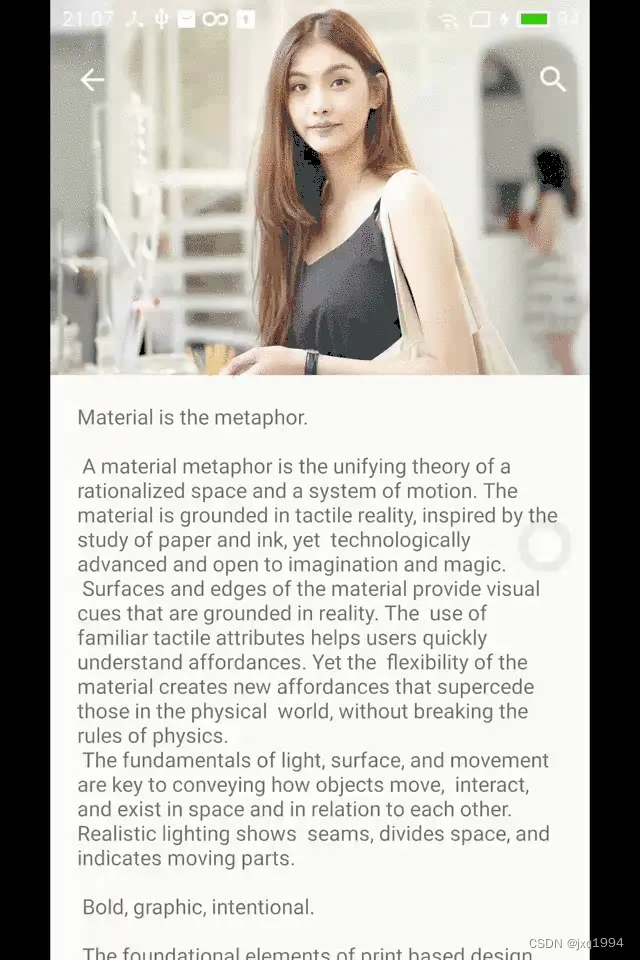
下面我们就结合这三个玩意来实现一个可折叠的标题栏,一般这种标题栏都要求是沉浸式标题栏,也就是将图片延申至状态栏。
关于沉浸式状态栏的实现,要明白一个重要的属性:
android:fitsSystemWindows
具体的含义可以看一下郭神的文章:
再学一遍android:fitsSystemWindows属性
我们只讲实现:

首先,为Activity提供一个NoActionBar的主题:
### themes.xml
    <style name="NoStatusBarTheme" parent="Theme.Design.NoActionBar">
        <!-- Status bar color. -->
        <item name="android:statusBarColor">@android:color/transparent</item>
    </style>
### AndroidManifest.xml
 <activity
            android:name=".coordinatorlayout.CoordinatorActivity"
            android:theme="@style/NoStatusBarTheme"
            android:launchMode="singleTask"/>
在Activity的布局文件中:
<?xml version="1.0" encoding="utf-8"?>
<androidx.coordinatorlayout.widget.CoordinatorLayout xmlns:android="http://schemas.android.com/apk/res/android"
    xmlns:app="http://schemas.android.com/apk/res-auto"
    android:layout_width="match_parent"
    android:layout_height="match_parent"
    android:fitsSystemWindows="true"
    android:orientation="vertical">
    <com.google.android.material.appbar.AppBarLayout
        android:id="@+id/appbar_layout"
        android:layout_width="match_parent"
        android:layout_height="wrap_content"
        android:fitsSystemWindows="true">
        <com.google.android.material.appbar.CollapsingToolbarLayout
            android:id="@+id/collapsing_toolbar"
            android:layout_width="match_parent"
            android:layout_height="300dp"
            app:layout_scrollFlags="scroll|exitUntilCollapsed"
            app:title="AppbarLayout"
            app:titleEnabled="false"
            app:titleTextColor="@color/white"
            app:expandedTitleGravity="right|bottom"
            app:collapsedTitleGravity="center"
            app:statusBarScrim="@android:color/transparent"
            android:fitsSystemWindows="true">
            <ImageView
                android:layout_width="match_parent"
                android:layout_height="match_parent"
                android:scaleType="fitXY"
                android:src="@mipmap/item1"
                android:visibility="visible"
                app:layout_collapseMode="parallax"
                app:layout_collapseParallaxMultiplier="0.6"
                android:fitsSystemWindows="true"/>

            <androidx.appcompat.widget.Toolbar
                android:id="@+id/toolbar"
                android:layout_width="match_parent"
                android:layout_height="?attr/actionBarSize"
                android:minHeight="?attr/actionBarSize"
                app:layout_collapseMode="pin"
                app:navigationIcon="@drawable/ic_baseline_arrow_back_24">
                <ImageView
                    android:id="@+id/search_view"
                    android:layout_width="wrap_content"
                    android:layout_height="wrap_content"
                    android:src="@drawable/ic_baseline_search_24"
                    android:layout_marginRight="20dp"
                    android:layout_gravity="right"/>
            </androidx.appcompat.widget.Toolbar>
        </com.google.android.material.appbar.CollapsingToolbarLayout>
    </com.google.android.material.appbar.AppBarLayout>

    <androidx.core.widget.NestedScrollView
        android:layout_width="match_parent"
        android:layout_height="wrap_content"
        android:background="@android:color/holo_green_light"
        app:layout_behavior="@string/appbar_scrolling_view_behavior">

        <TextView
            android:layout_width="wrap_content"
            android:layout_height="wrap_content"
            android:text="@string/large_text" />
    </androidx.core.widget.NestedScrollView>
</androidx.coordinatorlayout.widget.CoordinatorLayout>
在Activity中:
AppBarLayout appBarLayout = findViewById(R.id.appbar_layout);
        CollapsingToolbarLayout collapsingToolbarLayout = findViewById(R.id.collapsing_toolbar);
        appBarLayout.addOnOffsetChangedListener((appBarLayout1, verticalOffset) -> {
            if(Math.abs(verticalOffset) >= appBarLayout1.getTotalScrollRange()){
                collapsingToolbarLayout.setTitleEnabled(true);
            }else{
                collapsingToolbarLayout.setTitleEnabled(false);
            }
        });
如此就完成了效果图上的效果:
我们再来看一下设置了Content scrim(内容纱布) 的效果,也就是在CollapsingToolbarLayout中加上以下属性:
app:contentScrim="@android:color/holo_blue_light"
