STM32G070RBT6基于STM32CubeMX创建定时器中断控制LED闪烁
- 📍相关篇《【硬件开源电路】STM32G070RBT6开发板》
- 🌺配置内容演示:

📚功能介绍
📑通过STM32CubeMX配置定时器
1和定时器3分别作为两个led的定时闹钟。这里作为演示,当然使用一个定时器,通过轮询方式,实现多个led不定长时间闪烁也是可以的。
📝重写定时器中断回调函数内容
🍁在main.c中,相应位置添加如下代码:
#include <stdio.h>//用于调用printf函数打印,需要在target选项中勾选‘Use MicroLib’
#define led_shine_time 1000 //定时时长
#define led_shine_time2 1000
uint16_t cnt1,cnt2;
void HAL_TIM_PeriodElapsedCallback(TIM_HandleTypeDef *htim)
{
    if(htim->Instance == TIM1)                  //处理TIM1间隔定时中断
    {
				cnt1++;
				if(cnt1 == led_shine_time)
				{
					cnt1 = 0;
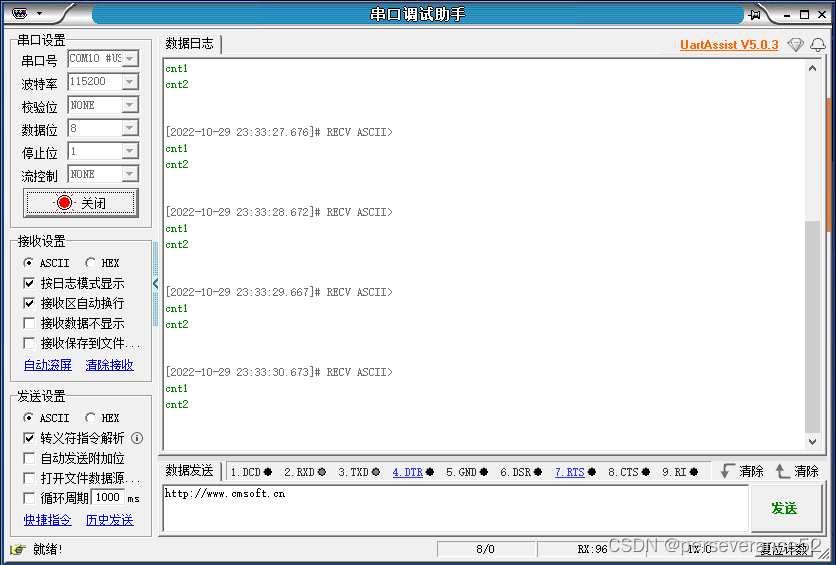
					printf("cnt1 \n");//1s打印一次
        HAL_GPIO_TogglePin(GPIOC,GPIO_PIN_2);
				}
    }
    if(htim->Instance == TIM3)                 //处理TIM3间隔定时中断
    {
			cnt2++;//1s打印一次
			if(cnt2 == led_shine_time2)
			{
				cnt2 = 0;
        HAL_GPIO_TogglePin(GPIOC,GPIO_PIN_3);
				printf("cnt2 \n");
			}
    }
}
- 🚩在
usart.c文件中添加如下内容:
#include "stdio.h"
/*可调用printf*/
int fputc(int ch,FILE *f)
{
    /*&huart1指的是串口1,如果用别的串口就修改数字*/
    HAL_UART_Transmit(&huart1 , (uint8_t *)&ch , 1 , 0xffff);
    return ch;
}
- 🌿串口调试信息打印
⛳程序源码
链接:https://pan.baidu.com/s/1UTPwtcE5xfC4EbIya-DRDA
提取码:e5ez
