前言
SeaTunnel(先前称为WaterDrop)是一个分布式、高性能、易于扩展的数据集成平台,旨在实现海量数据的同步和转换。它支持多种数据处理引擎,包括Apache Spark和Apache Flink,并在某个版本中引入了自主研发的Zeta引擎。SeaTunnel不仅适用于离线数据同步,还能支持CDC(Change Data Capture)实时数据同步,这使得它在处理多样化数据集成场景时表现出色。
本节内容作为官方的一个补充测验,快速开始体验吧。
一、Apache Seatunnel是什么?
从官网的介绍看:
Next-generation high-performance, distributed, massive data integration tool.
通过这几个关键词你能看到它的定位:下一代,高性能,分布式,大规模数据集成工具。
那到底好不好用呢?
二、安装
- 下载
https://seatunnel.apache.org/download
推荐:v2.3.5
- 安装
环境:Java8
安装插件:修改 config/plugin_config 以下是一些常用的,不要的暂时不装。
--connectors-v2--
connector-cdc-mysql
connector-clickhouse
connector-file-local
connector-hive
connector-jdbc
connector-kafka
connector-redis
connector-doris
connector-fake
connector-console
connector-elasticsearch
--end--
然后执行:
➜ seatunnel bin/install-plugin.sh 2.3.5
等待执行完毕,就安装完了,很简单。
三、测试
1. 测试 local模式下的用例
修改下模板的测试用例,然后执行如下命令:
bin/seatunnel.sh --config ./config/v2.batch.config -e local

任务的配置很简单:
这里使用了FakeSource来模拟输出两列,通过设置并行度=2 来打印 16 条输出数据。
2024-07-01 21:56:06,617 INFO  [o.a.s.c.s.u.ConfigBuilder     ] [main] - Parsed config file:
{
    "env" : {
        "parallelism" : 2,
        "job.mode" : "BATCH",
        "checkpoint.interval" : 10000
    },
    "source" : [
        {
            "schema" : {
                "fields" : {
                    "name" : "string",
                    "age" : "int"
                }
            },
            "row.num" : 16,
            "parallelism" : 2,
            "result_table_name" : "fake",
            "plugin_name" : "FakeSource"
        }
    ],
    "sink" : [
        {
            "plugin_name" : "Console"
        }
    ]
}

 任务的输出信息,这里的输出组件是 Console所以打印到了控制台
2024-07-01 21:56:07,559 INFO  [o.a.s.c.s.f.s.FakeSourceReader] [BlockingWorker-TaskGroupLocation{jobId=860156818549112833, pipelineId=1, taskGroupId=30000}] - Closed the bounded fake source
2024-07-01 21:56:07,561 INFO  [.a.s.c.s.c.s.ConsoleSinkWriter] [st-multi-table-sink-writer-1] - subtaskIndex=0  rowIndex=1:  SeaTunnelRow#tableId=fake SeaTunnelRow#kind=INSERT : hECbG, 520364021
2024-07-01 21:56:07,561 INFO  [.a.s.c.s.c.s.ConsoleSinkWriter] [st-multi-table-sink-writer-1] - subtaskIndex=1  rowIndex=1:  SeaTunnelRow#tableId=fake SeaTunnelRow#kind=INSERT : LnGDW, 105727523
2024-07-01 21:56:07,561 INFO  [.a.s.c.s.c.s.ConsoleSinkWriter] [st-multi-table-sink-writer-1] - subtaskIndex=0  rowIndex=2:  SeaTunnelRow#tableId=fake SeaTunnelRow#kind=INSERT : UYXBT, 1212484110
2024-07-01 21:56:07,561 INFO  [.a.s.c.s.c.s.ConsoleSinkWriter] [st-multi-table-sink-writer-1] - subtaskIndex=1  rowIndex=2:  SeaTunnelRow#tableId=fake SeaTunnelRow#kind=INSERT : NYiCn, 1208734703
2024-07-01 21:56:07,561 INFO  [.a.s.c.s.c.s.ConsoleSinkWriter] [st-multi-table-sink-writer-1] - subtaskIndex=0  rowIndex=3:  SeaTunnelRow#tableId=fake SeaTunnelRow#kind=INSERT : cSZan, 151817804
任务的统计信息:
***********************************************
           Job Statistic Information
***********************************************
Start Time                : 2024-07-01 21:56:06
End Time                  : 2024-07-01 21:56:08
Total Time(s)             :                   2
Total Read Count          :                  32
Total Write Count         :                  32
Total Failed Count        :                   0
***********************************************
2. 使用 Flink引擎
在上面的测试用例中可以看到如下的日志输出:
Discovery plugin jar for: PluginIdentifier{engineType='seatunnel', pluginType='source', pluginName='FakeSource'
这表示默认情况下它使用的是 seatunnel engine 执行的,官方称之为 zeta 。 这一块内容我们先看下 Flink引擎这边是如何执行的。
-
下载安装 flink1.17
https://nightlies.apache.org/flink/flink-docs-stable/docs/try-flink/local_installation/启动local cluster 模式
➜ flink bin/start-cluster.sh Starting cluster. Starting standalonesession daemon on host MacBook-Pro-2.local. Starting taskexecutor daemon on host MacBook-Pro-2.local. -
配置环境变量
➜ config cat seatunnel-env.sh # Home directory of spark distribution. SPARK_HOME=${SPARK_HOME:-/Users/mac/apps/spark} # Home directory of flink distribution. FLINK_HOME=${FLINK_HOME:-/Users/mac/apps/flink} -
修改slot插槽数量为大于等于 2
为什么?因为默认的配置中配置了 2 个并行度,而 local启动的默认情况下只有个插槽可供使用,因此任务无法运行。

默认启动后资源插槽:

提交程序运行后,发现一直无法对 sourcez做任务切分:

这是因为 job 的并行度是 2,如下所示:
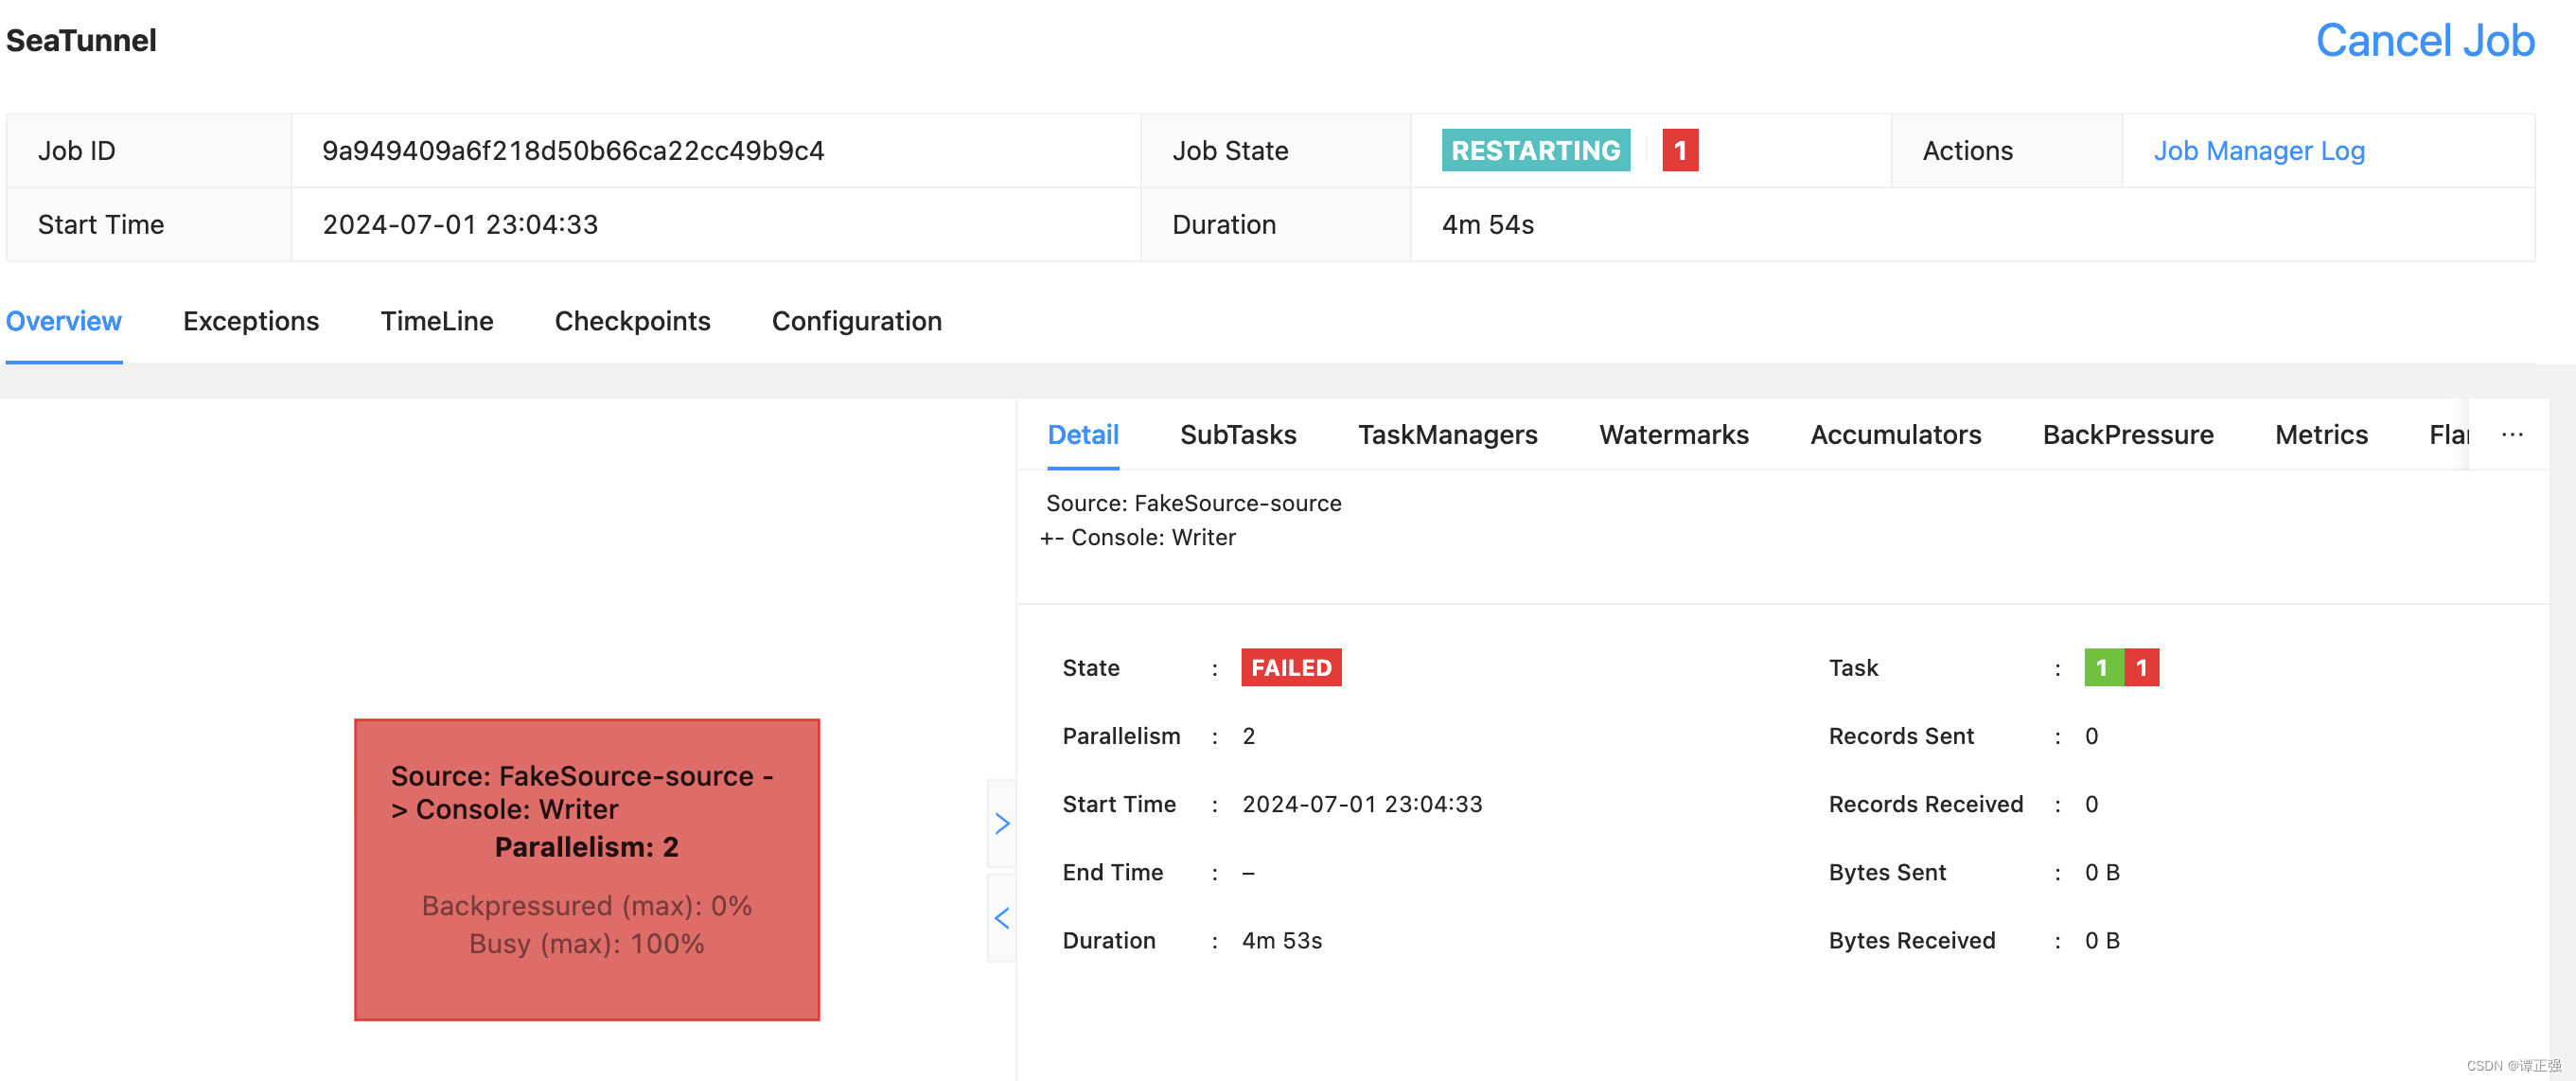

因此需要修改插槽数量才可以运行,官方这点可没说清楚,需要注意下。
-
运行测试用例
➜  seatunnel bin/start-seatunnel-flink-15-connector-v2.sh --config ./config/v2.streaming.conf.template
Execute SeaTunnel Flink Job: ${FLINK_HOME}/bin/flink run -c org.apache.seatunnel.core.starter.flink.SeaTunnelFlink /Users/mac/server/apache-seatunnel-2.3.5/starter/seatunnel-flink-15-starter.jar --config ./config/v2.streaming.conf.template --name SeaTunnel
Job has been submitted with JobID 9a949409a6f218d50b66ca22cc49b9c4
现在我们修改插槽数量为 2,测试如下:
访问:http://localhost:8081/#/overview

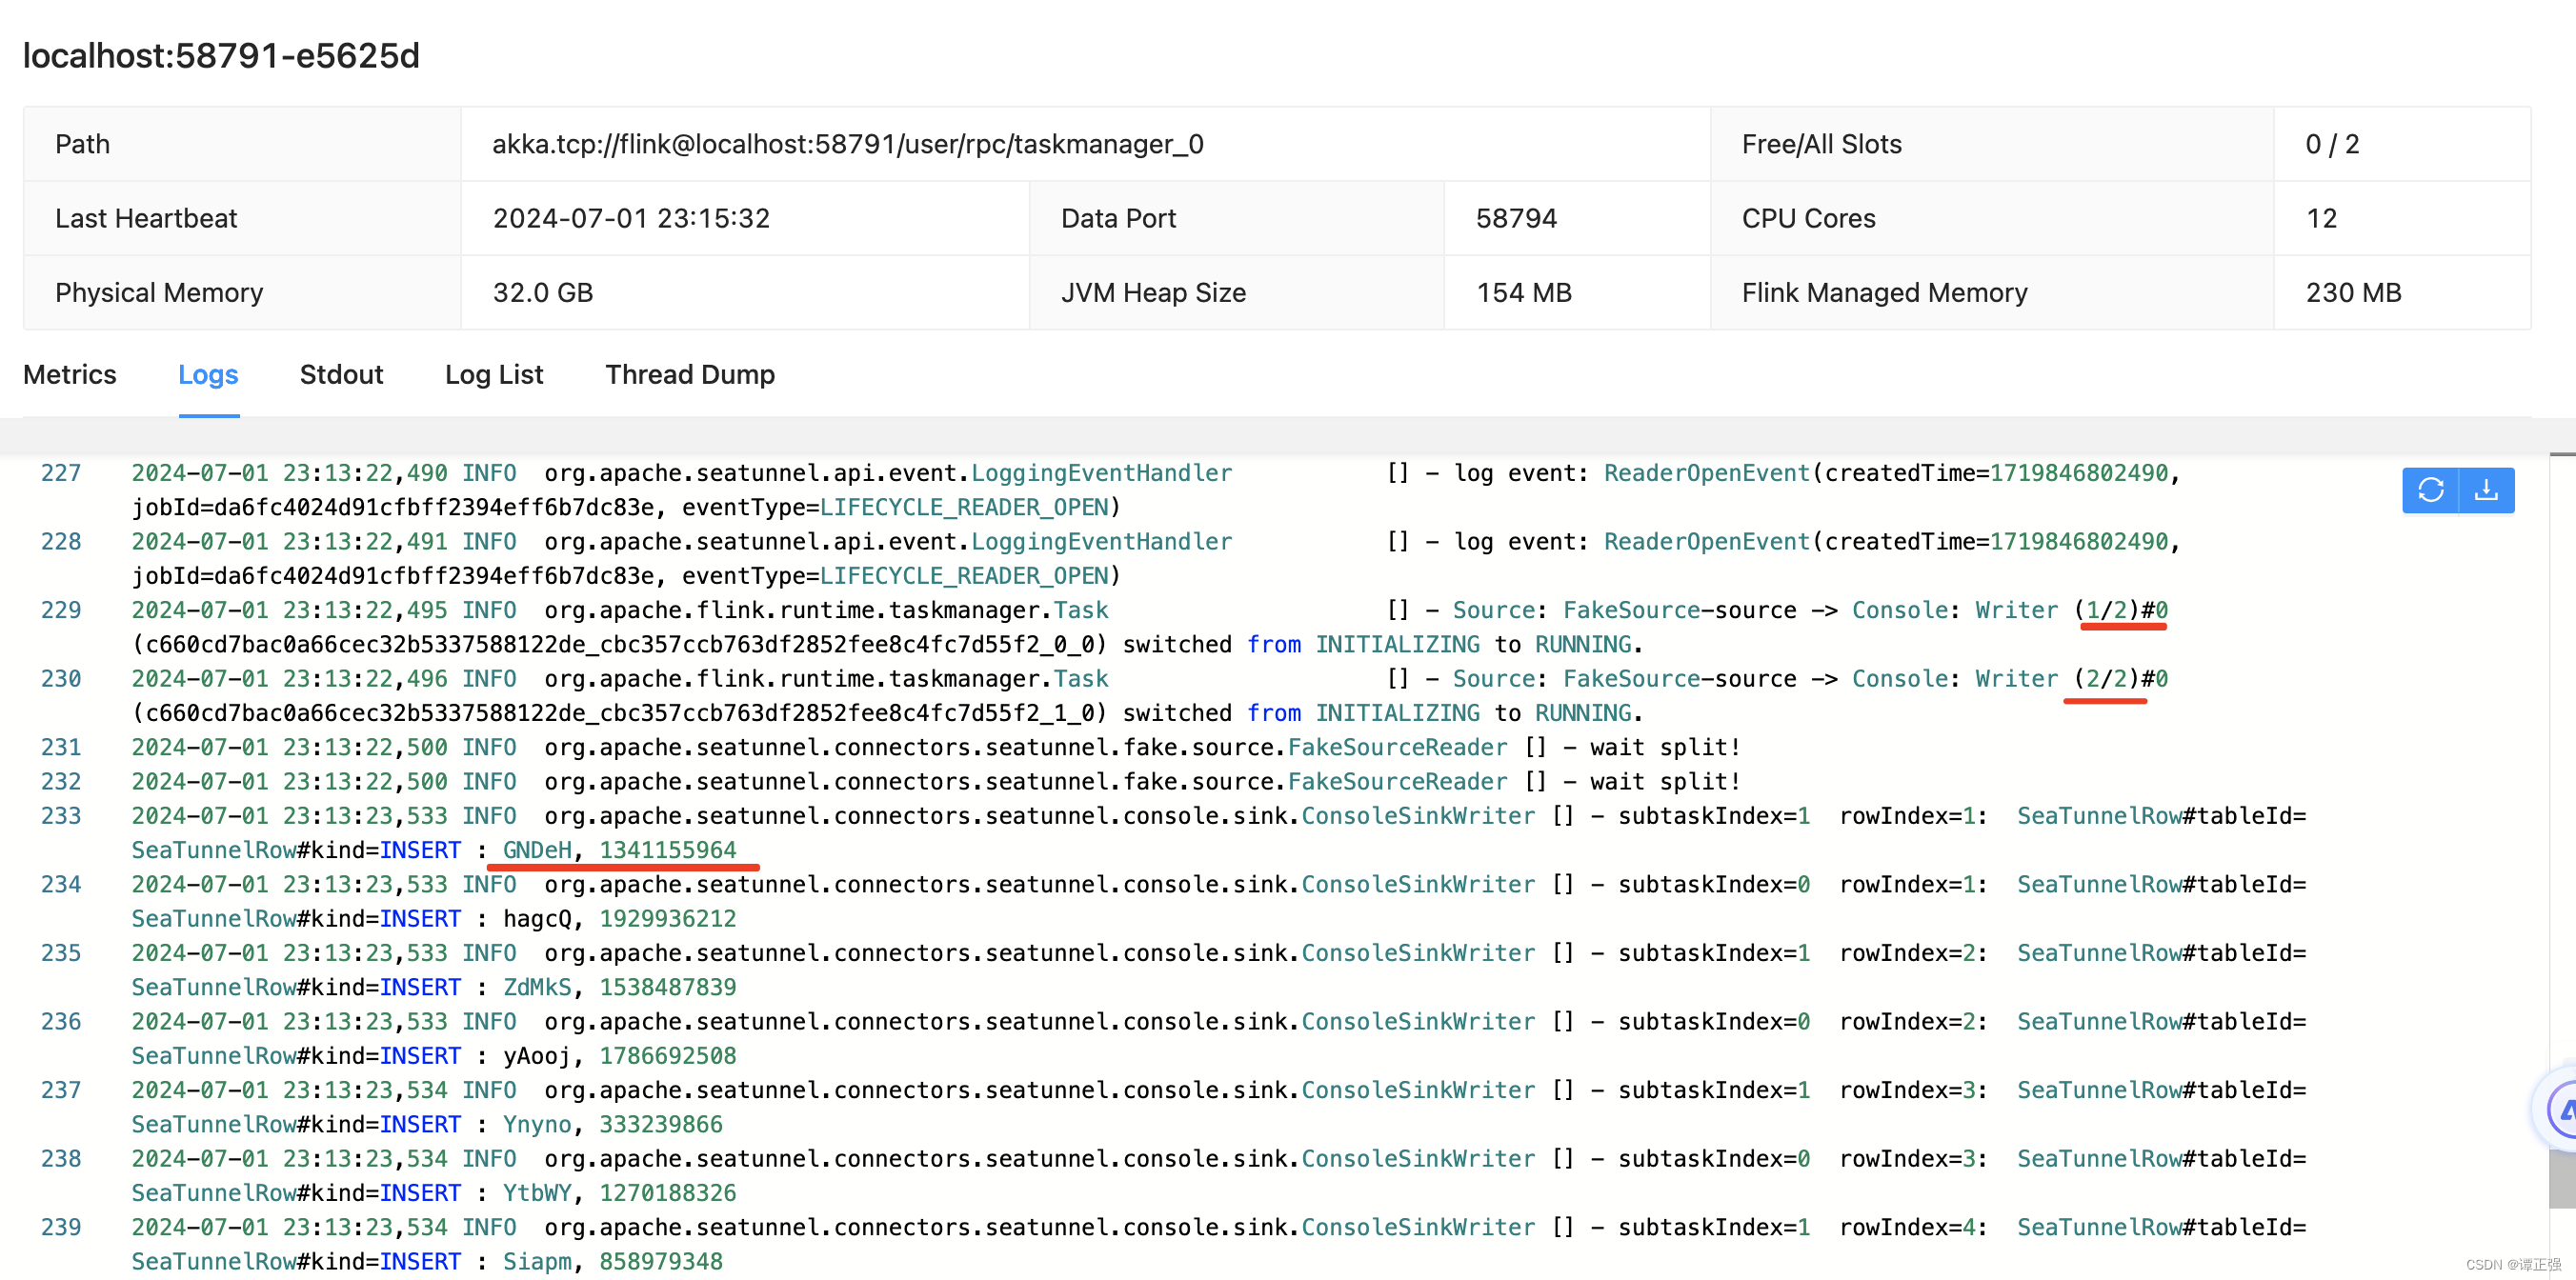
TaskManager输出日志如下:
3. 使用 Spark引擎
- 提交命令
➜  seatunnel bin/start-seatunnel-spark-3-connector-v2.sh \
--master 'local[4]' \
--deploy-mode client \
--config ./config/v2.streaming.conf.template

Execute SeaTunnel Spark Job: ${SPARK_HOME}/bin/spark-submit --class "org.apache.seatunnel.core.starter.spark.SeaTunnelSpark" --name "SeaTunnel" --master "local[4]" --deploy-mode "client" --jars "/Users/mac/server/seatunnel/lib/seatunnel-transforms-v2.jar,/Users/mac/server/seatunnel/lib/seatunnel-hadoop3-3.1.4-uber.jar,/Users/mac/server/seatunnel/connectors/connector-fake-2.3.5.jar,/Users/mac/server/seatunnel/connectors/connector-console-2.3.5.jar" --conf "job.mode=STREAMING" --conf "parallelism=2" --conf "checkpoint.interval=2000" /Users/mac/server/apache-seatunnel-2.3.5/starter/seatunnel-spark-3-starter.jar --config "./config/v2.streaming.conf.template" --master "local[4]" --deploy-mode "client" --name "SeaTunnel"
遇到报错:
2024-07-01 23:25:04,610 INFO v2.V2ScanRelationPushDown:
Pushing operators to SeaTunnelSourceTable
Pushed Filters:
Post-Scan Filters:
Output: name#0, age#1

Exception in thread "main" java.lang.NoClassDefFoundError: org/apache/spark/sql/connector/write/Write
看样子是缺少包导致的导致的,可以参见 issue讨论https://github.com/apache/seatunnel/issues/4879 貌似需要 spark 版本 >=3.2 ,而我的是 3.1.1 因此当前这个问题暂时无解。
Since spark 3.2.0, buildForBatch and buildForStreaming have been deprecated in org.apache.spark.sql.connector.write.WriteBuilder. So you should keep spark version >= 3.2.0.
于是,我便下载了 3.2.4(spark -> spark-3.2.4-bin-without-hadoop) 测试后出现了新的问题。
Exception in thread "main" java.lang.NoClassDefFoundError: org/apache/log4j/spi/Filter
	at java.lang.Class.getDeclaredMethods0(Native Method)
	at java.lang.Class.privateGetDeclaredMethods(Class.java:2701)
	at java.lang.Class.privateGetMethodRecursive(Class.java:3048)
	at java.lang.Class.getMethod0(Class.java:3018)
	at java.lang.Class.getMethod(Class.java:1784)
	at sun.launcher.LauncherHelper.validateMainClass(LauncherHelper.java:684)
	at sun.launcher.LauncherHelper.checkAndLoadMain(LauncherHelper.java:666)
Caused by: java.lang.ClassNotFoundException: org.apache.log4j.spi.Filter
	at java.net.URLClassLoader.findClass(URLClassLoader.java:387)
	at java.lang.ClassLoader.loadClass(ClassLoader.java:418)
	at sun.misc.Launcher$AppClassLoader.loadClass(Launcher.java:359)
	at java.lang.ClassLoader.loadClass(ClassLoader.java:351)
	... 7 more
这说的是 log4j的 jar包似乎不存在,由于我们使用的 spark 版本没有 hadoop的依赖,因此需要在 spark-env.sh里面配置相关的属性,如下:
export JAVA_HOME=/Library/Java/JavaVirtualMachines/jdk-1.8.jdk/Contents/Home
export HADOOP_HOME=/Users/mac/apps/hadoop
export HADOOP_CONF_DIR=/Users/mac/apps/hadoop/etc/hadoop
export SPARK_DIST_CLASSPATH=$(/Users/mac/apps/hadoop/bin/hadoop classpath)
export SPARK_MASTER_HOST=localhost
export SPARK_MASTER_PORT=7077
再次提交测试后,结果如下:
24/07/02 13:40:19 INFO ConfigBuilder: Parsed config file:
{
    "env" : {
        "parallelism" : 2,
        "job.mode" : "STREAMING",
        "checkpoint.interval" : 2000
    },
    "source" : [
        {
            "schema" : {
                "fields" : {
                    "name" : "string",
                    "age" : "int"
                }
            },
            "row.num" : 16,
            "parallelism" : 2,
            "result_table_name" : "fake",
            "plugin_name" : "FakeSource"
        }
    ],
    "sink" : [
        {
            "plugin_name" : "Console"
        }
    ]
}

24/07/02 13:40:19 INFO SparkContext: Running Spark version 3.2.4
24/07/02 13:40:25 INFO FakeSourceReader: wait split!
24/07/02 13:40:25 INFO FakeSourceReader: wait split!
24/07/02 13:40:25 INFO FakeSourceSplitEnumerator: Calculated splits for table fake successfully, the size of splits is 2.
24/07/02 13:40:25 INFO FakeSourceSplitEnumerator: Calculated splits for table fake successfully, the size of splits is 2.
24/07/02 13:40:25 INFO FakeSourceSplitEnumerator: Assigned [FakeSourceSplit(tableId=fake, splitId=1, rowNum=16), FakeSourceSplit(tableId=fake, splitId=0, rowNum=16)] to 2 readers.
24/07/02 13:40:25 INFO FakeSourceSplitEnumerator: Calculated splits successfully, the size of splits is 2.
24/07/02 13:40:25 INFO FakeSourceSplitEnumerator: Assigned [FakeSourceSplit(tableId=fake, splitId=1, rowNum=16), FakeSourceSplit(tableId=fake, splitId=0, rowNum=16)] to 2 readers.
24/07/02 13:40:25 INFO FakeSourceSplitEnumerator: Assigning splits to readers 1 [FakeSourceSplit(tableId=fake, splitId=1, rowNum=16)]
24/07/02 13:40:25 INFO FakeSourceSplitEnumerator: Calculated splits successfully, the size of splits is 2.
24/07/02 13:40:25 INFO FakeSourceSplitEnumerator: Assigning splits to readers 0 [FakeSourceSplit(tableId=fake, splitId=0, rowNum=16)]
24/07/02 13:40:26 INFO FakeSourceReader: 16 rows of data have been generated in split(fake_1) for table fake. Generation time: 1719898826259
24/07/02 13:40:26 INFO FakeSourceReader: 16 rows of data have been generated in split(fake_0) for table fake. Generation time: 1719898826259
24/07/02 13:40:26 INFO ConsoleSinkWriter: subtaskIndex=1  rowIndex=1:  SeaTunnelRow#tableId= SeaTunnelRow#kind=INSERT : eMaly, 2131476727
24/07/02 13:40:26 INFO ConsoleSinkWriter: subtaskIndex=0  rowIndex=1:  SeaTunnelRow#tableId= SeaTunnelRow#kind=INSERT : Osfqi, 257240275
24/07/02 13:40:26 INFO ConsoleSinkWriter: subtaskIndex=1  rowIndex=2:  SeaTunnelRow#tableId= SeaTunnelRow#kind=INSERT : BYVKb, 730735331
看结果符合预期,也就是使用 spark 提交 seatunnl引擎的流任务,通过FakeSource模拟两列输出了 16 条数据。看来的确是需要 spark3.2.x版本的才能成功了。
参考
https://www.modb.pro/db/605827
总结
本节主要总结了单机模式下使用 seatunel完成官方示例程序,初步体会使用,其实使用起来还是很简单的,模式同我之前介绍的 DataX如出一辙,可喜的是它有自己的 web页面可以配置,
因此后面我将分享下如何在页面中进行配置同步任务,最后时间允许的情况下,分析起优秀的源码设计思路,千里之行始于足下,要持续学习,持续成长,然后持续分享,再会~。
