本文参考FastAPI教程https://fastapi.tiangolo.com/zh/tutorial
Cookie参数
定义Cookie参数与定义Query和Path参数一样。
具体步骤如下:
- 导入
Cookie:from fastapi import Cookie - 声明
Cookie参数,声明Cookie参数的方式与声明Query和Path参数相同,第一个值是默认值,还可以传递所有验证参数和注释参数
from typing import Annotated

from fastapi import Cookie, FastAPI

app = FastAPI()


@app.get("/items/")
async def read_items(ads_id: Annotated[str | None, Cookie()] = None):
    return {"ads_id": ads_id}
- 必须使用
Cookie声明cookie参数,否则该参数会被解释成查询参数。
测试代码如下:
import requests

# 设置你的 FastAPI 服务地址
base_url = "http://localhost:8000"

# 发送带有 Cookie 的 GET 请求
def test_read_items_with_cookie():
    # 设置 Cookie 值
    cookies = {"ads_id": "your_ads_id_here"}

    # 发送 GET 请求,带上 Cookie
    response = requests.get(f"{base_url}/items/", cookies=cookies)

    # 打印响应内容
    print(response.json())

# 执行测试
if __name__ == "__main__":
    test_read_items_with_cookie()
得到如下结果:
{'ads_id': 'your_ads_id_here'}
Header参数
定义Header参数的方式与定义Query、Path、Cookie参数相同。
步骤如下:
- 导入
Header - 声明
Header参数:使用和Path、Query、Cookie一样的结构定义header参数,第一个值是默认值,还可以传递所有验证参数或注释参数
from typing import Annotated

from fastapi import FastAPI, Header

app = FastAPI()


@app.get("/items/")
async def read_items(user_agent: Annotated[str | None, Header()] = None):
    return {"User-Agent": user_agent}
- 必须使用
Header声明header参数,否则该参数会被解释成查询参数。
自动转换
Header比Path、Query和Cookie提供了更多功能。
大部分标准请求头用连字符分隔,即减号(-)。
但是user-agent这样的变量在Python中是无效的。
因此,默认情况下,Header把参数名中的字符由下划线(_)改为连字符(-)来提取并存档请求头。
同时,HTTP的请求头不区分大小写,可以使用Python标准样式(即snake_case)进行声明。
因此,可以像在Python代码中一样使用user_agent,无需把首字母大写为User_Agent等形式。
如需禁用下划线自动转换为连字符,可以把Header的convert_underscores参数设置为False。
from typing import Annotated

from fastapi import FastAPI, Header

app = FastAPI()


@app.get("/items/")
async def read_items(
    strange_header: Annotated[str | None, Header(convert_underscores=False)] = None,
):
    return {"strange_header": strange_header}
注意,使用 convert_underscores = False 要慎重,有些 HTTP 代理和服务器不支持使用带有下划线的请求头。
重复的请求头
有时,可能需要接收重复的请求头。即同一个请求头有多个值。
类型声明中可以使用list定义多个请求头。
使用Pythonlist可以接收重复请求头所有的值。
例如,声明X-Token多次出现的请求头,可以写成这样:
from typing import Annotated

from fastapi import FastAPI, Header

app = FastAPI()


@app.get("/items/")
async def read_items(x_token: Annotated[list[str] | None, Header()] = None):
    return {"X-Token values": x_token}
与路径操作通信时,以下面的方式发送两个 HTTP 请求头:
X-Token: foo
X-Token: bar
响应结果是:
{
    "X-Token values": [
        "bar",
        "foo"
    ]
}
这部分有疑问,怎么发送两个同样的请求头,如果直接发送字典形式,那么同名的会覆盖。
响应模型
你可以在任意的路径操作中使用response_model参数来声明用于响应的模型:
@app.get()@app.post()@app.put()@app.delete()- 等等
from typing import Any

from fastapi import FastAPI
from pydantic import BaseModel

app = FastAPI()


class Item(BaseModel):
    name: str
    description: str | None = None
    price: float
    tax: float | None = None
    tags: list[str] = []


@app.post("/items/", response_model=Item)
async def create_item(item: Item) -> Any:
    return item


@app.get("/items/", response_model=list[Item])
async def read_items() -> Any:
    return [
        {"name": "Portal Gun", "price": 42.0},
        {"name": "Plumbus", "price": 32.0},
    ]
注意,response_model是【装饰器】方法(get,post等)的一个参数。不像之前的所有参数和请求体,它不属于路径操作函数
它接收的类型与你将为Pydantic模型属性所声明的类型相同,因此它可以是一个Pydantic模型,但也可以是一个由Pydantic模型组成的list,例如List[Item]。
FastAPI将使用此response_model来:
- 将输出数据转换为其声明的类型
- 校验数据
- 在OpenAPI的路径操作中为响应添加一个JSON Schema
- 并在自动生成文档系统中使用
但最重要的是:
- 会将输出数据限制在该模型定义内。
返回与输入相同的数据
现在我们声明一个UserIn模型,它将包含一个明文密码属性。
我们正在使用此模型声明输入数据,并使用同一模型声明输出数据:
from typing import Union

from fastapi import FastAPI
from pydantic import BaseModel, EmailStr

app = FastAPI()


class UserIn(BaseModel):
    username: str
    password: str
    email: EmailStr
    full_name: Union[str, None] = None


# Don't do this in production!
@app.post("/user/")
async def create_user(user: UserIn) -> UserIn:
    return user
现在,每当浏览器使用一个密码创建用户时,API都会在响应中返回相同的密码。
在这个案例中,这可能不算是问题,因为用户自己正在发送密码。
但是,如果我们在其他的路径操作中使用相同的模型,则可能会将用户的密码发送给每个客户端。
永远不要存储用户的明文密码,也不要在响应中发送密码。
添加输出模型
相反,我们可以创建一个有明文密码的输入模型和一个没有明文密码的输出模型:
from typing import Any

from fastapi import FastAPI
from pydantic import BaseModel, EmailStr

app = FastAPI()


class UserIn(BaseModel):
    username: str
    password: str
    email: EmailStr
    full_name: str | None = None


class UserOut(BaseModel):
    username: str
    email: EmailStr
    full_name: str | None = None


@app.post("/user/", response_model=UserOut)
async def create_user(user: UserIn) -> Any:
    return user
这样,即使我们的路径操作函数将会返回包含密码的相同输入用户,我们已经将response_model声明为了不包含密码的UserOut模型,因此,FastAPI将会负责过滤掉未在输出模型中声明的所有数据(使用Pydantic)。
在文档中查看
当你查看自动化文档时,你可以检查输入模型和输出模型是否都具有自己的JSON Schema,并且两种模型都将在交互式API文档中使用。
响应模型编码参数
你的响应模型可以具有默认值,例如:
from typing import List, Union

from fastapi import FastAPI
from pydantic import BaseModel

app = FastAPI()


class Item(BaseModel):
    name: str
    description: Union[str, None] = None
    price: float
    tax: float = 10.5
    tags: List[str] = []


items = {
    "foo": {"name": "Foo", "price": 50.2},
    "bar": {"name": "Bar", "description": "The bartenders", "price": 62, "tax": 20.2},
    "baz": {"name": "Baz", "description": None, "price": 50.2, "tax": 10.5, "tags": []},
}


@app.get("/items/{item_id}", response_model=Item, response_model_exclude_unset=True)
async def read_item(item_id: str):
    return items[item_id]
description: Union[str, None] = None具有默认值None。tax: float = 10.5具有默认值10.5.tags: List[str] = []具有一个空列表作为默认值:[].
但如果它们并没有存储实际的值,你可能想从结果中忽略它们的默认值。
举个例子,当你在NoSQL数据库中保存了许多具有可选属性的模型,但你又不想发送充满默认值的很长的JSON响应。
使用response_model_exclude_unset参数
你可以设置路径操作装饰器的response_model_exclude_unset=True参数:
from typing import List, Union

from fastapi import FastAPI
from pydantic import BaseModel

app = FastAPI()


class Item(BaseModel):
    name: str
    description: Union[str, None] = None
    price: float
    tax: float = 10.5
    tags: List[str] = []


items = {
    "foo": {"name": "Foo", "price": 50.2},
    "bar": {"name": "Bar", "description": "The bartenders", "price": 62, "tax": 20.2},
    "baz": {"name": "Baz", "description": None, "price": 50.2, "tax": 10.5, "tags": []},
}


@app.get("/items/{item_id}", response_model=Item, response_model_exclude_unset=True)
async def read_item(item_id: str):
    return items[item_id]
然后响应中将不会包含那些默认值,而是仅有实际设置的值。
因此,如果你向路径操作发送ID为Foo的商品的请求,则响应(不包括默认值)将为:
{
    "name": "Foo",
    "price": 50.2
}
你还可以使用:
response_model_exclude_defaults=Trueresponse_model_exclude_none=True
参考 Pydantic 文档 中对exclude_defaults和exclude_none的描述。
response_model_include和response_model_exclude
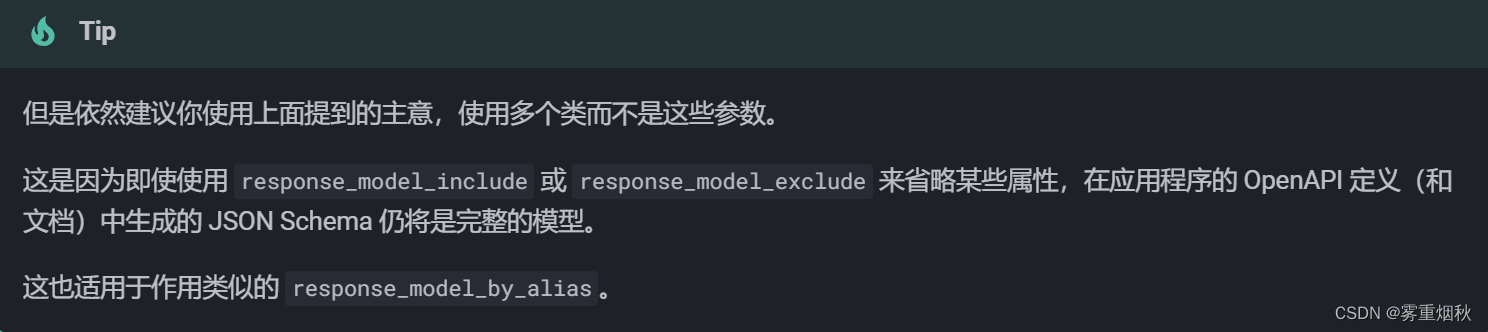
你还可以使用路径操作装饰器的 response_model_include 和 response_model_exclude 参数。
它们接收一个由属性名称 str 组成的 set来包含(忽略其他的)或者排除(包含其他的)这些属性。
如果你只有一个 Pydantic 模型,并且想要从输出中移除一些数据,则可以使用这种快捷方法。
from typing import Union

from fastapi import FastAPI
from pydantic import BaseModel

app = FastAPI()


class Item(BaseModel):
    name: str
    description: Union[str, None] = None
    price: float
    tax: float = 10.5


items = {
    "foo": {"name": "Foo", "price": 50.2},
    "bar": {"name": "Bar", "description": "The Bar fighters", "price": 62, "tax": 20.2},
    "baz": {
        "name": "Baz",
        "description": "There goes my baz",
        "price": 50.2,
        "tax": 10.5,
    },
}


@app.get(
    "/items/{item_id}/name",
    response_model=Item,
    response_model_include={"name", "description"},
)
async def read_item_name(item_id: str):
    return items[item_id]


@app.get("/items/{item_id}/public", response_model=Item, response_model_exclude={"tax"})
async def read_item_public_data(item_id: str):
    return items[item_id]
使用list而不是set
如果你忘记使用 set 而是使用 list 或 tuple,FastAPI 仍会将其转换为 set 并且正常工作:
from typing import Union

from fastapi import FastAPI
from pydantic import BaseModel

app = FastAPI()


class Item(BaseModel):
    name: str
    description: Union[str, None] = None
    price: float
    tax: float = 10.5


items = {
    "foo": {"name": "Foo", "price": 50.2},
    "bar": {"name": "Bar", "description": "The Bar fighters", "price": 62, "tax": 20.2},
    "baz": {
        "name": "Baz",
        "description": "There goes my baz",
        "price": 50.2,
        "tax": 10.5,
    },
}


@app.get(
    "/items/{item_id}/name",
    response_model=Item,
    response_model_include=["name", "description"],
)
async def read_item_name(item_id: str):
    return items[item_id]


@app.get("/items/{item_id}/public", response_model=Item, response_model_exclude=["tax"])
async def read_item_public_data(item_id: str):
    return items[item_id]
更多模型
多个关联模型这种情况很常见。
特别是用户模型,因为:
- 输入模型应该含密码
- 输出模型不应含密码
- 数据库模型需要加密的密码
**千万不要存储用户的明文密码。始终存储可以进行验证的安全哈希值。
如果不了解这方面的知识,请参阅安全性中的章节,了解什么是密码哈希。**
多个模型
下面的代码展示了不同模型处理密码字段的方式,及使用位置的大致思路:
from fastapi import FastAPI
from pydantic import BaseModel, EmailStr

app = FastAPI()


class UserIn(BaseModel):
    username: str
    password: str
    email: EmailStr
    full_name: str | None = None


class UserOut(BaseModel):
    username: str
    email: EmailStr
    full_name: str | None = None


class UserInDB(BaseModel):
    username: str
    hashed_password: str
    email: EmailStr
    full_name: str | None = None


def fake_password_hasher(raw_password: str):
    return "supersecret" + raw_password


def fake_save_user(user_in: UserIn):
    hashed_password = fake_password_hasher(user_in.password)
    user_in_db = UserInDB(**user_in.dict(), hashed_password=hashed_password)
    print("User saved! ..not really")
    return user_in_db


@app.post("/user/", response_model=UserOut)
async def create_user(user_in: UserIn):
    user_saved = fake_save_user(user_in)
    return user_saved
**user_in_dict()简介
Pydantic的.dict()
user_in是类UserIn的Pydantic模型。
Pydantic模型支持.dict方法,能返回包含模型数据的字典。
因此,如果使用如下方式创建Pydantic对象user_in:
user_in = UserIn(username="john", password="secret", email="john.doe@example.com")
就能以如下方式调用:
user_dict = user_in.dict()
现在,变量user_dict中的就是包含数据的字典(变量user_dict是字典,不是Pydantic模型对象)。
以如下方式调用:
print(user_dict)
输出的就是 Python 字典:
{
    'username': 'john',
    'password': 'secret',
    'email': 'john.doe@example.com',
    'full_name': None,
}
解包dict
把字典user_dict以**user_dict形式传递给函数(或类),Python会执行解包操作。它会把user_dict的键和值作为关键字参数直接传递。
因此,接着上面的user_dict继续编写如下代码:
UserInDB(**user_dict)
就会生成如下结果:
UserInDB(
    username="john",
    password="secret",
    email="john.doe@example.com",
    full_name=None,
)
或更精准,直接把可能会用到的内容与user_dict一起使用:
UserInDB(
    username = user_dict["username"],
    password = user_dict["password"],
    email = user_dict["email"],
    full_name = user_dict["full_name"],
)
用其它模型中的内容生成Pydantic模型
上例中,从user_in.dict()中得到了user_dict,下面的代码:
user_dict = user_in.dict()
UserInDB(**user_dict)
等效于:
UserInDB(**user_in.dict())
因为 user_in.dict() 是字典,在传递给 UserInDB 时,把 ** 加在 user_in.dict() 前,可以让 Python 进行解包。
这样,就可以用其它Pydantic模型中的数据生成Pydantic模型。
解包dict和更多关键字
接下来,继续添加关键字参数hashed_password=hashed_password,例如:
UserInDB(**user_in.dict(), hashed_password=hashed_password)
输出结果如下:
UserInDB(
    username = user_dict["username"],
    password = user_dict["password"],
    email = user_dict["email"],
    full_name = user_dict["full_name"],
    hashed_password = hashed_password,
)
减少重复
FastAPI的核心思想就是减少代码重复。
代码重复会导致bug、安全问题、代码失步等问题(更新了某个位置的代码,但没有同步更新其它位置的代码)。
上面的这些模型共享了大量数据,拥有重复的属性名和类型。
FastAPI可以做到更好。
声明UserBase模型作为其它模型的基类,然后,用该类衍生出继承其属性(类型声明、验证等)的子类。
所有数据转换、校验、文档等功能仍将正常运行。
这样,就可以仅声明模型之间的差异部分(具有明文的password、具有hashed_password以及不包括密码)。
通过这种方式,可以只声明模型之间的区别(分别包含明文密码、哈希密码,以及无密码的模型)。
from fastapi import FastAPI
from pydantic import BaseModel, EmailStr

app = FastAPI()


class UserBase(BaseModel):
    username: str
    email: EmailStr
    full_name: str | None = None


class UserIn(UserBase):
    password: str


class UserOut(UserBase):
    pass


class UserInDB(UserBase):
    hashed_password: str


def fake_password_hasher(raw_password: str):
    return "supersecret" + raw_password


def fake_save_user(user_in: UserIn):
    hashed_password = fake_password_hasher(user_in.password)
    user_in_db = UserInDB(**user_in.dict(), hashed_password=hashed_password)
    print("User saved! ..not really")
    return user_in_db


@app.post("/user/", response_model=UserOut)
async def create_user(user_in: UserIn):
    user_saved = fake_save_user(user_in)
    return user_saved
Union或者anyOf
响应可以声明为两种类型的Union类型,即该响应可以是两种类型中的任意类型。
在OpenAPI中可以使用anyOf定义
为此,请使用Python标准类型提示typing.Union
from typing import Union

from fastapi import FastAPI
from pydantic import BaseModel

app = FastAPI()


class BaseItem(BaseModel):
    description: str
    type: str


class CarItem(BaseItem):
    type: str = "car"


class PlaneItem(BaseItem):
    type: str = "plane"
    size: int


items = {
    "item1": {"description": "All my friends drive a low rider", "type": "car"},
    "item2": {
        "description": "Music is my aeroplane, it's my aeroplane",
        "type": "plane",
        "size": 5,
    },
}


@app.get("/items/{item_id}", response_model=Union[PlaneItem, CarItem])
async def read_item(item_id: str):
    return items[item_id]
模型列表
使用同样的方式也可以声明由对象列表构成的响应。
为此,请使用标准的Python typing.List:
from fastapi import FastAPI
from pydantic import BaseModel

app = FastAPI()


class Item(BaseModel):
    name: str
    description: str


items = [
    {"name": "Foo", "description": "There comes my hero"},
    {"name": "Red", "description": "It's my aeroplane"},
]


@app.get("/items/", response_model=list[Item])
async def read_items():
    return items
任意dict构成的响应
任意的dict都能用于声明响应,只要声明键和值的类型,无需使用Pydantic模型。
事先不知道可用的字段/属性名时(Pydantic模型必须知道字段是什么),这种方式特别有用。
此时,可以使用typing.Dict:
from fastapi import FastAPI

app = FastAPI()


@app.get("/keyword-weights/", response_model=dict[str, float])
async def read_keyword_weights():
    return {"foo": 2.3, "bar": 3.4}
响应状态码
与指定响应模型的方式相同,在以下任意路径操作中,可以使用status_code参数声明用于响应的HTTP状态码:
@app.get()@app.post()@app.put()@app.delete()- 等……
from fastapi import FastAPI

app = FastAPI()


@app.post("/items/", status_code=201)
async def create_item(name: str):
    return {"name": name}
status_code参数接收表示HTTP状态码的数字。
它可以:
- 在响应中返回状态码
- 在OpenAPI概图(及用户界面)中存档
关于HTTP状态码
在HTTP协议中,发送3位数的数字状态码是相应的一部分。
这些状态码都具有便于识别的关联名称,但是重要的还是数字。
简言之:
100及以上的状态码用于返回信息。这类状态码很少直接使用。具有这些状态码的响应不能包含响应体。200及以上的状态码用于表示成功。这些状态码是最常用的-
200是默认状态代码,表示一切正常
-
201表示已创建,通常在数据库中创建新纪录后使用
-
204是一种特殊的例子,表示无内容。该响应在没有为客户端返回内容时使用,因此,该响应不能包含响应体
300及以上的状态码用于重定向。具有这些状态码的响应不一定包含响应体,但304未修改是个例外,该响应不得包含响应体。400及以上的状态码用于表示客户端错误。这些可能是第二常用的类型-
404,用于未找到响应
-
- 对于来自客户端的一般错误,可以只使用
400
- 对于来自客户端的一般错误,可以只使用
500及以上的状态码用于表示服务器端错误。几乎永远不会直接使用这些状态码。应用代码或服务器出现问题时,会自动返回这些状态代码
状态码及适用场景的详情,请参阅MDN 的 HTTP 状态码文档。
状态码名称快捷方式
再看下之前的例子:
from fastapi import FastAPI

app = FastAPI()


@app.post("/items/", status_code=201)
async def create_item(name: str):
    return {"name": name}
201表示已创建的状态码。
但我们没有必要记住所有代码的含义。
可以使用fastapi.status中的快捷变量。
from fastapi import FastAPI, status

app = FastAPI()


@app.post("/items/", status_code=status.HTTP_201_CREATED)
async def create_item(name: str):
    return {"name": name}
更改默认状态码
高级用户指南中,将介绍如何返回与在此声明的默认状态码不同的状态码。
表单数据
接收的不是JSON,而是表单字段时,要使用Form。
要使用表单,需预先安装python-multipart
例如,pip install python-multipart。
步骤如下:
- 导入
Form - 定义
Form参数:创建表单参数的方式与Body和Query一样
from fastapi import FastAPI, Form
app = FastAPI()
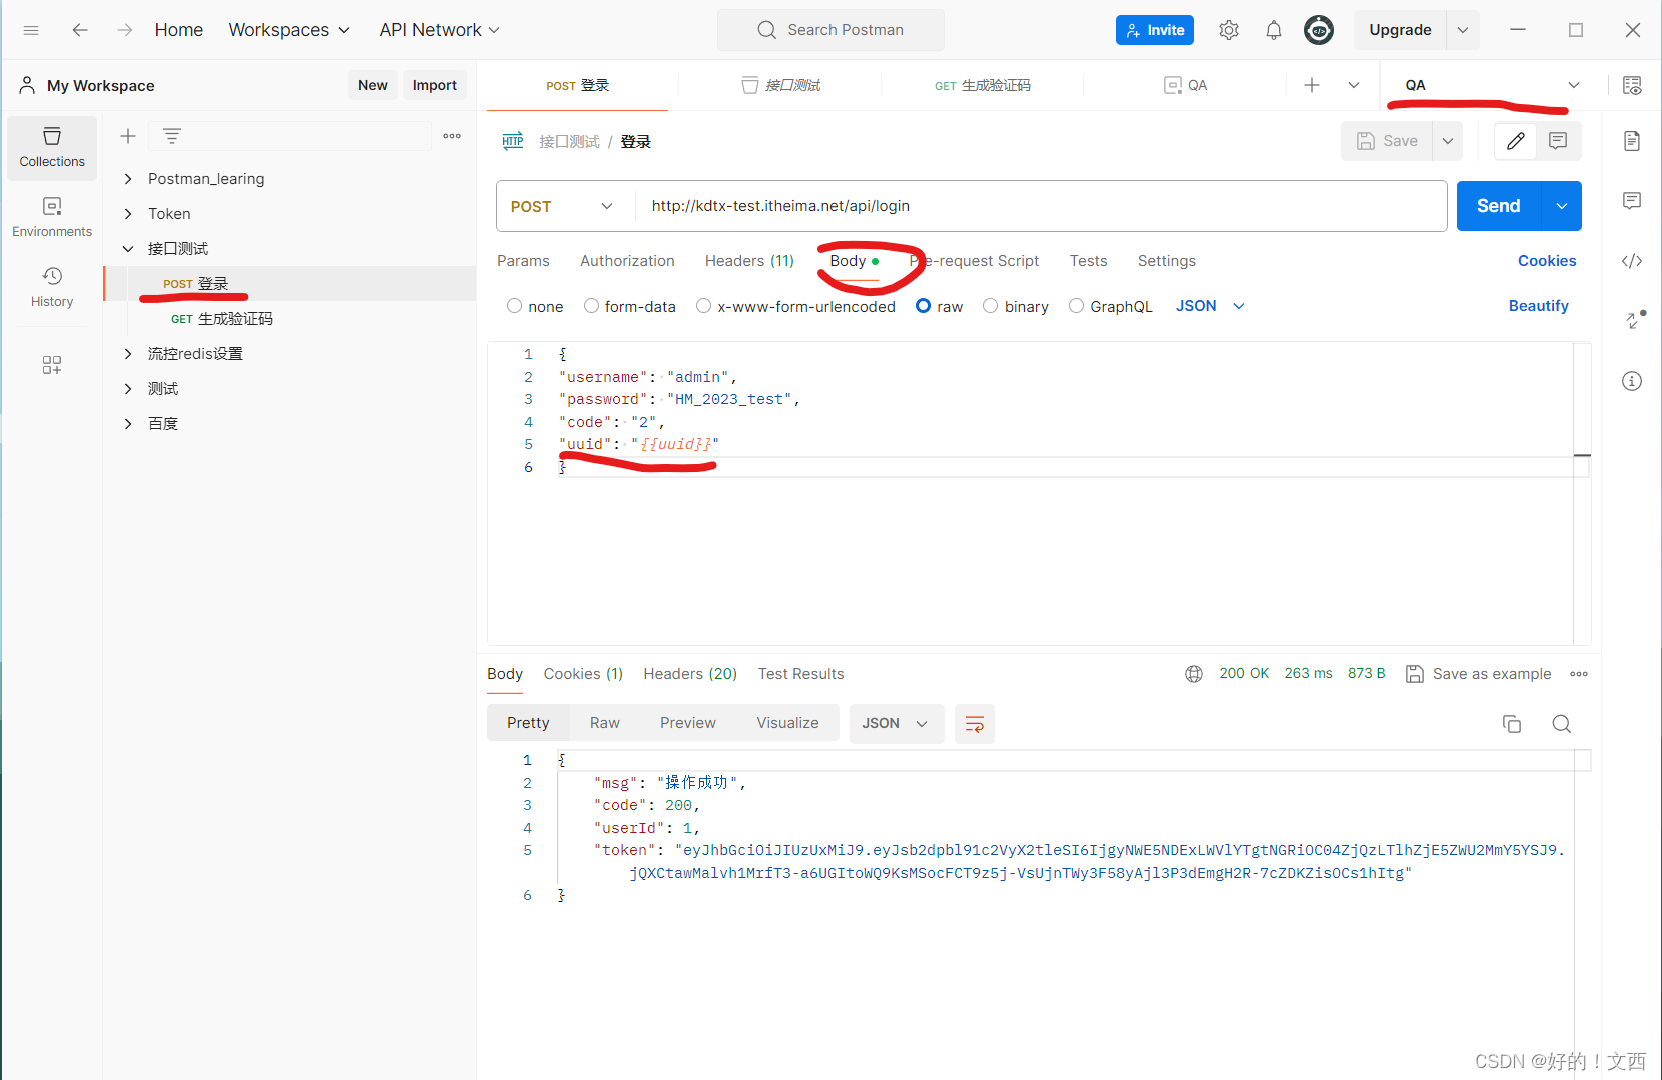
@app.post("/login/")
async def login(username: str = Form(), password: str = Form()):
return {"username": username}
例如,OAuth2规范的”密码流“模式规定要通过表单字段发送username和password。
该规范要求字段必须命名为username和password,并通过表单字段发送,不能用JSON。
使用Form可以声明与Body(及Query、Path、Cookie)相同的元数据和验证。
Form是直接继承自Body的类。
关于表单字段
请求文件
File用于定义客户端的上传文件。
因为上传文件以【表单数据】形式发送。所以接收上传文件,要预先安装python-multipart。
步骤如下:
- 导入
File:从fastapi导入File和UploadFile - 定义
File参数:创建文件File参数的方式与Body和Form一样
from fastapi import FastAPI, File, UploadFile

app = FastAPI()


@app.post("/files/")
async def create_file(file: bytes = File()):
    return {"file_size": len(file)}


@app.post("/uploadfile/")
async def create_upload_file(file: UploadFile):
    return {"filename": file.filename}
File是直接继承自Form的类。
文件作为【表单数据】上传。
如果把路径操作函数参数的类型声明为bytes,FastAPI将以bytes形式读取和接收文件内容。
这种方式把文件的所有内容都存储在内存里,适用于小型文件。
不过,很多情况下,UploadFile更好用。
含UploadFile的文件参数
定义文件参数时使用UploadFile:
from fastapi import FastAPI, File, UploadFile

app = FastAPI()


@app.post("/files/")
async def create_file(file: bytes = File()):
    return {"file_size": len(file)}


@app.post("/uploadfile/")
async def create_upload_file(file: UploadFile):
    return {"filename": file.filename}
UploadFile与bytes相比有很多优势:
- 使用
spooled文件:存储在内存的文件超出最大上限时,FastAPI会把文件存入磁盘; - 这种方式更适用于处理图像、视频、二进制文件等大型文件,好处是不会占用所有内存;
- 可获取上传文件的元数据;
- 自带file-like
async接口; - 暴露的Python SpooledTemporaryFile对象,可直接传递给其他预期【file-like】对象的库。
UploadFile的属性如下:
filename:上传文件名字符串(str),例如,myimage.jpg;content_type:内容类型(MIME类型/媒体类型)字符串(str),例如,image/jpeg;file:SpooledTemporaryFile(file-like对象)。其实就是Python文件,可直接传递给其他预期file-like对象的函数或支持库。
UploadFile支持以下async方法,(使用内部SpooledTemporaryFile)可调用相应的文件方法。
write(data):把data(str或bytes)写入文件;read(size):按指定数量的字节或字符(size(int))读取文件内容;seek(offset):移动至文件offset(int)字节处的位置;例如,await myfile.seek(0)移动到文件开头;执行await myfile.read()后,需再次读取已读取内容时,这种方法特别好用;close():关闭文件。
因为上述方法都是async方法,要搭配【await】使用。
例如,在async路径操作函数内,要用以下方式读取文件内容:
contents = await myfile.read()
在普通def路径操作函数内,则可以直接访问UploadFile.file,例如:
contents = myfile.file.read()
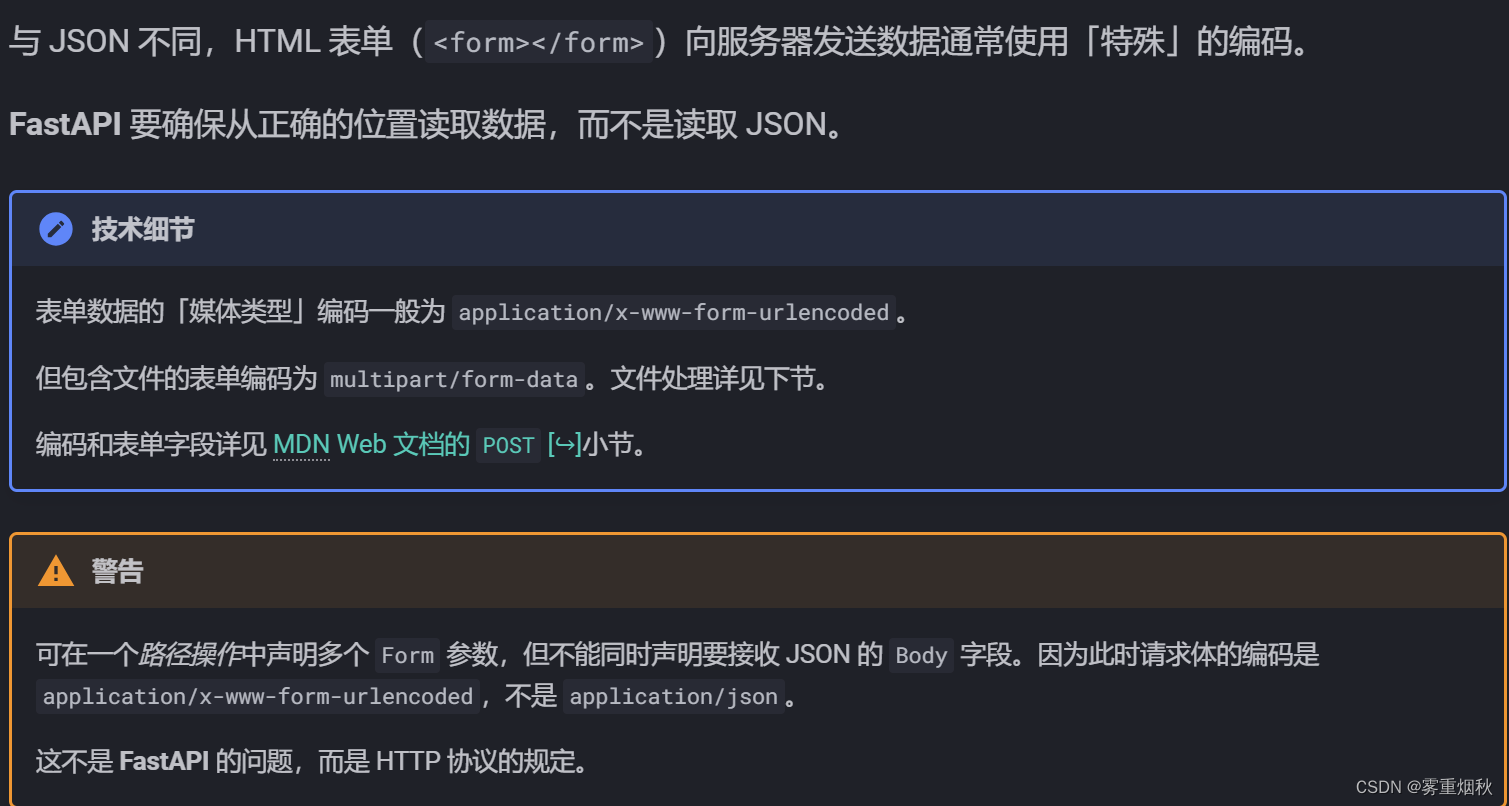
什么是【表单数据】
与JSON不同,HTML表单(<form></form>)向服务器发送数据通常使用【特殊】的编码。
FastAPI要确保从正确的位置读取数据,而不是读取JSON。

可选文件上传
您可以通过使用标准类型注解并将None作为默认值的方式将一个文件参数设为可选:
from fastapi import FastAPI, File, UploadFile

app = FastAPI()


@app.post("/files/")
async def create_file(file: bytes | None = File(default=None)):
    if not file:
        return {"message": "No file sent"}
    else:
        return {"file_size": len(file)}


@app.post("/uploadfile/")
async def create_upload_file(file: UploadFile | None = None):
    if not file:
        return {"message": "No upload file sent"}
    else:
        return {"filename": file.filename}
带有额外元数据的UploadFIle
您也可以将File()与UploadFile一起使用,例如,设置额外的元数据:
from fastapi import FastAPI, File, UploadFile

app = FastAPI()


@app.post("/files/")
async def create_file(file: bytes = File(description="A file read as bytes")):
    return {"file_size": len(file)}


@app.post("/uploadfile/")
async def create_upload_file(
    file: UploadFile = File(description="A file read as UploadFile"),
):
    return {"filename": file.filename}
多文件上传
FastAPI支持同时上传多个文件。
可用同一个【表单字段】发送含多个文件的【表单数据】。
上传多个文件时,要声明含bytes或UploadFile的列表(List):
from fastapi import FastAPI, File, UploadFile
from fastapi.responses import HTMLResponse

app = FastAPI()


@app.post("/files/")
async def create_files(files: list[bytes] = File()):
    return {"file_sizes": [len(file) for file in files]}


@app.post("/uploadfiles/")
async def create_upload_files(files: list[UploadFile]):
    return {"filenames": [file.filename for file in files]}


@app.get("/")
async def main():
    content = """
<body>
<form action="/files/" enctype="multipart/form-data" method="post">
<input name="files" type="file" multiple>
<input type="submit">
</form>
<form action="/uploadfiles/" enctype="multipart/form-data" method="post">
<input name="files" type="file" multiple>
<input type="submit">
</form>
</body>
    """
    return HTMLResponse(content=content)
接收的也是含bytes或UploadFile的列表(list)。
带有额外元数据的多文件上传
和之前的方式一样,您可以为File()设置额外参数,即使是UploadFile:
from fastapi import FastAPI, File, UploadFile
from fastapi.responses import HTMLResponse

app = FastAPI()


@app.post("/files/")
async def create_files(
    files: list[bytes] = File(description="Multiple files as bytes"),
):
    return {"file_sizes": [len(file) for file in files]}


@app.post("/uploadfiles/")
async def create_upload_files(
    files: list[UploadFile] = File(description="Multiple files as UploadFile"),
):
    return {"filenames": [file.filename for file in files]}


@app.get("/")
async def main():
    content = """
<body>
<form action="/files/" enctype="multipart/form-data" method="post">
<input name="files" type="file" multiple>
<input type="submit">
</form>
<form action="/uploadfiles/" enctype="multipart/form-data" method="post">
<input name="files" type="file" multiple>
<input type="submit">
</form>
</body>
    """
    return HTMLResponse(content=content)
请求表单与文件
FastAPI支持同时使用File和Form定义文件和表单字段。
- 导入
File与Form - 定义
File与Form参数
from fastapi import FastAPI, File, Form, UploadFile

app = FastAPI()


@app.post("/files/")
async def create_file(
    file: bytes = File(), fileb: UploadFile = File(), token: str = Form()
):
    return {
        "file_size": len(file),
        "token": token,
        "fileb_content_type": fileb.content_type,
    }
文件和表单字段作为表单数据上传与接收。
声明文件可以使用bytes或UploadFile。

处理错误
某些情况下,需要向客户端返回错误提示。
这里所谓的客户端包括前端浏览器、其他应用程序、物联网设备等。
需要向客户端返回错误提示的场景主要如下:
- 客户端没有执行操作的权限
- 客户端没有访问资源的权限
- 客户端要访问的项目不存在
- 等等…
遇到这些情况时,通常要返回4XX(400至499)HTTP状态码。
使用HTTPException
向客户端返回HTTP错误响应,可以使用HTTPException。
步骤如下:
- 导入
HTTPException - 触发
HTTPException,HTTPException是额外包含了和API有关数据的常规Python异常。因为是Python异常,所以不能return,只能raise。如在调用路径操作函数里的工具函数时,触发了HTTPException,FastAPI就不再继续执行路径操作函数中的后续代码,而是立即终止请求,并把HTTPException的HTTP错误发送给客户端。 - 本例中,客户端用
ID请求的item不存在时,触发状态码为404的异常:
from fastapi import FastAPI, HTTPException

app = FastAPI()

items = {"foo": "The Foo Wrestlers"}


@app.get("/items/{item_id}")
async def read_item(item_id: str):
    if item_id not in items:
        raise HTTPException(status_code=404, detail="Item not found")
    return {"item": items[item_id]}
响应结果
请求为http://example.com/items/foo(item_id 为 「foo」)时,客户端会接收到HTTP状态码-200及如下JSON响应结果:
{
  "item": "The Foo Wrestlers"
}
但如果客户端请求 http://example.com/items/bar(item_id 「bar」 不存在时),则会接收到 HTTP 状态码 - 404(「未找到」错误)及如下 JSON 响应结果:
{
  "detail": "Item not found"
}
添加自定义响应头
有些场景下要为HTTP错误添加自定义响应头。例如,出于某些方面的安全需要。
一般情况下可能不会需要在代码中直接使用响应头。
但对于某些高级应用场景,还是需要添加自定义响应头:
from fastapi import FastAPI, HTTPException

app = FastAPI()

items = {"foo": "The Foo Wrestlers"}


@app.get("/items-header/{item_id}")
async def read_item_header(item_id: str):
    if item_id not in items:
        raise HTTPException(
            status_code=404,
            detail="Item not found",
            headers={"X-Error": "There goes my error"},
        )
    return {"item": items[item_id]}
安装自定义异常处理器
添加自定义处理器,要使用 Starlette 的异常工具。
假设要触发的自定义异常叫做UnicornException。
且需要FastAPI实现全局处理该异常。
此时,可以用@app.exception_handler()添加自定义异常控制器:
from fastapi import FastAPI, Request
from fastapi.responses import JSONResponse


class UnicornException(Exception):
    def __init__(self, name: str):
        self.name = name


app = FastAPI()


@app.exception_handler(UnicornException)
async def unicorn_exception_handler(request: Request, exc: UnicornException):
    return JSONResponse(
        status_code=418,
        content={"message": f"Oops! {exc.name} did something. There goes a rainbow..."},
    )


@app.get("/unicorns/{name}")
async def read_unicorn(name: str):
    if name == "yolo":
        raise UnicornException(name=name)
    return {"unicorn_name": name}
请求/unicorns/yolo时,路径操作会触发UnicornException。
但该异常将会被unicorn_exception_handler处理。
接收到的错误信息清晰明了,HTTP状态码为418,JSON内容如下:
{"message": "Oops! yolo did something. There goes a rainbow..."}
覆盖默认异常处理器
FastAPI自带了一些默认异常处理器。
触发HTTPException或请求无效数据时,这些处理器返回默认的JSON响应结果。
不过,也可以使用自定义处理器覆盖默认异常处理器。
覆盖请求验证异常
请求中包含无效数据,FastAPI内部会触发RequestValidationError。
该异常也内置了默认异常处理器。
覆盖默认异常处理器时需要导入RequestValidationError,并用@app.excption_handler(RequestValidationError)装饰异常处理器。
这样,异常处理器就可以接收Request与异常。
from fastapi import FastAPI, HTTPException
from fastapi.exceptions import RequestValidationError
from fastapi.responses import PlainTextResponse
from starlette.exceptions import HTTPException as StarletteHTTPException

app = FastAPI()


@app.exception_handler(StarletteHTTPException)
async def http_exception_handler(request, exc):
    return PlainTextResponse(str(exc.detail), status_code=exc.status_code)


@app.exception_handler(RequestValidationError)
async def validation_exception_handler(request, exc):
    return PlainTextResponse(str(exc), status_code=400)


@app.get("/items/{item_id}")
async def read_item(item_id: int):
    if item_id == 3:
        raise HTTPException(status_code=418, detail="Nope! I don't like 3.")
    return {"item_id": item_id}
访问/items/foo,可以看到默认的JSON错误信息:
{
    "detail": [
        {
            "loc": [
                "path",
                "item_id"
            ],
            "msg": "value is not a valid integer",
            "type": "type_error.integer"
        }
    ]
}
被替换为了以下文本格式的错误信息:
1 validation error
path -> item_id
  value is not a valid integer (type=type_error.integer)
路径操作配置
路径操作装饰器支持多种配置参数。
status_code状态码
status_code 用于定义路径操作响应中的 HTTP 状态码。
可以直接传递 int 代码, 比如 404。
如果记不住数字码的涵义,也可以用 status 的快捷常量:
from typing import Set, Union

from fastapi import FastAPI, status
from pydantic import BaseModel

app = FastAPI()


class Item(BaseModel):
    name: str
    description: Union[str, None] = None
    price: float
    tax: Union[float, None] = None
    tags: Set[str] = set()


@app.post("/items/", response_model=Item, status_code=status.HTTP_201_CREATED)
async def create_item(item: Item):
    return item
tags参数
tags参数的值是由str组成的list(一般只有一个str),tags用于为路径操作添加标签:
from typing import Set, Union

from fastapi import FastAPI
from pydantic import BaseModel

app = FastAPI()


class Item(BaseModel):
    name: str
    description: Union[str, None] = None
    price: float
    tax: Union[float, None] = None
    tags: Set[str] = set()


@app.post("/items/", response_model=Item, tags=["items"])
async def create_item(item: Item):
    return item


@app.get("/items/", tags=["items"])
async def read_items():
    return [{"name": "Foo", "price": 42}]


@app.get("/users/", tags=["users"])
async def read_users():
    return [{"username": "johndoe"}]
OpenAPI 概图会自动添加标签,供 API 文档接口使用:

summary和description参数
路径装饰器还支持summary和description这两个参数:
from typing import Set, Union

from fastapi import FastAPI
from pydantic import BaseModel

app = FastAPI()


class Item(BaseModel):
    name: str
    description: Union[str, None] = None
    price: float
    tax: Union[float, None] = None
    tags: Set[str] = set()


@app.post(
    "/items/",
    response_model=Item,
    summary="Create an item",
    description="Create an item with all the information, name, description, price, tax and a set of unique tags",
)
async def create_item(item: Item):
    return item
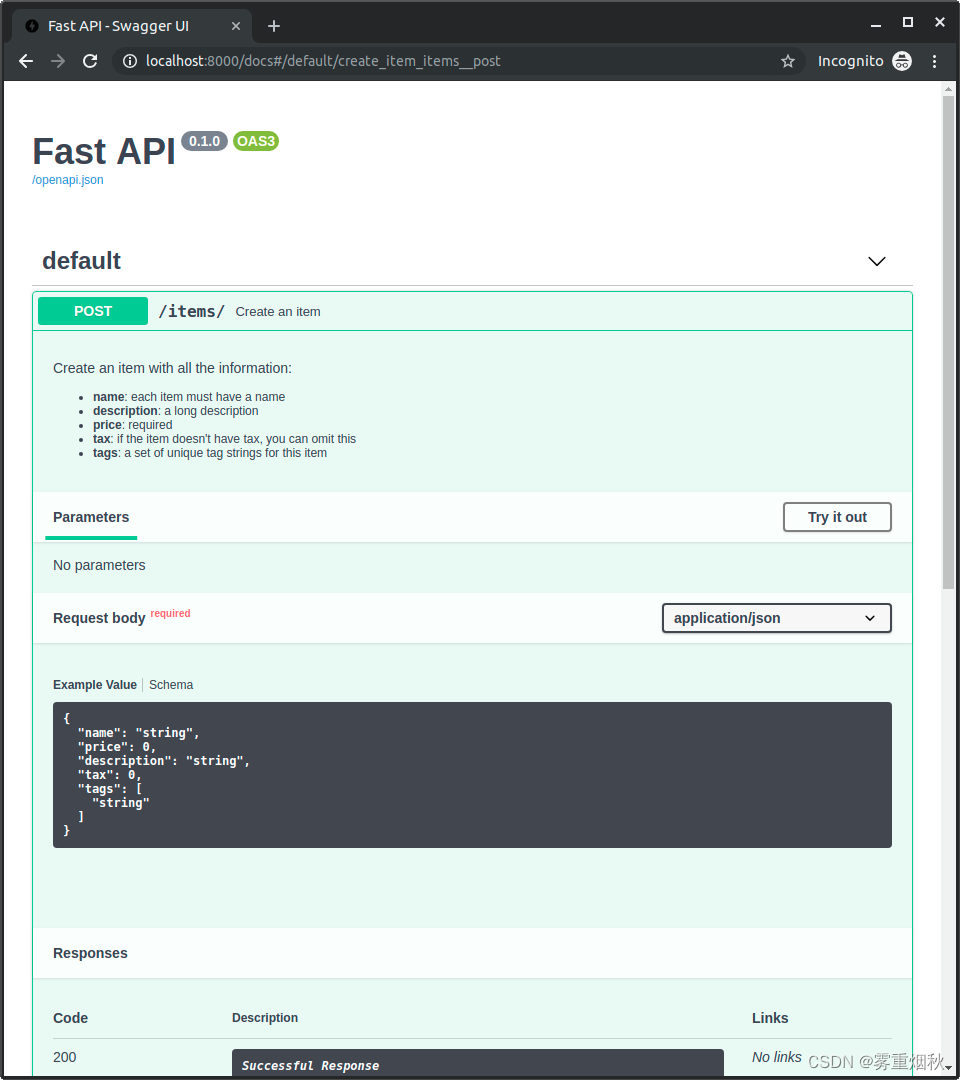
文档字符串(docstring)
描述内容比较长且占用多行时,可以在函数的docstring中声明路径操作的描述,FastAPI支持从文档字符串中读取描述内容。
文档字符串支持Markdown,能正确解析和显示Markdown的内容,但要注意文档字符串的缩进。
from typing import Set, Union

from fastapi import FastAPI
from pydantic import BaseModel

app = FastAPI()


class Item(BaseModel):
    name: str
    description: Union[str, None] = None
    price: float
    tax: Union[float, None] = None
    tags: Set[str] = set()


@app.post("/items/", response_model=Item, summary="Create an item")
async def create_item(item: Item):
    """
    Create an item with all the information:

    - **name**: each item must have a name
    - **description**: a long description
    - **price**: required
    - **tax**: if the item doesn't have tax, you can omit this
    - **tags**: a set of unique tag strings for this item
    """
    return item
下图为 Markdown 文本在 API 文档中的显示效果:
响应描述
response_description参数用于定义响应的描述说明:
from typing import Set, Union

from fastapi import FastAPI
from pydantic import BaseModel

app = FastAPI()


class Item(BaseModel):
    name: str
    description: Union[str, None] = None
    price: float
    tax: Union[float, None] = None
    tags: Set[str] = set()


@app.post(
    "/items/",
    response_model=Item,
    summary="Create an item",
    response_description="The created item",
)
async def create_item(item: Item):
    """
    Create an item with all the information:

    - **name**: each item must have a name
    - **description**: a long description
    - **price**: required
    - **tax**: if the item doesn't have tax, you can omit this
    - **tags**: a set of unique tag strings for this item
    """
    return item
弃用路径操作
deprecated参数可以把路径操作标记为弃用,无需直接删除:
from fastapi import FastAPI

app = FastAPI()


@app.get("/items/", tags=["items"])
async def read_items():
    return [{"name": "Foo", "price": 42}]


@app.get("/users/", tags=["users"])
async def read_users():
    return [{"username": "johndoe"}]


@app.get("/elements/", tags=["items"], deprecated=True)
async def read_elements():
    return [{"item_id": "Foo"}]
JSON兼容编码器
在某些情况下,您可能需要将数据类型(如Pydantic模型)转换为与JSON兼容的数据类型(如dict、list)。
比如,如果您需要将其存储在数据库中。
对于这种要求,FastAPI提供了jsonable_encoder()函数。
使用jsonable_encoder
让我们假设你有一个数据库名为fake_db,它只能接收与JSON兼容的数据。
例如,它不接收datatime这类的对象,因为这些对象与JSON不兼容。
因此,datatime对象必须将转换为包含ISO格式化的str类型对象。
同样,这个数据库也不会接收Pydantic模型(带有属性的对象),而只接受dict。
对此你可以使用jsonable_encoder。
它接收一个对象,比如Pydantic模型,并会返回一个JSON兼容的版本:
from datetime import datetime

from fastapi import FastAPI
from fastapi.encoders import jsonable_encoder
from pydantic import BaseModel

fake_db = {}


class Item(BaseModel):
    title: str
    timestamp: datetime
    description: str | None = None


app = FastAPI()


@app.put("/items/{id}")
def update_item(id: str, item: Item):
    json_compatible_item_data = jsonable_encoder(item)
    fake_db[id] = json_compatible_item_data
在这个例子中,它将Pydantic模型转换为dict,并将datetime转换为str。
调用它的结果后就可以使用Python标准编码中的json.dumps()。
这个操作不会返回一个包含JSON格式(作为字符串)数据的庞大的str。它将返回一个Python标准数据结构(例如dict),其值和子值都与JSON兼容。
请求体-更新数据
用PUT更新数据
更新数据请用HTTP PUT操作。
把输入数据转换为以JSON格式存储的数据(比如,使用NoSQL数据库时),可以使用jsonable_encoder。例如,把datetime转换为str。
from typing import List, Union

from fastapi import FastAPI
from fastapi.encoders import jsonable_encoder
from pydantic import BaseModel

app = FastAPI()


class Item(BaseModel):
    name: Union[str, None] = None
    description: Union[str, None] = None
    price: Union[float, None] = None
    tax: float = 10.5
    tags: List[str] = []


items = {
    "foo": {"name": "Foo", "price": 50.2},
    "bar": {"name": "Bar", "description": "The bartenders", "price": 62, "tax": 20.2},
    "baz": {"name": "Baz", "description": None, "price": 50.2, "tax": 10.5, "tags": []},
}


@app.get("/items/{item_id}", response_model=Item)
async def read_item(item_id: str):
    return items[item_id]


@app.put("/items/{item_id}", response_model=Item)
async def update_item(item_id: str, item: Item):
    update_item_encoded = jsonable_encoder(item)
    items[item_id] = update_item_encoded
    return update_item_encoded
PUT用于接收替换现有数据的数据。
用PUT把数据项bar更新为以下内容时:
{
    "name": "Barz",
    "price": 3,
    "description": None,
}
因为上述数据未包含已存储的属性 "tax": 20.2,新的输入模型会把 "tax": 10.5 作为默认值。
因此,本次操作把 tax 的值「更新」为 10.5。
用PATCH进行部分更新(用PUT也无妨)
- 使用Pydantic的
exclude_unset参数:更新部分数据时,可以在Pydantic模型的.dict()中使用exclude_unset参数。比如item.dict(exclude_unset=True)。这段代码生成的dict只包含创建item模型时显式设置的数据,而不包括默认值。然后再用它生成一个只含已设置(在请求中发送)数据,且省略了默认值的dict - 使用Pydantic的
update参数:接下来,用.copy()为已有模型创建调用update参数的副本,该参数为包含更新数据的dict。例如,stored_item_model.copy(update=update_data)
from typing import List, Union

from fastapi import FastAPI
from fastapi.encoders import jsonable_encoder
from pydantic import BaseModel

app = FastAPI()


class Item(BaseModel):
    name: Union[str, None] = None
    description: Union[str, None] = None
    price: Union[float, None] = None
    tax: float = 10.5
    tags: List[str] = []


items = {
    "foo": {"name": "Foo", "price": 50.2},
    "bar": {"name": "Bar", "description": "The bartenders", "price": 62, "tax": 20.2},
    "baz": {"name": "Baz", "description": None, "price": 50.2, "tax": 10.5, "tags": []},
}


@app.get("/items/{item_id}", response_model=Item)
async def read_item(item_id: str):
    return items[item_id]


@app.patch("/items/{item_id}", response_model=Item)
async def update_item(item_id: str, item: Item):
    stored_item_data = items[item_id]
    stored_item_model = Item(**stored_item_data)
    update_data = item.dict(exclude_unset=True)
    updated_item = stored_item_model.copy(update=update_data)
    items[item_id] = jsonable_encoder(updated_item)
    return updated_item
更新部分数据小结
简而言之,更新部分数据应:
- 使用
PATCH而不是PUT(可选,也可以用PUT); - 提取存储的数据;
- 把数据放入Pydantic模型;
- 生成不含输入模型默认值的
dict(使用exclude_unset参数);只更新用户设置过的值,不用模型中的默认值覆盖已存储过的值。 - 为已存储的模型创建副本,用接收的数据更新其属性(使用
update参数)。 - 把模型副本转换为可存入数据库的形式(比如,使用
jsonable_encoder)。把这种方式与Pydantic模型的.dict()方法类似,但能确保把值转换为适配JSON的数据类型,例如,把datetime转换为str。 - 把数据保存至数据库;
- 返回更新后的模型。