目录
0、项目介绍
1、项目展示
2、项目搭建
3、项目的代码与讲解
4、项目资源
5、项目总结
0、项目介绍
本篇与上一篇有很多联系,大家可以看看这篇Opencv项目实战:13 手部追踪,我们将根据上一节的内容,进行一个拓展。本篇你可以学到如何通过手势来控制电脑的音量大小。
1、项目展示
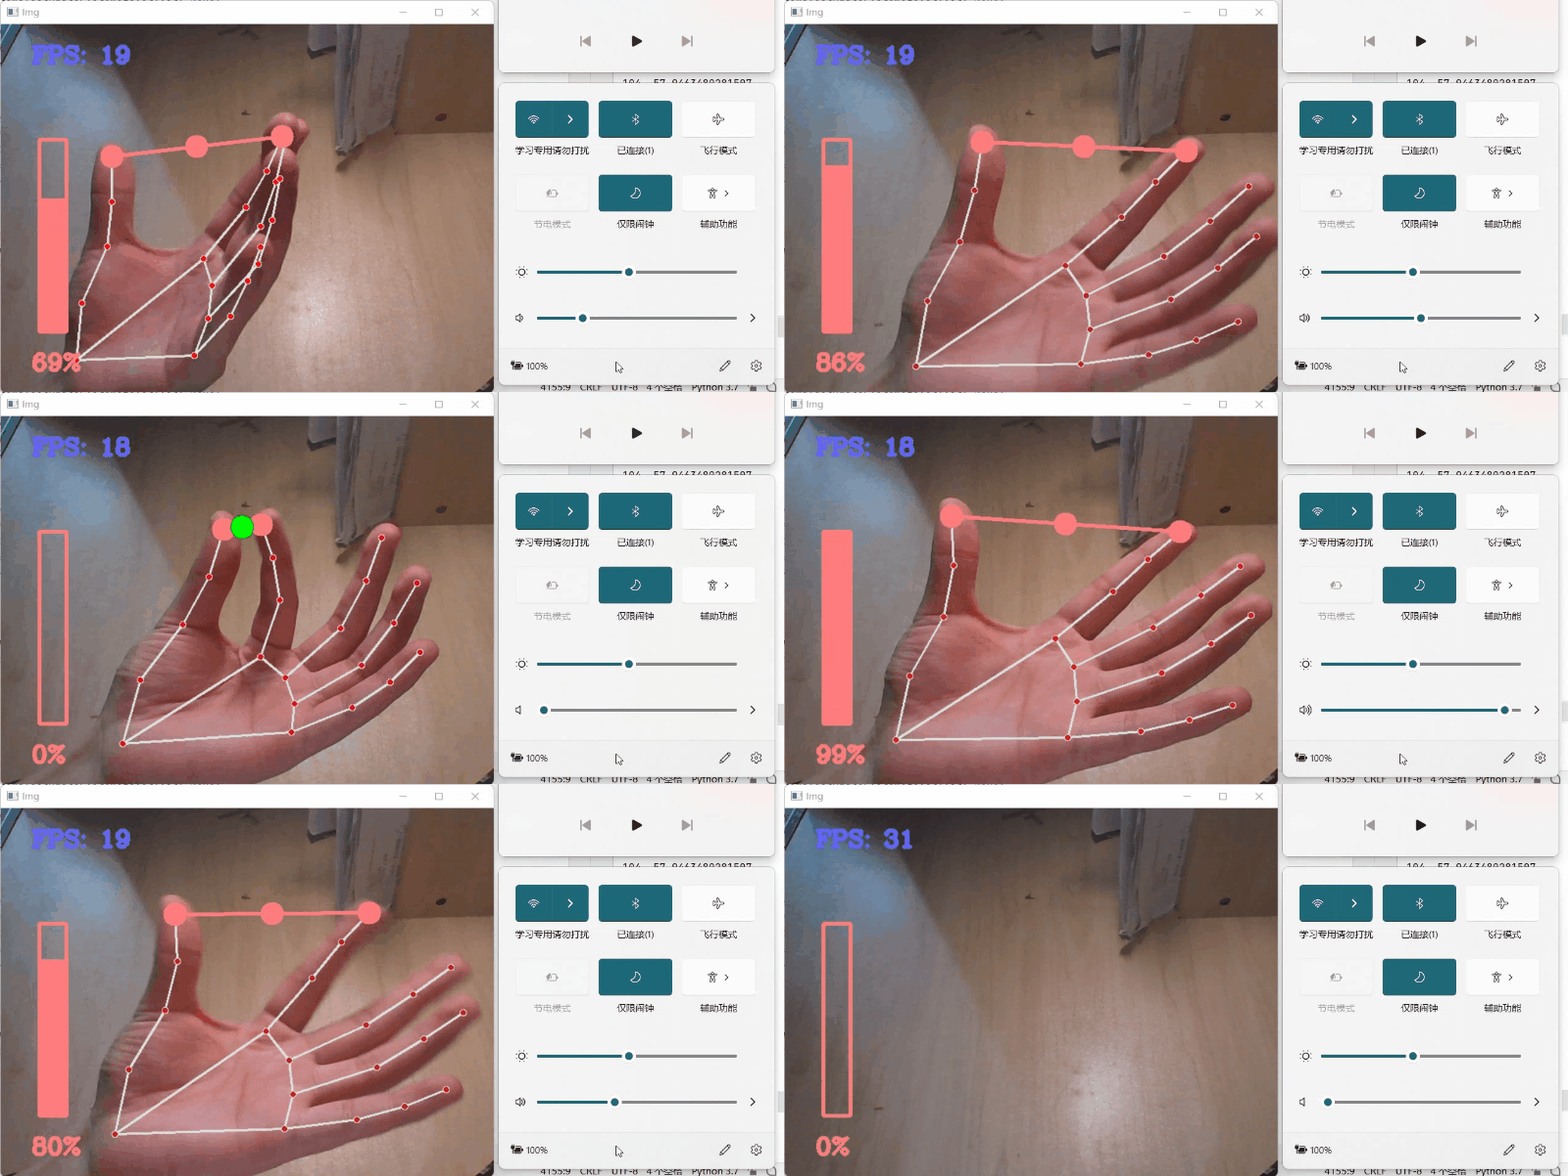
这个就是一个主要的效果,通过大拇指与食指来控制音量,并在侧边具有一个音量条,更加美观和简洁。
2、项目搭建

在上一节中,我们根据手部识别写了一个类模块HandTrackingModule.py,以便于我们可以在别的项目中直接拿来用。
除此之外,你还需要:
pip install pycaw
有了这个包,我们可以很简单的与电脑的音量联系在一起,点击这里AndreMiras / pycaw 我们可以在这里看它的README.md文件。
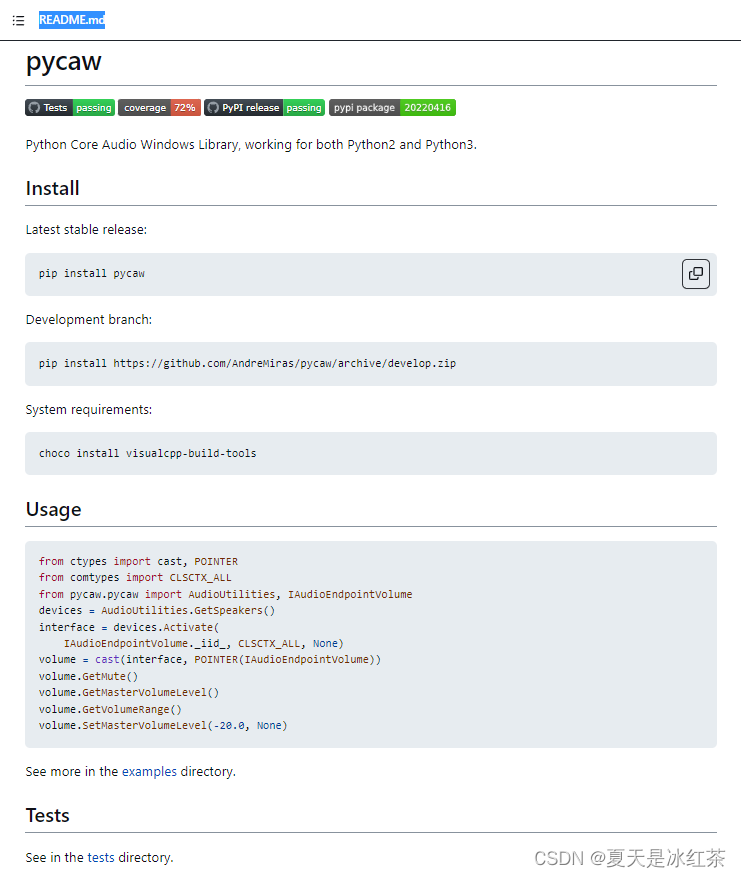
具体是怎么做到,不用在意,我们在这里用到了Usage的部分,将它cv进入我们的代码当中。
3、项目的代码与讲解
import cv2
import time
import HandTrackingModule as htm
import math
import numpy as np
from ctypes import cast, POINTER
from comtypes import CLSCTX_ALL
from pycaw.pycaw import AudioUtilities, IAudioEndpointVolume

wCam, hCam = 640, 480
cap = cv2.VideoCapture(0)
cap.set(3, wCam)
cap.set(4, hCam)
pTime = 0


detector = htm.handDetector(detectionCon=0.7)

devices = AudioUtilities.GetSpeakers()
interface = devices.Activate(
    IAudioEndpointVolume._iid_, CLSCTX_ALL, None)
volume = cast(interface, POINTER(IAudioEndpointVolume))
volume.GetMute()
volume.GetMasterVolumeLevel()
volRange = volume.GetVolumeRange()
##print的结果(-74.0, 0.0, 1.0)
minvol,maxvol = volRange[0],volRange[1]
vol=0
volBar=400
volPer=0
while True:
    success, img = cap.read()
    detector.findHands(img)
    lmList=detector.findPosition(img,draw=False)
    if len(lmList)!=0:
        # print(lmList[4])
        x1,y1=lmList[4][1],lmList[4][2]
        x2,y2=lmList[8][1],lmList[8][2]
        cx,cy=(x1+x2)//2,(y1+y2)//2


        cv2.circle(img,(x1,y1),15,(125, 125, 255),cv2.FILLED)
        cv2.circle(img, (x2, y2), 15, (125, 125, 255), cv2.FILLED)
        cv2.line(img,(x1,y1),(x2,y2),(125, 125, 255),3)
        cv2.circle(img, (cx, cy), 15, (125, 125, 255), cv2.FILLED)
        length=math.hypot(x2-x1,y2-y1)
        if length<50:
            cv2.circle(img, (cx, cy), 15, (0, 255, 0), cv2.FILLED)
        # print(length)

        #handrange  50——300
        #volume range -74——0

        vol = np.interp(length, [50, 300], [minvol, maxvol])
        volBar = np.interp(length, [50, 300], [400, 150])
        volPer = np.interp(length, [50, 300], [0, 100])
        print(int(length), vol)
        volume.SetMasterVolumeLevel(vol, None)

    cv2.rectangle(img, (50, 150), (85, 400), (125, 125, 255), 3)
    cv2.rectangle(img, (50, int(volBar)), (85, 400), (125, 125, 255), cv2.FILLED)
    cv2.putText(img, f'{int(volPer)}%', (40, 450), cv2.FONT_HERSHEY_COMPLEX,
                1, (125, 125, 255), 3)

#################打印帧率#####################
    cTime = time.time()
    fps = 1 / (cTime - pTime)
    pTime = cTime
    cv2.putText(img, f'FPS: {int(fps)}', (40, 50), cv2.FONT_HERSHEY_COMPLEX,
                1, (255, 100, 100), 3)

    cv2.imshow("Img", img)
    k=cv2.waitKey(1)
    if k==27:break
至于另外一个类模块,大家可以去看看上一篇。在此,我还是来讲讲实现效果的思路。
- 首先,是要将我们的摄像头打开,调好参数,保证摄像没有问题,调用我们另外一个模块中handDetector函数,提高置信度,实现手部的跟踪。
- 其次,打印我们的帧率,并完成对大拇指与食指的位置信息的记录和标点,两点之间在中间点标记,这个时候,我们可以打印出来,观察,在窗口中,呈现近大远小,我们决定采用50——300作为我们两指之间距离的判定,小于50,中间点将会变为绿色,大于300,不会对音量再造成影响
- 然后,打印volRange的音量范围,(-74.0, 0.0, 1.0),最小值,最大值,第三个参数,你可以视而不见,np.interp()函数可以将我们手指距离与音量范围产生映射,什么意思呢?假如length为变量x,函数有自变量手指距离与因变量音量范围构成,输入x,即可得到y,这里不好解释,官方文档也没写清楚,大家要结合着图像来理解。
- 最后,复制pycaw的Usage,其他初始化的我们不用理解,将vol传入volume.SetMasterVolumeLevel()当中,在对侧边的音量条和音量打印在窗口当中。
4、项目资源
GitHub:Opencv-project-training/Opencv project training/14 Finger control volume at main · Auorui/Opencv-project-training (github.com)
下载pycaw:
AndreMiras/pycaw: Python Core Audio Windows Library (github.com)
5、项目总结
本次结合了上一次的类模块,做了一个新项目,很不错的想法,当然,这里要感谢AndreMiras,让我能够轻松的完成本次项目。


