此前dbpystream库是用python开发 web api。今天在rust中试用一下protobuf。
本文关键词:编译器、protobuf、proto文件、序列化、zstd压缩,build。
一、 protobuf编译器下载
具体见相关文章。没有编译器,protobuf无法运行。
windows参见:
https://blog.csdn.net/wowotuo/article/details/139458846?spm=1001.2014.3001.5502。
二、proto文件的准备
proto文件中主要模拟了一个dbpystream中一个get_price函数的输入和输出的格式,输入HistoryBarRequest ,输出HistoryBarResponse。HistoryBarResponse中,有代码名称,日期,开盘价,最高价等。
在格式中,包括了string,TimeStamp,double; 其中repeated就是vec格式。
syntax = "proto3";
package dbdata;
import public "google/protobuf/timestamp.proto";
service DataService {
  rpc query (HistoryBarRequest) returns (HistoryBarRequest) {}
}
service Login{
  rpc auth (Auth) returns (Response) {}
}
message Auth{
   string id =1;
   string password=2;
}
message HistoryBarRequest {
  string security  = 1;
  string frequency = 2;
  FieldParam fields     = 3;
  google.protobuf.Timestamp start_date = 4;//收集时间
  google.protobuf.Timestamp end_date = 5;//收集时间
  bool is_fq  =6 ;
}
message HistoryBarResponse{
  repeated string securitycode = 1;
  repeated google.protobuf.Timestamp  datetime =2;
  repeated double  open = 3;
  repeated double  high = 4;
  repeated double close = 5;
  repeated double low =6;
  repeated double volume=7;
  repeated double amount=8;
  repeated sint64 is_fq = 9;
}

message FieldParam{
  bool is_all = 1;
}

message Response {
  bool status = 1;
  bytes msg   = 2;
  string error = 3;
}
三、toml文件、文件目录结构、build.rs
1、toml文件有
[package]
name = "clap-2"
version = "0.1.0"
edition = "2021"

# See more keys and their definitions at https://doc.rust-lang.org/cargo/reference/manifest.html

[dependencies]
axum = "0.7.5" # web 服务器
anyhow = "1" # 错误处理
reqwest = { version = "0.12.4", features = ["json"] } # HTTP 客户端
tokio = { version = "1", features = ["full"] } # 异步处理库
prost = "0.12.6"
# Only necessary if using Protobuf well-known types:
prost-types = "0.12.6"
serde = { version = "1", features = ["derive"] } # 序列化/反序列化数据
polars = { version = "0.39.0", features = ["json"]}
chrono = { version = "0.4", features = ["unstable-locales"] }
zstd = "0.13" # 压缩库
[build-dependencies]
prost-build = "0.12.6" # 编译 protobuf
上面polars,chrono,prost-types,prost-build,prost,zstd是关键库,其它暂时可以不看。
2、目录结构
具体如下:
PS D:\my_program\clap-2> tree /F
卷 新加卷 的文件夹 PATH 列表
卷序列号为 D855-8BFE
D:.
│  .gitignore
│  build.rs
│  Cargo.lock
│  Cargo.toml
│  dbdata.proto
│
└─src
    │  main.rs
    │
    └─pb
            dbdata.rs
            mod.rs
可见,在src/目录下,手动创建了一个pb文件夹,存放未来生成的dbdata.proto文件。
3、build.rs
在src同级目录上(如上),创建build.rs,具体如下:
fn main() {
    prost_build::Config::new()
        .out_dir("src/pb")//设置proto输出目录
        .compile_protos(&["dbdata.proto"], &["."])//我们要处理的proto文件
        .unwrap();
}
运行cargo build,即生成了dbdata.rs,具体内容如下:
// This file is @generated by prost-build.
#[allow(clippy::derive_partial_eq_without_eq)]
#[derive(Clone, PartialEq, ::prost::Message)]
pub struct Auth {
    #[prost(string, tag = "1")]
    pub id: ::prost::alloc::string::String,
    #[prost(string, tag = "2")]
    pub password: ::prost::alloc::string::String,
}
#[allow(clippy::derive_partial_eq_without_eq)]
#[derive(Clone, PartialEq, ::prost::Message)]
pub struct HistoryBarRequest {
    #[prost(string, tag = "1")]
    pub security: ::prost::alloc::string::String,
    #[prost(string, tag = "2")]
    pub frequency: ::prost::alloc::string::String,
    #[prost(message, optional, tag = "3")]
    pub fields: ::core::option::Option<FieldParam>,
    /// 收集时间
    #[prost(message, optional, tag = "4")]
    pub start_date: ::core::option::Option<::prost_types::Timestamp>,
    /// 收集时间
    #[prost(message, optional, tag = "5")]
    pub end_date: ::core::option::Option<::prost_types::Timestamp>,
    #[prost(bool, tag = "6")]
    pub is_fq: bool,
}
#[allow(clippy::derive_partial_eq_without_eq)]
#[derive(Clone, PartialEq, ::prost::Message)]
pub struct HistoryBarResponse {
    #[prost(string, repeated, tag = "1")]
    pub securitycode: ::prost::alloc::vec::Vec<::prost::alloc::string::String>,
    #[prost(message, repeated, tag = "2")]
    pub datetime: ::prost::alloc::vec::Vec<::prost_types::Timestamp>,
    #[prost(double, repeated, tag = "3")]
    pub open: ::prost::alloc::vec::Vec<f64>,
    #[prost(double, repeated, tag = "4")]
    pub high: ::prost::alloc::vec::Vec<f64>,
    #[prost(double, repeated, tag = "5")]
    pub close: ::prost::alloc::vec::Vec<f64>,
    #[prost(double, repeated, tag = "6")]
    pub low: ::prost::alloc::vec::Vec<f64>,
    #[prost(double, repeated, tag = "7")]
    pub volume: ::prost::alloc::vec::Vec<f64>,
    #[prost(double, repeated, tag = "8")]
    pub amount: ::prost::alloc::vec::Vec<f64>,
    #[prost(sint64, repeated, tag = "9")]
    pub is_fq: ::prost::alloc::vec::Vec<i64>,
}
#[allow(clippy::derive_partial_eq_without_eq)]
#[derive(Clone, PartialEq, ::prost::Message)]
pub struct FieldParam {
    #[prost(bool, tag = "1")]
    pub is_all: bool,
}
#[allow(clippy::derive_partial_eq_without_eq)]
#[derive(Clone, PartialEq, ::prost::Message)]
pub struct Response {
    #[prost(bool, tag = "1")]
    pub status: bool,
    #[prost(bytes = "vec", tag = "2")]
    pub msg: ::prost::alloc::vec::Vec<u8>,
    #[prost(string, tag = "3")]
    pub error: ::prost::alloc::string::String,
}
4、mod.rs
在pb目录下,创建mod.rs:
pub mod dbdata;
四、原始数据、main.rs
1、原始数据准备
这个原始数据的格式,即收到request后,将发送这个数据内容出去。
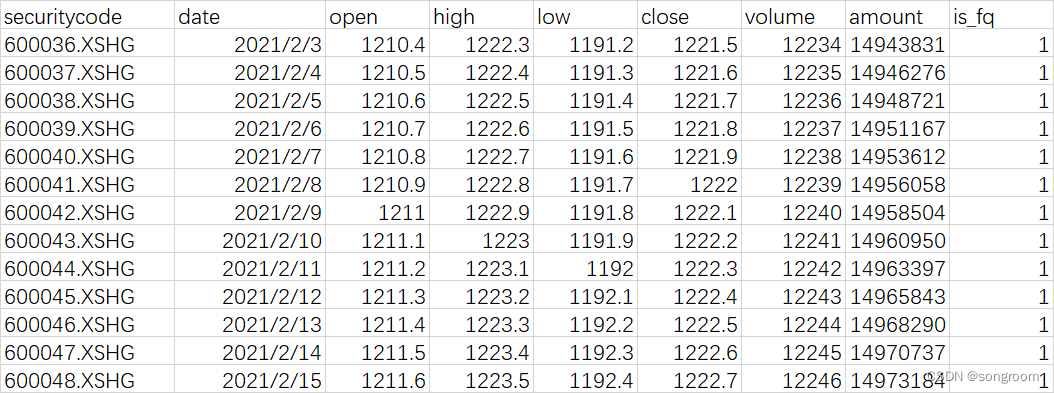 文件名称是"C:\Users\Desktop\test.csv"。
这里采用了polars来读取csv文件。
2、main.rs
下面的main.rs模拟了收到resquest,发送response的过程。这个过程可以用web框架,如axum,也可以用grpc框架。这部分不是今天的重点。
需要说明的是:在序列化HistoryBarResponse的基础上,并用zstd库进行了压缩打包,进一步减少了二进制对象的大小,有利于网络传输。
use pb::dbdata::{self, HistoryBarResponse,Response};
mod pb;
use prost_types::Timestamp;
use std::time::{Duration, SystemTime};
use polars::prelude::*;
use chrono::{NaiveDate, NaiveDateTime,NaiveTime};
use zstd;
fn main() ->Result<(),PolarsError>{
    let request = dbdata::HistoryBarRequest {
        security: String::from("600036.XSHG"),
        frequency: String::from("1minute"),
        fields: Some(dbdata::FieldParam {is_all:true}),
        start_date: Some(prost_types::Timestamp::from(SystemTime::now()-Duration::from_secs(3600*12*250))),
        end_date:Some(prost_types::Timestamp::from(SystemTime::now())),
        is_fq:true,
    };
    println!("模拟收到request:{:?}",request);
    println!("模拟开始进行相应的数据处理.....");
    let file = r"C:\Users\hongsl\Desktop\test.csv";
    let df: DataFrame = CsvReader::from_path(file)?
            .has_header(true)
            .finish().unwrap();
    println!("starting...");
    println!("df: {:?}",df);
    let res_raw = HistoryBarResponse{
        securitycode : df.column("securitycode")?.str()?.into_no_null_iter().map(|s|String::from(s)).collect(),
        datetime:df.column("date")?.str()?.into_no_null_iter()
        .map(|t| convert(t)).collect(),
        open:df.column("open")?.f64()?.into_no_null_iter().collect(),
        high:df.column("high")?.f64()?.into_no_null_iter().collect(),
        close:df.column("close")?.f64()?.into_no_null_iter().collect(),
        low:df.column("low")?.f64()?.into_no_null_iter().collect(),
        volume:df.column("volume")?.i64()?.into_no_null_iter().map(|v|v as f64).collect(),
        amount:df.column("amount")?.f64()?.into_no_null_iter().collect(),
        is_fq:df.column("is_fq")?.i64()?.into_no_null_iter().collect(),
    };
    //println!("{:?}", res);
    let encoded_raw = prost::Message::encode_to_vec(&res_raw);
    let compression_level = 3;
    // 服务端对序列化对象进行压缩,
    let compressed = zstd::encode_all(&*encoded_raw, compression_level).unwrap();
    // 服务端模拟通过web或grpc发送
    let res = Response{
        status:true,
        msg: compressed,
        error:String::from(""),
    };
    let encoded = prost::Message::encode_to_vec(&res);

    // 模拟客户端接收到web或grpc相应的数据对象
    let decoded_raw =  < pb::dbdata::Response as prost::Message>::decode(&encoded[..]).unwrap();

    // 并进行解压,得到Hist
    let decoded_raw: Vec<u8> = zstd::decode_all(decoded_raw.msg.as_slice()).unwrap();
    let decoded  = < pb::dbdata::HistoryBarResponse as prost::Message>::decode(&decoded_raw[..]).unwrap();

    println!("模拟发送相应的数据: {:?}", &decoded.securitycode[0]);
    Ok(())
}

fn convert(dt_str:&str) ->Timestamp {
    let naive_date = NaiveDate::parse_from_str(dt_str, "%Y/%m/%d").unwrap();
    let nano_second = NaiveTime::from_hms_milli_opt(0, 0, 0, 0).unwrap();
    let dt: NaiveDateTime = naive_date.and_time(nano_second );
    Timestamp{
        seconds:dt.and_utc().timestamp(),
        nanos:0,
    }
}
运行如下:
模拟收到request:HistoryBarRequest { security: "600036.XSHG", frequency: "1minute", fields: Some(FieldParam {
is_all: true }), start_date: Some(Timestamp { seconds: 1707035277, nanos: 595181300 }), end_date: Some(Timestamp { seconds: 1717835277, nanos: 595183100 }), is_fq: true }
模拟开始进行相应的数据处理.....
starting...
df: shape: (482, 9)
┌──────────────┬───────────┬────────┬────────┬───┬────────┬────────┬─────────────┬───────┐
│ securitycode ┆ date      ┆ open   ┆ high   ┆ … ┆ close  ┆ volume ┆ amount      ┆ is_fq │
│ ---          ┆ ---       ┆ ---    ┆ ---    ┆   ┆ ---    ┆ ---    ┆ ---         ┆ ---   │
│ str          ┆ str       ┆ f64    ┆ f64    ┆   ┆ f64    ┆ i64    ┆ f64         ┆ i64   │
╞══════════════╪═══════════╪════════╪════════╪═══╪════════╪════════╪═════════════╪═══════╡
│ 600036.XSHG  ┆ 2021/2/3  ┆ 1210.4 ┆ 1222.3 ┆ … ┆ 1221.5 ┆ 12234  ┆ 1.4943831e7 ┆ 1     │
│ 600037.XSHG  ┆ 2021/2/4  ┆ 1210.5 ┆ 1222.4 ┆ … ┆ 1221.6 ┆ 12235  ┆ 1.4946276e7 ┆ 1     │
│ 600038.XSHG  ┆ 2021/2/5  ┆ 1210.6 ┆ 1222.5 ┆ … ┆ 1221.7 ┆ 12236  ┆ 1.4949e7    ┆ 1     │
│ 600039.XSHG  ┆ 2021/2/6  ┆ 1210.7 ┆ 1222.6 ┆ … ┆ 1221.8 ┆ 12237  ┆ 1.4951e7    ┆ 1     │
│ 600040.XSHG  ┆ 2021/2/7  ┆ 1210.8 ┆ 1222.7 ┆ … ┆ 1221.9 ┆ 12238  ┆ 1.4954e7    ┆ 1     │
│ …            ┆ …         ┆ …      ┆ …      ┆ … ┆ …      ┆ …      ┆ …           ┆ …     │
│ 600513.XSHG  ┆ 2022/5/26 ┆ 1258.1 ┆ 1270.0 ┆ … ┆ 1269.2 ┆ 12711  ┆ 1.6133e7    ┆ 1     │
│ 600514.XSHG  ┆ 2022/5/27 ┆ 1258.2 ┆ 1270.1 ┆ … ┆ 1269.3 ┆ 12712  ┆ 1.6135e7    ┆ 1     │
│ 600515.XSHG  ┆ 2022/5/28 ┆ 1258.3 ┆ 1270.2 ┆ … ┆ 1269.4 ┆ 12713  ┆ 1.6138e7    ┆ 1     │
│ 600516.XSHG  ┆ 2022/5/29 ┆ 1258.4 ┆ 1270.3 ┆ … ┆ 1269.5 ┆ 12714  ┆ 1.6140423e7 ┆ 1     │
│ 600517.XSHG  ┆ 2022/5/30 ┆ 1258.5 ┆ 1270.4 ┆ … ┆ 1269.6 ┆ 12715  ┆ 1.6142964e7 ┆ 1     │
└──────────────┴───────────┴────────┴────────┴───┴────────┴────────┴─────────────┴───────┘
模拟接收并解析发送相应的数据: "600036.XSHG"