之前几个项目,都是通过copy老项目的CMakeLists.txt方式来编译项目,今天来体验一下树莓派官方提供的工具pico-project-generator。
pico-project-generator是树莓派官方出的Pico C SDK 项目的自动生成工具,该工具可以通过配置,自动生成编译所需的CMake文件、example文件、VSCodeIDE配置文件等。工具同时也支持命令行和可视化配置。
该工具使用Python3和tkinter编写而成,可以在
https://github.com/raspberrypi/pico-project-generator 下载。如当前电脑系统未安装tkinter,Linux可通过sudo apt-get install -y python3-tk 命令安装。
1、命令行运行
在命令行中输入./pico_project.py --help 可以获取工具命令行参数及对应参数使用说明。
./pico_project.py --help
usage: pico_project.py [-h] [-t TSV] [-o OUTPUT] [-x] [-l] [-c] [-f FEATURE] [-over] [-b] [-g] [-p PROJECT] [-r]
                       [-uart] [-nouart] [-usb] [-cpp] [-cpprtti] [-cppex] [-d DEBUGGER] [-board BOARDTYPE] [-bl]
                       [-cp CPATH]
                       [name]

Pico Project generator

positional arguments:
  name                  Name of the project

optional arguments:
  -h, --help            show this help message and exit
  -t TSV, --tsv TSV     Select an alternative pico_configs.tsv file
  -o OUTPUT, --output OUTPUT
                        Set an alternative CMakeList.txt filename
  -x, --examples        Add example code for the Pico standard library
  -l, --list            List available features
  -c, --configs         List available project configuration items
  -f FEATURE, --feature FEATURE
                        Add feature to generated project
  -over, --overwrite    Overwrite any existing project AND files
  -b, --build           Build after project created
  -g, --gui             Run a GUI version of the project generator
  -p PROJECT, --project PROJECT
                        Generate projects files for IDE. Options are: vscode
  -r, --runFromRAM      Run the program from RAM rather than flash
  -uart, --uart         Console output to UART (default)
  -nouart, --nouart     Disable console output to UART
  -usb, --usb           Console output to USB (disables other USB functionality
  -cpp, --cpp           Generate C++ code
  -cpprtti, --cpprtti   Enable C++ RTTI (Uses more memory)
  -cppex, --cppexceptions
                        Enable C++ exceptions (Uses more memory)
  -d DEBUGGER, --debugger DEBUGGER
                        Select debugger (0 = SWD, 1 = PicoProbe)
  -board BOARDTYPE, --boardtype BOARDTYPE
                        Select board type (see --boardlist for available boards)
  -bl, --boardlist      List available board types
  -cp CPATH, --cpath CPATH
                        Override default VSCode compiler path
可以看到-g 或者--gui参数可以运行可视化配置,接下来重点介绍一下可视化配置工具。
2、可视化配置
运行./pico_project.py --gui 启动可视化工具
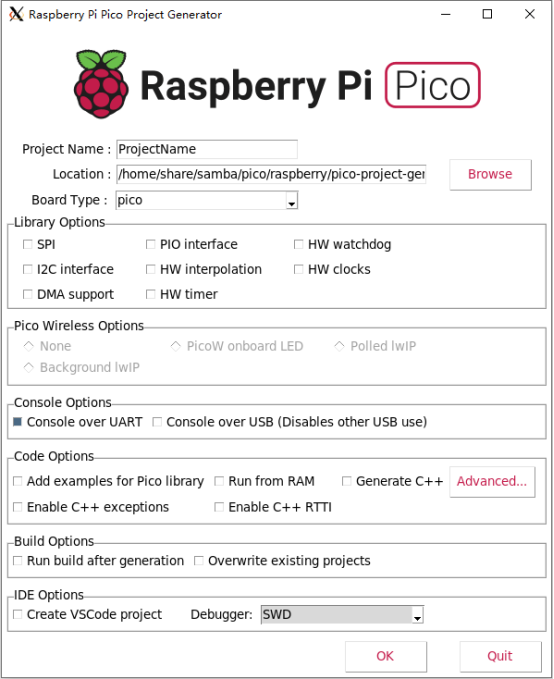
Project Name:项目名称,创建的文件夹名称和CMake项目名都为该名称。
Location:项目存储位置
Board Type:可以选择不同的开发板类型
Library Options:选择当前项目需要的对应RP2040芯片外设,选中对应能力后,会在CMakeLists.txt文件的target_link_libraries中加入外设能力;如选中SPI则会自动加入hardware_spi。
Console Options:选择通过串口输入日志还是USB
Code Options:这个配置选项最多,点击Advanced还有更多。我常用的有“Add example for Pico library” 和“Run from RAM”,其他的功能后面继续发掘。
选中“Run from RAM”, 会在项目目录下的CMakeLists.txt中添加以下语句,代码运行在RAM中
# no_flash means the target is to run from RAM
pico_set_binary_type(testtt2 no_flash)
Build Options:选中“Run build after generation”会自动编译一次当前生成的项目。
IDE Options:选中“Create VSCode Project”,选中使用SWD还是PicoProbe。
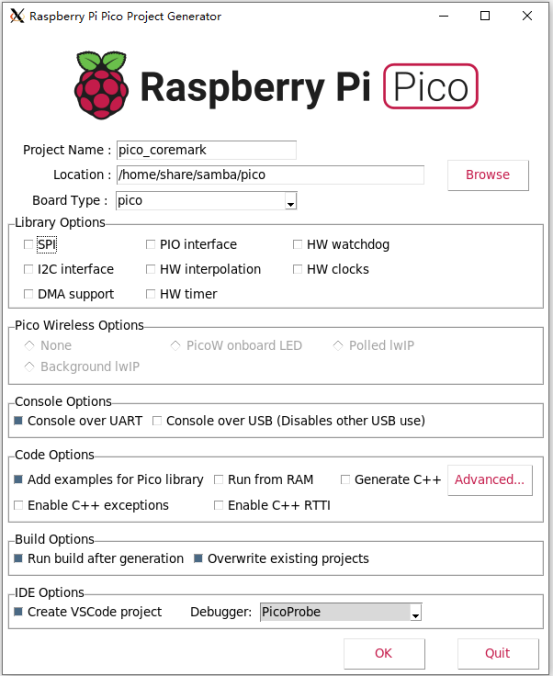
配置完成后点击OK,工具自动会运行,如果没有配置PICO_SDK_PATH和toolchain环境变量会报错。
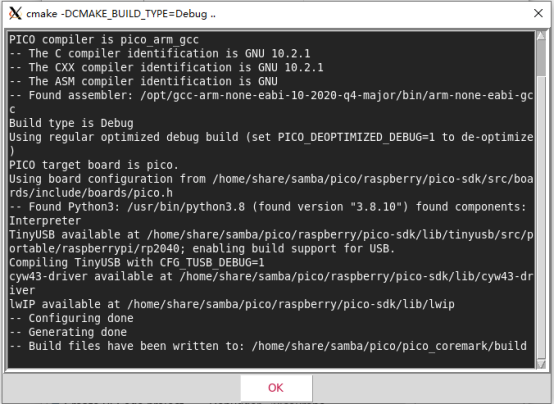
点击OK之后,如配置中选中了“Run build after generation”,会自动运行编译。
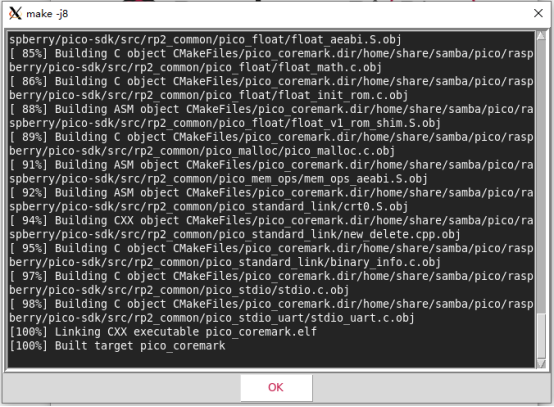
编译成功后,我们来看一下文件夹下有些啥?
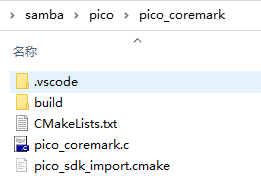
pico-project-generator工具把编译需要的相关文件CMakeLists.txt和pico_sdk_import.cmake都已经自动创建了,比手工创建项目方便多了。





![[GWCTF 2019]枯燥的抽奖](https://img-blog.csdnimg.cn/084fedf1de6d4aeaaff078f5868c86b7.png)


