一、MyBatisPlus概述
MyBatisPlus(简称 MP)是一个MyBatis的增强工具,在 MyBatis 的基础上只做增强不做改变,为简化开发、提高效率而生。
MyBatis-Plus可以节省我们大量工作时间,所有的CRUD代码它都可以自动化完成!
同类技术框架有:JPA、tk-mapper、MyBatis-Plus。
MyBatisPlus官网地址:https://mybatis.plus/、https://baomidou.com/
MyBatisPlus项目地址:https://gitee.com/baomidou/mybatis-plus
MyBatisPlus特性:
- 无侵入:只做增强不做改变,不会对现有工程产生影响。
- 损耗小:启动即会自动注入基本 CRUD(增删改查),性能基本无损耗,直接面向对象操作。
- 强大的 CRUD 操作:内置通用 Mapper、通用 Service,仅仅通过少量配置即可实现单表CRUD 操作,更有强大的条件构造器(QueryWrapper),满足各类使用需求。
- 支持 Lambda:编写查询条件无需担心字段写错。
- 支持主键自动生成:支持多达4种主键策略(内含分布式唯一ID生成器:Sequence)可自由配置,完美解决主键问题。
- 支持 ActiveRecord 模式:支持 ActiveRecord 形式调用,实体类只需继承 Model 类即可进行强大的 CRUD 操作。
- 支持自定义全局通用操作:支持全局通用方法注入( Write once, use anywhere )。
- 内置代码生成器:采用代码或者 Maven 插件可快速生成 Mapper 、 Model 、 Service 、 Controller 层代码,支持模板引擎,更有超多自定义配置等您来使用。
- 内置分页插件:基于 MyBatis 物理分页,开发者无需关心具体操作,配置好插件之后,写分页等同于普通 List 查询。
- 分页插件支持多种数据库:支持 MySQL、MariaDB、Oracle、DB2、H2、HSQL、SQLite、Postgre、SQLServer 等多种数据库。
- 内置性能分析插件:可输出 SQL 语句以及其执行时间,建议开发测试时启用该功能,能快速揪出慢查询。
- 内置全局拦截插件:提供全表 delete 、 update 操作智能分析阻断,也可自定义拦截规则,预防误操作。
MyBatisPlus支持的数据库:(任何能使用MyBatis进行CRUD操作,并且支持标准 SQL 的数据库)
-
mysql 、mariadb 、oracle 、db2 、h2 、hsql 、sqlite 、postgresql 、sqlserver 、presto 、Gauss 、Firebird。
-
Phoenix 、clickhouse 、Sybase ASE 、 OceanBase 、达梦数据库 、虚谷数据库 、人大金仓数据库 、南大通用数据库。
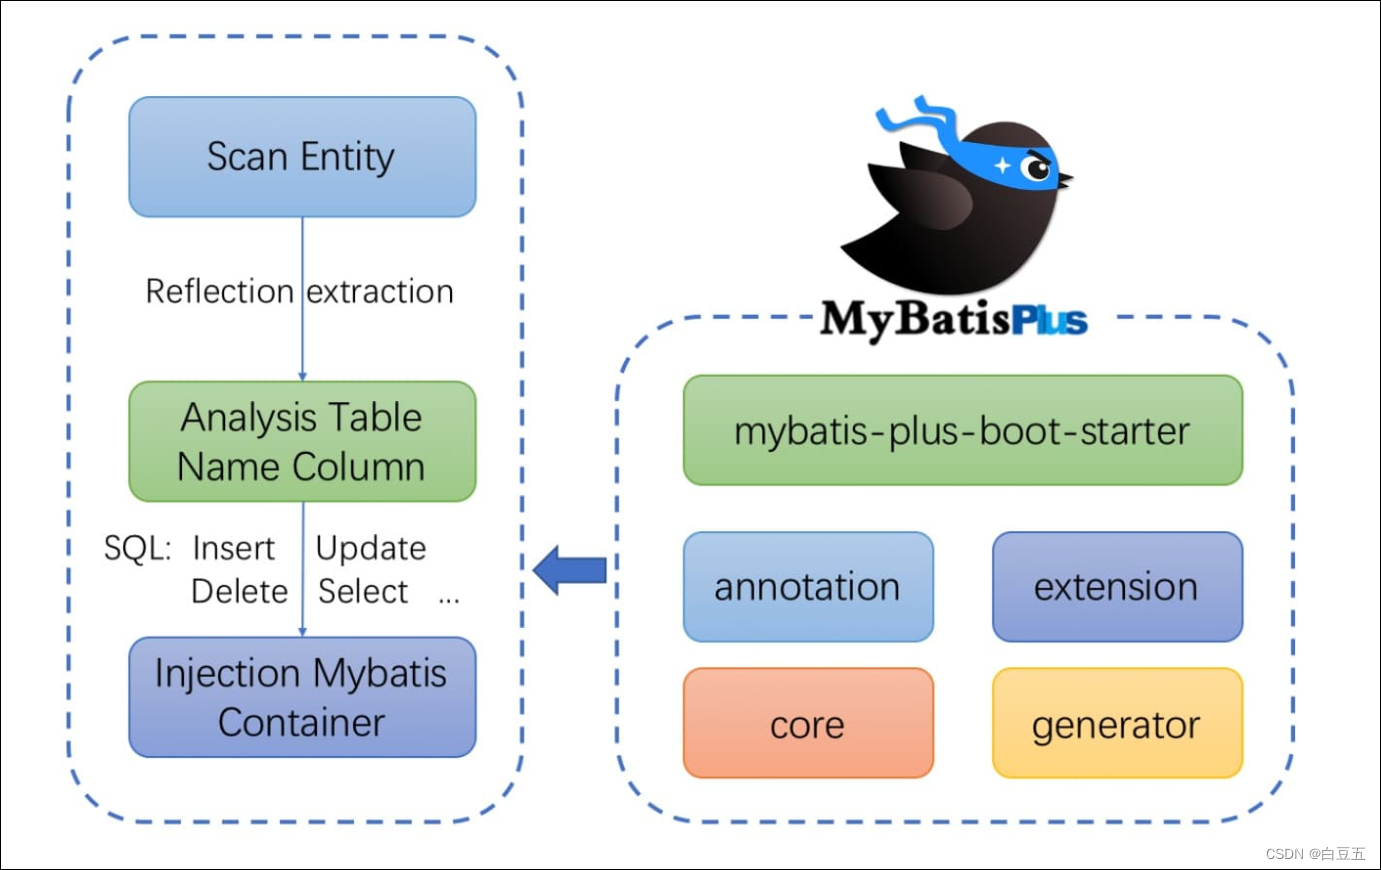
MyBatisPlus框架结构:
二、MP快速入门
文档地址:https://mybatis.plus/guide/quick-start.html
使用第三方组件的流程:
1、导入对应的依赖。
2、研究依赖如何配置。
3、代码如何编写。
4、提高扩展技术能力!
SpringBoot整合MP操作步骤如下:
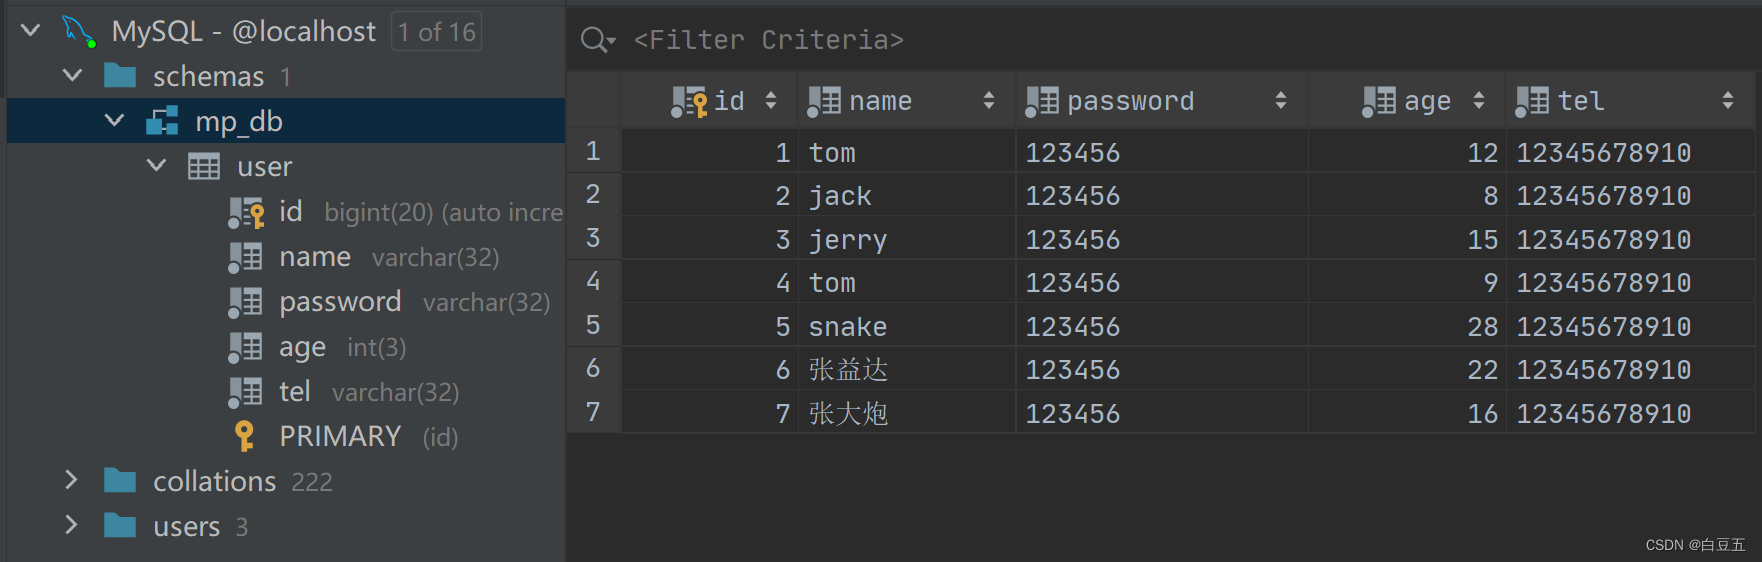
1、准备数据:
create database if not exists mp_db character set utf8;
use mp_db;
CREATE TABLE user (
            id bigint(20) primary key auto_increment,
            name varchar(32) not null,
            password  varchar(32) not null,
            age int(3) not null ,
            tel varchar(32) not null
);
insert into user values(null,'tom','123456',12,'12345678910');
insert into user values(null,'jack','123456',8,'12345678910');
insert into user values(null,'jerry','123456',15,'12345678910');
insert into user values(null,'tom','123456',9,'12345678910');
insert into user values(null,'snake','123456',28,'12345678910');
insert into user values(null,'张益达','123456',22,'12345678910');
insert into user values(null,'张大炮','123456',16,'12345678910');
2、创建一个maven工程。
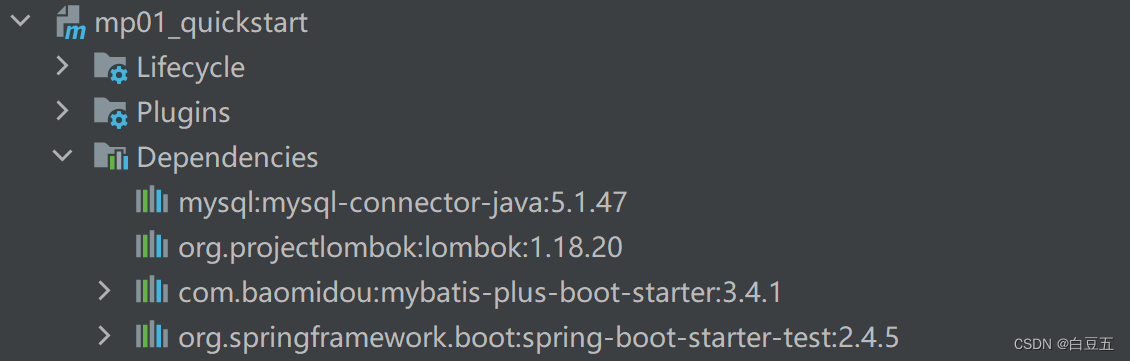
3、导入依赖:
<?xml version="1.0" encoding="UTF-8"?>
<project xmlns="http://maven.apache.org/POM/4.0.0"
         xmlns:xsi="http://www.w3.org/2001/XMLSchema-instance"
         xsi:schemaLocation="http://maven.apache.org/POM/4.0.0 http://maven.apache.org/xsd/maven-4.0.0.xsd">
    <modelVersion>4.0.0</modelVersion>

    <groupId>com.baidou</groupId>
    <artifactId>mp01_quickstart</artifactId>
    <version>1.0-SNAPSHOT</version>

    <properties>
        <maven.compiler.source>8</maven.compiler.source>
        <maven.compiler.target>8</maven.compiler.target>
        <project.build.sourceEncoding>UTF-8</project.build.sourceEncoding>
    </properties>

    <!--父工程-->
    <parent>
        <groupId>org.springframework.boot</groupId>
        <artifactId>spring-boot-starter-parent</artifactId>
        <version>2.4.5</version>
        <relativePath/> <!-- lookup parent from repository -->
    </parent>

    <dependencies>
        <!-- MySQL驱动 -->
        <dependency>
            <groupId>mysql</groupId>
            <artifactId>mysql-connector-java</artifactId>
            <version>5.1.47</version>
        </dependency>

        <!-- lombok,通过注解简化实体类的开发 -->
        <dependency>
            <groupId>org.projectlombok</groupId>
            <artifactId>lombok</artifactId>
        </dependency>

        <!-- mybatisplus的起步依赖 -->
        <dependency>
            <groupId>com.baomidou</groupId>
            <artifactId>mybatis-plus-boot-starter</artifactId>
            <version>3.4.1</version>
        </dependency>

        <!-- Junit起步依赖 -->
        <dependency>
            <groupId>org.springframework.boot</groupId>
            <artifactId>spring-boot-starter-test</artifactId>
        </dependency>
    </dependencies>
</project>

4、编写实体类:(类名与表名对应,属性名与字段名对应)(ORM对象关系映射)
package com.baidou.entity;

import lombok.Data;
//实体类
@Data
public class User {
    private Long id;
    private String name;
    private String password;
    private Integer age;
    private String tel;
}
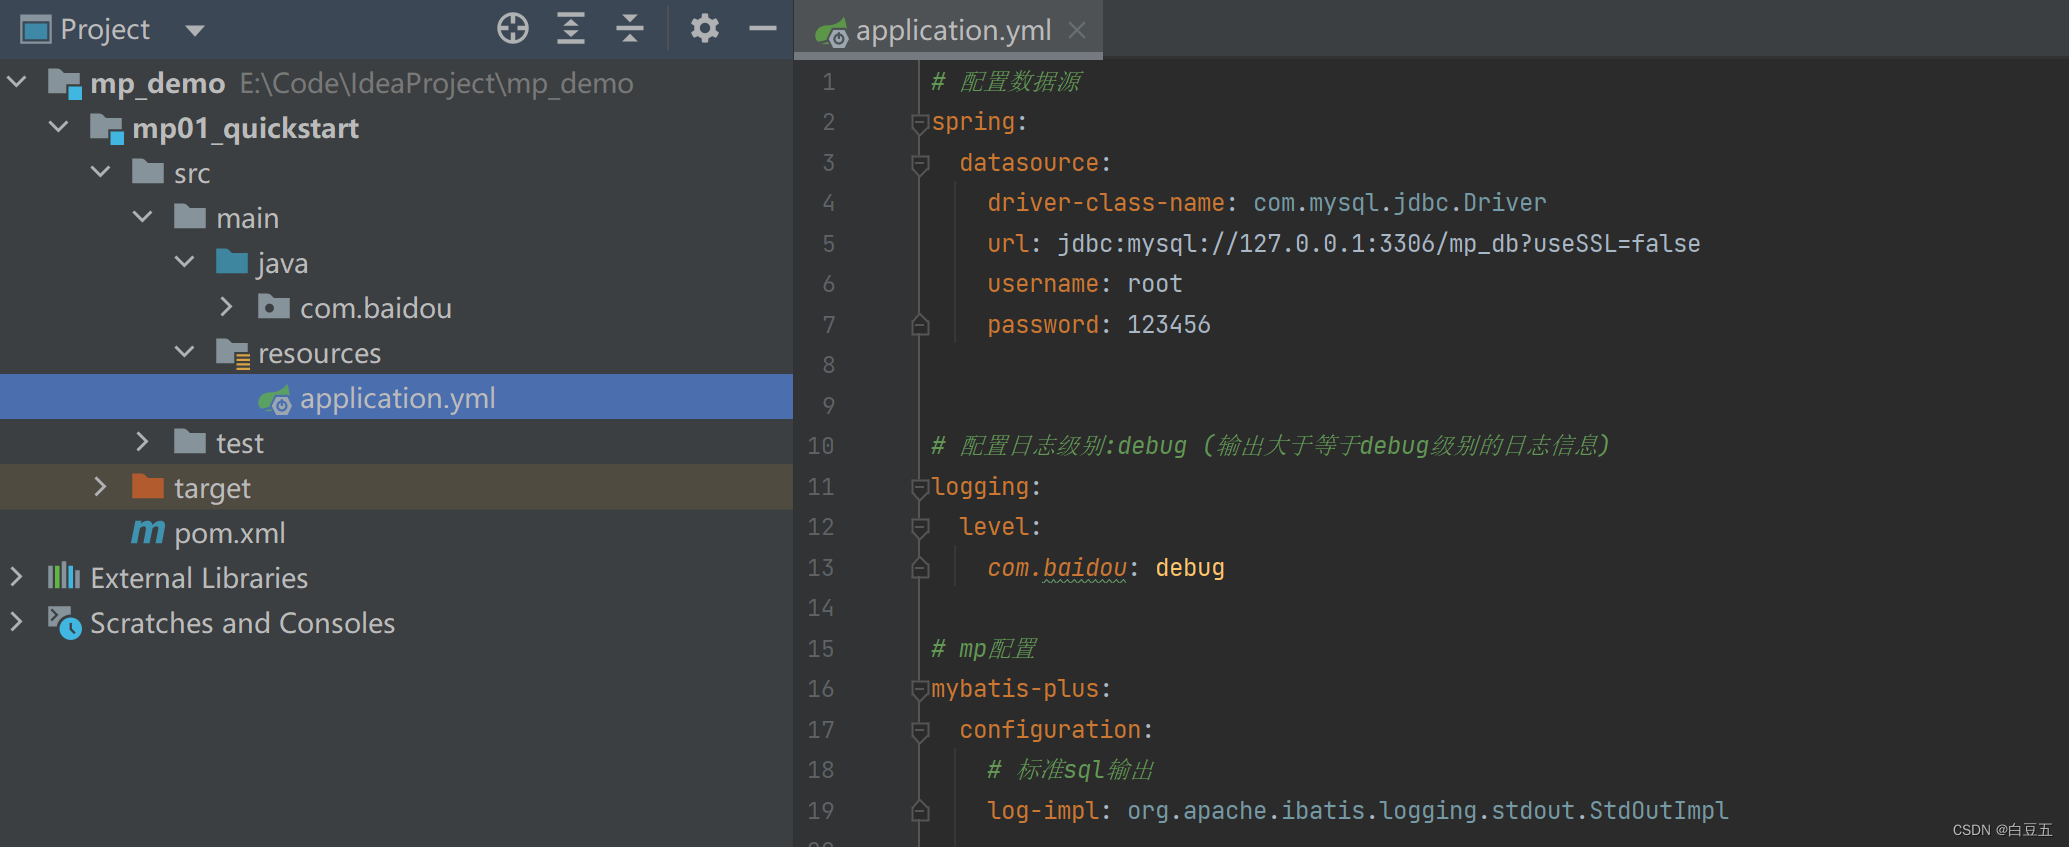
5、在application.yml文件中配置jdbc相关参数:
# 配置数据源
spring:
  datasource:
    driver-class-name: com.mysql.jdbc.Driver
    url: jdbc:mysql://127.0.0.1:3306/mp_db?useSSL=false
    username: root
    password: 123456

# 配置日志级别为:debug (输出大于等于debug级别的日志信息)
logging:
  level:
    com.baidou: debug

# mp配置
mybatis-plus:
  configuration:
    # 配置标准sql输出
    log-impl: org.apache.ibatis.logging.stdout.StdOutImpl
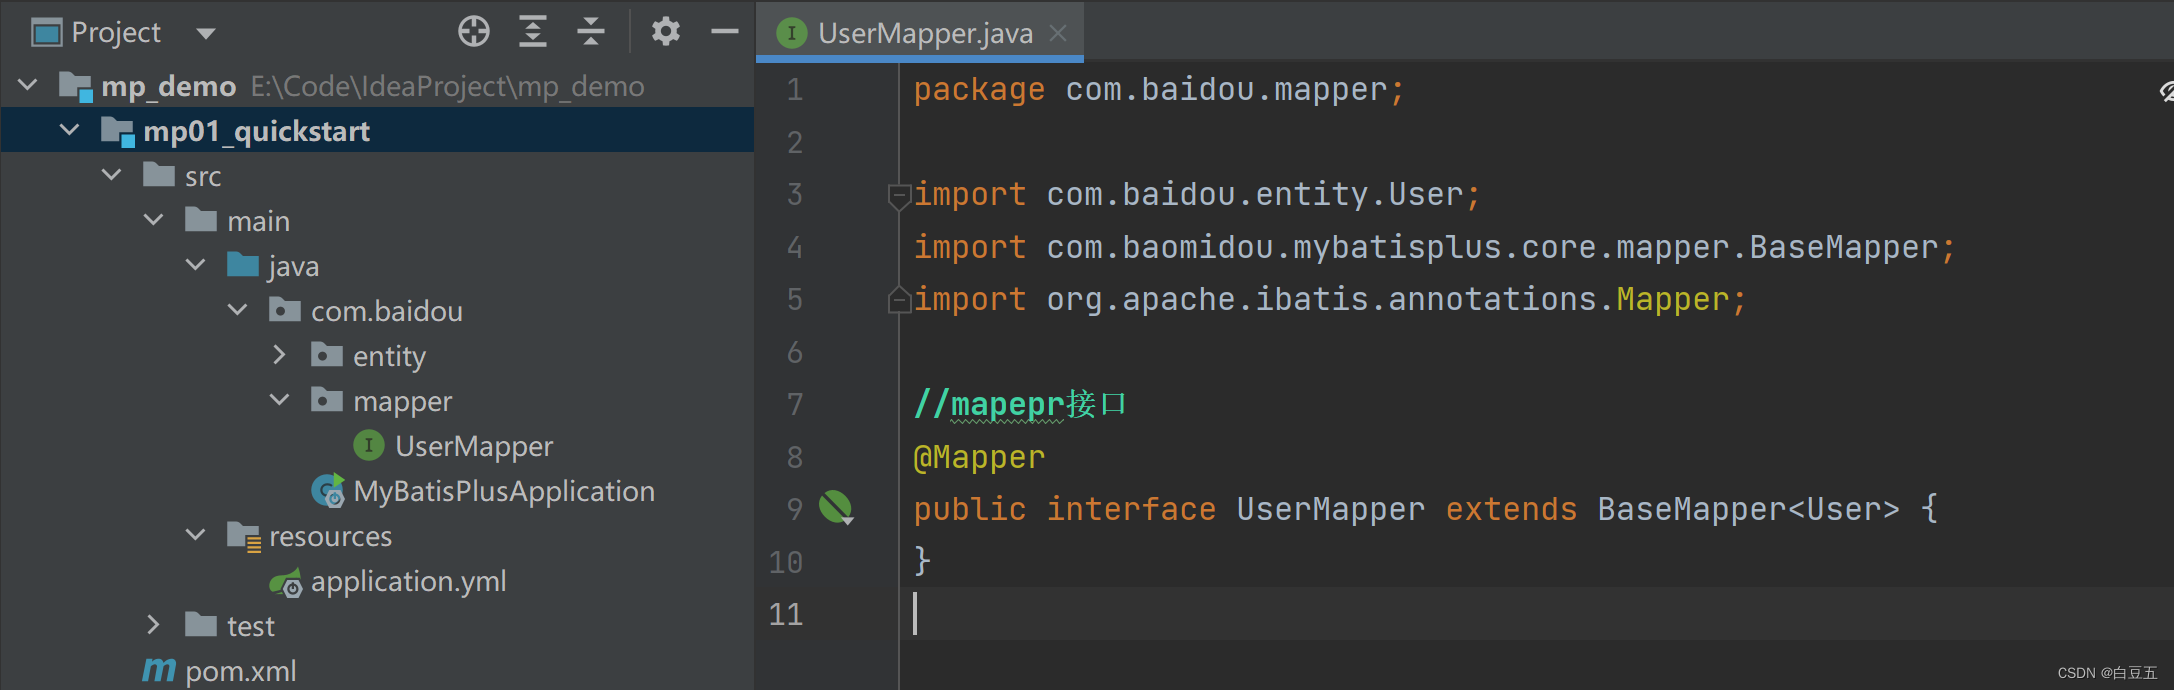
6、定义mapper接口,继承BaseMapper。
package com.baidou.mapper;

import com.baidou.entity.User;
import com.baomidou.mybatisplus.core.mapper.BaseMapper;

//在对应的Mapper上面继承BaseMapper接口

//@Repository //代表持久层
@Mapper
public interface UserMapper extends BaseMapper<User> {
    //所有的CRUD操作都已经编写完成了
    //你不需要像以前配置一大堆文件了!
}
7、定义启动类,并配置mapper扫描:
package com.baidou;

import org.mybatis.spring.annotation.MapperScan;
import org.springframework.boot.SpringApplication;
import org.springframework.boot.autoconfigure.SpringBootApplication;

@SpringBootApplication
@MapperScan("com.baidou.mapper") //扫描我们的mapper包下的所有接口
public class MyBatisPlusApplication {
    public static void main(String[] args) {
        SpringApplication.run(MyBatisPlusApplication.class, args);
    }
}
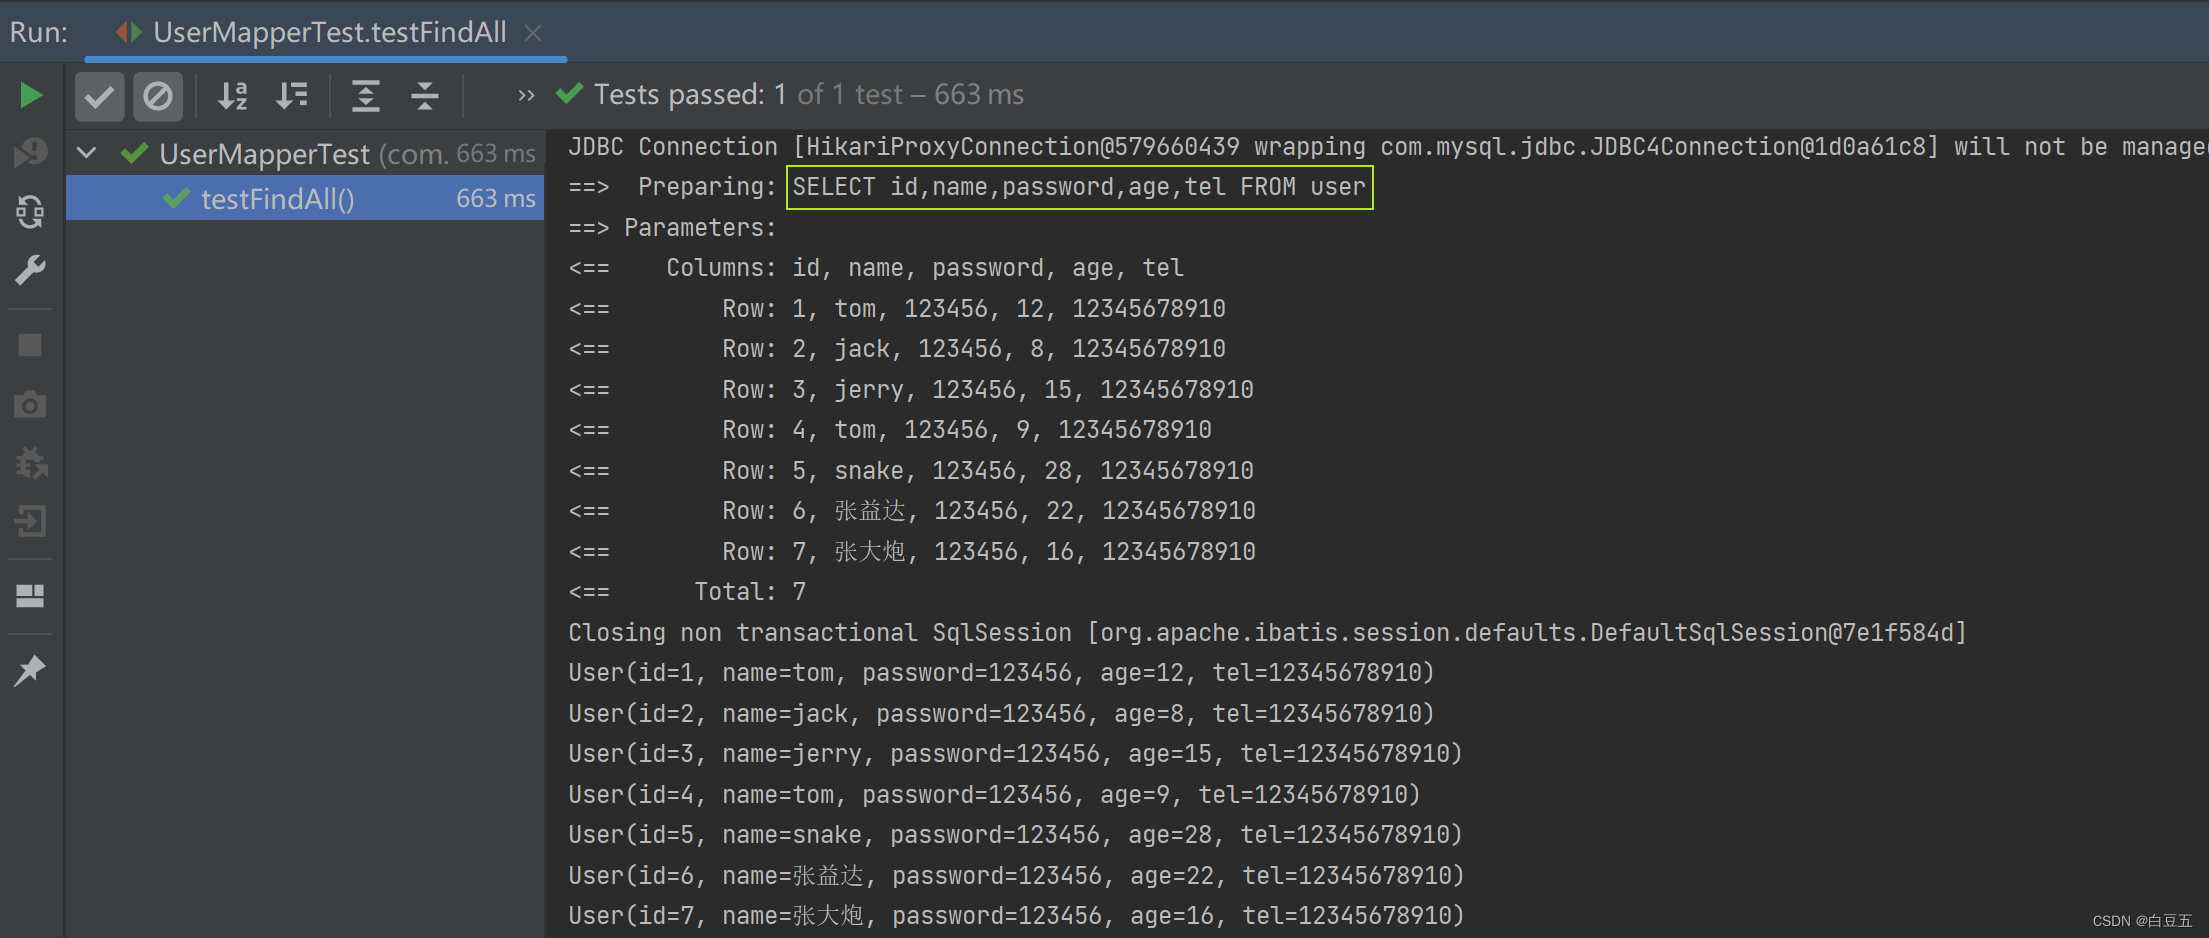
8、编写测试
package com.baidou.test;

import com.baidou.entity.User;
import com.baidou.mapper.UserMapper;
import org.junit.jupiter.api.Test;
import org.springframework.beans.factory.annotation.Autowired;
import org.springframework.boot.test.context.SpringBootTest;

import java.util.List;

/**
 * 测试类
 *
 * @author 白豆五
 * @version 2023/1/23
 * @since JDK8
 */
@SpringBootTest
public class UserMapperTest {

    @Autowired
    private UserMapper userMapper;

    @Test
    public void testFindAll() {
        List<User> userList = userMapper.selectList(null); //null表示不传条件参数
        for (User user : userList) {
            System.out.println(user);
        }
    }
}
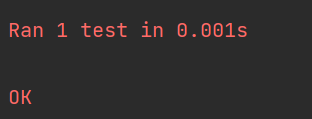
运行结果:
灵活拷问:
- SQL谁帮我们写的? MyBatisPlus都写好了。
- 方法哪里来的? MyBatisPlus都写好了。
三、标准数据层开发
1. MyBatisPlus的CRUD操作
| 功能 | 之前自定义的接口 | MP提供的接口 |
|---|---|---|
| 新增 | boolean save(T entity) | int insert(T entity) |
| 删除 | boolean delete(int id) | int deleteById(Serializable id) |
| 修改 | boolean update(T entity) | int updateById(T entity) |
| 根据id查询 | T getById(int id) | T selectById(Serializable id) |
| 查询全部 | List getAll() | List selectList() |
| 分页查询 | PageInfo getAll(int age,int size) | IPage selectPage(IPage page) |
| 按条件查询 | List getAll(Condition condition) | IPage selectPage(Wrapper queryWrapper) |
示例代码:
package com.baidou.test;

import com.baidou.entity.User;
import com.baidou.mapper.UserMapper;
import org.junit.jupiter.api.Test;
import org.springframework.beans.factory.annotation.Autowired;
import org.springframework.boot.test.context.SpringBootTest;

import java.util.List;

/**
 * 测试mapper接口的crud操作
 *
 * @author 白豆五
 * @version 2023/1/23
 * @since JDK8
 */
@SpringBootTest
public class UserMapperTest {

    @Autowired
    private UserMapper userMapper;

    // 查询全部
    @Test
    public void testFindAll() {
        List<User> userList = userMapper.selectList(null); //null表示不传条件参数
        for (User user : userList) {
            System.out.println(user);
        }
    }

    // 新增
    @Test
    public void testSave() {
        User user = new User();
        user.setName("小舞");
        user.setAge(18);
        user.setPassword("123456");
        user.setTel("13212341234");

        int num = userMapper.insert(user);

        if (num==1){
            System.out.println("添加成功");

            //自动返回新增记录的主键
            Long id = user.getId();
            System.out.println("用户的id:"+id);//1617500546355167234
        }
    }

    // 修改
    @Test
    public void testUpdate() {
        User user = new User();
        user.setId(5L);
        user.setName("小米");
        userMapper.updateById(user);
    }


    // 删除
    @Test
    public void testDelete() {
        userMapper.deleteById(1527307439025266690L);
    }
}
2. MyBatisPlus分页功能
MyBatisPlus内置分页插件。
2.1 MyBatisPlus分页功能接口
// 分页查询
IPage<T> selectPage(IPage<T> page)
2.2 MyBatisPlus分页使用
1、配置分页拦截器组件
package com.baidou.config;
import com.baomidou.mybatisplus.extension.plugins.MybatisPlusInterceptor;
import com.baomidou.mybatisplus.extension.plugins.inner.PaginationInnerInterceptor;
import org.springframework.context.annotation.Bean;
import org.springframework.context.annotation.Configuration;
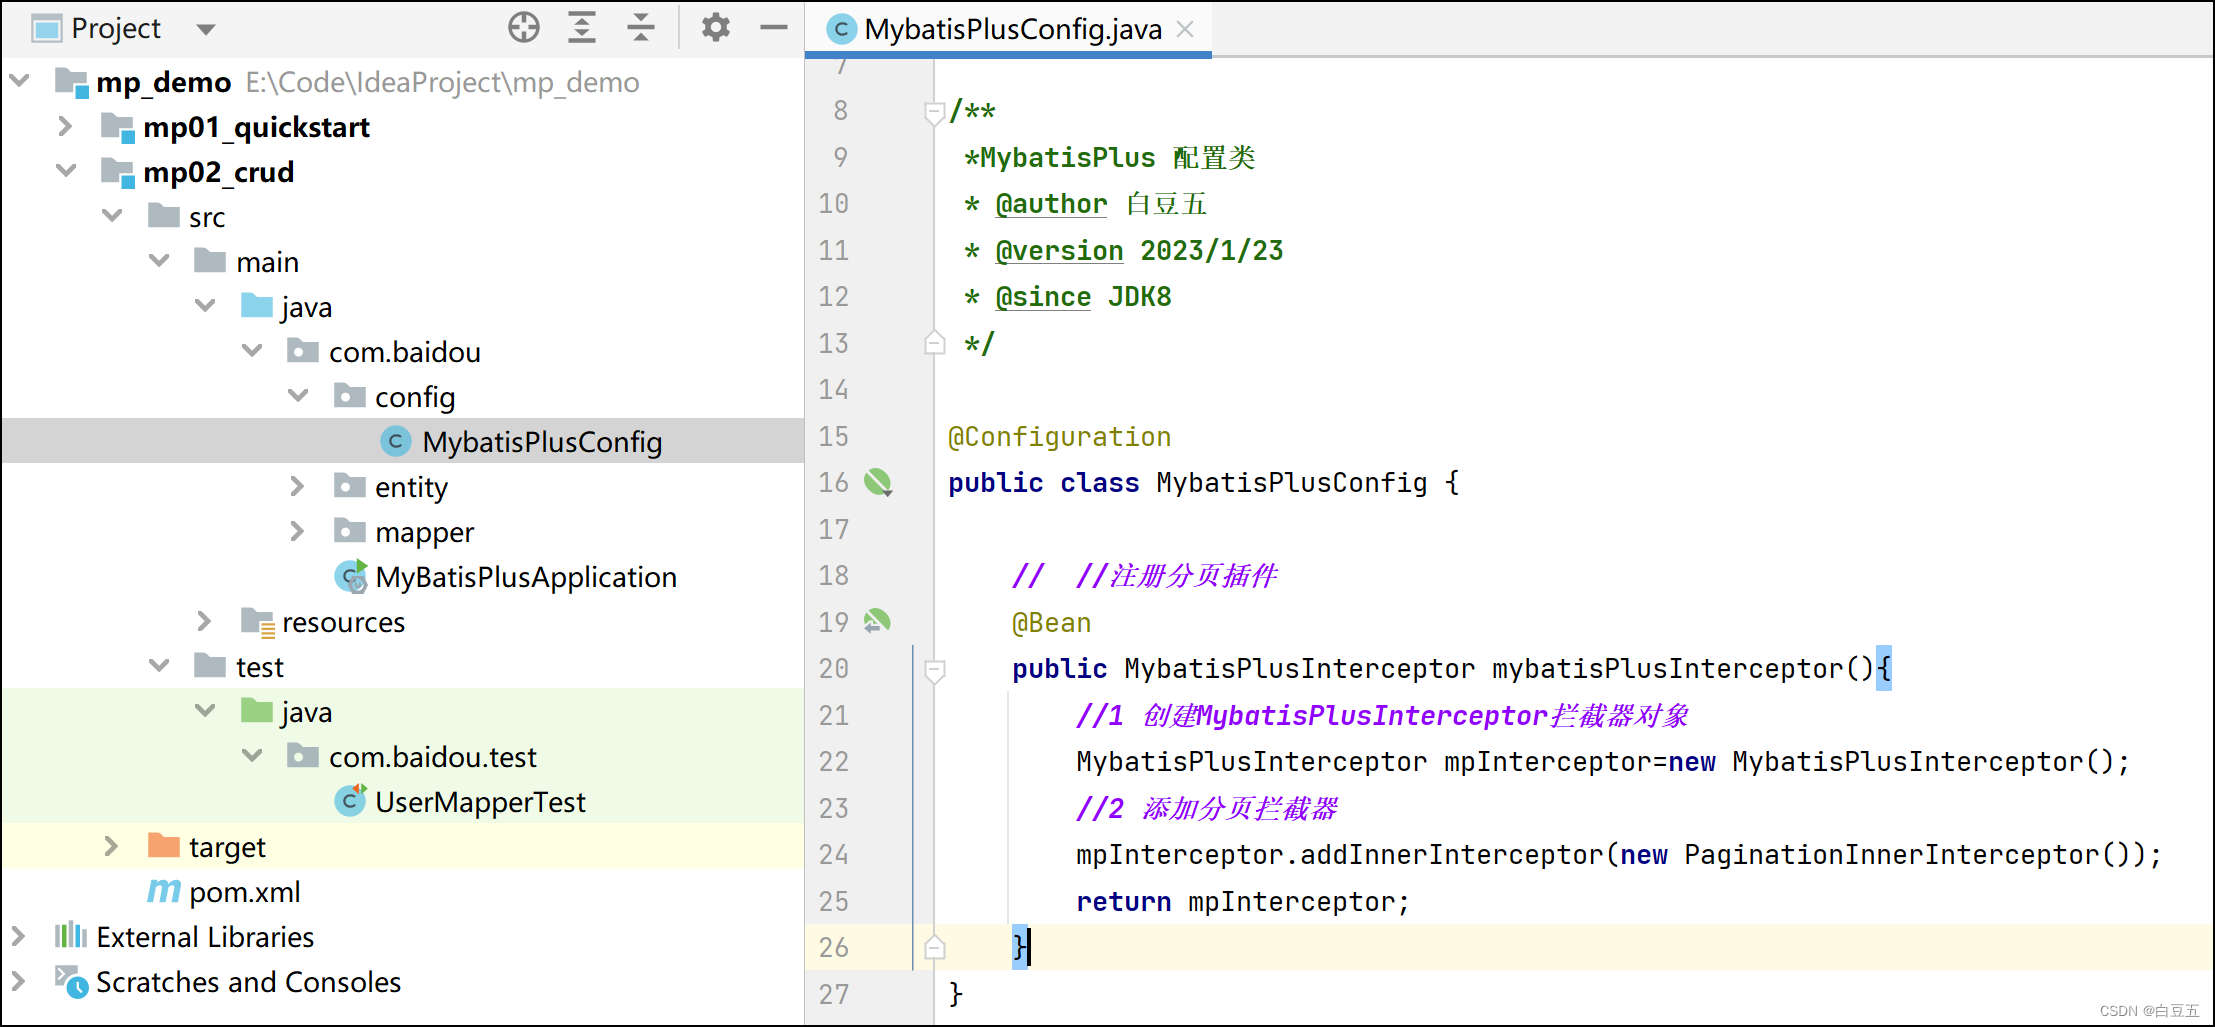
/**
*MybatisPlus的配置类
* @author 白豆五
* @version 2023/1/23
* @since JDK8
*/
@Configuration
public class MybatisPlusConfig {
// 注册分页插件
@Bean
public MybatisPlusInterceptor mybatisPlusInterceptor(){
//1 创建MybatisPlusInterceptor拦截器对象
MybatisPlusInterceptor mpInterceptor=new MybatisPlusInterceptor();
//2 添加分页拦截器
mpInterceptor.addInnerInterceptor(new PaginationInnerInterceptor());
//注意:不同的数据库在开启分页功能的时候,需要设置成对应的数据库类型 (数据库方言不太一样)
//mpInterceptor.addInnerInterceptor(new PaginationInnerInterceptor(DbType.MYSQL));
return mpInterceptor;
}
}
2、开启MyBatisPlus日志
# 开启mp的sql日志
mybatis-plus:
  configuration:
    log-impl: org.apache.ibatis.logging.stdout.StdOutImpl
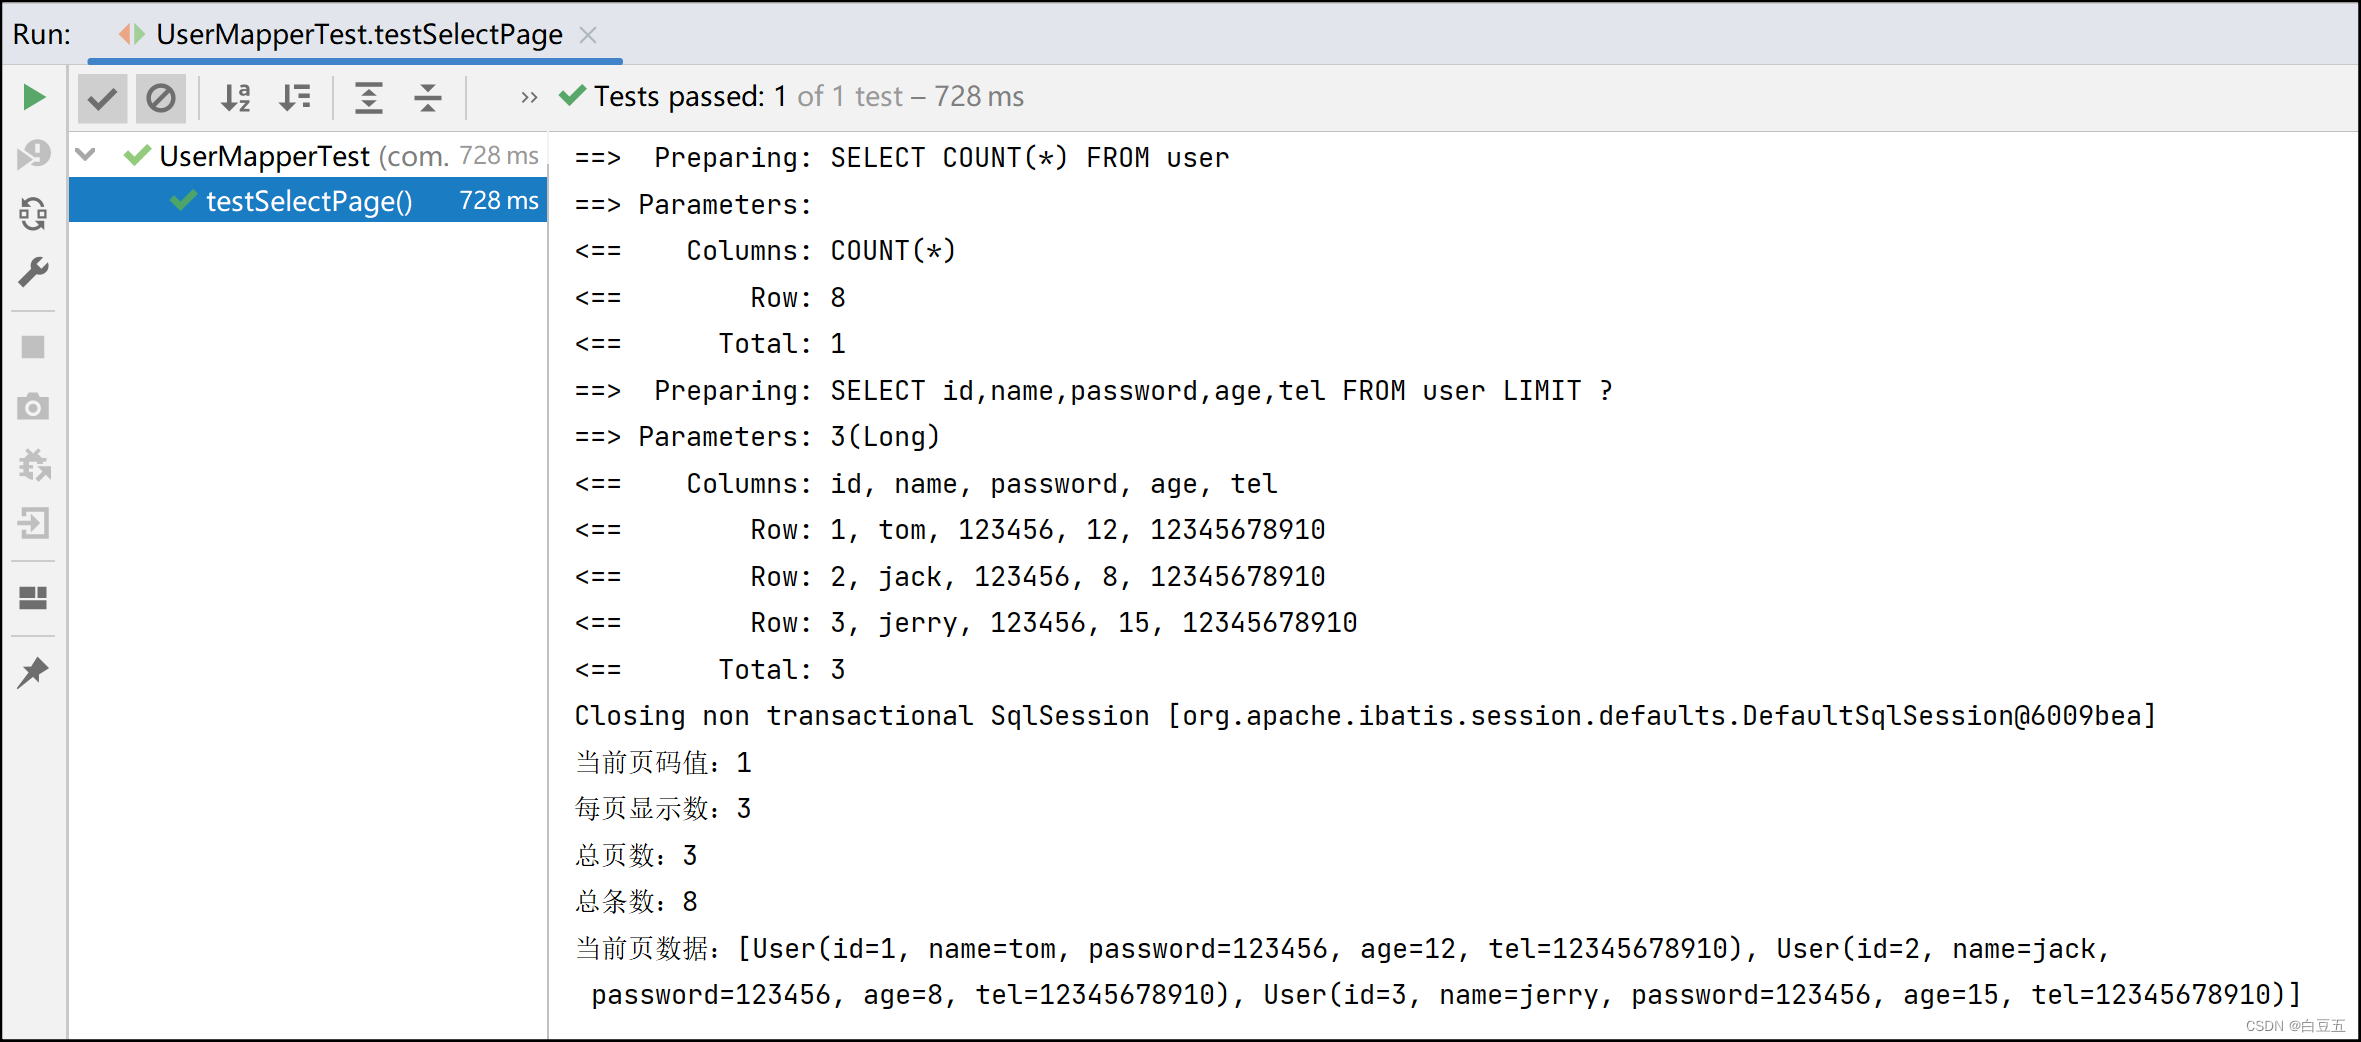
3、编写测试
// 分页查询
@Test
public void testSelectPage() {
    // 1.创建IPage分页对象,设置分页参数
    // 参数一:当前页
    // 参数二: 页面大小
    IPage<User> page = new Page<>(1, 3);//import com.baomidou.mybatisplus.extension.plugins.pagination.Page;

    // 2.执行分页查询
    userMapper.selectPage(page, null);

    // 3.获取分页结果
    System.out.println("当前页码值:" + page.getCurrent());
    System.out.println("每页显示数:" + page.getSize());
    System.out.println("总页数:" + page.getPages());
    System.out.println("总条数:" + page.getTotal());
    System.out.println("当前页数据:" + page.getRecords());
}
运行结果:
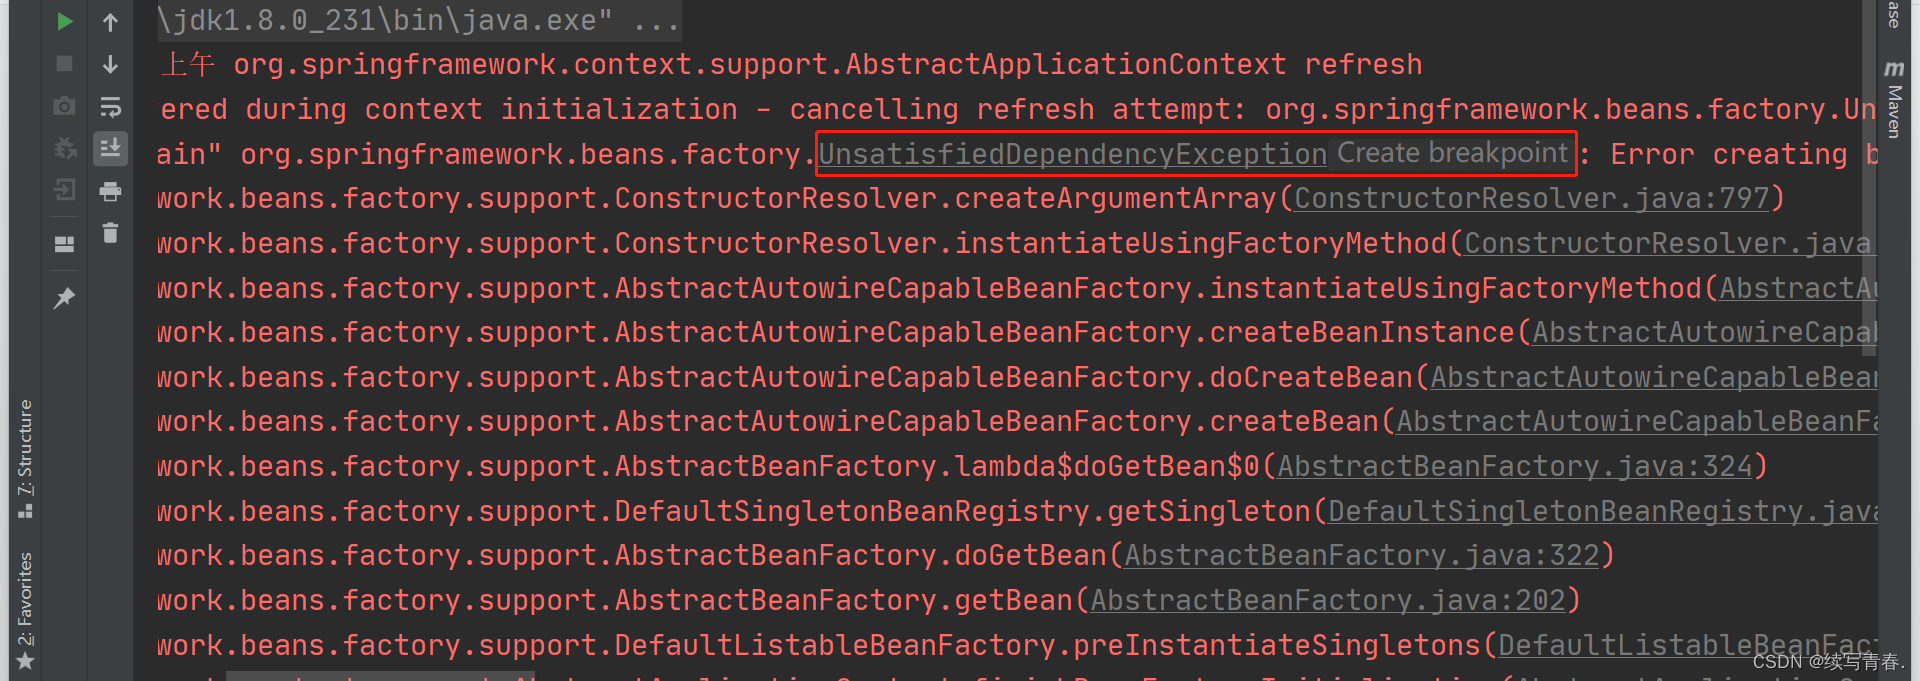
解决日志打印过多问题
1、取消初始化spring日志打印

解决方案:在resources下新建一个logback.xml文件,名称固定,内容如下:
<?xml version="1.0" encoding="UTF-8"?>
<configuration>

</configuration>
logback常用配置:https://www.jianshu.com/p/75f9d11ae011
2、关闭springboot启动的beanner图标
spring:
  main:
    banner-mode: off # 关闭SpringBoot启动图标(banner)
3、关闭MybatisPlus启动的beanner图标
mybatis-plus:
  global-config:
    banner: off # 关闭mybatisplus启动图标