目录
1、基础环境准备
2、KVM的安装
3、开启服务
4、开启图形化界面
5、也可以通过浏览器管理KVM
6、举例安装一个windows2012R2
1、基础环境准备
【关闭防火墙】
systemctl stop firewalld
systemctl disable firewalld
【关闭selinux】
修改文件/etc/selinux/config里的SELINUX=disabled
vi /etc/selinux/config
# This file controls the state of SELinux on the system.
# SELINUX= can take one of these three values:
#     enforcing - SELinux security policy is enforced.
#     permissive - SELinux prints warnings instead of enforcing.
#     disabled - No SELinux policy is loaded.
SELINUX=disabled
# SELINUXTYPE= can take one of three values:
#     targeted - Targeted processes are protected,
#     minimum - Modification of targeted policy. Only selected processes are protected.
#     mls - Multi Level Security protection.
SELINUXTYPE=targeted
2、KVM的安装
需要安装的6个软件作用:
【qemu-kvm】 KVM的主程序,KVM的虚拟化模块。
【virt-manager】 KVM的图形化管理工具。
【libvert】 虚拟化服务。
【libguestfs-tools】 虚拟机的系统管理工具。
【virt-install】 安装虚拟机的使用工具,内含一些实用命令,如virt-clone等。
【libvert-python】 python调用libvert虚拟化服务的api接口库文件。
yum install -y qemu-kvm virt-manager libvert libguestfs-tools virt-install libvert-python
3、开启服务
systemctl start libvirtd
systemctl enable libvirtd
【验证模块是否加载成功】
lsmod | grep kvm如果输出下图说明加载成功
[root@localhost ~]# lsmod | grep kvm
kvm_intel             183621  0
kvm                   586948  1 kvm_intel
irqbypass              13503  1 kvm
4、开启图形化界面
virt-manager
出现界面

5、也可以通过浏览器管理KVM
【安装cockpit】
yum install -y cockpit【开启cockpit】
systemctl start cockpit【通过宿主机ip:9090访问】

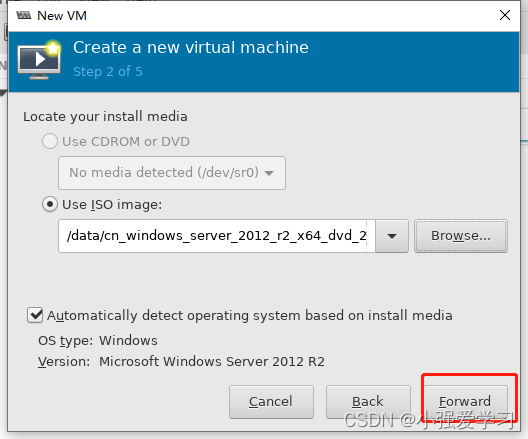
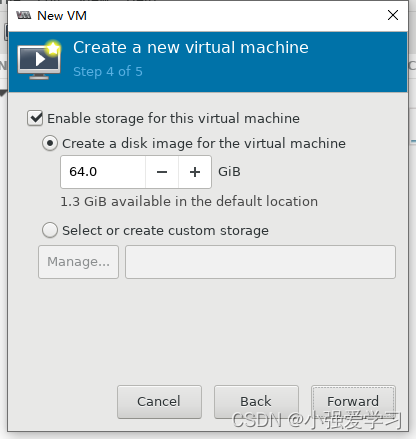
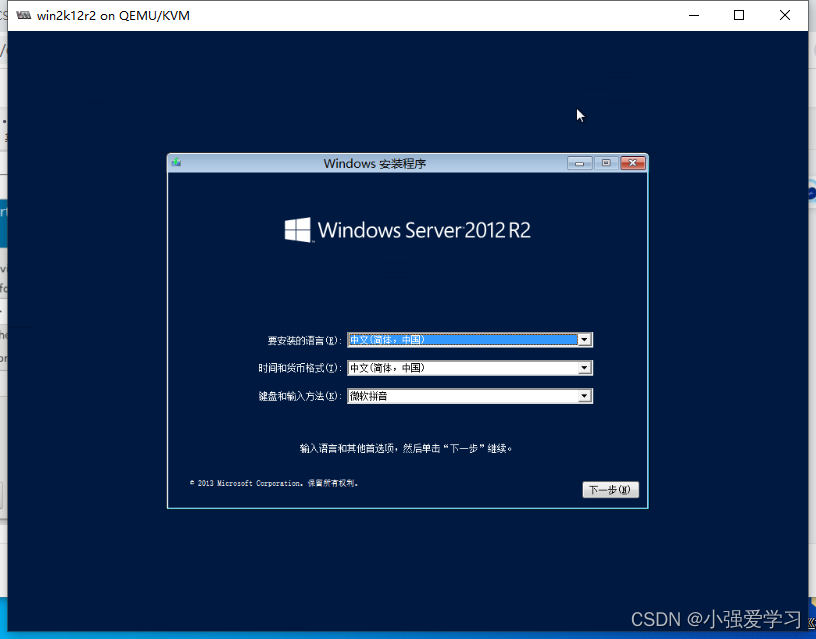
6、举例安装一个windows2012R2
1【首先上传镜像】

2【打开图像化管理界面】
virt-manager
3【新建一个虚机】

4【本地导入镜像】

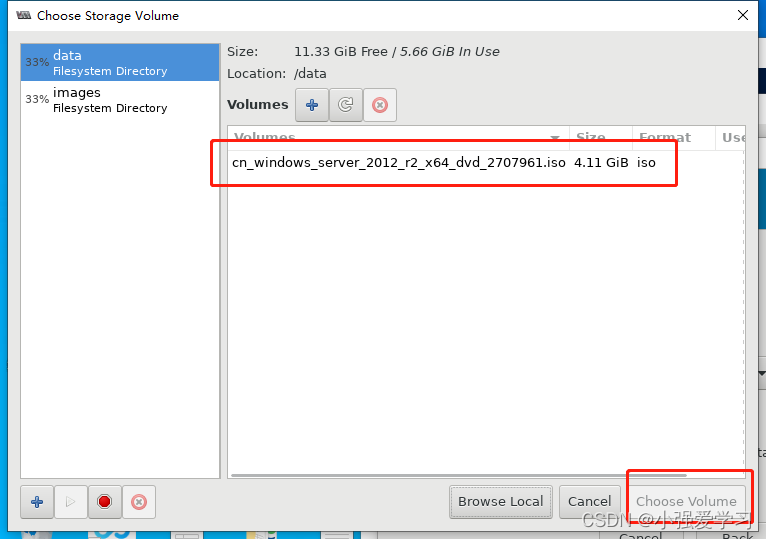
5【选择镜像】


5【虚机cpu 内存 存储配置】

6【打开虚机给虚机装系统】耐心等几分钟


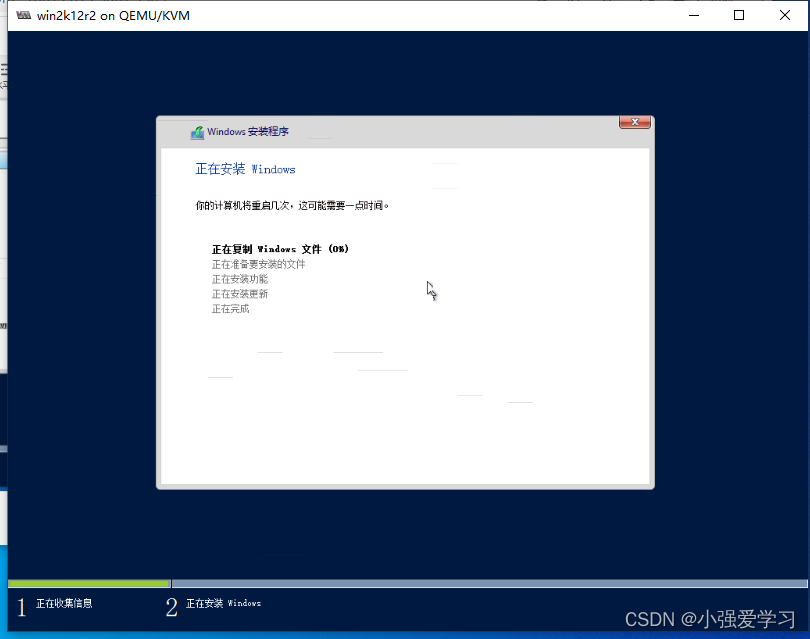
等几次重启window2012R2虚机就安装好了

感谢阅览