一、背景介绍
如果我们的物理机有很多,不管是基于"file_sd_config"还是"kubernetes_sd_config",我们都需要手动写入目标target及创建目标service,这样才能被prometheus自动发现,为了避免重复性工作过多,所以我们可以使用Consul做注册中心,让所有的机器注册至Consul,随后Prometheus再从Consul上来发现目标主机完成自动加入Prometheus的Target中。
二、Consul部署
Consul部署至K8s集群内部,所以直接使用helm部署即可。
- 获取consul的values
# 增加helm的repo
~] helm repo add hashicorp https://helm.releases.hashicorp.com

# 查看repo是否添加成功
~] helm repo list
NAME     	URL
hashicorp	https://helm.releases.hashicorp.com

# 获取consul的values,具体参数含义可参考官网
# https://developer.hashicorp.com/consul/docs/k8s/helm
~] helm inspect values hashicorp/consul &> /gensee/k8s_system/consul/
~] vim /gensee/k8s_system/consul/values.yaml
server:
	...
	# 这里是定义部署3个consul以实现consul集群,保证数据高可用
	replicas: 3
	# 要与server.replicas的值一致
	bootstrapExpect: 3
	# 定义每个节点使用多少的存储空间存储数据,默认100Gi
	storage: 100Gi
	# 定义storageclass的名称,如果有的话
	storageClass: managed-nfs-storage
...- 创建名称空间并安装consul
~] kubectl create ns consul
~] helm install consul hashicorp/consul  --namespace consul --values /gensee/k8s_system/consul/values.yaml
# 查看consul安装状态
~] helm status consul -n consul
~] kubectl get all -n consul
NAME                                                      READY   STATUS    RESTARTS   AGE
pod/consul-consul-connect-injector-89d7cf9d8-vqzgm        1/1     Running   7          3d23h
pod/consul-consul-server-0                                1/1     Running   0          3d22h
pod/consul-consul-server-1                                1/1     Running   0          3d22h
pod/consul-consul-server-2                                1/1     Running   0          3d22h
pod/consul-consul-webhook-cert-manager-649d7486d7-x2pn5   1/1     Running   0          3d23h

NAME                                     TYPE        CLUSTER-IP       EXTERNAL-IP   PORT(S)                                                                            AGE
service/consul-consul-connect-injector   ClusterIP   172.13.185.211   <none>        443/TCP                                                                            3d23h
service/consul-consul-dns                ClusterIP   172.13.152.148   <none>        53/TCP,53/UDP                                                                      3d23h
service/consul-consul-server             ClusterIP   None             <none>        8500/TCP,8502/TCP,8301/TCP,8301/UDP,8302/TCP,8302/UDP,8300/TCP,8600/TCP,8600/UDP   3d23h
# 对外提供UI的svc
service/consul-consul-ui                 ClusterIP   172.4.246.29     <none>        80/TCP                                                                             3d23h

NAME                                                 READY   UP-TO-DATE   AVAILABLE   AGE
deployment.apps/consul-consul-connect-injector       1/1     1            1           3d23h
deployment.apps/consul-consul-webhook-cert-manager   1/1     1            1           3d23h

NAME                                                            DESIRED   CURRENT   READY   AGE
replicaset.apps/consul-consul-connect-injector-89d7cf9d8        1         1         1       3d23h
replicaset.apps/consul-consul-webhook-cert-manager-649d7486d7   1         1         1       3d23h

NAME                                    READY   AGE
statefulset.apps/consul-consul-server   3/3     3d23h
三、Nginx代理Consul
由于Consul部署在K8s集群内部,且集群并没有直接对外,所以使用nginx代理到集群内部Consul以提供UI界面
server {
    listen 80;
    server_name xxx-xxx.xxxxx.xxx;
    return 301 https://$host$request_uri;
}

server {
        # For https
        listen 443 ssl;
        # listen [::]:443 ssl ipv6only=on;
        ssl_certificate sslkey/server.cer;
        ssl_certificate_key sslkey/server.key;
        server_name  xxx-xxx.xxxxx.xxx; # 替换成你的域名
        access_log  logs/consul-access.log;
        error_log   logs/consul-error.log;
        location / {
                # 这个svc是consul-ui
                proxy_pass http://consul-consul-ui.consul.svc.cluster.local;
                # 增加nginx自带basic认证
                auth_basic "Basic Authentication";
                auth_basic_user_file "/etc/nginx/conf/system/.htpasswd";
                proxy_set_header X-Real-IP $remote_addr;
                proxy_set_header Host $host;
                proxy_set_header X-Forward-For $proxy_add_x_forwarded_for;
                proxy_set_header Upgrade $http_upgrade;
                proxy_set_header Connection 'upgrade';
         }
}
四、注册至Consul
# id和tags的第二个字段是主机名,xxx.xx.x.xxx是主机的ip地址,其他保留
~] curl -u xxxxx:xxxxx -X PUT -d \
'{"id": "xxx-xxx-xxxx","name": "node_exporter","address": "xxx.xx.x.xxx","port": 9100,"tags":["prometheus","xxx-xxx-xxxx"],"checks": [{"http": "http://xxx.xx.x.xxx:9100/metrics", "interval": "5s"}]}'  \
https://xxx-xxx.xxxxx.xxx/v1/agent/service/register
# 从consul中注销,node-exporter是id,如果注销失败,说明第一次请求没有到这台机器所在的consul节点,需要再次执行
~] curl -X PUT http://xxx-xxx.xxxxx.xxx/v1/agent/service/deregister/node-exporter
五、prometheus配置consul_sd_config
# 与此文档(https://www.yuque.com/kkkfree/itbe1d/zzzgu0)中的第四.1一样,修改prometheus-additional.yaml,在kubernetes_sd_configs下面添加
- job_name: 'consul-prometheus'
  consul_sd_configs:
	# 这是可以直接调用consul的svc了,不用写ui了,因为都在K8s集群中
  - server: 'consul-consul-server.consul.svc.cluster.local:8500'
    services:
  	# 指定获取哪个service,我这里因为机器都注册到了node_exporter这个service,所以我只抓取这个
    - 'node_exporter'
  relabel_configs:
	# 将注册上来的id标签替换为hostname,看起来比较直观
  - source_labels: [__meta_consul_service_id]
    action: replace
    target_label: hostname
# 重载prometheus配置文件
~] kubectl delete secret generic additional-configs -n monitoring
~] kubectl create secret generic additional-configs --from-file=prometheus-additional.yaml -n monitoring
# 手动使prometheus重新读取配置
~] kubectl get pods -o wide -n monitoring
~] kubectl get pods -o wide -l app=prometheus -n monitoring
~] curl -X POST http://IP:9090/-/reload
六、效果图
- consul的node_exporter的service中实例展示

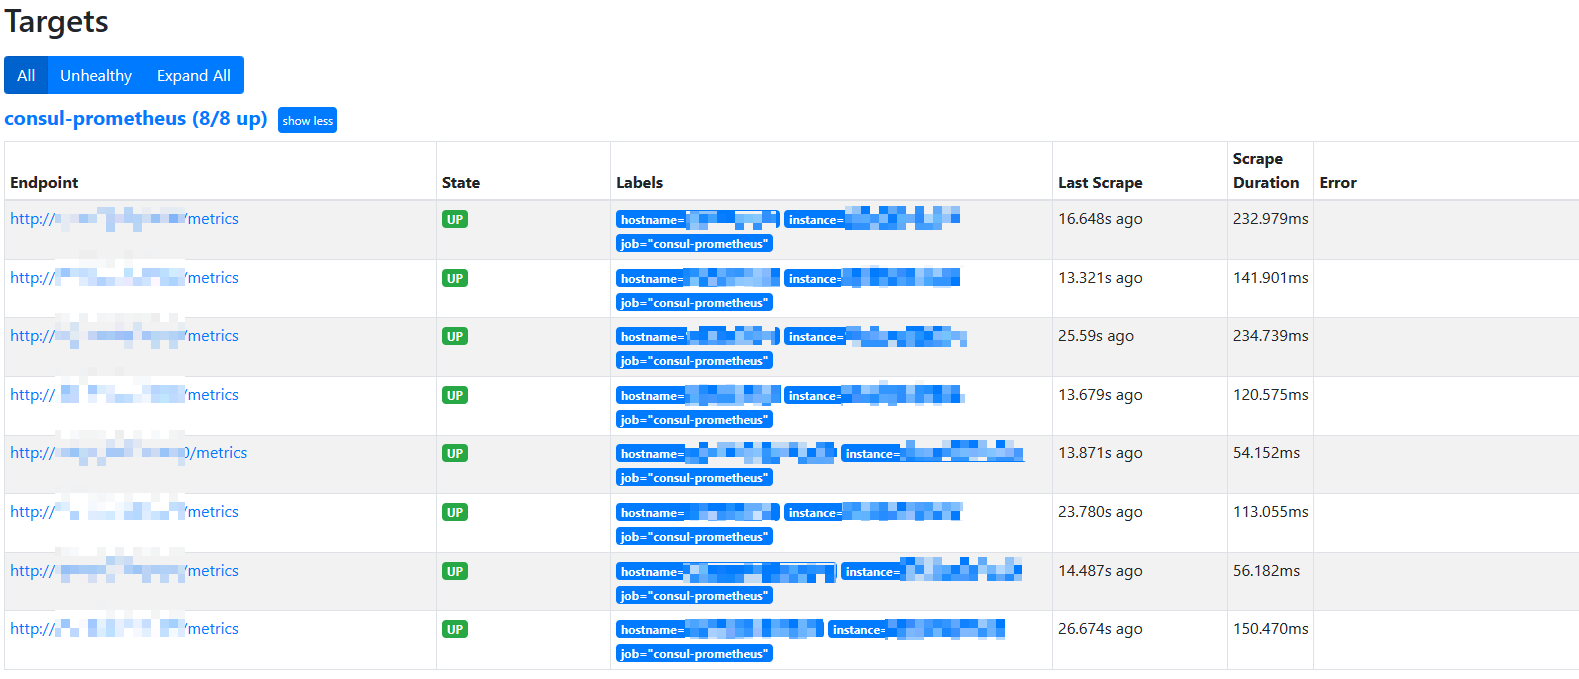
- prometheus自动发现的endpoint
