vue-router简单实现
初步预习
动态路由
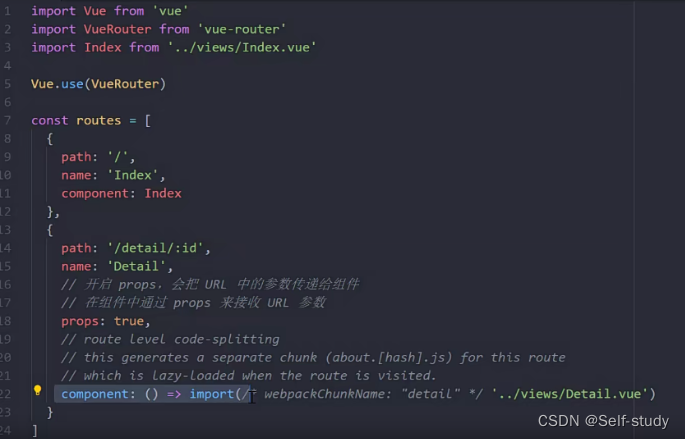
获取id方式
![[外链图片转存失败,源站可能有防盗链机制,建议将图片保存下来直接上传(img-RCsWeouT-1673227747315)(C:\Users\Administrator\AppData\Roaming\Typora\typora-user-images\image-20230106160357372.png)]](https://img-blog.csdnimg.cn/7da952a0b2f24a798d3476ca58b1adcf.png)
第一种强依赖路由
第二种父传子方式(推荐)
嵌套路由
相同的头和尾,默认index,替换为detail
![[外链图片转存失败,源站可能有防盗链机制,建议将图片保存下来直接上传(img-9fSuxr4P-1673227747316)(C:\Users\Administrator\AppData\Roaming\Typora\typora-user-images\image-20230106160606733.png)]](https://img-blog.csdnimg.cn/5f54bfb0e541468c9c43f0e67d4ac474.png)
编程时导航
this.$router.push()
this.$router.repleace()
this.$router.go()
this.$router.back()
hash和history

简单实现vue-router
1,判断是否安装了当前插件
2,把Vue构造函数记录到全局变量
3,把创建Vue实例时候传入的router对象注入到Vue实例上
再创建router-link组件的时候,template无法编译
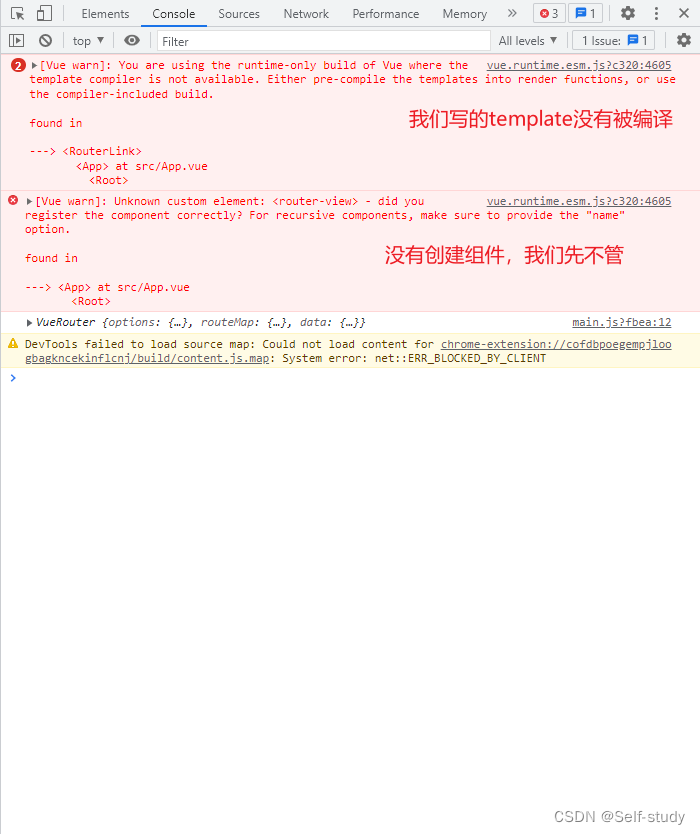
原因是因为

所以我们有两种版本第一种就是template,再vue.config.js中配置如下
runtimeCompiler: true,
另一种是根据render函数传来的h函数进行编译渲染
大家看注释,每一部都有注释
let _Vue = null;
export default class VueRouter {
  static install(Vue) {
    // 1,判断是否安装了当前插件
    if (VueRouter.install.installed) return;
    VueRouter.install.installed = true;

    // 2,把Vue构造函数记录到全局变量
    _Vue = Vue;

    // 3,把创建Vue实例时候传入的router对象注入到Vue实例上

    //混入
    _Vue.mixin({
      beforeCreate() {
        if (this.$options.router) {
          _Vue.prototype.$router = this.$options.router;
          this.$options.router.init();
        }
      },
    });
  }
  constructor(options) {
    // 记录传入的选项
    this.options = options;
    // 把options里面的路由规则记录到routerMap里面
    this.routeMap = {};
    // vue提供的observable可以创建响应式的对象
    this.data = _Vue.observable({
      current: '/',
    });
  }

  init() {
    this.initCreateRouteMap();
    this.initComponents(_Vue);
    this.initEvent();
  }

  initCreateRouteMap() {
    // 遍历所有的路由规则以键值对的形式存储到routeMap里面
    this.options.routes.forEach((route) => {
      // 键是路径,值是对应组件
      this.routeMap[route.path] = route.component;
    });
  }

  // 创建router-link组件
  initComponents(Vue) {
    Vue.component('router-link', {
      props: {
        to: String,
      },
      //Vue传来的h函数 选择器,设置属性,a标签之间的内容 运行时
      render(h) {
        return h(
          'a',
          {
            attrs: {
              href: this.to,
            },
            on: {
              click: this.clickHandler,
            },
          },
          [this.$slots.default]
        );
      },
      methods: {
        clickHandler(e) {
          history.pushState({}, '', this.to);
          //把当前路径赋值,它是响应式的 h函数会去渲染dom
          this.$router.data.current = this.to;
          e.preventDefault();
        },
      },
      //完整时
      // template: '<a :href="to"><slot></slot></a>',
    });
    const _this = this;
    Vue.component('router-view', {
      render(h) {
        //拿到当前路径组件放到h函数进行虚拟dom渲染
        const component = _this.routeMap[_this.data.current];
        return h(component);
      },
    });
  }
  //浏览器历史回退
  initEvent() {
    window.addEventListener('popstate', () => {
      this.data.current = window.location.pathname;
    });
  }
}
